


dickf
-
Content Count
442 -
Joined
-
Last visited
Posts posted by dickf
-
-
I have had very good results with a cheap, throw away camel hair brush (that I wash out with hand soap after each use) and it works super well.The secret is twofold: a) dilute the resolene to a 50/50 solution of resolene and water AND
 apply two wet coats together, starting with the inside of the holster, then the back side, soaking into the flesh side of the leather. Once the first coat has been applied, . . . brush it until you have an almost foam like appearance that will then disappear with a bit more brushing. Continue to the smooth side of the leather pieces, . . . again soaking, working up the foam, and brushing until the foam bubbles are basically gone.
 It is not as important on the flesh side, . . . but on the smooth side, . . . brush untill the bubbles are gone.
Now, . . . go back, . . . right now, . . . and do it again.
I like to hang my project up in the window, . . . let the sun's heat dry it, . . . or I hang it up about 7 feet above the furnace register, . . . it gets heat, . . . just not all at once.
I only had one problem with this method, . . . I got in a hurry on a black OWB I did for a .40 Glock, . . . and some of the bubbles were not gone, . . . when they dried, . . . it looked like water spots on a finely waxed wooden table.
Dye some scrap leather pieces, . . . and practice, . . . I think you will like it.
May God bless,
Dwight
Exactly what I was looking for - thank you!
-
Thanks for the replies. I think I'm going to go the dip route, but will definitely experiment with the foam brush. Do you use it on the interior as well?
-
Looks really great. I also use Photoshop to mock up my patterns. I have actually developed a little system that is working nicely. I scan the pistol into Photoshop and cut it out with the pen tool. After I have the pistol on it's own layer, I throw in a 1.75" black strip all the way across the canvas to act as a belt. Then, I can cant the pistol by selecting the pistol layer and apple+T it to my liking. I usually adjust it's opacity to ~25% and print it out. I can then pencil a pattern over top of a life-size image of the pistol and a belt. I scan it back in and clean the pencil up with the pen tool on a new layer (round out the curves and put more thought into cutting the pattern in leather (i.e. eliminating any hard to get to spots)), then print 1 last time. Cut it out of the paper, and trace the pattern on the leather. Viola - a printable pattern. I keep the pattern itself on it's own layer, so in my psd, I have the pistol and have multiple pattern layers, so I can just switch them on and off depending on what pattern I want to work with/print.
Sorry for the long winded post.

-
Can resolene be applied without an airbrush? Any tips on applying it without air?
-
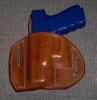
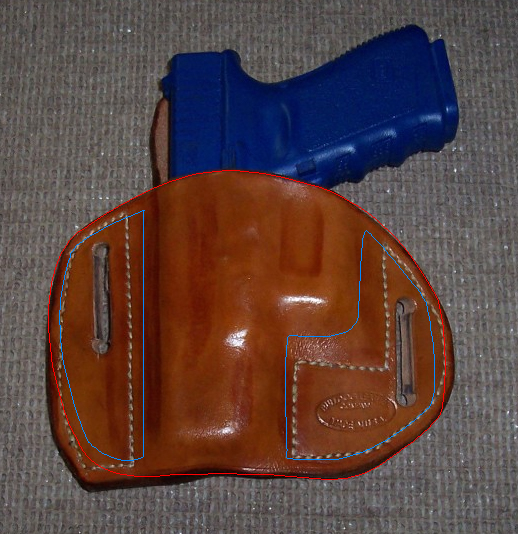
That is absolutely NOT the real gun - it is indeed a dummy gun (a blue gun).
-
It doesn't look like you buffed the purple off of that black. Get yourself a soft cloth and buff that puppy until the residual dye isn't there anymore. It should then turn black without the purple.
-
Randy, I'm no expert, but I think this is a great start. Attached is a quick edit to your photo which illustrates what I would do differently next time (but like I said, I'm no expert). I think I would get a steel ruler and slightly angle the slots.
Good work - I'd love to get my hands on that Artisan you have.

-
Thanks for the kind words - I'm proud of this one!
-
Once again, another masterpiece!
Very well done. I really enjoy the amount of thought and planning and how it shows through in the end.
-
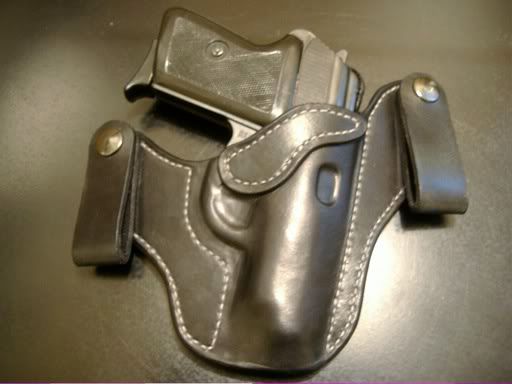
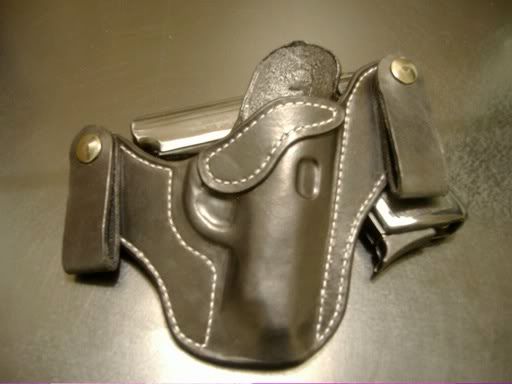
I finished this for a fellow in Texas. He wanted white thread on black leather, and I think it turned out pretty classy. Pistol is a Polish P-64.
This was my first experience with spirit dye - I like it a lot better than the eco-flow stuff. I grooved the piece, dyed the inside and outside, then stitched, molded, and finished.
Wish I had a better camera - these photos don't really do it justice.
Comments and critiques welcome!
-
Beautiful leather - I also vote to leave natural.
Do you have a photo of this holster being worn?
Wonderful work!
-
The reason stiffness matters is what madmax said above, the mouth collapsing and making one hand reholstering more difficult and not smooth. This isn't much of an OWB issue, though I like good and stiff. But the big thing these days is IWB. Many folks wearing IWBs want a holster that will not collapse when they pull the gun. Well I can agree and disagree. I don't think one handed reholstering matters if you ever pulled your gun in defense. Chances are you aren't reholstering anytime until the threat is stopped and you have to sort out some things anyway. BUT on the other hand, folks need to practice their draws. Lots of folks do dry fire practice at home (I am one of them). Lots of folks do live fire drills out at the range (I am also one of them). Learning to draw from the preferred method of carry is vital. And, in order to practice drawing, you have to reholster.Now you can insert the preferred method of mouth support here. Makers have different methods like metal inserted, kydex or a leather piece.
Soooo, all in all, do your leather how you prefer. Customers talk and compare notes and yap on the internet. Some characteristics will sell a holster, some won't. It depends on the customers. The beauty of it is that we all have our own methods and we all have folks who we've supplied and made happy.
Well said!

-
If they did, in fact, support 25lbs without collapsing, that's like a hard piece of plastic on my hip all day - no thanks. I'll take the leather that gives and feels like part of me, thank you.
-
This one already on it's way to Florida. (Wish I were too)Randy
Amen brother!
-
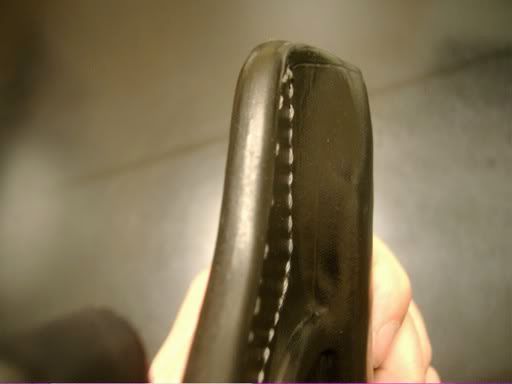
As I stated in another thread, I drill the holes at the top and bottom of the slot, then use a very sharp wood chisel to get a perfect line. Cheaper than Tandy punches, and you probably have a source for them right down the road (Lowe's, HD, Harbor Freight, etc).
I'd be interested to see what this holster looks like when someone is wearing it. ?? Randy, pics?
-
The chisel is soooo sharp, you can lightly 'walk' it across the length of the slot and then almost push it through with needing to tap it home. And, chisels are relatively cheap.
-
Great looking finish. I guess an airbrush is something to add to my ever-growing list of tools and gear.
I've used the method in Chuck's thread about Isopropyl alcohol as a deglazer and it works really well.
-
I use a drill to get the diameter of the slot and to make the top and bottom holes, then join them using a wood chisel. The chisel is so sharp, it makes easy work of leather, and the lines stay perfectly straight. Great holsters - I like the 1st one the best!
-
Thanks, Bruce - means a lot coming from you.
-
Dan, these look superb! I'm also having issues with achieving a solid tan finish. All in good time I suppose. Yours look really really nice.
Bruce, I admit - I'm also a closet Gibson fan. Thanks for the inspiration.
Cheers!
-
I think it looks great. Nice and clean.
What type of finish are you using?
-
I have GOT to get me one of those!!! I love the caliber, but I bet that Bersa 308 kicks like a mule!Haha!! I bet your right!
Good looking setup. It's not often that you see a shoulder rig for a lefty. Is the open trigger guard a customer request?
I have found that spraying rubbing alcohol on my piece to clean it and slightly dampen it lets the brown dye soak in more evenly. I apply it with a rag.
Cheers!*edit* Oh yeah, what weight is that leather?
-
gavingear, the strap would help keep the mouth open more if it wrapped around the holster all the way. As it is now, it certainly helps in keeping the mouth open and gives the muzzle something to butt up against when reholstering. It almost serves as a guide, if that makes any sense. I think it's necessary - at least, on this type of pattern. I made one for my XD40, and it's become my daily carry. This version (P64 - pistol is almost a duplicate of a Walther PPK) lets the pistol ride high enough for a solid grip, yet low enough the conceal really well. Plus, the pistol wants to hug the body, which is also desirable. We'll see how this H&K comes out.
Without this forum, I wouldn't know anything that I do now.
-
Thanks, Randy!
IWB belt loops
in Gun Holsters, Rifle Slings and Knife Sheathes
Posted · Report reply
My ventures have been in 6-7oz so far, but just got a real pretty double shoulder in 7-8oz. The edges look nice in the thicker leather, I think.