Dave4
-
Posts
44 -
Joined
-
Last visited
Dave4's Achievements
Member (2/4)
-
Questions about 206RB feed eccentric motion
Dave4 replied to Dave4's topic in Leather Sewing Machines
I have a "Bob sez" list of things I've cut-n-pasted from this site. It's a good resource. (Actually, I have 4 or 5 of these lists, based on comments from different tech contributors here.) Anyway, Bob - I need to clarify which video you think was the best. I went back and renamed all the videos in this thread: Video 1, Video 2, etc. You can see the title in upper left corner of each one. Above, when you said "I like the first vid the best...", did you mean Video 2, which was the 1st video I posted after I adjusted the presser foot timing, but before I messed with the feed dog lift timing? Thanks. Gregg - thanks for the additional manual. As Floyd already mentioned, it's surprising how often different manuals help clear things up. Correct me if I'm mistaken, but I think the page18 procedure you referenced in the Juki manual is the same adjustment as Seiko 8-5, which is the yellow-colored cam in Uwe's picture, which controls when the horizontal component of feed dog motion begins and ends. What I learned from Uwe's post is how to control when the vertical component of feed dog motion begins and ends by adjusting the timing of the blue-colored lift cam in his image. What I learned from Bob (pending his reply here) is that a more "sloping up" feed like what is shown in both Video 1 and Video 2 can be a good way to set the machine up, rather than using the blue-colored feed dog lift cam adjustment to seek a more "rectangular" feed dog action. Two more FYI comments: FYI #1 - I used a good quality ruler to measure the horizontal distance traveled by the feed dog during the interval that it is significantly above the throat plate height. I set my SL to 3.5, and then measured how far the feed dog traveled while it was at least "halfway above" the throat plate. IOW, since my feed dog height is 1mm, I measured how far the dog traveled during the time that it was at least 0.5mm above throat plate height. Before I changed the timing of the blue-colored lift cam, the travel distance was 4mm. After I adjusted the blue lift cam, it was still 4mm. The only thing that changed was that instead of having a long slope up to a plateau and then a sudden drop-off, now it had a short slope up, a plateau, and then a short slope down. This supports Bob's comments. Either way will feed the same amount. Bob gives reasons why "sloping" feed eccentric may be better. My original feeding problem wasn't caused so much by a long sloping-up feed dog motion as it was caused by having the inside foot arriving to early, jamming the material down into the throat plate opening until the feed dog rose enough to push it back out FYI #2 - In the OP, I mentioned the part #4 feed rock shaft base. I did a series of tests on this part. It had no effect on anything. My method: retard #4 a little, then advance #24 feed rock shaft crank the same amount. Test outcome. Repeat and test again. I did 4 iterations. I far as I can tell, an adjustment to #4 is the same as an adjustment to #24 - it changes the horizontal (longitudinal) position of the feed dog, but nothing else. OK. Thanks again to all. Bob - shoot a quick reply when you have a minute. I gotta keep my Bob sheet updated. Dave -
Questions about 206RB feed eccentric motion
Dave4 replied to Dave4's topic in Leather Sewing Machines
It only took a few minutes. A little give and take between the feed lift cam adjustment and the presser lift cam adjustment, and I think I got it pretty close to a happy medium. My foot is meeting the dog at plate level, and the dog has a more uniform rise - move back - drop motion, instead of the sloping up motion you see in the first vid. My needle is "arriving" just after the foot meets the dog, which is correct according to the Seiko manual. Bob mentioned that the needle should arrive first (in fact it did in Video 2). IMO, that means the Seiko manual is probably wrong, but I ran out of time and patience chasing the elusive perfect setup, and I called it a night. I may play with it some more later, but it is sewing great now and looks pretty good to me. Other noobs reading this: pay attention to when the needle comes up out of the material. The inside foot cannot release pressure on the goods until after the needle has cleared. Big thanks to everyone here. I learned a lot today. And I made an adjustment that I haven't seen in any manual, and it worked. Feedback and further suggestions always welcome. Dave -
Questions about 206RB feed eccentric motion
Dave4 replied to Dave4's topic in Leather Sewing Machines
So I grabbed a screwdriver and adjusted the feed lift cam. It is adjusted the same as any other cam, loosen one set screw, slightly loosen the other, continue to stab the screwdriver into the 2nd screw to hold the cam from moving, and advance or back up the hand wheel a little, then tighten the screw and observe your result by slowly rolling the machine by hand, making sure to stop immediately if something binds up. In a few minutes, I had this: You can see that now the feed dog motion is less of a slope-up and finish strong motion, and more of an even "almost rectangular" motion. BUT - this feed lift cam adjustment messed up my prior presser lift cam adjustment. You can see that now the inside foot is "too late", not meeting the feed dog until the feed dog has already risen above throat plate height. After a few minutes of trial and error, it became pretty clear that both adjustments affected each other, and the optimal setting was to "balance" the two adjustments. So that's what i did. -
Questions about 206RB feed eccentric motion
Dave4 replied to Dave4's topic in Leather Sewing Machines
I followed Bob's recommendation to adjust the presser lift cam. This adjustment is described in the Seiko manual, 2nd part of 8-12, or in the Navy manual, Chapter 4, page 4-7 - 4-8, available here: Navy Manual. Also described above by Bob and Floyd, with wise advice on how to not let the cam "jump away" when you loosen the set screws. The next video shows the end result of me retarding that cam a little: the inside foot now meets the rising feed dog at throat plate height instead of below it. Before I made this adjustment, my inside foot was meeting the feed dog before the feed dog rose to throat plate level (see the 1st video above). This squashed the material below throat plate height, which caused feeding friction and therefore inconsistent stitch length, but we never experienced the problem until we started sewing soft grabby garment leather. I guess firm leathers didn't get pushed into the low spot enough to cause drag or feed problems. However, I still felt like my feed dog motion wasn't correct. It was still not rising to full height until halfway through the backward motion. About the time I finished this video, Uwe posted the post above this one, pointing out the difference between the feed drive cam (which I had already adjusted) and the feed lift cam, which I had never even considered because it's not mentioned in any Consew, Seiko, Pfaff, or Juki manual I have seen. Thanks Uwe! -
Questions about 206RB feed eccentric motion
Dave4 replied to Dave4's topic in Leather Sewing Machines
Bob - thanks for the detailed response! I will start with your suggestions. I understand your warnings about not letting that shaft jump around during the procedure, thanks for posting them. Floyd - thanks for repeating the warning. I did this adjustment once about a year ago. I learned then that the shaft will want to jump if you completely loosen both screws. It's possible I screwed it up back then. Time to check it again. Bob - thanks also for the suggestion to adjust relative foot height. I've been doing this with the "Navy" method of setting relative lift equal (see image below). I will try it your way for fine tuning. Uwe - You saw what I saw in the lift timing and action of the dog. The Seiko manual describes how to set the lift cam in your diagram: raise the needle 1mm from BDC, actuate reverse lever repeatedly while observing dog and needlebar. They should be motionless. If they are not, adjust lift cam until they are motionless while actuating the reverse lever. I've set and double-checked that adjustment according to the manual. This was the only feed timing adjustment I could conceive of, hence my questions in the OP. I'm going to start with Bob's suggestion, and then consider setting the lift cam "improperly" a little if necessary. Gregg just posted while i was writing this. There is the manual. Thanks Gregg! I'll post back what i find out. Dave -
I used the Seiko SM to set up our 206RB4-TH. It's been working well for canvas and 5oz firm leather. We recently started some garment leather projects, and started noticing inconsistent stitch length problems. Today I verified proper FD height, FD longitudinal position, needle centered in FD hole, and timing of the lift cam on the arm shaft (actuate reverse lever, confirm that FD and needle bar are motionless). I did all this according to the Seiko manual. But I noticed that my feed dog eccentric motion doesn't look ideal. The feed dog is only at the proper height above the throat plate for half of the cycle. I also noticed that the needle and foot are not arriving at the feed dog at the same time. I'm pretty sure something is out of whack, but I can't figure it out. Isn't the feed dog supposed to work in a nearly "rectangular" motion? Mine seems to be sloping up to proper height, which suggests a timing problem between the feed lift and the feed motion. Is there some other way to adjust the timing relationship of these two actions to get a more "rectangular" action, or perhaps I should be doing the lift cam timing adjustment differently? Is the needle supposed to arrive at the goods at the same time as the foot? In the attached image, #27 is a pinch screw for #24 feed rock shaft crank, which sets longitudinal position of feed dog. #31 is a pinch screw for #30 feed lifting crank, which sets feed dog height. #4 is a feed rock shaft base, also with pinch screws, but not mentioned in the service manual. When I acquired this machine, it barely sewed and a lot of the standard settings were "off". It's entirely possible that someone messed with this #4 base setting in the past, but I've never attempted do anything with it because it's not mentioned in the manual. Is this a possible culprit in my feed issues? Is there a method for setting it to a "factory" position? I'm open to suggestions or ideas! Thanks.
.png.e88443bcf744bbc768fbd7a61923c317.png)
-
I was working on my 206 again today, and found so more info that may help others with snapping thread problem. Read This.
-
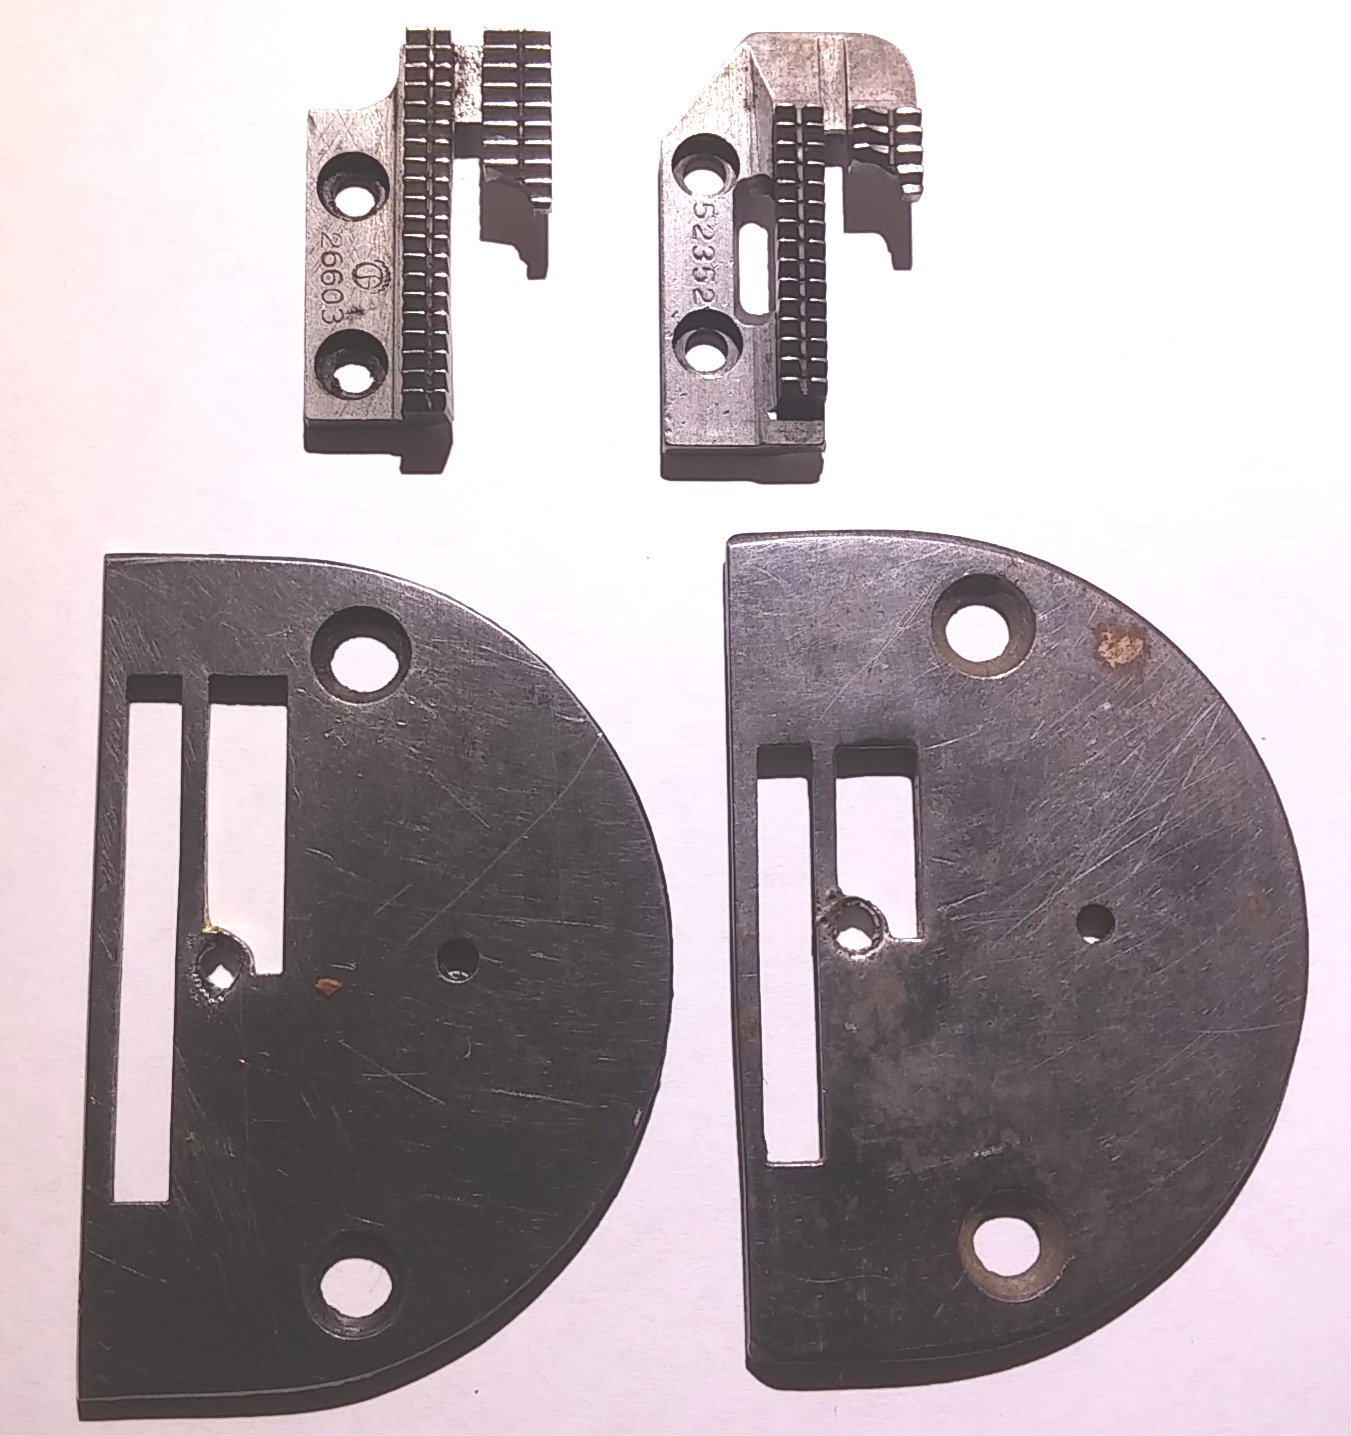
Thanks for the replies. Searched around, confirmed it's mostly common sense: Smaller pitch for lighter work, longer pitch for heavier. Shorter row (tooth count) for lighter work and for curving. Longer row for heavier work and generally straighter stitching. More rows for heavier material, also helps with straight lines, therefore not as easy to turn. Singer 31 spawned a LOT of plate/dog combinations! Thx.
-
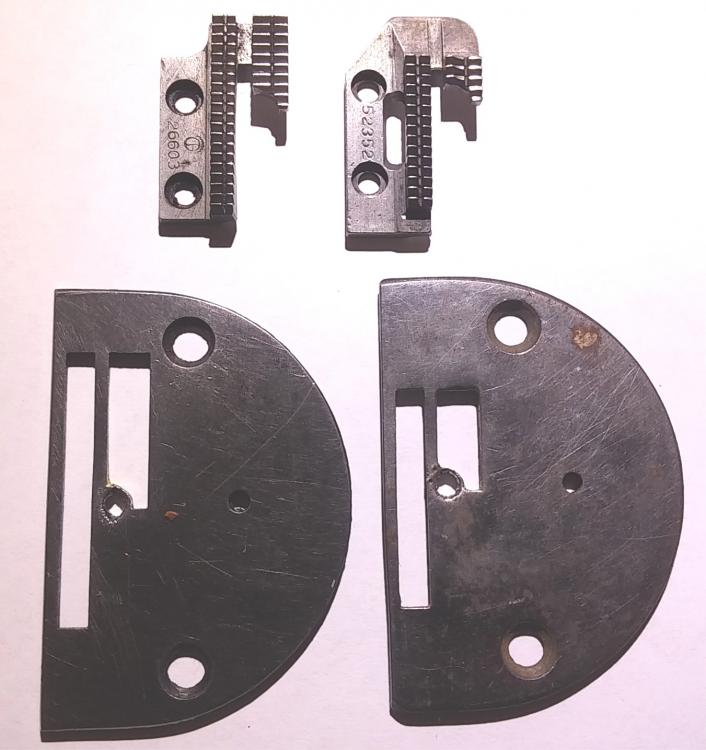
Photo - other dogs with more rows and bigger footprint. Compared to the dogs in the 1st post, what is the purpose or functional difference of the dogs in this 2nd post? Thanks!
.png.85fe3ea6c90e0f9e3c72a096600a69a0.png)
-
Greetings all, Photo: 2 feed dogs of different lengths. What is the functional difference between the 2 lengths? Is the shorter length better for curves? Any other differences, such as intended for different fabrics, uses, etc? Thanks!
-
Recommend vintage textile machine with reverse
Dave4 replied to Dave4's topic in Leather Sewing Machines
Constabulary - I received your PM and sent you a reply. Haven't heard back from you. May be interested in one or both, depending on shipping cost. Check PM. Thx. -
Recommend vintage textile machine with reverse
Dave4 replied to Dave4's topic in Leather Sewing Machines
I'm embarrassed to admit, we got so busy this summer I completely forgot I posted this question. Any new purchases will probably be next year. Thanks Constabulary and Uwe for the suggestions. Constab - did you ever sell yours? I see that the 130 has the classic crazing. I've never seeen a 130 myself that didn't have the crazing in the finish. Thanks, DCS -
Greetings. With the help of this board, last year I bought and restored a 31-15 and a 206RB4. The 31-15 has turned into a favorite machine around here: it's a great stitcher and works well with light or heavy fabrics. I'm considering buying another vintage industrial textile machine to restore and add to our shop. One with reverse! We've gotten pretty good at flipping things around to backstitch on the 31, but we want reverse on the next machine. What can you guys or gals recommend we look for in a vintage industrial that will sew light & heavy textiles, with reverse, with reasonable parts availability & prices? Many thanks for suggestions!
-
Hello CD. My set-up goal is to have the check spring release tension just as the needle passes into the goods, and to not pick up tension again until after the needle thread has been passed across the bobbin case face. Check spring stop too far advanced: lets off tension before needle tip reaches goods. Stop too far retarded: lets off tension too late after needle is buried. Stop just right: it lets off tension just has needle passes into goods. My findings: When I set the stop just right, the check spring ends up with only a small range of motion, on pretty much all my machines. I guess that's normal? On my early 31-15, the takeup lever starts its rise before the needle thread has crossed the bobbin case face, causing snappy action instead of smooth action. I'd like to advance the hook timing, but the shuttle and crank are pinned on the oscillating shaft. I'm wondering if there is another way to either advance the hook or retard the takeup? Thanks!
-
Thanks Eric. This gives me a better starting point.