


photo2u
-
Content Count
20 -
Joined
-
Last visited
Posts posted by photo2u
-
-
14 hours ago, CowboyBob said:We are also a Consew dealer & have this needlebar in stock in either generic or OEM.We sell more generics than OEM the only difference is the needle set screw are different tpi than OEM there is a $14.00 difference in price.
Will contact you tomorrow! Thanks for the info.
23 hours ago, shoepatcher said:bell who?
Do not understand you...
-
Contacted Consew New York and California. NY told me to contact California. California gave me a location in Bell. The person in Bell had little information on the particular part. Still checking.
-
5 hours ago, shoepatcher said:I would call Consew and see what a genuine needle bar #10530 bar cost. Then I would call Henderson Sewing in Alabama. They showed a generic one in that catalogue. Price and availability will determine whee you get it. Also, check your bobbin supply and if you need any, order them as well.
glenn
Thank you. I will contact them now.
-
4 hours ago, shoepatcher said:Use Greased Lighting and sewing oil to clean up the machine. Call Consew direct and sew what the prices are for the part. The needle bar part is indeed #10530. see if they changed it.
glenn
Thanks! I will give greased lighting a try. Consew is great. I was thinking the same. However, I was hoping to find an aftermarket product that works as well as OEM.
-
4 hours ago, 1hp said:looks like you are in Cali. bought my machine from these guys:
https://zamirsew.net/products/
Consew dealer.
Thanks. I have contacted them. They were not able to help.
-
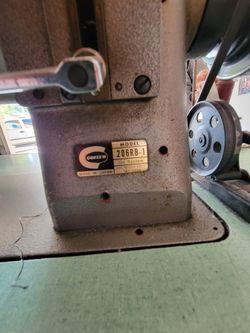
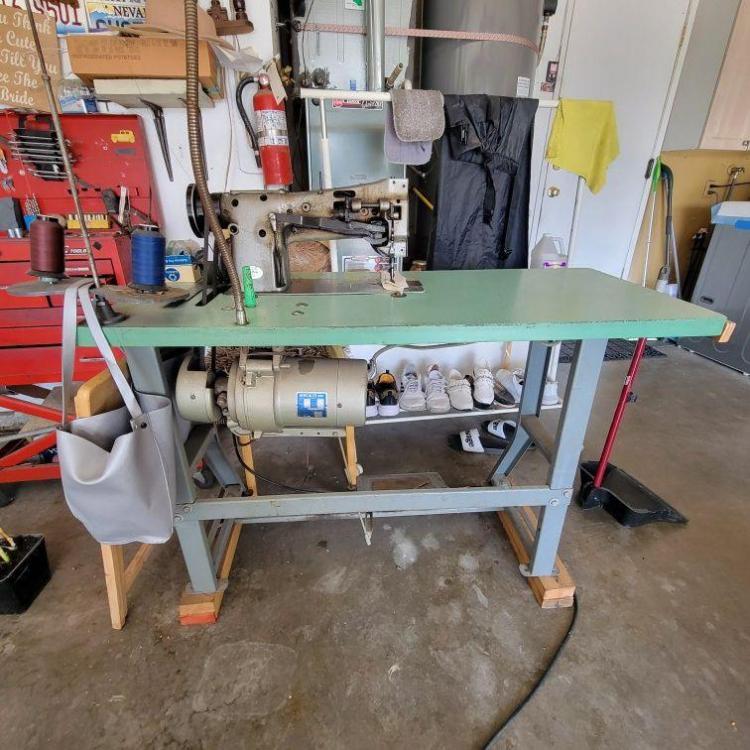
Hello friends,
I just got a very greasy Consew 206rb-1. This will be my pride and joy machine. I am hoping this machine will clean up well. My plans are to remove the old dry oil in the main parts. I welcome any tips to remove old oil puddles. Additionally, the machine needs a needle bar. According to the Consew Manual, part # is 10530 for the needle bar. In my search for the needle bar, I came across part # 19413. Is the #19413 bar, the same as the 10530 bar? I was thinking the #19413 contains the additional NEEDLE BAR THREAD GUIDE & NEEDLE & GUIDE SCREW?
I would love to buy OEM parts, however, do you recommend a particular brand or seller?
Likewise, I welcome any input to accomplish my goal of bringing this fine machine back to health.
-
On 9/30/2018 at 2:44 PM, BattleAx said:This is a stock item it depends on how thick the material is that you are going to sew. The thickest material you can put through this binder is 1/4".
Hi, I was wondering if you happened to know the part number for the consew 225?
Please advice,
Thanks!
-
6 hours ago, Frodo said:you can change out a 220 breaker to a 110 30amp breaker in the breaker box
use the 2nd hot wire on the 220 breaker as the common on the 110
Just a thought
Exactly what I did. Thanks! The run from my box is quite long. I upgraded the main box for future options.
-
20 hours ago, Wizcrafts said:Consew produces some 220 volt servo motors, as does Enduro. Whatever you look at, make sure it is specifically designed to fit under an industrial sewing machine table, fitting the same bolts as the original motor, and hook up to a floor pedal. If you intend to sew slowly, ask the seller to fit it with a 45 or 50mm pulley. This will slow down the maximum speed and multiply the torque. You will need a new vbelt to go to the machine. It is hard to guess what the difference in length will be until you install the motor. Try to use the original belt and note how much too long or short it is. Then order the appropriate length that is within the motor mount adjuster's range.
Thanks so much for the info. I think I am going to give the enduro in eBay a try. I saw some videos on YouTube from user of this particular motor. They appear happy with the end results.
The reason I liked the enduro motor was mainly the price. I wanted to know if the enduro motor was legit not just junk. I will keep my options open for the 110 also.
-
22 hours ago, Wizcrafts said:Why do you need a 220 volt servo motor? The standard in the USA is 110vac.
The servo motors I buy cost $160 delivered and they are analog, with a speed limited knob. All of them are 110 vac.
Thanks so much for getting back to me. I truly value your sage advice. I understand the 110 norm. I know my way around electricity and custom installations. I have 220 in the garage where I am going to use it. I upgraded my house to run both 220 and 110. Many things in kitchen, garage, AC, pool,Family/entertainment room, emergency generator hook-ups, ect. That uses 220.
I guess my question should have been, Any feedback on these motors? I am not a pro or will be using this in an industrial or professional production. If no one used them, Can someone recommend me a particular model that will work for my applications?
I welcome any input! Not in a hurry to buy.
-
Friend, I am in the market to upgrade my well maintained consew 225. I am planing to do slow thicker leather T138 work max. Mostly T105 and T90.
Do you have any input as to which one might be the best suited for my type of needs? I saw a nice one deliver with tax for $60: Enduro Pro SM645B-2P Servo Motor w/ Positioner Industrial Sewing Machine 220V or
this one for 65 deliver: Enduro sewing machine servo motor 220 volt ONLY variable speed motor SM1050-2PF.
The prices are very low, and I wonder if these motors are just junk?
Please advice,
G.
-
8 hours ago, Wizcrafts said:I like Organ titanium coated needles for their resistance to the leather tape I baste seams with. I like Schmetz for their S point inline oval leather point needles. I also use Groz Beckert needles. I avoid no name brands.
I was looking at the Organ Titanium coated Needles also. They look good. I will give them a try. Thank you sir.
-
Hello friends, I want to put my 225 to work and need to get some leather needles for Tex 70,90, and 138. Can you please recommend a needle company? I was about to buy some Organ brand needles. However, there are some Germans that do look good.
Any input, if greatly appreciated!
G.
-
On 10/29/2019 at 5:46 PM, Wizcrafts said:No. I was referring to the driver. Polish the end where the top thread exits.
If your hook has burrs, polish it to a shine.
Great! I buff the driver as good as it can be. Thanks for the info. Finally, could you please let me know how about how little a should pry the end of the driver's? 1 or 2 millimeters?
-
15 hours ago, Wizcrafts said:Yes, that's the shuttle driver. I think I see a crew on your shuttle driver. If so, unscrew it/them and remove the driver. Insert it in a vise and carefully bend one of the arms out slightly. Reinstall it and see if there is more clearance for the top thread. Also, polish the trailing end where the thread exits.
Thanks for getting back to me and helping me out with your sage advice. You are a fountain of info and I am absorbing it! I took out the shuttle driver. I clean and polish it the best I could. I was wondering how much I should carefully bend one of the arms? I was thinking about 1.5mm? or less?
Also, you mentioned "polishing the trailing end where the thread exits" is that in the stainless steel Shuttle Hook?
Thank you!
-
3 hours ago, photo2u said:Thank you so very much for helping me out. I am new at this as I just got into sewing.
I was reading your instructions and I truly do not know the areas you are referring too. I am including an image to confirm if my understanding is correct.
I welcome any input!
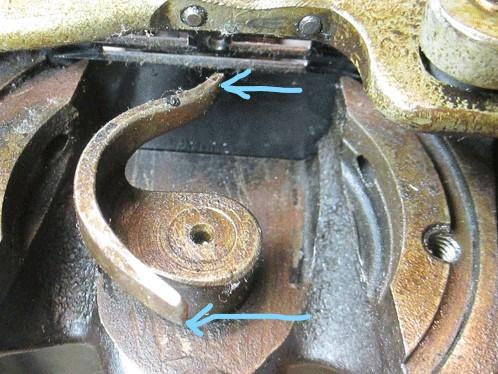
Is this the area where the "prying" is needed? Please advise!
-
3 hours ago, Wizcrafts said:My Singer 31-15 has a pinned shuttle driver that can't be rotated to adjust timing. When I bought it, the clearance between the ends of the driver and the shuttle was just enough to clear standard cotton or polycore garment sewing thread. This made for excellent results with thin thread, but not with bonded 69. My solution, which was passed along by a friendly industrial sewing machine dealer, was to carefully pry the ends of the shuttle driver out a little. This increases the free space between the driver and the shuttle. I fine tuned the clearance for #69 bonded thread and called it a day.
Because the 31-15s had fixed position shuttle drivers, the only way to time the machine is by moving the needle bar up or down and changing the clearance to the shuttle. Many of these almost 100 year old machines have partially or fully stripped set screws on the needle bar. If you can get the screw to turn it is best to replace it with a new one. Then you can fine tune the needle's eye to hook point very slightly, or even to change needle systems. I set mine to use system DBx1 , also known as; 16x231, 16x257, 1738, or 1515. These are the same needles my serger uses, so I get double duty out of these needles.
Here is a discussion about the Singer 31-15 that I was involved with.
Note, that if you set too much clearance on the shuttle driver, the shuttle action will become sloppy and you'll get unpredictable results.
Thank you so very much for helping me out. I am new at this as I just got into sewing.
I was reading your instructions and I truly do not know the areas you are referring too. I am including an image to confirm if my understanding is correct.
I welcome any input!
-
2On 10/19/2016 at 9:45 AM, Wizcrafts said:I use my 31-15 to sew wallet interiors and for all cloth projects (tailoring). I usually use a walking foot machine to sew the back to the interior. My machine can handle #69 bonded nylon, because I clearanced the shuttle driver and shuttle race to do so. Otherwise, it would not clear that size of thread without a slight but noticeable binding and click sound that messed with the stitch quality and dependability.
Hi, I am new in this forum and I was looking for ways to make my 31-15 utilize tex 69 thread properly. I am interested in knowing how to "clearanced the shuttle driver and shuttle race" as you did to your machine?
I welcome any advice,
G.

Paint match Consew Grey?
in Leather Sewing Machines
Posted · Report reply
That is incredible how a name will be so misleading. I am going to give it a try. Will keep you posted. Now I got to learn how to blend/feather the paint to the rest of the body.