CedarCreek
-
Posts
36 -
Joined
-
Last visited
Content Type
Profiles
Forums
Events
Blogs
Gallery
Store
Everything posted by CedarCreek
-
Here something different
CedarCreek replied to CedarCreek's topic in Gun Holsters, Rifle Slings and Knife Sheathes
Thanks, I cut the two large buckles from some thin gauge stainless steel and then tack welded some loops to the back for attatching the belts. I cut them by hand and then sanded and polished. The project was on a pretty low budget. If I were to do it again I would draw them up in CAD and have them laser cut. -
This is some thing I made a while back for my brother in-law, who is a real Star Wars Geek. He is part of a Star Wars fan club the does alot of charity work with the childrens hospitals, etc. This is not my best work but it is fairly accurate as far as a movie prop goes.


-
Question, Firearm types/models?
CedarCreek replied to Scott1952's topic in Gun Holsters, Rifle Slings and Knife Sheathes
Like Art , I do mostly cowboy gun leather for guys getting started in sass. Mainly has a hobby for a little extra cash. Colts and colt clones, Ruger Vaqueros, etc. -
Yes, I put a groove line for all the stitches, inside and out. Thanks everyone for the comments. I think the next project will be a shoulder holster.
-
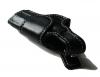
Well, I made a few pattern changes to clean up some things from the original design. So here is version 2.
-
First attempts
CedarCreek replied to Scott1952's topic in Gun Holsters, Rifle Slings and Knife Sheathes
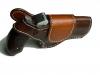
They look real good for your first set of holsters, the pictures are a little small but from what I can see they look great. As a suggestion for the holster for the 2" revolver, you might try intagrating the belt tunnel with additional support peice that wraps around the mouth of the holster. This will help it hold its shape better when reholstering the gun. Just a thought. Keep building and show us you your next project.Those pictures are much better. and again they do look great. -
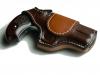
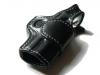
Thanks, the reason I put in the spacers is because of the width of the trigger guard as well as the rest of the gun. It allows me to narrow up the profile of the holster some. Without the welt the holster would have the be much wider just so I could get the main seam sewn up. If I was building a holster for a colt 1873 style pistol I would use the same spacer except I would tamper it down to nothing once I got past the trigger guard. Hope that made since.
-
thanks, I use a 7/8 outer with 3/4 liner. All of the western rig I build are lined so I did the same with this one. I think it gives a better finished look and holds its shape better. I know most CC holsters are unlined, I just have not tried it. The finish is buffed Fiebings proffesional oil dye Black.
-
Sorry, Have got this posting down yet. had to edit. How do I put images right in the post rather than an as an attatchment?
-
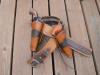
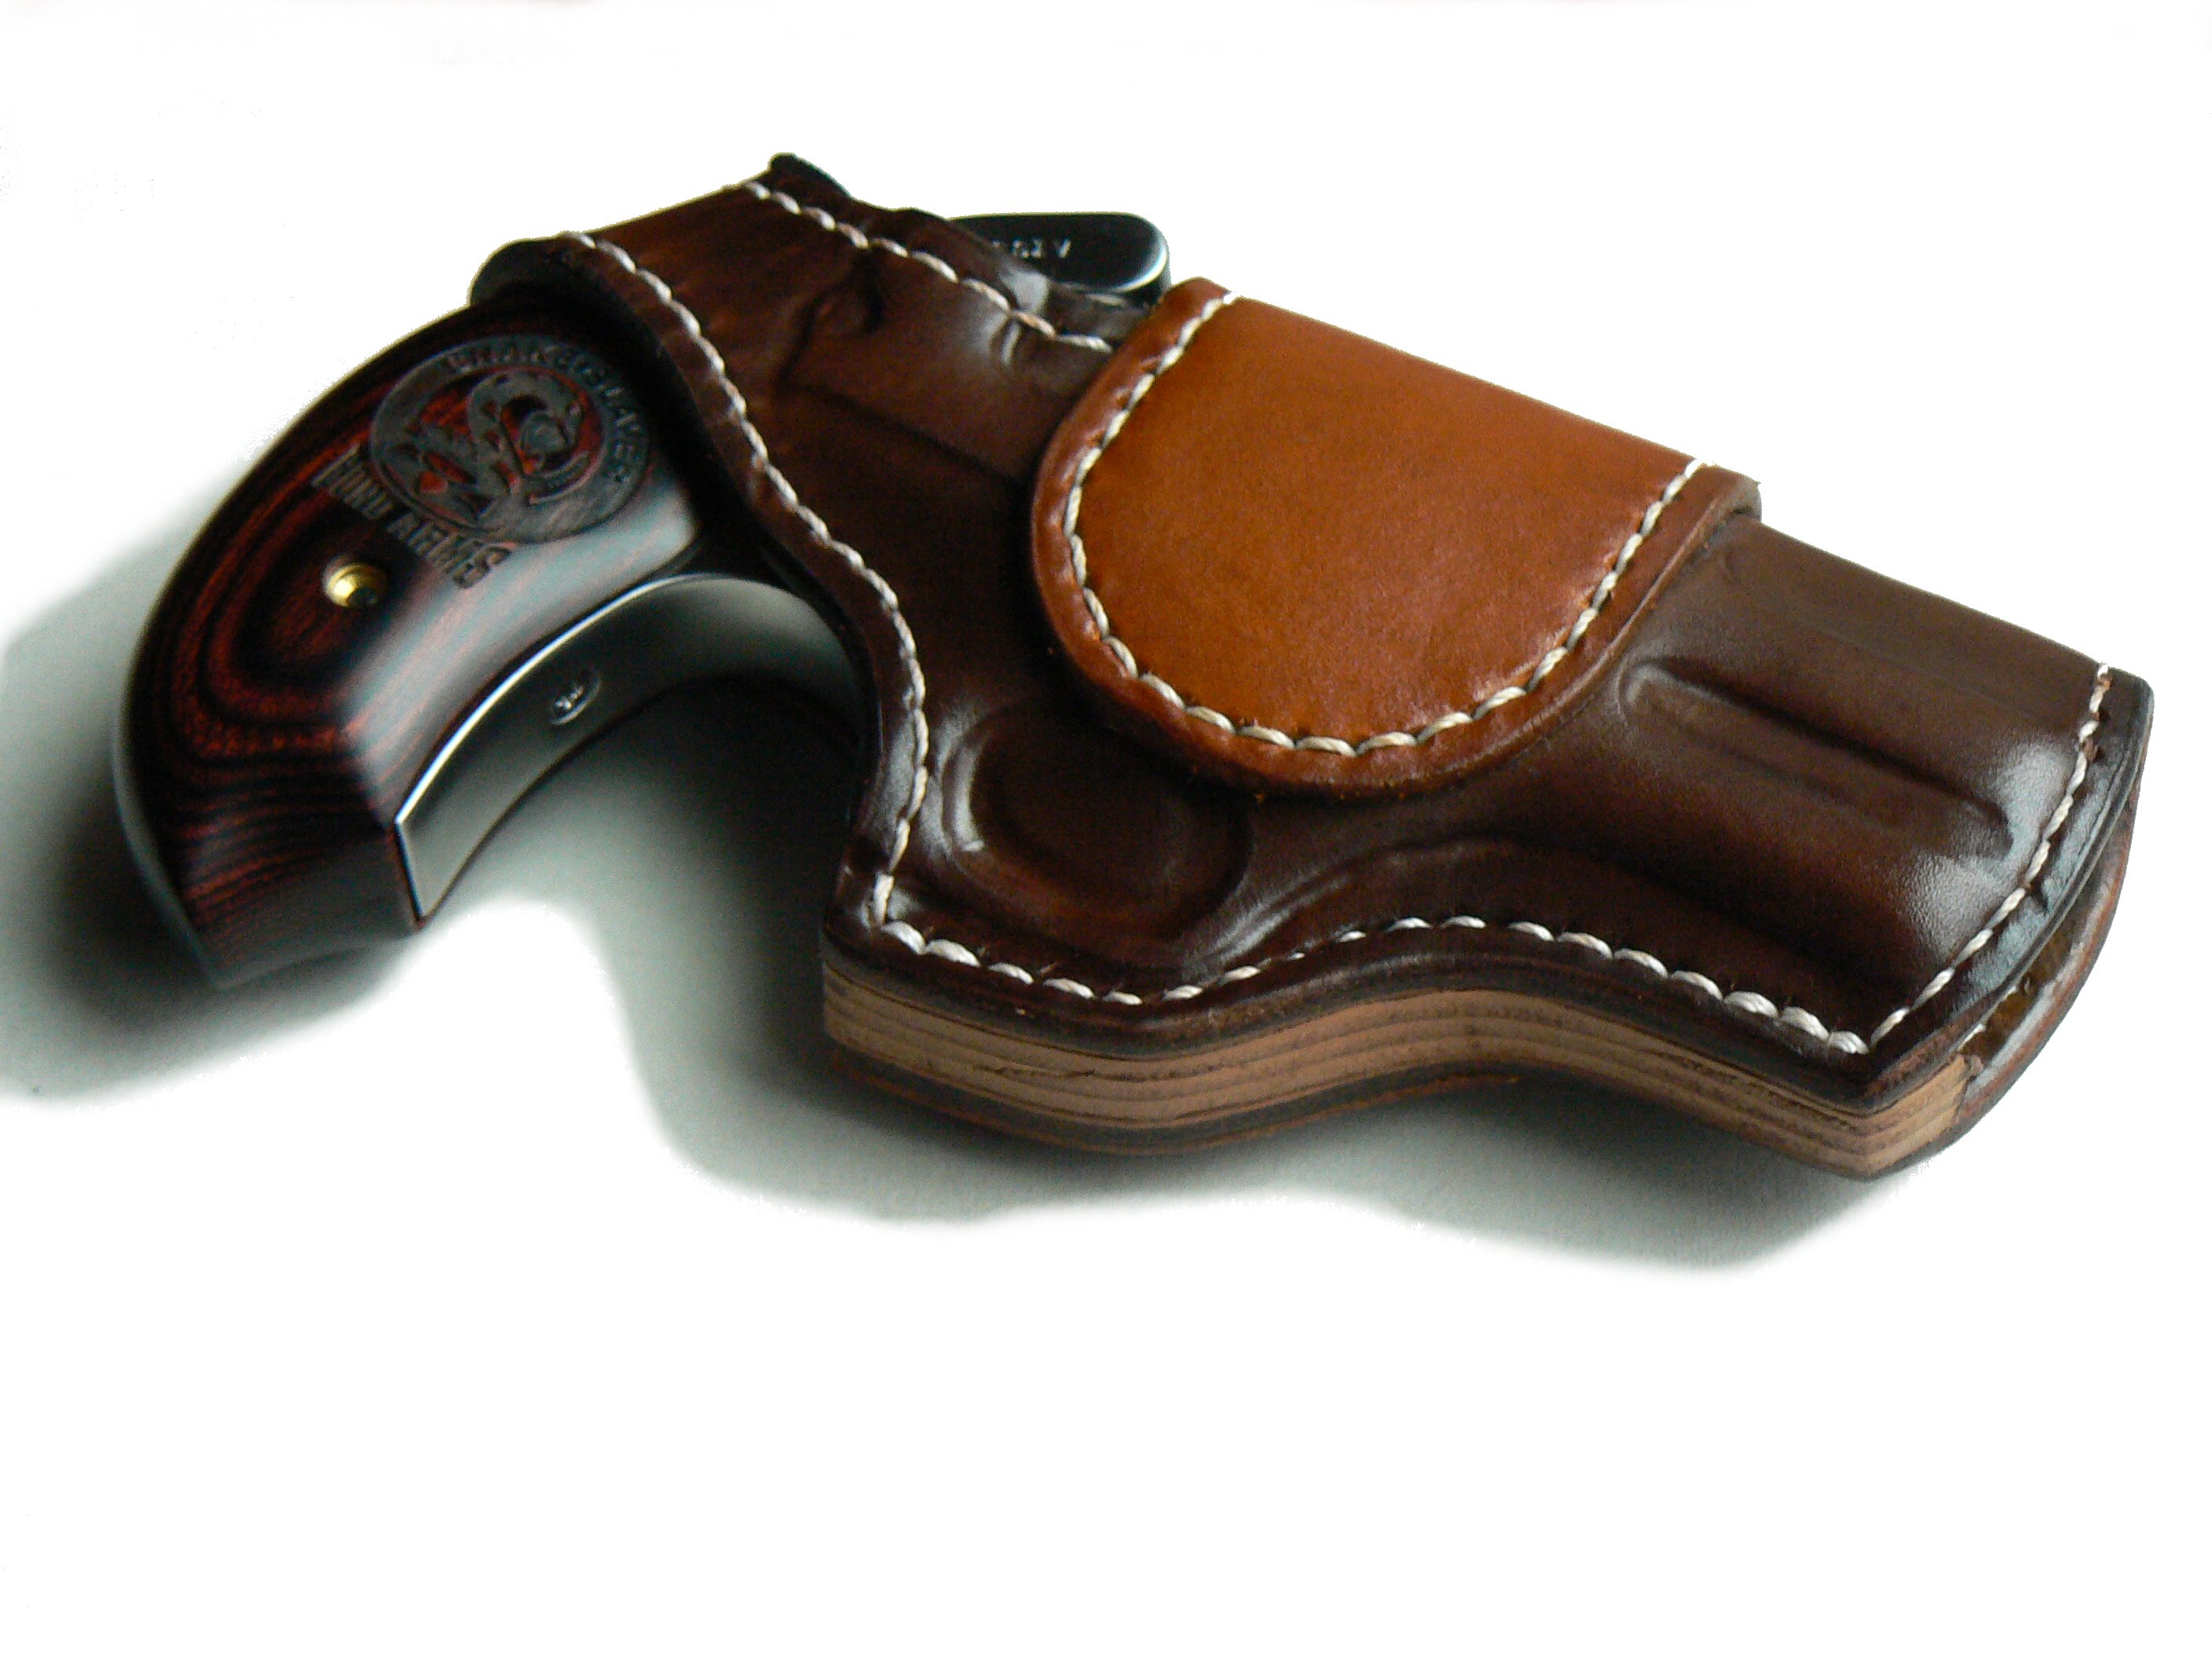
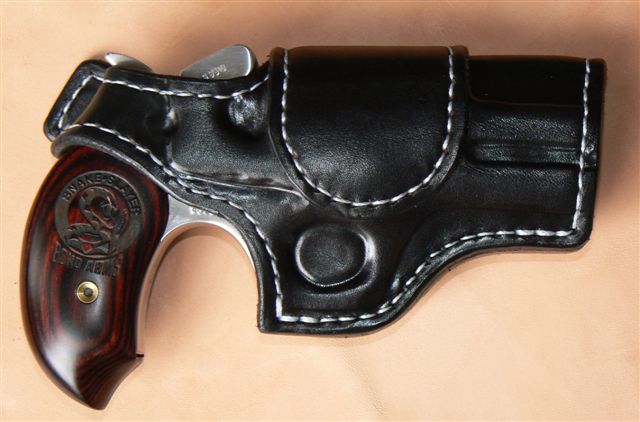
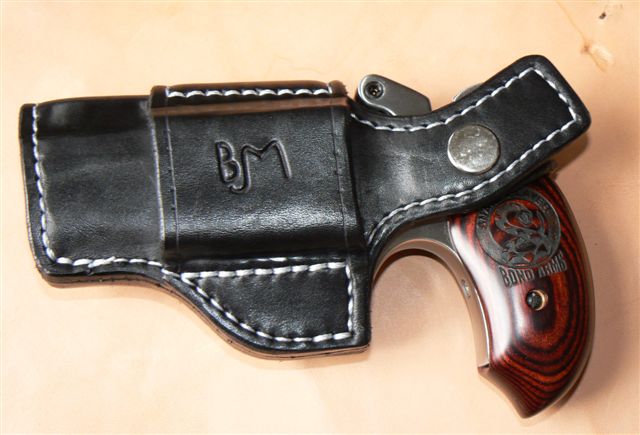
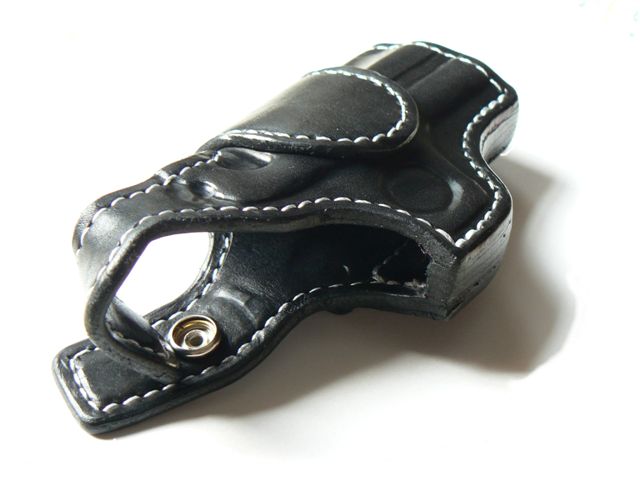
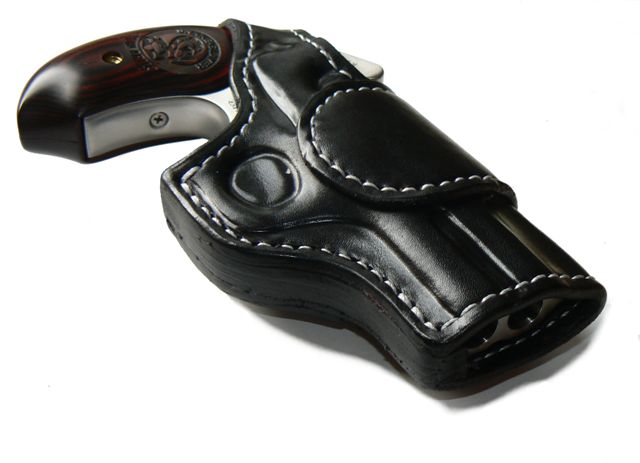
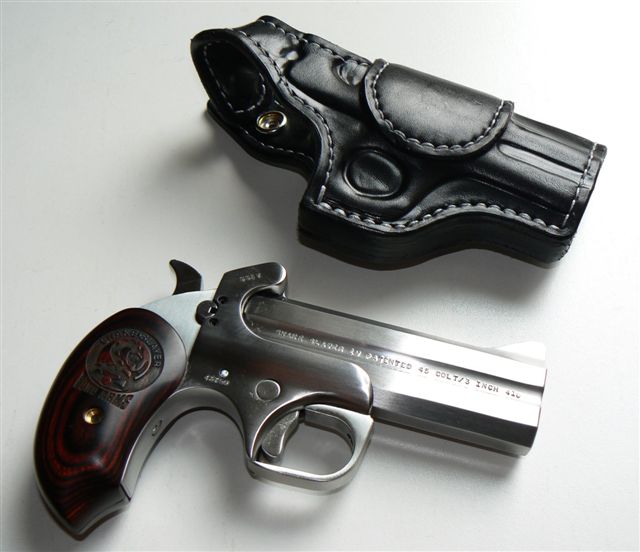
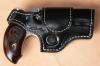
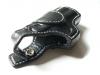
Had to build a holster for a new pistol I got from my wife for Christmas. Its a Bond Arms Snake Slayer IV .45LC/.410 with 3 1/2" chambers. I recently got my concealed carry license so this is my first attempt at a concealed holster. There are a few things I will change for the next one, but I think it came out pretty good. Let me know what you think and I will get started on the next one.


-
New Member
CedarCreek replied to CedarCreek's topic in Gun Holsters, Rifle Slings and Knife Sheathes
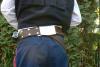
Thanks all for the complements and suggestions. I am glad I found this site. I have had to solve all my design issues and construction questions on my own. It will be nice to have a place to ask questions. I mainly build western rigs for a gun shop in my home town. But I would like to try some concealed carry holsters. Yes, the belt is lined with pig suede and all hand stitched. The only reason I do not lace the bullet loops under the lining is for maintanence reasons. It was my thought that if I ever needed to repair a belt or bullet loop, I could easily remove and relace new loops. I agree it would look nicer and the chances of ever needing to relace the loops is probably pretty slim. Any thoughts on that? Thanks -
Hello, just found this site and I think it is great. Have been building western holsters for a while now, and have been self taught. I can see that this site could be a great place for help and ideas. Let me know what you think of this latest rig. Thanks