livewire516
Members-
Posts
18 -
Joined
-
Last visited
Profile Information
-
Location
Philadelphia, PA, USA
Recent Profile Visitors
The recent visitors block is disabled and is not being shown to other users.
livewire516's Achievements

Member (2/4)
-
Replacing strap keepers on a Swiss Rucksack
livewire516 replied to livewire516's topic in How Do I Do That?
Thanks for the explanation - I'm sold. Also, the more I think about it, a big reason I'd procrastinated on this is how unwieldy double-needle stitching is on the bag (I hadn't figured out a good workholding solution). I appreciate you sharing the tutorial as well - I'll be sure to use it. Agreed - the additional stitching is what's key here. It's my go-to bag! I found it in an Army-Navy store without shoulder straps - making shoulder straps for it was one of my first leather projects and served me well for several years. I really appreciate everyone's input! With the craziness of the holidays, I'm unsure how quickly I'll get to this but will be sure to post my results for those who might be interested. -
Replacing strap keepers on a Swiss Rucksack
livewire516 replied to livewire516's topic in How Do I Do That?
Definitely a good option. I agree, I definitely plan to pre-punch and not use an awl. Is there an advantage to do a back stitch rather than a saddle stitch? In the past, when using a stitching chisel, I would use the needle in the right-hand like the awl for me to find/chase with my left-hand needle. -
Replacing strap keepers on a Swiss Rucksack
livewire516 replied to livewire516's topic in How Do I Do That?
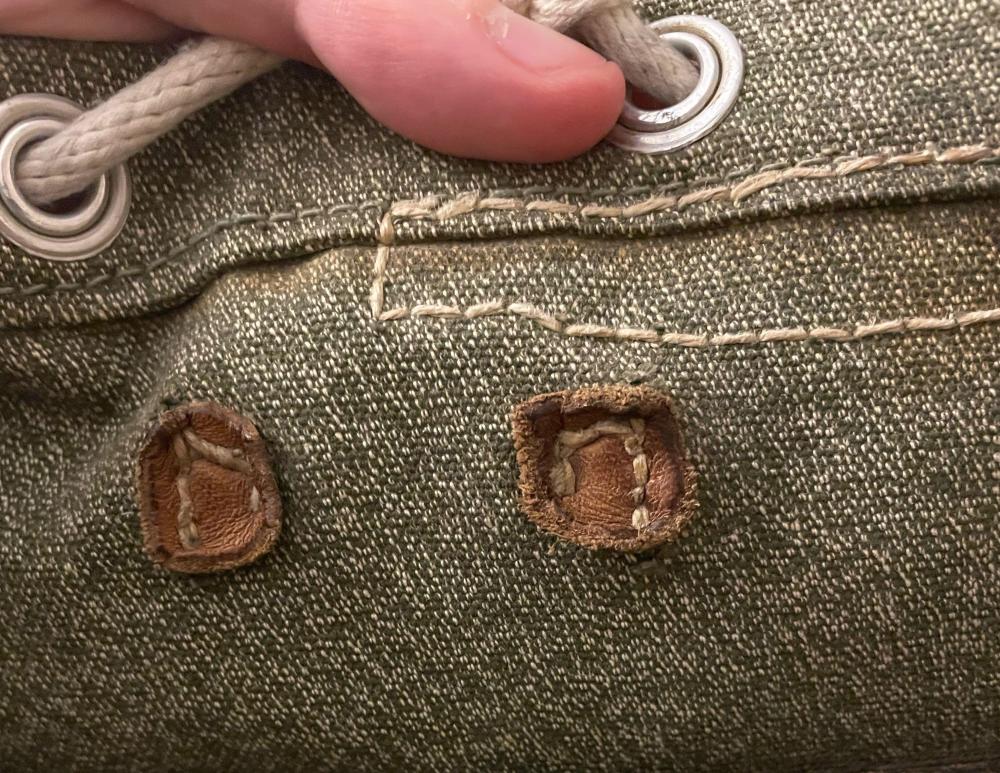
That's a great idea: the originally were small pieces of leather on the other side, but were only stiched to the keeper. I hadn't though to make it oversized. chuck123wapati thanks for your photo - it's fun to see the many variations of these rucksacks. This is the inside of mine; you can see why I didn't feel as though this would be adequate. -
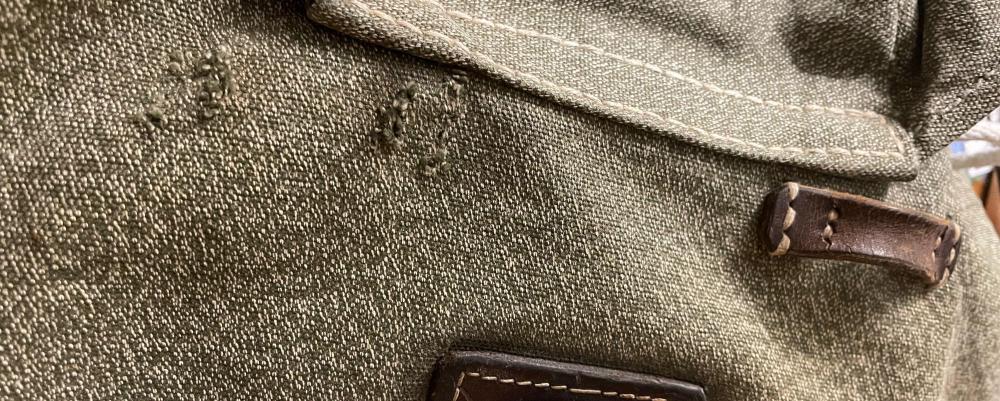
I have a Swiss Military rucksack from around the 50's-60's. One of the leather keepers for shoulder strap had dry rotted and feel apart - I plan to replace it. My question is how best to go about it? My main concern is the canvas appears weakened from the original stitch holes - it seems likely to eventually rip if I were just to stitch a comparably sized keeper in roughly the same place. I'm not especially concerned about it appearing entirely original. At present, I'm thinking I'd either making a larger keeper that will allow me to stitch elsewhere on the waxed canvas, patch the canvas, or perhaps both. I would love the community's input - below is an image where you can see the intact strap keeper on the right, and the stitch holes in the canvas where the other keeper was.
-
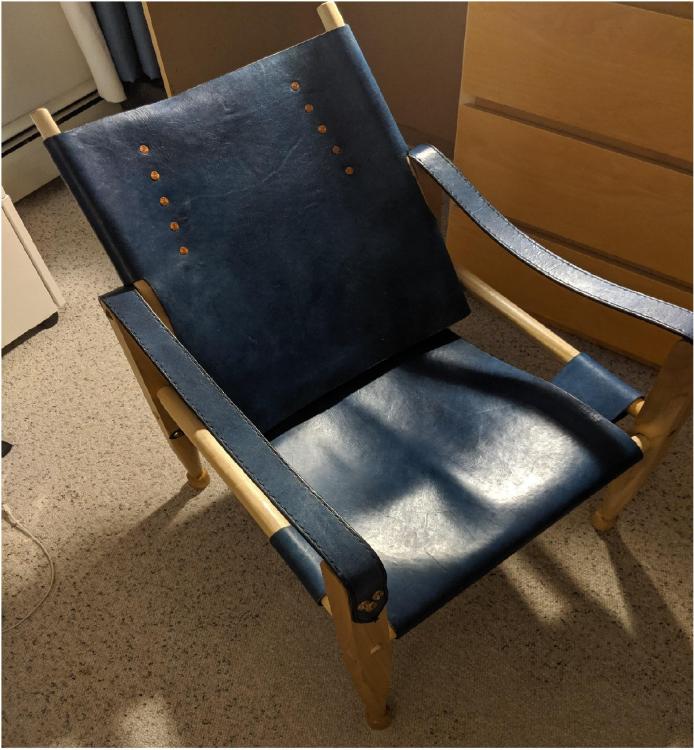
What would be a good finish for a sling chair, made from Bridle Leather? I am making another chair in the style pictured; however, it will be in a true navy. I'm using Wickett & Craig's 8 oz. English Bridle. It will be a gift for my cousin; she has been asking me to make her one for years, ever since seeing the one pictured. She collects handbags, and definitely prefers things look pristine, rather than having patina. (That puts me outside of my comfort zone: I generally use minimal finish, prioritizing preserving the hand-feel of natural materials and embracing signs of wear. But this gift is for her, so I'm trying my best to honor her tastes ). What kind of finish will protect against the inevitable scuffs and wear? What kind of prep do I need to do with the hide being tanned like English bridle?
-
Secondary Leather/Keeping Costs Reasonable
livewire516 replied to livewire516's topic in Leatherwork Conversation
These are both great ideas; I have been thinking similarly. I actually plan to make some of these chairs primarily out of canvas, so I have already purchased good heavyweight duck cloth. I'm struggling to find the pictures online, but I've also seen Roorkee Chairs secured/tensioned underneath with a criss-cross of either rope or lace. The historical examples I've seen are just simply punched holes, but they obviously stretch, so I probably would fit them with grommets for durability. Being based on the USA East Coast, I've never given much thought to Kangaroo. Very interesting - I'll definitely check it out! ------ I must say, sling chairs are definitely tough in leather: they need to have some stretch to be comfortable, but I'm trying to keep the rate at which it sags to a minimum. My first attempt at this chair (pictured in the original post), has a perfect impression of my bony butt lol. That's definitely not what I'm going for. That being said, back then I didn't understand how best to pick and orient pieces out of the hide. I'll also mention that the other method I'm strongly considering, is joining smaller pieces rather than making each component out of one large panel. It would also permit me to play with making good use of remnant hides and perhaps even playing with contrasting colors. I haven't practiced the French seam, but I would expect it to add visual interest to this chair as well. Thanks for everyone's input!! -
I've been making Roorkee Chairs, also known as Safari Chairs, or Safaristols. They have armrests that are made of two long straps of 8 oz thick veg tan, 1.75 inch (45 mm) in width. There are also 5 straps that are underneath the chair that are each 3/4 inches wide. None of these parts are all that visible, nor are they touch points in daily use of the chair. I plan to make the entire chair out of Wickett & Craig English Bridle. Can anyone recommend a utility leather that I should keep stocked in the shop to serve as a secondary leather in places where strength matters but appearances don't? I primarily work in wood and I generally depend on pine, poplar, or plywood for parts that aren't visible or touched to keep costs reasonable, and save my nickles for premium wood where it counts. I look forward to hearing the community's suggestions! Here's a mock-up of the chair made out of Tandy's not-finest.
-
Perhaps I should've used something softer, like beeswax rather than Tokonole for burnishing. Otherwise, I'm pleased how they turned out. I have not yet burnished the belt holes - I'm unsure if I will bother to be honest.
-
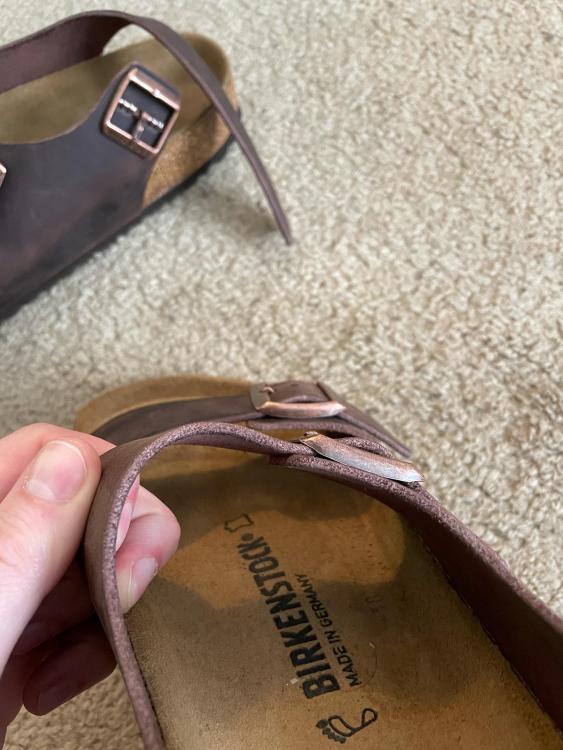
Will do! Thank you both - just needed a little prodding. Well hey - still consider them decent value, even at their price. I see where the money was spent materials wise. I don’t know the term for leather itself, but woodworking and leatherworking have definitely taught me that a quality tool at a fair price is generally sold unfinished and needs fettling. I noticed this with some of my casual boots, but they all get only occasional use. I will practically be living in sandals between now and October. When the package arrived, my housemate saw me closely inspecting the sandals. They asked, “aren’t you going to try them on?” I said no and rattled off about beveling and burnishing. They rolled their eyes and said, “you know too much.”
-
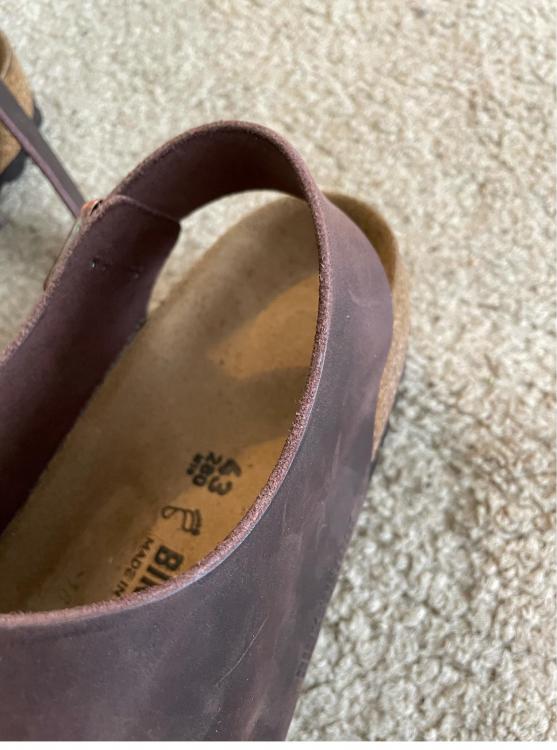
So my leatherworking has been exclusively with thick vegtan - making straps, sheaths for edge tools, sling chairs, etc. Looking at this pair of Birkenstock sandals I just ordered, I immediately had the impulse to bevel and burnish their raw edges, as well as burnish the buckle holes a bit. Is there any reason not to? It seems like they'll wear better - both in terms of my comfort and durability of sorts. Besides re-gluing soles on occasion, I've never messed with my own shoes. Any input is appreciated!
-
Diamond chisel - each side separately or through both?
livewire516 replied to livewire516's topic in Sewing Leather
Thanks for everyone sharing their thought process. Yeah, I'm finding the difficulty of matching sides at the moment with a practice project. It was helpful to spot check every so often with an awl, but as mentioned in a Nigel Armitage video, when you chisel each side separately, you really only have the very center of the hole so it's a little harder for the harness needle to find its way through. -
I've seen/read instruction to use a diamond chisel much like a pricking iron: chisel each piece separately, then join them together for stitching. I've also been instructed to glue both pieces of leather together, then strike the diamond chisel through both pieces at once. I'm left with the impression that the first technique will result in a finer end product, while the latter technique is easier. That being said, I'm a novice and I'd like the community's input as to which method they use, and why. Are their certain use-cases where one is necessary? (ex. when both faces are effectively show faces, I'd imagine you ought to use the first technique). I'm looking forward to any guidance on the matter.


