


AdamZ
-
Posts
40 -
Joined
-
Last visited
Content Type
Profiles
Forums
Events
Blogs
Gallery
Posts posted by AdamZ
-
-
Glad the idea has inspired others to cover their ugly mallets! I almost didn't buy one because it was so ugly, but since I'm new to leather work and I lacked experience to know if it was worth buying a more expensive maul or rawhide mallet I just got this. I don't think I'll feel so uninspired seeing it anymore. Please post some pictures if you make them. I'd love to see what someone more skilled comes up with. There is plenty of opportunity to be a bit creative - I was going to have the stitches crossed over on the front like when I made my archery quiver hood, which I think would look good. I assume a baseball style stitch could work too. Then I guess more details on the leather than the few lines I gouged in with my dividers could look good too, especially if done with a better tool. Speaking of tools, tooling is probably another option - not something I've ever tried myself yet. And then plenty of colour options too...
-
33 minutes ago, LatigoAmigo said:
You managed to take a lemon and make lemonade. Nice job, it looks great.
Haha, thanks. I almost wish I'd used a piece of leather that wasn't damaged.
-
-
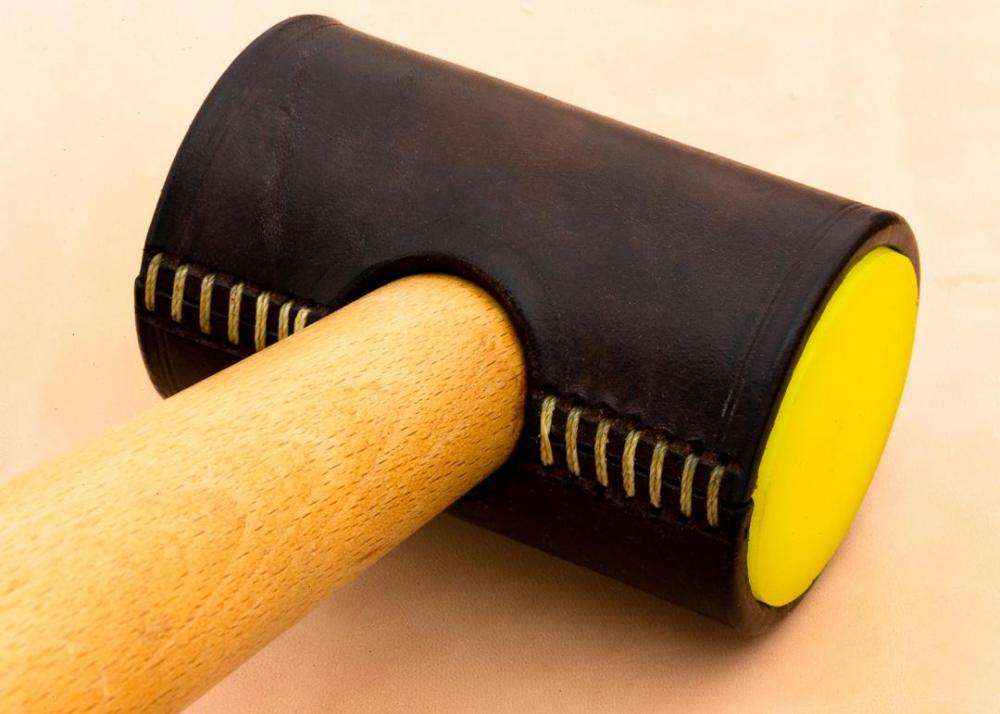
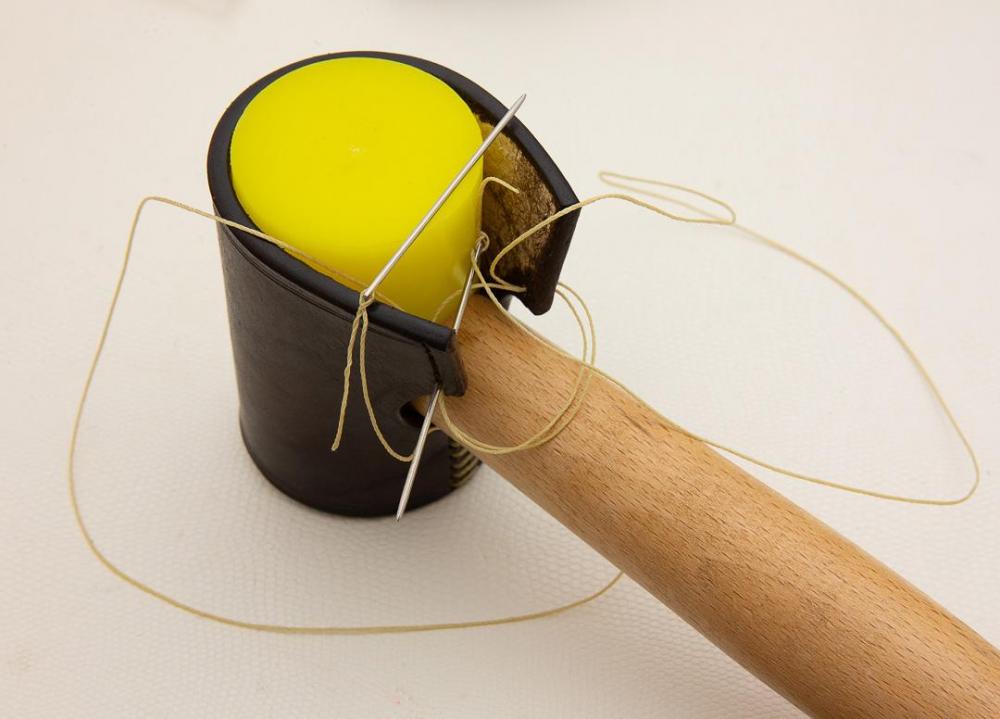
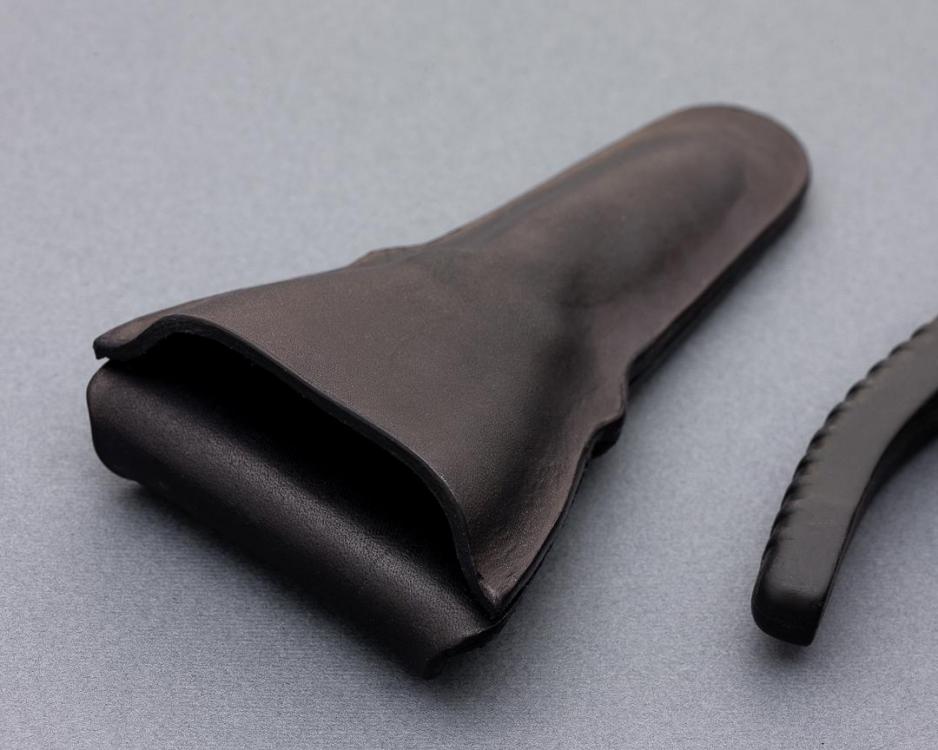
And here it is finished:
-
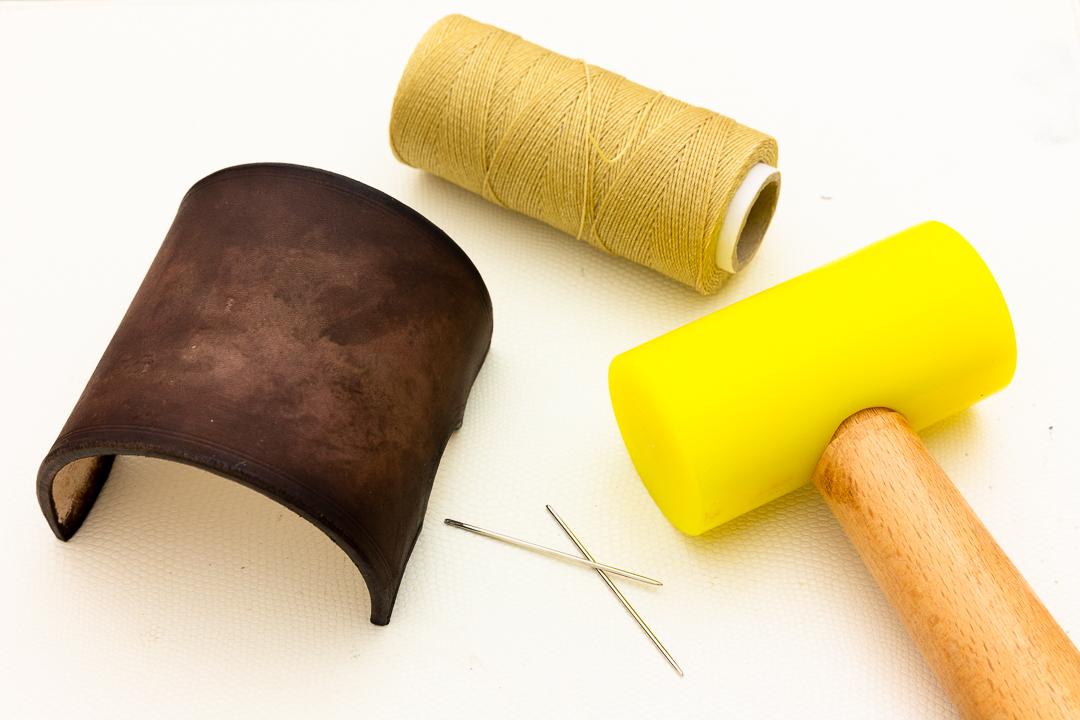
I made this tonight with a rough bit of scrap leather because I really don't like the way these poly mallets look. As a bonus, while not a lot, the extra weight it adds is actually noticeable. I tried a few new things. Firstly I mixed the Fiebing's Show Brown Pro Dye, which I appled with one sponge, and some methylated spirits (rubbing alcohol?) with another sponge and worked at getting a different, perhaps aged look. Then I finished it by buffing in some bees wax. I'm not sure if doing a bees wax finish like this is normal, or if it is even a good or bad idea, but I figured an unimportant and small project like this is the best place to try new things. Anyway, here is the thing from start to finish...
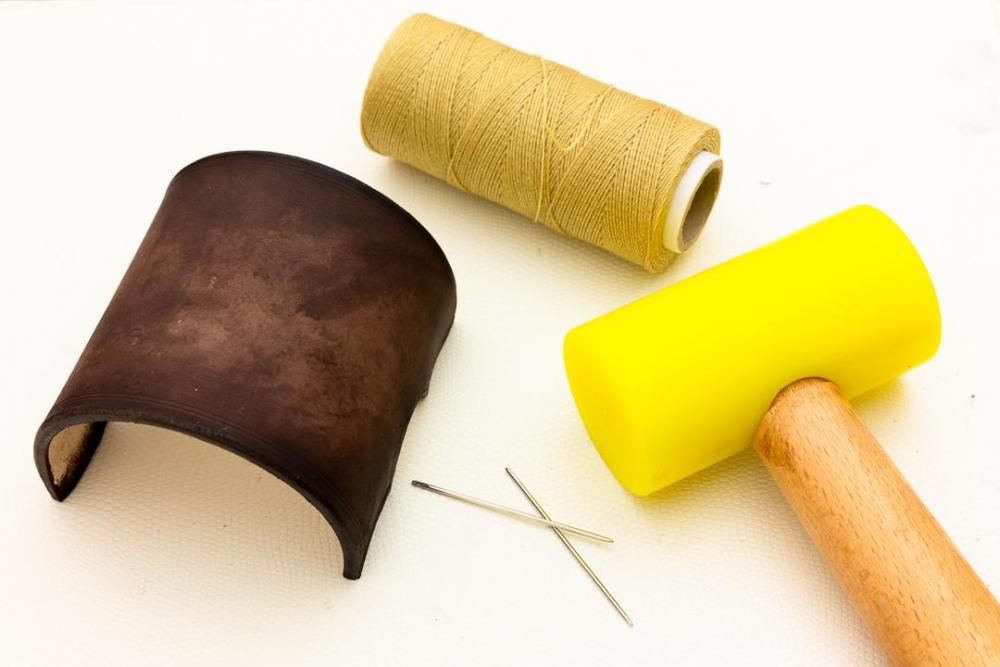
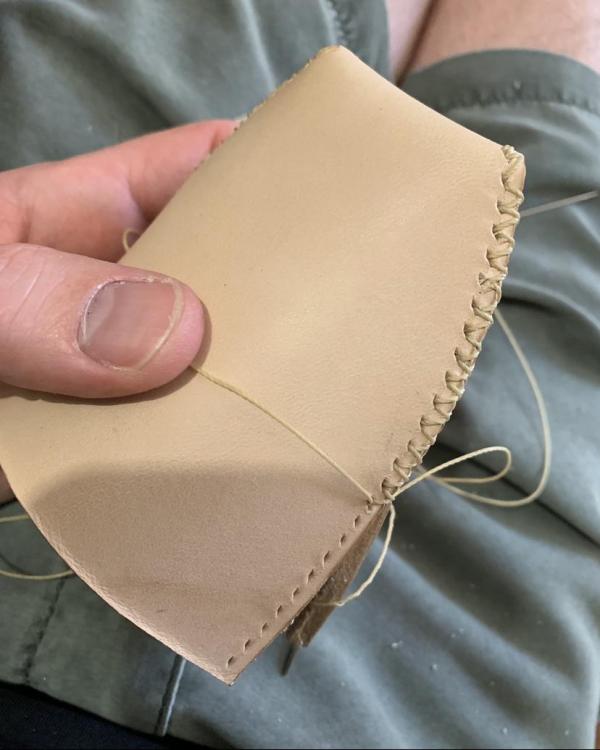
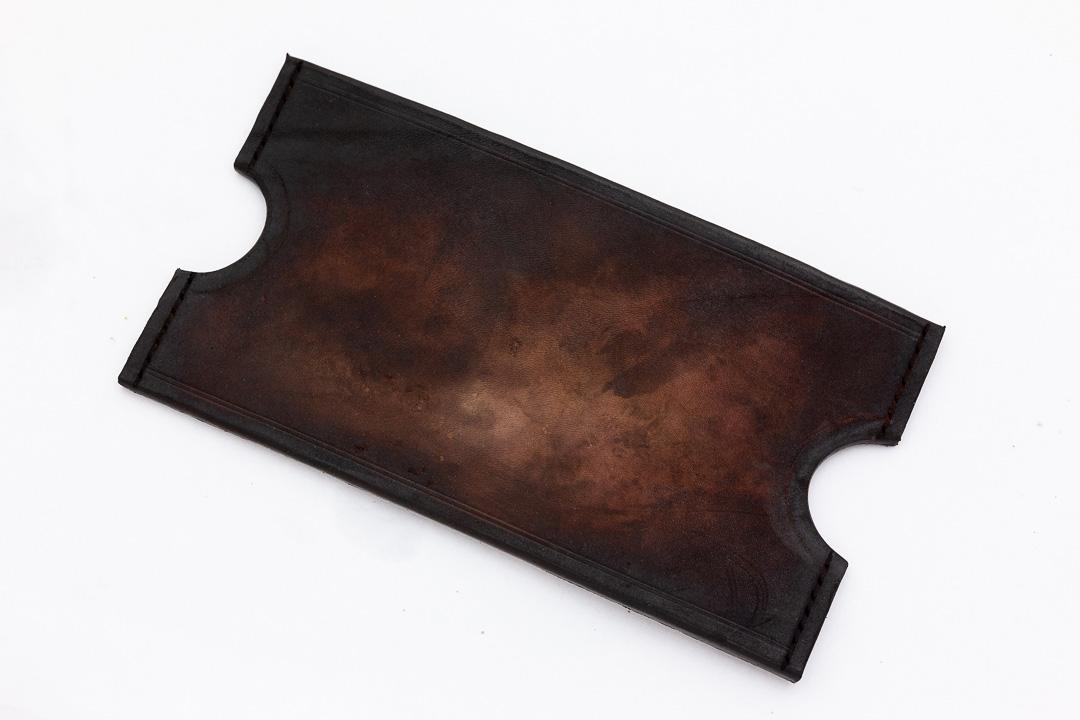
Prior to dyeing:

After dying:

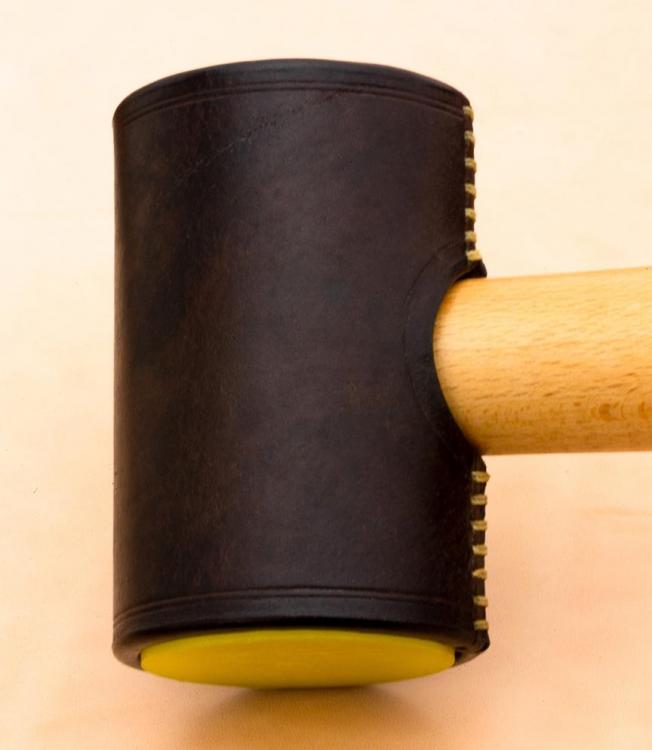
I wasn't really happy, so decided after more work on the edges I would go back and add some more dye Here it is with the mallet before the second round of dye:
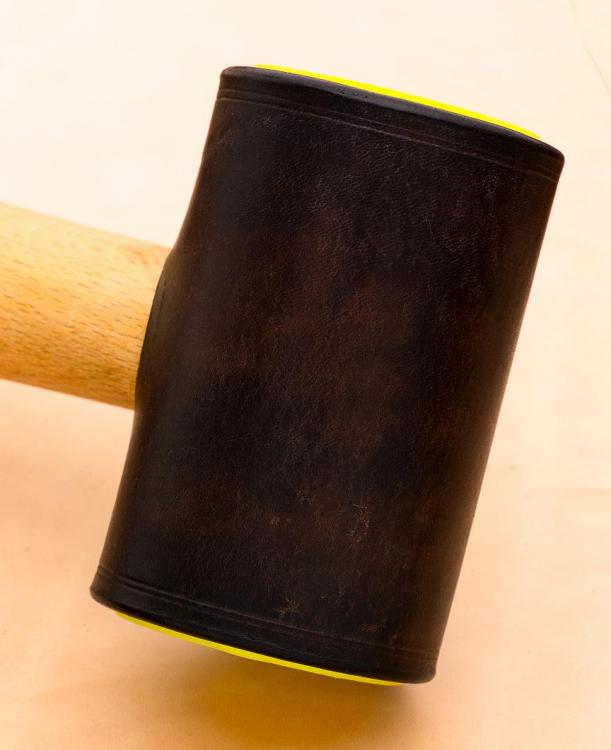
Half way through stitching, you can see here the dye is much darker - I had also finished the edges as well as buffing the whole thing with bees wax:
-
5 hours ago, Dwight said:
Yes, . . . the brace would be about 2/3 the thickness of the pliers.
And yes, . . . the basic terminology is a welt. I always put a welt up the outside seam of my cowboy holsters, . . . knife sheaths, . . . and tool holders like this. 1) it makes the molding easier and 2) it gives the finished product more of a professional look I think and 3) the tool holder will eventually become looser, . . . allowing the tool to bottom out, . . . and the tip of the pliers hitting a welt will not hurt the holder, . . . but if it gets to the stitches, . . . trouble lays ahead.
I would suggest a couple things, . . . google "drill sander" and take a look at some of the ideas there. Any kind of a powered sander will give you a quicker and more professional looking edge. Plus, . . . stitching pony's are a piece of cake to make, . . . see below.
You are doing good, . . . keep up the good work.
May God bless,
Dwight
Thanks Dwight, all very helpful! I'll definitely invest in some more and better tools as time goes by. It's a bit difficult right now with the virus lockdowns. I just gave the edges a sand with some fine grit paper (finished with 1200). since the sanding went through the dye layer in places and discoloured the stitching a bit (which I was already not thrilled with), I'm considering restitching after I re-dye. I wasn't happy with the dye around the holes anyway, so despite it being a bit of a pain I figure it will give me more stitching practice and I can be satisfied it is as good as it can look despite the problems I had along the way.
-
Lastly, and I hope it's ok to post a link, but this was the inspiration behind my design: https://www.bearsden.com/product14357.html
-
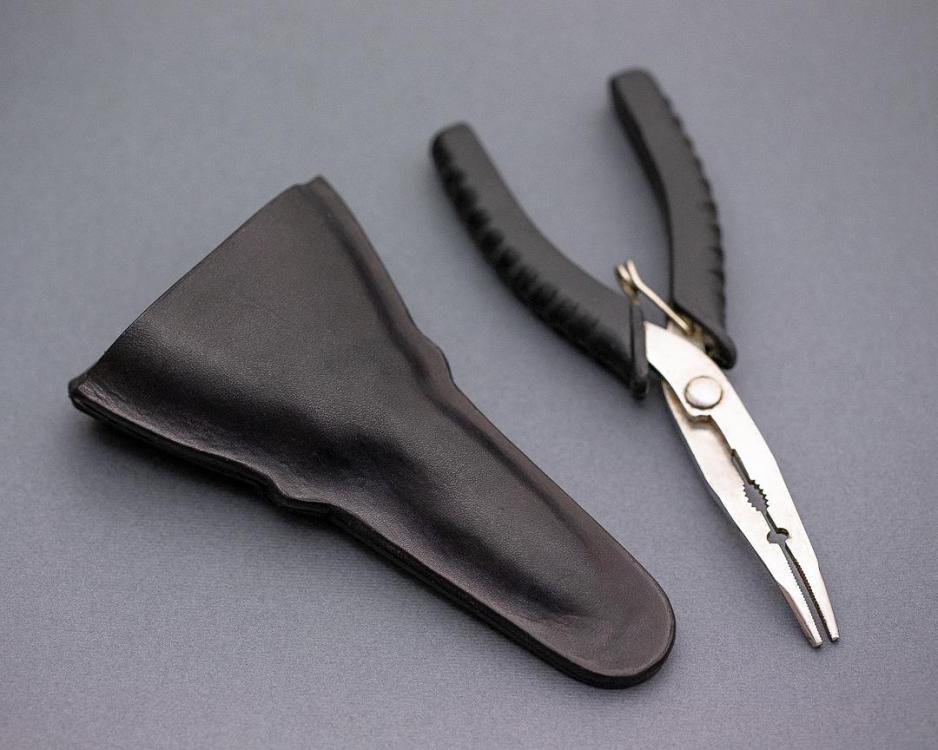
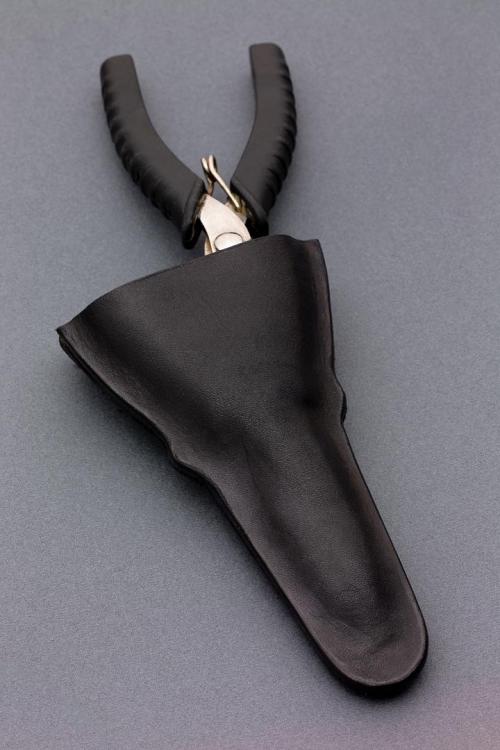
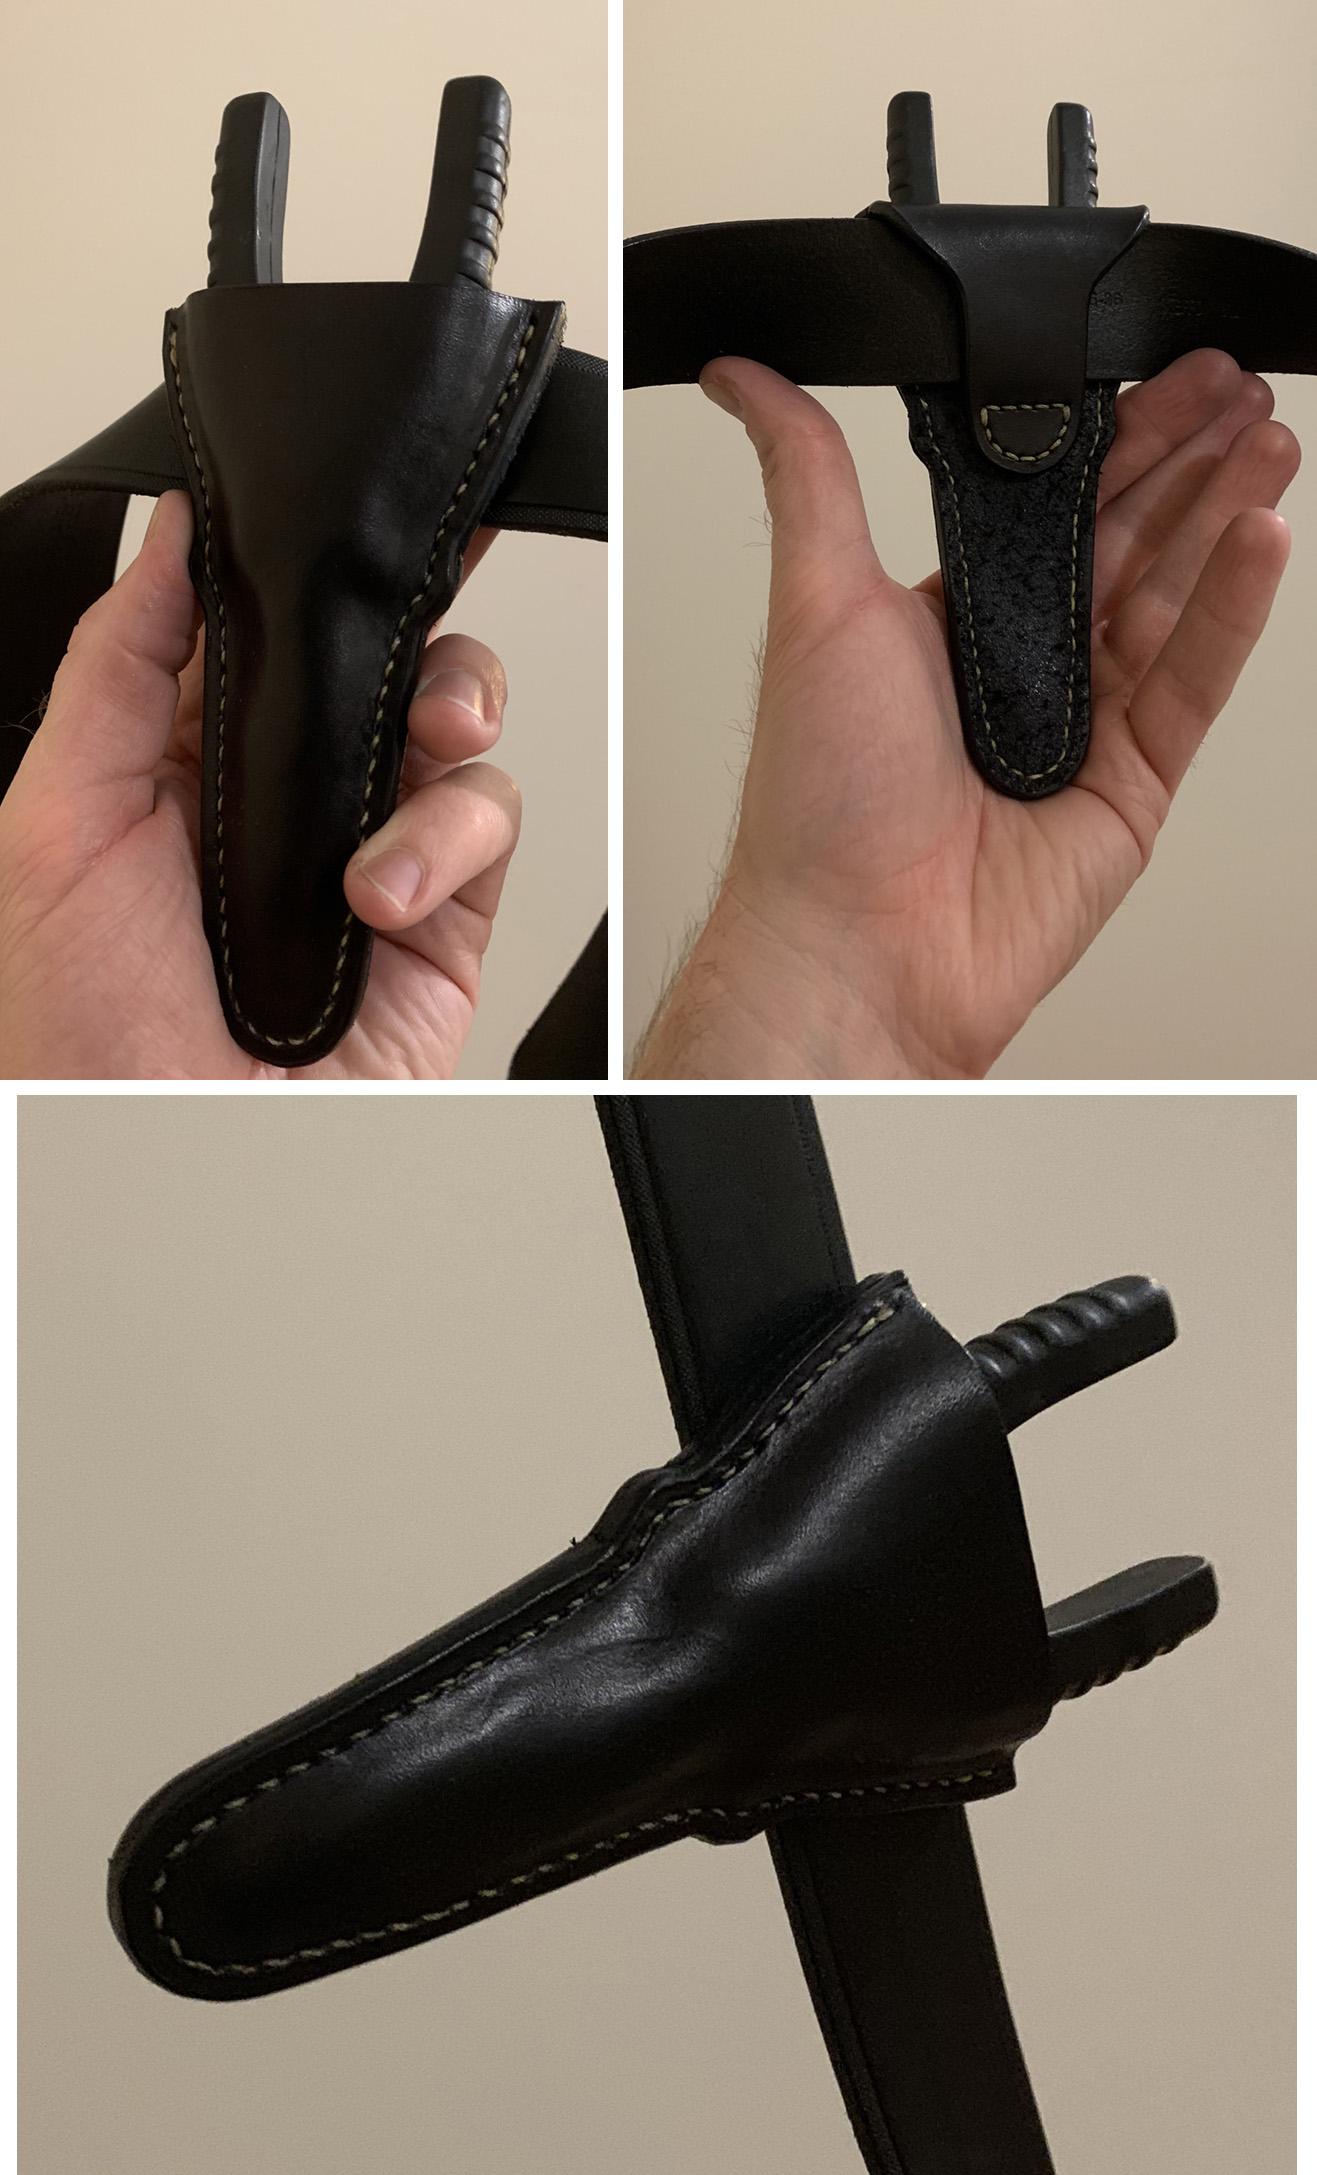
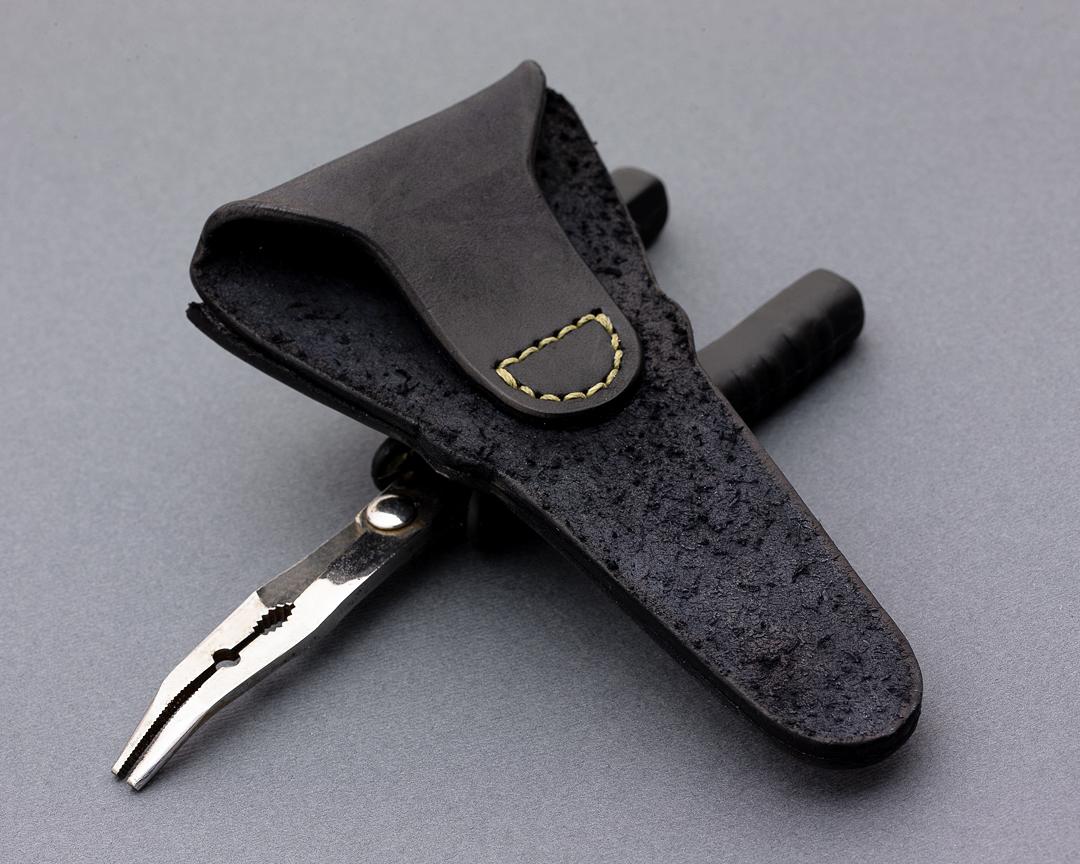
This is where I'm up to now. I need to sand and burnish the edges, and apply some sort of final finish. The fit is very tight and there's quite a bit of leather between the points of the pliers and the stitching in the bottom - I doubt they will ever make contact, especially as they are bent nose pliers. The fit is very tight, but will no doubt loosen a little with use. As the pliers are cheap, about $10 Australian, so even less than that in US$, and the sheath was made from scrap veg tan, I think it will be ok though I'd definitely like to improve on my next one. On a belt the worst of the back side of the stitching is covered...
 11 hours ago, Outfitr said:
For wet molds I always set the item on a board and lay the oversized wet piece of leather which is cut straight on top and layed over the item at the right position for the top line. The rest of the leather drapes over at least an inch too big. then start molding with appropriate modeling tools while stapling the leather to the board. When its molded enough I remove the item and put in oven till pretty hard. Using dividers mark a fat quarter inch boundary line and cut there. Then the back piece is just flat leather bigger than the front, glued on to the front and then trimmed exact to the front. Then stitched.
Thank you for your reply too Outfitr!
-
You can see there wasn't a massive amount of overlap, however I think I may have trimmed it a bit prior to glueing
-
20 hours ago, Dwight said:
I would then make something or find something that is about 2/3 the thickness of the pliers, . . . wood, plastic, other leather, etc, . . . but which outlines the pliers fairly close. Lay that all around the pliers.
When dry, . . . lay the front face down on a terry towel, . . . put braces under the edges, . . . lay the pliers in that front "shell".
When you mention the braces under the edges, do you mean the thing you made about 2/3 the plier thickness?
20 hours ago, Dwight said:For these types of "holsters" I also will put in another piece of leather between the front and back, . . . it is the basic outline of the tool itself, . . . will be about 3/8 of an inch wide, . . . and will follow the coutour of the edge of the holster, . . . all the way around. I usually get it by first making the front piece, . . . laying it down on another piece of leather pretty much the same size, . . . outline it, . . . cut it out, . . . then lay the tool on that piece, . . . outline the tool, . . . cut out the outline, . . . discard that piece from the middle.
Is this 3/8 wide piece different than the 2/3rd thick piece you mentioned above? If not, I'm a little unsure about things. Also, is this 3/8 wide piece essentially a welt that goes around the pliers to make more space and so the points don't rub the bottom of the sheath with wear?
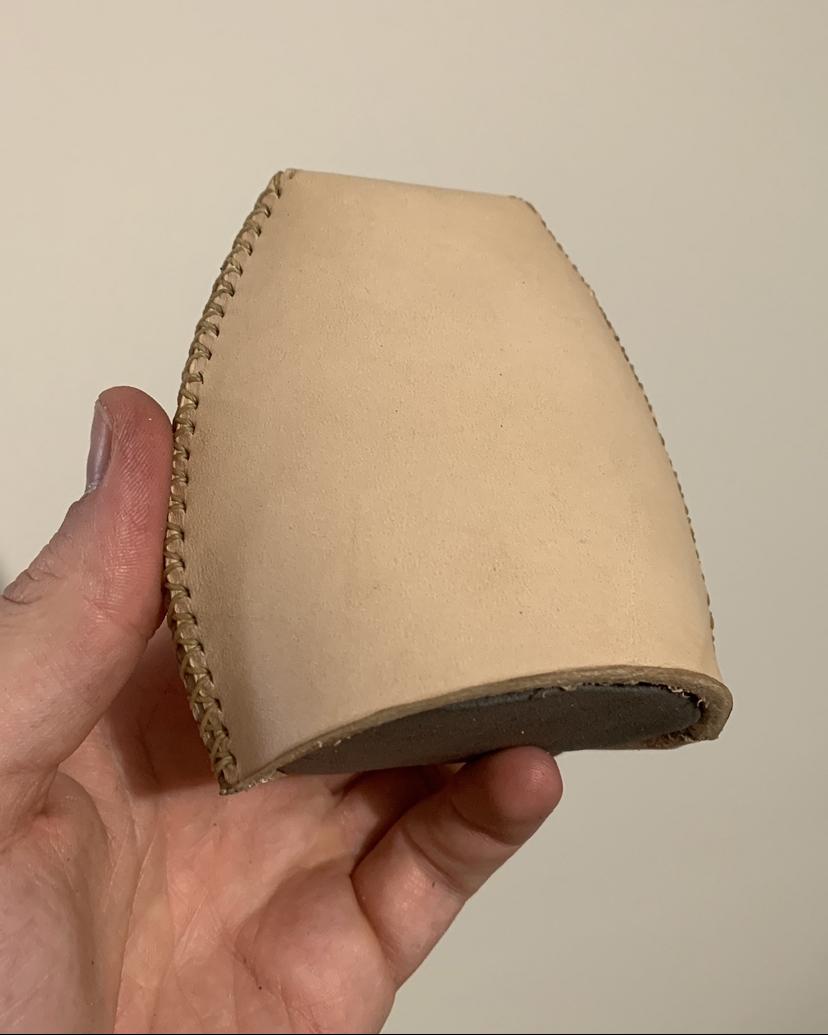
Anyway, this was a fantastically detailed response and very much appreciated. If I can fully understand it I may give it a go next time. I don't have any access to a belt sander, so unfortunately for now will have to hand sand. I've got some pictures now I've finished stitching - a big challenge for me was when punching holes because the back panel had the belt loop stitched I could not lay it flat to punch the holes near the top. I also had to re-dye after punching holes as the raw veg tan was visible - I didn't do a very good job and now the stitching doesn't look great. The holes near the top are much less straight on the back than those on the lower section because of my inability to lay it flat when punching those holes too. Keep in mind I am working on my dining room table and only have a few basic leather working tools and not an ideal working environment. Stitching was done on my couch with the sheath either in my hands or between my knees as I don't have a stitching pony.
As can be seen, I had cut the back to size from the beginning and the front is slightly oversized and was trimmed to match the back once glued.

-
8 hours ago, fredk said:
When, after I've sewn up the two pieces, they are locked together so cannot get out of alignment. After the first basic shape moulding I'd have trimmed the leather close up to allow for the bulldog clamps, the larger clips can go to out 20mm, the small ones only about 10mm or 12mm, so I've probably got 14 to 15mm from my sewing to the edge.
After sewing I then use a wing divider to mark the cutting line. Very carefully running a (blunted) point of one divider arm along the thread and the other arm out where I want to cut, say, 6mm from the sewing. Done slowly and carefully this marks where I'll cut. If necessary I can go over the marked cutting line to deepen it, to fill in missed gaps, to make it more prominent.
As the sewing goes through both pieces I do the above on both the front and back
When cutting I try (sometimes I fail) to do the cutting as Al Stohlman advises. Cut at an angle. I do the front first, cutting along the marked line but at an angle so the cut is on the outside of the line on the rear. Then I turn the item over and using a new, or newly sharpened, blade I cut straight down along the marked line. This should take only a sliver of leather off. I finish off by taking some grit/sand paper to areas that look a bit askew
Then its onto the slicking and burnishing
Thanks for the detailed reply. thanks. I might blunt down a point on my dividers before making the next one.
-
Thanks for the replies so far. Either way, if both pieces are larger, how do you then ensure you are centring and cutting everything evenly? do you just cut around the mould by eye? If so, I don't think that would be any more precise than how I did mine (back panel cut out to the finished size and the wet moulded piece a bit bigger and then glued onto the back once the moulding was finished and then trimmed to the same size as the back. I think a big issue was how hard/thick the leather was when I cut out the shape made it difficult to get really precise cuts around the tight bits on the centre. One side is a tiny bit higher than the other and one is more rounded than the other. Perhaps its just a tool and technique thing with the cuts. Lining up the back and front panels , perhaps theres some simple solution for that. Without getting both halves right when cutting the shape though, there is no chance of perfect symmetry anyway I guess.
-
-
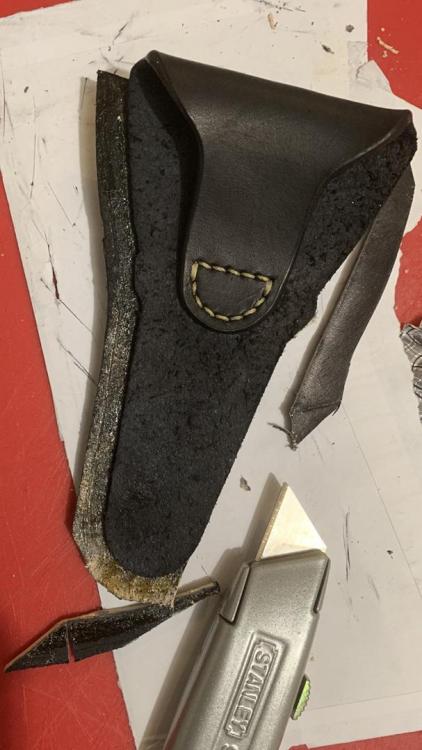
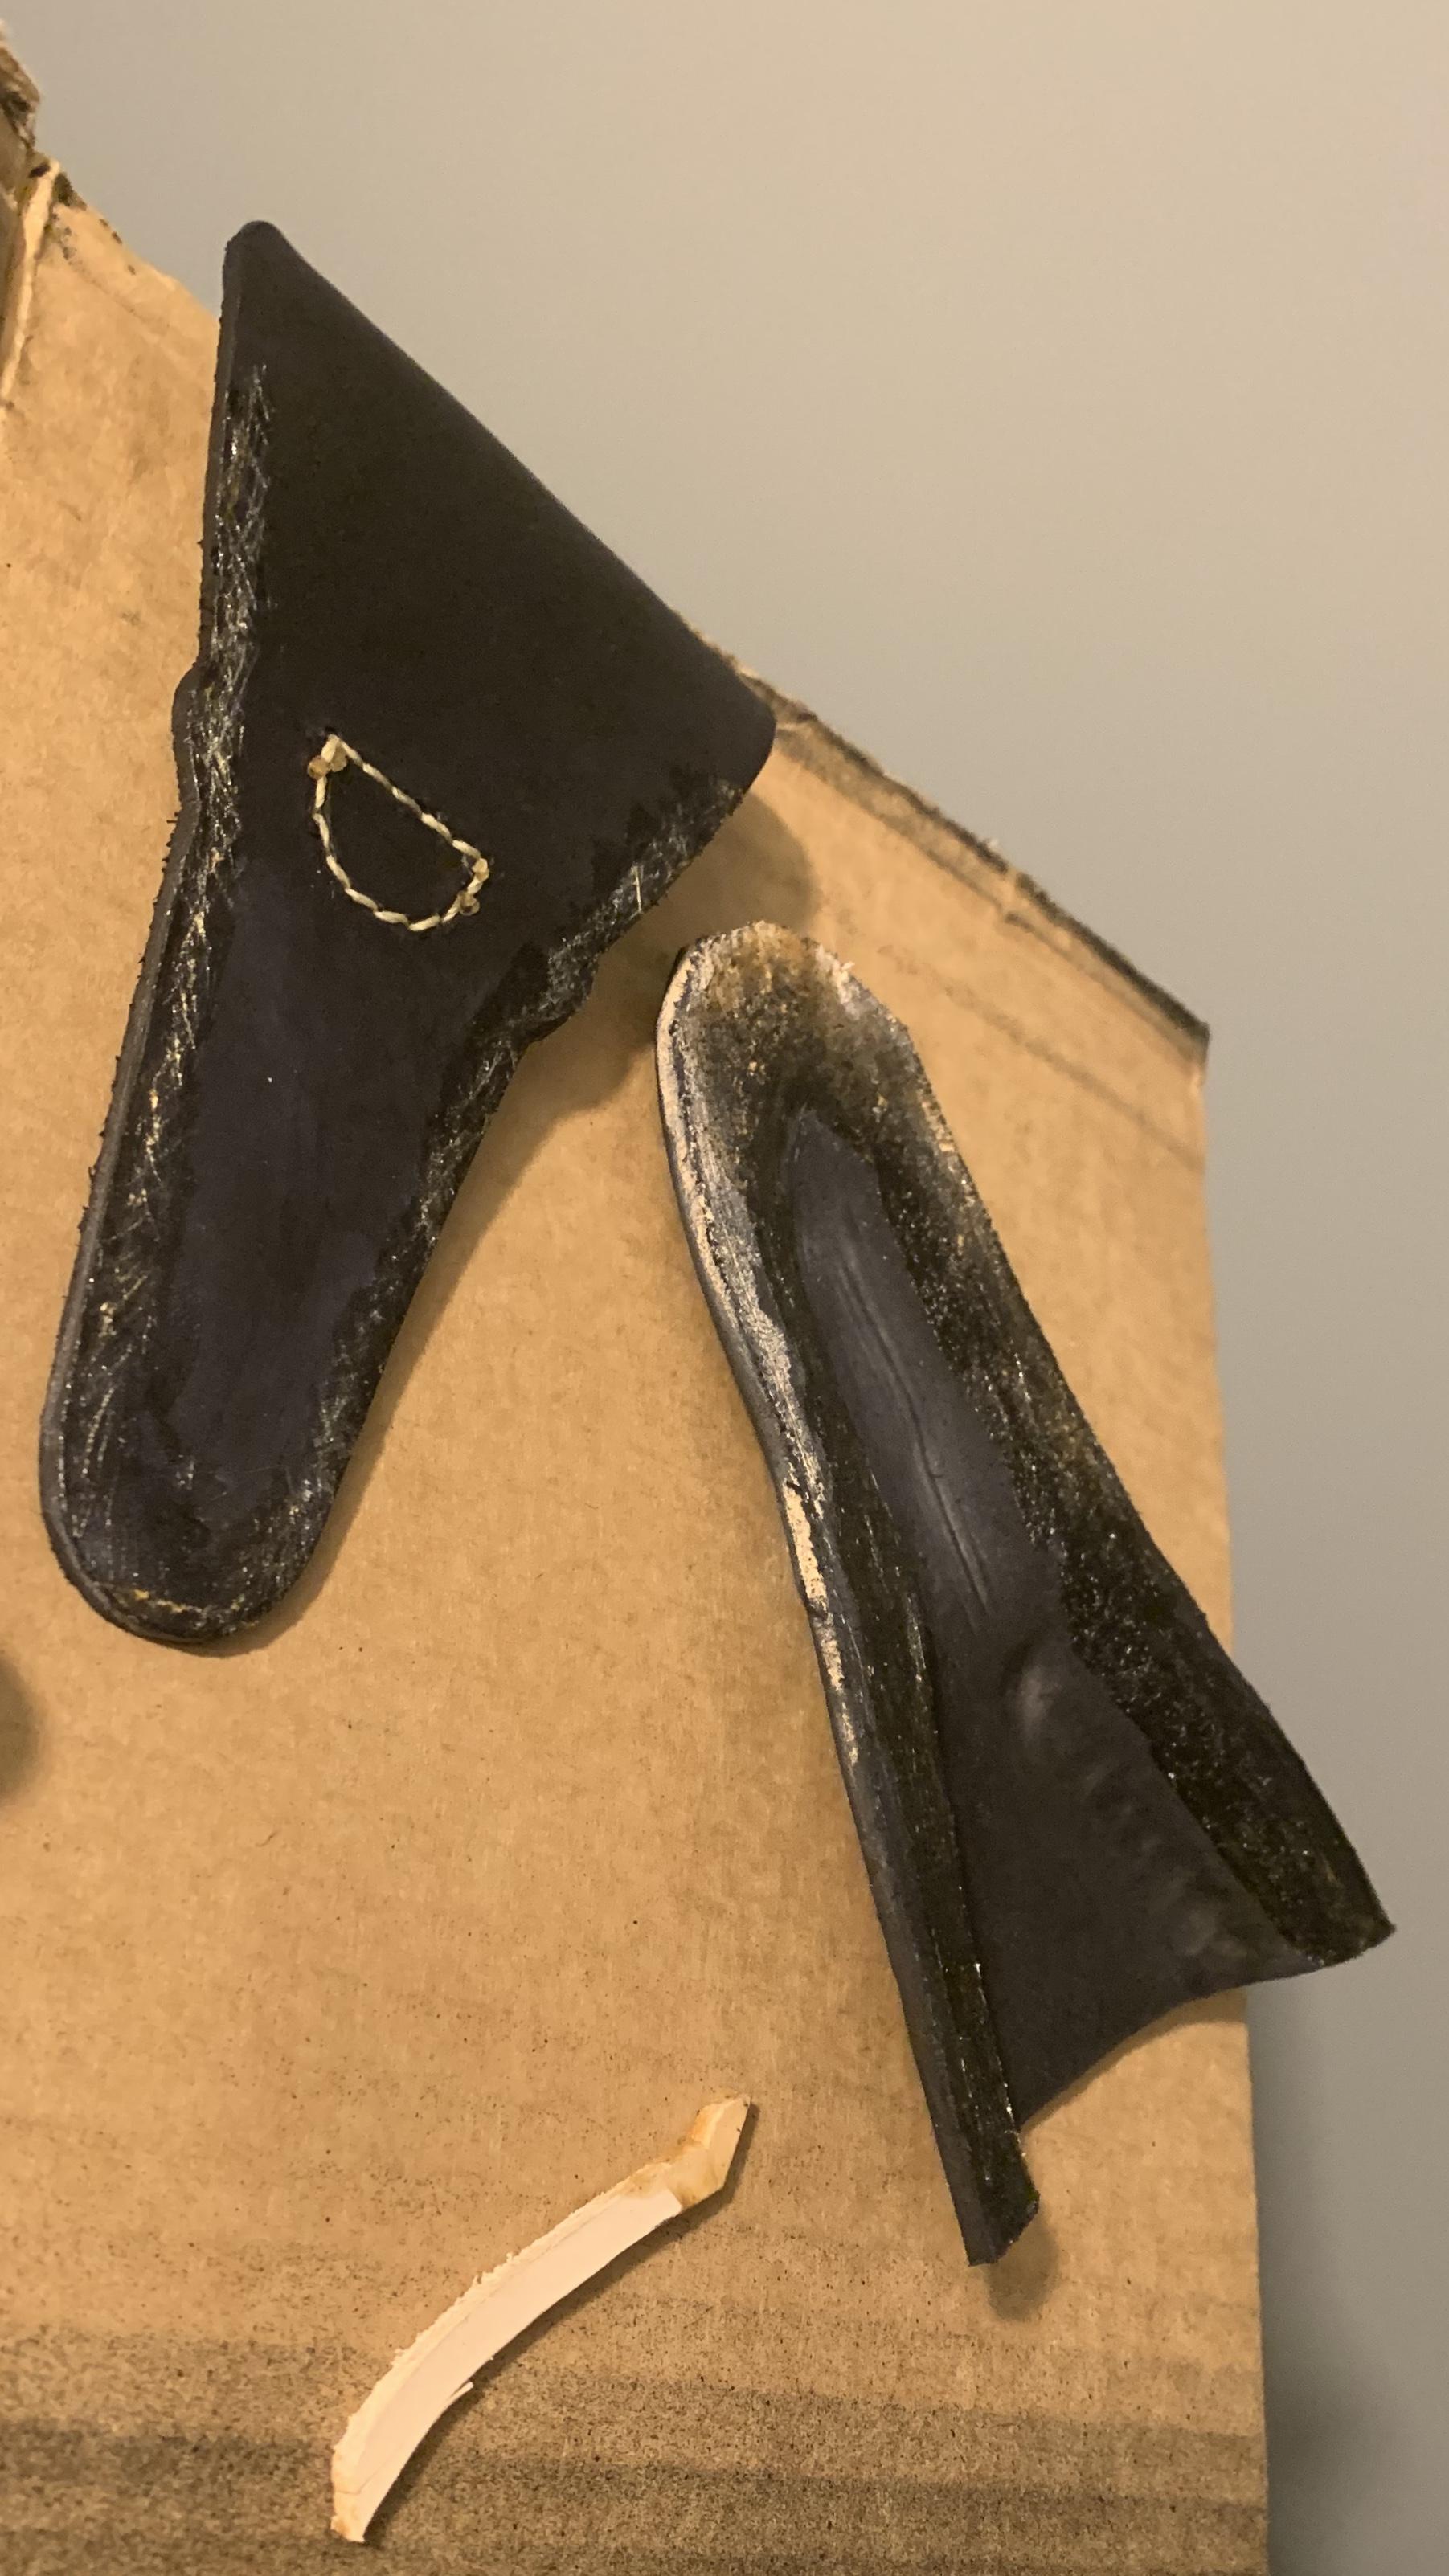
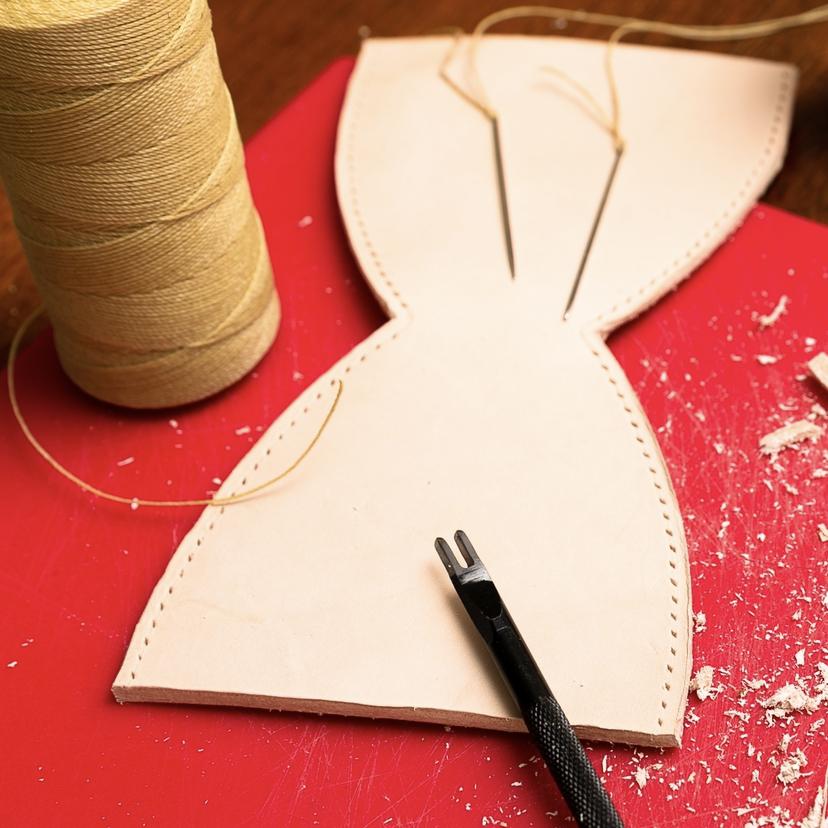
I'm in the middle of making a wet moulded sheath for my fishing pliers and had some issues getting both sides of the cutout perfectly symmetrical, particularly on the sides in the middle where there is a little bump (see photos). Perhaps it was the type of knife I used, just the basic Stanley knife/box cutter type thing. Also, I found it difficult lining up the centre of the moulded front piece with the centre of the back piece and it looks like it is slightly off. Lastly, the belt loop is not quite centred. It looked right until I got the stitching in and now it looks off.
How does everyone ensure things are lined up perfectly on pieces that should be symmetric? Obvioulsly there are various parts to this, from cutting to the process used for ensuring everything is lined up. Hopefully this makes sense, anyway, here is the pictures of the making up to this stage. I just need to get the main stitching in and finish the edges a bit better. Given this is for a cheap pair of pliers and for my own personal use I'm going to finish it and use it, but I'd like to get some nicer pliers later, and when I do it would be nice to get it right when I make a sheath for those.
-
-
Beautiful - the sheath not only looks great on it's own but really compliments that knife nicely. Would be nice if the red in the pin on the knife was a similar blue to that on the sheath though perhaps.
-
Very nice! I might get around to trying some tooling work one day. I hope when I do it's half as nice as this.
-
nicely done!
-
5 hours ago, Retswerb said:
Nice work, @AdamZ! Looking forward to seeing the whole thing when the other half is complete as well.
Thanks. With everything going on I can't go out to get what I need so it might be a while unfortunately.
-
8 hours ago, kiwican said:
Looks great! What's the foam insert you used ?
Thanks. The foam was just the densest foam I could get at a local place that sells foam and rubber products. I just cut it to fit as tightly as I could. The material in a pool noodle would have been better though I think, however they were not suitable because the ones I could get were all hollow and I needed solid foam.
-
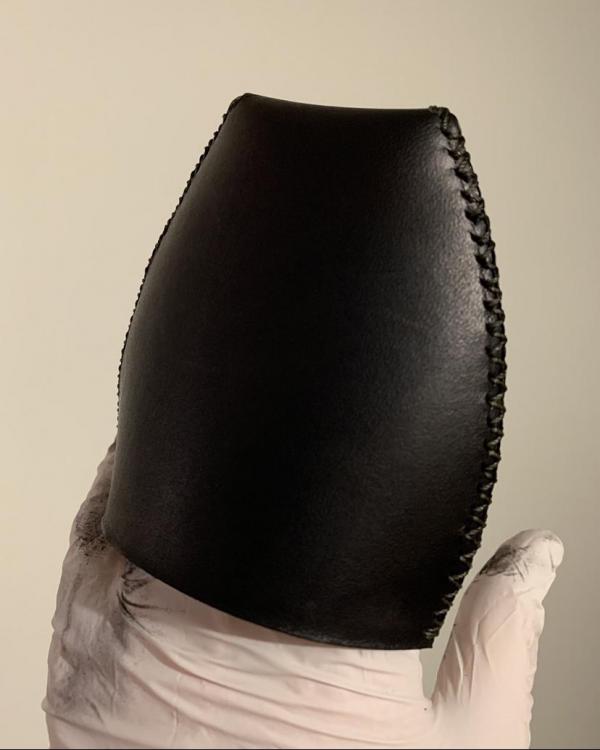
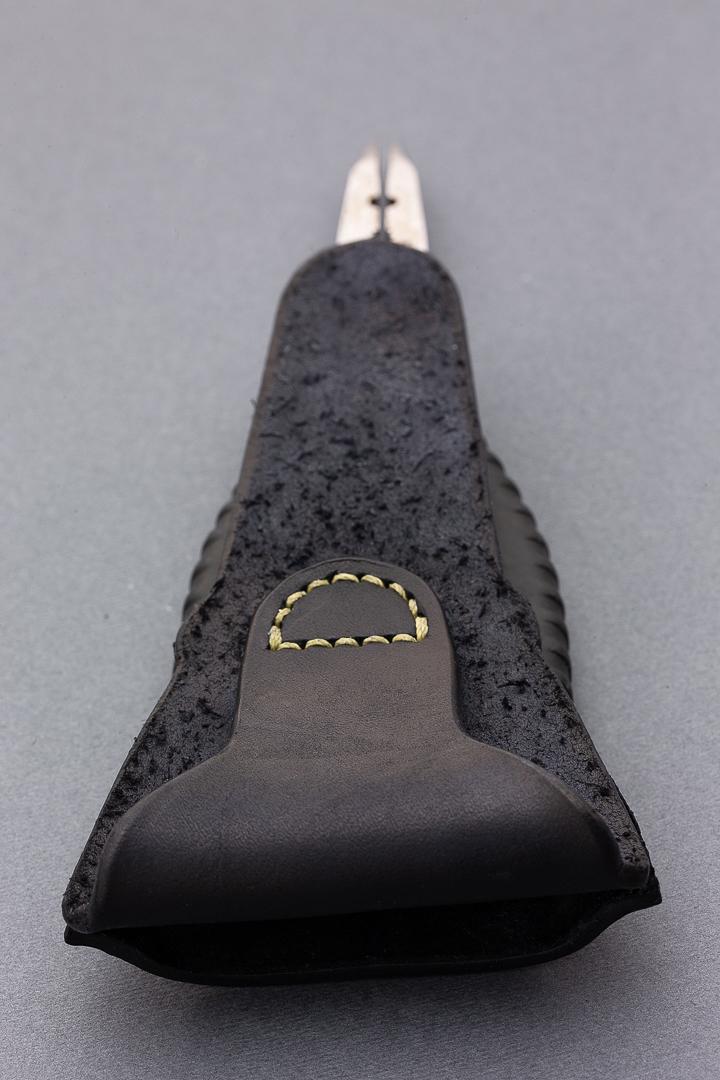
Some black alcohol dye and it was done. I wanted black thread but the only black thread they had in stock was more than I wanted to spend as I didn't know if this was going to work - that's why I dyed it after stitching.
-

After stitching I cut out and inserted the foam to see if it would work prior to dyeing.
-
One stitch on the top pulled through the leather, it has not effected the functionality and is barely noticeable, especially since dyeing it. The rest of the stitching went surprisingly well. commercially made leather quiver hoods use a similar stitch but with a thicker thread or lace and less, but bigger holes.
-
.

Leather cut and holes punched ready for stitching. I had burnished the curved edges as best as I could with water and the handle of a wooden spoon


Poly mallet head cover
in Leather Tools
Posted
...oh, and by the way I also considered (and still thinking about) making a short piece just underneath that covers the top of the handle, kind of like an axe guard/collar. It is probably pointless of course.