-
Posts
20 -
Joined
-
Last visited
Content Type
Profiles
Forums
Events
Blogs
Gallery
Store
Everything posted by Nate88
-
Okay this is great advice. I did end up adjusting needle bar height a recently so maybe I adjusted it off a tiny tiny bit. Thanks for the tips!!!
-
Do you have any ideas on why the top thread was slipping down along the outside of the bobbin case? All the sewing frustration aside, I was worried that I had messed up my machine. The sound does bother me but more importantly I was worried that this sound was related to why the thread kept falling getting caught alongside the bobbin case. I only have 1 spool of thread (tex69 and I'm using an 18 needle) so when I loaded a bobbin I would go full speed and max out the revolutions to fill up the bobbin quickly. After doing this like the 3rd time then this loud metal clacking sound developed.
-
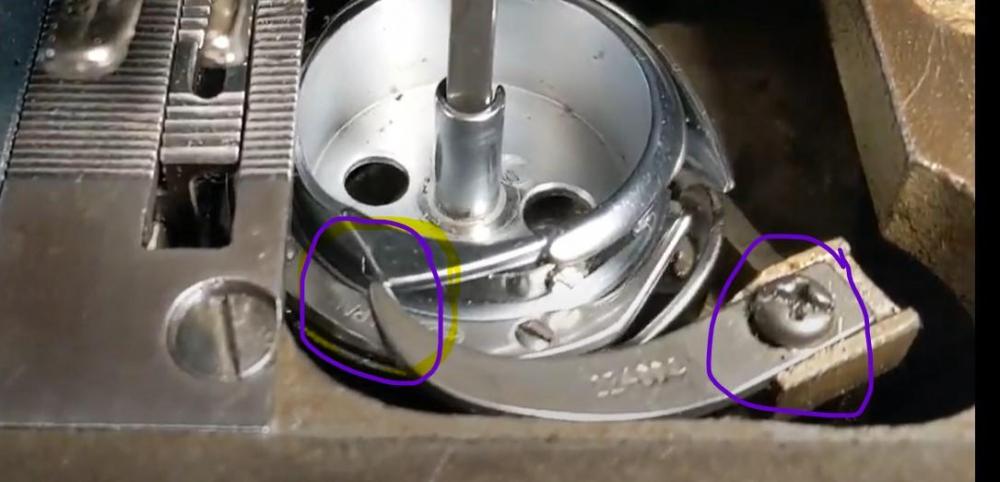
Thanks Wizcrafts! Just to make sure I'm following you....the purple/yellow circle is the opener arm. That needs to slide forward just a hair. The purple circle is the screw where I could bring the arm forward.
-
This video might show the sound I'm talking about a little better. PXL_20210120_001546704 (1).mp4
-
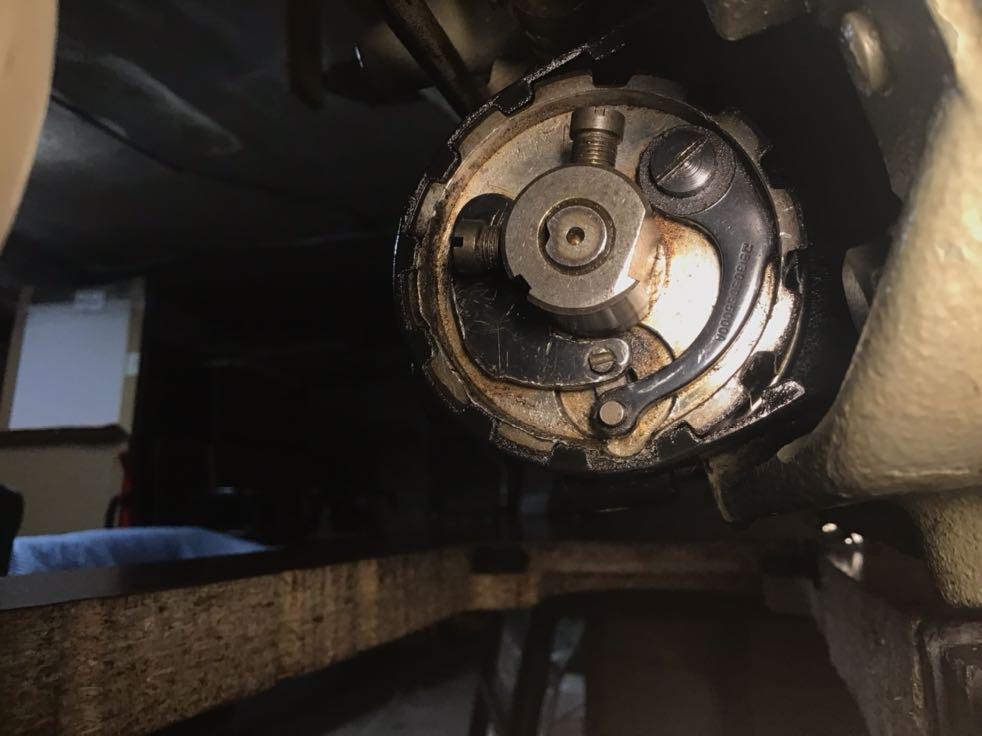
Hello amazing leather workers and sewists! I need some help figuring out what going on with my beloved Juki. I'm 2/3 finished reupholstering a sofa and I started having issues with top thread getting stuck outside around the bobbin case. Thought it was just thread tension issue, but then this clacking / grinding sounds developed. I oil everything regularly and also oil around the bobbin case. I took out the bobbin from the bobbin case to look for jammed threads....nothing there it seems to be nice and clean. When investigating I noticed that the whole bobbin case assembly seems to have a significant amount of play. Like something is loose but I can't figure out what. Any help would be super appreciated. Thanks! hook (1).mp4
-
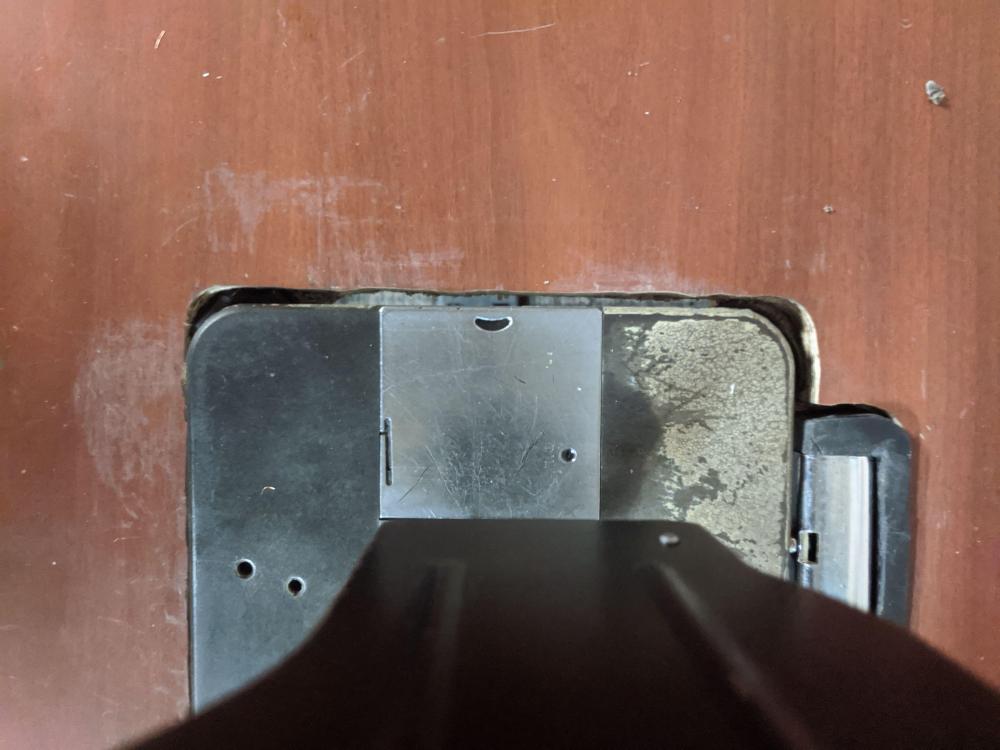
**update on the skipped stitches situation. I took Northmount’s advice and went back to the basics. I mentioned earlier that I bought this machine in rough shape. The table it came on was broken from a move, so I had to make a new table. After setting up the machine on my new table, I noticed the fit wasn’t perfect but figured it wouldn’t matter too much. well before messing with the settings on my machine, I decided to put shims in the spaces where there were gaps between the table and the machine head. Now the machine sits really snug and doesn’t not move or vibrate at all while running. And....no more skipped stitches. Another factor is that the fly wheel is a little bent so the machine rocks a bit from that wobble. Maybe that was contributing to the problems I was having. I tried to straighten the shaft by taking off the flywheel, using a pipe, and attempting to bend the shaft. I had no success with that. Anyway, the journey continues, and I can finally start working on projects again. pic shows gap , now I have this space fitting more snug using shims
-
Yes I will take some pictures today. I haven’t made any progress on it, so I plan to get back tot the basics and start from scratch with the whole process. I’ll post more pics this afternoon
-
So, I messed around with hook placement and needle height some more. Still lots of skipped stitches. Ugh. Feeling pretty frustrated since I spent a few days getting the hook timing and rotation set up correctly. I must be just a hair off. Has anyone experienced this problem before? And do you think just tiny little adjustments to the hook/needle height can make a dramatic difference in how the machine stitches. I definitely notice that skipped stitches tend to happen more when I'm running the machine fast I bought this machine used, and it came in rough shape. It had stitching problems since the first time I tried it out. I have switched up a bunch of different needle size and thread size combinations, as well as top thread tension. Still skipping stitches.
-
-
Thanks for the tips with the photos. I do most of my posting with My iPad but the forum doesn’t allow for me to upload the photos because file size is too big. Any tips for downsizing photos on an iPad? I try out hook timing and hopefully that will solve the skipped stitches **edit. Got photo uploading figured out!
-
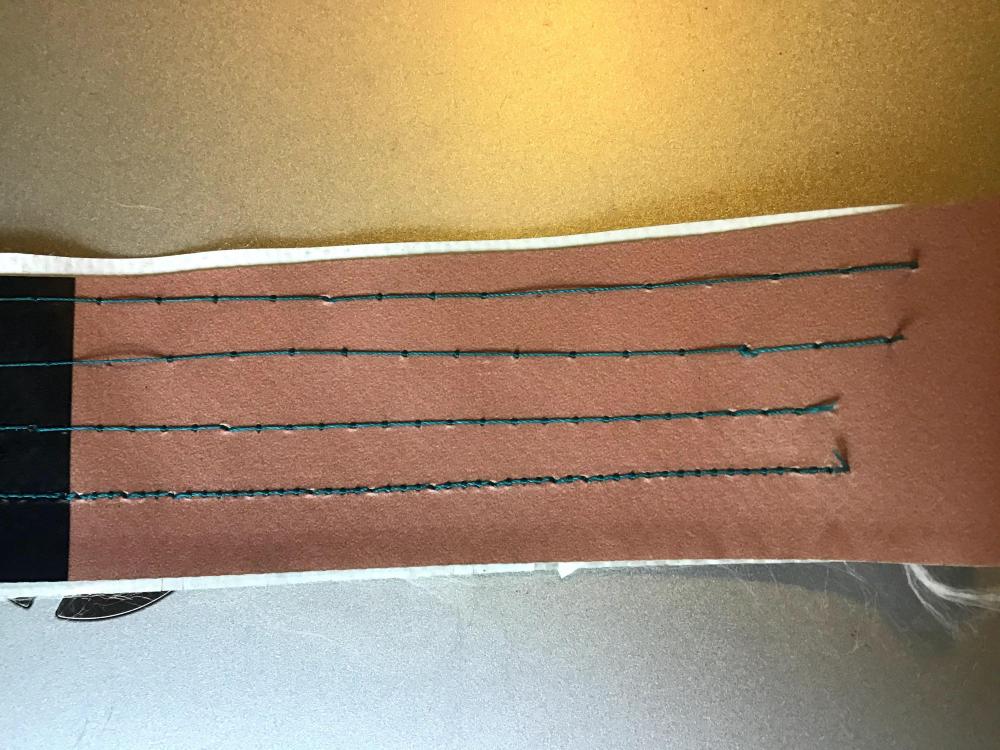
Hello, I am reaching out for help again. I got my machine working now! Very excited about that. I ran into some trouble with skipped stitches. I put a new size 18 needle in with TEX69 thread. I messed around with tension alot which didn't seem to affect the skipped stitches. Here's a photo to see a sample. I did different stitch lengths and that seemed to help just a little bit. Smaller length stitch = less skipped stitches. Any tips to get my machine stitching every time? Thanks!
-
I was able to get the machine stitching beautifully. Thanks all once again. I have another question about my safety clutch on my machine. I noticed mine doesn't have a spring and if I want to engage the clutch I have to use a screw driver to force the clip down into the groove. My question is, do I need to buy a whole new clutch or can I just buy that little finger and spring? I found some springs on ebay but no luck with the finger. Link shows what my safety clutch looks like now. https://photos.app.goo.gl/mC9RSFmaMTb1G7J78
-
Thanks y’all. I’m working on it again today and will report back. cheers
-
Hi Community I bought a Juki lu 563 in pretty rough shape. I've been working on it thanks to Uwe's incredible youtube videos. I am having a lot of trouble figuring out how to set the needle bar height correctly. I feel like I got the timing right for the hook, and it seems like it meets the needle at the right point. The issue I have is that when I am trying to sew material, the top stitch does not grab the bobbin thread. However, when I have everything taken apart and I'm testing out the hook, timing, needle bar height etc, it does work out and thread from the needle does successfully catch on the hook. I do have the hook as close as possible to the needle (without actual contact being made). So, here's a little video of what it looks like. Can anyone give me any pointers on how to tune this a little better so that I can begin sewing?? This is my first industrial machine and first time working on sewing machines, so any help is really appreciated. https://photos.app.goo.gl/6DiHxPw9gqdw7QAy8 -Nate
-

Broken screw head on needle assembly juki lu563
Nate88 replied to Nate88's topic in Leather Sewing Machines
Thanks for all the tips - I really appreciated it. I ended up taking drilling out the screw, using a tiny bit, then stepping up 1 size. That eventually cleaned the screw out without damaging the threads in the needle bar miraculously. Just waiting for my shipment from sewingpartsonline to get my new screws. For those who have this machine (or cloned ones), the screw above the needle set screw is meant for attaching the thread guide right above the needle. I understand that this screw is only for tightening the thread guide, and not the needle. Can someone confirm that for me? The person I bought the machine from said he used both screws to tighten in the needle. Looking for clarification on this. Thanks all once again. -

Broken screw head on needle assembly juki lu563
Nate88 replied to Nate88's topic in Leather Sewing Machines
Uwe, thanks for your response! I subscribe to your YouTube channel and I absolutely love your professional videos. Thanks for putting all that time and effort into your work, you’ve taught me a ton already! I ended up drilling a tiny hole through the screw, but haven’t been able to find a screw extractor small enough to pull out the broken screw. Do you have a video or resource available for how to remove the needle bar? -
Hi community, was working on a project and changed the needle. I have a juki lu563. It has two screws to tighten the needle in the assembly. The top screw head broke off because I just barely overtightened it . my local ACE carries screw extractors and I picked one up, but while attempting to bore a hole, I got real scared I would F this up. if you have any tips for me, please help! Much appreciated. N
-
have been sewing for about a year now, mainly making bike bags and camping gear. I love working with sewing machines and I just recently bought a juki lu-563. The machine is in pretty rough shape, so it's been a hell of a time getting it to work. I found this website in search of some advice. I'll post a few of my bike bags here, but I am also looking for some ideas for leather projects? I have never worked with leather before. A friend of mine who works at RedWing shoes gave me a big piece of factory reject leather and I want to make wallets or slings or something small and simple. Any ideas would be greatly appreciated! edit: Max file size is only 1.46MB. How do y'all add pictures and videos? -Nate

.jpg.d60258221c476480a6e073a8805645bb.jpg)


