


OldNSlowMarine
-
Content Count
44 -
Joined
-
Last visited
Posts posted by OldNSlowMarine
-
-
8 hours ago, Northmount said:If you want to post more photos, reduce the file size. See this post for some helps and suggestions.
Thank you! I'll take a look.
Sale is Pending as of Sunday, 6 March.
-
Up for sale is a "like new" Cobra Class 26 sewing machine from Leather Machine Co. I bought this machine in May 2021 for $2,354.00 USD. I am looking to sell outright for $2,200.00 USD. I will also consider trades for either a Cobra Class 3 or Cobra Class 4. Other brands will be considered as well.
No shipping.
I will consider delivery up to 4 hours driving distance from Richlands, NC 28574. If delivery is requested, a non-refundable deposit of $500.00 USD plus an additional delivery fee of $200.00 will be required.
This machine has only been used during initial set up and one test holster. I am so used to operating my Class 4 that I just don't like the 26. I have decided that I would just rather have another Class 4 or a Class 3 set up to do what I want instead of the Class 26.
Pick up price: $2,200.00 USD
Delivery price: $2,400.00 USD ($500.00 non-refundable deposit required)
Additional pictures are available (I was limited here by file size)
Please contact me direct:
Jason Ingle
Ingle Gun Leather
910-333-6305
jasoningle@inglegunleather.com

-
8 hours ago, DaltonMasterson said:I think I have one. I will have to check my box. I did have it on a sale table for awhile but don’t think it sold. It is a Duncan’s. I’ll get back with you.
Thank you!
-
ISO an aluminum 1911 mold. Prefer a 4.25-inch model.
-
14 hours ago, JSage said:Although Dwight's Solution would probably be stronger, I too didn't want to permanently alter my blue gun. So, took a chunk of hard wood and rough shaped it ( on the belt sander) then finish trimmed it with my pocket knife to final shape so that when placed on the front of the round guard, it mimicked the Squair guard on my son's pistol. I temporarily attached it with contact cement and used black tape to secure it. Worked for me. The tape and glue came off without much effort and a little rub down with peroxide cleaned up what little residue that was left.
"An unarmed man can only flee from evil, and evil is not overcome by fleeing from it."
-Col. Jeff CooperDo you have a picture?
11 hours ago, Dwight said:Glad to see I'm not the only redneck on here This makes at least 3 of us . . .
Do you have a picture Dwight
-
18 hours ago, Dwight said:Cut the round one off . . . screw on a piece of pine . . . and shape it on a belt sander . . .
Piece of cake.
May God bless,
Dwight
Thanks for the input. I have considered something along these lines. But that's not my first course of action. That's why I'm here asking if anyone knows of any molds yet.
-
18 hours ago, AzShooter said:Maker's Leather .com has the 1911 with the squared trigger guard.
Do you mean Maker's Leather Supply? If so, I'm not seeing it. They only carry Blue Guns. Blue Guns does not produce a 1911 with a square trigger guard. They make a Staccato 2011 which has a square trigger guard. But that's not at all what I want. Big difference between Springfield Emissary 1911s and the Staccato 2011s.
-
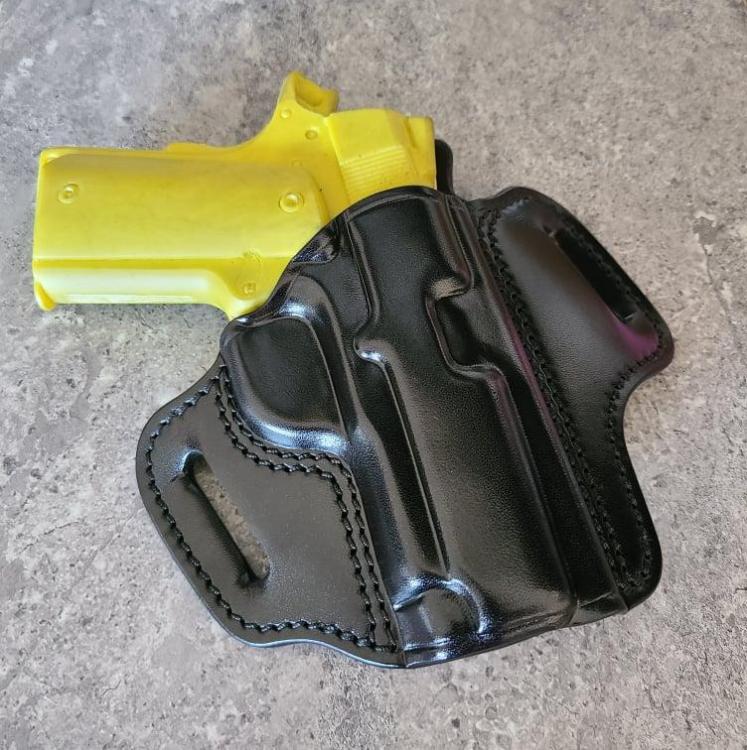
Does anyone know of a source that is making a 1911 mold with a square trigger guard? With the release of the Springfield Armory Emissary line, I'd really like to be able to make holsters for them. I've already contacted John at Ring's and there's not enough requests for them to justify producing molds yet.
-
8 hours ago, AzShooter said:Super detail. I like this holster a lot. You really nailed molding it. I use vacuum bags and they just don't give that much detail. I'm thinking of buying a better vacuum. Mine is just an old shop-vac.
Is it hand stitched as well? Nice stitching.
Thank you! No, I don't think I could hand stitch much anymore. I use a Cobra Class 4.
-
1 hour ago, jrdunn said:I know that "too tight" is relative but does crisp molding around the ejection port make it difficult to draw? It is a handsome holster!
I definitely had to manipulate it some from the inside to keep it from locking up.
-
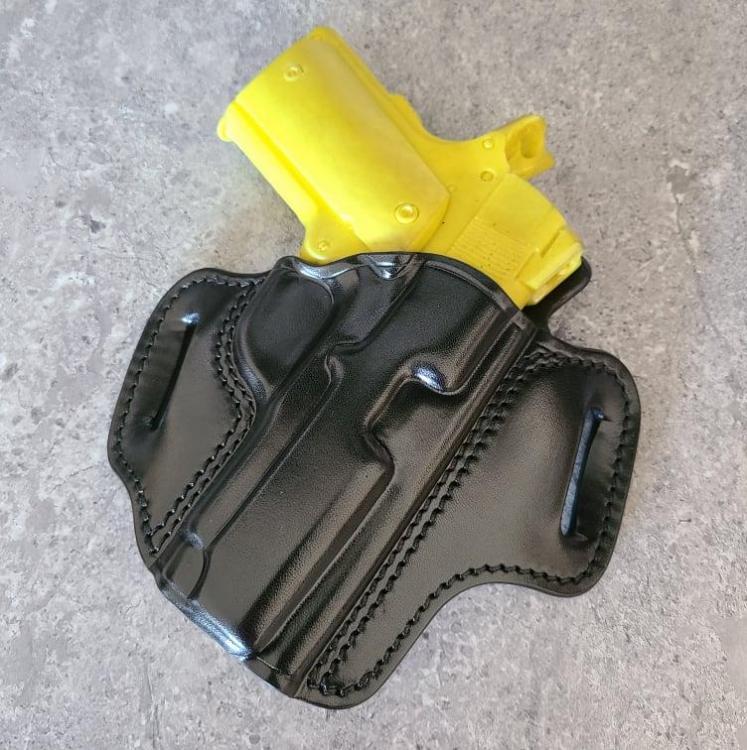
8 minutes ago, JLSleather said:No fair double dipping

I don't go that deep in the port simply because i dont' want anything "catching" on it.. I want the holster to slightly "smooze out" the profile - like the snow fills a ditch - so it doesn't catch shirts, pockets, etc.. and telegraph that it's there.
Holster looks good, though ... and nuthin' I said should be taken as "negative" or "bad" ... just each his own. I AM wondering how you got the trigger area so F L A T ...
")
It was pushed out some from the inside after molding. Draws just fine. With the flat side of a Tandy stainless steel folder.
https://tandyleather.com/products/craftool-pro-foldercreaser-stainless-steel
-
1 hour ago, PastorBob said:Very nice. Clean lines and great molding. Vacuum press?
Thank you. No press, no vacuum. Wet molded while the holster was wet with dye. I dip-dye. This one has been dyed twice. Once when the leather was cut, then a second time for molding.
-
40 minutes ago, chuck123wapati said:you got that down pat really nice work. How thick is that leather
Thanks! Wickett and Craig veg-tan, split to 8oz, 'holstered' with pasted flesh
-
Here's a classic all black pancake-style I recently finished for a client's 3.5-inch 1911. I really like making these without the Reinforcement Panels on the front.
-
On 8/13/2021 at 5:46 PM, tsunkasapa said:I don't DIP anything except chips. Everything is done with a dauber or a rag. I don't have the space or resources to have a "dip area".
I have five five-gallon "liquid rated" buckets in my dye area. The set up didn't extend beyond the area I was already working in though. The buckets are set up next to my work bench. Out of the bucket-onto the work bench. I work out in my garage, so that helps with space. I definitely would not recommend doing this indoors.
-
On 7/26/2021 at 11:11 AM, YinTx said:I am glad I revisited this post. I had a similar experience just recently with mahogany pro dye, but with sheepswool applied resolene. And I used 50/50 water/resolene mixture! Going to run a sample piece with your suggested % mixture to see if that helps. My leather was 10 0z Hermann Oak, firmest piece of HO I've ever had.
YinTx
I should've mentioned before, but I'm using Angelus dyes and acrylic #605. I don't know how the Fiebing's will react. I know when I first tried dip-dyeing with Fiebing's, I didn't like the results at all. I've gotten much better results with Angelus products.
-
On 7/5/2021 at 1:22 PM, muzzleblast said:OldNSlowMarine,
Thanks for sharing the results of your experiments. I have been hand applying the acrylic with a 1" foam brush 5 - 6 coats, waiting for coats to get tacky between reapplication. Gives a nice finish but is really not time efficient. I'm going to give dip coating a try. To keep from making a large batch, I think I'll try out these containers. Tall, wide and deep enough for the largest pancake I make. I gal. capacity.
https://www.amazon.com/gp/product/B00H8ZUV5Oube /ref=ox_sc_act_title_2?smid=A3MFA6X0A6DLFT&psc=1
Sorry for the late response, I haven't checked the site in a while. Eric Larson of HBE uses some shallow containers https://youtu.be/Xm4nIQj46L0 . Keeping it in 5 gallon "liquid rated" buckets has been working well so far. No pouring back into a jug and the bucket has a rubber seal to keep it airtight.
-
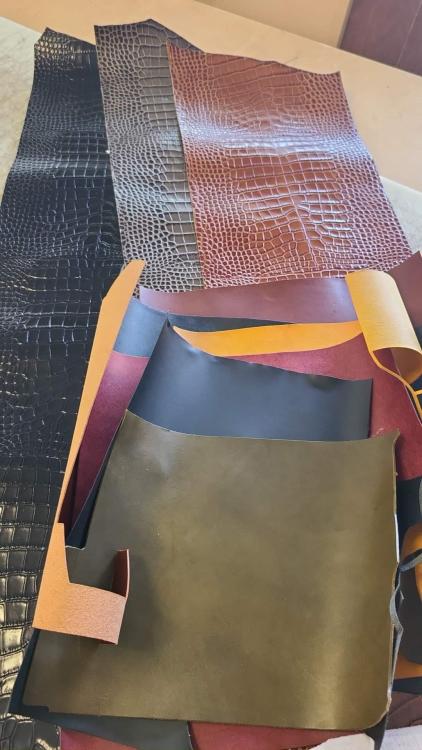
10.8 pounds of boxed leather including Italian leathers, Horween Dublin, Wickett and Craig, Rocky Mountain Leather Supply embossed Crocodile, etc. Sorry, not parting out. It just takes too much time to ship and negotiate each piece. Now on sale!
https://inglegunleather.com/shop/ols/products/misc-leathers-italian-horween-wickett-craig-1-5-ounces
-
I have a variety of leather for sale. Thickness ranges from 1 ounce to 5 ounces. Some are high quality Italian leathers, embossed alligator print leathers, Horween, etc. Please email me at jasoningle@inglegunleather.com to initiate contact. I'm motivated to clear out some shelves so this will be a good deal.
-
17 hours ago, Grunt said:NICE!
Thanks!
-
7 hours ago, PastorBob said:Very nice. Did you use a backing for the shark or is it applied straight to the holster? What did you use to edge burnish the shark?
Thank you! Yes, I used a leather backer for the shark. Once the glue has dried, I cut the excess shark off, sand even, crease for stitch line. Edge as you would any other leather, then dye. For burnishing, I use Barry King's Quick Slick, followed but black Brillant Yankee Wax, then buff with horsehair brush. After all that it gets glued in place. Oh, I hold off on sanding and edging the top until after I have stitched it into place, then repeat that whole process.
-
On 6/12/2021 at 9:57 PM, AzShooter said:Excellent job. Molding and stitching are top notch.
Thank you!
12 hours ago, JayEhl said:yea, really nice color combo match up. And very nice work.
Thank you!
-
8 hours ago, Josh Ashman said:I think I'm following what is being asked and the process but I have no idea why the edges being glued with Barge are coming apart.
It sounds like you're making "western" type holsters where you have 1 piece of leather folded over on itself with a main seam. You are also using a liner so at your main seam you have 4 layers of leather. I'm going to assume that the total thickness of your leather(outer and liner) is 12 oz. or less before you fold it over to make the pouch of the holster. I do this a lot and use Barge to hold it all together without issue.
My process sounds a lot like yours, any grain to grain side gluing gets the glued area roughened up. I apply the glue to both sides and let it sit for a few minutes. then I press the glued edges together. Here I get a lot simpler than what you are describing. Once the glued surfaces are pressed together by hand I tap them down on my tooling block with a smooth face hammer. I "tap" hard enough to make my wife mad if she's in the house but not so hard as to leave a noticeable impression on the finished surface. At this point pulling the seam apart tends to separate the leather rather than the glued seam. From there I sand, stitch gouge and sew. When I hand sew I use an awl to make the holes but instead of stabbing them horizontally when I have the item clamped in my stitching horse I stab them straight down with the item on one of those hard rubber pads over the top of a cutting board. Going straight down helps me to keep the back looking tidy and uniform. When hand sewing I have to wear light leather gloves with the just the tips of the fingers cut off. Otherwise I cut my pinky fingers to ribbons as I pull the thread tight until my hand slips on it, which makes the cuts. I saddle stich with 2 needles, right needle goes through to the left, then left to the right, then with the needles between thumbs and index fingers my hands go around the thread and I pull the stitch tight until the thread slips where it runs through the bottom of my hands, AKA the pinky finger cutting operation. If machine stitching I'll just go to the machine after gouging. No clamps, boards or 24 dry times unless it just happens that I leave something that long between gluing and sewing. And, I've never had a problem with a glued and sewn seam coming apart after the fact. Maybe try more glue?
Brother, that's a lot of good feedback. I'm done until a picture is posted though lol
-
I've made one before. I used a roll of coil steel feeler gage stock to do it. I forget what thickness it was. Might have been 0.015 inch? I'm not sure how the mass producers of these do it, but I centered it between two layers of 8 ounce Hermann Oak single belt bend strips. I didn't punch holes in it for the buckle holes, just got somewhat close to the last hole. Not sure if they do or not. Last I heard, the customer liked it.


1911 with square trigger guard mold
in Gun Holsters, Rifle Slings and Knife Sheathes
Posted · Report reply
Thank you Gordon! I was able to find an aluminum 4.25-inch mold. Speaking with the gentleman I bought it from, he recommends JB Weld steel putty. Hopefully it'll hold for a while. I don't have a press so hopefully it'll hold up to my hand-molding. It should last longer than some of the 'yellow' molds anyway lol. It's one of those things that I'm only doing it because I have an itch that needs to be scratched. I'm seeing all these folks picking up the S.A. Emissary 1911s and I can't make a holster for them. I may never be able to unless Blue Guns starts making a mold, but I'm going to give it a try.