-
Posts
11 -
Joined
-
Last visited
About BarnOwl
- Birthday 06/27/1968
Profile Information
-
Gender
Male
-
Location
San Diego
-
Interests
Most anything metal
Fabrication
Finding new unique alternatives to the normal
Learning a new craft
Old cars and trucks
LW Info
-
Interested in learning about
Sewing Machines
-
How did you find leatherworker.net?
Internet
Recent Profile Visitors
The recent visitors block is disabled and is not being shown to other users.
BarnOwl's Achievements

Member (2/4)
-
Well Toxo you got me thinking, After I thought about what I was planing for the machine I figured that now was a better time than later. I ordered the Sailrite 500 watt 3/4 hp servo motor. It should arrive about the time I am ready to install it on the new table. Thank you for your little push to get me in the right direction. Mike
-
So an update on my Easter egg hunt. I bought all of the parts needed for the machine and will be up and running by the time I finish my sewing table. I shopped Campbell Randal and talked to Dan on the phone. If any of you are looking for a place to buy hard to find parts, Dan is the man. He spent about 30 minutes on the phone with me chasing down dozens of parts ranging from $2 to $200.He was very accommodating and not once did it seem he had better (more lucrative clients). All in the parts cost me more than the machine from the auction, but it is worth it in the long run as most of the parts I purchased are not the consumable type parts but the part that are supposed to last forever but were missing.
-
Yes I think you are right that a servo motor is soon to follow but the controls are the same between the two motors correct? It is a rod that pulls on a lever that actuates the motor, that is in pretty much the same location as the clutch arm right? I am designing a cable actuation system that will allow more free space under the table and will be adjustable throw on the pedal so I can adjust how much pedal movement it takes to start and stop
-
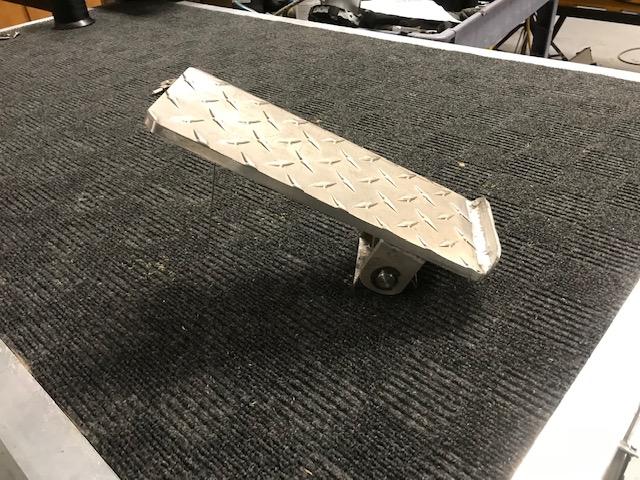
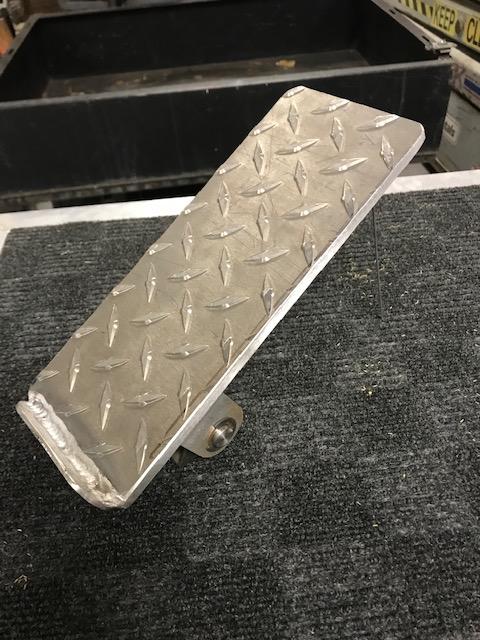
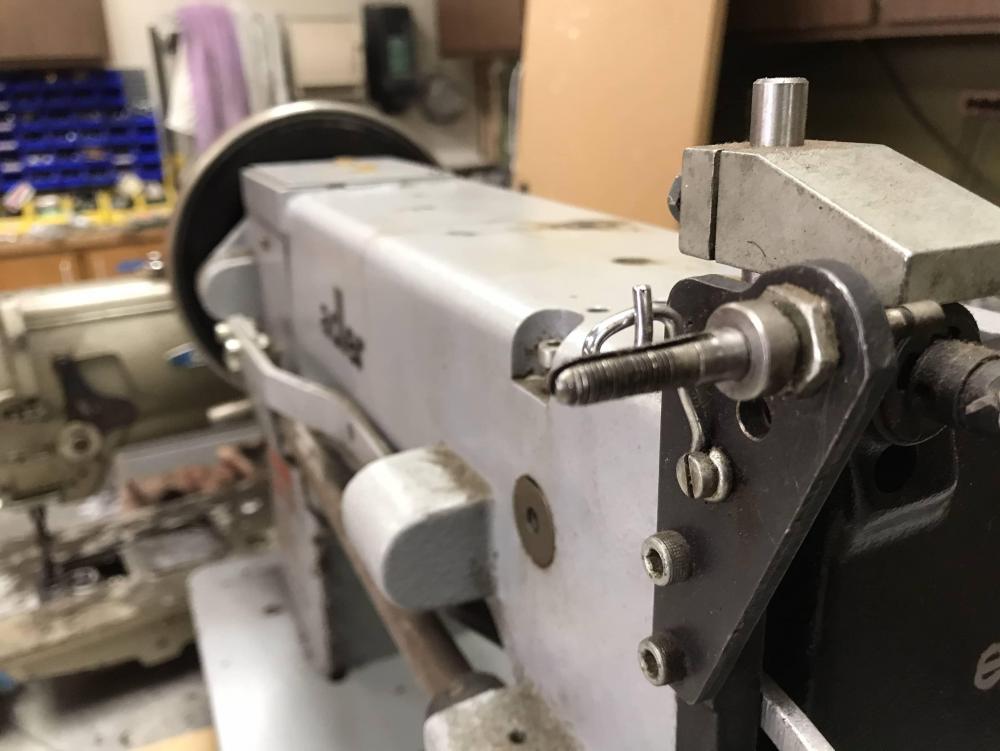
Being a fabricator by profession I am building a new sewing table for the Adler 204-64. After many years the old table looked like an old horse, it was sway backed and wobbly with missing chunks and cracks here and there. The new table will be 5 feet x 3 feet made from 1.5 aluminum tubing with space for a drawer and casters so it can be mobile. I have found that being able to move equipment around the shop is very beneficial. First up is the foot pedal. The original one was cracked right down the middle and the design would not fit the new table any way so out it went. I am used to the foot pedal on my TIG welder so that is the size I designed to resemble. It will be somewhat suspended off of the ground because I am making the table taller than standard so I can stand and walk around larger projects I may be working on. Pictured is the finished product, The shaft is hardened tool steel so it will not wear out or develop groves. The aluminum frame has bronze bushings for wear resistance. E-clips secure it into place for easy disassembly or cleaning. I am waiting to drill the hole for the clutch motor rod so it will be paced exactly where it needs to be.
-
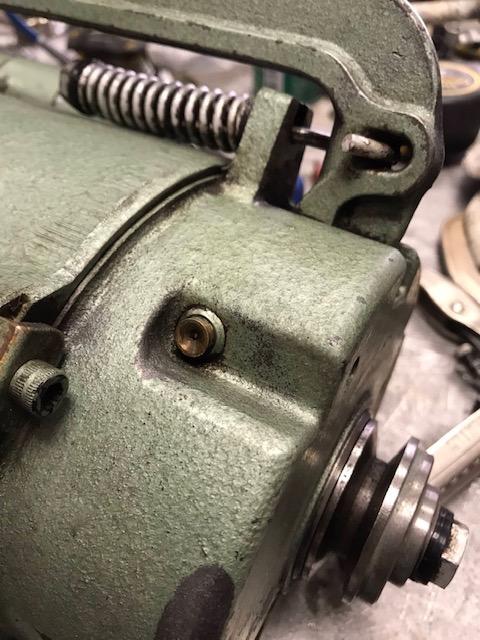
Thanks Guys, it kind of caught me off guard as the motor was pretty dusty mixed with years of being oiled regularly but not really cleaned. As I was cleaning it I unearthed this port like a fossil that probably has not been used in years, it actually looked like a bolt head until I scraped about 1/4' of greasy lint off the the top. I did not want to put too much in or the wrong type and have my clutch Strat slipping.
-
I looked around to see if this had been addressed in a specific topic but I couldn't find one dedicated to it, I am sure it has been discussed on here before. I was cleaning the clutch motor off of my Adler 204-64 and noticed oiling ports on the clutch. What type of oil (same as the machine)? and how much typically is needed. It is a 1/2 hp Super, it appears to be the original made in Belgium.
-
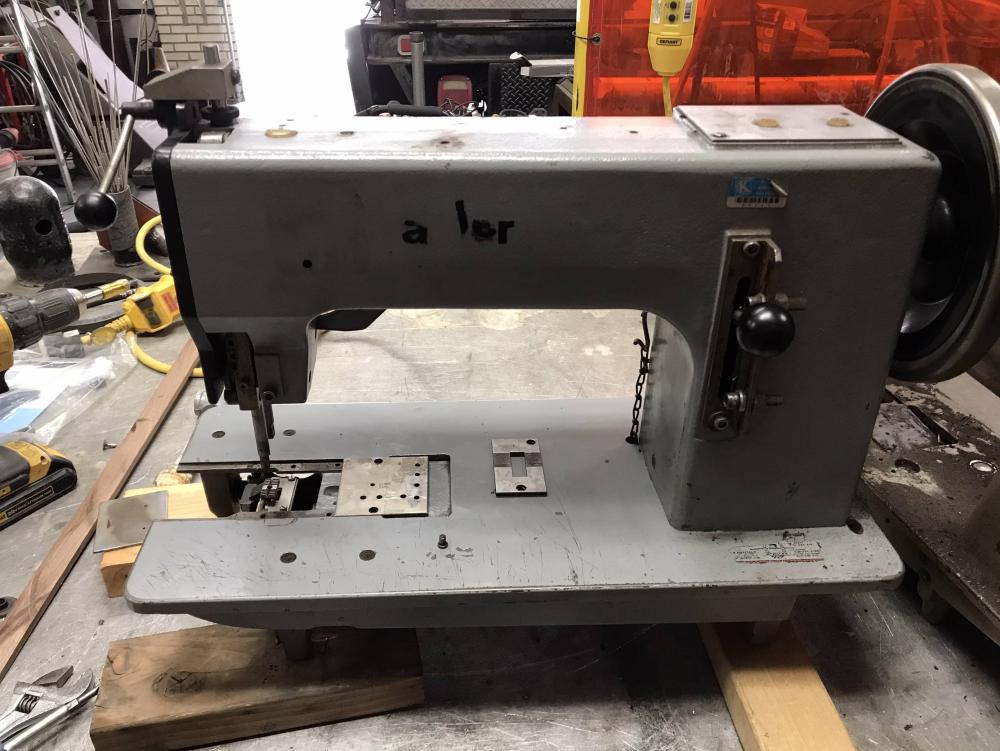
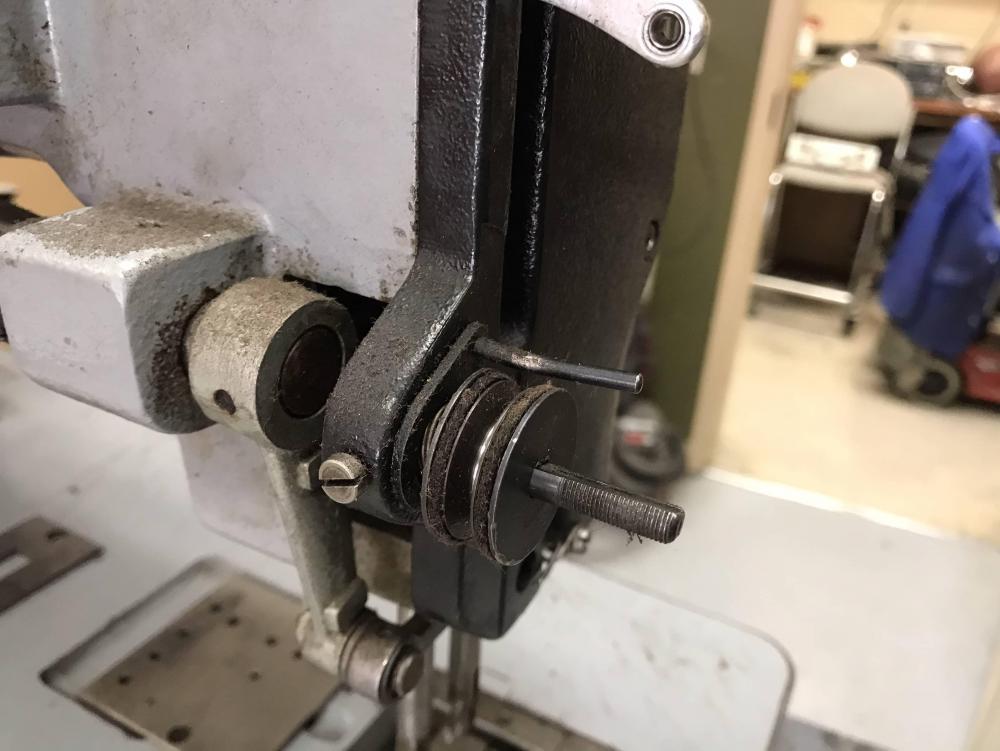
So here are some images of my 204-64 as you can see some parts are there and some are not. I would like to rebuild the forward reverse lever back to OEM and the tensioners need to probably need a complete rebuild just so I works as designed. Rather than trying to save old parts and make them work I think new would just make more sense. For those of you familiar with Adler the for/rev lever appears to be off of a 104-64 machine, and the 204 had a spring lever and stop built into the lever itself. If I cannot find one fabricating one shouldn't be too difficult.
-
I will try Henderson sewing, Thanks! Thanks to Uwe, I have the parts list and exploded view of the machine but it is all in German and the numbers listed are not the same as the item numbers from the supply shops like Campbell Randal. Then with out a photo of the actual item it is kind of a crap shoot. There are several different presser feet for this machine and each costs about $100. My hope is to find someone who has this machine and can tell me what set up they have
-
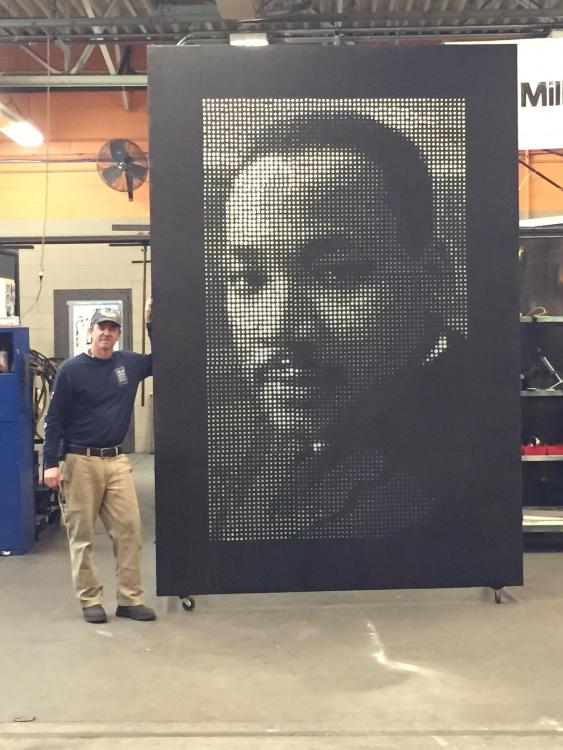
This was not CNC, this was all hand punched on our iron worker one hole at a time. I loaded the image into basically a photo shop editor to create a pixelated half tone out of the original image. Then I made blueprints of the hole locations based upon the half tone for my students and gave them each a 20" sheet of 16 ga steel and told them to follow the map. It consisted of letters A through G laid out on a 1" spaced grid pattern and each letter represented a different size punch. All of the blueprints had to not only be followed to the letter (pun intended) but the edges all had to line up to create the effect. The amazing part about the project was that they really did not know what feature of the portrait they were given and in the raw steel unpainted phase, even I could not tell if the punch locations were correct. Not until it was painted black and placed in front of the white back ground could the image be seen. The project was the main feature for San Diegos Martin Luther King Jr parade, but I chose this labor intensive task to teach them that even if you don't have a clear picture of the whole, following directions will lead to success.
-
So this is my second post on this forum. I acquired a Durkopp Adler 204-64 industrial sewing machine at an auction and am looking for some information regarding a good parts supplier. The previous owner had an auction house come in and clear out some of his unused machinery from his business that makes leather holsters and knife sheaths. They make a whole lot of other things but the sewing side mostly it is weapons related. He has several other Adler machines and he robbed several parts off of the machine for the other machines still in service. Among the items missing are the presser foot, the needle collar, basically the entire thread tension system needs to be replaced, the thread guide on top of the machine and several bobbins are needed. The good news is that the shuttle hook is in place and the entire assembly looks intact. I may need to relieve some burring on the hook but the rest looks okay. Most manuals or parts lists are in German and it is a bit frustrating to research this machine only to find it all written in another language. I have looked up companies like Campbell Randal and most of their products for this machine do not have images associated with the product. I don't like gambling on a $100 foot when I am not 100% that it is the correct part. Who out there has experience with the 204-64 and can give me some beta on the parts I need. Also a diagram on threading the machine would be a big help. Mike
-
Greetings my name is Mike and I came across your site while researching my newly acquired Durkopp Adler 204-64 industrial sewing machine. I love to learn, typically hands on building type learning. My brother in law at one point in his life was a very accomplished knife maker and I learned tons from him as we worked in his shop. I have made more than a few custom knives including the leather sheaths. Back then it was all hand sewing, although very strong, production was very slow. I have chosen the name Barn Owl because I am known to hunt for barn finds that are too good to pass up. Mostly to add to my car collection, but recently I have found myself enjoying estate sales and online auctions of businesses closing their doors. I had a line on a long arm Consew 744-R30 industrial sewing machine but someone was willing to pay more than I was. I stopped bidding at $3600, it retails for more than twice that but it was a used machine and I just did not know the history. I have worked at a large local church here in San Diego for 28 years and have built up the maintenance shop to include many tools to accomplish most anything that needs to be done on the ten acre campus. One of our venues has a stage curtain that is 20 feet tall and 100 feet wide. It is over 20 years old and is showing its wear. I know that at least half of the cost of replacing the curtain will be labor to sew it, and I kept looking for an industrial sewing machine. I found the Durkopp Adler on an auction and won it for about $450. Although it is not a walking foot like the Consew, the walking needle feed should be adequate for my needs. Of course with a machine like this I will probably find myself sewing all kinds of things I could not in the past. I was reading several members post about the care and maintenance of industrial sewing machines and figured I would hang out in your barn for a while and learn from some experts. Although I am formally trained in metal craft and have fabricated lots of cool sculptures with a welding torch, I am looking forward to deepening my knowledge of industrial sewing. Whether welding or stitching, fabrication requires forming and joining of different materials to make a product. I will probably never make a saddle but learning from folks who have the skills to make something as complex and proprietary as that is just what I am looking for. I have many other skills I highlighted in my profile, so if any of you have a question within my area of expertise I will be happy to share my knowledge. Mike p.s. The photo is me with a sculpture I did of MLK for the college where I teach. It is a true half tone constructed of 6000 holes punched into a steel plate. There is not a photograph or painted image of Martin Luther King, it is only holes of various size in front of a white background to create photographic effect.


