ddiuni
-
Posts
64 -
Joined
-
Last visited
Content Type
Profiles
Forums
Events
Blogs
Gallery
Store
Everything posted by ddiuni
-
Has anyone tried replacing the 91k5's looper? I looked at the installed looper and it was not just plugged in. When I looked at the part where it was plugged in, it looks like it was fixed with solder or something. The looper cannot move while rotating, so I think it was fixed with a solder lamp. To disassemble this and put a new looper on, you have to remove the lead... It doesn't seem easy. I'm asking if anyone has removed it.
-
Yes, thank you for your kind notice. Thank you for looking into this information for someone else. I know this site through a lot of searches. First of all, the needle I got Only got 70/10, 80/12, 90/14. In just one month, 65/9 and 75/11 were sold out. Referring to the table you provided, I think I will need to find a replacement.

-
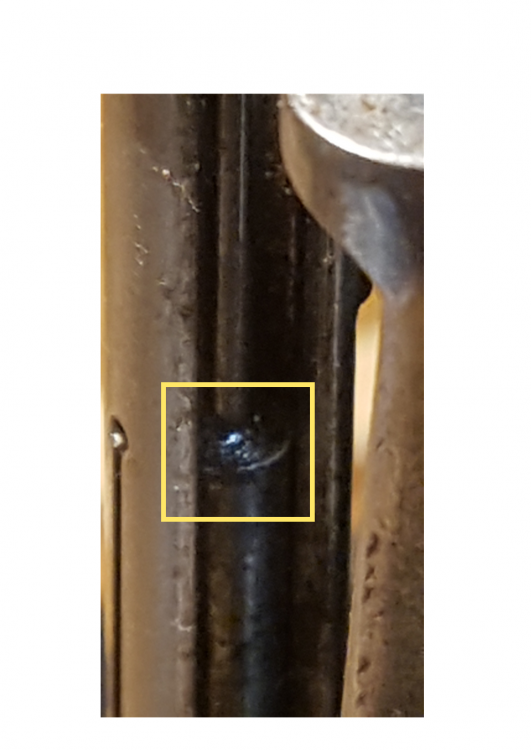
The result of checking the shape of the needle groove is as follows. The shape of the needle groove for inserting the needle is as follows. ㄷ So the right screw secures the needle. And the diameter of the needle groove is measured to be possible up to about 1.9 mm. However, if it is this thick, the tip of the needle can touch it when it passes the hook, so it is judged that the diameter should be smaller.
-
Features of 46x1 needles: #One. Diameter 1.1mm #2. Total length: 42.2mm #3.The length of the groove: about 24.5mm #4. Length of needle eye and shark: about 13.8mm #5. Length from the tip of the needle to the eye of the needle: about 35.7mm
-
Is the needle you mentioned a 46*1 replacement needle?
-
So it looks like a chain that is sewn on the underside of the fabric. The lower thread seems to be sewn in a spiral shape. I recently bought a 91k5 and 6. So, I got the needle up to number 14.... Needle 9 is out of stock. And in the video uploaded to YouTube, it is explained that the person using the needle uses number 16. If you have thick gloves, you should probably use the number 16 needle. 46*1 needles are no longer produced in this world. Sooner or later, the needle will disappear, and this sewing machine will remain as an antique.
-
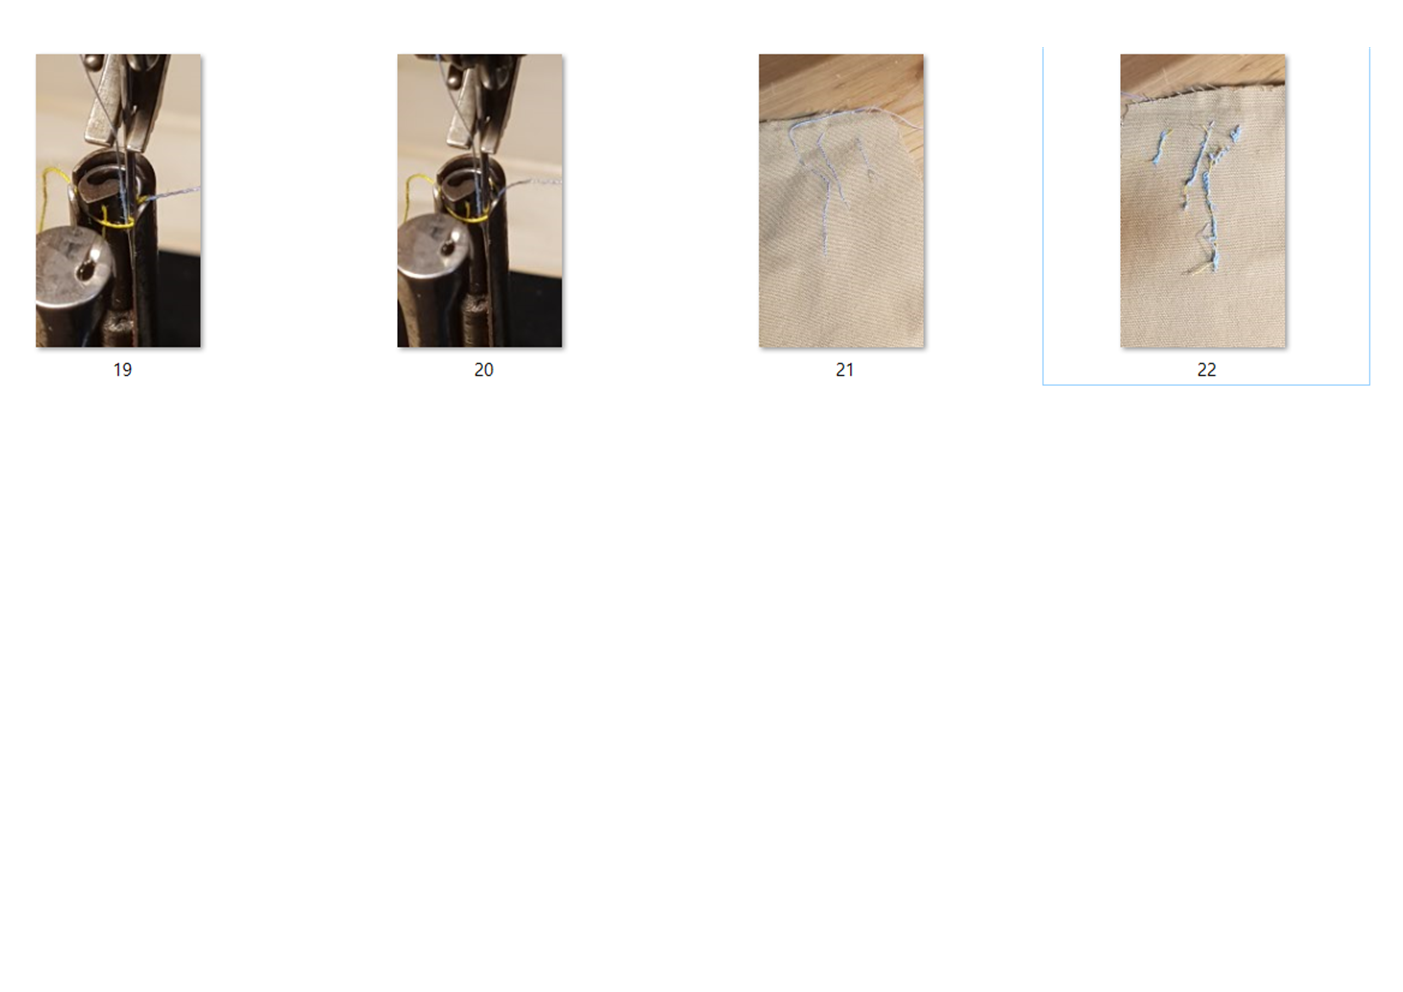
I'll post the picture you mentioned. First, look at the picture of the sewing and see if it is right to sew like this.
-

-
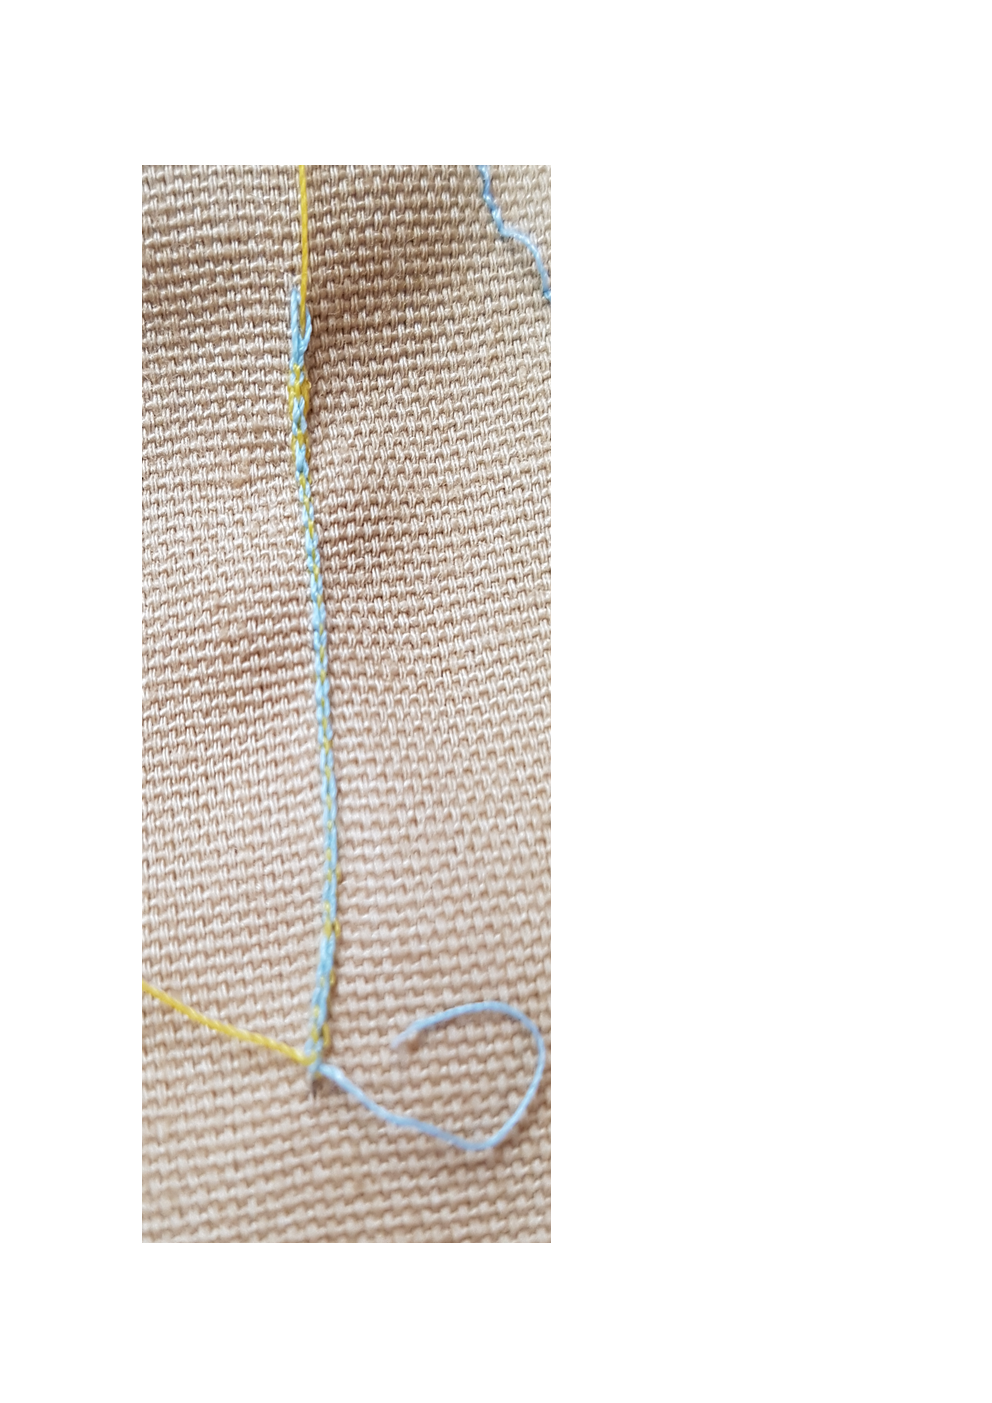
I adjusted the tension first, and the sewing works well. I can't upload only blurry due to photo size limit I'll re-upload it one by one. However, if you see the upper thread and the lower thread are sewn on the lower side, a thread is formed and it is sewn. I don't know if it's like this in the first place. I don't know if this is the characteristic of sewing 5 and 6 of 91k.


-
The sewing on the lower thread worked well. However, it is not flat, and 91k5 and 6 are stitched like this, so can they be sewn?

-

-
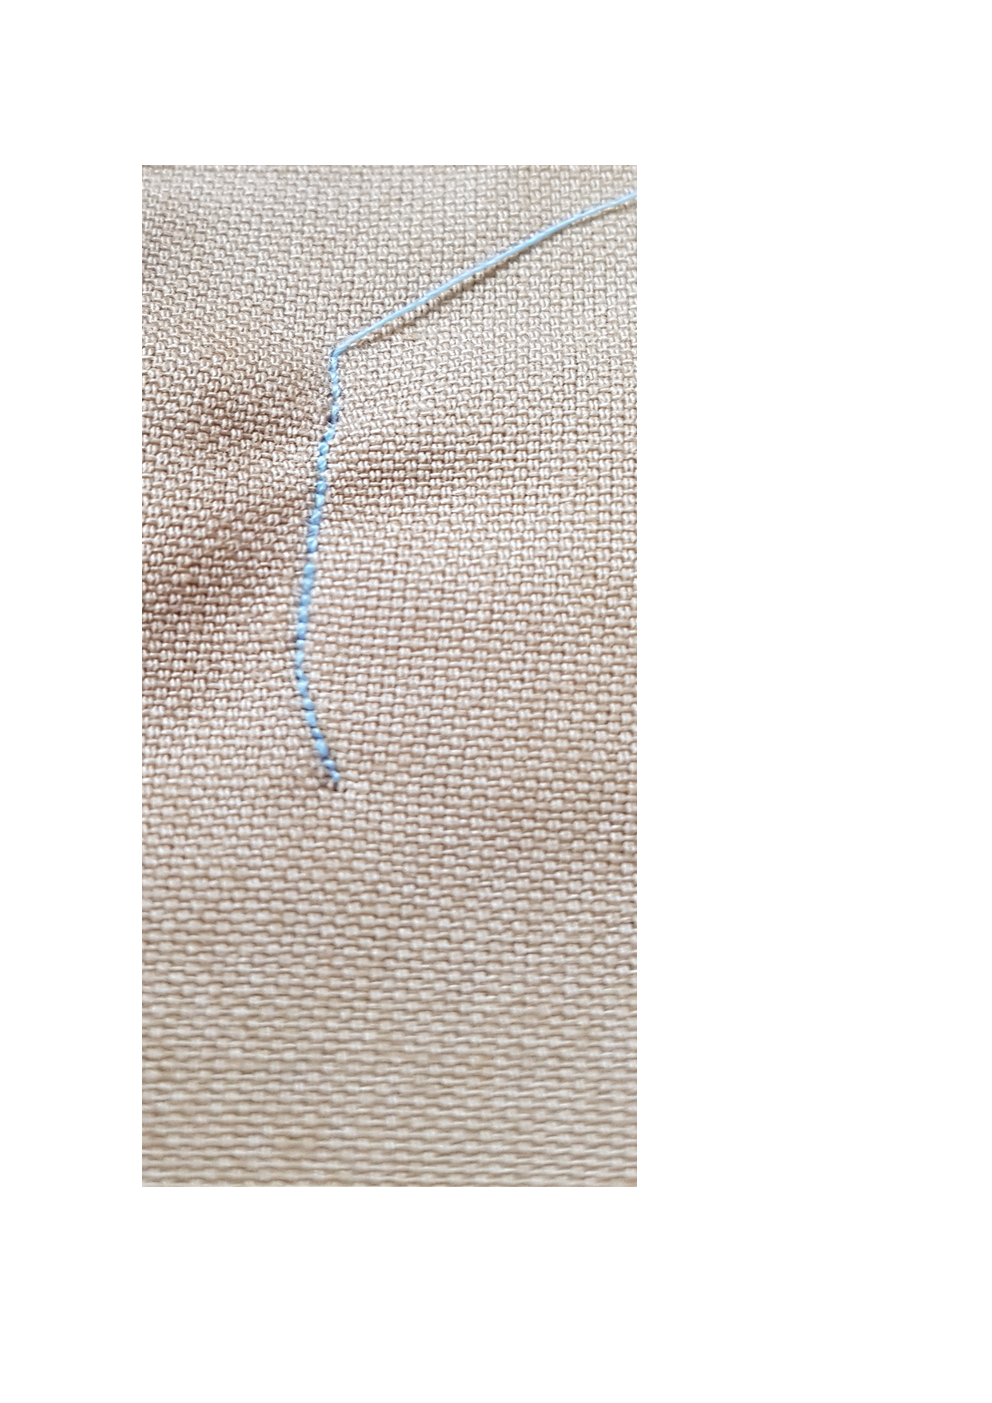
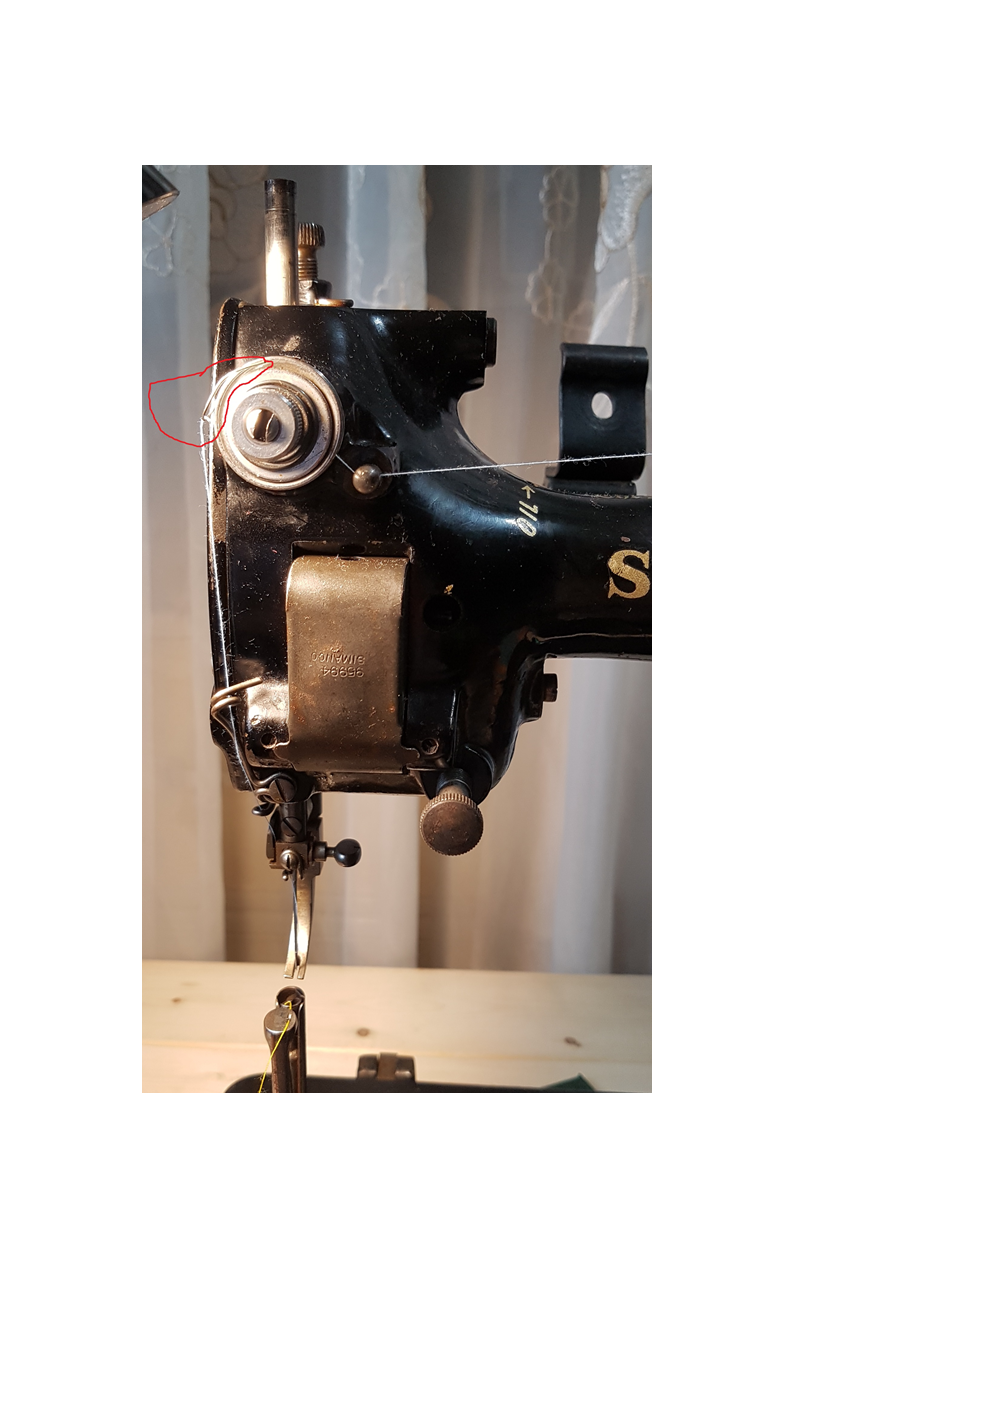
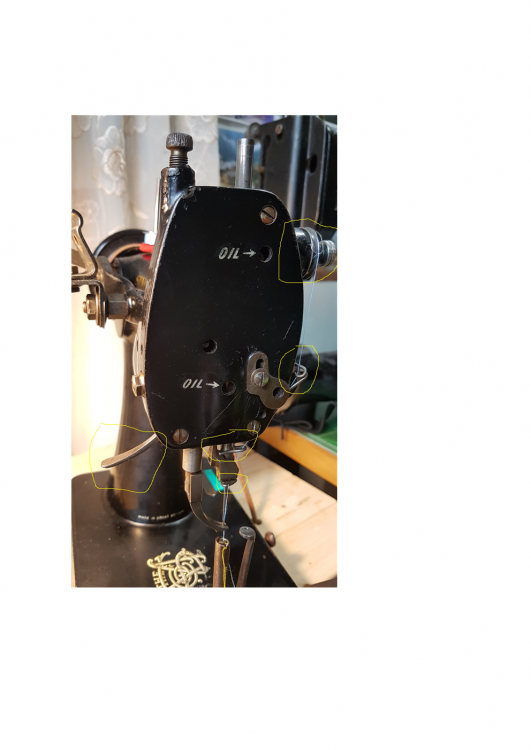
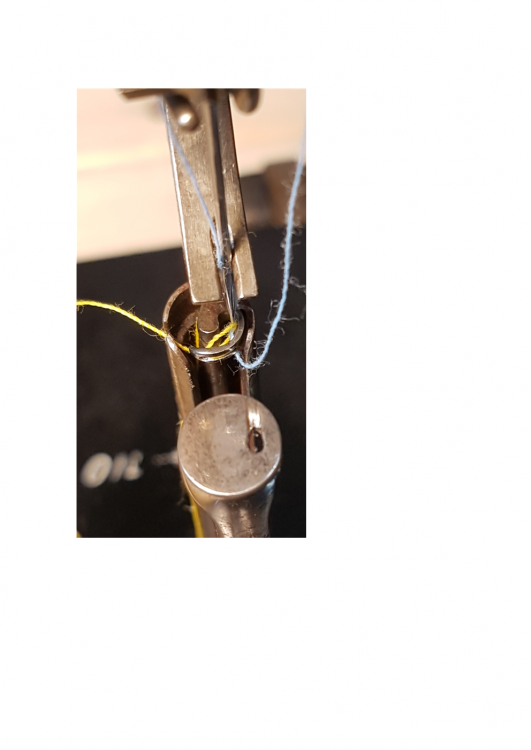
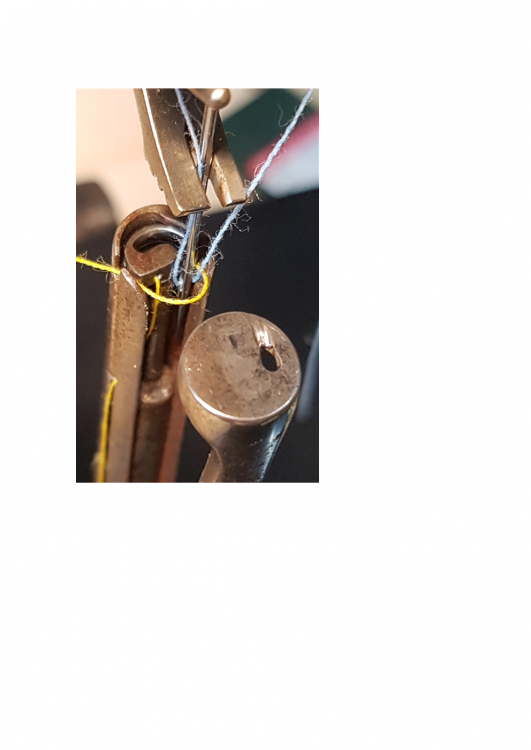
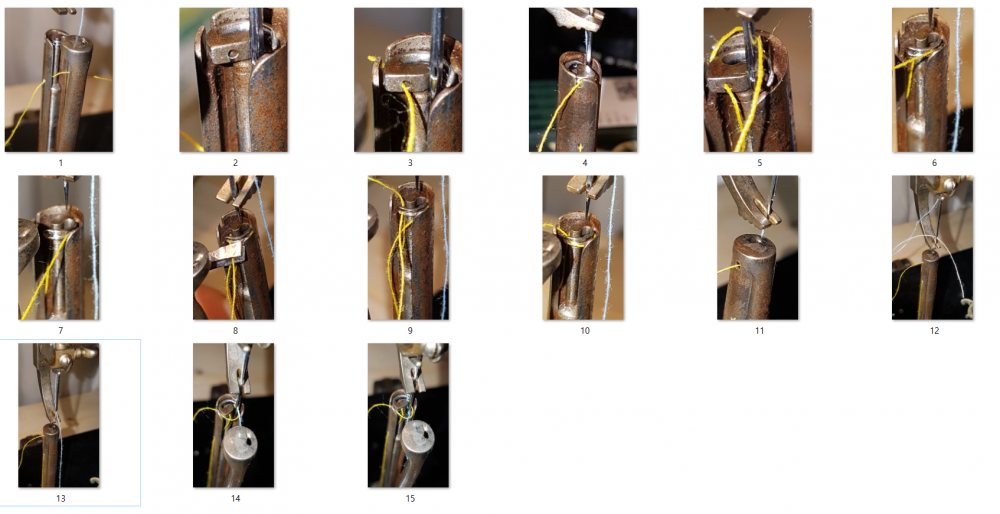
The tension control of the circle part was not tight, so I removed it again, fixed it, and then sewed it again, and the sewing worked well. However, the size of the photo only increases by about 1.4M. First of all, I adjusted the tension control part of the circled part in the picture I uploaded, and it is sewn. Sewn limbs will be posted in the next post. However, if you look at the picture, the stitch itself is forming a thread on the lower thread. Is the original 91k5 and 6 sewn in the shape of a string at the bottom? The top is very well stitched.

-
-

-
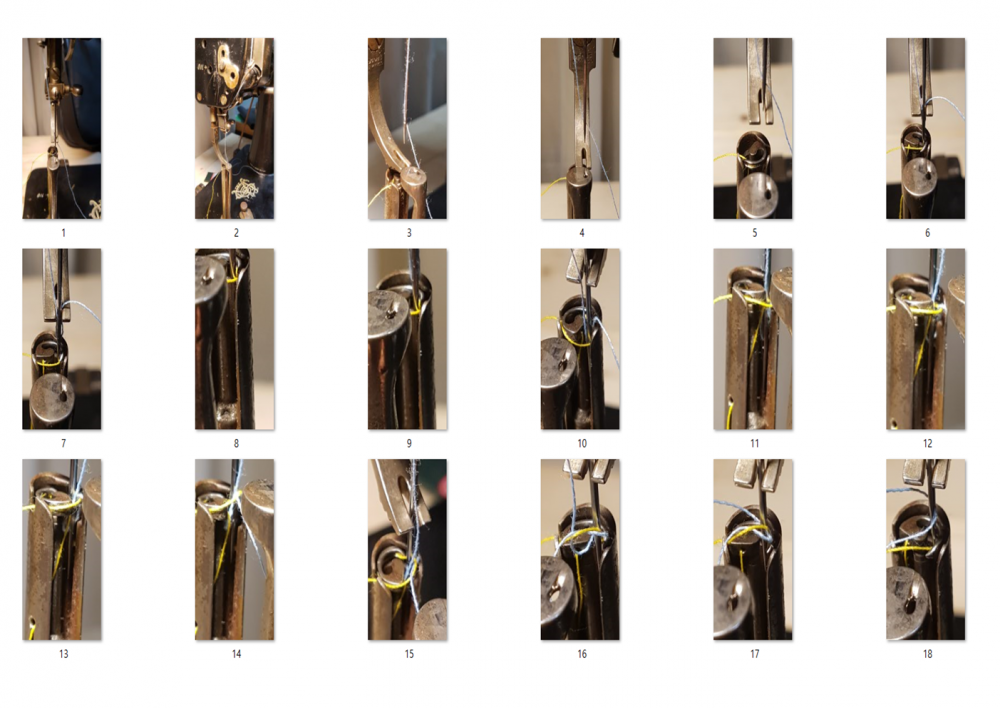
The photos from #13 are photos taken with the thread slightly pulled upwards. Seeing that the upper thread clumps at the bottom, something is wrong, but I don't know where it is.

-
-
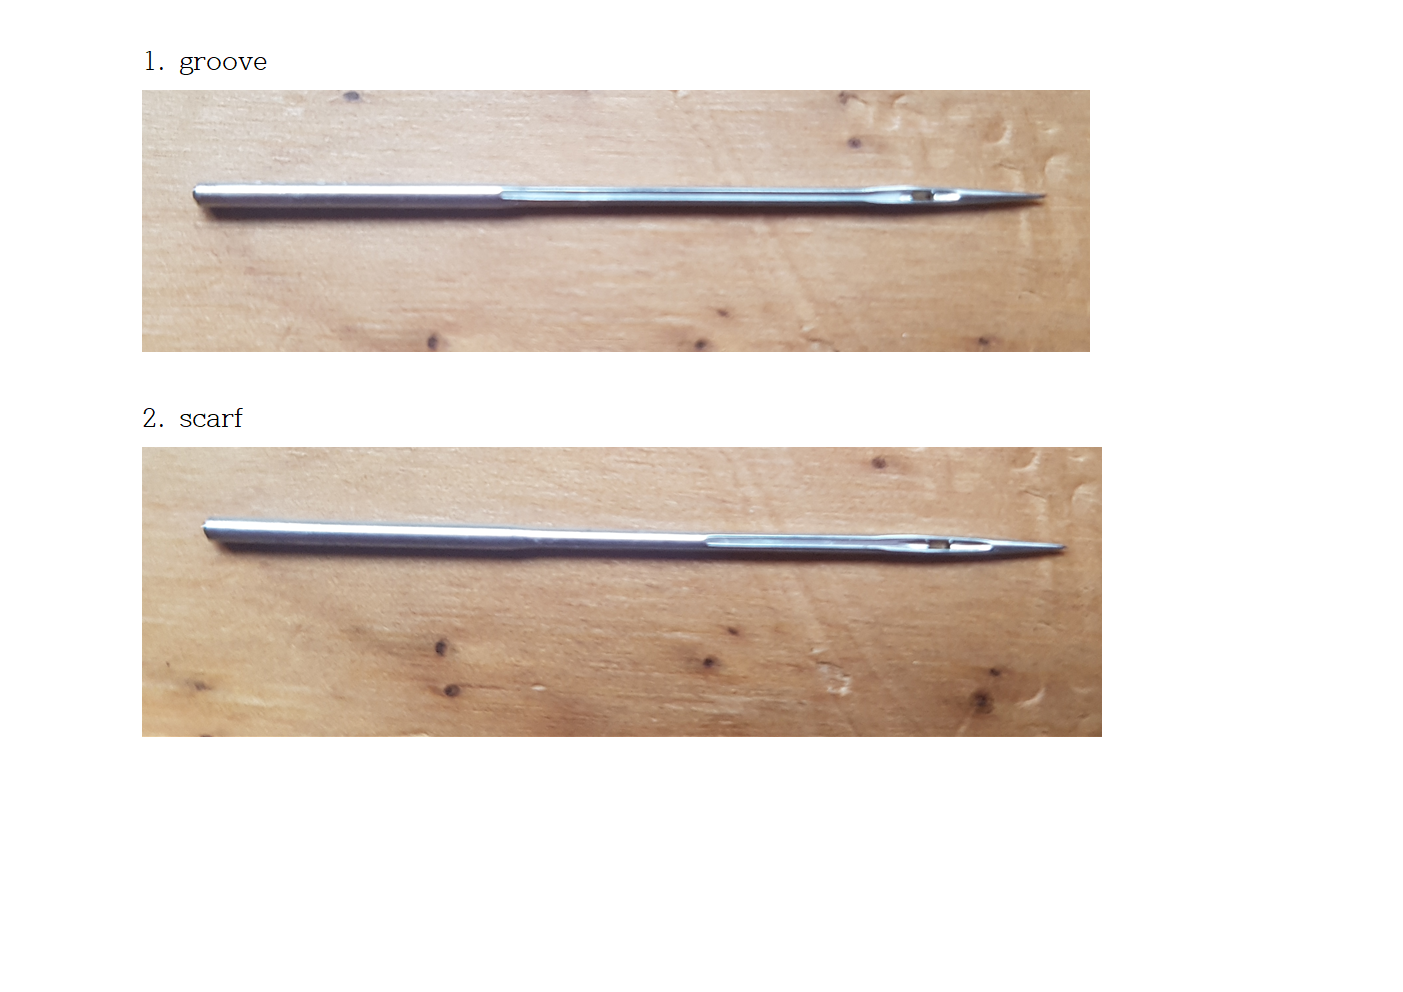
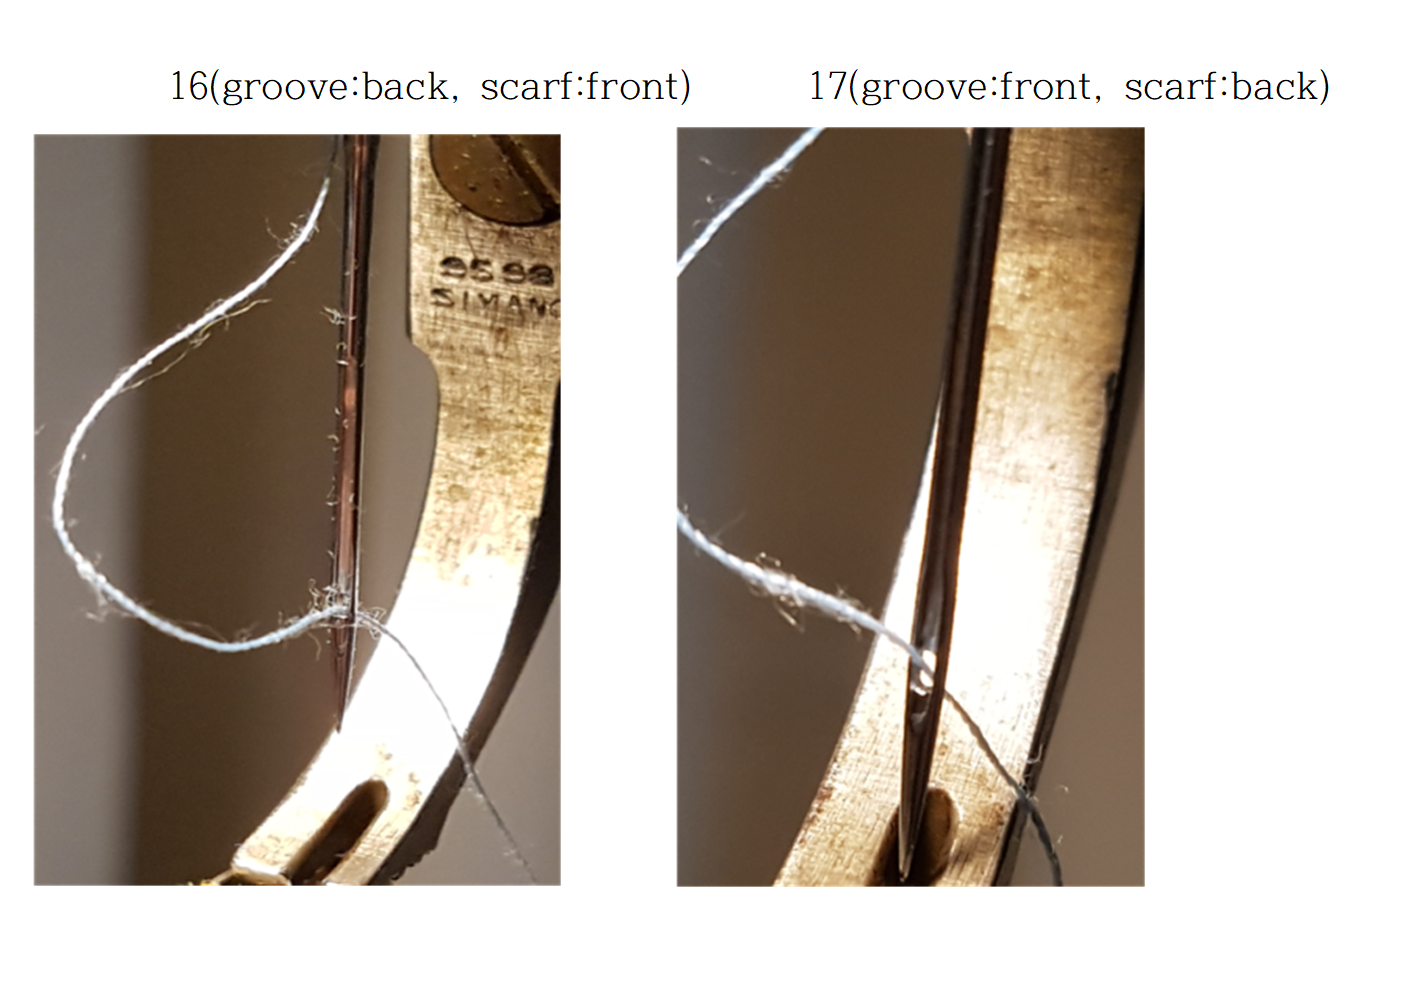
Let's check them one by one. Today, I accidentally changed my mind and changed the position of the needle. I put the needle so that the scarf is on the right side so that the thread goes from left to right. Then, it becomes sewing, but the upper thread clumps toward the lower thread. (For 91k5,6, the needle must be inserted so that the groove is on the left and the scarf is on the right. Is that correct?) Maybe the timing isn't right. Let's do it slowly, one by one, as described.
-
There is no manual, and I have no idea why sewing is not working. This is a special glove sewing machine. Even if you look at the YouTube video, the video is blurry and you can't tell because it doesn't come out properly.
-
I haven't sewn it yet. A little later.... Let's test by adjusting the height of the needle bar slightly, or by adjusting the height of the needle slightly.
-
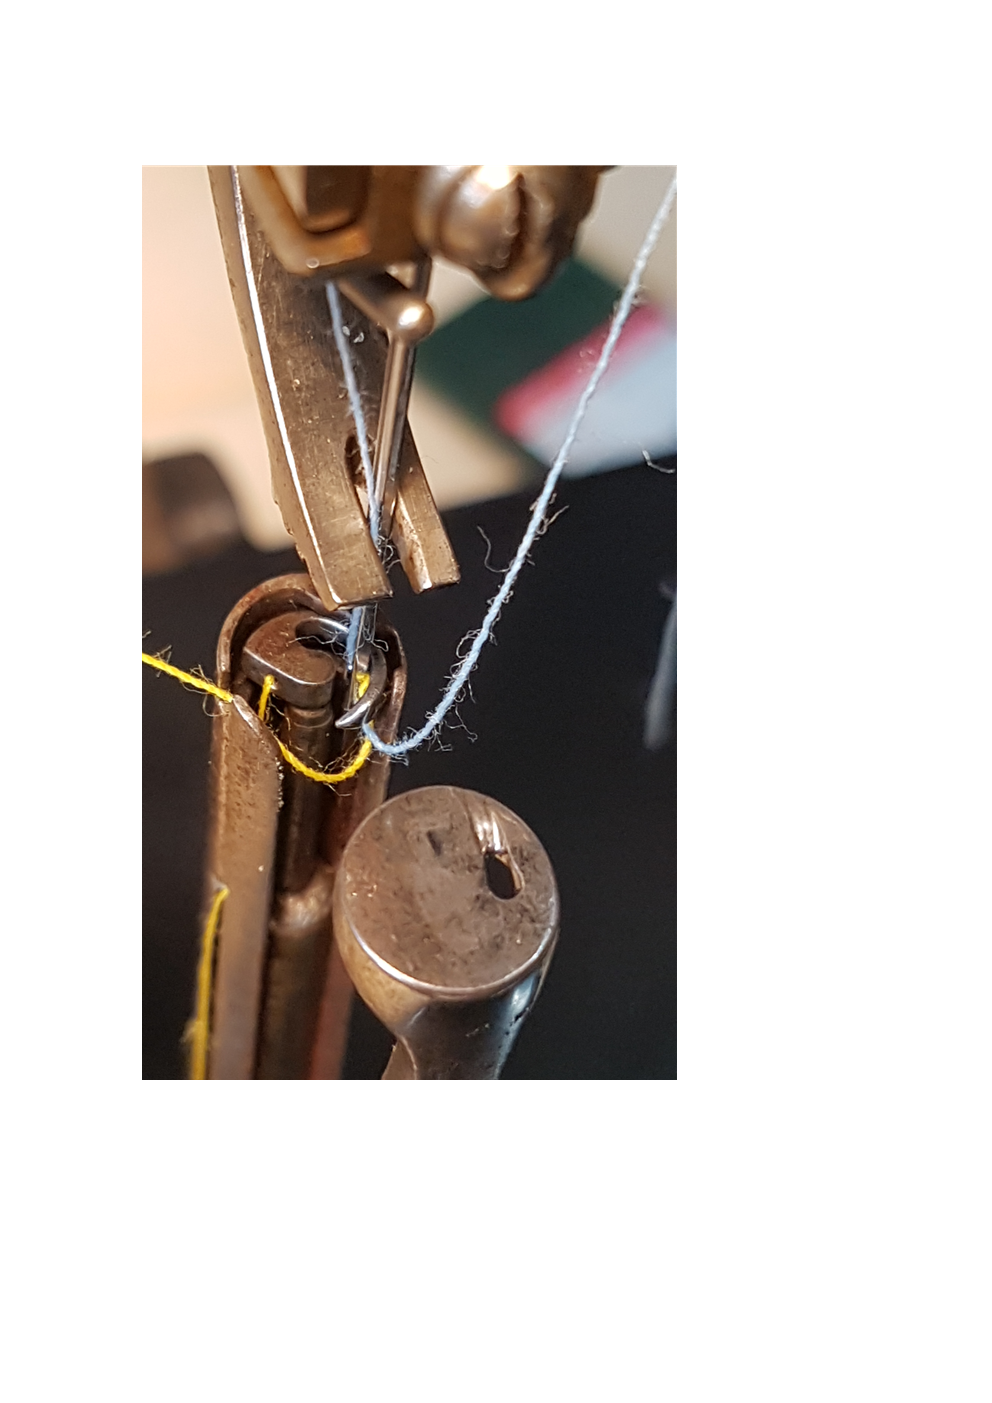
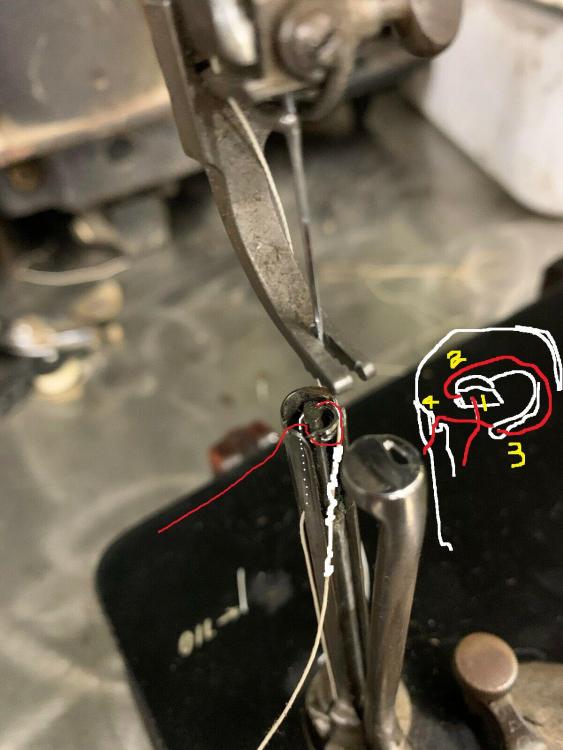
Number 17 is the scarf at the back. You say to connect the thread like number 17 in the photo. But even if I connect it like No. 17 and lower the presser foot and sew it, it is not sewing at all.

-
다시 순서대로 놓습니다. 무슨 일인지 알려주세요
-
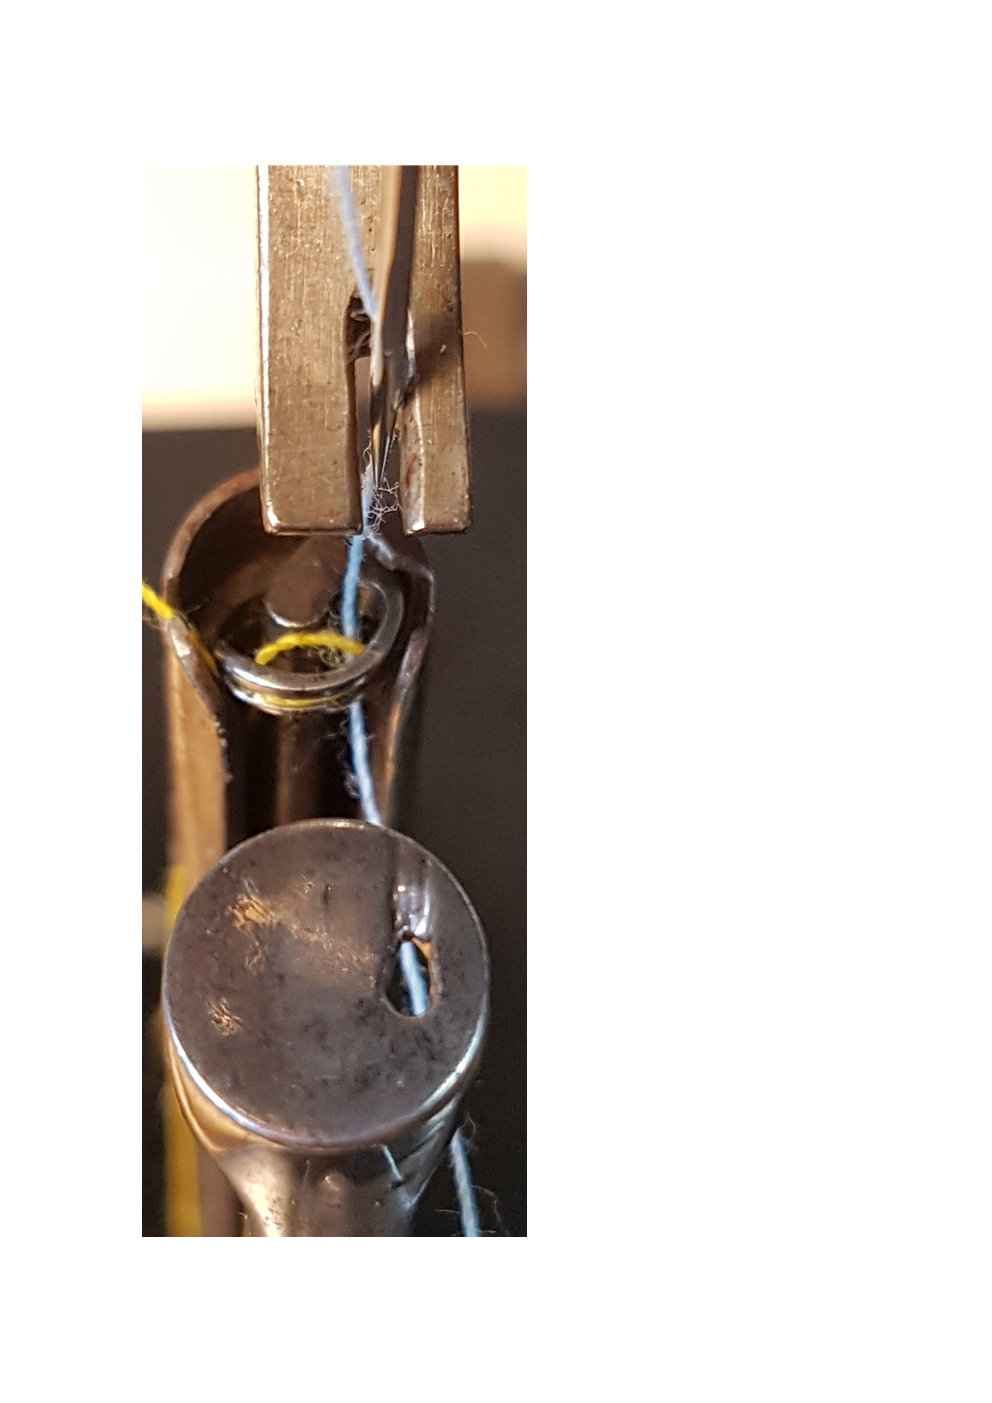
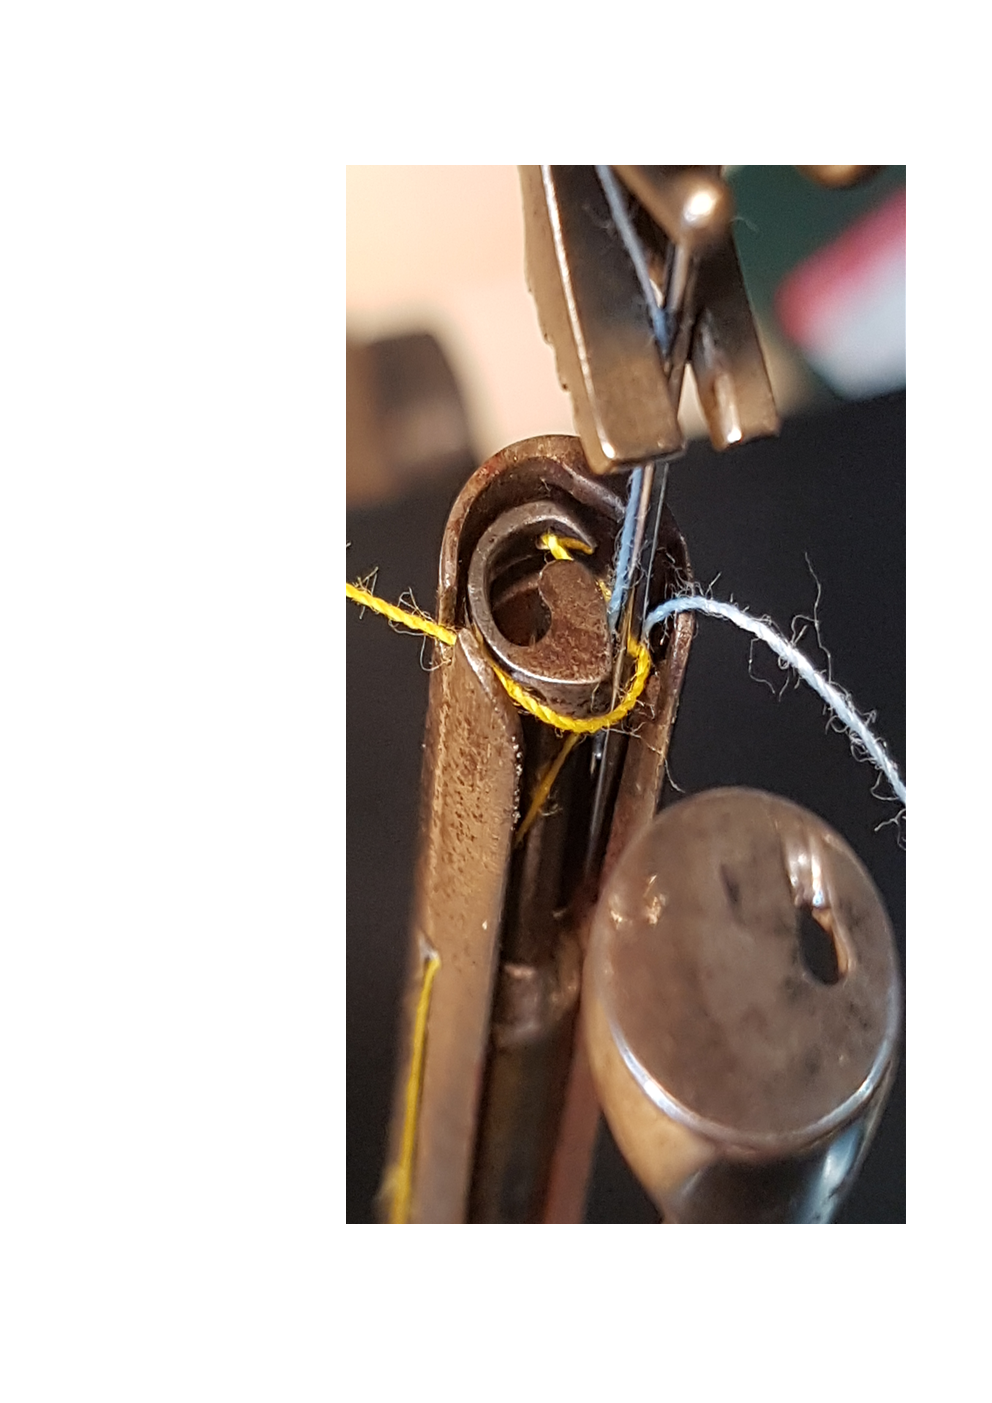
The thread is connected to the lower bar. I wrote down the numbers in order. Please tell me what's wrong
-
The thread is connected to the lower bar. I wrote down the numbers in order. Please tell me what's wrong

-
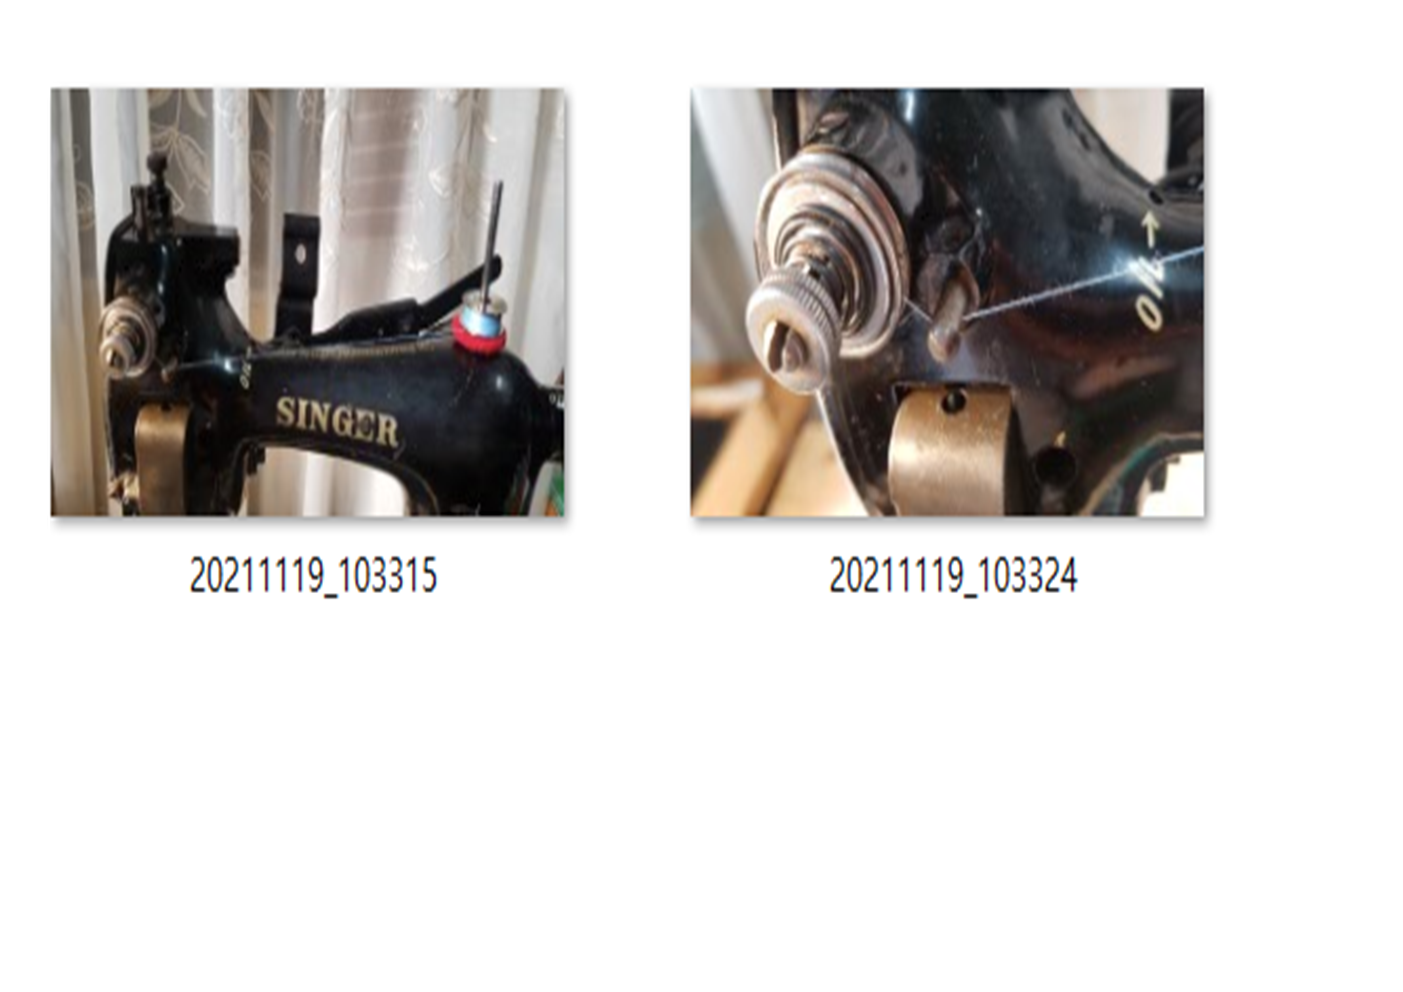
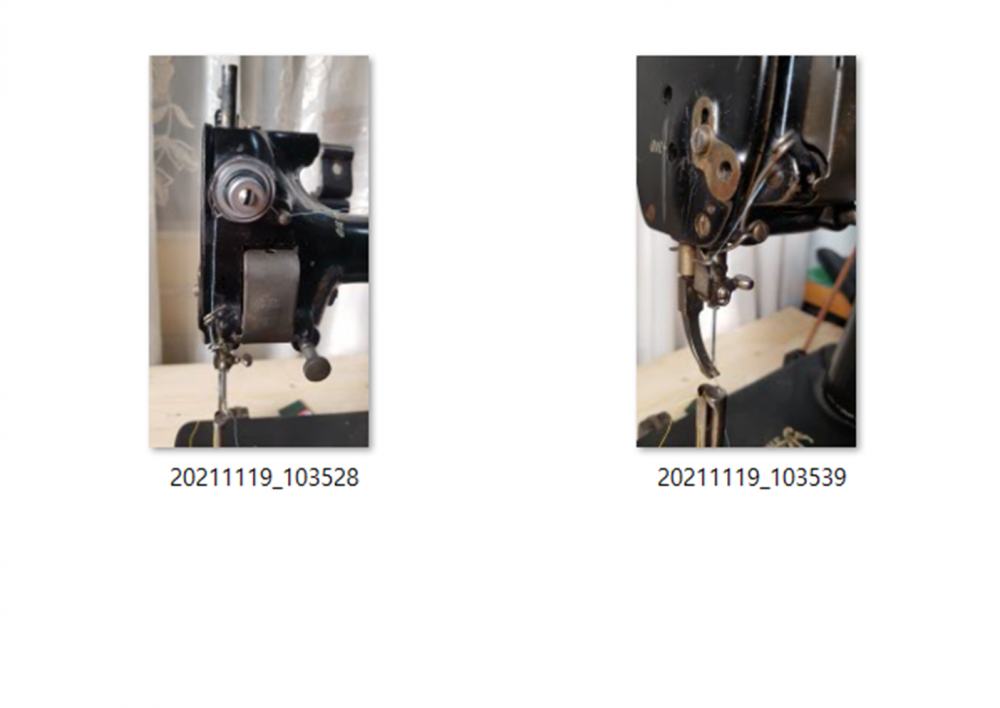
Hello. This time, I got the Singer sewing machine 91k6. The question is I don't know how to connect the threads. First, I connected the thread to the lower post. (I don't know if I connected it properly.) Then I connected the thread to the upper needle bar. (When viewed from the front, the thread came out from the back to the front.) And when I sew, only the upper thread is sewn and the lower thread is not pulled up at all. what kind of problem... If anyone knows how to connect the threads, please let me know.
-
Singer 91K5 Glove Sewing Machine Parts
ddiuni replied to humanshoes's topic in Leather Sewing Machines
Can you please tell me how to connect the thin sewing machine 91k6 thread.