


ddiuni
-
Content Count
60 -
Joined
-
Last visited
Posts posted by ddiuni
-
-
12 minutes ago, RockyAussie said:나는 당신이 가지고 있는 것이 우리가 사슬 재봉기라고 부르는 것이고 밑실은 일반적으로 이런 모양이라고 믿습니다. 보빈이 없기 때문에 다른 많은 기계처럼 잠금 스티치를 형성할 수 없습니다. 나는 당신이 지금 그것을 얻을 수 있을 만큼 잘 가지고 있다고 생각합니다.
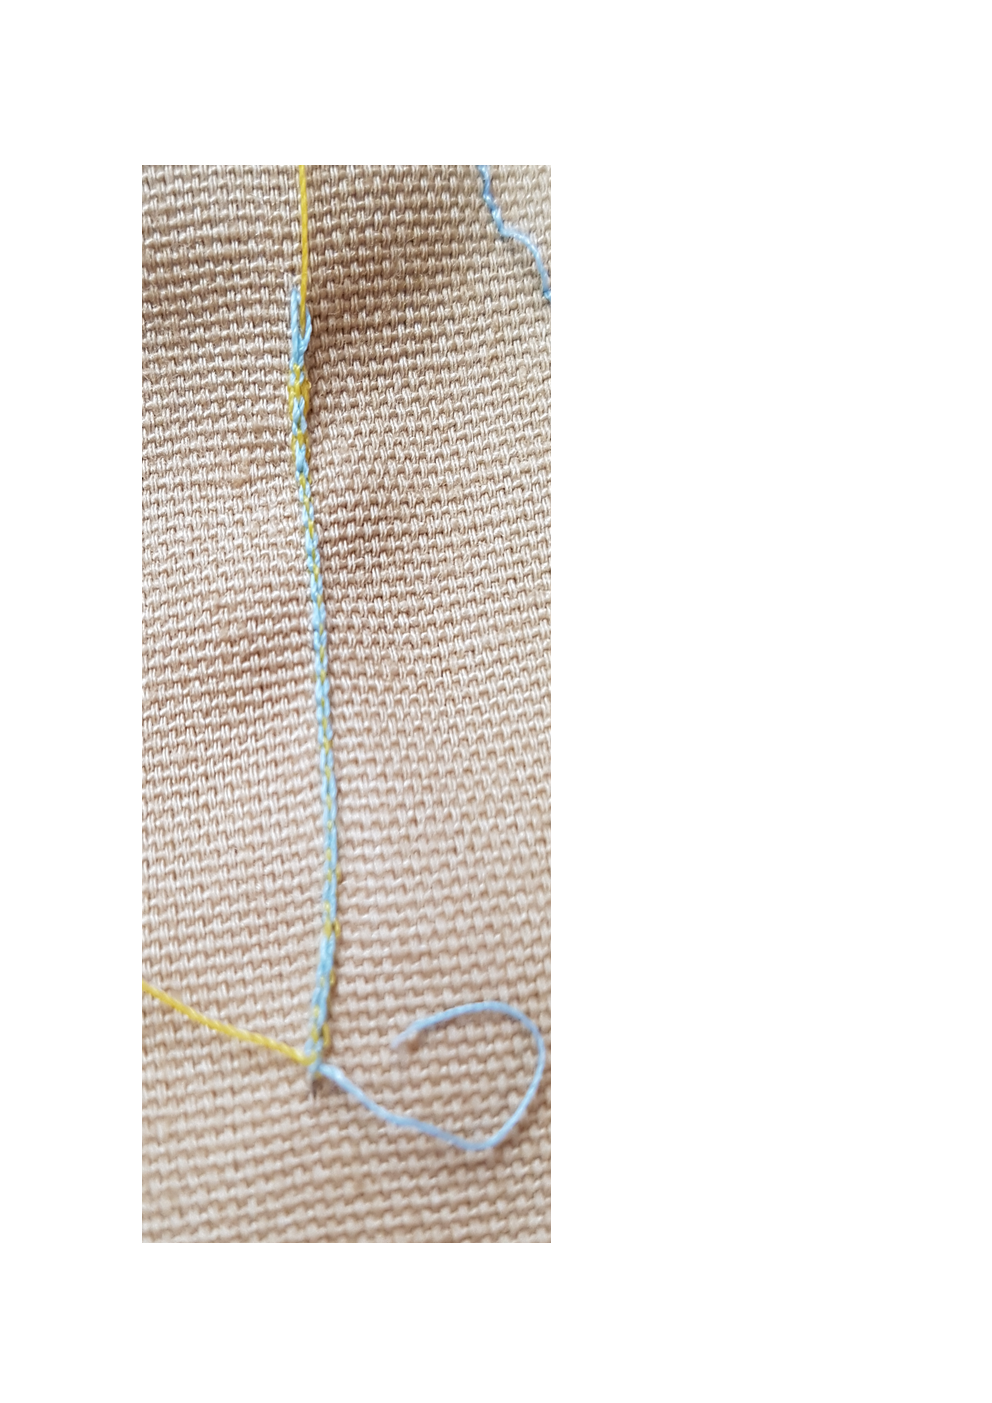
So it looks like a chain that is sewn on the underside of the fabric.
The lower thread seems to be sewn in a spiral shape.
I recently bought a 91k5 and 6. So, I got the needle up to number 14....
Needle 9 is out of stock. And in the video uploaded to YouTube, it is explained that the person using the needle uses number 16. If you have thick gloves, you should probably use the number 16 needle. 46*1 needles are no longer produced in this world. Sooner or later, the needle will disappear, and this sewing machine will remain as an antique. -
16 minutes ago, Wizcrafts said:이제 이 기계에 실제로 내가 알고 있는 테이크업 레버가 있는지 궁금합니다.
I'll post the picture you mentioned.
First, look at the picture of the sewing and see if it is right to sew like this.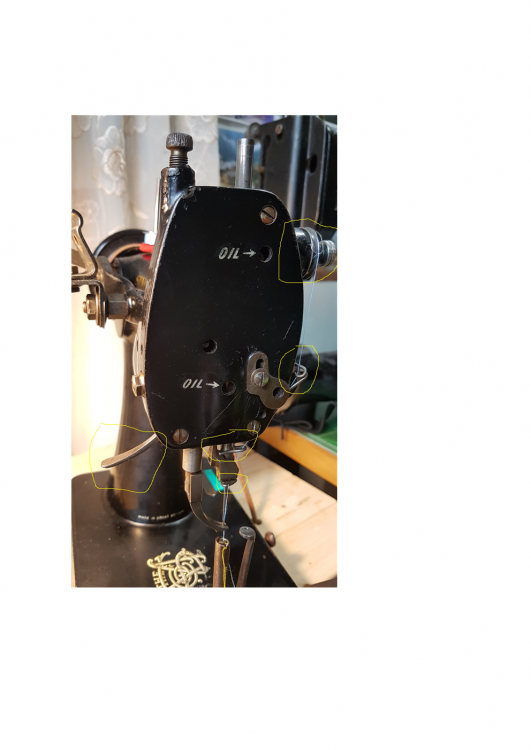
-
-
4 hours ago, RockyAussie said:사진이 매우 흐릿하고 식별하기 어렵습니다. 실 복귀 스프링과 실채기가 보이지 않습니다. 위의 마지막 사진 각도에서 바늘을 아래로 한 다음 바늘을 1/2 위로 올린 상태에서 사진을 찍을 수 있습니까? 사진 크기를 너무 많이 줄이지 마십시오.
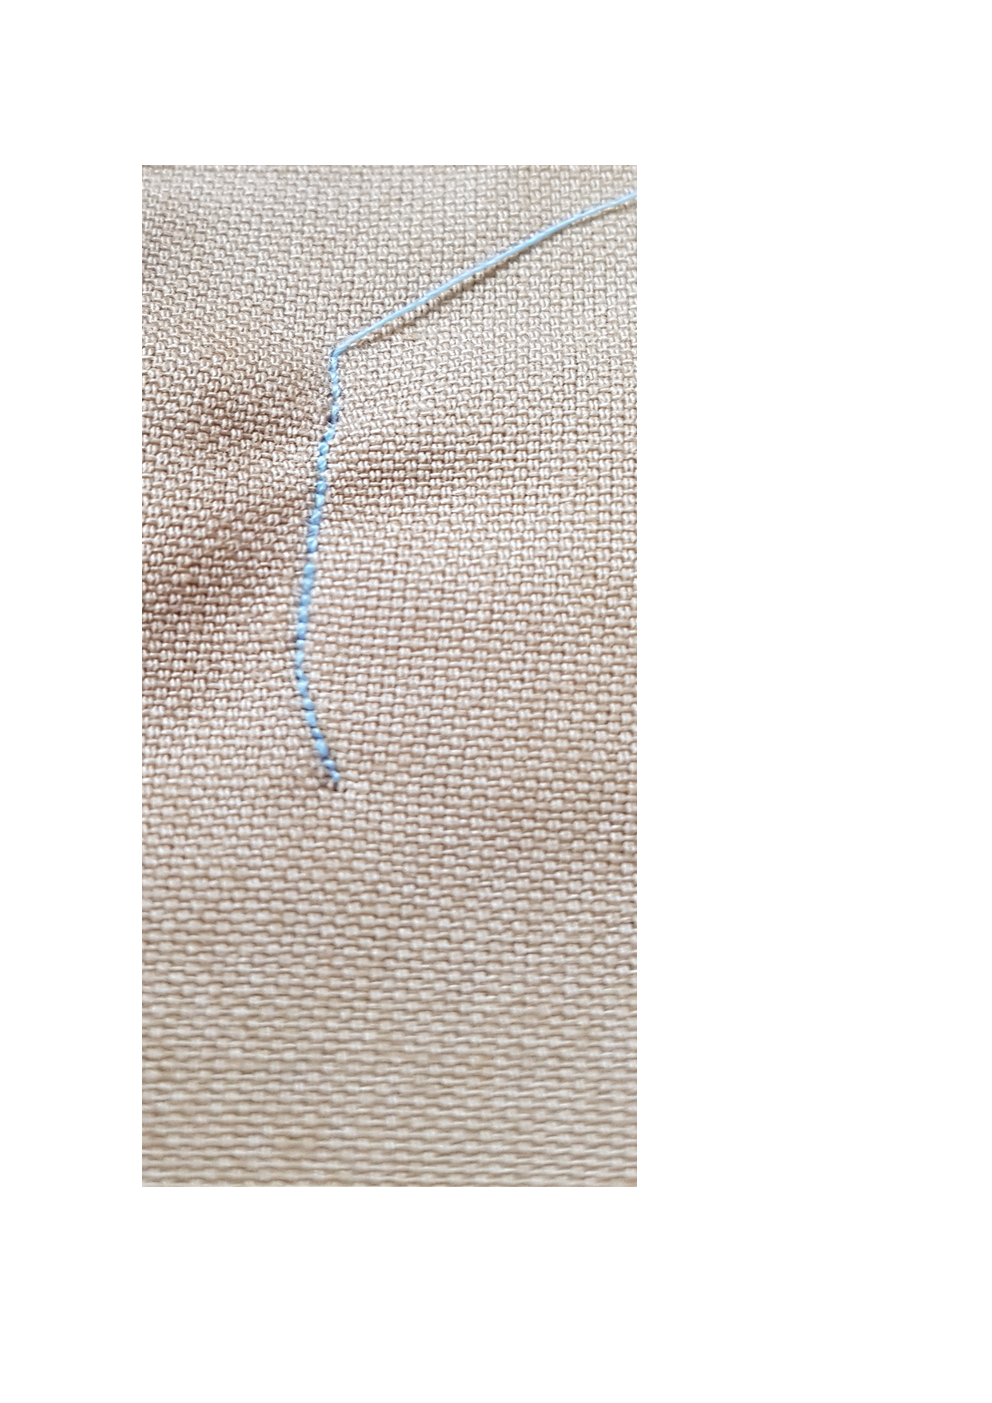
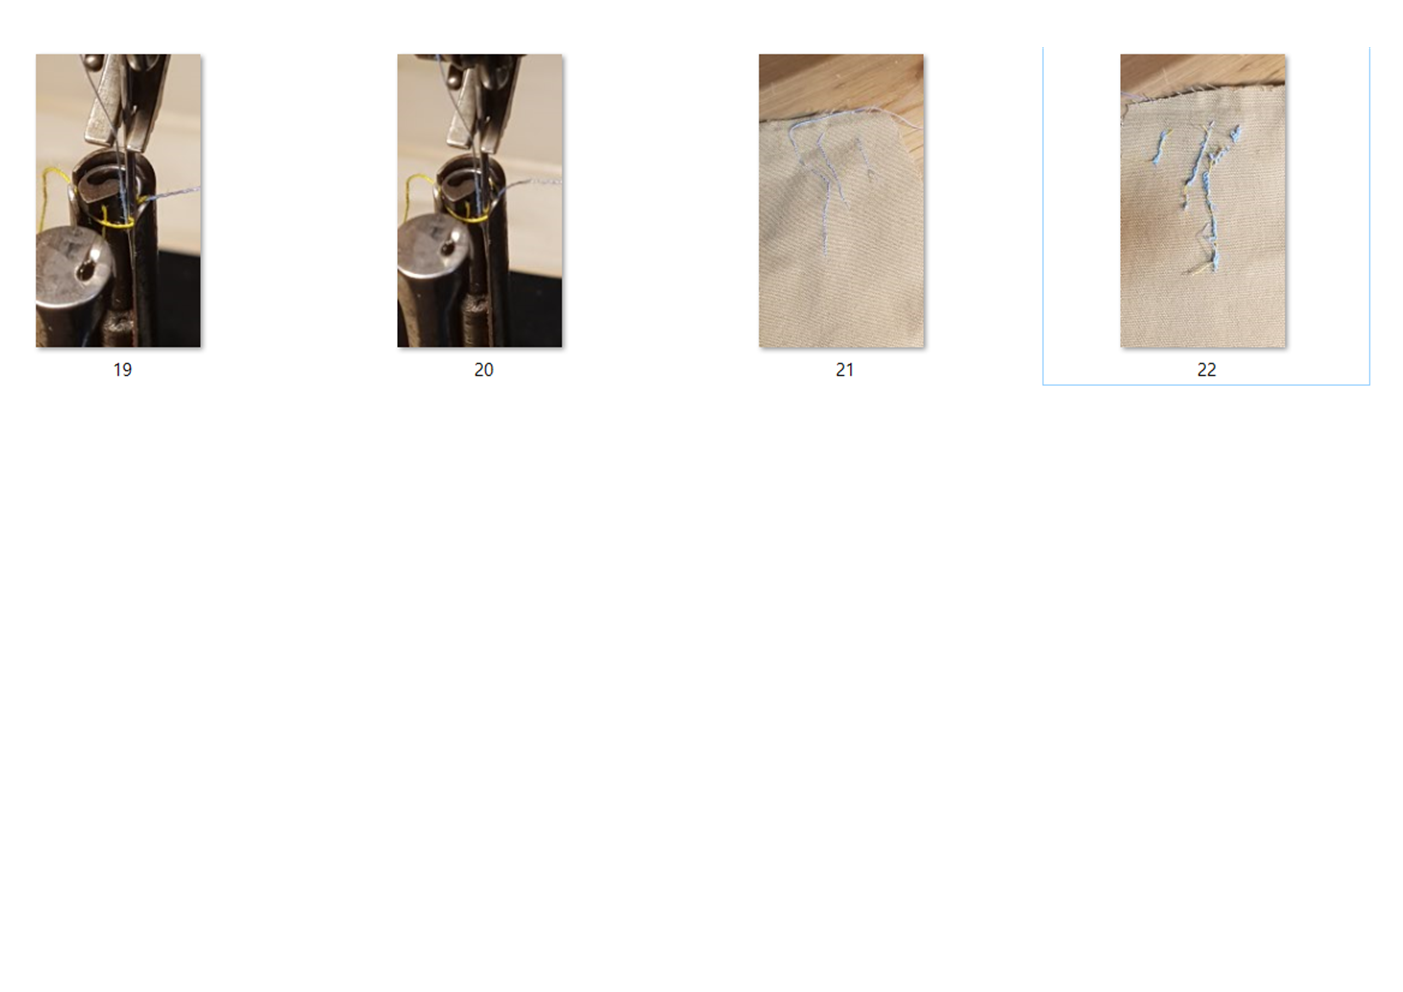
I adjusted the tension first, and the sewing works well.
I can't upload only blurry due to photo size limit
I'll re-upload it one by one.However, if you see the upper thread and the lower thread are sewn on the lower side, a thread is formed and it is sewn. I don't know if it's like this in the first place. I don't know if this is the characteristic of sewing 5 and 6 of 91k.


-
The sewing on the lower thread worked well.
However, it is not flat, and 91k5 and 6 are stitched like this, so can they be sewn?
-
-
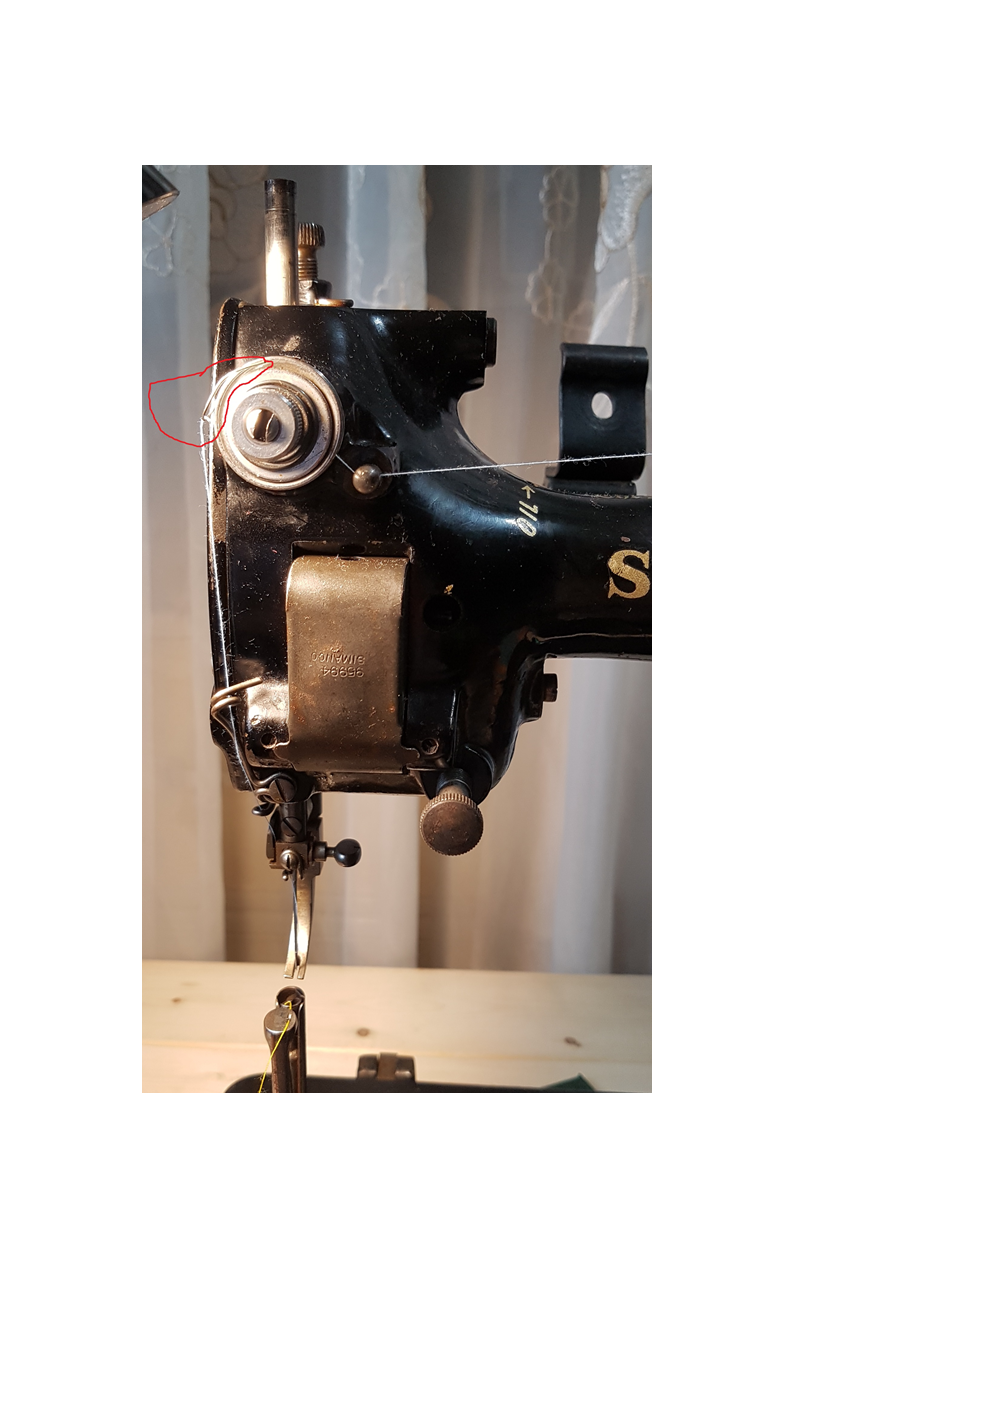
The tension control of the circle part was not tight, so I removed it again, fixed it, and then sewed it again, and the sewing worked well.
However, the size of the photo only increases by about 1.4M.
First of all, I adjusted the tension control part of the circled part in the picture I uploaded, and it is sewn. Sewn limbs will be posted in the next post. However, if you look at the picture, the stitch itself is forming a thread on the lower thread. Is the original 91k5 and 6 sewn in the shape of a string at the bottom? The top is very well stitched.
-
-
-
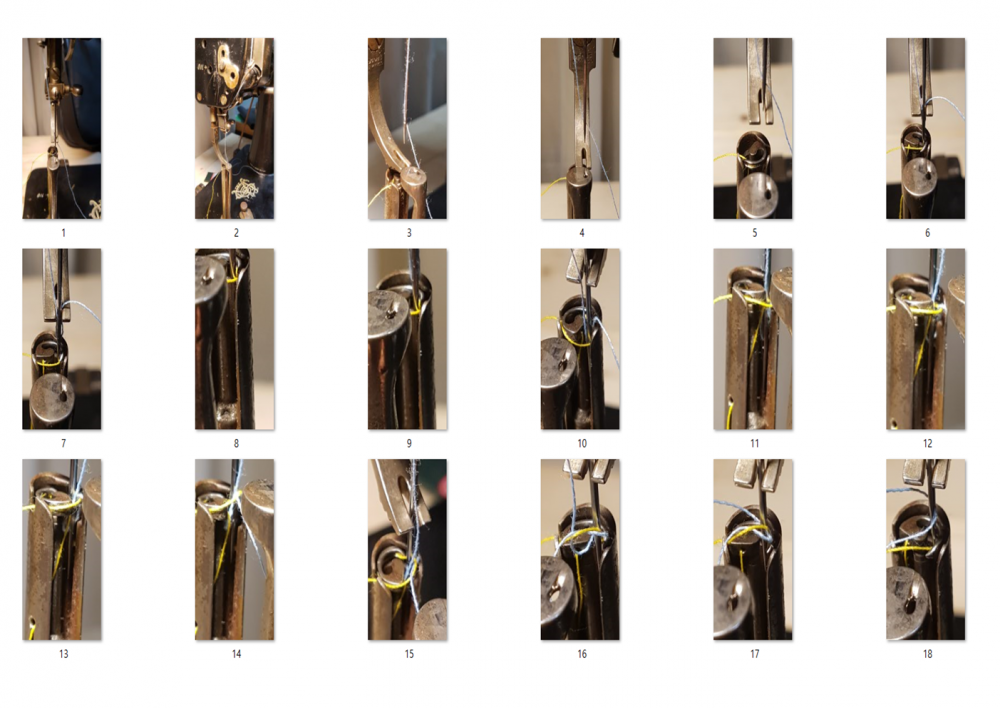
The photos from #13 are photos taken with the thread slightly pulled upwards.
Seeing that the upper thread clumps at the bottom, something is wrong, but I don't know where it is.
-
On 2021. 11. 17. at 오전 11시 24분, RockyAussie said:사진을 보여주세요. 상단 장력이 더 필요하거나 어떤 이유로 아래가 너무 조일 수 있습니다.
-
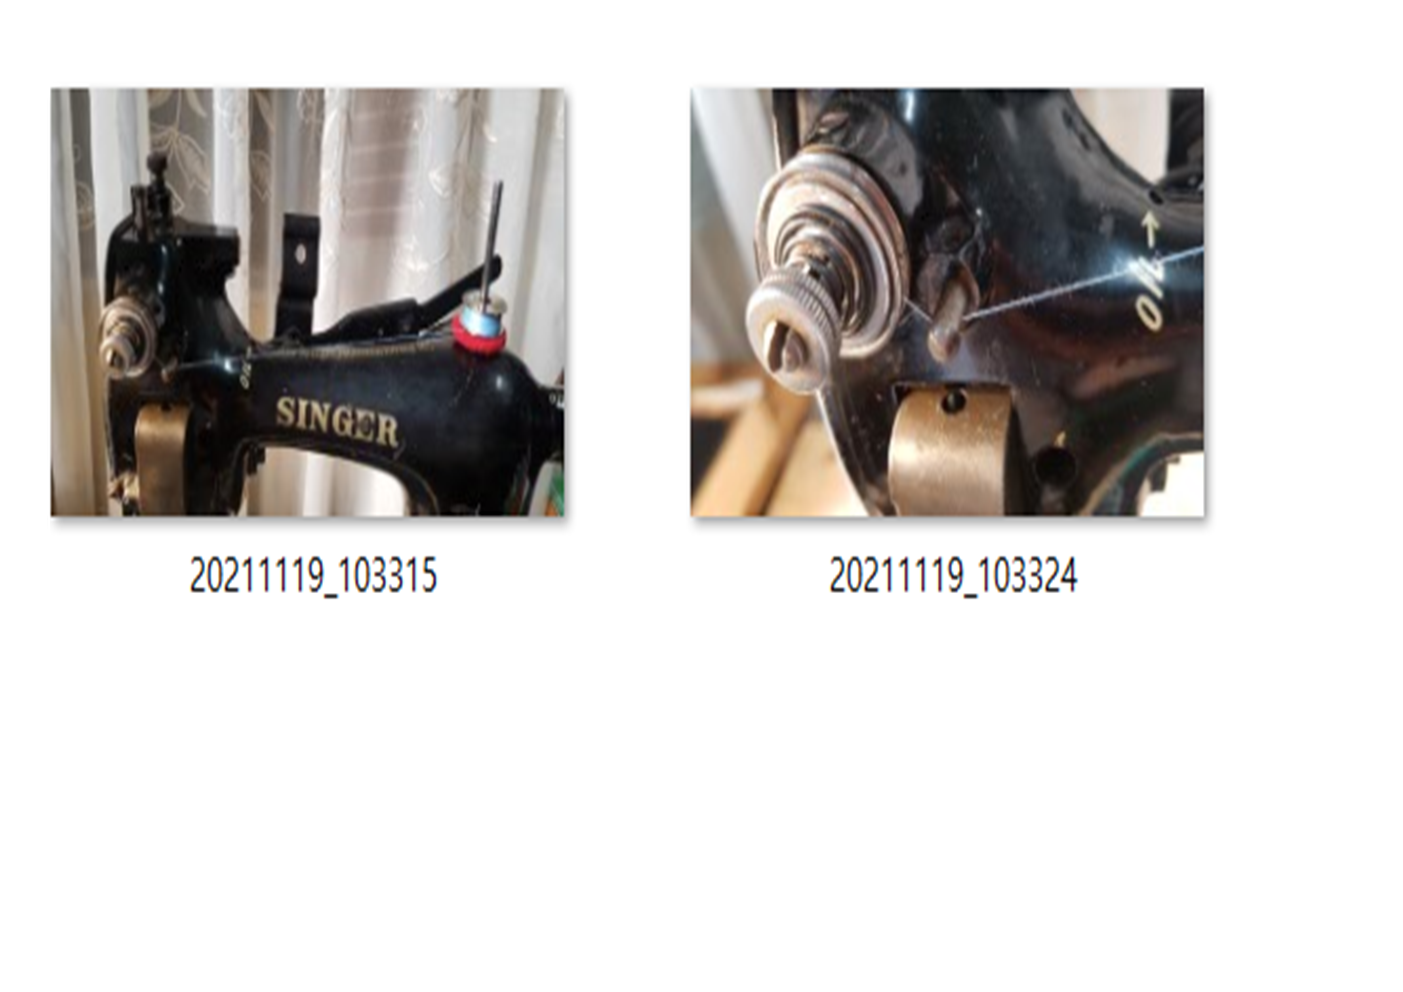
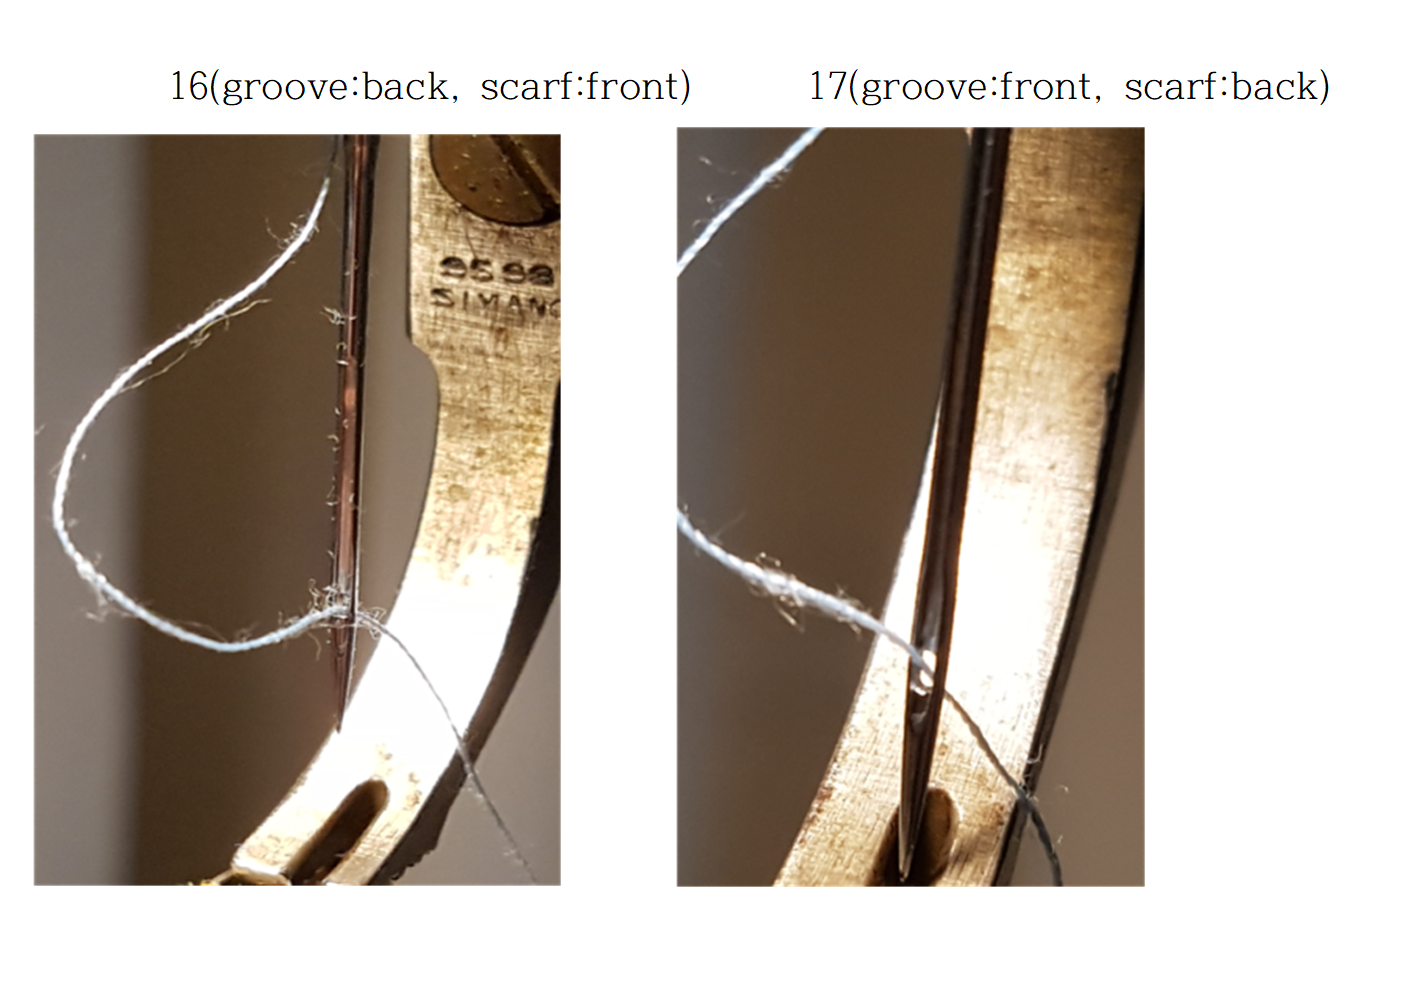
59 minutes ago, Wizcrafts said:- 스카프가 후크를 향하도록 바늘이 정렬되지 않았습니다. 고리의 끝이 어디인지 확인하고 스카프가 바늘을 향하도록 합니다.
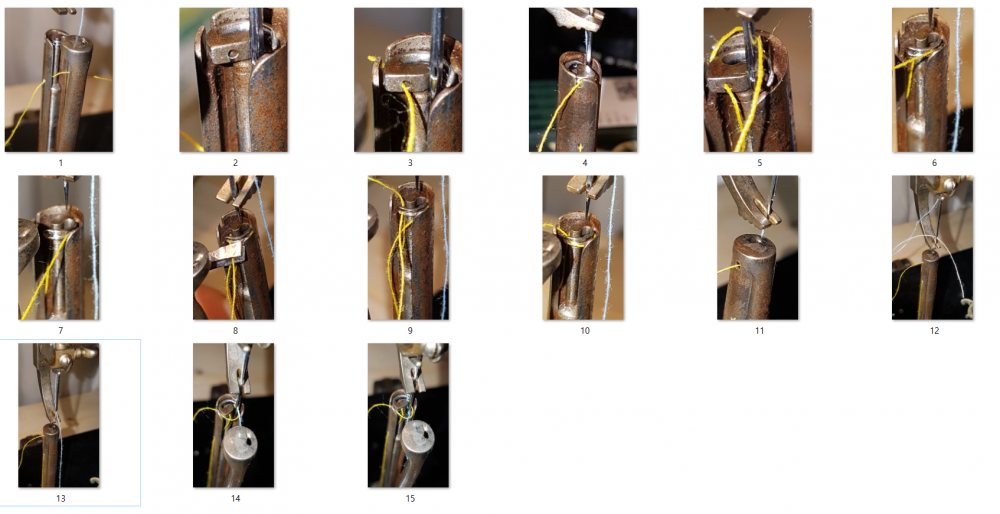
Let's check them one by one.
Today, I accidentally changed my mind and changed the position of the needle.
I put the needle so that the scarf is on the right side so that the thread goes from left to right.
Then, it becomes sewing, but the upper thread clumps toward the lower thread.
(For 91k5,6, the needle must be inserted so that the groove is on the left and the scarf is on the right. Is that correct?)
Maybe the timing isn't right.
Let's do it slowly, one by one, as described. -
There is no manual, and I have no idea why sewing is not working. This is a special glove sewing machine. Even if you look at the YouTube video, the video is blurry and you can't tell because it doesn't come out properly.
-
7 hours ago, RockyAussie said:이 기계는 저도 모릅니다. 당신이 보지 못했을 수도 있는 이 비디오는 비슷한 유형으로 보이며 그 아래의 댓글 섹션에서 그들이 사용하는 바늘 유형에 대해 누군가에게 답변했습니다. 그들에게 연락할 수도 있습니다.
기계 상단의 실 경로를 보여주는 사진을 찍을 수 있다면 도움이 될 것입니다. 또한 타이밍이 맞지 않을 수도 있으며 일반적으로 후크가 바늘을 통과할 때 바늘의 스카프가 있는 위치를 보면 알 수 있습니다. 바늘의 눈은 바늘이 바늘을 통과하는 위치보다 1~2mm 아래에 있어야 합니다. 그렇지 않은 경우 후크를 조정해야 합니다. 사진의 후크가 많이 닳아 보입니다.
I haven't sewn it yet.
A little later....
Let's test by adjusting the height of the needle bar slightly, or by adjusting the height of the needle slightly. -
1시간 전 RockyAussie는 다음과 같이 말했습니다.단서라고 생각합니다. 이전에 질문이 시샤하는 바가. 11에서 훌쩍 훌쩍 훌쩍 훌쩍 훌쩍 훌쩍 훌쩍 훌쩍 훌쩍 훌쩍 훌쩍 훌쩍 훌쩍 훌쩍 훌쩍 훌쩍 훌쩍 훌쩍 훌쩍 훌쩍 훌쩍 훌쩍 훌쩍 훌쩍 훌쩍 훌쩍 훌쩍 훌쩍 넘게 달려 가게되는 11 번 째 궁에서 훌쩍 훌쩍 훌쩍 훌쩍 훌쩍 넘어가는 훌쩍 훌쩍 훌쩍 훌쩍 훌훌훌훌훌훌훌훌훌훌훌훌훌훌훌훌훌훌훌훌훌훌훌훌훌훌훌훌훌훌훌훌훌훌훌훌훌훌훌훌훌훌훌훌훌 훌훌훌훌훌훌훌훌훌훌훌훌훌훌훌훌. 그림 12에서 당신이 보고 있다는 사실을 알려줍니다. 것입니다. XXXXXX
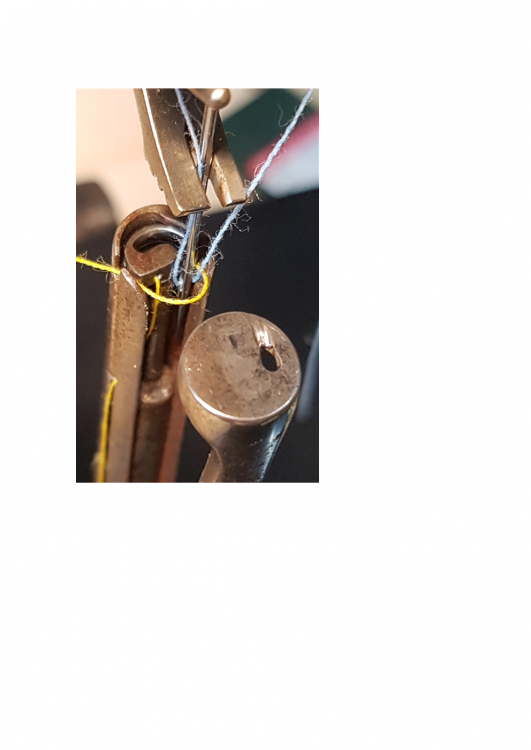
Number 17 is the scarf at the back.
You say to connect the thread like number 17 in the photo.
But even if I connect it like No. 17 and lower the presser foot and sew it, it is not sewing at all.
-
다시 순서대로 놓습니다. 무슨 일인지 알려주세요
-
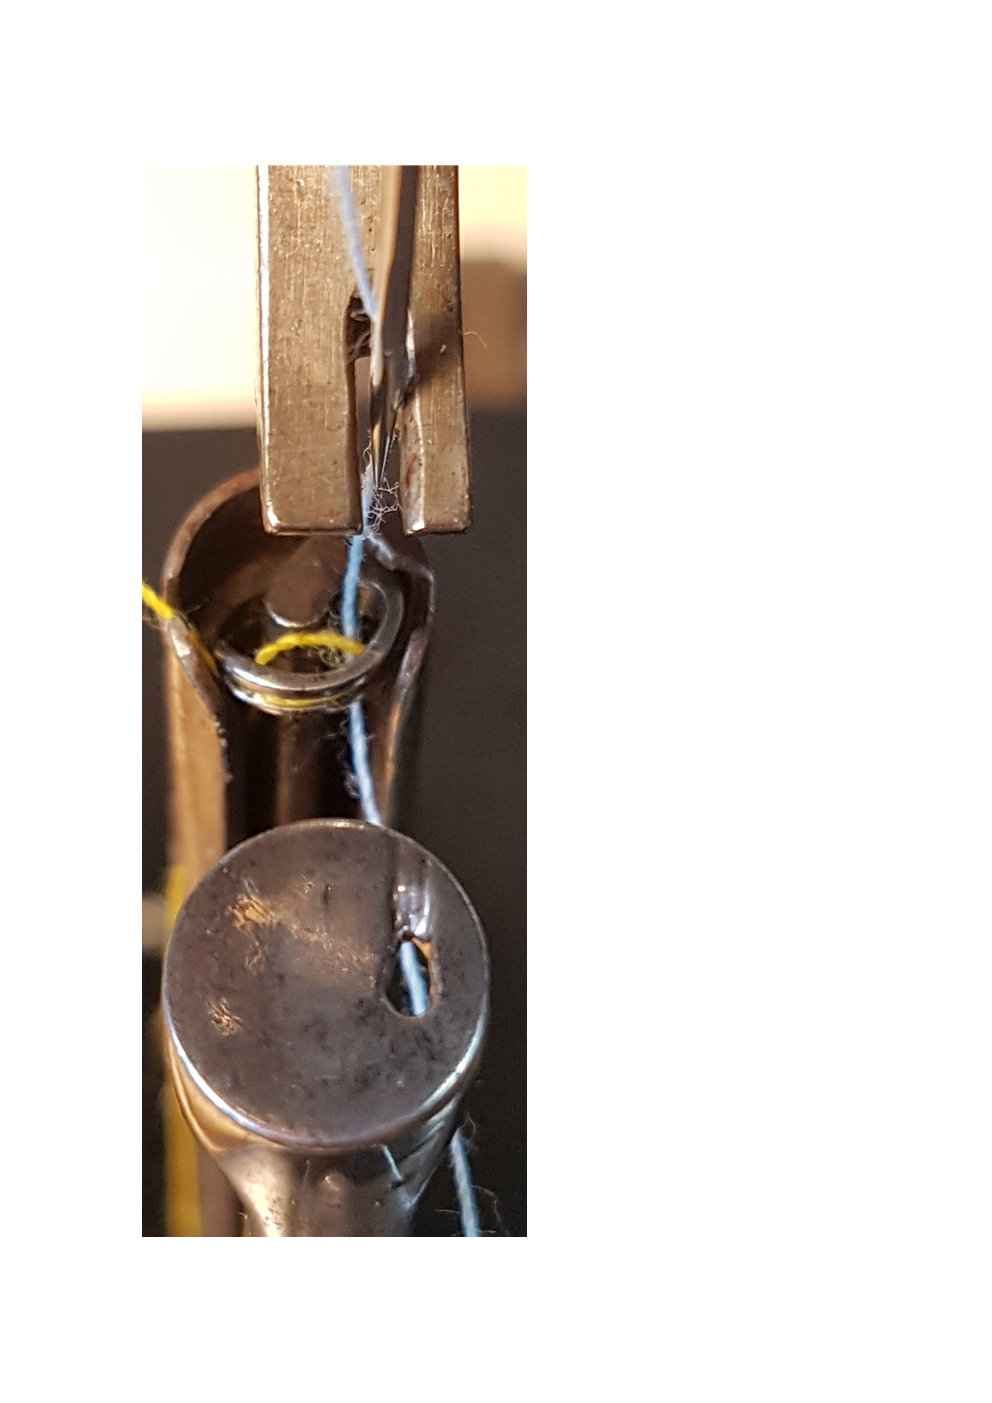
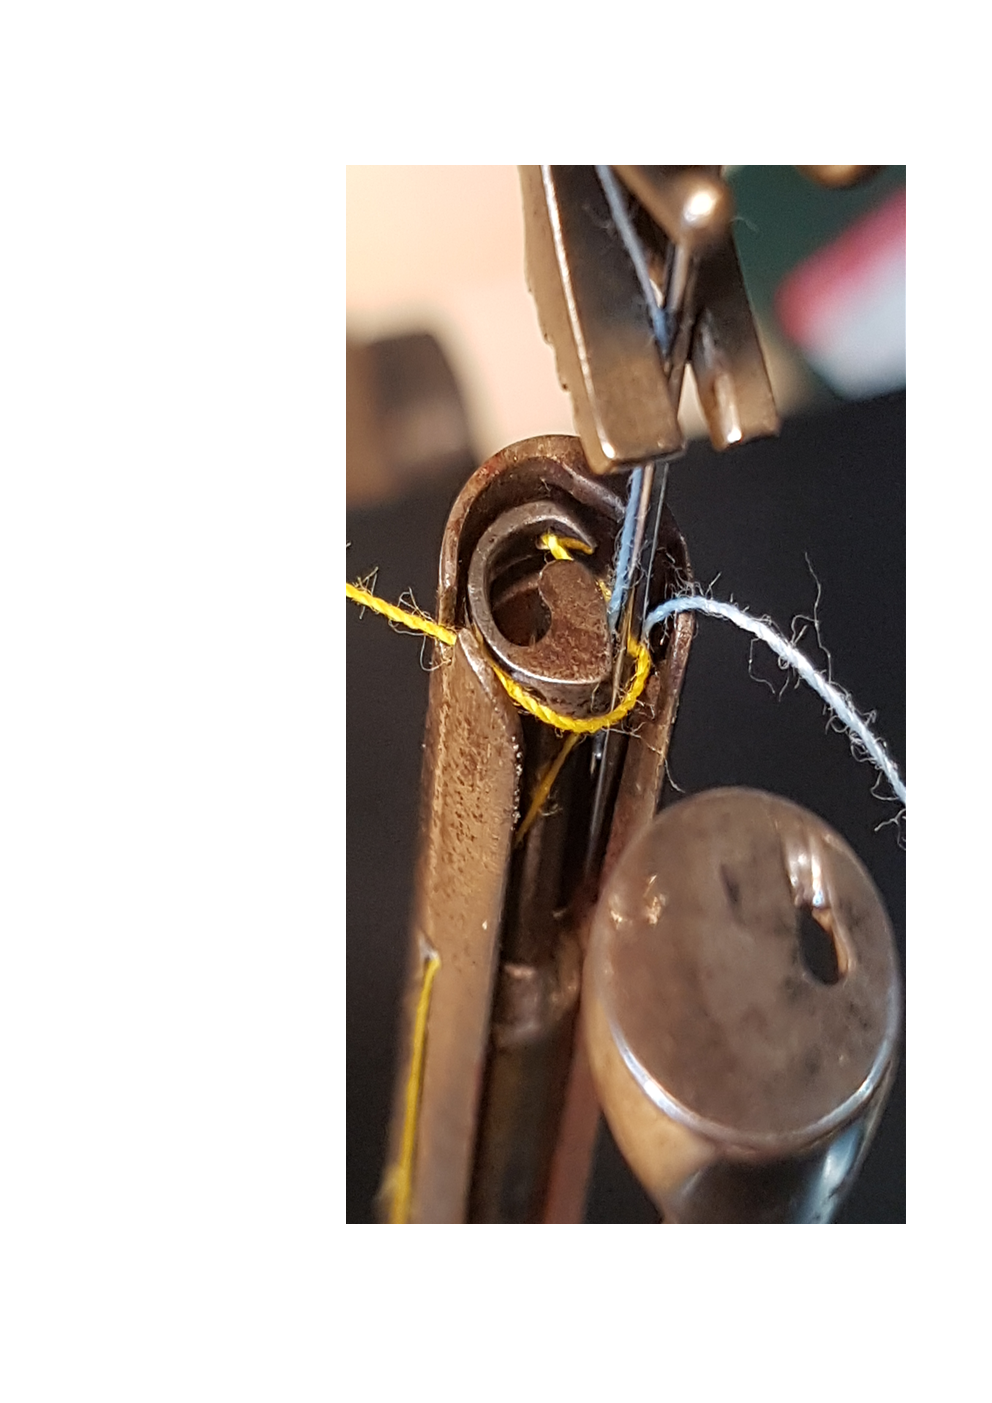
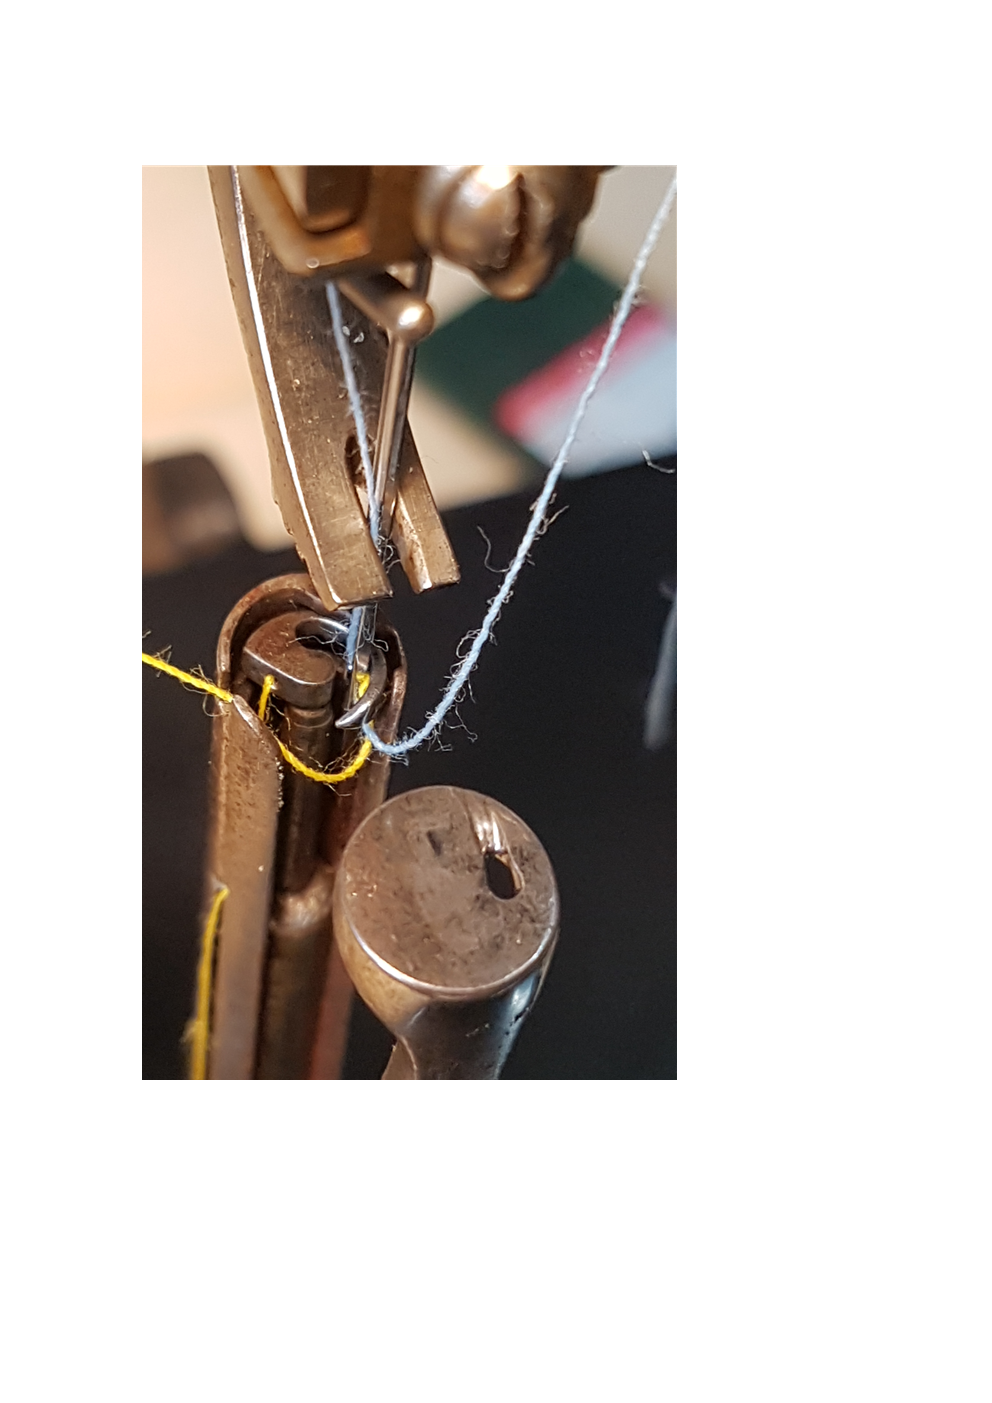
1 hour ago, Wizcrafts said:실채기를 통해 실을 통과시키는 것에 대해 언급한 적이 없습니다. 그 레버는 밑실을 당기는 것입니다.
포스트 위에서 아래로 스레드 경로의 작은 해상도 사진을 찍을 수 있습니까? 우리는 당신이 놓친 것을 볼 수 있습니다. 그러나 나는 당신이 테이크업 레버를 통과하는 것을 잊었다고 확신합니다.
The thread is connected to the lower bar.
I wrote down the numbers in order.
Please tell me what's wrong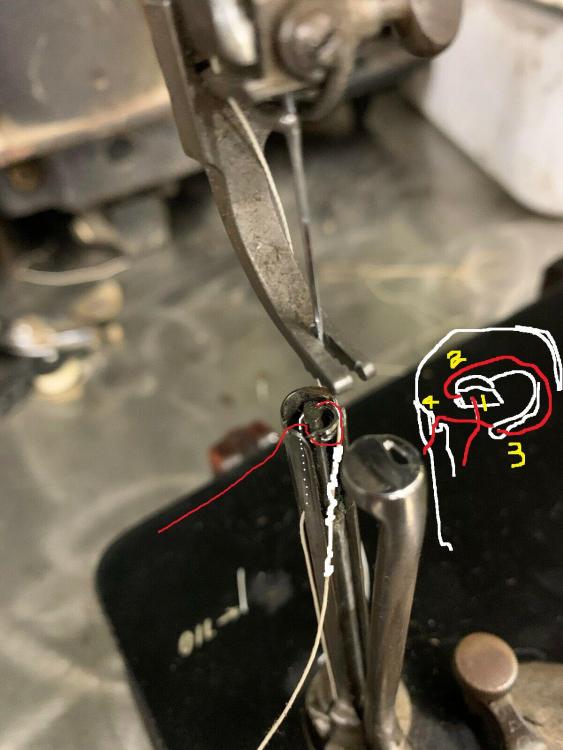
-
The thread is connected to the lower bar.
I wrote down the numbers in order.
Please tell me what's wrong
-
Hello.
This time, I got the Singer sewing machine 91k6.
The question is I don't know how to connect the threads.
First, I connected the thread to the lower post. (I don't know if I connected it properly.)
Then I connected the thread to the upper needle bar. (When viewed from the front, the thread came out from the back to the front.)
And when I sew, only the upper thread is sewn and the lower thread is not pulled up at all.
what kind of problem...
If anyone knows how to connect the threads, please let me know. -
On 2018. 3. 20. at 오전 12시 19분, humanshoes said:모두들 안녕. 여기 누가 내 Singer 91K5 장갑 재봉틀용 루퍼(부품 번호 95967)를 어디에서 구입할 수 있는지 알고 있습니까? 불가능한 퀘스트인 건 알지만 어쨌든 여기서 던지고 싶다는 생각이 들었다. 감사 해요!
Can you please tell me how to connect the thin sewing machine 91k6 thread.
-
On 2017. 7. 11. at 오전 12시 50분, Yetibelle said:나는 그것들 중 몇 개를 가지고 있지 않습니다. 오늘 밤 집에 갈 때 부품 번호를 확인하겠습니다.
Do you have a 45k56 feed, presser foot and throat plate?
-
2021. 4. 18. 오전 7시 9분에 InTheMist님이 말했습니다.전 세계적으로 알고 있던 NewBerry 뜨개질 518 355 1630에서 배송 중 파손된 Singer 91K6을 알게 되었습니다. 주소는 1420 Curry Rd. 스케넥터디, NY 12306.
글렌 밀러(Glenn Miller) 하키 글러브 리스토어러가 나에게 브리드.
Can I get the looper part number 95967?
-
On 2021. 9. 19. at 오후 10시 3분, Cumberland Highpower said:Uwe 사진과 테스트 적합에 감사드립니다. 내가 작업하고 있는 몇 가지 이상한 응용 프로그램이 있고 이것은 좋은 도움이 됩니다. 또한 귀하로부터 내 Adler 205-64용 바닥판을 받았고 제가 필요로 하는 것처럼 보입니다. 감사합니다.
Can you tell me which presser foot is compatible with the 45k presser foot?
-
Please let me know if there are any parts I can buy for the 45k56.
And do you still have the oil box?


How to connect thread to 91k5, 91k6
in Leather Sewing Machines
Posted · Report reply
Is the needle you mentioned a 46*1 replacement needle?