jcwoman
Members-
Posts
37 -
Joined
-
Last visited
Content Type
Profiles
Forums
Events
Blogs
Gallery
Store
Everything posted by jcwoman
-
Need help or a clear video for setting line 16 glove snaps
jcwoman replied to jcwoman's topic in How Do I Do That?
Ah, I figured it out, thanks to another post here. There's some kind of magic about setting that half on the backside of a metal anvil. The other post said that makes the bottom part spread out so that they lock together. Not just any flat surface will do, apparently! -
Need help or a clear video for setting line 16 glove snaps
jcwoman replied to jcwoman's topic in How Do I Do That?
Okay, I got the cap pair set nicely but when I tried to set the other half, they wouldn't clamp together firmly. It seems like the shorter post just deformed a little. What is supposed to happen to make those two snap together firmly? I tapped them with about the same light force as the cap pair. Do I need to hit them harder to make the longer post smash into the shorter post and lock? -
Need help or a clear video for setting line 16 glove snaps
jcwoman replied to jcwoman's topic in How Do I Do That?
Ah, thank you, I wasn't sure. I bought them from buckleguy and they didn't use that name. I did look at this video but wish they'd zoomed in just a bit more. It's hard to see exactly how the one piece fits inside the cap without just breaking the cap. I'll re-watch it and experiment and come back if I still have questions. -
I tried to google for this and watched some youtube videos but I'm a bit frustrated because they all seem to be out of focus, don't zoom in enough for me to see which part fits which other part, etc. I found a video by Tandy that might be good except that it's all low-contrast brown leather on brown work surface. I just can't see enough detail to be able to know which of the four snap pieces goes with the other piece. I've also been fiddling a bit and can't figure it out on my own. I use rivets a lot and know how to set line 20 snaps - and I know those are different, but I just add it to say that I do have some of the basic skills. Can someone point me to a decent tutorial? Edited to add a picture of what I have. The cap is pretty obvious, but I can't tell which of the other three is supposed to fit into the cap. If I can figure that out, then maybe I can figure out the rest. I'm using snap setters for line 16 snaps.
-
Nice! That will work!
-
Yeah, they're small. I work on 1/2" wide straps, so the letters are about the right size for that. Not as ornamental as stamps commonly used for belts and such. I make straps for dog muzzles and special-purpose collars (they hold the muzzle on, for smart dogs that figure out how to slip the muzzle strap over their heads). It's the collars that I'm thinking of stamping, to personalize them a bit.
-
Thanks all! I'm going to look for some more videos showing these techniques.
-
So I know I can paint them and I can use antique.... but I'm wondering what is the best method to make a stamped name on a leather strip more visible and pretty. I got a set of letter/number stamps as a gift last month. I tested it and it works great, but I'll use it for sellable products so I want to make sure the letters are visible and attractive. The letters are just slightly taller than 1/4". I don't think I have the dexterity to hand paint them and "stay within the lines", so a better method might be something that I can wipe over the whole strap and then polish away the parts outside of the letter imprint. I usually dye the straps black, but for this i can go with brown or whatever, because I know you can't easily put a lighter color over the top of black. What would you guys recommend?
-
What size punch or what tool would you use for this?
jcwoman replied to jcwoman's topic in How Do I Do That?
I think my main lesson from all of this is that my sharpening skills need to improve, which isn't outrageous given that I'm new at it. Practice makes perfect! But also, I'm going to buy another punch, a bit larger. Either 3mm or 4mm size, and the style that Chuck pictured above. It looks like those have a better taper to begin with. -
What size punch or what tool would you use for this?
jcwoman replied to jcwoman's topic in How Do I Do That?
Okay, thanks, that's super helpful! -
What size punch or what tool would you use for this?
jcwoman replied to jcwoman's topic in How Do I Do That?
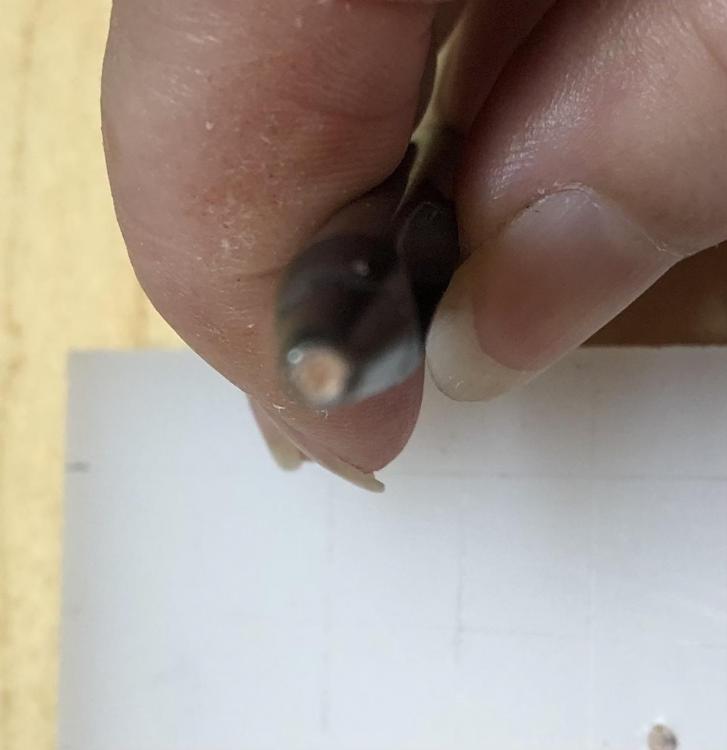
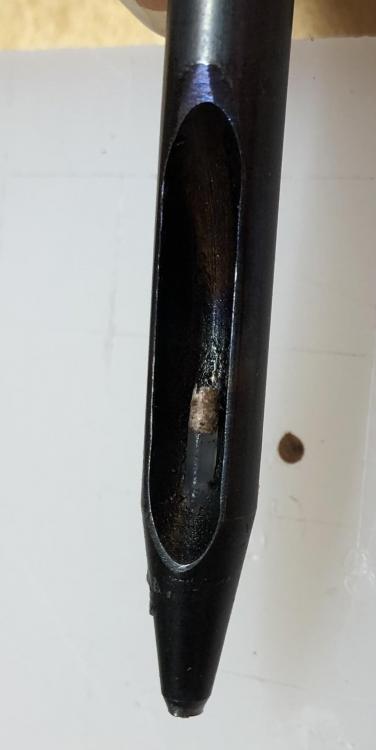
You're not wrong, but... this is a second punch that I bought after thinking the first one was cheap/soft/bad. I can absolutely buy a third one, but I'm starting to think it's my attempt at sharpening that's the problem, so I think I should fix that first. So to sharpen it, I chuck it into the drill and hold sandpaper over the tip while I run the drill. The outside edge looks better after that, but after a few punches the edge rolls over again. Maybe that's normal and you have to clear the plugs and re-sharpen it after every 4 or so holes? Really, my issue is that I'm spending more time unplugging and sharpening than doing actual strapwork. While fixing the edge this time after you guys called that out, I used a magnifying glass to examine it. That works fine, but I sure wish there was a way to see if the inside is roughened up to cause the jams. I can hold it up to my shop light and see the light through it but I need a third hand with a really good magnifying glass to really see the inside surface. -
What size punch or what tool would you use for this?
jcwoman replied to jcwoman's topic in How Do I Do That?
Ohh, I see what you mean. Yeah, could be my shitty attempt at sharpening it. I'll address that. -
What size punch or what tool would you use for this?
jcwoman replied to jcwoman's topic in How Do I Do That?
I know, that's what's making me crazy. I must be doing something wrong, or not sharpening the punch correctly or something! Trying to figure it out. I've also punched against an old retired kitchen cutting board (wood). It has lots of little circles all over it now. Since I am new at this, maybe I just haven't found the knack for it yet. Things seemed okay at first, then went downhill. -
What size punch or what tool would you use for this?
jcwoman replied to jcwoman's topic in How Do I Do That?
I claim newbieness... can you put an arrow or circle around the bit you're talking about? -
What size punch or what tool would you use for this?
jcwoman replied to jcwoman's topic in How Do I Do That?
Oh, I was just re-reading this and it caught my eye. You don't find that 4mm holes are too big for a 1/2" wide strip? Maybe my problem will go away if I use a bigger gauge punch. Or at least it would be easier to clear. -
What size punch or what tool would you use for this?
jcwoman replied to jcwoman's topic in How Do I Do That?
The only reason I'm fussing with the punch getting impacted is because it stops it from actually punching holes. Just compresses circles into the leather instead. And I was using a tiny wire brad with my mallet to clear it but sometimes had to dig the leather out and that dulled the edge of the punch. If I tried to ignore it for 6 or 7 punches to see if it works itself out, it actually gets so impacted that I can't pound it out with the mallet and brad... gotta dig a few layers out. I have not yet tried the burning technique, so I guess I could do that. I'm punching against a polyurethane punch board, and the leather is dry. The procedure I was doing was this, but I could do the oiling first if that is better: 1. measure, cut lengths and punch holes 2. oil strips 3. dye strips 4. rivet parts together -
What size punch or what tool would you use for this?
jcwoman replied to jcwoman's topic in How Do I Do That?
Oh, of course! I'm an idiot, sorry. I know at some point we were talking about chucking a punch into the drill, but for some reason that just evaporated out of my brain. So, I tried that. It worked great... for a couple holes. Then the punch impacted with leather again. I even punched it into my wax block in between every two leather punches. I'm about as finished trying this as you guys are likely tired of hearing from me. I guess I need to find someone to coach me in person to see what I'm doing wrong, and then maybe just do all the straps for me. -
What size punch or what tool would you use for this?
jcwoman replied to jcwoman's topic in How Do I Do That?
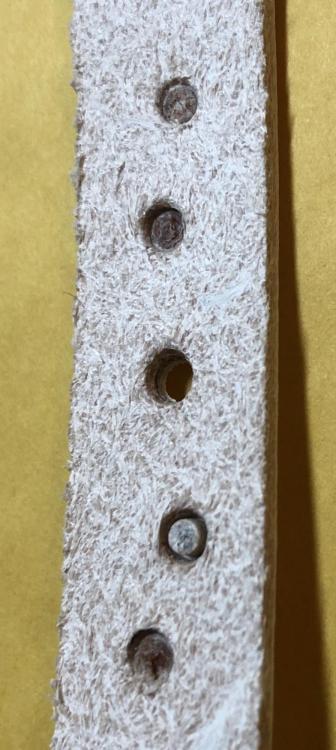
I hope you guys don't mind me coming back to add on to this thread some more! Still trying to find my solution. Over the weekend I thought I'd try an experiment with a hand drill before I spent money on a drill press. It didn't go well at all. The holes ended up looking chewed. We tried it high speed, low speed, and two layers of leather, all bad. Here's a picture. So unless a drill press will have a much better result than a hand held drill, that leaves me with the arbor press and die solution, which I'm going to research a bit more into now. Couple questions about custom dies: if they need to be sharpened from time to time, how do you do that? Are they less inclined to clog with the leather bits because they're much shallower than a punch? Or would I still have to dig the leather plugs out of them? -
What size punch or what tool would you use for this?
jcwoman replied to jcwoman's topic in How Do I Do That?
So I was browsing arbor presses and they seemed similar to something I've already bought. I have this: https://www.amazon.com/gp/product/B08C4WWKN6/ref=ppx_od_dt_b_asin_title_s00?ie=UTF8&psc=1 It doesn't have the pressure rating of an arbor press, but seems to work very much the same. Do you think it would work with a cutting die? If not, that's fine. I'm still just weighing my options. -
What size punch or what tool would you use for this?
jcwoman replied to jcwoman's topic in How Do I Do That?
I have a couple of retired racing greyhounds. My second pair, actually. The darned things are addictive as heck. I don't really do anything with them other than keep them as beloved pets, but I adore them to the end of the earth. What do you have? Galgos? I used to volunteer for galgo rescue for a couple years. (I see that you're in France, so that's a possibility, although these days there are a lot of galgos in the USA also.) I know this, is off topic.... is there a DM function here that things like this should go to? -
What size punch or what tool would you use for this?
jcwoman replied to jcwoman's topic in How Do I Do That?
So many good bits of info and advice! Thanks all, let me digest this and check out your recommendations for a bit, then come back with more questions maybe. -
What size punch or what tool would you use for this?
jcwoman replied to jcwoman's topic in How Do I Do That?
Oh, Klara I just noticed your interests include sighthounds. Me too!! So I'm going to spend a few days researching drill presses. I don't want cheap junk but don't need anything overkill for my purposes either. I'm going to mount it to my bench which is in our house, so I'll never use it for woodworking or any other messy or super-loud uses. -
What size punch or what tool would you use for this?
jcwoman replied to jcwoman's topic in How Do I Do That?
Oh, I just found another great video by Weaver. I think his drill press is larger than what I need, but I love the demonstration of it! -
What size punch or what tool would you use for this?
jcwoman replied to jcwoman's topic in How Do I Do That?
Hmm, okay so my issue is that I am using hole punches in the size that matches the buckle prong. It happens to be tiny, 2mm punches. I've complained in other threads and don't want to beat a dead horse, but I've been struggling with the punches in that diameter getting impacted after 4 or 5 punches and not clearing themselves like they should. I've tried cheap punches, Osborne punches, a rotary punch, waxing the punches, a tiny dab of oil inside the punch... nothing is working. If I ignore the fact that the plugs aren't coming out the clearance hole of the punch and keep going, what I see is that the punch just either makes a round compression on the strap instead of a hole, or if I hammer it hard enough it actually jams the latest plug into my board. (I've been alternating between a nylon board and a wooden cutting board to try not to dull the punches.). It's something else to pick leather plugs out of my board with my fingernail! It's been more work getting the punches cleared than actually making holes in my straps. I love Chuck's idea. Just trying to visualize it so I can assemble/make the setup for my bench. -
What size punch or what tool would you use for this?
jcwoman replied to jcwoman's topic in How Do I Do That?
Okay, I think I understand.... trying to visualize that. Do you happen to know of any videos or pictures online where someone has that setup?


