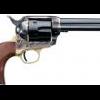
Members FiftySix Posted May 28, 2010 Author Members Report Posted May 28, 2010 For a quicker draw, I will make it a shade bigger next time (like an 1/8"), but for fit and retention, it worked well. I went with the Stohlman pattern. Once cut I folded the sides together and then used rubber bands to hold the shape so I could test fit the 45. It's tight - very tight. For grins I tried my Ruger 22 as well. On the smaller gun there was plenty of room (maybe too much). Next time I think I'll go with your suggestion and give the sides an extra 1/8" for the 45 off the Stohlman pattern - I think that would be just right. I may need to add a filler to the trigger area on this one to create a bit more room. Quote Just an old cowboy who likes to ride iron horses...
Contributing Member rdb Posted May 28, 2010 Contributing Member Report Posted May 28, 2010 yep, that's pretty much what i found...glad i helped Quote Web page Facebook
Members FiftySix Posted May 28, 2010 Author Members Report Posted May 28, 2010 . . . and his "secret" is to always cut em a little big, . . . you can always cut em down he says, . . . I'm thinking this is the ticket... Thanks! Quote Just an old cowboy who likes to ride iron horses...
Members TexasJack Posted May 28, 2010 Members Report Posted May 28, 2010 Listen, get Chuck Burrows' holster making DVD. It's worth every penny. His technique allows you to make the holster to fit the gun. (His sheath making video is even better!) Quote
Members WillGhormley Posted May 28, 2010 Members Report Posted May 28, 2010 For what it's worth... I make all my patterns to fit the specific pistol. I use a series of minimum measurements to make sure the gun fits in a holster constructed of 9-10 oz. leather. You can make it larger without any problem, but it starts gettin' tight if you go much smaller than these standard measurements. Now, I like a holster that fits a gun tight enough it's still in the holster when you need it. I don't mind yankin' that baby out, I just hate checkin' my back-trail looking for iron. For instance, for a Colt 1873, (or clone thereof), I lay the pistol down on the folded paper just as mentioned before and trace it. Then, I add 5/8" around the trigger guard, 1" around the frame and ejector housing, and even down the barrel, (though you can start to fudge a little on the barrel, don't get under 3/4"). If the holster is goin to get a toe-plug, I allow 1/4" at the end. If it is goin' to be a sewn, round toe, I allow 3/4" at the lowest portion of the curve. If I'm addin' a lining, I generally ad 1/4" to every measurement, except for a toe-plug. The lining doesn't add enough thickness to change that measurement. With those basic measurements as my, "not tighter than this" guide, I give the holster the contours I want to see after that. Works every time for me. Will Quote Exploit your Strengths, Compensate for your Weaknesses!
Members FiftySix Posted May 29, 2010 Author Members Report Posted May 29, 2010 For what it's worth...Coming from what I consider to be an expert, it's worth a lot! Thank you! Those guidelines will come in mighty handy on the next cut out. BTW - I've got your Cartridge Belts pattern set waiting for me to finish the holsters. I'm liking the Ranger style for this project... Quote Just an old cowboy who likes to ride iron horses...
Members WillGhormley Posted May 29, 2010 Members Report Posted May 29, 2010 Yeah, the Ranger Belt has a lot to offer in style. It's probably my favorite all-'round belt. Oh, on the holster measurements, those are for traditional holsters without any welts or whatnot. Will Quote Exploit your Strengths, Compensate for your Weaknesses!


Recommended Posts
Join the conversation
You can post now and register later. If you have an account, sign in now to post with your account.
Note: Your post will require moderator approval before it will be visible.