Members Nuttish Posted November 2, 2013 Author Members Report Posted November 2, 2013 "Maker" in a black letter typeface. I like. Very nice maker's mark. What do you mean that's how you get them to look? Is that what it looks like when you use a stitching wheel? I've never used one. I can't draw a straight line on a piece of paper. I'm sure as shit not trying on a $20 piece of leather that I can't replace this month. Quote
Members keableleather Posted November 2, 2013 Members Report Posted November 2, 2013 What do you mean that's how you get them to look? Is that what it looks like when you use a stitching wheel? Thanks for the makers comment, and yes mate that is an impression from what you called a stitching wheel, usually referred to as an over-stitch wheel and is also used after stitching to pressure down & tidy up your stitching.....if you want to stitch beautifully and quick then stick to the basics and practice and then some more practice. But the easy way to get your lines very straight is to use as (NVLeatherworx) pointed out, use a grooving tool to scribe your line and undercut a nice groove along the edge, this tool guides as straight as the edge of your leather is and makes a perfect groove to the distance you set it from your edge. That's gives you your stitch line, then dampen (case) the leather and use the over-stitch wheel, place it in the groove taking note of where you want to start your first stitch and then just slowly rock back and forth with firm downward pressure, continue to track along your groove at a pace that suits you.... take care and be patient, you need to go over and over until your desired depth is acquired and the result is what you seen in the image i posted, ready for the awl. (practice on some scrap veg tan and if you don't have any than I'll send you some for nothing if you cover the postage) Next it is important to use a sharp awl and angle the point (the diamond shape) at 45 degrees to your stitch line and then just allow the point to slip into each stitch groove depression the wheel has made and ensure you are at 90 degrees to the face of your leather and then push down.....but get yourself a chunk of old conveyor belt rubber or some type of thick stiff rubber to push into, glue it to a bit of timber also another good tip is to use a chunk of bees wax as the backing to stab through the leather and into ...in stead of your fingers....(the bees wax keeps your awl lubricated every stab and makes life real easy) don't ever try to punch/stab an awl through leather into fresh air expecting your fingers/hands to be out of the way!!!! It is so so so much easier and safer to stab into a semi solid backing ... Cheers Jace Quote Keable Leather - Australia Website | FaceBook
Members keableleather Posted November 2, 2013 Members Report Posted November 2, 2013 Nuttish - this is a good video on actually stitching for perfection.. http://youtu.be/Q2lDExF5NbE Quote Keable Leather - Australia Website | FaceBook
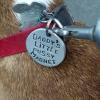
Members keableleather Posted November 2, 2013 Members Report Posted November 2, 2013 Here's my technique on getting a straight line stitch using an edge grooving tool & the Craftool Over-stitch Wheel System Item #8091-00 from Tandy. This tool comes with 3 wheels that are easy to change over , you get 5,6 & 7 TPI. 1 - Set your grooving tool to the desired distance & cut your groove, do several passes to get the depth you require. 2 - Wet your stitch line, position your over-stitch wheel in the groove & keeping a firm pressure move slowly forward and then back, repeat and progressively move along your groove. 3 - The result is a perfect formed straight stitching groove with even indents to take the awl. 4/5 - Take your awl & here i am using bees was to stab the hole at approx 45 degree to the stitch line. Quote Keable Leather - Australia Website | FaceBook
Members Nuttish Posted November 4, 2013 Author Members Report Posted November 4, 2013 Hi Keable - thanks for the link. This is helpful. It's always good to hear someone discuss needle priority and casting the thread. It seems to me that the author is probably using a pricking iron in his groove. Same as I'm attempting, but I take your point that grooving makes things a lot easier to line up. The 7-8 re-tanned pull up leather I'm using won't groove and it's very soft, so I might actually use a dull scratch awl and get a slightly deeper and wider mark to prick. In other words, your advice is helpful to show me that I'm making lining up and opening my holes way too hard on myself. My pricking iron and thread are too fine for some of my work and dividing my scribed line is my main challenge. When using it I also see that my stitching awl is a big wide so I'm occasionally exceeding the edges of my pricking iron impressions. I need to take a longer stitching awl to a stone to narrow it up so I can't open my pricked marks too wide. Nigel Armitage is just really really good at this. Thank you. Quote


Recommended Posts
Join the conversation
You can post now and register later. If you have an account, sign in now to post with your account.
Note: Your post will require moderator approval before it will be visible.