Members RiverCity Posted January 18, 2014 Members Report Posted January 18, 2014 Does anybody have any tricks for marking veg tan for a reference line etc that can be removed/erased. I've tried light scribing and rubbing it out, but that sometimes still leaves marks. I've tried different kinds of tape, then there's residue.... I've even thought about a line laser, but haven't gone that route yet. So any tips or tricks that I haven't thought of yet? Chuck Quote
Chief31794 Posted January 18, 2014 Report Posted January 18, 2014 (edited) A picture or example of what you're trying to do would help to determine a solution. Any mark however light will probably have an effect on the leather, there are no perfectly erasable lines. The best way is to only use lines that will be eradicated by the stamping or tooling. in the examples below, I always layout on dry leather, then I case it after the marks are on. The reason for that is that even with cork backed tools cased leather is very easy to "mark" by sliding the rule, touching inadvertently with a tool, etc. So I'll list a couple of scenarios. 1. Aligning lettering. I use a T-Square with a cork bottom, I put it against the side of a wallet for example, layout my letters on the slab touching, then measure them to determine the true center of the set, I then start stamping the letters from the center out to each end. Two reasons for that, the letters will be perfectly aligned and centered and there is less deviation from the center to each end than there would be if you started at one end and progressively stamped to the other. One note, make sure the spelling doesn't get mixed up. 2. To lay out a border, say with a veiner. I used to scribe a very light line in order to keep the veiner aligned, I learned a better method years ago. I use a pair of dividers instead. First I make three impressions of the veiner spaced end-to-end in a piece of scrap leather. I then set my dividers so that one leg is on the beginning of the first impression and the other divider point is on the beginning of the second impression. This allows me to set the veiner on the first mark (which will be under the stamp and cannot be seen) and align it up to the side of the second mark. I then use my T-Square again, align it on the edge, determine the starting point and make a small mark with the divider then use the ruler on the T-Square (I normally set the marks on the veiner I use most often to 1/4" from the edge) and keep moving it and aligning the next mark against the 1/4" (for example) mark on the ruler. This gives me a very straight line of veiner impressions exactly 1/4" from the edge all along the item (I do this a lot on Instrument Straps guitar, dobro, banjo, mandolin). On the straps I do, I want the line of veiners aligned with each other so I turn the strap around and use a scratch awl and the T-square, I move the T-Square to the first mark on the far side of the strap and then make a small dot aligned on the T-Square at the 1/4" mark in my example. 3. To do basketweave, I scribe a line lightly and that line is "removed" by the stamp as I tool the beginning line alignment after that is with the tool itself on the existing impressions, so there will be no remaining alignment marks. Hope this helps some, Chief Edited January 18, 2014 by Chief31794 Quote "Life's too short to carry ugly leather"
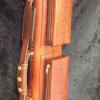
Members RiverCity Posted January 19, 2014 Author Members Report Posted January 19, 2014 I'm thinking the wing dividers along a straight edge is what I'm looking for! If you look real close you can see my reference line. Especially when I use an antique paste. I do a lot of linear stamping with veiners and border tools etc. Some stamps cover the line of course, but veiners, especially when you do a line down the middle of something won't. I'm usually pretty good about running a very light line, but as my eyesight goes, the line needs to be more visible.....lol I'm thinking marking the end points with dividers down the line will work perfect, thanks Chief! Chuck Quote


Recommended Posts
Join the conversation
You can post now and register later. If you have an account, sign in now to post with your account.
Note: Your post will require moderator approval before it will be visible.