mlapaglia Posted December 6, 2011 Report Posted December 6, 2011 I tried the search but didn't find what I was looking for. I remember seeing a thing about cartridge loops that showed 3 ways to do them. Sewn on the belt. Pulled through a slot and pulled through a slot where the leather for the loop was taller on the part behind the slot. Anyone remember where that might be? I dont know if it was in a book or on a site some where. I thought it was on this site but I cant find it. Help please if anyone remembers. Thanks Michael Quote The key to immortality is first living a life worth remembering. Bruce Lee
Members Kcinnick Posted December 7, 2011 Members Report Posted December 7, 2011 (edited) Bianchi shows how to sew loops in his DVD's. They cost about $50. I haven't coughed up the money for them yet, but they are on my to buy list. Cas City has some pictures of the different stages of bullet loops also, I don't know if there is a full blown tutorial, but you can get the process from looking at the different pictures. Edited December 7, 2011 by Kcinnick Quote
Contributing Member TwinOaks Posted December 7, 2011 Contributing Member Report Posted December 7, 2011 There's this one: http://leatherworker...=1 And this one: http://leatherworker...=1 but I don't see the third way one a quick search.....but that one is easy- In the first link, Jbird shows how he made a pair of slots for the strap to run through. Another way is to only make 1 slot per bullet, which lets you pull only the loop through....it feeds back on itself. I've found this last way to be pretty fast, but the least attractive (just my opinion) because the loops have very little support and can twist in place, or lay over to the side on the ends. There's more topics listed- search criteria: "bullet loops" ....including the quotes. Quote Mike DeLoach Esse Quam Videri (Be rather than Seem) "Don't learn the tricks of the trade.....Learn the trade." "Teach what you know......Learn what you don't." LEATHER ARTISAN'S DIGITAL GUILD on Facebook.
Members katsass Posted December 7, 2011 Members Report Posted December 7, 2011 (edited) I tried the search but didn't find what I was looking for. I remember seeing a thing about cartridge loops that showed 3 ways to do them. Sewn on the belt. Pulled through a slot and pulled through a slot where the leather for the loop was taller on the part behind the slot. Anyone remember where that might be? I dont know if it was in a book or on a site some where. I thought it was on this site but I cant find it. Help please if anyone remembers. Thanks Michael FWIW from the grump; I don't stitch my loops, I use the second method you describe, AND, don't know what the hell you are talking about on the third. I use a GOOD 3/4" bag punch to make the cut-out for each loop --- 3/4" apart. Run the loop leather (4/5 oz) up, make a loop, and back through the same hole --- on to the next. Mike A sample --- These are .44 mag. Edited December 7, 2011 by katsass Quote NOTE TO SELF: Never try to hold a cat and an operating Dust buster at the same time!! At my age I find that I can live without sex..........but not without my glasses. Being old has an advantage.......nobody expects me to do anything in a hurry.
mlapaglia Posted December 7, 2011 Author Report Posted December 7, 2011 (edited) FWIW from the grump; I don't stitch my loops, I use the second method you describe, AND, don't know what the hell you are talking about on the third. I use a GOOD 3/4" bag punch to make the cut-out for each loop --- 3/4" apart. Run the loop leather (4/5 oz) up, make a loop, and back through the same hole --- on to the next. Mike A sample --- These are .44 mag. You are about to see why I failed 1st grade art class. Please do not assume perspective is correct not aspect ratio. The top image is the actual leather that holds the cartridges against the belt. They are set up one slot per side of loop. 3 slots would support 2 cartridges etc. The second image is the belt with the cartridges leather installed. the dotted lines are a bad representation of the leather behind the slot. There are no stitches except on the ends of the leather cartridge belt. The purpose of the extra leather is to better support the cartridge opening. If I remember correctly. All 3 of these examples were on the same book, post, video what ever it was. This assumes that my drawing was at all understandable. Michael added: I did more thinking about this and remembered that the areas of the cartridge leather that went behind the belt was cut to spread out on a little. I made a quick example that might help. This is the back side of the belt using this process I am trying to remember. Edited December 7, 2011 by mlapaglia Quote The key to immortality is first living a life worth remembering. Bruce Lee
Contributing Member TwinOaks Posted December 7, 2011 Contributing Member Report Posted December 7, 2011 And leave it up to the other Mike to immediately post a pic of a beautiful example of the way I like least........ Mike, do you ever have issues with the loops leaning or twisting? Now I'm wondering if perhaps I just did something wrong. Perhaps my loop leather was a bit too thin, as the first and last loops in the line kind of "fell over" towards the belt. Quote Mike DeLoach Esse Quam Videri (Be rather than Seem) "Don't learn the tricks of the trade.....Learn the trade." "Teach what you know......Learn what you don't." LEATHER ARTISAN'S DIGITAL GUILD on Facebook.
Members katsass Posted December 7, 2011 Members Report Posted December 7, 2011 (edited) And leave it up to the other Mike to immediately post a pic of a beautiful example of the way I like least........ Mike, do you ever have issues with the loops leaning or twisting? Now I'm wondering if perhaps I just did something wrong. Perhaps my loop leather was a bit too thin, as the first and last loops in the line kind of "fell over" towards the belt. For Twin Oaks; frankly, I have never had a comeback on any of these I've done. I guess that the trick (if there is one) is to be sure that when pulling that wet strip through to make your loop, you pull it straight. You can 'walk' it some to get it where you want, but you need it to have even tension on the top and bottom of the loop around the cartridge, AND going on to the next one. Also you have to be careful not to pull so hard as to narrow the 3/4" strip. I use 4/5 oz for my loops, wet down well , but not so wet as to have it wet noodle like, and work fairly quickly as it tend to loose moisture the longer the strip is worked. Seems like they have been doing it this way for over 100 years --- and samples are still intact. Mike P.S. For mlapaglia; I still don't know what the hell you are talking about --- never seen anything similar, BUT I don't proclaim to be an "EXPERT" --- an 'EX', a has-been combined with a "SPURT", a drip under pressure. Mike P.P.S. You can see why I don't stitch those beggars, waaaay too time consuming. It would take me as long, or longer to hand stitch each loop in place as it did to hand stitch the whole damned rig Edited December 7, 2011 by katsass Quote NOTE TO SELF: Never try to hold a cat and an operating Dust buster at the same time!! At my age I find that I can live without sex..........but not without my glasses. Being old has an advantage.......nobody expects me to do anything in a hurry.
Members leatherjunkie Posted December 7, 2011 Members Report Posted December 7, 2011 i use 4-5oz 3/4 wide for bullet loops. punch 5/8 slot and weave my bullet loop(dry) through the slot around the bullet and back through same hole. never had a problem with loops laying over or twisting in place. i use 5/8 bag punch so you dont see the slots after the loops are made. i saw the slots after loops were made when i used 3/4 bag punch. 3/4 wide loops work great for me for pistol rounds. on rifle rounds i would use 1" wide for the loops. Quote keep it in the 10 range or at least hit the steel.
mlapaglia Posted December 7, 2011 Author Report Posted December 7, 2011 (edited) I called Kevin at Springfield leather (God I love those people) and he remembers what I was trying to say. We talked about it and I am going to make up a small example with pictures so it will be clearer. At least I know I am not nuts about this method. It is done with a single slot per loop and the extra leather at the top and bottom is at the space between the bullets behind the belt. supposed to keep the loops tighter and not mess up them all if one gets pushed in a little. Ill be back with the example. Keven also said if he remembers where he saw it he will let me know. I found an example. Its for shotgun shells and not the one I was looking for but its the same principle. this post http://leatherworker.net/forum/index.php?showtopic=15872&view=findpost&p=112971 and the one below it show the basic process. You push the loop through from the back so you are not lacing all the thick parts each time you do another loop. Anyone remember seeing this process before?? Thanks Michael Edited December 7, 2011 by mlapaglia Quote The key to immortality is first living a life worth remembering. Bruce Lee
mlapaglia Posted December 7, 2011 Author Report Posted December 7, 2011 Ok, I threw one together and I mean threw it together. It's rough but its a proof of concept. I colored the tabs on the bullet leather red on the back to make them easy to see. From what I remember they can be glued down and the loops wont slip back in if pushed. The distance between tabs, the actual loop, is a little short and since it was just a quick test its not really straight. But this is the method I was talking about. Needless to say I have enough information to use it now. I think that if its done well and correctly it would work on an unlined belt and look fine. Questions, comments, snide remarks? (the concept, not the crappy way it was thrown together.) Thanks Michael Quote The key to immortality is first living a life worth remembering. Bruce Lee
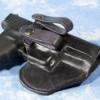
Members katsass Posted December 8, 2011 Members Report Posted December 8, 2011 (edited) Ok, I threw one together and I mean threw it together. It's rough but its a proof of concept. I colored the tabs on the bullet leather red on the back to make them easy to see. From what I remember they can be glued down and the loops wont slip back in if pushed. The distance between tabs, the actual loop, is a little short and since it was just a quick test its not really straight. But this is the method I was talking about. Needless to say I have enough information to use it now. I think that if its done well and correctly it would work on an unlined belt and look fine. Questions, comments, snide remarks? (the concept, not the crappy way it was thrown together.) Thanks Michael OK Michael; the one thing I see as a possible problem is that for the system to work well is that it requires precision measuring as well as very precision cutting of the position of the 'tabs'. I believe that the tabs are designed to fit exactly between the cartridges. A miss-step in cutting or a measurement will make the loop either too loose or too tight -- as will variations in the thickness of the leather. To me it doesn't seem to provide for any increased security over the simpler method I generally use, as the back side of the cartridge is not seated on solid leather, as is the method I use. JMHO Mike P.S. Here is a pic of a rig I made about 35 years ago -- the back side of the belt can be seen showing the loops. They don't seem to be too objectionable. Mike Edited December 8, 2011 by katsass Quote NOTE TO SELF: Never try to hold a cat and an operating Dust buster at the same time!! At my age I find that I can live without sex..........but not without my glasses. Being old has an advantage.......nobody expects me to do anything in a hurry.
mlapaglia Posted December 8, 2011 Author Report Posted December 8, 2011 OK Michael; the one thing I see as a possible problem is that for the system to work well is that it requires precision measuring as well as very precision cutting of the position of the 'tabs'. I believe that the tabs are designed to fit exactly between the cartridges. A miss-step in cutting or a measurement will make the loop either too loose or too tight -- as will variations in the thickness of the leather. To me it doesn't seem to provide for any increased security over the simpler method I generally use, as the back side of the cartridge is not seated on solid leather, as is the method I use. JMHO Mike P.S. Here is a pic of a rig I made about 35 years ago -- the back side of the belt can be seen showing the loops. They don't seem to be too objectionable. Mike Mike, I totally agree with you. It was just I remembered seeing it and then could not find it anywhere nor could I explain my self enough to make people understand. It was driving me a little nuts. After playing with making it my sample shows all the problems you mention. I also played with a simple weave with a straight cut piece of leather and it lined up and adjusted great. It is a much better way. Thanks. That's a great looking rig. Id like to be half as good as you are someday. The main thing is I am having fun trying. Michael Quote The key to immortality is first living a life worth remembering. Bruce Lee
Members katsass Posted December 8, 2011 Members Report Posted December 8, 2011 (edited) Mike, I totally agree with you. It was just I remembered seeing it and then could not find it anywhere nor could I explain my self enough to make people understand. It was driving me a little nuts. After playing with making it my sample shows all the problems you mention. I also played with a simple weave with a straight cut piece of leather and it lined up and adjusted great. It is a much better way. Thanks. That's a great looking rig. Id like to be half as good as you are someday. The main thing is I am having fun trying. Michael From the old and grumpy guy: Thank you, I do appreciate the compliments, however you may consider that I have been making holsters for quite a few years and the simple odds are that some of them would come out pretty well. I have observed, over time, that one thing seems to be a truth. That is that a lot of shooters (including LEO's) love 'gimmicks', and a lot of the newer holster designs are 'gimmicky' in my eyes. I've seen new designs show up, sell like hotcakes then disappear from the scene. I'm very much a traditionalist in my design and work. I have made some of the newer designs and just a few (IMO) are pretty good. Two that pop out at me are Ray's (Lobo Gunleather) enhanced pancake and avenger styles, while others just don't appear anymore practical than older designs. One of the negative (IMO) design aspects that has appeared is the holster mouth reinforcing. In all my years I have never seen a well made and cared for holster collapse from use. If an empty one hit the floor of the barn and had a couple of 100# sacks of grain, or a couple of bales of hay land on it, it probably would flatten out, but in everyday use --- never. The only positive aspect that I see of the reinforcing is that it provides a palette for enhanced aesthetics by the addition of a contrasting color, or an exotic hide. My advice would be to experiment as much as you want, but keep a grasp on practicality, understand why (and if) the change is actually better than the more traditional. Remember that those traditional designs have stood the test of time, and are still around. Some of the most versatile are the Tom Threeperson style, the Mexican Loop, and the common pouch. With them you can fit damned near all handguns made, and make them suitable for many methods of carry. JMHO Enjoy what to are doing and keep it up. Mike Edited December 8, 2011 by katsass Quote NOTE TO SELF: Never try to hold a cat and an operating Dust buster at the same time!! At my age I find that I can live without sex..........but not without my glasses. Being old has an advantage.......nobody expects me to do anything in a hurry.
Contributing Member TwinOaks Posted December 10, 2011 Contributing Member Report Posted December 10, 2011 Mike, I have to disagree with you about the holster mouth reinforcement....to a degree. Yes, for holsters worn on the belt, the holster is not likely to collapse. I agree with that completely, and do my utter best to build holsters that will stand up to years of use. However, as much of the market now deals with IWB holsters, the mouth band is playing an important part. Correctly fitting pants is one of the biggest issues with the buyers of the IWB holsters - NObody wants to buy a size larger or lose weight to carry concealed. Either is crucial as it accounts for the additional space needed for the weapon (and I HAVE had a customer ask why I wouldn't make a IWB for his Redhawk). The mouth band simply adds a partial second layer to the holster only at the top, allowing the rest of the holster to be of single thickness. I think this adds to the utility of the design as it will give support at the mouth, but not add any additional bulk behind the waist band of the pants. Think of it as a skeleton design.... for one of the layers. Back to OWB / belt holsters; I've lately started making more 2 layer holsters, with grain 'up' on both sides, after seeing your results. Even with lighter weights like 4/5, like you, I've found them to be much stiffer than they'd ever really "need" to be. But for a small portion of the holster market, having that mouth band screams "BUY ME!".....and I wouldn't want to argue with the customers. Quote Mike DeLoach Esse Quam Videri (Be rather than Seem) "Don't learn the tricks of the trade.....Learn the trade." "Teach what you know......Learn what you don't." LEATHER ARTISAN'S DIGITAL GUILD on Facebook.
Members katsass Posted December 10, 2011 Members Report Posted December 10, 2011 (edited) Mike, I have to disagree with you about the holster mouth reinforcement....to a degree. Yes, for holsters worn on the belt, the holster is not likely to collapse. I agree with that completely, and do my utter best to build holsters that will stand up to years of use. However, as much of the market now deals with IWB holsters, the mouth band is playing an important part. Correctly fitting pants is one of the biggest issues with the buyers of the IWB holsters - NObody wants to buy a size larger or lose weight to carry concealed. Either is crucial as it accounts for the additional space needed for the weapon (and I HAVE had a customer ask why I wouldn't make a IWB for his Redhawk). The mouth band simply adds a partial second layer to the holster only at the top, allowing the rest of the holster to be of single thickness. I think this adds to the utility of the design as it will give support at the mouth, but not add any additional bulk behind the waist band of the pants. Think of it as a skeleton design.... for one of the layers. Back to OWB / belt holsters; I've lately started making more 2 layer holsters, with grain 'up' on both sides, after seeing your results. Even with lighter weights like 4/5, like you, I've found them to be much stiffer than they'd ever really "need" to be. But for a small portion of the holster market, having that mouth band screams "BUY ME!".....and I wouldn't want to argue with the customers. Thanks Twin Oaks, I see your point. I actuality I have only built one true IWB holster in the last 15 or so years. That one was a very simple light weight pouch with a single clip for hanging on the belt. It was for a personal friend and retired LEO that was rather rotund, and even with his 'chubbies' the mouth never really collapsed --- squish a little yes, but he still had little problem re-holstering. BUT as you say also --- the customer is (almost) always right. Along those lines, I have made a few IWB (inside the BELT) holsters for off duty and concealed carry for LEO's (mainly). These are not much more than a slightly re-designed standard belt pouch with the exception being that a right-hand model is actually left-hand appearing --- the integral belt loop is on the outside. When worn, if the toe of it seen, it appears to be nothing more than the omnipresent cell phone holster. NOW --- I'll quit there, I don't want to get going on those damned cell phones. I will say that I have one, I pay $20 every 90 days to be able to use it --- I have over $300 in available time accrued from lack of use. Haven't found enough of an emergency to use the damned thing. Mike Edited December 10, 2011 by katsass Quote NOTE TO SELF: Never try to hold a cat and an operating Dust buster at the same time!! At my age I find that I can live without sex..........but not without my glasses. Being old has an advantage.......nobody expects me to do anything in a hurry.


Recommended Posts
Join the conversation
You can post now and register later. If you have an account, sign in now to post with your account.
Note: Your post will require moderator approval before it will be visible.