


friquant
-
Posts
518 -
Joined
-
Last visited
Content Type
Profiles
Forums
Events
Blogs
Gallery
Store
Everything posted by friquant
-
Thread has a finite width. So as each thread leaves the lock (in between layers of fabric) it is off-center. This deviation from straight-line gets more noticeable with large thread, thin material, and short stitch lengths.
-
 First let's see if your machine actually skips any stitches when working with this new fabric.. I would cut some scraps of this new material for practicing, and make them 5 layers thick. (I imagine that's the max number of layers you will see as crossing seams during the topstitch.) Try stitching on them--both straight and in curves. If no skipped stitches yet, mock up some joints like you will have on the seat, stitch them together, and top-stitch. The goal is to encounter the same situations as you will when you're actually doing the seat, without gouging a big piece of fabric. If you do manage to get some skipped stitches, then we'll have something to talk about :
 -
This may help: https://leatherworker.net/forum/topic/101339-problem-with-reverse-stitch-tightness-on-singer-industrial/#findComment-685135
-
Yes lots of good options for motors these days. 🤩
-
@Brandicandi Good move getting it oiled up and moving again! 🏅 Can you post some photos so we can see what kind of machine you have? Additionally, how about a very close-up video of the needle/feed-dog/shuttle area (with the cover removed). For the video, turn the handwheel as slow as you can without stopping or going backwards...that way we can see it as one fluid motion.
-
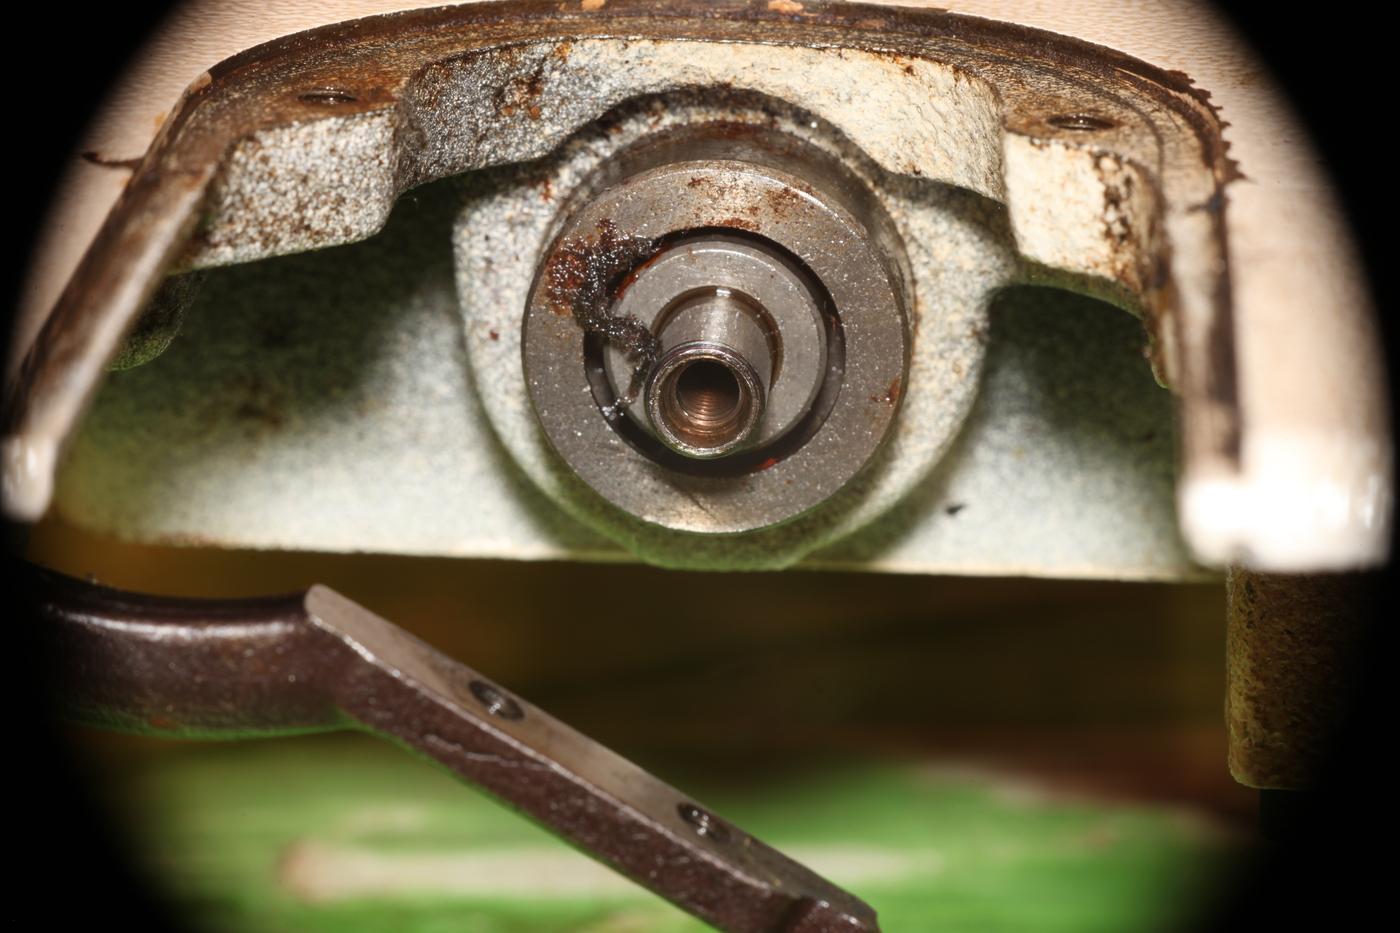
Can a worn case/hook prevent adjustment of case opener lever.
friquant replied to beefy's topic in Leather Sewing Machines
Can you post a very slow, close-up video of the latch area as you move the handwheel by hand? (Keeping the handwheel in a forward snail's pace the whole time---not letting it stop or go backward, that way the thread going round the bobbin is taut the whole time) I'm curious to see the "latch closes too late" business. I remember having that on a machine, but I don't remember which one. -
Replacement Pulley for Tapered Shaft
friquant replied to friquant's topic in Leather Sewing Machines
That's great! Photos? I have seldom had anybody else print my 3d models. -
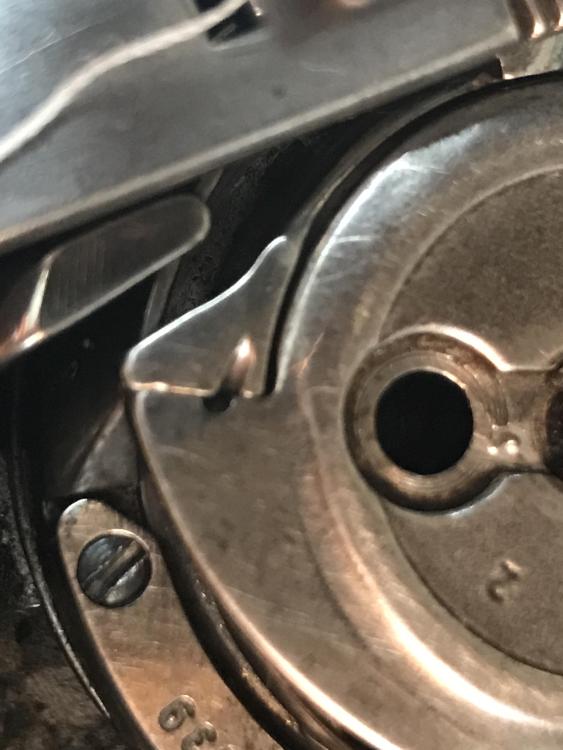
Is this a newly acquired machine? Has the feed dog moved correctly (without play) in the past?
-
Perhaps the off-center hole in the screw is the "arrow". I've seen that on a different machine.
-
Singer 211G156 vs Seiko STW-8B (Consew 226R) for heavier thread.
friquant replied to beefy's topic in Leather Sewing Machines
Go ahead. Buy a couple spools of TEX 270. Try it out on your machines. Experimentation is a great teacher. -
You can do that too. In a different setup I have a 3-phase clutch motor being driven by VFD. Instead of running the motor at full speed (60Hz) I usually run it between 17-25 Hz. This means it's quieter and the pace is easier to manage.
-
See my post here: https://leatherworker.net/forum/topic/131403-my-first-vfd-w-3-phase-ac-gearmotor/ and blog entry here: https://leatherworker.net/forum/blogs/entry/518-option-d-3-phase-ac-gearmotor-with-vfd-variable-frequency-drive/ In the blog you'll see reference from other folks too. (I'm actually using an asynchronous (induction) motor, if I've got my terminology right) It's not actually a resistor...but yes the braking is quite effective. The braking settings on mine are confusing but I did get it to brake less than it used to 😃 Yes mine has maybe five options for ramp up speed. Would be better if the ramp-up was exponential instead of linear, but I'm being picky. Sewing at very slow speeds does not add any more energy to the coils than sewing at high speed. Yes the fan will spin slower, but there is also less heat going into the bearings because they are moving slowly. To even get the motor warm you will have to run it both at a considerable duty cycle and at considerable load. (At low load the motor doesn't slip much, meaning not much inductance, meaning not much heat generation.) When I'm sewing it's typically one minute or less of slow stitching followed by lots of minutes of figuring. My motor never feels warm...always feels room temperature. Adoption The biggest hurdle at the moment for the adoption of VFD is finding an inexpensive source for an AC induction gearmotor.
-
Heel tap functionality is typically done by rotating the lever on the hall sensor the other way. That is, the hall sensor lever is sprung in two directions...one for forward, the other for heel tap.
-
Replacement Pulley for Tapered Shaft
friquant replied to friquant's topic in Leather Sewing Machines
Definitely. Attaching here. The .stl file is probably what you need/want. The .f3d file is my original in Autodesk Fusion 360. The README is notes on printing it. By the way, the material I used is PETG. (It's tougher than PLA, and the creep issues are less than with PLA) pulley.f3d pulley.stl README.txt -
Review of Jianglong 341 after 4 months
friquant replied to friquant's topic in Leather Sewing Machines
That's great! Happy to hear What is your bobbin diameter? Did that hook come with your machine, or did you order it separately? My bobbins are diameter 25.7mm. There is enough take-up lever throw to accommodate a larger hook than mine has. Getting reverse stitch to match the same holes has some challenges on lots of machine. For one, there is no knob to turn...you loosen a screw then make your adjustment then tighten down. So it's hard to get a reliable small change in the direction you want. Beyond that, the feed dogs have a slant to them to optimize forward feeding. We can accommodate this for a particular material, material thickness, thread tension, stitch length, and presser foot tension. But then we change one of those variables and still hope that it matches up the holes in forward/reverse. I bought two binding attachments with the machine. I don't see how to attach them either. One of us could send a message to the Jianglong factory to ask. They usually reply with photos or videos. -
As kgg mentioned, I've tried stitching with a sheet of copy paper under difficult materials. This made the stitching easier, but I had trouble removing all the bits of paper afterward. Perhaps something thinner that would dissolve in the water like tissue paper (the kind people wrap gifts in) or aluminum foil or wax paper or mineral oil or flour and water or cornmeal (ew!) or any of your favorite spices from the kitchen cabinet. Spitballing here, have not tried any of these 🙃
-
You may want to grind it to accommodate your desired thread. Here is a photo of my pfaff 545 when I got it. (note the ill-fitting bobbin case)
-
Juki DDL-8700 Oil Pump System Clogged
friquant replied to friquant's topic in Leather Sewing Machines
Found some reference to what this should oil in the user manual.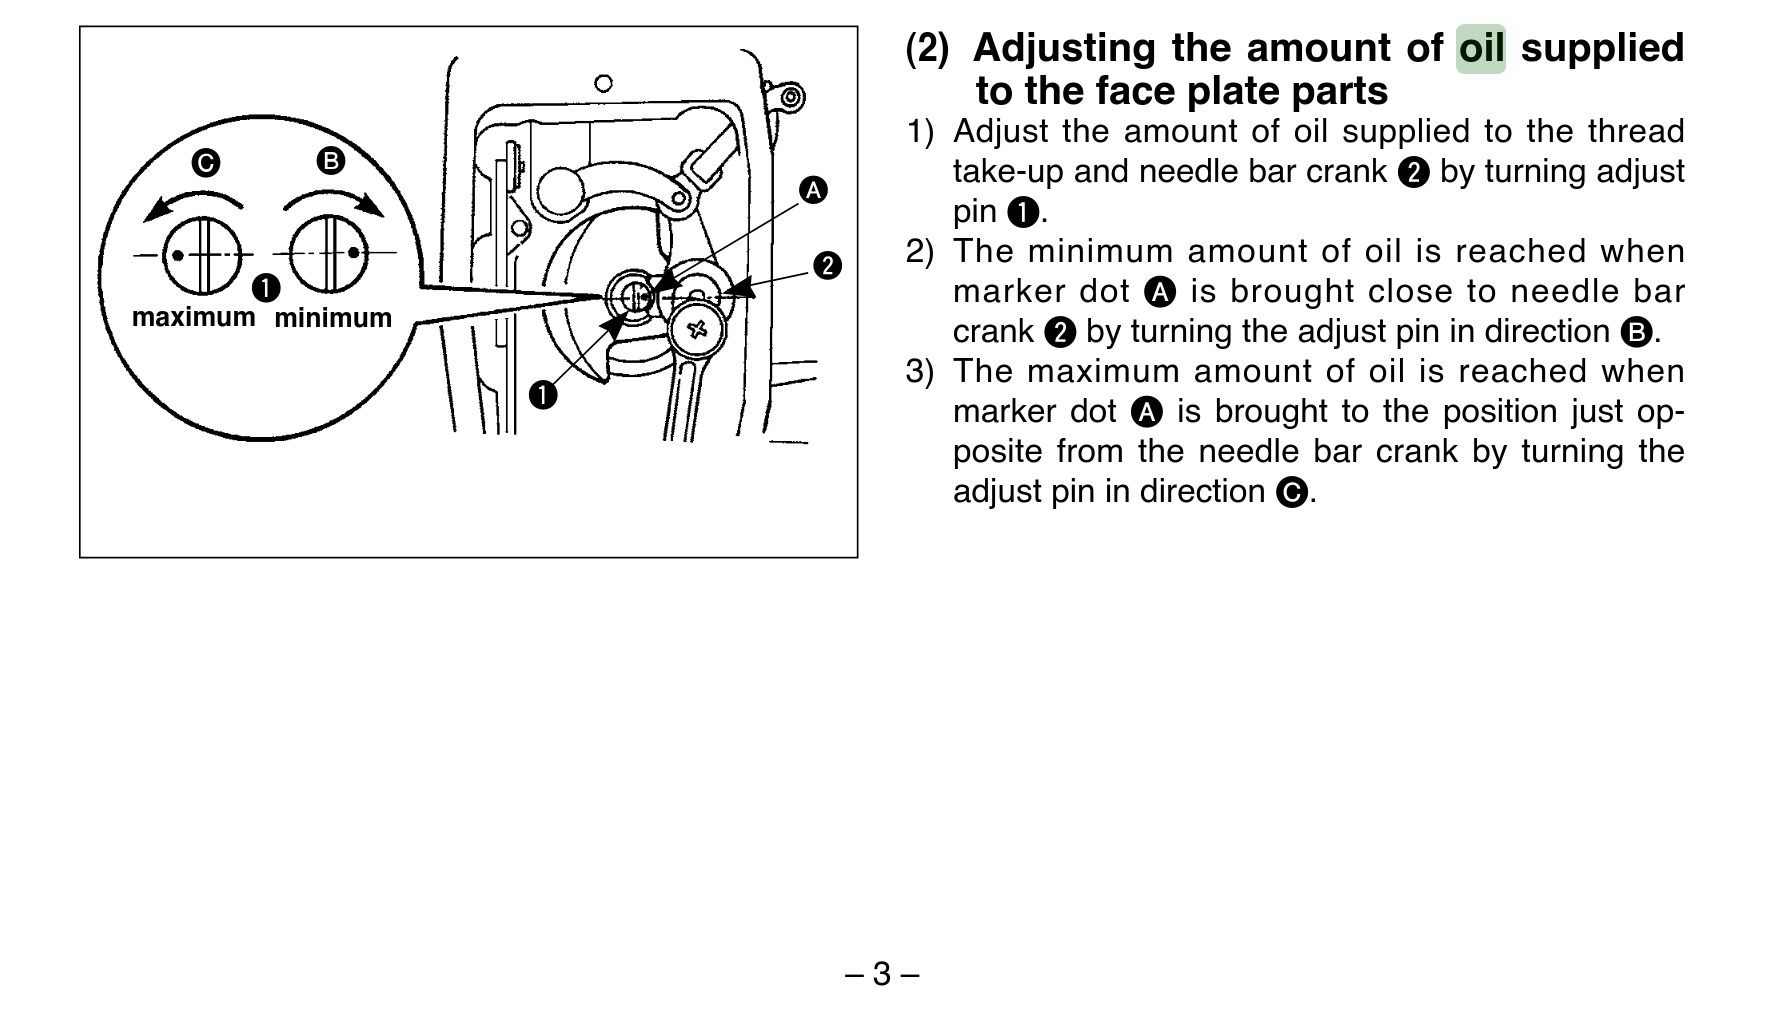
-
Juki DDL-8700 Oil Pump System Clogged
friquant replied to friquant's topic in Leather Sewing Machines
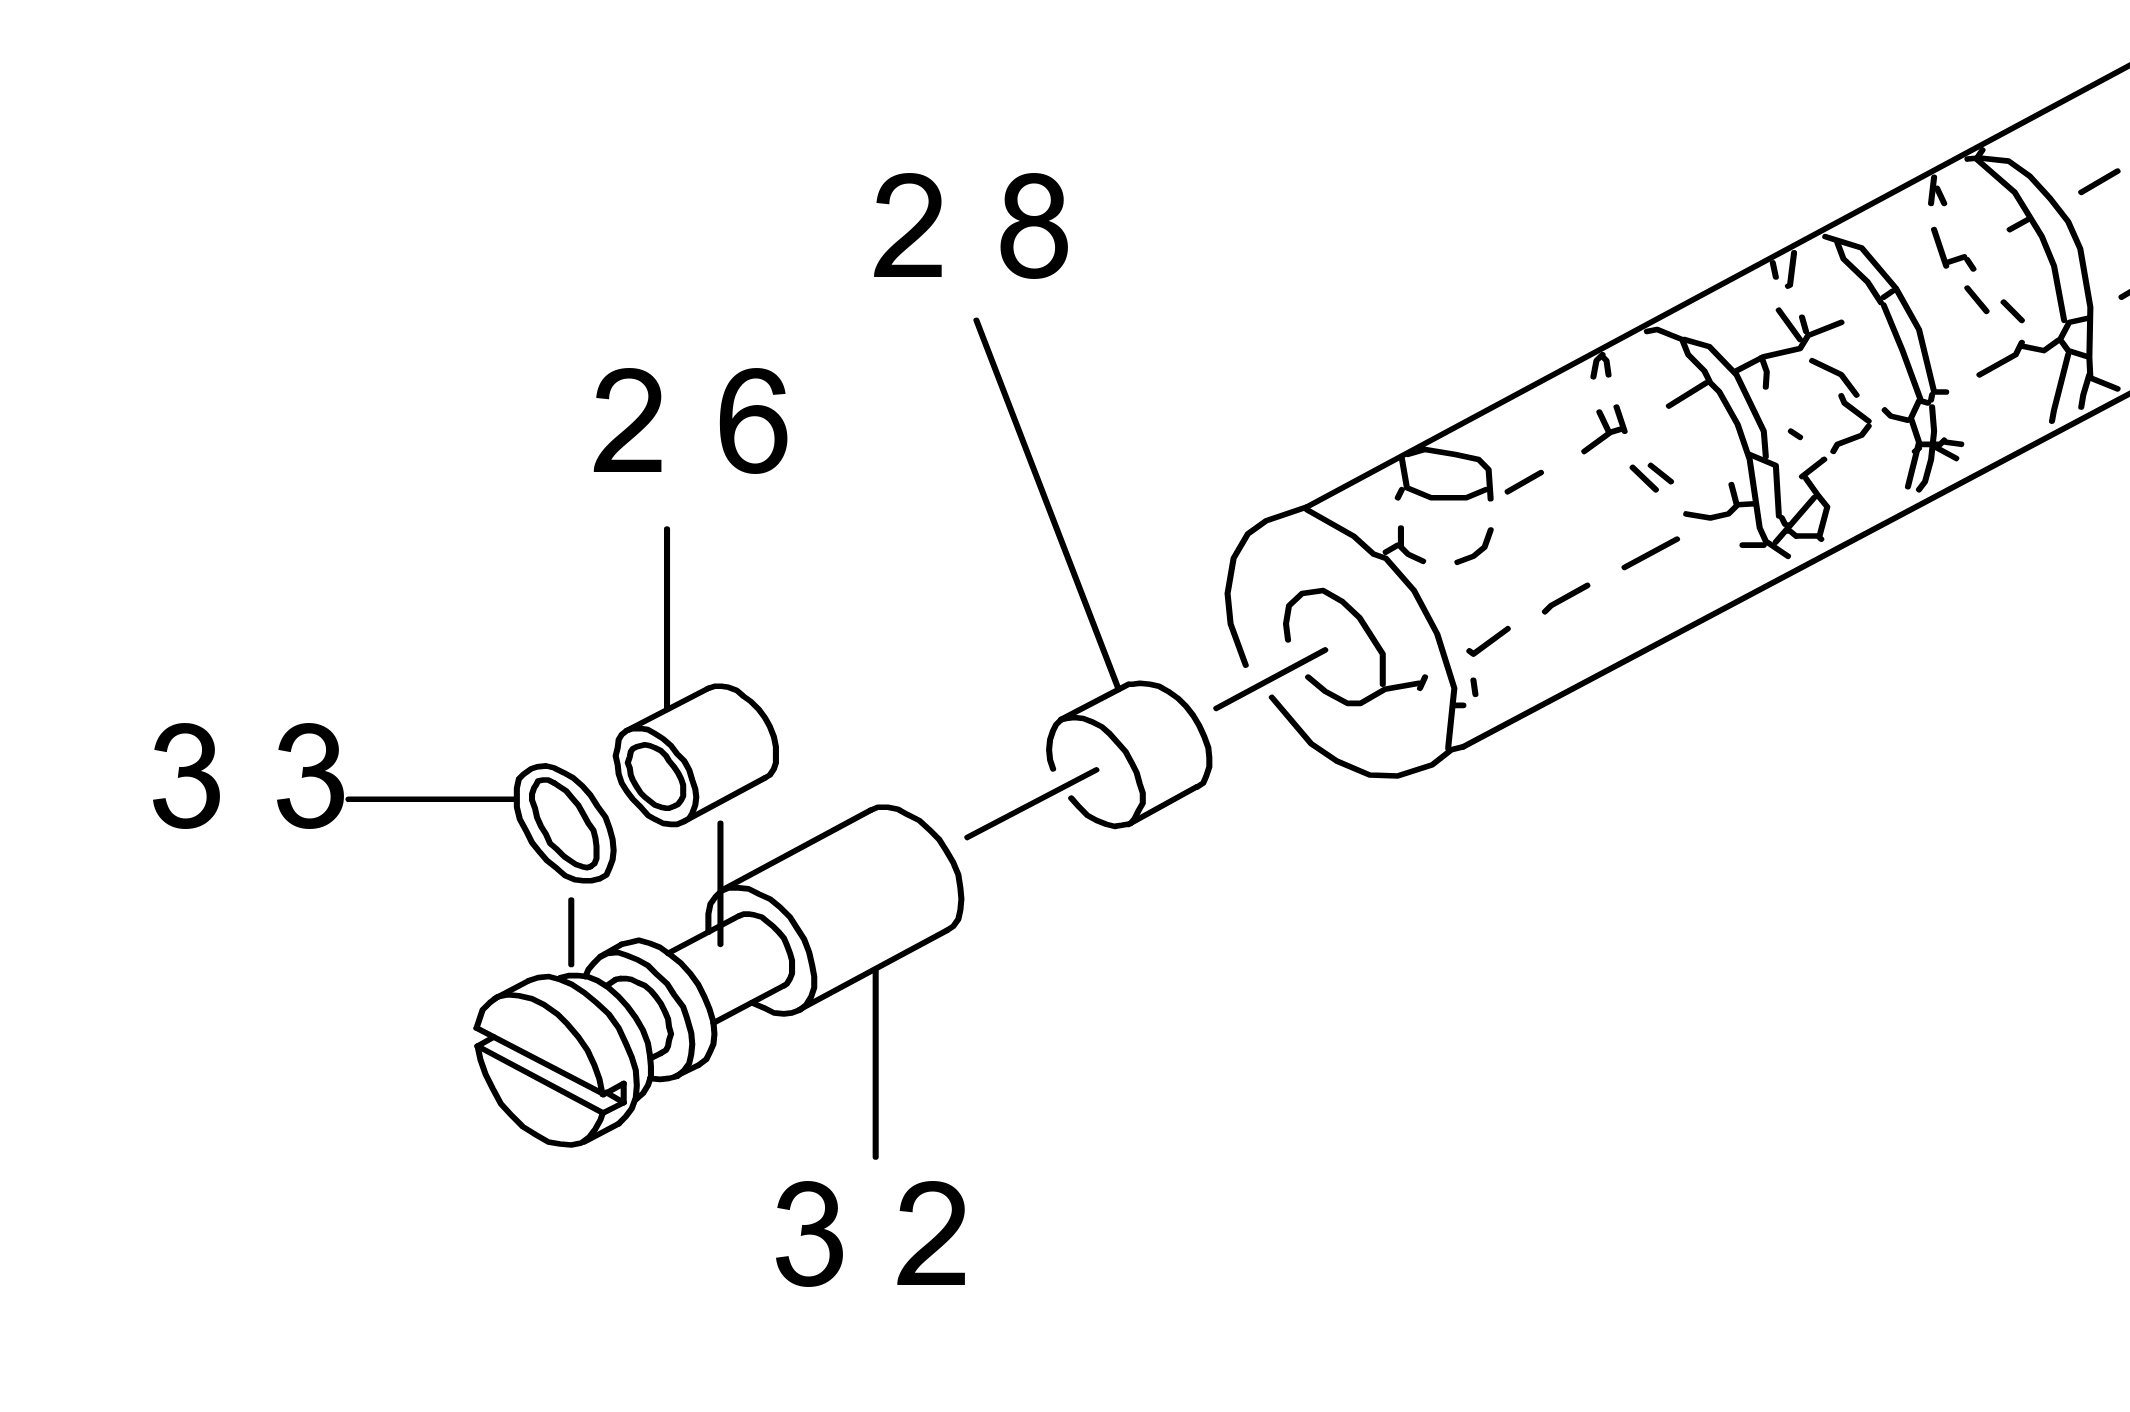
Where should I expect to see oil coming out at the left end of the main shaft? What does it feed oil to...the needle bar crank rod? Or the thread take-up crank shaft assembly? I expect there are some pieces that are to be oiled manually...just not sure which ones. This diagram shows the relevant pieces. Supposedly you rotate part #32 180 degrees to go from "minimum oil" to "maximum oil". Diagram is from page 3 of this juki ddl-8700 parst list: https://www.juki.co.jp/industrial_j/download_j/manual_j/ddl8700/menu/ddl8700/pdf/partslist.pdf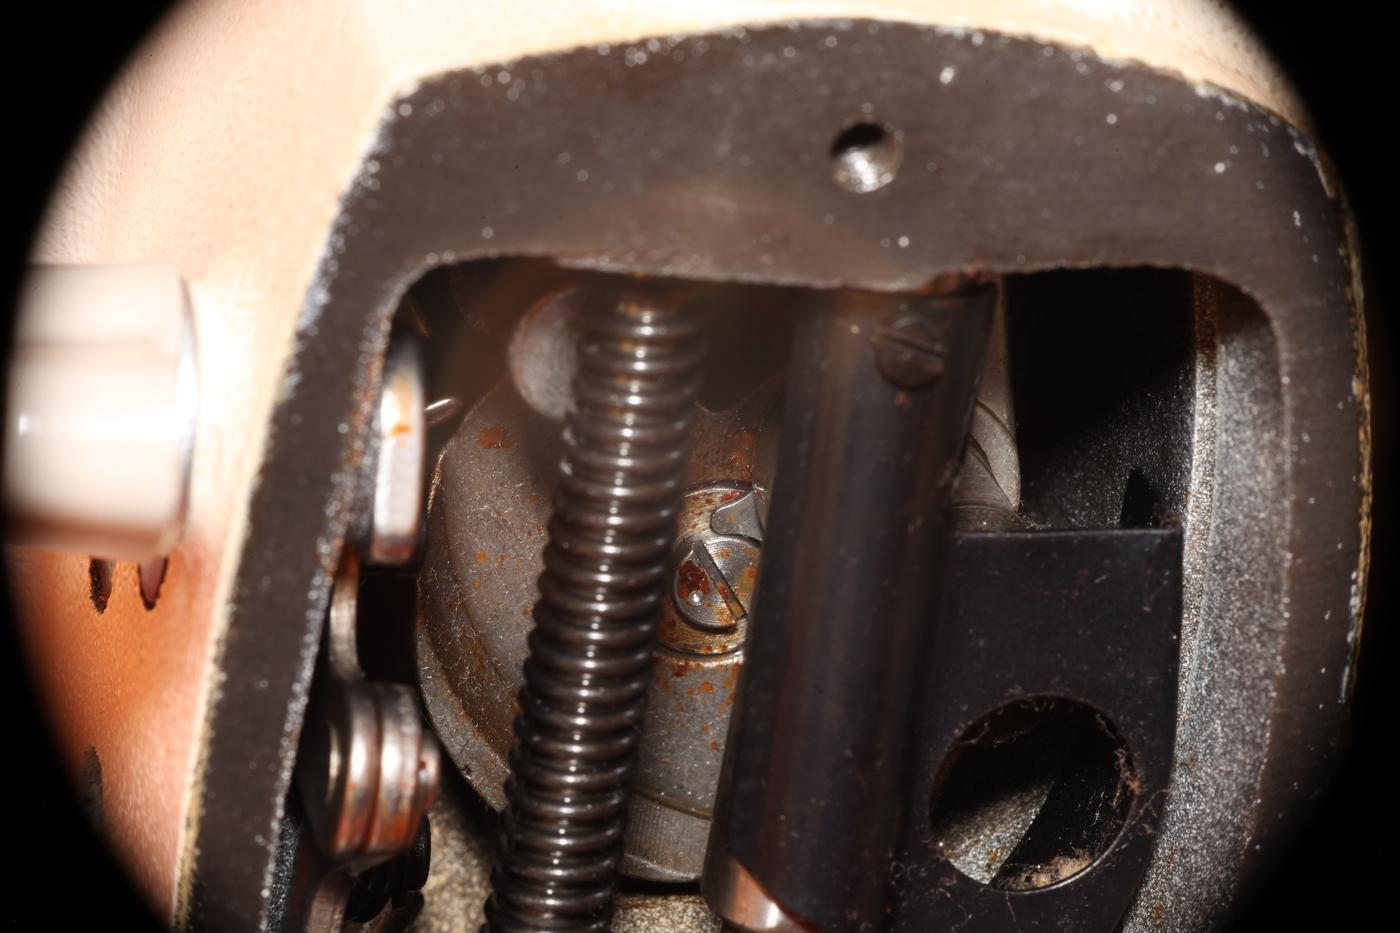
-
Juki DDL-8700 Oil Pump System Clogged
friquant replied to friquant's topic in Leather Sewing Machines
The "fiberglass" piece was removable. I pulled it out carefully. The jet was clogged, but shoving a sewing pin through it cleared the hole. In this photo we have: (left) Oil jet (middle) The clog. (silicone-like texture) (right) The "fiberglass" piece. (filter?) Am hoping that after reassembly (without the silicone-like clog) that it will weep a few oily tears for the hook.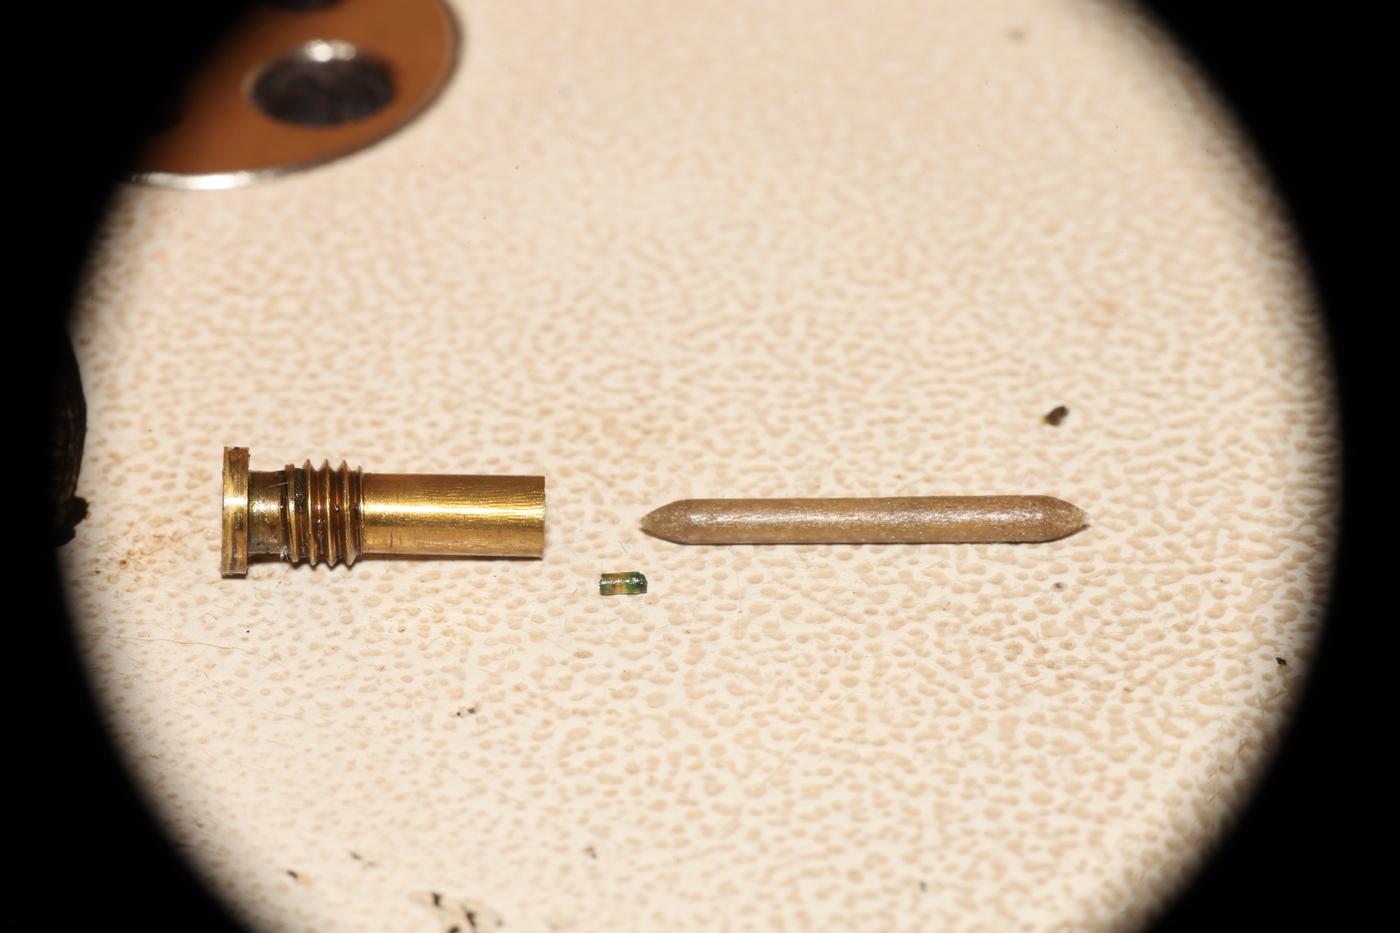
-
Juki DDL-8700 Oil Pump System Clogged
friquant replied to friquant's topic in Leather Sewing Machines
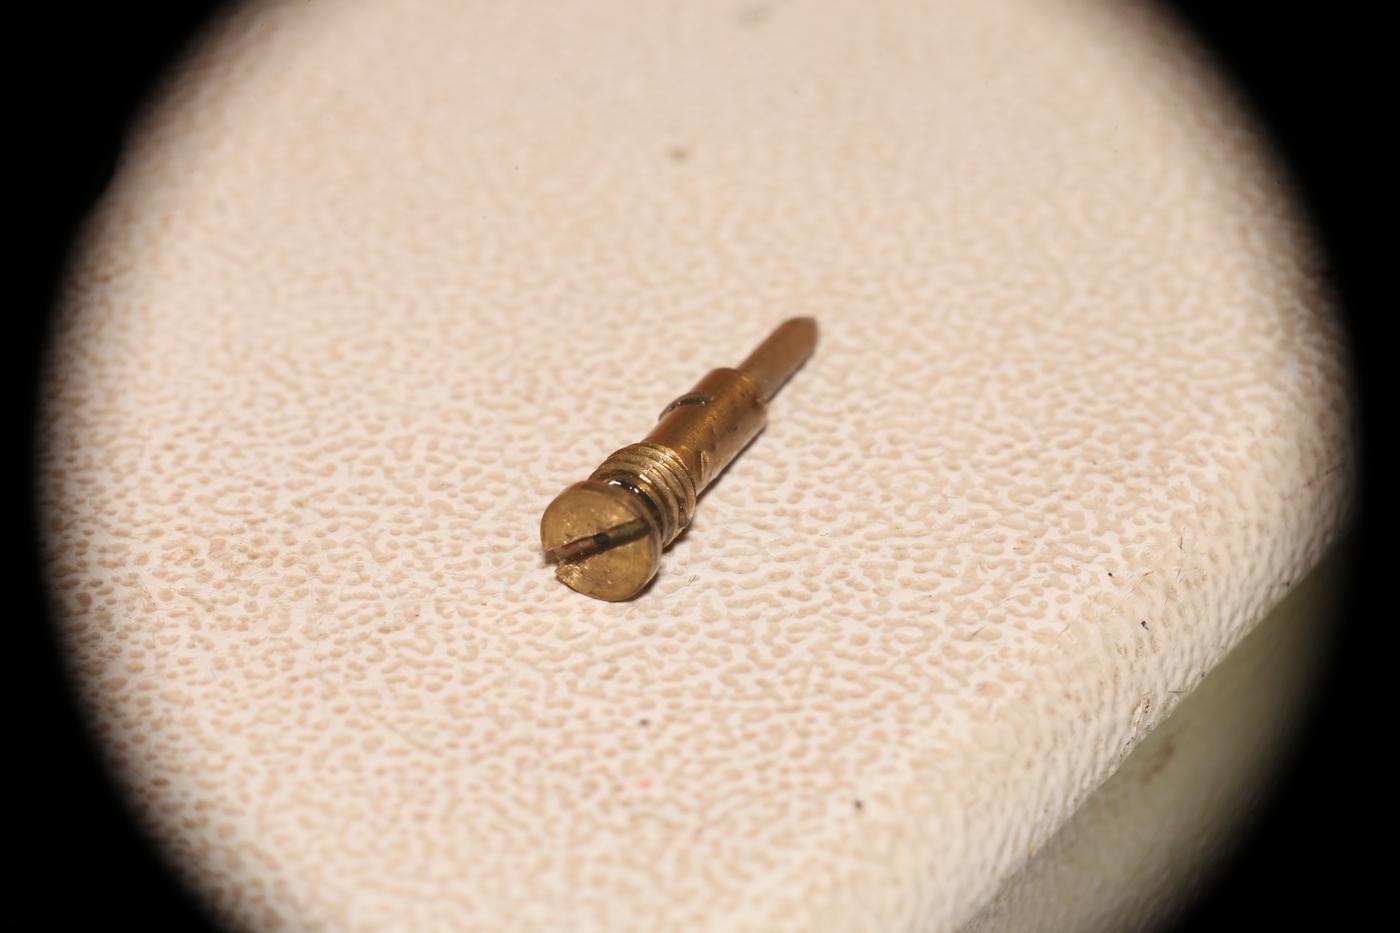
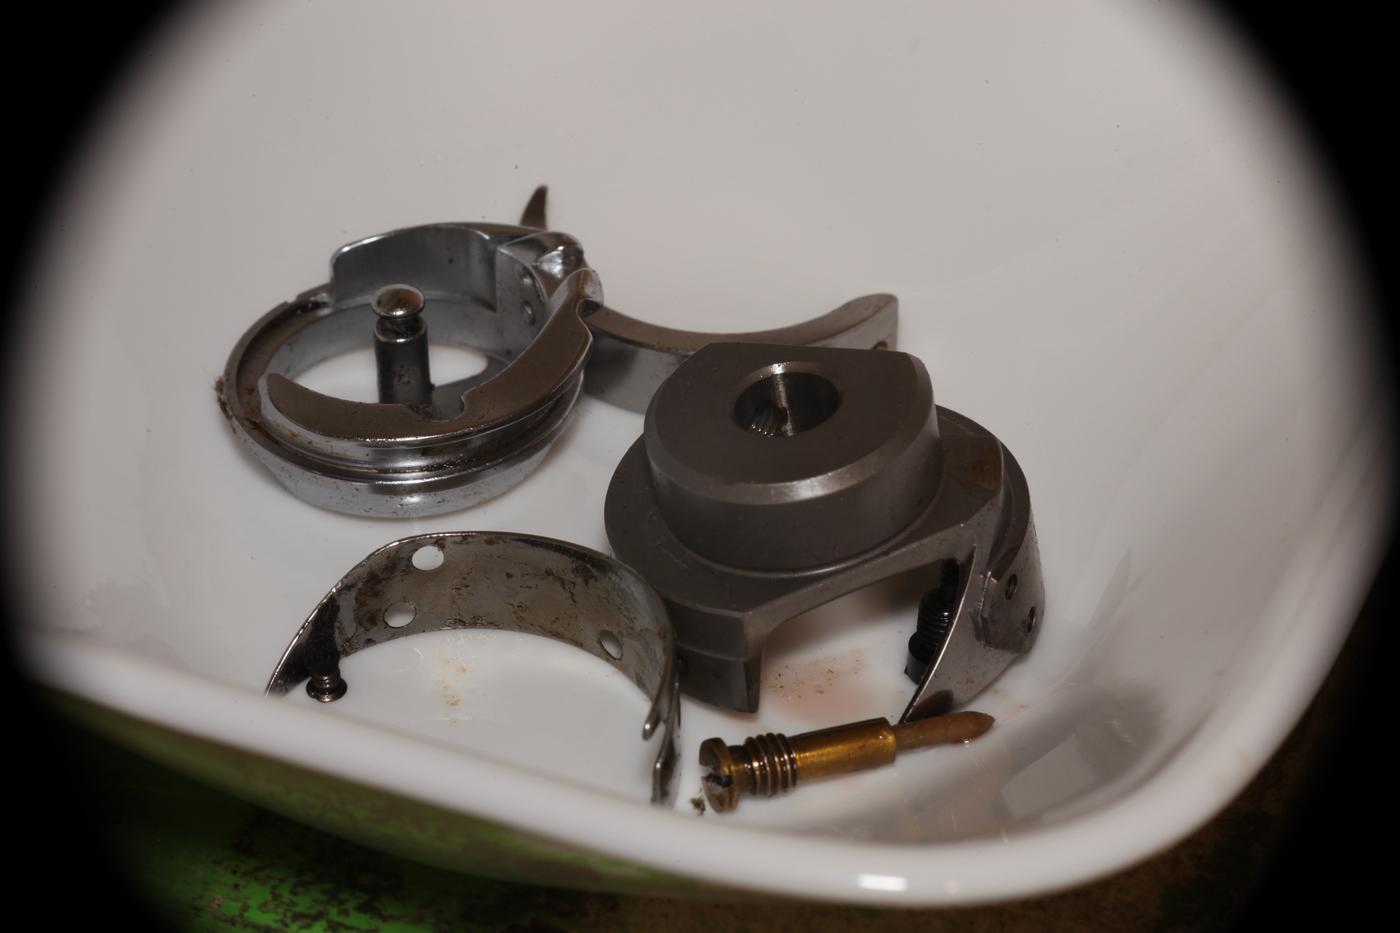
Removed the hook This brass screw was screwed into the end of the hook shaft. The near end has a tiny hole in it, like a carburetor jet. The far end is not brass...rather looks more like fiberglass. Perhaps it is porous? After washing the brass screw in soap and water, I tried blowing through it. Nothing seemed to come out.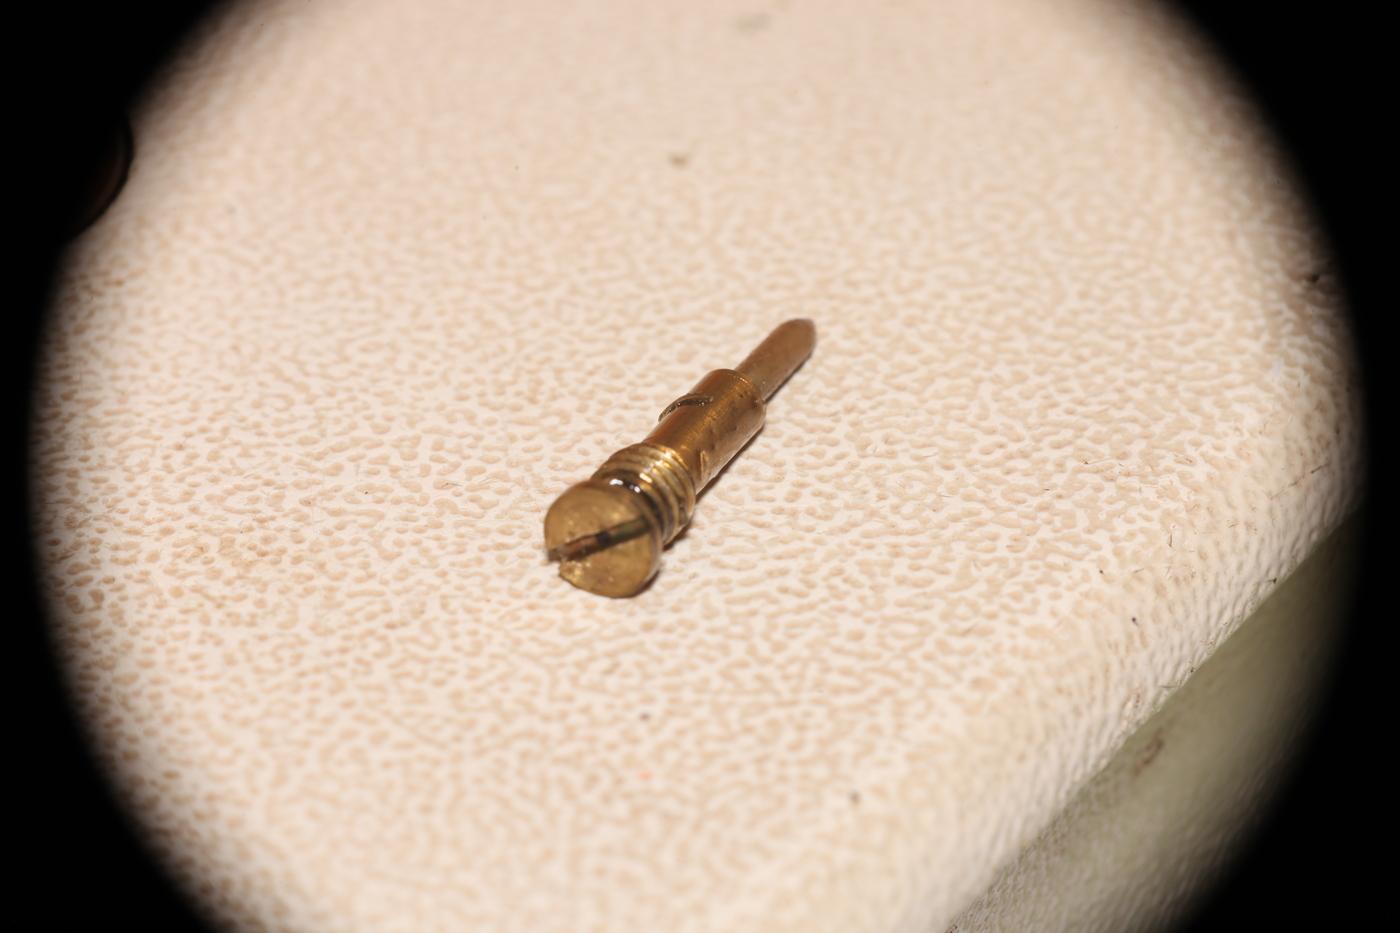
-
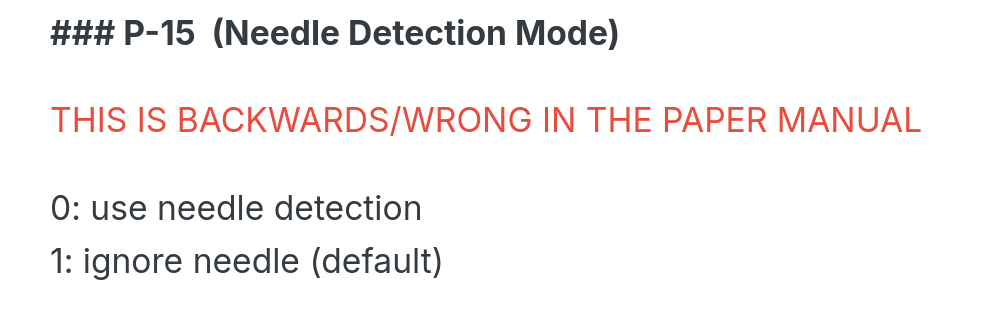
In the Stitchman Servo Motor: The Missing Manual Specifically this part:
-
What settings did you try for P-15 (Needle Detection Mode)?
-
I see now why you're asking if a needle positioner is required in order for that button to function.. What about the other menu functionality? Are you able to set forward/reverse and min/max speed?
-
What happens when you hold down the needle positioner button (far left) for 3 seconds, then release?
