


skyblast
-
Posts
30 -
Joined
-
Last visited
Content Type
Profiles
Forums
Events
Blogs
Gallery
Posts posted by skyblast
-
-
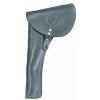
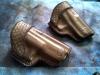
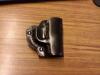
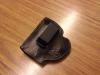
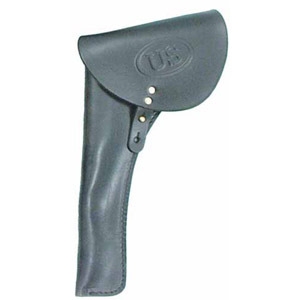
Well the tooling is not that adavced but I'm considering selling them on my website??? California Holsters I've got them listed as coming soon. I've got about 6 more designs but I'm waiting to sell another holster to come up with the funds to buy some lamb skin to line them with.
Any suggestions? It's my first attempt. The gun is a reproduction. Is there any market for these kinds of holsters?

-
I hope that I am putting this in the right section?
Does anyone know where I might be able to find a US civil War era leather stamp like the one shown?
-
HI! And welcome to the forum.
2 things that make the most difference and they are really important.
Make sure that your leather is cased properly. Too wet and the cuts will mush and close. Too dry and you won't get them open in the first place!
Search casing leather on the forum and you will get 1000 new friends chiming in!
Secondly, make sure that your cuts are deep and even. When I first started (NO instruction, teacher, etc) I was very timid in CUTTING the leather. I merely "scored" it thinking that it was deep enough! Of course the beveling was timid too and the pieces came out like someone had gently used a scratch awl on a piece of glass!!!
Submit your stuff- we'll all be glad to critique it and get you on your way
write if you find work!
pete
Thank you Thank you Thank you.
I am so excited to go home and get started.....wetting the leather
 Who knew??? Thanks!!!
 -
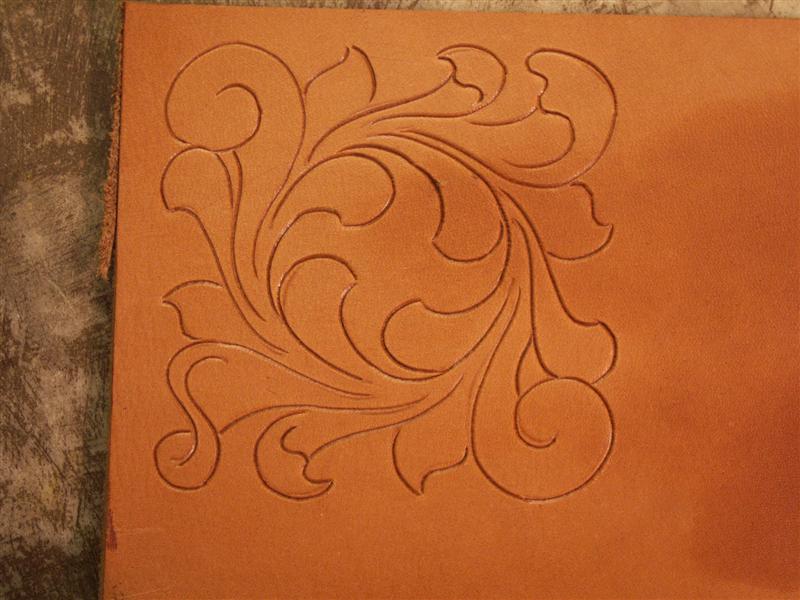
This has been really bugging me for some time now. In this picture, which I believe is the first step, how does one get a nice deep wide channel with a swivel knife? When I've tried using my swivel knife I get a very thin slice that does not stay wide. Any suggestions for how to get a nice wide channel with a swivel knife as shown in the pic? Is there a step I'm missing? Thanks
The picture is supposed to show step one in making a floral design in leather

-
Thank you everyone. Lots of things to experiment with now!!
-
I think that I am using the right products but I think I may be using them in the wrong order.
Here are the steps I use after a holster has been assembled and burnished (burnished using only water).
1) dye and let dry for a few hours (Feibings non pro dye)
2) using a dry cloth wipe off excess dye.
3) Spray on Saddle Soap to clean off any dye that did not take...let dry
4) Dye again let dry over night
5) Lexol to moisturize
6) Resolene (if only the dye looks good)
It is in step 5 where I have been noticing dye coming off. Dye coming off to the point where I can seen bare leather showing through.
Any suggestions? I get the feeling that I am way out of whack here.
-
For me it was never about money it was about principal. I broke the part, I called to get a new one without a thought of getting it for free. Then I get a Tippman rep telling me, "the one screw shuttles are faulty and that for some reason they seem to be loosing tension over time." He said this at least twice and kept repeating it's not you, it's not you. He then told me they were hoping to someday get the one screw shuttles out of circulation. After I had paid I starting thinking about what he had said. I told them how I felt, they issued me a refund. The only reason I posted the two emails on this forum was to see if Bob was somehow irritated with me. Hard to tell in emails sometimes. I also posted to see if others were having issues with their one screw shuttles. I never thought I would get ripped so badly...WHICH I DESERVED!!
What did I learn? One, I broke it. Once I broke it all justifications for whether or not the part is faulty goes out the window. You break it you buy it. End of story. I had NO right asking for anything. Maybe they might want me to mail the part in so they could test it themselves? Not that they would but they deserve that right. Me breaking it takes that option away from them. Two, I just need to shut my mouth and be happy Tippman exists. Amen? Amen!!!
-
skyblast,
I applaud your paying for the shuttle once you understood the problem better. There is always a learning curve with anything new in life. When we are in the middle of a problem, things aren't very clear sometimes. I think both you and Tippmans have treated each other very well once the communication and understanding was complete. Here's to a long term working relationship!

Thanks Denise. Wow, what a learning situation for me this has been for me.
-
I've dealt with Tippmann since the '80s in the Paintball industry. In the fairness category, they have always come down on my side. I've returned guns that look like they have been piddled on and run over by a truck and got them back brand new. All they have ever asked from me is to tell them what happened.
I think you have been pushing the envelope expectation wise. When you bust something, you should expect to pay for a new one, you broke a part that has been working in those machines (and quite a few others I might add, at much higher speeds) for decades. Someone makes those shuttles for Tippmann, and Tippmann sure had to pay for it. Now you are complaining because you got it for free?
Art
It looks as though I am clearly in the wrong in this situation.
To:TroyS
PLEASE UNDERSTAND I WAS ONLY MESSING WITH THE TENSION ARM BECAUSE MY MACHINE WAS GETTING ZERO TENSION. ACCORDING TO A TIPPMAN REPRESENTATIVE THE ONE SCREW SHUTTLES WERE FAULTY...THIS CAME DIRECTLY FROM THE HORSE'S MOUTH.
Once I was told this, I really felt like the part should have been recalled. Hence, why should I have to pay for it?
I now understand having talked to couple different individuals at Tippman that the shuttle is a wear and tear item and the fact that mine lost tension is normal. This I can accept. I really wish that I would have spoken one of these two guys in the beginning.
That said, I called Tippman this morning and paid for the shuttle.
-
The reason for this post is that I am having a hard time trying to figure out how to interpret the response from Bob Tippman regarding my email to him. Mainly, I now feel guilty that I was given a refund. Should I? Are any of you detecting some irritation/sarcasm in Bob's response? Sometimes I read it and think that he was 100% honest/kind and then sometimes I read and feel that he is pissed off? Have any of you experienced any issues with the "single screw" shuttle?
Should I have complained about this shuttle? Do I have a leg to stand on here? I was told in a 10 minute phone conversation that I would not be getting a refund do to the fact that 1000's of single screw shuttle are out there and that they seem to be working fine for most. I accepted this and figured...oh well, can't win em all. Then unexpectedly Bob Tippman emailed me back....
In the end I guess no matter what I consider the Tippman company to be top notch. Number one they listened and second they were not obligated to do a thing for me as I was not the original purchaser and the machine is 5+ years old. I kind of wish now I could give the money back...
I did already bring this up with a service guy and apparently he is looking into my situation.
Last night I broke a piece off of my shuttle. I was trying my darndest to adjust the tension arm on the shuttle because I simply was not getting any kind of tension on the bobbin string. I figured tweaking it a bit was my only alternative.
This morning I called and spoke to someone about ordering a new part. The gentlemen I spoke to indicated that the "one screw" shuttle set up (the type I have) was faulty and that for some reason it was loosing tension over time. He also explained that they were hoping to have everyone call in to order the new two screw shuttle to replace the one screw shuttles.
This sounds very much to me like a recall. For a machine that is supposed to be virtually indestructible I would certainly not expect the shuttle to loose tension over a short period of time. The individual I purchased this machine from told me that he had only used it a limited number of times. I am guessing he had been having issues with tension also...hence the reason for selling it to me?
In my small holster business if a customer informed me that a snap or rivet had gone bad on their holster I certainly would not be charging them for replacement. I would view this as a faulty part and send them a replacement free of charge. When this has happened to me in the past I even covered the customers shipping both ways.
In closing, I am having a hard time trying figure out why I am being charged for what appears to be a defective part.
I did already place an order and pay for the part. I am however looking for reimbursement.
Thank you very much for hearing me out.
Sincerely,
Tim Ostrander
Holland Holster Co. (A one man operation)
P.S. At some point I am looking into purchasing one of your embossers. Tired of doing it by hand.
Timothy-
The machine comes with a one year warranty. There are other major brands selling their sewing machines with the exact same shuttle that you have. 5 years ago, I found a new source for the shuttles and have been very happy with them. However, I understand your frustration, and will replace the 5+ year old shuttle at no cost to you and it will ship out tomorrow. Please accept this as my way of saying welcome to the Tippmann family. I hope that you enjoy many good years of our service and make lots of money off our machinery. Have a great day!
Thanks <br clear="all"> Bob Tippmann
Tippmann Industrial Products
Cell: (260) 409-1936
Toll Free: (866) 286-8046
-
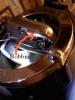
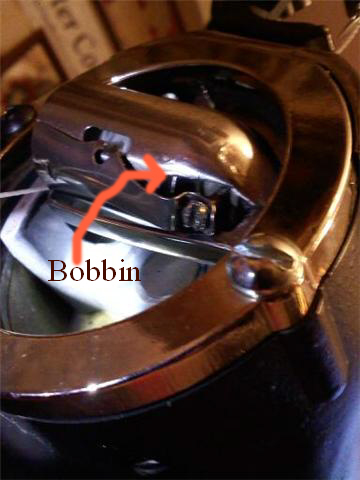
This is to anyone using or knows how to use a Tippman Boss. I really do not understand the mechanism behind the bobbin tension?? At least on my TB the screw looks to be functioning perfect however I do not understand what creates tension on the bobbin? When I tighten the screw down the bobbin turns as freely as when the screw is loose? The arm with the screw in it doesn't even touch the bobbin when it's completely in...
In the picture the bobbin is all the way in. When I hold the tension arm down (the arm with the screw in it) the bobbin turns freely. Why? Isn't the tension arm (with the screw) supposed create tension?
Any ideas?
Oh... I think I figured it out. The arm places tension on the thread not the actual bobbin. I took off the tension arm, gave it a few tweaks and now there seems to be more tension on the thread. I'm glad that I didn't have to box it up and send it to Indiana. Thanks for being a sounding board leatherworker.net!!
-
This is to anyone using or knows how to use a Tippman Boss. I really do not understand the mechanism behind the bobbin tension?? At least on my TB the screw looks to be functioning perfect however I do not understand what creates tension on the bobbin? When I tighten the screw down the bobbin turns as freely as when the screw is loose? The arm with the screw in it doesn't even touch the bobbin when it's completely in...
In the picture the bobbin is all the way in. When I hold the tension arm down (the arm with the screw in it) the bobbin turns freely. Why? Isn't the tension arm (with the screw) supposed create tension?
Any ideas?
-
I spoke with Fiebings this morning regarding the regular oil vs Pro oil. I buy the Pro 2 cases (8 gal) at a time. (for whats it worth I pay $48 gal).
He says the Pro is much better than the regular and both can be Airbrushed.
I have officially taken the plunge. I returned the two quarts of spirit dye and and now own three bottles of pro oil dye. Thanks everyone for the great advice.
Now time to tackle the airbrush...
-
I have not started airbrushing my work yet but on my projects have had the best results with the pro oil dyes or the angelus dyes.
I think you would do good by experimenting a little with the different ones, just buy a couple of small containers of each and try them out. I get mine from springfeild.
Good advice. One can't beat experimenting.
On that note I burnished my first edge on a drill press this morning. You know that plastic wheel with the hole in it that a lot of leather stores sell? It has about a three inch diamemter? I hammered a phillips drill bit into it and attached it into my drill. Oh man! That plastic wheel works really well. I was able to get my first glass edge with it!! First I wet the edge, burnish, then I applied some saddle soap mixed with lexol, then burnished again??? I am I doing this right? I also rubbed in some burnishing wax then burnished again. I worry about the dye not being able to penetrate the wax though. I have a feeling my steps are out of wack?
I also noticed that my edge is a bit cracked looking. I started out by going both directions while burnishing....I'm only supposed to go one direction right? How does one know which direction is right?
-
Hi there! Where are you buying the dye from? I think I paid about $20 for a quart - I believe my wife ordered my dyes from Springfield. When you're airbrushing the dye - it will go a long, long way and you'll get a ton of holsters out of it. If I were you, I'd pony up the extra cash for the Pro dyes, but I would also only buy one quart at a time - at least until you're comfortable with the colors you picked and the results you're getting.
Hey!! Is that you? It's Tim here!! I noticed your web address. So yeah, I have my two bottles of spirit (regular) dye all bagged up and ready to return. I buy from McPherson's Leather in Seattle. I called them up and yes, they are around $20. Thanks, man you are so helpful!
-
Skyblast;
I too am getting into Airbrushing, mostly on belts & holsters. I use Fiebings Pro Oil and was wondering if it's ok in an Airbrush. By the way, which compressor did you end up with and do you use a "paint booth".
It should be interesting.
I ended with the $80 Harbor Freight set up...comes with a compressor. I believe the Pro oil is ok as I already know one guy that is using it. I am wondering if the regular stuff is ok? The pro oil is so expensive.
I made a spray booth out of a cardboard box.
-
Soon I will be attempting to airbrush my holsters instead to dipping them.
Question: When airbrushing is it better to use pro oil dye or is the regular Fiebings dye ok? Actually for that matter which is a better dye to use....for any application dipping or airbrushing? Does it even matter or is one better than the other for certain things.
Curious. If I do decide to switch.... Feibings professional is so much more expensive!!
Any airbrush advice before I take the plunge? I think that I have all the equipment I need to get started. Now I'm just staring at it kind of nervously trying to work up the nerve to get started.
Thanks
-
I havent made any post on here but I was reading yours and thought I would share how I get my stuff to shine. All I use is Kewi Boot polish. I use the black on projects that are black and netural on everything else. Just rub it on, buff it off. You can make it shine like a new nickle and I think it helps protect it a little. It will dull down over time and all ya have to do is put alittle more on it.
I might be wrong by doing it this way but it has worked for me on holsters, belts, motorcycle seats and just about everything I have done.
Just my 2 cents worth.
Joker
Thanks for the great advice. Sometime soon I hope to try polishes and waxes.
Update on saddle lac. In my humble opinion....I do not like it. I spent three hours over the weekend scraping saddle lac off of 9 holsters!!! It was NOT fun to say the least. Once I noticed it chipping off of one of my holsters I knew that there was no way that I was going to send one out the door. I did refinish them with Resolene (love it now) but will have to sell them at a discount because they were salvaged. Oh well live and learn. Thanks for all the advice all.
-
I've seen here and there wooden and plastic burnishing bits that appear to go on the end of a drill.
My question. Is there anything out there that rests on a table that you can operate by foot? I am invisioning a heavy motorized device that spins at variant speeds by foot pedal inwhich you can determine the speed of the bit while burnishing an edge?
Does anything like that exsist and where might one buy this type of thing? Thanks
-
Thanks again for all of the great advice. I tried dipping a saddle lac(ed) holster in Resolene to bring it down to satin. It seems to have worked a little. Man, saddle lac is no joke...shinny as all heck!
So I did bring down a few saddle lac(ed) holsters to a gunshop where I am currently selling them. The responce I did get from a very experinced gun dealer (who is in charge of the holster ordering)....all he had to say was, "WOW, they look fantastic!" Before when they had a light satin finsh on them I did not get the same reaction.
BUT
On the the flipside I keep hearing from everyone that most guys will prefer a matte/satin, instead of the high gloss...? I guess I will have to carry my designs in both satin and gloss?
Although most may prefer matte/satin I am gald all of my demos are in high gloss. I really want them to make a statement when I bring them into a shop for the first time. As the saying goes....one chance at making a first impression. Risky though. Maybe the guy in the shop hates high gloss? I will have to quickly tell him... and they come in satin too and bust one out asap!!
-
I suggest you try resolene some more.
I recently finished some coasters for my mom for mother's day. Aside from being a gift, I wanted to test my finish process to see how well it holds up against water. My process was to brush on a coat of Satin Sheen, then wipe the excess with a towel and allow to completely dry in front of a fan. I then applied a second coat the same way the following day. Lastly, I took Dwight's suggestion of 1:1 water & resolene, but I was too lazy to use a brush - I simply used a sponge to make sure the solution was applied liberally and got into all of the tooling impressions. Like before, I toweled off the excess and allowed them to dry in front of a fan again. I'm very happy with the finish - I do not like overly glossy leather. It doesn't feel natural to me.
I usually airbrush the resolene, but thought I'd see how the sponge method works this time as I can mix a batch of it and store it for future use in a container. Being water based, it's not hard to clean up the airbrush, but it saves a little time - and I feel like I get better coverage this way.
Great suggestions. Thank you.
Now that I have applied the lac to this particular holster is there any way to tone it down a bit? Maybe with some kind of thinner? I love the idea of saddle lac but yes it is a bit too shinny. If saddle lac on a scale from one to ten is a 9 I'm looking for about a 7.
-
So now I'm afraid I'm a victum of maybe getting what I asked for...too shiny? I have noticed that Galco, Brigade and many other big companies work their holsters up to a pretty good shine. Is mine too shiny?
When I brought one of my holsters into a shop the other day mine was compared to a Galco. The Galco popped with a nice shinny finsh whereas mine was dull and boring. I understand each to his own but I also love the fact that Saddle Lac seals the dye in. No more dye rubbing off on my customers pants.
Also is there a way to tone the shinness down a bit? Is there a lower gloss Saddle Lac? I can't seem to find one. The holster on the table is the same as one on my pants. Obviously though the one on the table is reflecting more light.
What do you think?


-
I picked up some saddle lac last week or so and when compared to neat lac it is different. It smells different and has a silghtly different texture.
I have heard that neat lac and clear lac are the same thing and saddle lac is suppose to be similer but I have not had much time to play with the saddle lac yet. More experienced guys should chime in about the saddle lac. I will have to experiment with it some more before I can really determine if I like it. It may be that it doesnt hold as well as the other stuff does.
Ok so now I'm home and am using Feibings Resolene and Saddle Lac. I gotta tell you guys...I freakin love love love the (spray) Saddle Lac!! OMG!! Wow. My only issue is that it might be a bit too shiny?
The Resolene was ok? It tended to run a lot and now that it's dry you can the see the streaks.
Is there a lower gloss spray saddle lac out there? The one I have says "new higher gloss"
-
In my limited experience I have found the trick for neat lac is nice thin coats. If its something that is flexed around alot I will rub the neat lac into the leather in two thin coats. I do the first and let it dry then buff it a little then come back with a second thin coat. I usually use a white tshirt. If the item is persay a holster or hard knife sheath or something with alot of tooling that requires the neat lac to get into depressions in the leather I will use some sheep scraps but still try to keep it somewhat thin.
I dont have much experience with resolene so I cant help ya there but both of these sealers are usually the last thing to go on and is all that is required to seal up the leather. On the neat lac items I will usually throw a thin coat of nuetral shoe polish on once it is fully dry and buff that out to a nice shine.
Great!! Thanks for the good advice. Darn. I wish I would have learned this two years ago. Oh well better now than never right?
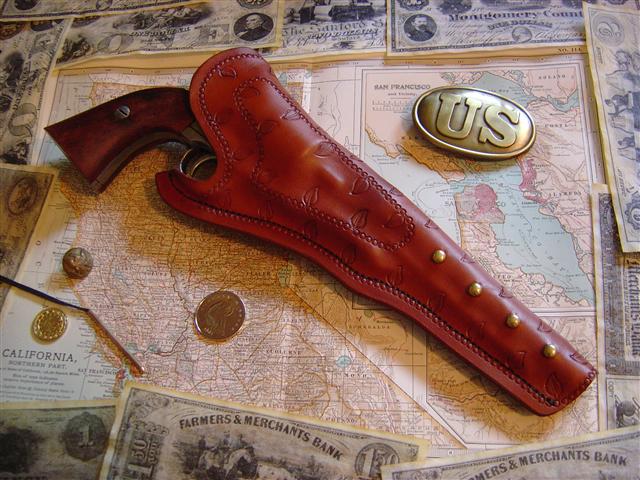
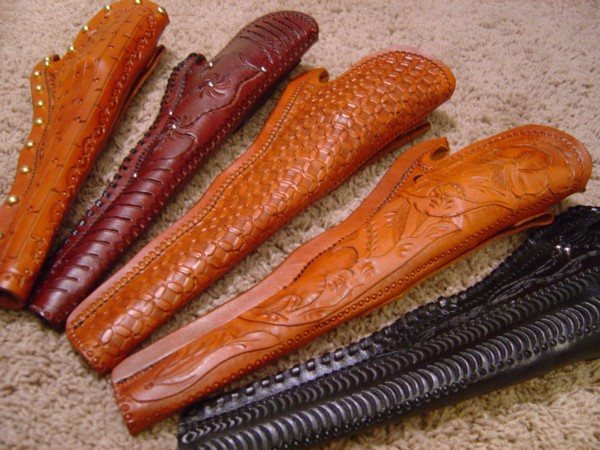
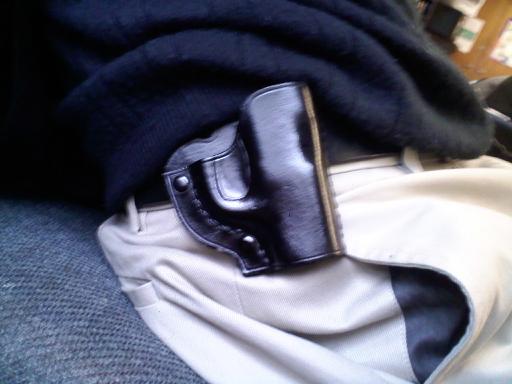
California Holster
in Gun Holsters, Rifle Slings and Knife Sheathes
Posted
Thanks! This type of holster is so fun to hold in your hands....taking the pistol in and out. I got a lot of my ideas from the holster book, Packing Iron. I am so greatful to have found it.