


Rising Sun Leather Co
-
Content Count
36 -
Joined
-
Last visited
Posts posted by Rising Sun Leather Co
-
-
I used the awl method a few times and it worked out ok, but I think the best way to go, at least for me was, the single, double and four prong diamond hole stitching punches in different sizes. ( stitches per inch). All of my work is hand sewn and it looks as even and consistent as a machine. I wouldn't recommend any other way.
Joey
-
I can definitely help with this. I have made a strap exactly like Merle's for a Vegas Merle impersonator. the best two ways to reach me are by phone or email. (702)371-3125 Joey@RisingSunLeatherCo.com Thanks, Joey
-
hello, check out my website and Facebook page. if you like what you see give me a call. I'm sure I can make a collar for your dog that you'll love. www.RisingSunLeatherCo.com
Thanks, Joey
-
Hello, I would like to take a look at these patterns. My email is Joey@RisingSunLeatherCo.Com . Thanks, Joey
-
really neat and simple design. I'm curious why you didn't sew the entire clip to the body.
pete
That's why it's called a "tuckable" IWB. You can tuck your shirt in under the clip.
-
Ok then. Lets change gears here to lighten things up. I wasn't going to get involved with this one because of lack of experience with any sewing machine, especially a heavy leather stitcher, but here goes.
This is going back to the"bumps" on the back side of the leather issue. First off, up until today all the stitching I've done,(and it's been a lot) has been by hand. I do have a tippmann boss stitcher(which I did use today). When I first got the machine it was used and had some issues with it. It didn't feed the leather proper, it missed stitches, the stitch length wasn't consistent, it scratched up the backside of the leather, and it left those "bumps". I sent it to tippmann industrial, where they completely restored the machine and sent it back to me. When I received the machine, I couldn't wait to use it. Pulled it out of the box, set it up, grabbed some leather, and away I went. Well, let me tell you... It's just not that easy. The machine was repaired and yet it was still not stitcing the way it should be(this was my error this time). And it was leaving the "bumps" still. I put it away and went back to stitching by hand. Later that week I went to my friends, who happens to have a Cobra 4. He let me play with it and I decided I have to get one of these(so I have one on order). Anyway, when I was done using his machine, I looked at the bottom stitches, and guess what, the were there. Today, I took my Boss back out of the box and played with it, adjusting the tension settings and stitch lengths untill I got it working so I was happy with it. I made a holster and belt with bullet loops and it worked perfectly(didn't miss any stitches, evenly spaced) and guess what... No "bumps". Yep I said NO BUMPS.
The secret is to not take short cuts. When I stitch by hand I put a stitching groove on the front and back pieces of leather (this makes the stitches level with the surface of the leather so they won't get rubbed and worn out.(i think it adds a very professional touch). Anyway, I did the same thing before I used the Boss. No Bumps, and you can't feel the stitches.
Problem solved, use stitch grooves. Also, I am selling my Boss for $1100 + $30 for shipping.(to help pay for my cobra 4) I will be putting it on ebay monday or tuesday, so if your interested send me a P.M. before then.
Thanks for taking the time to read and I hope this helps everyone.
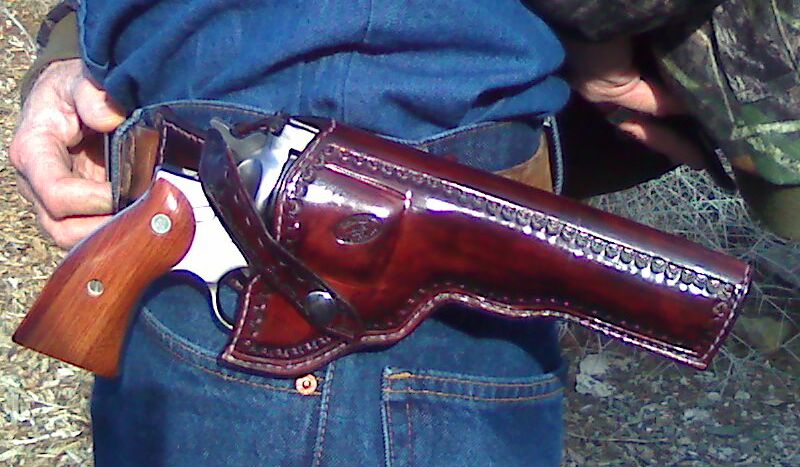
Here is the rig I made. Another satisfied customer. Sorry, I didn't take any close ups of the back because I wasn't going to get involved... But trust me, "no bumps".

-
That my friend is something that you will have to find out for yourself. When I used it, I dipped black suede in the solution just long enough to get wet all over. Then I let it dry. It became a little stiff when it dried. At that point I just rolled it in every direction and it softened up to it's original feel.
I would say, try to wipe the solution on lightly with a cloth or even maybe mistit on with a spray bottle. Sorry I can't be more certain what else might happen to the front side. I do know that when i did it, not even the smallest trace of black ever rubbed off.
Hope this helps,
Joey
-
Use a 50/50 water to vinegar solution.
-
Then stitch only the outside border and only glue the inside connecting pieces?
uote name='Bluesman' timestamp='1335817094' post='245860']
Check out the fonts in Word or Excel. There is one were the holes in "b" and "o" have cnnection lines runiing from the inside diameter to the outside diameter.
-
Hey all,
I was wondering how do I cut the top piece of cowhide so that the exotic skin underneath looks like the letter it is. What i'm talking about is the shape of the letter. Most are easy, I'm stumped on the ones with holes in the middle. IE. A,b,d,e etc... If I cut out the outline it's not really a proper letter, but more like a blob. The only thing I can see is gluing the center on top of the exotic, but that doesn't seem proper or that it will last very long before falling off.
Any help would be appreciated.
Thanks, Joey
-
This one was made so while riding his horse it wouldn't rub on his leg and could still draw and holster it with ease.

-
Here's my 2¢ worth: any time I have a difficult customer, I add an additional charge for the "ick factor". That charge varies depending on how much of a pain in the butt they are. Sometimes I'll quote them a price so outrageous hopeing they'll go elsewhere for the work. This is then a win win situation for me. Either I dont have to deal with their BS, or I will make a lot more money than normal. I also add $20 to the price anytime I have to order a dummy gun, and always get half up front if they are local and paid in full if they are not local.
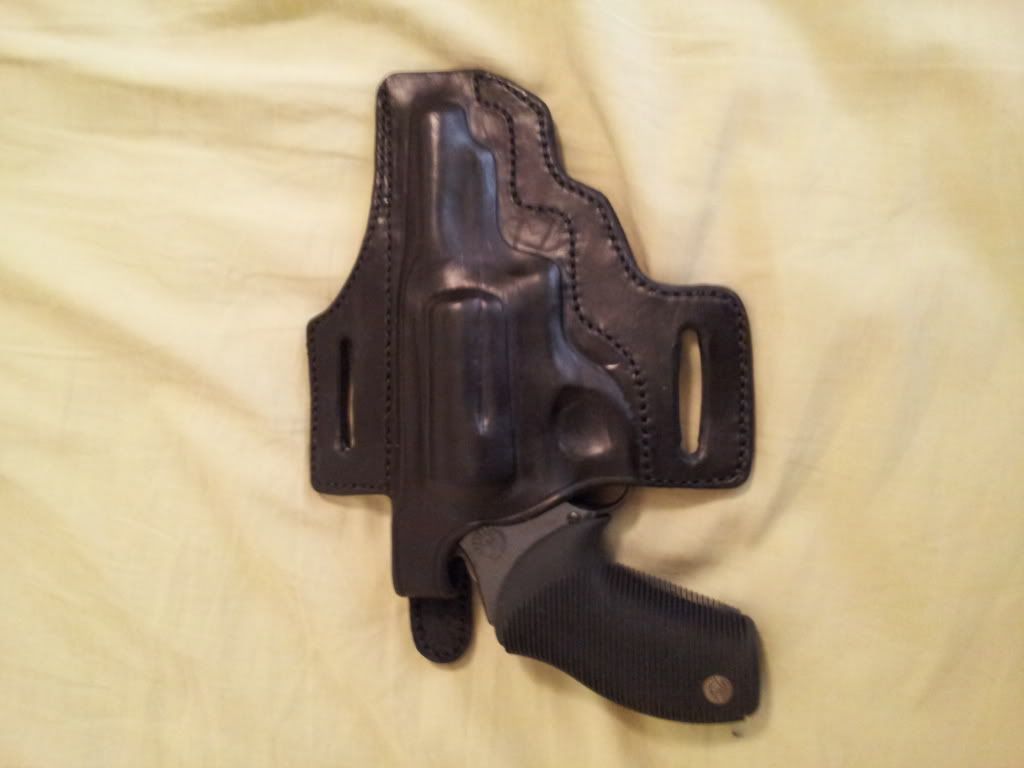
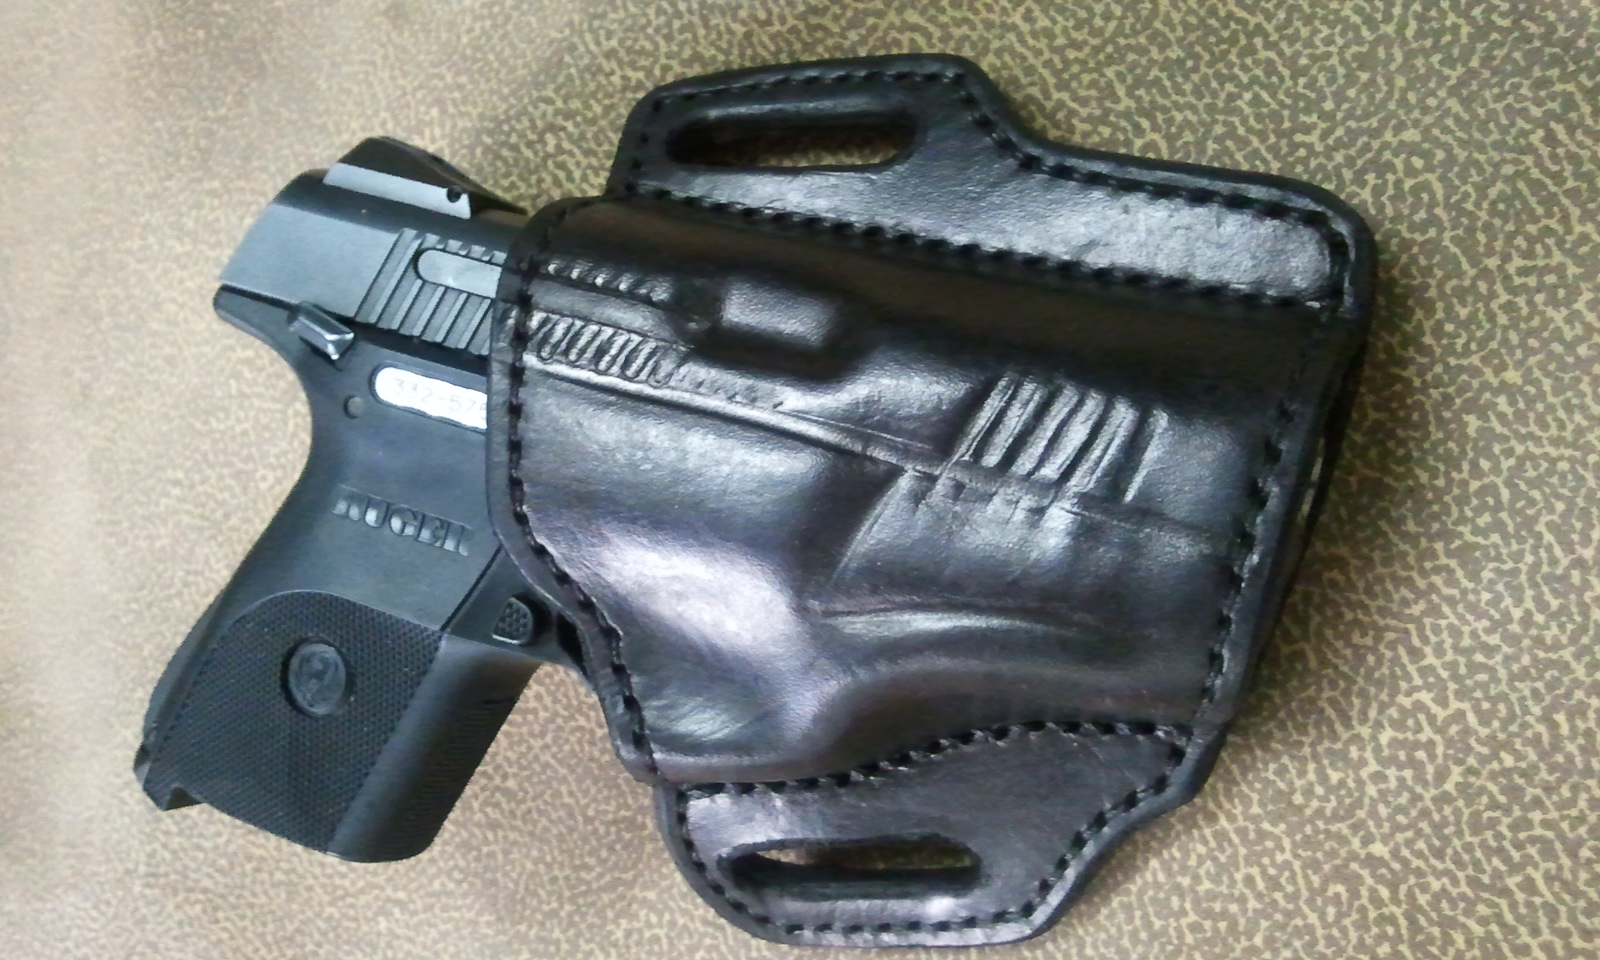
The other thing I thought I might mention is the quality of your work. Your molding looks very good and your stitcing also looks good. The only thing I would do different is stitch much closer to the gun. In time the leather will soften and the molding will open allowing the gun to wiggle and move inside the holster. Here is a picture of one I made for a Ruger SR9C. Otherwise, great job and keep up the good work.
quote name='glockanator' timestamp='1335727589' post='245728']
He came through with the judge but not the sign paid up front also.
This is what I came up with.

-
Whenever I add throat reinforcements, after I have located where exactly I want it and marked it, I glue the reinforcement piece to the main piece laying flat. Once the glue has dried, I then stitch the two together, while flat. I also line all of my holsters, so I do this before I put on the liner. I do not stitch the top of the reinforcement at this time. That will be stiched at the same time I stitch in the liner. I do it this way because it hides and protects the rest of the stitcing.
I bend the leather over after I have edged and burnished most of the leather.
Hope this helps.
Joey
-
Can someone please explain how to use the t-nuts. I'm guessing you only use the front side of the male part of a snap and screw it to the t-nut. If that is so, what type and or sizes all go together, (t-nut, snap and screw) . Also if there is something else I'm missing please let me know.
Thanks, Joey
-
I will have to agree with ramrod. I used the black oil dye for the first time two days ago on a belt i'm making for a customer. The belt is lined with veg tan, glued and stitched together. I then gave it a thorough neats foot oil bath and let it dry for about 12 hours or so. I then applied the fiebings black oil dye with a dauber to both sides of the belt. A single coat on each side is all that was needed and it went on very evenly. After three hours when I buffed out the belt, there was almost zero bleeding to my white cloth. A thin coating of satin sheen and no rub off at all.
The only other way, is to use multiple coats of super sheen. I have had very good results that way. The down side there is, everything is so damm shiny.
Hope this helps.
quote name='ramrod' timestamp='1330039097' post='235909']
three words JD: feibing's oil dye. use it and you won't have a probem.
-
E mail sent.
quote name='Jim' timestamp='1326646254' post='229216']
I'm interested in having approximately 20 deerskin 41/2 x 6 1/2" leather pouches made identical to the picture below.
http://i44.tinypic.com/amfh51.jpg
If you are interested, please contact me at the following address:
canerods(at)comcast.net (replace the "at" with @)
Thanks.
Jim
-
Oops, didn't notice that the heading said OWB Snap on.
Those look really nice. I did notice two things however, and it might just be the angle of the pictures. The first was the stich line at the top of the gun along the sights. It seems to angle away from the front sight. The other thing was that the belt keepers look pretty small if these are iwb. It looks like the snap will be in the way. How wide of a belt will the Sheriff be wearing? Again, very nice job.
-
Thanks, I started putting money down on the boss and should pay it off shortly. Just wanted to make sure it can handle the big jobs like that. So far the longest belt I made was 65 inches to center hole. Took 2 hours to punch the holes and 3 to hand stitch. Looked good, but what a chore. Anyway, thanks for the info.
Joey
quote name='steelhawk' timestamp='1324784550' post='226027']
I miscalculated how much was on the bobbin, but I believe it would have held enough to do the job, as long as I put as much on it as possible.
-
Do the bobbins on the tippmann and cobra hold enough thread for that long of a run, or did you just forget to check how much was on the bobbin first?
Thanks, Joey
-
Hi all,
I am purchasing a tippmann boss and had a few general questions about sewing. So far, all of my work has been hand sewed using the saddle stitch with a grooved stitched line on top and bottom pieces of leather. So, I was just wondering if you use the same size thread on the bobbin as the main thread, or one size smaller. Also, I'm guessing that you dont grove a stitch line in the bottom piece of leather, and my final question is, when you are doing decorative stitching on belts and such do you grove a stitch line?
Thanks,
Joey
-
Not sure about switching to the brown, but it is worth a try. It should be fine. Black is the only color I ever have problems with. As far as the roon goes, I can not be of any help as I am brewing my first batch as we speak. Today is the 7th day since I made the roon and so far haven't notice any change in the liquid. Must be patient.
Good luck, and if you have any other questions just ask.
Joey
-
If you are finishing the edges, after the dye has been applied, slick the edges with a slicker tool or canvas or even some old faded blue jeans. After the edges dry, apply some Gum Tragacanth to the edges. Let the gum sit there for a short time,(until it looks like it's about dry), and then slick the edges again. This will help quite a bit, then you can use a very light application of super or satin sheen on top of that and you should be good. (black is a pain in the butt to keep from rubbing off without super sheening the heck out of it)
Have fun, Joey
-
Rayban, that looks really nice. I saw a post a while back on how to make the VG, but I just skimmed over it. I can't find that post now, so if you could let me know how you make it, I would be greatful.
Thanks, Joey
Max, here's my latest v-roon attempt...came out pretty good this time.


Wanted: Person To Produce Steady Leatherwork
in Help Wanted
Posted · Report reply
give me a call or send an email. I may be able to help you. (702)371-3125
Joey@RisingSunLeatherCo.com
thanks, Joey