Wayward Shrimp
-
Posts
22 -
Joined
-
Last visited
Content Type
Profiles
Forums
Events
Blogs
Gallery
Store
Everything posted by Wayward Shrimp
-
Cool Thanks.
-
Holster Making Guide
Wayward Shrimp replied to Wayward Shrimp's topic in Gun Holsters, Rifle Slings and Knife Sheathes
Thank you all so much for your replies! The knowledge and experience you share is invaluable. I had a pretty awesome reply, that addressed most replies personally, and of course, thats when my computer chose to crash. I'll do my best to cover what I said but man am i aggravated > Taking all into account I will be moving forward with a belted design of some sort. I guess I was all little vague (or maybe bratty?) in the original post. I have no qualms with belts, just currently don't have the habit (or possession of one) wearing them. Seeing the clips it seamed to make scene that loops=belt clip=no belt. But I'm not going to argue with years of experience and very very sound logic. Belts are my future As it is I am indeed small (5'1" and while I'm not heavy but I'm no twig...) so finding properly fitting clothes is sometimes a challenge, awkward new lump or no... But finally I have no reservations about making adjustments, and hopefully it won't be to much of a nightmare... To me, on-body is the only option. I want it in easy reach, held securely and no chance of leaving it in a bag somewhere. As far as pocket carry, even my men's jeans hardly have room for my wallet. Which, is there because I only wear a purse when I have no pockets (and I'll wear a jacket with pockets first...) So i luck out that in the purse is not top of the list of best ways to carry CDMatherne, I really like what you have done with that holster idea. Especially the multi function (OWB ad IWB). Again thank you all so much for your input and opinions. Perhaps, since I missed the whole shoe thing most women get into, I'll have a holster for every occasion... j/k Soooo, in summary I will likely be moving forward with something on a nice belt, with leather loops. Likely also rough out. this made me laugh so hard! Unfortunately, I can make a relatively small shirt look like a dress. Which i guess is good for concealing things... not so good for avoiding being confused with a little kid... lol -
Holster Making Guide
Wayward Shrimp replied to Wayward Shrimp's topic in Gun Holsters, Rifle Slings and Knife Sheathes
well bummer. I guess it might be time to visit the 'how to make a belt' forum too Thanks for the replies! -
There are some really good tutorials on here, but I have some situation specific questions. First are there any guides/threads that I could look thru? (IWB holster keywork ended up being a wild goose chase) I want to make a IWB holster for a Ruger LCR. Thing is I don't wear a belt, and if I do, its a thin one, not something anything could really clip or use as support. How do I select the spring clip? (Size, and shape) Any specific considerations for this type of holster/carry situation. Thanks in advance!
-
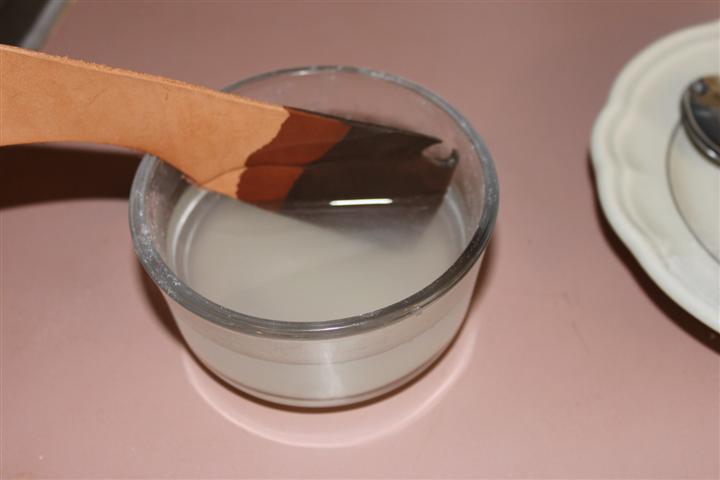
Thanks! Okay. I'll let it set for a few days then. I got it half in order... hadnt' sewn it yet, but had cut and put the holes in. Is it possible to use the eco-flo dyes AFTER oiling? Would that be a matter of let it set for a few days or will it conflict?
-
I have some thin (2-3) oz veg tan leather that I have been trying to use up, but its very uncooperative. To start it feels very dry and has the tendency to want to curl and looks generally unappealing. It is hard to case (gets sopping wet and then dries right out) so I don't bother tooling it just swivel knife cuts. I decided to use it to make little notebook covers. In an effort to give it a nicer texture and lightly darken I oiled one of the covers (with I admit not too much) neats foot. It is fine over the general surface, however it seeped around the stitching holes and swivel knife cuts leaving a dark greasy bleed under effect. Is there a way that I can pull some of the oil out? Or some other way to reduce the 'greasy'ness of it? Mostly I worry about transfer of oils to the papers.
-
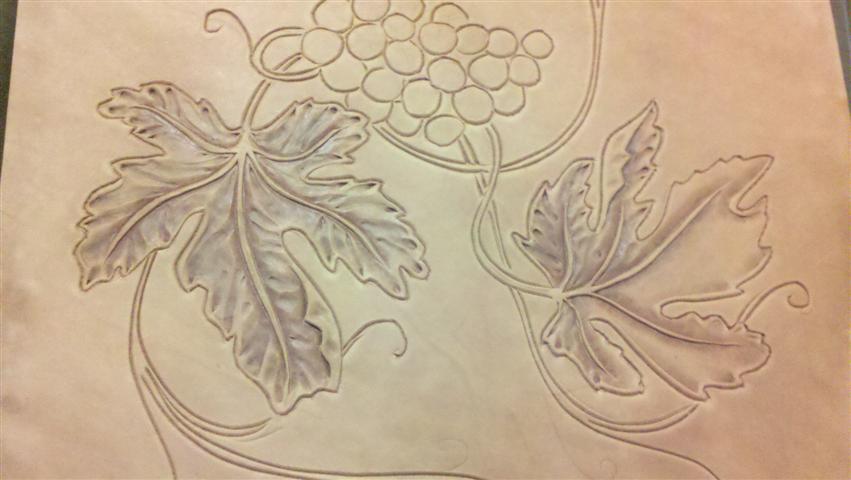
Currently I have P972 F902... mostly I've been doing small stuff, but need something bigger. I can't tell from the Tandy/Springfield sites what the sizes of the impression are.... Any suggestions for good tools to pick up? Or at least an idea of the comparative sizes? The leaves are about 3"-4" across.
-
I just use a 1/4 dowel rod. With a sponge or brush I tend to slip but not the rod. Hurrah surface tension :D
-
From the album: Wayward Shrimp's Finished Projects
Best advice/educational tidbit I got about leather-work was about skill of leather crafter is mostly in the 'coverup/fix/hide mistakes' department. Make that resist splotch look intentional. Make that stray swivel cut look like it goes there. In the instance of my case... two things went wrong. First it was my brilliant layout to have two ends of the side piece meet right where the latch would be. brilliant! second.... well lets just say i never did take underwater basket weaving in college. my weave went horribly astray. so. i cut the ends off the piece, and added a decoration to the latch area!© © leatherworker.net
-
Wayward Shrimp's Finished Projects
Images added to a gallery album owned by Wayward Shrimp in Our Leatherwork Galleries
-
-
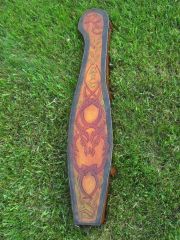
From the album: Wayward Shrimp's Finished Projects
Case for my handmade mountain dulcimer. First BIG project and even bigger learning experience. Took ~ a year or so to finish (and i never fully lined it...) This was the first phase of the dye job. I grew dissatisfied with the washed out look and dyed over it again and finished it. Don't have pics yet. learned: 1.) Casing is important. NOT soaking the leather to mush is important. hot water is BAD 2.) Parallel lines are a pain. 3.) Hand stitching hurts 4.) Mitering is difficult 5.) leather stretches more than you want it too 6.) eco-flo black sucks. eco-flo black antique, also sucks. 7.) basket weave is tricksy. in person is easy to see my 'learning curve' in my tooling and stitching. its an interesting capture of the growth of my skills.© © leatherworker.net
-
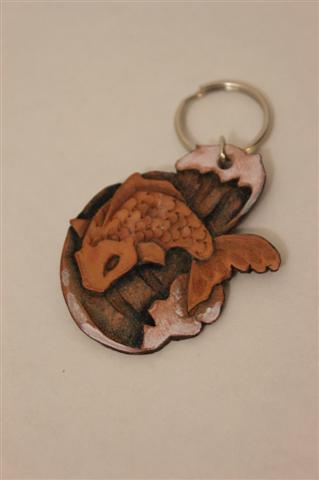
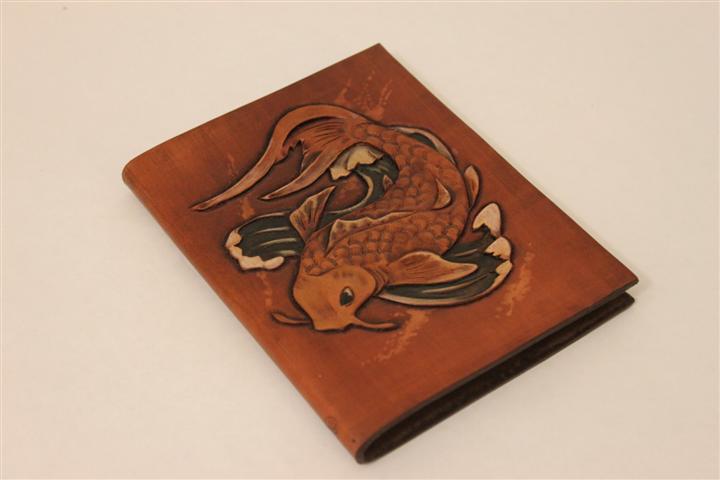
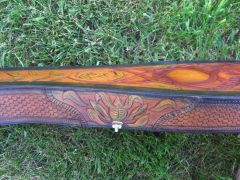
I like that seeder technique! Thats a lot of tiny scales, but it looks great
-
For big scales i've used D434 tho its a bit more stylized For small scales I use C770 A tight patern And a looser lighter impression. I like any of the tools with two cresents.

-
Wow, thank you for that info! I've no intent to lead anyone astray! D: I'm not looking so much to save time, but space. I don't have much room for my supplies/chemicals/tools and any clutter I can reduce is good. One day I hope to have a shop or something, but now I just have a old entertainment center.
-
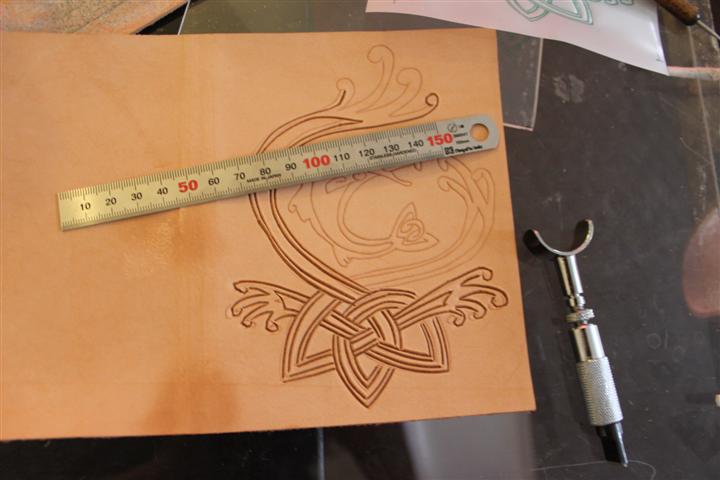
I do a lot of celtic/viking style knots and nothing annoys me more than slipping on the last bit of two parallel lines. Is the spacing on a double edged swivel blade a possible option to help? The trick is the long stretches... I've not seen many samples of the results or how wide the spacing is. I suspect its too narrow... i've used ceramic blades before, but only a little. i dont know much about care and maintenance. curently i just use standard tandy blades and handles. any experiences? Or some other idea? or just practice makes perfect?

-
I made sure to check the ingredients for 'ferrous sulfate" or "iron sulfate" some said "in the form of" other was just in the ingredients. And like i mentioned you can get a huge (to me) bag at the garden center of a hardware store that doesn't have to be crushed or have the other stuff tablets do. I mostly do small projects so I figured tablets and small batches is fine for me.
-
I was out today to get some steel wool and vinegar to start my batch over (Its bubbling away in the closet now) and looked about for Iron Sulfate. They had a large bag in the gardening section of the hardware store. Maybe I'll go this route next time, but in case it didn't work I didn't want to be stuck with a big bag of it, I got Iron tablets from the grocery store. Anyway, I crushed up 2-3 tablets and mixed it with hot water, and dipped some scraps into the solution. It seams to have worked! I'm not sure if the color is on par with the classic Vinegaroon recipe, but it sure was faster to make. The oval piece was the one I tried to treat with my stainless steel batch... I suspect thats why the color is worse, the scraps are the peices cut out from around it. I am not sure how long this lasts, or how large a project it will treat.


-
I was just going to ask if I need to remake my batch... I suspect so. I grabbed the nearest steel-wool I could find and turns out it was Stainless. I tried a bit of leather in it tonight (its been brewing a week or a little more) and it only made the leather kinda... muddy looking. I'll try again with regular steel-wool. 2 questions remain... 1. Should I keep the stuff i have and see if it improves? How long would I expect to let it sit before deciding its a lost cause? 2. How should it smell on the leather? I'm betting 'vinegary' is part of it. But I would best describe this as... pond mud and vinegar. Or, old tackle-box and vinegar... Also, while looking around for info i found this forum post http://www.aawforum.org/vbforum/showpost.php?p=33699&postcount=4 Has anyone tried using ferrous sulfate instead?
-
I have a small apartment and love to use things for as many purposes as I can (in addition to too many hobbies). My small tools and notions are stored in cleaned out glass food jars, altoids tins (MY FAV!) and Dice Boxes. I like to cross pollinate with some other hobbies. I use sculpting and resin casting tools along with leather-shaping spoons. I have a dental pick to mark,press corners, pull out tucked things and pull out stitches when I screw up. I have made some small stamps from Sculpey (i.e. logo) They aren't too durable but way cheaper than having a real one made! I made the master mold and make a new one each time the old one wears out. My favorite is my table. I don't have a marble block. I used a granite floor tile for awhile (12x12) but it was way too small. Now I have 2.5'x3' slab of 2" bullet proof glass (its some sort of dense acrylic). I screwed some 9oz leather scraps onto either end for handles and can 'move it' when I need. (Its really heavy tho 50-75lbs i would guess) It sets on a end table and works great for stamping, staining, paper mache, painting, sculpting and as a coffee table. A little windex and clean up is a breeze. Probably not ideal but way lighter than the similarly sized granite counter-top, and less noticeable propped against the wall.
-
I will give that a try, though I worry I will still have the problem. The other case i made with an awl exclusively and still had the trouble lining up, and pinching at the edges. Thanks!
-
It's thicker on top, but i'm not sure the weight, around 1/8-3/16 thick. And then double thickness on the sides of a slightly thinner leather. I left out the thickness because i'm still way off at guessing the thicknesses in oz correctly.
-
Joining you all from Central Ohio, I've been lurking about for a while and have gathered a lot of little tricks and tips here, and finally decided to join. I am working on a wine bottle case, essentially a cylinder with lid, and for the life of me I can't sew a square corner to attach the circular end to the tube sides. I have the tubes sewn and the tops are nice and square, I grooved and punched holes. (I like to use the 4 prong chisel since i'm still not so good at evenly spacing with an awl.) I cut the top using the tube as the template, grooved and punched it as well. Both are beveled to get mitered type joint in the corner. The problem is sewing starts out fine but getting a tight stitch seams to pinch the corner to a tight angle or something and by the time i get about halfway around, the circle is too small for the tube. If I sew it completely it bunches and buckles and the tube looks 'gathered' and the circle looks bowed. This makes one side pinched and the other drawn. If they matched it would be more tolerable... I have tried several things. Let me preface these attempts with the statement that I tend to hack at things until they work. This is the second case I've made. I worked from the Stolman book on the first and still it had basically the same trouble but was less noticeable because it was an irregular shape. I'm sure my solutions might be 'unthinkable' or way against the proper method, but I am basically making things up as I go. 1.) 'basting' the circle every 90 degrees (four points) 2.) sewing from opposite sides simultaneously 3.) reducing the distance from the stitch groove to the edge on the tube (haven't tried the circle) 4.) sewing at 45degrees (punch with awl) and at right angles (punched holes) on different attempts. What should I be doing? I have the feeling that my bevel angle is off, my stitch to edge width is off or something like that. What measurements should I be using to set these dimensions? I don't want the grove too close to the edge for decorative purposes but the warping and buckling looks really bad. Do I need some sort of form to keep the shape from distorting?