-
Posts
14 -
Joined
-
Last visited
Content Type
Profiles
Forums
Events
Blogs
Gallery
Store
Everything posted by Steve W
-
Hi folks, in my day job we're designing a mechanical device that will use 2-1/2" wide leather drive belts similar to old school woodworking shops. I had planned to simply apply neatsfoot oil to the belts and let the leather naturally age and darken, but the customer has requested matching a color sample that will most likely require dying the veg tan leather. I'm a little worried about flexibility and cracking of both the finish and the leather since the belts will frequently be flexing over pulleys. It will be a hand operated mechanism, so the belts will be running at low velocities. Should I worry about stiffening and cracking in the leather if I apply alcohol based stains with an airbrush? Any thoughts or recommendations about approach and products would be greatly appreciated. Thanks and best regards to all. ~Steve W. Seattle
-

Needle Shredding Backstitch On Backside...
Steve W replied to Steve W's topic in Leather Sewing Machines
Nice! Thanks Leatherjo! That's a good one too. Do you have a favorite needle? Steve -

Needle Shredding Backstitch On Backside...
Steve W replied to Steve W's topic in Leather Sewing Machines
I love the internet! I just found the Schmetz guide to leather cutting point needles that illustrates stitch appearance. Very helpful! http://www.schmetzneedles.com/learning/pdf/leather-needles.pdf Cheers! Steve -

Needle Shredding Backstitch On Backside...
Steve W replied to Steve W's topic in Leather Sewing Machines
Thanks, Wiz. I appreciate your thoughts. I have some Organ needles that don't seem as "aggressively" shaped as the D point 200 size needle that I have. It doesn't have any manufacturer's mark on it. My impression is that it makes pretty nasty shaped holes. I understand that different point shapes also affect stitch alignment. This one makes staggered stitches that are slightly diagonal across the centerline of the stitches. Do the S point needles make stitches that are parallel with the stitch line? Are you aware of any needle point guides that illustrate stitch pattern relative to needle point shape? I seem to remember from other posts that you prefer Schmetz needles because they loop better in both directions. Still true? Thanks again! Steve -
Hi Folks, I'm running what looks like a diamond point size 200 needle, the one that came set up on my Cobra 4, with size 277 bonded polyester thread. On my back stitches, the needle cuts or shreds the stitches on the back side. The backside ends up looking frayed and, well, bad. Can anybody suggest technique(s) for avoiding this? Do you try to shift the leather sideways so that the needle drops to one side of the thread that's in place already? Should I try a different needle point shape? Thanks in advance, Steve
-
Doh! Was just reading Cobra Steve's 441 machine tips, I forgot about the banana slide adjustment. That might help my side presser foot marking issue. ~Sw the Cobra rocks!
-
Nice! Thanks all, for the replies. The groover is gone. Now there is the faintest depression where the foot presses, but not objectionably so. I'm thinking about getting a pair of left and right side pressers and having a metalworker friend add some thickness on the pressing face to help spread the load when not stitching next to a zipper. I get marks with the narrow foot on soft leather, even with the minimum-est of presser foot tension. Thoughts anybody? Cheers, Steve
-
Hi all, just received my new Cobra 4 machine. I love Christmas in August and I love the Cobra! As I work through skill building and getting familiar with the machine, I noticed that the groover "fin" on the bottom of the center presser foot leaves a mark at the beginning of each stitch run. While I like the groover concept, I don't care for that groover mark. It seems like I would rather manually cut my own groove channel, just as I always have when and stitching. Has anybody else had the impulse to file the groover fin off of your presser feet? I've attached a pic of the groover marks at the beginning of each stitch line. Thanks in advance, Steve Seattle, WA
-
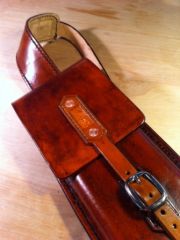
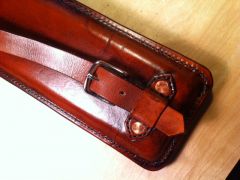
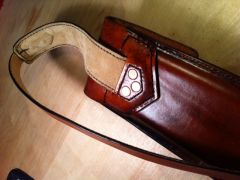
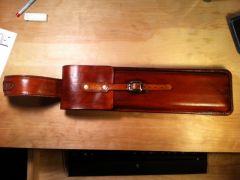
A drumstick case. Practiced forming, stitching, gluing, burnishing, riveting, and sequencing of steps. Discovered issues around waterbased stains & Super Sheen. Loved every step of the way!
-
From the album: First Project!
-
From the album: First Project!
-
From the album: First Project!
-
From the album: First Project!


