

Harley Corns
-
Content Count
24 -
Joined
-
Last visited
Posts posted by Harley Corns
-
-
A "bump" brings a thread that hasn't been commented on in a while back to the top....and this particular thread is definitely worthy of such a deed.
Thanks northmount !
-
Very nice work CWR...and I also like that Jeremiah Watt stamp you used. I went to his site and didn't see that design. Could it possibly be one that he doesn't offer to the public yet...or any longer.
And...thanks for the explanation of your stamping layout process.
-
I voted for "other".
One of the nice things about the monthly challenge is that it invites people to try something new or apply something they already know in a new way. One of the challenges with the challenges, is that sometimes the topic is a bit too narrow. For instance, not everyone is interested in cosplay or has a use for a costume piece, so you'll find a lot of people passing up that particular challenge.
Everyone has their niche, whether it's holsters or handbags or armor, and broadening the challenge topic to more of a "theme" would invite more folks to participate. I recall a previous challenge in the summer with a "fire" theme. You had people submitting photos of projects with fire tooled on them, other projects using fiery colours, and projects incorporating flames in other ways. This theme allows anyone to apply the challenge to a kind of project they like, with room to apply it to a new kind of project they're learning.
My favourite past challenge was the "break through" one, even though I wasn't able to participate in it. The challenge was thought provoking, and there were many different ways the theme could be applied to pretty much any kind of project.
Hope this helps!
I totally agree Lightingale.
I've only participated in one monthly challenge (breakthrough) ..but it was theme based and each of the participants had their own individual design and ideas. I learned a great deal with my project....largely because I was motivated by the challenge to do the research and to try several things for the first time. But I also learned a great deal (probably more) from ideas and varied designs of the other participants. It was a win..win all around for me.
-
called a Button Stud
Tandy leather sells them for around $3.00
-
I'd like to be added too please.
Thanks...
-
Thats quite a surprise gift! and from the color of the wood it looks like it might be made out of walnut. Regardless...its beautiful.
-
Xacto number 11 blade. Keep one sharp and another dulled with emery paper. You'd be amazed at what you can do...
DH,
I'd like to hear more of how you utilize a dulled Xacto blade.
I'm always trying to come up with new and/or improvised tools....
Much appreciated.
-
I just saw this thread ...and thought I'd share a Youtube video I found on the subject.
DIY - Modified Arbor Press for Rivets (eyelets) - kenpoist7.mp4
I'm in the process of modifying my 1 ton from Harbor Freight...for use much like lwm803 described( rivets,snaps and 3D and letter stamps)
I drilled the ram...and turned a shaft with the appropriate diameter(with an O ring slot) on the end to receive the 3D stamps. The O ring holds the stamp in place during the process.
Next my plan is to make adaptors that will work for each of the different size of rivets, and snaps...and probably a hole punch as well.
When all is finished.... i predict my total out of pocket will be less than $100.
-
This tutorial is outstanding Yak Lady. Your easy to follow-step by step instructions are helping me grow and expand my leather skills into figure carving....plus you have helped me feel like a true artist.
Thank you for taking the time and for your willingness to share your expertise (and at no charge, is like icing on the cake).
And a tip of the hat to northmount as well, for making the PDF's available.
PS
I agree wholeheartedly with Cheryl......This tutorial deserves to be pinned.
-
Beautiful ....you did a great job all around.
I hope you post pics of your daughters bag when its completed.
-
Greetings Rae,
I think I might like to participate in your May challenge....but not really sure what it entails, so I'll need to wait until at least your next posting before deciding.
-
Very nice work.
-
I found his book "Figure Carving Finesse" to very informative and helpful,and IMO...while its rather pricey,its well worth the investment.(in fact I think Tandy has it on sale in May.($18)
After seeing your excellent drawings, I believe you'll be interested in what he shows and demonstrates on portrait carving ,beveling,etc.to help make the images appear lifelike.
-
Have you looked through any of Al Stohlman's books of figure carving?
-
Greetings aguilerag
Nice drawing .
It'll be cool to see in leather too.
I've never done a face before either....so I'm interested to see what I can learn from your experience with this project.
-
Your project worked out well Regalto.
Not sure what your mental image was for the coloring...but I think what you've done works fine.
The colors enhances your tooled design.
And since you're finished with 4 days to spare....there's still time for a second entry....
-
I know what emboss means but not in this context. Can you explain? Thanks, Cheryl
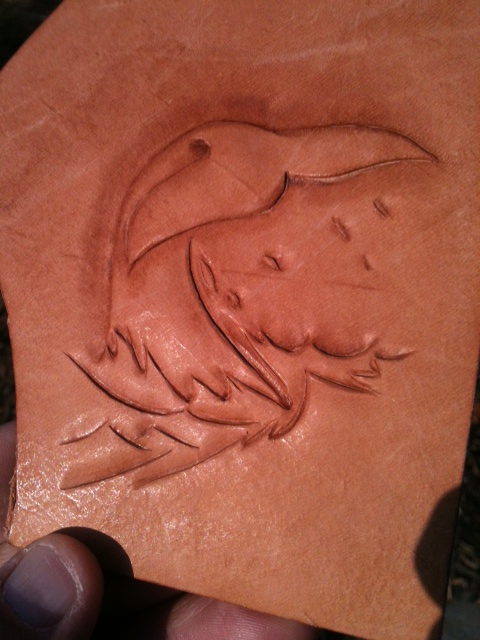
Like what I did on the whale tail...
I used a modeling tool with two different sized ball tips on the ends.... rubbing it on the flesh side within the beveling... raising and forming the shape of the horses body.
-
Thanks folks for the input.
I hear what you're saying about the hair blade and burnishing.
Still contemplating my approach on the surface texture of the tail,and the water .
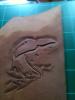
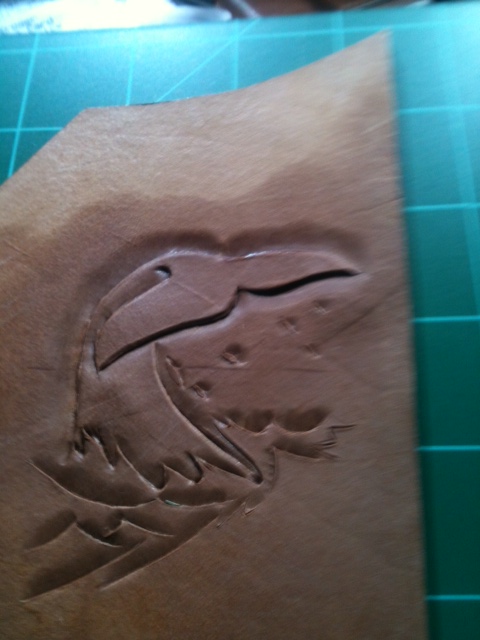
I attached a couple close up pics to show what I'm looking for.
The top one has distinct lines flowing out toward the tips ends of the tail.(which are counter to the water flowing off)
Where as in the lower example the lines appear to be just the water flowing off the tail
Ultimately,(another challenge down the road) , my plan is to try and finish-highlight with colors, in hopes that I can create a wet look and bring the viewers attention-focus to the splashing,flowing,dripping, water.
But right now I'm still toying with how best to texture the tail to represent the water flowing off..into a spray....and droplets.
And By the way....
Thanks Cheryl for ram-rodding this challenge.... Its my first time to participate,and probably not my last.
What I've already learned through seeing and reading about what you and the other participants are doing, has been well worth the price of admission.
A tip of the hat to you !
-
Nice start Cheryl. ...your tough design decision is now history.
If it were me....I think I'd do some really forceful beveling on the outline cuts.
Double bevel all the lines where the horse is exiting the glass.
Emboss the central portions of main body/Lt .shoulder boldly...then in a diminishing degree down the Lt. leg.
Emboss the front chest ...& Rt leg.
Save the rest of the mane until last.... with light uniform Swivel knife cuts and/or hair blade.
-
Here's what I've accomplished so far on the whale tail.
I didn't get quite the depth I'd hoped for with my beveling. (Might have needed more casing)
Some light embossing gave me a little more 3D effect.
I'm hoping that with a little creative use of some stamps and petal lifters, the water will come to life
Still contemplating how to create the texture of the whale skin...possibly a hair blade?

-
Yes I suppose it is rather ambitious...so far all I have is the sketch that I lifted from a "true" artist...along with a mother load of unknowns.
I plan to make it small...so not to waste too much material.
Outside of fellow leatherworkers on here....the finished project may never see the light of day.
Thanks for the feedback
-
I just stumbled upon this thread today and would like to participate as well. Never done any leather work like this before.(and may not again)...but I've always had a love for whales.
Getting a late start might keep me from finishing by the end of the month, but I hope to learn some things in the process regardless.
And obviously...I don't know how to post a pic either
-
I would really appreciate a set of the patterns you are offering. Thanks in advance.
chili.monsta@yahoo.com
Carving Horses
in Figure Carving
Posted · Report reply
I'm with you Cheryl.
This tutorial is very deserving of being pinned.