-
Posts
62 -
Joined
-
Last visited
Content Type
Profiles
Forums
Events
Blogs
Gallery
Store
Everything posted by AlizabethThomas
-

Alpha S.M. skiver cross reference?
AlizabethThomas replied to AlizabethThomas's topic in Leather Machinery
-

Alpha S.M. skiver cross reference?
AlizabethThomas replied to AlizabethThomas's topic in Leather Machinery
There are also older Alpha models in google searches, but none that look like this one. It has a modern look to the arm. The vacuum debris extraction table looks exactly like many other models. I'm waiting for a 1-2hp digital 3 phase converter device for it which I think will be adequate for this 3 motor rig, the largest of which is 1/2 hp. -
I have this Alpha S.M. bell skiver and am trying to identify a company who may still make and sell any parts for it that I need. I know there's a lot of machine cloning that has happened over the decades and this is one vein of that which I have found myself wanting to trace for future mechanical endeavors. I acquired this beautiful skiving machine last November and have finally set up a space for it in the sewing room of my shoe repair shop. I couldn't think of any better way to convey what I am looking for help with other than to say "cross reference". I can't find much evidence of the company that made this bell skiver. I did a bunch of Googling and the machine that looks most similar in the area where the work happens is the Sagitta model. Some parts of it look like the F.A.V. machine. In the process, I learned that there is an Italian name for skiving machine, simply "scarnitrice". Many company or machine names have that word before it. The company in L.A. that originally sold it has an active business listing online. I could tell they have a smaller focus and appear more to be headed towards die cutting than bell skiver sales, and having been in business since 1954, maybe a part time operation. I got their voicemail right away and they probably only bother returning calls with larger clients. I am attaching photos in case any owners spot part numbers or part shapes exactly matching theirs.
-
I'm about to pick up one of these next weekend, I think it's a different model, but very similar and it's definitely a USMC. I will know more when I pick it up but I am here to ask if a copy of the manual could be forwarded to me. If so please send me a message. I did get confirmation that pilgrim went out of business, so I didn't think i would be able to ask anyone there and get a response.
-
I bought a sutton jack sander for my shoe repair and shoe making operation. The seller didn't have the bags with it when I picked it up, and the ones that went with it, he said needed the elastic replaced anyway. I know where i can buy them for a couple hundred bucks for a set (there are (5) 60" tubes that hang from hooks in the back) but i know I can also make some pretty fast and have elastic already. I am requesting that anyone who has made a dust collector bag with attention to detail could suggest something with the best filtration. I bought some fireproof fabric for a jack sander i was going to build, but I can see fairly large pinholes in the light with that material, and i don't have enough of it for this set of bags. I seem to remember the old chalkboard eraser cleaner in the janitor's closet we had the privilege of using a couple times in elementary school having a twill fabric dust bag, same with my mom's ancient dirt devil vacuum cleaner. I am looking for the best combination of durability and filtration, though I am also tempted to just use whatever and surround the bag system with fine furnace filters. Having seen some videos of equipment dealers and the back sides of some of those machines and their bags, I am really hoping someone has a source for the special fabric. I have an older jack sander that has an almost fleece material on the filter bag. The machine is so old I'm not sure if it is original.
-

Fortuna model 10 skiver parts availability
AlizabethThomas replied to AlizabethThomas's topic in Leather Machinery
-
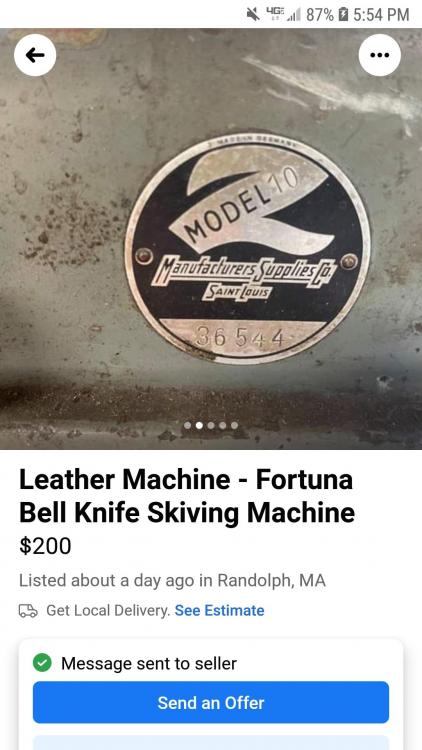
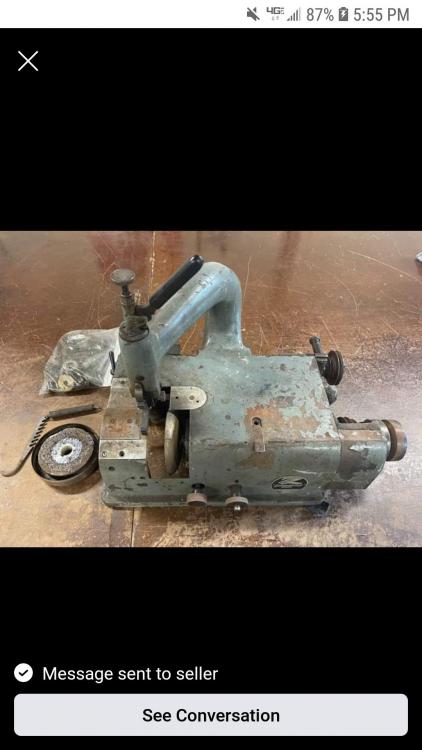
I have a chance to buy a Fortuna model 10 skiver and was hoping to find out if I could get most parts for one, and where. I would like to know if skivers are anything like old Singer sewing machines in that the designs have been copied so closely that they have parts still being made as usable replicas, or if Fortuna is in business and still making parts compatible with older machines. This is kind of like older shoe repair and shoe making machinery; there are few people who might know the answers. I like that it is one of the skivers that uses two motors, one driving the cutting edge and the other driving the material feed for consistent knife speed and better skiving performance. But since the seller doesn't know what parts it's missing, they'd better be readily available, or I will need another matching parts machine.
-
My local shoe repair supply that is a leather store carries some Sellari's products, but not the heavyweight stitcher oil. I can't stand the smell of gear oil, it can be really nasty. I'm not sure if all fossil/mineral oil of that weight has to be so obnoxious. I also do not think that gears in a differential and the kind of lubrication they need is really the same as what an outsole or McKay stitcher's rotating and cranking parts need. I got to the point of buying a line finisher and will need to select an oil for the oil bath bushings and remembered my limited experience around milling machines and lathes and the presence of Mobil's Delo, Velocite, spindle oil... my memory and knowledge o these oils are limited. So I do know shoe machine equipment knowledge is really obscure and highly individualized. This guy uses this and that, another guy, does he even lubricate it? with just whatever oil? I'm looking for the optimal lubricants, and hopefully a person who knows what the Sellari's actually is inside the can and what it's appropriate for, from an engineering standpoint with the forces of each machine's parts considered.
-

Singer 52w22 questions
AlizabethThomas replied to AlizabethThomas's topic in Leather Sewing Machines
I finally got the routing of the table done and it fits and is padded. The hinges are a lot of work as I excpected, since I wanted to fabricate my own. There'a another step to making them I didn't want to have to do but here I am. Hey, the guy I bought a set of table legs from had this Singer lamp he gave me. That's about all the logo I need, if i even keep it on there. It puts the light where the work is coming out, but I thought I'd try it. The light in the room is probably enough. Then I need to make an oil pan as well. -

Singer 52w22 questions
AlizabethThomas replied to AlizabethThomas's topic in Leather Sewing Machines
I'll look into those options when and if I get tired of these type of needles, but not feeling the motivation as I have basics like getting the table routed to take care of first. Thank you for the leads on parts as usual. I'm glad you're part of the community, you're very knowledgeable and helpful, as well as entertaining. Here's the video, skip to 13:47 for the beginning of the needle bar talk, beginning with him saying the word "presser bar" (he misspeaks here without correction, he means to kick off the "needle bar" segment). Juki LH-515 is the model he quotes as being compatible with his machine but too long. I bet it would be the same for my cylinder bed singer 153w102 since it is a needle feed too, I'd have to do some measuring between that and my 52w... tible o -

Singer 52w22 questions
AlizabethThomas replied to AlizabethThomas's topic in Leather Sewing Machines
You showed us where to get the adapter for the laterally flat shank foot to the square post in another thread (which I will be adding to my cylinder bed sometime), can you show us what needle bar to buy? There is a guy who made a youtube video on the new style needle bar with threaded, screw-in needle block and timing reference marks etched into it, added to his needle feed double needle flat bed vintage industrial Singer. Just not sure which one to look for for our 51/52 series machines. Or the search criteria. I tend to spend way too much time looking, it's a confusing world of sewing machine parts out there. -

Singer 52w22 questions
AlizabethThomas replied to AlizabethThomas's topic in Leather Sewing Machines
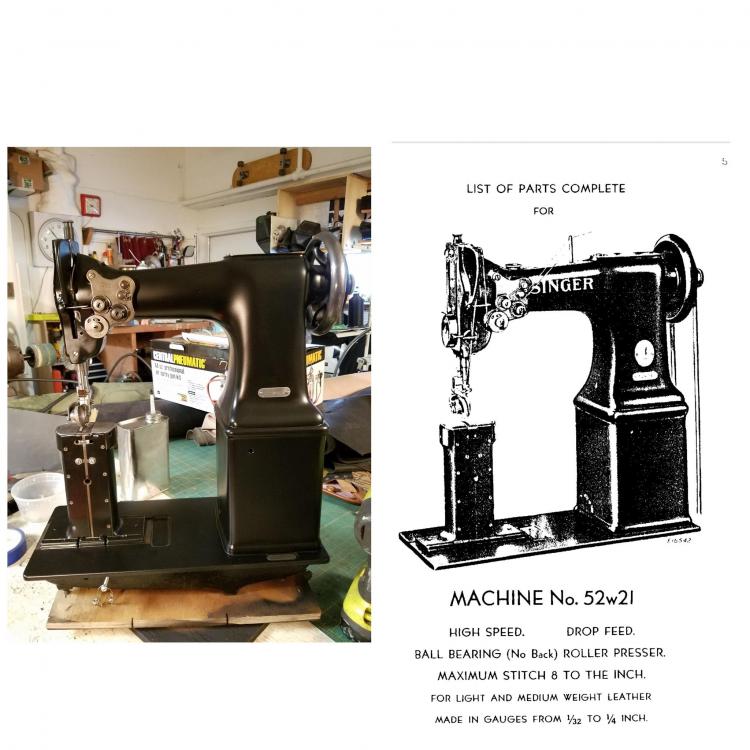
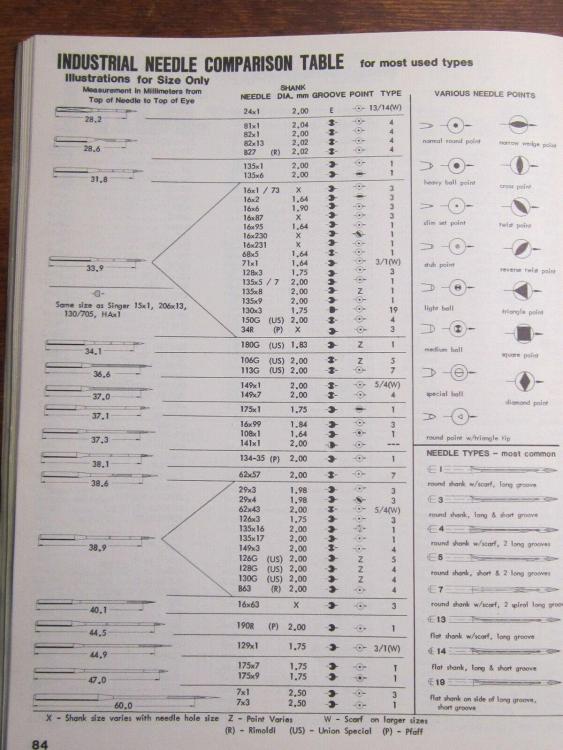
That's what I ordered, or was searching for when I bought this small sample pack I have here. It's going to take me a while to learn needle sizing equivalences. This pack says 128x22TRI. The thing that seems strange is that it has another short grooved area where the scarf would normally be cut out. The one needle in the machine had a scarf there, both sew. I'm not sure which one was more correct. My listing says 128x21 128x3 128x1128x22 for Singer 11w 21w1 51w where I purchased them (ebay) and has been the most reliable place to order. I looked at Diamond's website and they only allow me to purchase $32 of these at a time. It does also clarify 128x3 or 4 as, or give the conversion to, 128x22TRI there as well. I just wonder about the scarf. The cast, machined segments that make up the post of the machine are spaced a bit further apart than show in the old school hand-illustrated "stock photo" of it's manufacturing day, so I am thinking the hooks could be spaced to compensate for no scarf; couple MM on either side further from the needle. Note the gap/no gap in the photo collage. So I am cuirous about this feature of the machine and it's currently available needles compared to what was available originally; if there is a difference. -

Singer 52w22 questions
AlizabethThomas replied to AlizabethThomas's topic in Leather Sewing Machines
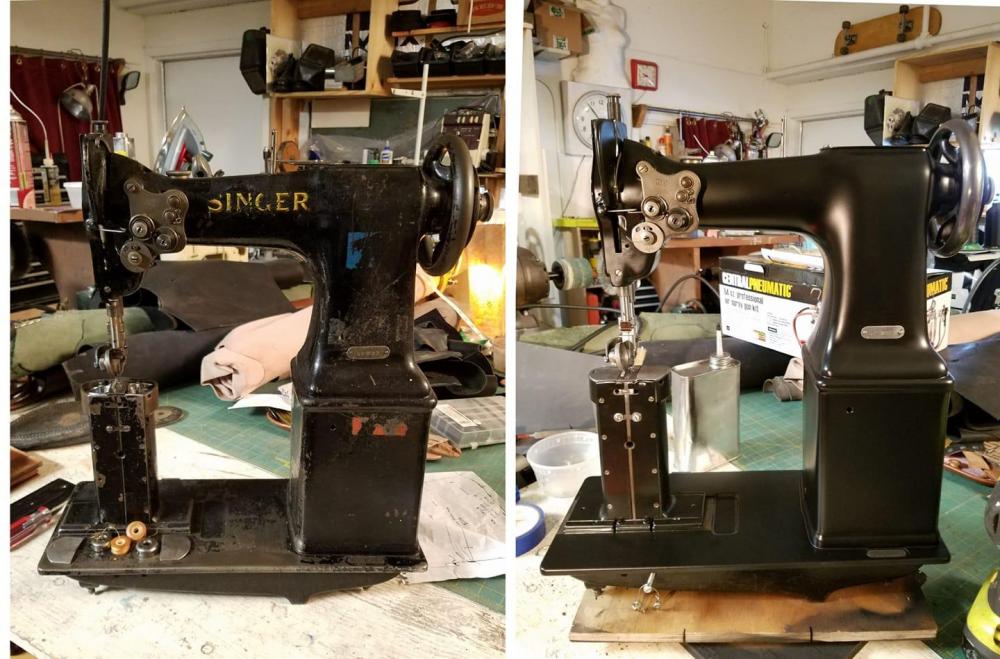
Rustoleum satin, thinned with Xylene. It's what was in the old school spray paint and magic markers. Volatile enough to dry fast, viscous and stable like mineral spirits. None of that crazy brittling, curdling, or evaporating to the point of no longer knowing how thin it still is, or drying around the edges causing dry particles to form or redissolve from/back into the paint side effects like with lacquer thinner or acetone. Edit: used 400-500 grit to featheredge after stripping the old outer layer of cheap oil. Under that was what seemed like powdercoat (sanding it produced a reddish powder reminiscent of a powdercoat primer I used to sand and paint at a factory job I had). Sanded reaally well and finished with 600 grit. When I used the 600 enough that it left no previous marks from coarser papers, it's marks were invisible under one sprayed coat. I did resort to paper as coarse as 220 to get rid of some major crusty layers, and paid dearly in redo time with the marks left. -

Singer 52w22 questions
AlizabethThomas replied to AlizabethThomas's topic in Leather Sewing Machines
It's completely finished here. I spend so much time looking for parts I actually need that decals and stuff like that are just a waste of time. I wanted something easy on the eyes, and logos don't help that look. Plus, since I had to sand and respray about 7 times, I'm not going to risk messing up the satin finish again with any kind of decal. -

Singer 52w22 questions
AlizabethThomas replied to AlizabethThomas's topic in Leather Sewing Machines
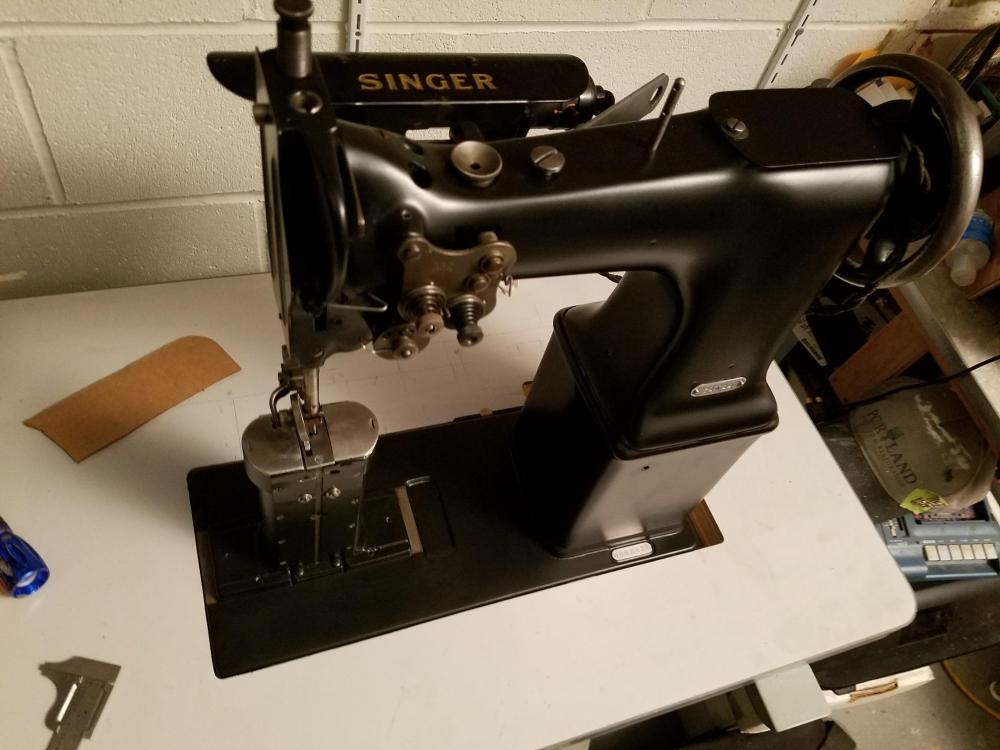
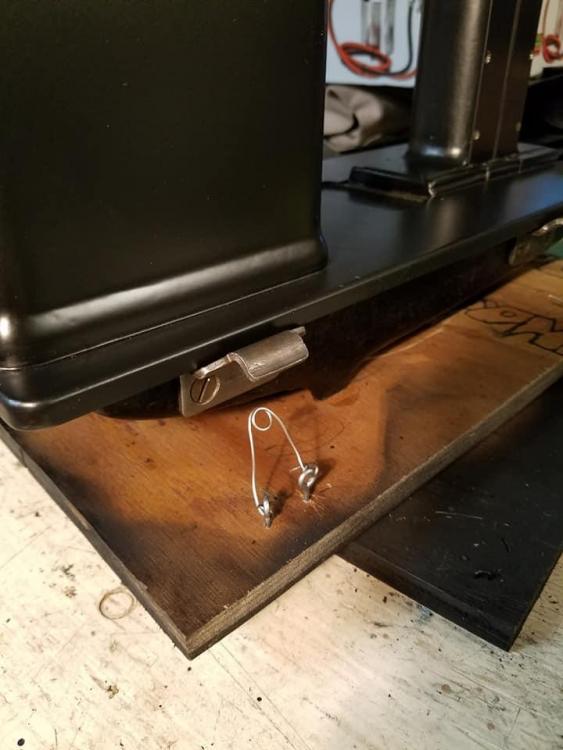
Wanted to share the restoration results, and show the half of the hinge that I have missing it's tabletop counterparts. Hoping one of the regulars can tell me who to ask or how to acquire a set of these hinges. I might have to fabricate some if I can't find them quickly, the next step is to route the tabletop for the head. Also, I guess I could put it off a little while just by making only enough room for these parts of the hinge to clear for now, then route out to full size later when I have the parts. I have fit the bobbins inside the cases, they're taller than the prewounds that were inside, but the bobbin cases still snap on effortlessly. I also got the needles but I haven't tried them I only just got it to this point now after a full day of cleaning up masked edges and careful assembly of hardware. -

Singer 52w22 questions
AlizabethThomas replied to AlizabethThomas's topic in Leather Sewing Machines
Wiz, the Organ needles on Ebay, the main listing I could find for this... 128 system, I guess it is... has Regular point needles in #16-#22 in even numbers, plus a #21 in each type, regular and leather point. Listed for 21w, 11w, and 51w, I have my fingers crossed the 52w is an extension of the 51w series, as there is not another listing with my machine listed. But since I got it sewing with this needle and it matches the measurements of that number, I should be good. -

Singer 52w22 questions
AlizabethThomas replied to AlizabethThomas's topic in Leather Sewing Machines
Thanks for the "tips", Wiz! ahahaha! Seriously though, that's good to know about the triangle points. Looks like this might be a difficult learning project on figuring out each chart for compatibility. Once I was reasonably sure I was sure I was sure what system/ type of needle, Ebay only turned up a couple choices, only in one listing I was sure enough to order some Organ needles in a leather point, offered in a two digit size format within the system type. Found the one for my most often used 92 thread. Once I get it sewing right on those, I'll order some more in other sizes and types. I never disliked the way the standard normal round point sews on the thin to medium leather I've used, perhaps there are advantages to leather point I have been overlooking. I got some aggressive chisel point leather needles one time but I think they were too big and I was sewing some chrome tan as toggle gussets on some nylon messenger bags I was making and didn't like the holes. But I'm learning a lot more now. -

Singer 52w22 questions
AlizabethThomas replied to AlizabethThomas's topic in Leather Sewing Machines
found it on ISMACS database, FINALLY. that was excruciating looking for the needle size. The type of needle for this machine is *garbled transmission* . . . . . . . . 128x4! I mean 128x3! I think! -

Singer 52w22 questions
AlizabethThomas replied to AlizabethThomas's topic in Leather Sewing Machines
yes- we are looking at a 125 in terms of hole/thread size, now I need to figure out what the other size info is. Last time I played with this was going from 29x3 needles to 29x4 ones in my 29-4 patcher. Seems like those weren't even the right size as I have to grind the shank shorter to eliminate skipped stitches. May have something to do with the downward-shimmed slack in the NB driving lever piston joint geometrically translating to far more than the shim's thickness, but I digress. I am now looking to find the other size info, and welcome the help of anyone who has done this. The shank is 1.72mm, the other missing bit of info from my end. EDIT: I did a little reading on needle systems, and my head is still spinning, but I found out NM is a system. Are you sure NM is this system? You only stated what manufacturer it probably stood for, then we have the size for thread compatibility, which does appear to be 125 with this size held up to my other 120s. I'll look into systems next time I'm at my leather supplier. -
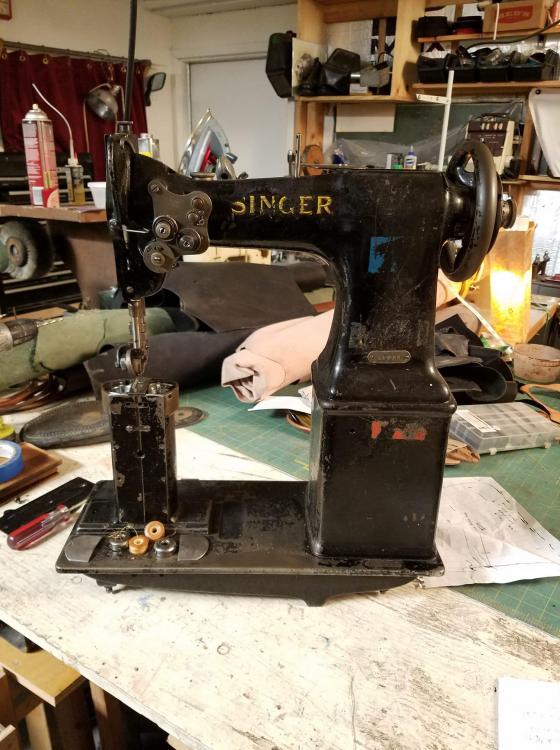
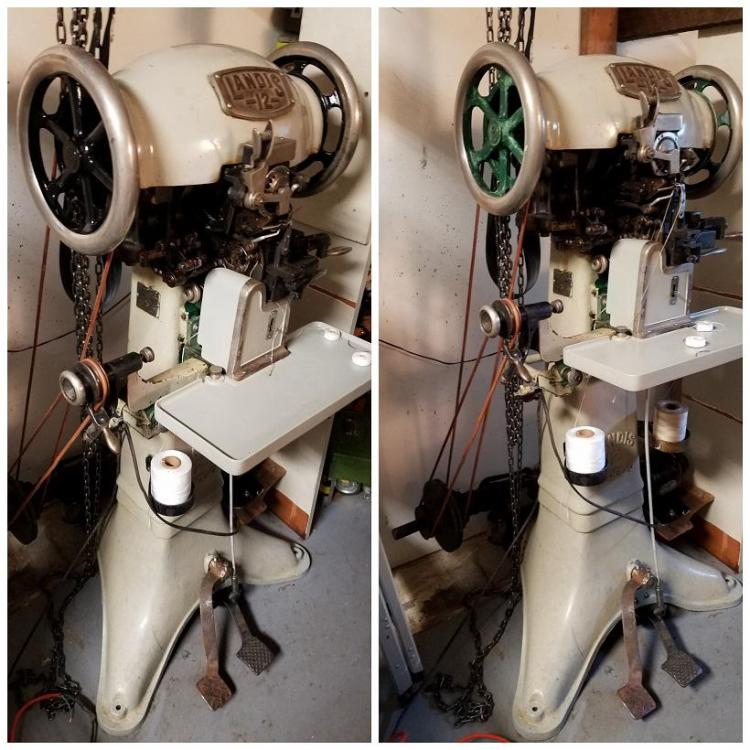
Just got my first post bed head, a 52w22 from 1941. I have bobbin questions. The bobbin appears on the parts list as #203208, which Cutex sewing supplies has on Ebay. The sides have the right shape, but my model number isn't listed, and they look too wide. I've messaged them asking for diemnsions. Mine came with a couple prewound paper ones in it, one was still pretty full and measurements are 10.45mm wide x 21.7 mm O.D. I guess the part number is probably correct to the machine since it's right out of the Singer parts list. Just thought I would ask here if anyone knows for sure. One ebay listing with this part number, actual dimensions not listed. The other question is about needles. I have a pair of needles here that both say "TORR 125" on the shank, and measure 40.5mm with an eye that is open from 34-35mm from the shank, and the scarf is scooped in the 30.5-33mm range. What size is this? The top thread tensioner spring is thicker on the right side than the left. The roller runs closer to the left needle and someone had commented that their double needle set up like this had better tension on the left. Sounded like user error on tension to me, just one of my trivial pursuits I suppose, unless someone here knows if this is a thing.
-
You would... leave the hoist box up. Good call, I would like to clean up that clutch shaft assembly. I haven't lifted the whole machine with it, just the base and then the head, so if it pops or cracks, I will have to take it down and wait, see lumber is really expensive now, I noticed. About the models, I wrote about this in my last post, this seems to me to be a '40s model. I would love to know what decades which letter models were in production. I've seen G models with more of a toggle style lightswitch, but this has the mother of pearl inlaid push button style, looking original to the machine. It seems to be a 1940's model just as they were progressing away from that kind of thing.
-
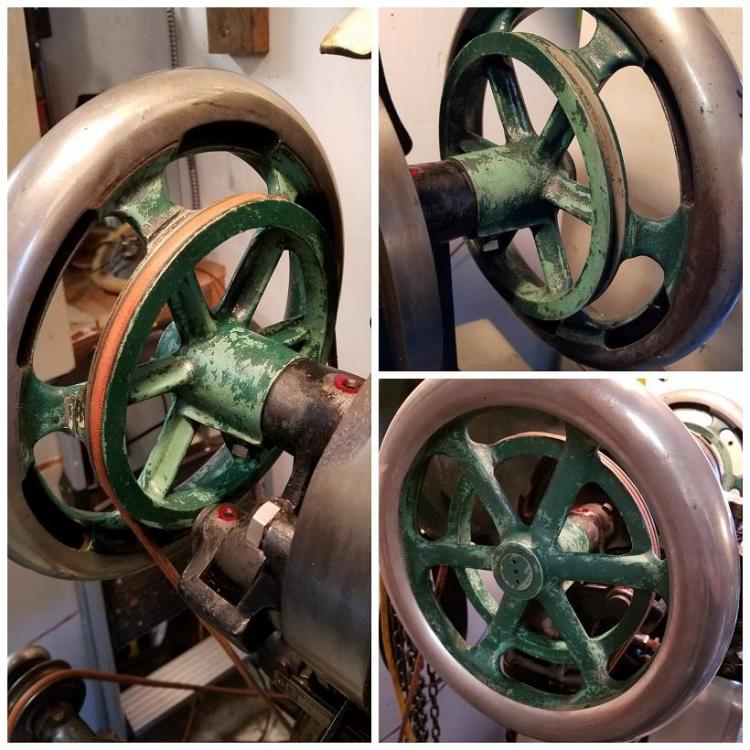
Now the handwheels. I chose to paint black. Came to find out that painting to match the body would have been the original style. Several of these cast iron parts were originally chrome- or probably nickel- plated (I say nickel because of their now-dull appearance, almost like tarnished silverware, I don't think chrome can dull that way but I've seen nickel coins do it... I digress...) Anyway they plated the whole table, thread spool holders, tombstone cover, and handwheels entirely, after smoothing the strip around the edge- the hand contact area of the wheels, the raised edge of the table, the collar of the spool holders ,etc., and PAINTED OVER the orange peel rough cast areas- tabletop surface, spokes of wheels... so stripping the wheels to chrome would have not made it more like original, painting it body color would have. But matching the moving parts seemed to bring out and tie in the mechanical genius of the machine with the aesthetics while also keeping it quiet mysterious. It looks more gothic, or like a stark art deco kind of element- this probably a 1940's model, there's no wikipedia section on Landis stitcher history, nothing like the Comprehensive Singer Sewing Machine Model List (https://ismacs.net) of Landis machines out there... that I know of.
-
With all this work and setting up my Singer 29-4 and troubleshooting it on Saturday, I really didn't feel like doing any more work on Sunday, but I just HAD to clean up those grimy hand wheels. I was growing tired of getting nasty antique oil crud on my hands any time I played with the machine. I still have that under my nails. It took a lot of effort, as if the human hand oils such as is found on steering wheels, doorknobs, and other common surfaces were the primer for the rest of the shoe repair shop dust and oil top coat. If you've ever cleaned that human hand oil residue off anything, you know how tenacious it is, and this combination was much worse than just machine residues I'd previously cleaned. That pretty much wraps up the grime cleaning except the clutch jackshaft and the back of the machine. Still debating on if I should leave the hoist box in place until I get all that cleaned up back there. As thorough as I've been so far, I probably should.
-
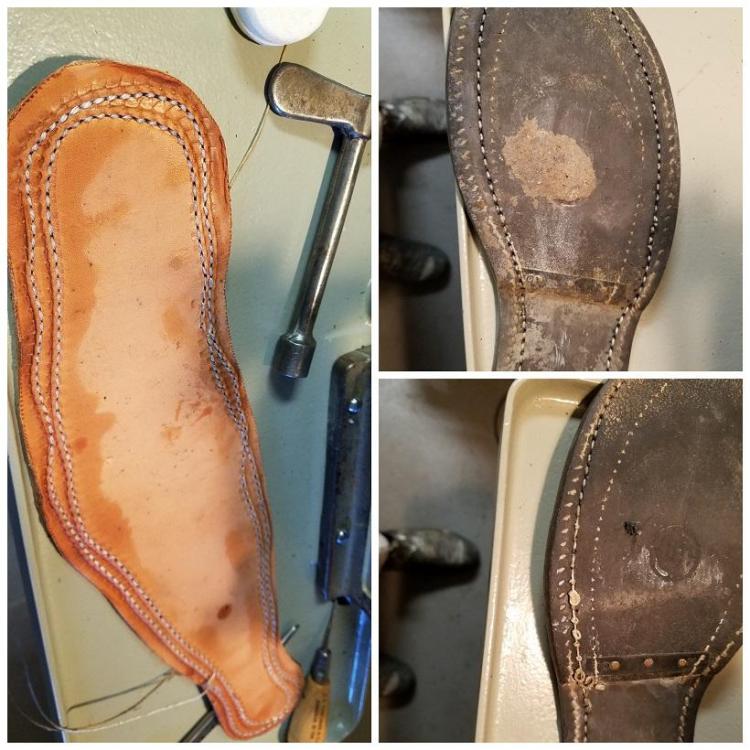
Here, counterclockwise from left, we have: 1. "my first pizza pie" 2. Tension problem when going up a half sole. Honestly, with all the stories of "letting the machine do the work" of advancing the material, this one got stuck there too and did need some help. I should have wetted the work with an alcohol/water solution though, so that's another thing to do next time. 3. Tension problem sorted. I hope I can avoid ruining soles by being able to set up tension for different types of soles. I see in my future showing up at legit operating shoe repair shops, little poor kid look, asking "I'd like another bag of used soles, please" for practice material. Or just dumpster diving for them out back, and the answer for why if caught makes me laugh to myself.
-
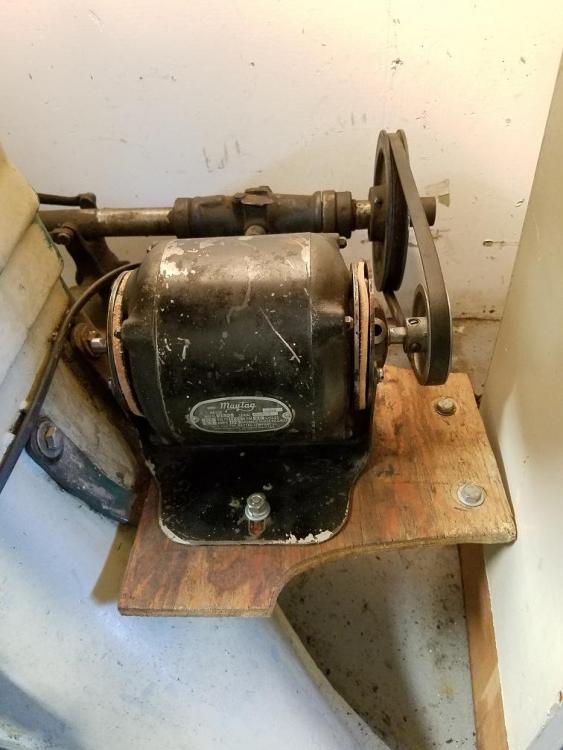
The motor mounted. I had to bolt the plywood down on all 4 bolt holes that were there, it was flopping around on only the outer 2 when I got the machine. It used to stick out to the right further, more than it needed to, so I had also cut off some of the end including some of the metal L-brackets. They're concave for strength underneath the plywood, and it now appears I've butchered an original Landis parts set, but this is modified for functionality. With this bolted in, I had to loosen the pulley on the clutch driveshaft and pound the pulley to the right to get it inline with the motor pulley. Glad I bought that deadblow hammer, it took a lot of persuasion with all the grime on the shaft and gummed up oil. I could have cleaned it and hit it with some penetrating lubricant first, I guess. Despite having blown out the oily dusty gunk, the motor still gives off an oily grime smell when warm. Maybe I'll spray some essential oils in there or something.


.thumb.jpg.7b7652ee4a1d9e97d823c2bdc78e6f4a.jpg)
.thumb.jpg.0602af395e8de998a041fbc192472776.jpg)
.thumb.jpg.2b3d1c37292d8578b336c0c3b67e759d.jpg)
.thumb.jpg.9c49a5b8a350e1f696146353791d81a7.jpg)
