-
Posts
62 -
Joined
-
Last visited
Content Type
Profiles
Forums
Events
Blogs
Gallery
Store
Everything posted by AlizabethThomas
-
Glad to see this idea, it sure beats being upside down fiddling with very limited, almost nonexistent real estate between my knee lift and wire routing .I've already been getting familiar with pillow block bearings and shafts because of my ongoing home built shoe sanding machine project.
-
How much of the needle bar did you have to take off here? I ordered an extra NB, the adapter, and the wheel is on it's way from China (should be halfway here by now). Which end was shortened? I now see it could be either end since it slides through, but also it just clamps in place and I have a through-hole out the top. So I guess I just have to find the area to clamp with the taller wheel in place that provides the best range of pressure on the material, right? Doing this on a 153w102 cylinder bed needle/drop feed.
- 14 replies
-
- and many more
- singer 153w
-
(and 4 more)
Tagged with:
-
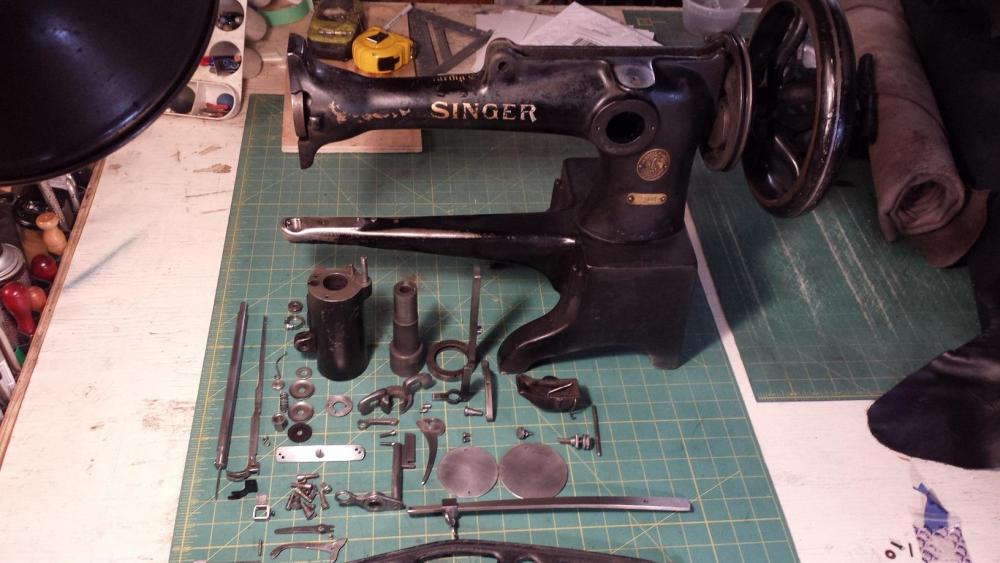
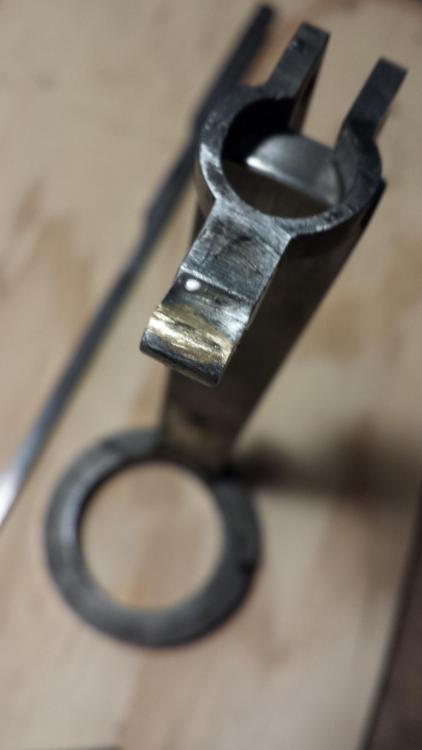
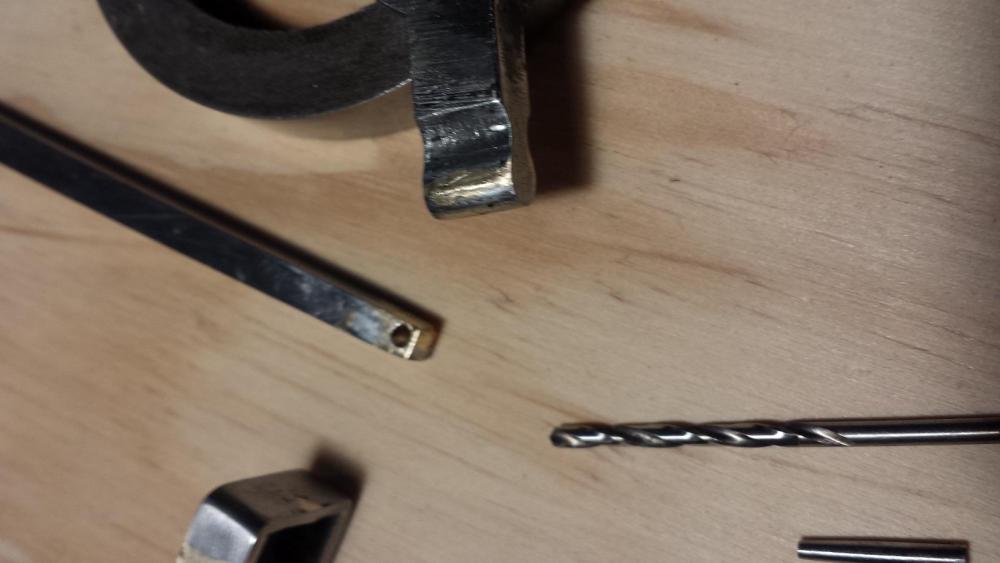
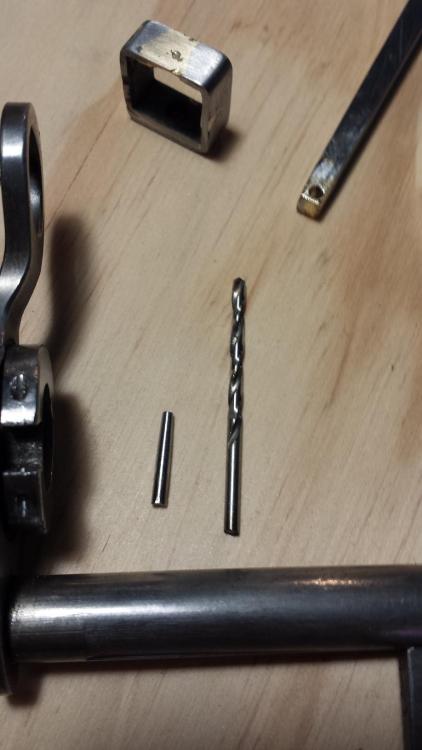
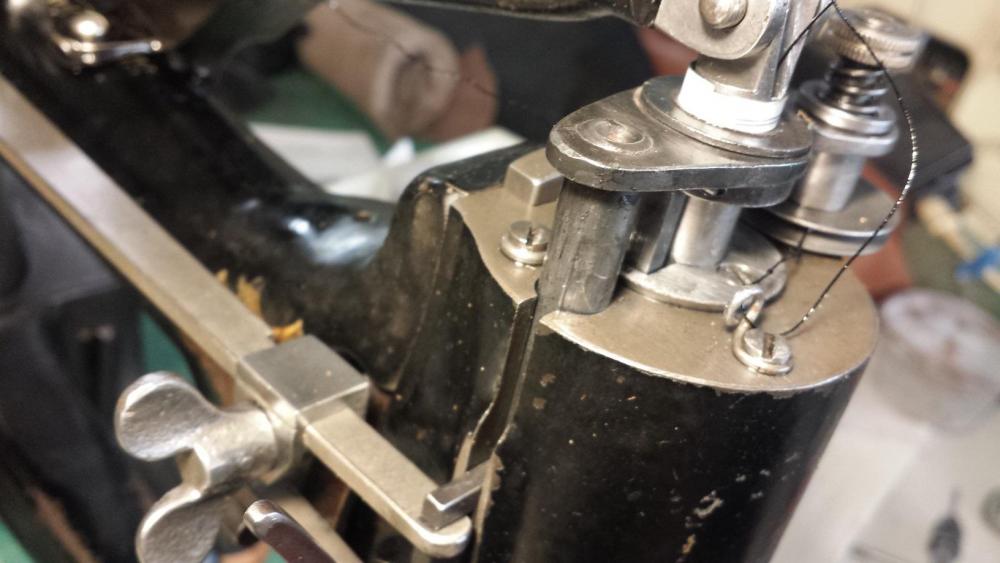
The gib had some braze in it needing to be filed out. There was some other troubleshooting. This rod shown has the last of the slop affecting stitch length. If I could get a weld buildup and lathe treatment, possibly also oversize drill/ream and a bushing fitted if needed, i would be able to get 5 or maybe even 4 SPI. I get a respectable 6 through a few modest thicknesses, and like a 16 oz. stack sends the max length down to a still respectable 10 SPI. I put a rolled up neatly cut strip of beer can shim in the needle bar hole of the foot bar revolving joint, after re-crimping the center ring which had come apart during testing. Previous owner had thought that had to be un-crimped to be disassembled, in fact tried to manstruct me to do so as well. I also had to file down the skeleton key end of the revolving joint's shaft to make free play between it and the foot lift lever. It better matches it's profile on the parts list this way as well. At least the depiction of it assembled. The rectangle part shown disassembled from the shaft (not something that can really be done outside of a well-equipped machine shop), it is still 90* at all corners. Filing for free play must be something of a setup job for these. I did that because I was having trouble geting the foot to fall fully, and wanted to be sure it has it's full range of motion. Now it seems to rest fully on it's bottom of the cylindrical shaft hole or the skeleton key tooth slot, and not the lifting lever, and does it's lift in a crisp, smooth movement in spite of the slop in that shaft. I am tempted to use some of my upcoming stimulus money to buy and have a new one resurfaced, though a welder and a lathe are also seeming like the better investment...
-
I didn't do anything to the gib wedge, and I have it positioned as shown. The wedge's groove is ramped different amounts, so part number up or down inside the gib, I'm about to find out. I only brazed worn off material inside opposite the wedge in the box, filing flat with surrounding original material. I guess the needle bar had been rubbing the outside as well, that also got the treatment. I can tell what is wear and original surface, that's all I brazed .The foot lift rod to the side that has a block pressed in for the lifting lever has a lot of wear that I didn't get to surface out, I'm hoping to once I could be sure that area would fit in a lathe chuck to finish it off. Brass/bronze will be better for the other surfaces and rebuildable. It's not the needle bar, but the foot bar that I was looking for. It has a weaker upper hole since I brazed it. I'm aware of the differences in the other parts, and William Hopgood had a blog about using bellcrank and lever with a decent amount of filing to get it to work, but he didn't need a foot bar #8586, so I had no info there. Someone on Victorian Sweatshop convinced me to try the newer one, but it's now back in the outbox. I suppose next time I could TIG weld it, but to remove all the brass now would require more of it to be ground away, and I'd *really* have to be careful of the dimensions and hole location then. I could also try to TIG some of that special silicon bronze filler with it too. We'll see how it holds up. If you had part #8685 for less than $75 total to USA, I might have to get that from you. I know of a website purportedly run by the Amish on the east coast that parts them out for that much.
-
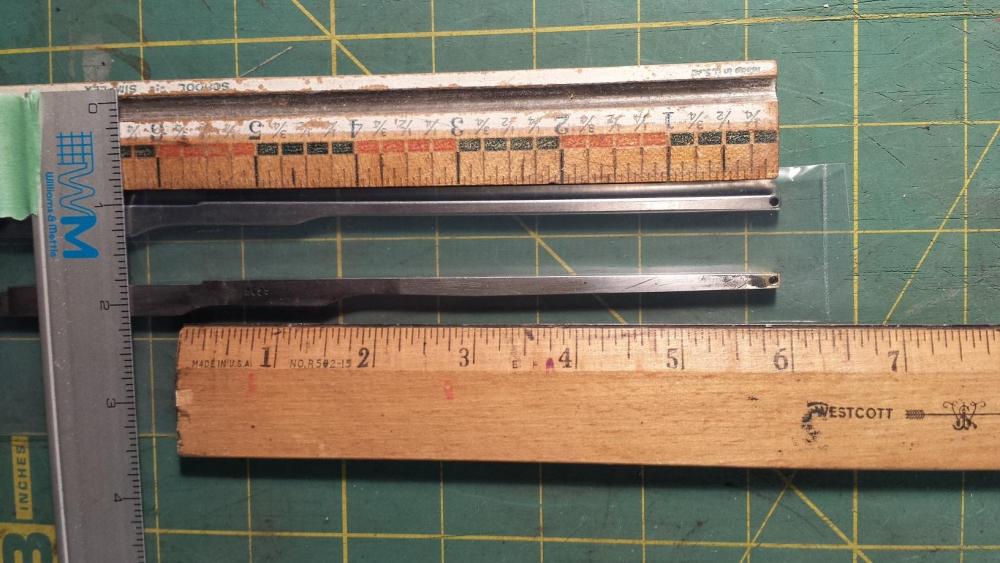
Now the rest of the internet knows the needle bars are not in production anywhere. I wonder what a machine shop would charge to make a replica. If it would result in a much tighter machine and under $150, it might be worthwhile. Then again, that money toward a 29k_ could be better spent when $36 replacements are available. Obviously not enough people own 29-4s that any company has undertaken reproducing them. Here are some poor photos of my braze reconditioning.
-
The answer for those searching the internet, NO, these are not compatible crossover parts. Now the internet can tell you this. I brazed all parts with the common worn areas most affecting stitch length, and took note of the approximate bobbin shuttle bushing. With punch marks on every gear in the pinion, I reassembled that. The rest of the needle/foot head is cleaned and can go back together. I'll clean the rest of what I can mainly on the outside, I won't bother disassembling the handwheel and the pinion's levered cam in there, just grease or oil it from the access hole and put the stitching end back together with my newly brazed/ reconditioned parts.
-
I got the foot and foot bar #8675. I will at least get the foot's upper hole location, I bet that will be the same if the whole thing isn't close to the right size and shape enough to use or modify then use. Will report back then. Also almost got the missing bobbin winder, but I figured between my bobbin winders on other industrial machines and a drill and other bits I should be able to electrically wind them with only a little crafting of a split shaft, to save $38 right now.
-
I was planning on getting that foot. The main question was about the foot bar. Can i use #8675 instead of #8685, or can someone tell me from an intact spare the center of the small upper hole's location, ex. "2mm from side, 3mm from top to center of hole" as mine is rounded out AND broken. For whe I weld/file. Not sure if #8675 has same hole location or if it is more accurate on the $36 version or the $12 one, but would buy one if nobody can answer this detail.
-
Hey everyone, I've gotten myself a singer 29-4 that stitches. Very short stitch length. I did a lot of reading on what causes that, but what obviously needs fixing is the broken-out upper small hole on the foot bar. So I'm writing to ask for help in fixing that in a couple of ways. Most direct fix: weld build and re-drill. That hole has been busted out a while and is wallowed out. I would want to have a nice accurate location before I drill a hole that is pinned in, or I would start it wanting to break again. I will want to look for a solid pin as well, or what factory correct pin, not a nail like that mangled bit in there probably is. I've been cleaning it. So, I could either get someone with a spare to measure, or hope that the cheap version of the #8675 has a good tolerance on the hole location (and it's the same as the #8685) to use as a guide. Or, if someone could tell me that the 8675 foot bar is something that they've successfully used or modified to be usable in place of the 8685, I would just do that. I've done hours of searches and lots of useful and entertaining info, much of it from this site, has turned up, but not on this specific part's backwards compatibility. Plenty of that on the bellcrank and it's lever, even someone who shimmed it to like new, which gives me other hope for this machine to have a long life...once I work out the foot bar problem to establish a baseline. I know the bobbin tension is insane, and foot is dull. Before I order the foot though, I'd like to know if I could add a foot bar to my order. I'm still just taking it apart and cleaning off all this nasty gear oil the previous owner used on it for it's entire service. Those must have been some stinky repairs with that oil cup full of gear oil, saturating the thread.
-
I have been looking around for walking foot sewing machines in central NC and found a liquidating company that has several used Yamata FY5318 machines. They say "High speed lockstitch sewing machine" right on a badge on the front. I wanted to know if some machines have faster internal gearing than others, if anyone knows. Now I'm going to go into detail... Let it be noted that in the past I've used: (all were someone else's or are not available to me at this time and place) -Econosew 2060 with consew servo motor. Horizontal axis bobbin. It allowed me to have amazing needle control, and allowed me to do very fine detail work. -Consew ____? double needle walking foot machine converted to single needle, clutch motor. Vertical axis bobbin. Horrible needle control ability, would run-on and always felt too fast even when I changed to the smallest available pulley on the motor. I got the feeling it was internally geared too fast or something, although I might have tried switching to a servo motor, had it not been the wrong tool for the job being double needle and all it's wear and tear. It also seemed it wanted so stair-step stitches. I started questioning the vertical axis bobbin's possible contribution to this. Have seen stitches look like this but this machine also wanted to steer to the side. -Consew 206-RB_? A rugged single needle walking foot machine that came with a clutch motor and had a more manageable speed than the previously mentioned Consew. Started using a servo motor. This helped the speed and needle control a lot, but I still couldn't quite walk it one stitch at a time like I could the Econosew. It still wanted to run on one stitch further or start another stroke when I wanted to stop it. It didn't seem too fast, but that this was just a feature of it's mechanics. Also getting enough tension at times was difficult, I figured being an older used machine, it could probably have used new tension discs and spring, feed dogs, etc. The vertical axis bobbin axle seemed to have some play in it as well, not sure if this affected performance. Now back to the current situation. The Yamata FY5318 walking foot machine seems to be in the duty range I need for what I do with canvas to thin decorative leather accent pieces, double layer cordura to leather and double layer seatbelt webbing. Nothing in the extra heavy duty range will be needed, but I am a stickler for needle control. This Yamata had a clutch motor so I was sure it could be improved. It was way too fast and hard to stop and start so unsuitable for the small details I need to do in its current setup. The warehouse guy had me sew on a drop feed Yamata with a servo motor. That just about had acceptable needle control and speed at the low end, but was an apparel machine. The walking foot model, however had a badge on it saying "high speed lockstitch machine". This had me wondering if it is actually geared to run higher speed INTERNALLY in the head of the machine. Why, if the speed only depended on the motor type and pulley size, would you label the machine as high speed? The warehouse guy still says that the speed really only depends upon the speed or type of motor and pulley, but the badge seems to indicate differently. I'm just afraid that even if I get the 3/4 hp $150 servo motor he can order and says is more geared towards walking foot machines, that it will still be too fast compared to that econosew I once used with perfect needle control, if it is geared faster internally. He won't or can't set the machine up this way without a guarantee I'll buy it, and I wouldn't want to buy it without reassurance about the gearing. So I decided not to buy it until I do some more homework. Of course, the surest way to get the performance I remember would be to go find an econosew 2060, but I can't find it. I know there is a lot of machine cloning between brands, but not sure what make/model the econo' copies. You all seem really knowledgeable on machines here, so I'm looking forward to any replies!

.jpg.d60258221c476480a6e073a8805645bb.jpg)

.thumb.jpg.f28af886c5d2838e8abc4fa72f8ebfa8.jpg)
