TSquared
-
Posts
53 -
Joined
-
Last visited
Content Type
Profiles
Forums
Events
Blogs
Gallery
Store
Everything posted by TSquared
-
Eric, I couldn't agree more with your assessment of Dave's situation. I have the same philosophy as you, it is a machine and as such it has the ability of performing the job it was designed for. The only thing missing in Dave and my case is experience. I also agree with Dave about the pride thing. We both have the mechanical ability but lack the experience that you have. Your knowledge and patience has been so helpful over the past few weeks that I couldn't begin to thank you enough. The old phrase of "teach a man to fish..." is certainly appropriate. I have learned a lot from the help you have given to Dave, I just haven't commented because I am sneaking my Internet time at work. I have made a couple of small items this past week with some success. The cover for my Kawasaki zn1300 came out nice but the stitch lenght varies depending on the speed of the machine. It seems the faster speed produces a longer stitch. I am sewing two layers of Sunbrella and it seems like I don't have enough presser foot pressure to move the material. I would have thought the needle would advance the material in a uniform manner. The knob for spring pressure is turned all the way down so I am assuming I missed an adjustment somewhere. The video you mentioned would be extremely helpful to me. Since I have no experience with this machine, I don't know the relationship between the different parts. As to Dave's issue with broken thread, could this be caused by using the wrong size needle? While I did not break any thread, I could not get consistent sewing without getting thread wrapped around the bobben until I changed the needle size. I was using a needle about two sizes too small (I went from a 20 to a 23). The tip in this forum on how to test needle size to thread size put me on track. Gotta go, thanks again for your help. Tom
-
Thanks! Coming from a master repairman that means a lot. I could not have gotten this far without your help and all the others. To all on this forum - have a nice thanksgiving. Take the day off and spend time with your loved ones. Tom
-
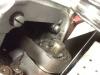
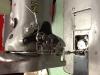
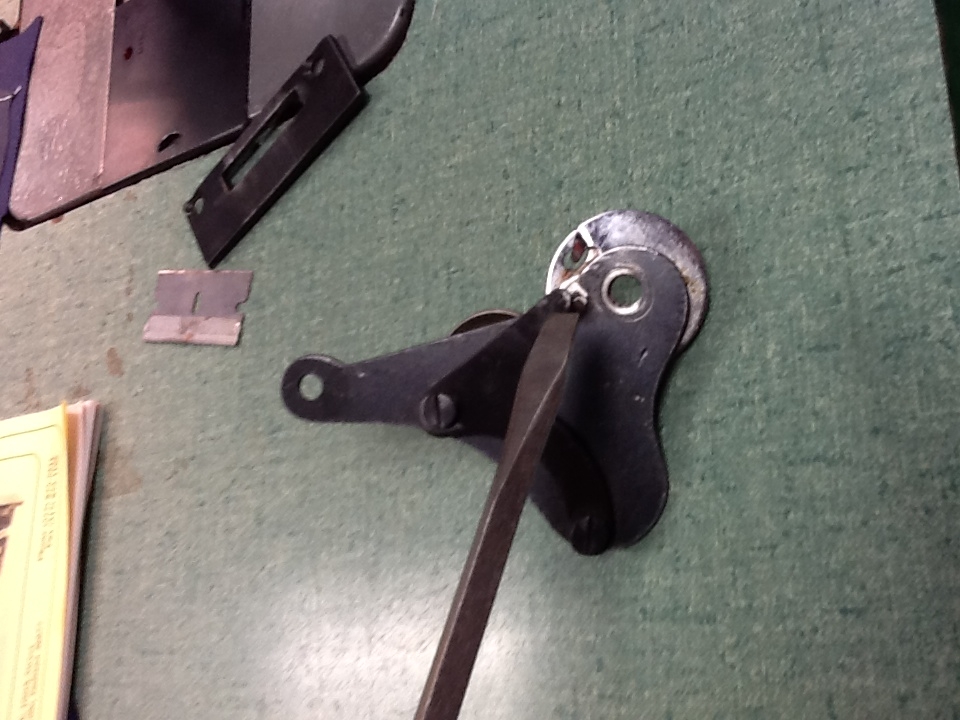
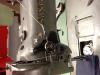
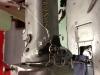
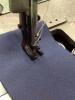
Eric, I got motivated tonight after baking all the pies for tomorrows dinner. I tackled the tension release issue first. It took me a while but I finally figured it out. after adjusting the presser foot the tension release still did not work. I took the mechinism off the machine and found that someone had straightened the release bar so it was not even making contact with the pin. I made several small adjustments to the bar (I didn't want to bend it too far). Photo is attached for those interested. The second thing I tackled was the walking foot. That took me longer to figure out but I figured I couldn't screw it up any worse than it was. The only problem I have with my adjustment is that sometimes when I flip the presser foot release down the presser bar sticks. There is a long copper color bar that is underneath the black bar that has the chain attached to it. It looks like the end of that bar is supposed to be nested into a notch on the presser bar shaft adjuster. i can't seem to get past the spring clip. I don't know if this bar is bent or not. the presser bar lifts with the foot pedal and with the lever on the back of the machine so do I need to worry about it? photo of walking foot attached as well. tomorrow I will file the hook as you suggested and I will attemp my first project. http://youtu.be/CuqUTLCDQNQ http://youtu.be/6hSOXNlitnk Have a great Thanksgiving everyone!! Tom

-
What would we do without you Eric?
-
Gee Eric you must get up pretty early! I can't even think straight that early in the morning much less posting video. Thanks for the tip with the emery cloth. I will polish her up tonight. Thanks, Tom
-
I must have gremlins in my house. Last night when I pasted the YouTube link all I saw was a large square with a red x in the corner. Tonight I will work on adjusting the feed dog and needle bar. I also have to adjust the lift of the foot. This is where my problem is. When I lift the release lever, the foot only comes up maybe a 32nd. I saw a video on you tube where is seemed that the foot should lift 1/4 inch or more. I also noticed last night that I have a burr at the end of the needle hook. It is not in a position to stone very easily. I also noticed that there is some slop in the shaft side to side. A new bushing or bearing might be in order. Is there an easy way to get the hook out?
-
Eric, I went to the two hole method. Tension is almost as stiff. I loosened the nut until I was on with one thread on the shaft. tension was looser. I tightened the nut till it was flush with the end of the stud. way too tight. the machine will sew but when you want to pull the cloth out the back (after raising the presser foot) I break the needle or the thread. I am posting another photo along with the video I uploaded on youtube. gotta get up early for work so I am cashing in for the night. Thanks, Tom http://youtu.be/GRWXwgEmHr8 I guess I can't past the youtube link here. I will try again tomorrow night.
-
I am going to try the two hole method. I will let you know if the tension eases up or not. The good thing about this is when we are finished I will have a nice machine that I will be able to keep in service till I get planted! My daughter has already claimed my machine. LOL
-
I don't know why I view these photos on my Pc and they are in the correct orientation but when I post them they get rotated. Maybe I need to rotate them first and then they will be correct after posting. What a pain in the patute. I took a video of my needle bar and walking foot but I just can't seem to get it posted. I still have the issue with the needle bar hitting the walking foot (when it is attached). When sewing, the walking foot bar does not move up and down. I know, get one issue solved at a time....I am just getting a little impatient and too old.
-
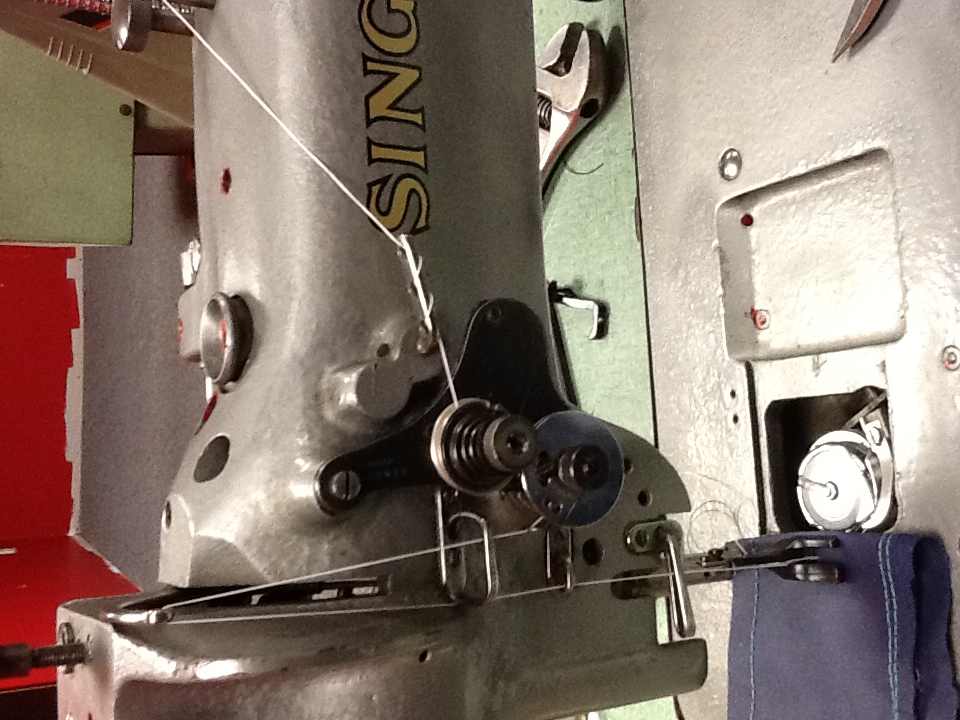
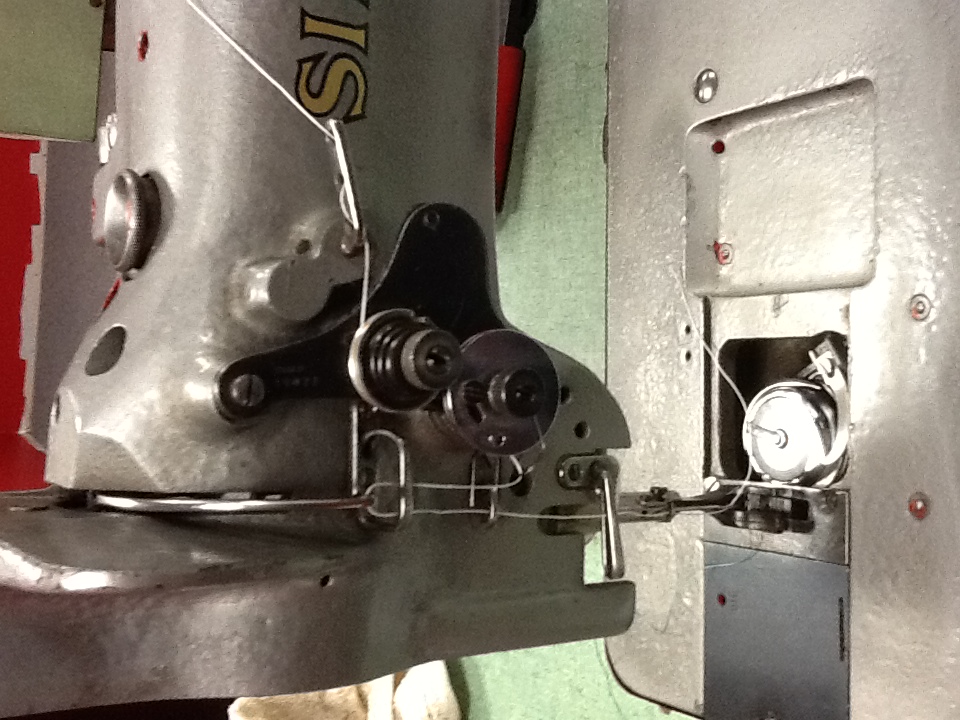
Dave, not to worry. I will eventually have the same issues that you have now. you are just a few steps ahead of me. I have attached some photos of the way I threaded my machine. It appears to be the same as what was shown in Eric's diagram. I now have the thread between the two plates. Even with the nut backed all the way (almost ready to fall off) the thread pulls so hard that I can break it before I can get it to advance. The machine is able to sew but the tension is so tight on the top that it curls the material. At this rate, it might be Christmas vacation before I start using it. LOL Tom
-
All I can say is WOW!!!!! Eric, that was a first class explanation. Thanks for taking the extra time to educate some of us. Tom
-
Dirtclod, thanks for the quick reply. I will change my threading tonight accordingly and let you know what happens. I have to say, it sure is nice having a great forum (and great members) to help us rookies out. Tom
-
after looking at Erics sketch labled as 211 upper threading, I got to thinking that I might be doing the threading wrong. I have the thread going in the same path, but does the thread actually go between the two round plates or over the top of them (like a pulley)? It seems that it would make some sence for the thread to go between the plates so if the knurled nut is turned clockwise it would increase tension on the thread. I don't know the correct way of threading. when I got the machine, the thread was over the top of the round plates and the nut was as tight as it could be. Any thoughts?
-
Dave, What mark was off by .125? Too much honey do this and that this weekend. I love all the food on thanksgiving but just abhor the prep needed to get there. lol. The last two issues I have is with the walking foot hitting the needle bar and the thread being loose around the take up lever. I think that once solved, I will be able to use the Tenara thread. I still need to post some photos. Never enough time in the day....
-
Eric, I haven't been able to get back to my machine this week. Been busy at work and getting a lot of "honey doos" done around the house. One thing I did get accomplished is changing out the motor. I removed the tacsew motor and replaced it with a DC drive unit that has a 25 to 1 gear reduction on it. I coupled that with a Dake DC controller and a larger pulley. I now have variable speed from zero to 250rpm. With the larger pulley, I calculate max stitch per minute to be just over 300spm. Even at the lowest setting of 5spm you can't stall this motor. I can post some photos if anyone is interested. I will get back on the machine adjustments tonight. Hopefully with your continued assistance I will be up and running by the weekend. Tom
-
Eric, I will change the way the thread goes past the first three holes. the rest is the same except where you have an X. I assume that you don't want me to put the thread thru that opening? Tom
-
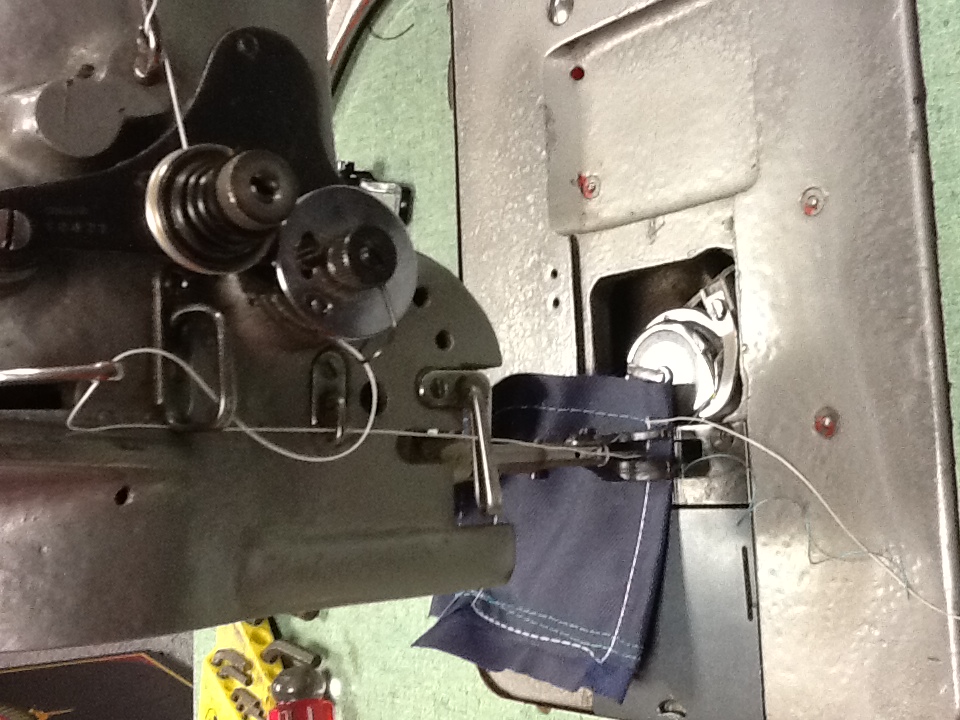
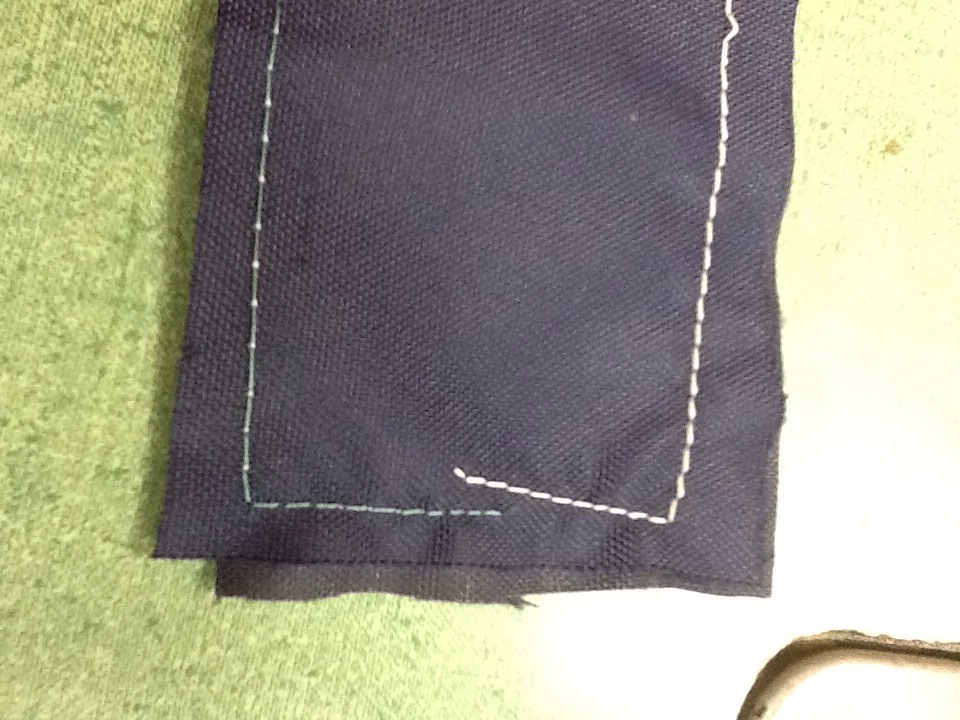
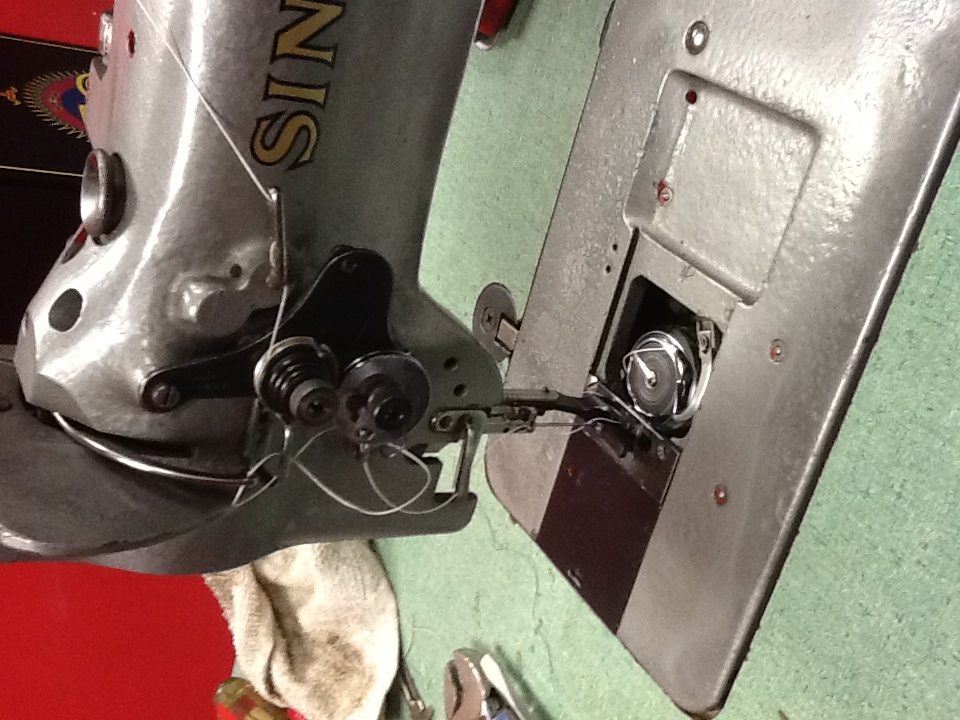
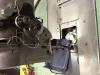
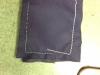
Eric, thanks for the thumbnails. I will check my machine when I get home from work tonight. In the meantime, I am attaching photos I took last night. The photo of the stitch shows top and bottom stitch. the other photos show the loose thread when the take up lever is down (walking foot not attached) and the needle bar hitting the walking foot.
-
Eric, Thanks to you I am a step closer! I can make a stitch, not pretty but functional. The thread I want to use is Tenara Gore, with this I can not make a stich. The thread that came with the machine (a couple of bobbins full) is a poly thread. It is the same thickness as the Tenara but much limper. The Tenara thread just wants to make multiple wraps around the hook. The poly thread behaves as it should. The other issue is that I am back to having the needle bar hit the walking foot. I can not make one revolution. I will post photos tomorrow from my pc as this iPod will not post. Getting closer, Tom
-
Eric, Many thanks for your help. I am heading for the basement to make the adjustments. I will let you know how things turn out. Tom
-
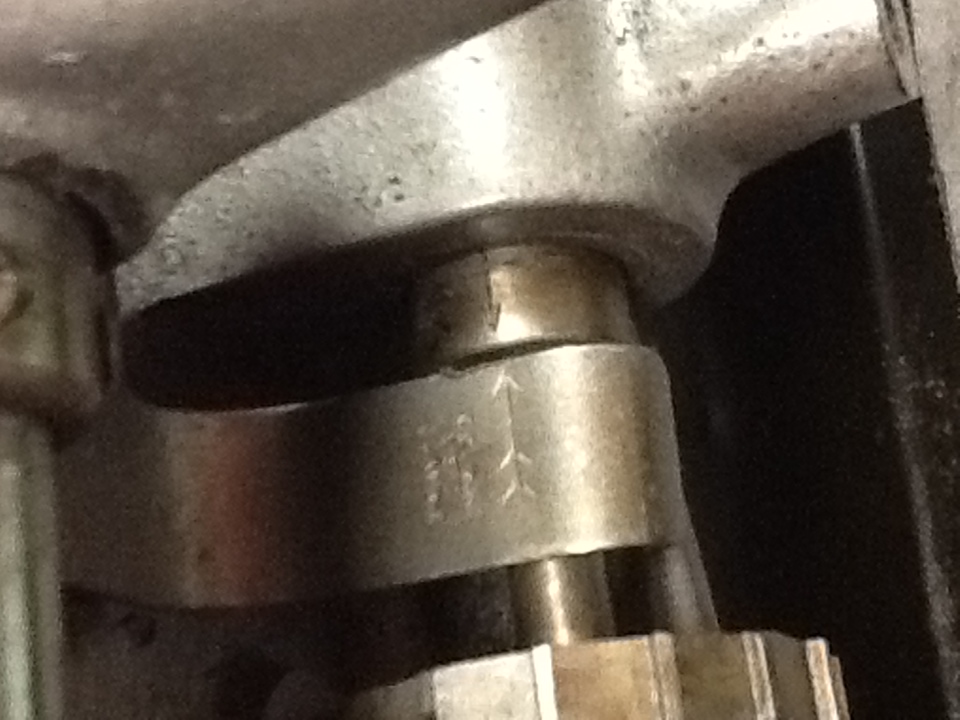
I think I might be a little confused. If the clogged gear is on the end of the lower shaft and the lower shaft also has a timing mark that aligns with a timing plate, why would the orientation of the cog gear mean anything if the timing marks line up and the take up arm is in the upmost position? I tend to over analyze things so I apologize in advance. Is the time mark you are referring to the same as in the photo I posted earlier?
-
Eric, Got yor photos. My lower gear does not look like yours (mine seems th have some type of release built into it, see the photo I posted above. I also don't have a letter B stamped anywhere on the gear. The set screw in my gear appears to be in the same relation as in your photo. Tom
-
Trox, thanks for the link. I read most of the manual, I will print it tomorrow at work. Looks like a lot of good info there.
-
Thanks Eric. Your help is greatly appreciated.
-
No, unfortunatly not. When I got the machine the guy said it was "looked at" by a sewing machine guy. Said he was having trouble with it, paid the guy 90 bucks and got a "works fine" for his money. I build machinery for a living so I figured it can't be too hard to figure out. Oops! Anyhow, when I got it set up, the needle bar would hit the walking foot on its way down (the walking foot was not attached when I picked up the machine). It was at that point that I started to see different issues with the hook timing, needle bar timing etc. none of the manuals I have read give any step by step instructions for setup. I suppose that I mostly interpreted the manuals hoping that common scents would prevail. After several hours of looking under the hood, I understand some of the workings. This is a good forum and it appears that there are a lot of people who have had similar problems as mine. I hope I can learn enough to fix my problems and hopefully sometime in the future help someone else with their problems. Many thanks to those who are helping me. Tom
-
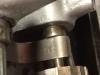
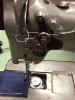
Bob, I have the hook at the needle with just a .oo5 gap between hook and needle. the eye of the needle is about 1/16 below the hook. That being said, I am not confident that the needle bar is set correctly. there were no marks on the needle bar so I used the setting of 8tpi, needle 3/32 (approx) off bdc then adjusted needle bar to get the hook approx 1/16 above the eye. I am attaching some photos to this comment as requested by Trox and Eric