


Slow Learner
-
Content Count
43 -
Joined
-
Last visited
Posts posted by Slow Learner
-
-
Thanks for the information. I use Corel Draw but no way I can do anything like that. Good work.
-
Thank you!
Very professional looking pattern. What program did you do the design in, If I may ask?
-
Thanks Tip for that information.
I'm not sure what this means?
"I hope you notice I made my suggestion without the bias of the other contributor."
Oh well.
-
Consider the seat swivel for a boat. They are substantial and readily available at Wally World and I'm sure other places.
-
I made one a long time ago from a reciprocating carver. It only stamps when you press down.
You have to turn down the bevelers to fit the collet.
I would say it worked ok on long bevelings like a border. Not so much on short bevels.
I made this for a class demonstration. I think I've still got it around in my toolbox.
Cheers!
May I as which carver you made it from. I have an old Harbor Freight hanging grinder but it is not reciprocating tool. What king of reciprocating carver did you use?
-
At one of the Pendleton Leather Shows I was able to sit down for about 30-minutes to try the Power Mallet. It does have a learning curve. I tried on different weights of leather and found it worked best for me on heavier leather. Saddle weight leather. Since my work is around 3/4/5 ounce I found it a little too robust. Maybe with more time and experience I could have mastered the lighter weight leather. There was a one-armed man who was looking at the mallet and I think those with physical impairments or muscle limits might benefit from the unit. You wanted thoughts--you have mine.
Bob Stelmack
Thanks Bob,
The demo says that turning down the controller helps with the thinner leather. Were you able to turn it down when working on the thinner stuff? I have nothing but time to practice at least as much as God will allow. Thanks for your thoughts.
-
What is you exact problem - holding the stamps, or using the mallet/maul?
It is both. After holding the stamp only a short time my hand will cramp and if I try to work through the cramp then I destroy the piece. It is difficult fro me to maintain the stamp grip pressure on the mallet therefor striking the stamp is inconstant making for an ugly project.
-
I used to work at a trophy shop and we used sublimation dye heat transfers onto metal and polyester material. I assume the process would be the same.
We would spray a bonding agent on to the light colored metal or material then place the art printed from our sub dye printer (Hewlett Packard laser printer), onto the object then apply heat using a heat press machine. All of the supplies are available and the dye is quite expensive.
-
I have the usual old age problems with my hands and tooling has become almost impossible for me to do. I happened across a tool call the "Power Mallett" and it looks like the thing that will allow me to tool/carve leather. The problem is it is very expensive as hand tools go. Almost $1000.00. A price I would willingly pay if I could try one out but the guy that invented the mallett doesn't live next door so hands on is out of the question. I have seen it demoed on Youtube and it is exciting but he is a pro and the inventor so it would look easy. I have always gotten good guidance here at leatherworker.net so I come here looking for anyone who has seen/know about this little machine and hear your thoughts.
-
I will vouch for Goldstar - very satisfied with their press and their die sets are the most reasonable I have found. https://goldstartool.com/
I have just purchased a Goldstar tool press and dies. I bought both the line 20 and 24 and out of the bag as they were intended to be used, they did not work but a combination of the two I found four dies from the eight that would do both the line 20 and 24 snaps. I want to try some of their dies for rivets and spots but a twenty bucks a pop I am a little reluctant with out some idea as to which to purchase. If you have had some experience with their other dies I would welcome the input.
-
I liked the holster and thanks for the pdf. I will build one for my 1911. It looks better than the NRA two piece holster they were touting some time back.
With your permission I would like to try some different modifications. If it works out I will post the results.
I would also like to see one of the "stick it in the barrel holsters" that shooter mentioned. I think I have only seen one of those and it was being used as a quick draw holster in competitions. They must have thought it a good idea. I don't know just saying.
-
Is that all that is needed? I put my old singer in storage and picked up a clone shoe patcher to do the occasional work on thin stuff. I paid more for the patcher than the motor would have cost? If that is all that is needed, I will order a servo motor from toledo today.
-
Where did you get the post that attaches to the burnisher? The typical dermal post would be too short, I think? I assume you drilled through the burnisher piece?
-
I know this is off topic but since there are 31-15 users I thought someone here could help.
My Singer 31-15 keeps breaking the thread when I sew leather but does ok when I sew heaver cloth. I have had the bobbin case, feed dogs and still the problem continues.
I am wanting to put a servo motor and reducer wheel to slow the machine down and maybe that will fix the problem.
Any idea? and Which motor and wheel should I use?
Oh I forgot. I am using #16 leather needle and #46 Bonded nylon thread.
-
Slightly off topic but I have been trying to use my 31 15 and it keeps breaking the top thread when sewing leather. Fabric works fine. Also would a servo motor help slow down the machine for more control in tighter sewing situations. I would love to be able to use this machine to put decorative stitches on belts, wallets and watch bands.
-
I have one of these.......nice price and good machine!!
Do you know the heaviest thread and largest needle that this machine will handle? I want to use a machine like this to add decorative stitches to belts, wallets and watch bands.
-
Have you talked with Steve about this? They are interesting observations. Since the Cobra 4 is for the most part a "clone" I would expect there to be a reason for difference. I have looked for what you described and sure enough my machine does the same. I can start sewing a single piece with a good stitch and as I sew the stitch will change and start pulling the top stitch all the way through the piece leaving the bobbin thread flat on the back of the piece. I adjust the stitch again and continue sewing then I will get a loose top stitch. The stitch stands up above the others and after I finish I have to pull the bottom of the stitch bringing the top stitch back down then milt the back stitch to take up the slack. I thought it was just me but maybe it's not. I'm going to call or email Steve with this information. Maybe he has some thoughts.ThanksSlow Learner,
I have the same problem with my C4 machine and it's about the top thread tension. Put about 1/4" of leather in your machine and turn the handwheel very slowly and look closely at the needle/presser foor interaction. You might take off the dust cover off and also watch the thread as the stitch is picked up. When the hook picks up the thread the needle is on the way up and as the hook rotates on around pulling thread through the needle and top thread tensions, observe what happens. The top thread is pulled toward the front of the machine and at the same time the needle is pulled/bent toward the front of the machine along with your product because the needle is still in the product. The high tension will cause the product to slip under the pressor foot, which is effect shortens the stitch length. The thicker the material being sewed, the more top tension, therefore shorter stitches. I also expect that when you are backstitching the needle is not going in the same hole. That's because to compensate for the above issue if you want 6 STI you will need to set the machine for 5 STI. When the lever is reversed there is no p[roduct slipage under the presser foot and therefore you will get 5 STI on the backstitch.
Take a scrap piece of 8oz veg tan and stitch without any thread in the needle. The stitches will be longer than when thread is used. Is there a fix for this, which I'm sure is a top tension issue? I don't know. I do believe that haveing the front of the walking foot or needle foot cut out adds to the problem. When I sew 1/4" of veg tan using 277 thread top and bottom and a 25 needle, the needle will be bent forward completely into the cutout. The other heavy stitchers like the Ferdco and Juki 441 I've seen, don't have this cutout. Just a round hole for the needle to pass through. This round hole would prevent the needle from coming forward nearly as much and I believe would solve much of the problem.
-
Oh, please let me in?
-
I had the same problem then I refreshed the page and it loaded.
-
Got it working now. Looks good on 5oz. and 1/2" thick. Now on to sew. Thanks Steve for your patients and understanding. It's good knowing you are there we non sewing mechanics run into problems. Darrel
-
This is to my fellow Cobra 4 owners. I for the most part like the machine even thought it probably is overkill for what I do. (holsters, belts and odds and ends. But I have a block and can't seem to find a solution. Of course I could call Steve but, I wanted to find out if others have experienced the same thing and if so how you resolved the problem.
The problem is that when sewing around curves (not tight turns at all) or when sewing up a gradual incline to two or three thickness of 8-10 oz. leather the stitch length will become smaller. Sometimes it will happen when sewing a straight seam with no turns. I have about decided the feed dogs (spelling??) are the culprit. My machine came with the smooth surface feed dogs in place so I figured that was appropriate and never thought to changing. It has become very frustrating because every project ends in my quickly growing box of uoops. I can't let anything out of my shop that looks like that. I am about to go back to sewing everything by hand and suffer with the pain or give up completely and sell everything.
HELP.
Darrel.


-
Thanks Dwight, I understand the need for specificity in the design as I have seen no less then 20 different configurations hence the confusion. Your drawing seems pretty straight forward and simple enough to make it practical. If you don't mind I may take your picture and develop on that and see what happens. Thanks Darrel
-
I want to make a bag for an electrician friend. Specifically a tool bag and belt. I have looked at pictures but have not been able to make a pattern so I come to the place where I know someone will head me in the right direction. I have looked at the bag tutorial here, and even though it is not exactly what I wanting to do I may go with it anyway and make some dividers for tools inside the bag and some loops of some type on the outside for other tools. I just didn't want to reinvent the horse so to speak.
-
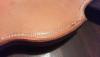
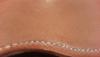
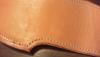
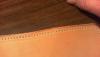
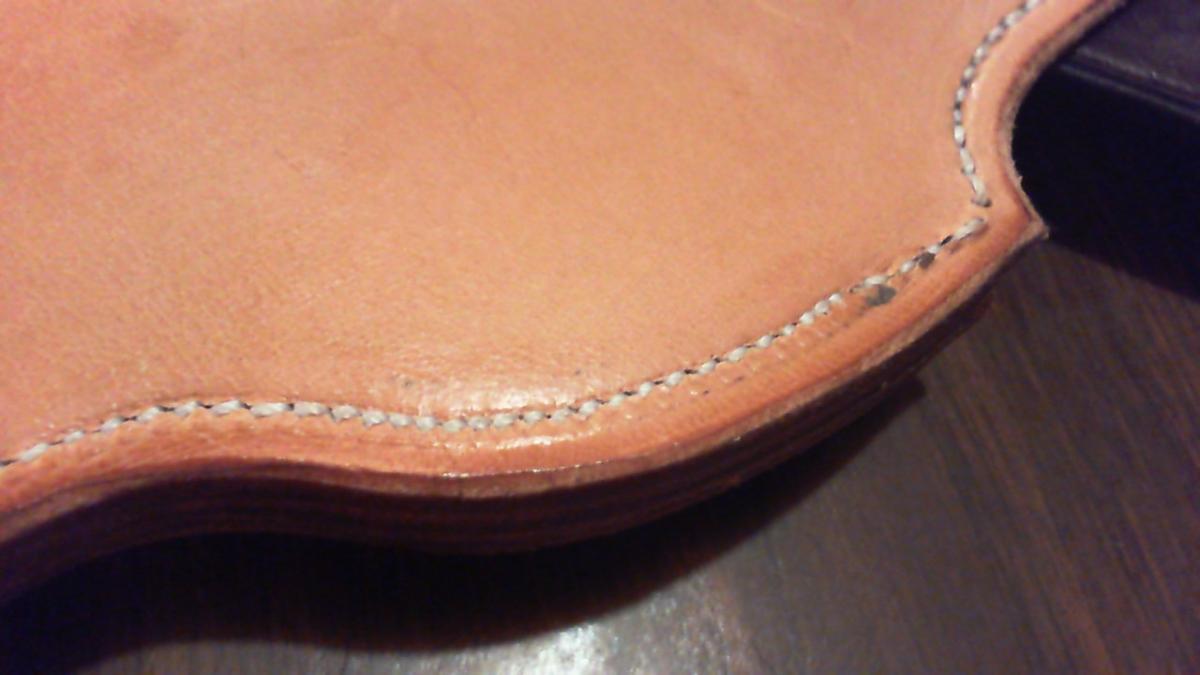
I like the tooled addition. How did you sew that on after molding the holster? I assume the holster was glued and sewn prior to molding. It is a classy touch.I like to pre-curve my holsters when I form them - that way when the customer is wearing the holster and tightens his or her belt, it doesn't have to pull the wings too far toward the body, which causes the holster to flex and bend too much, as well as putting excess pressure on the back of the holster causing it to want to collapse. I try to leave about 1/2" from the edge of the holster to the edge of the belt slot. The amount of space you leave between the belt slot and the stitch line will vary with the thickness of the holster, but I'd say you want at least 3/4" clearance between the slot and the trigger guard and top of slide stitch lines. The thicker the gun, the more space you'll need.
How do you know how much is enough? Your mock-up holster... Make your pattern, then make a mock-up out of scrap leather. When I form my holster, I like to bend my wings downward enough so I can see straight through both of my belt slots without the back of the holster getting in the way very much, if at all. If it's too hard to bend the leather that far, add a little more width to the holster.
Here's an example of where I probably should have added a little more width to the pattern because the wings had to curve pretty far (very thick pistol), but I was able to make it work.


Here's an older photo that shows how much curve I shoot for:


Press For Line 24 Snaps?
in Getting Started
Posted · Report reply
Looks like I will be ordering at least 1 10mm and probably 8 & 9mm rivet dies as well. My earlier post about the line 20 and 24 dies I was in correct it seems that I mistakenly ordered one of the wrong dies. I have since ordered the correct set and am very pleased with Goldstar tools. Thanks Allen for your post on the rivet dies. Big help.