


SARK9
-
Content Count
390 -
Joined
-
Last visited
Posts posted by SARK9
-
-
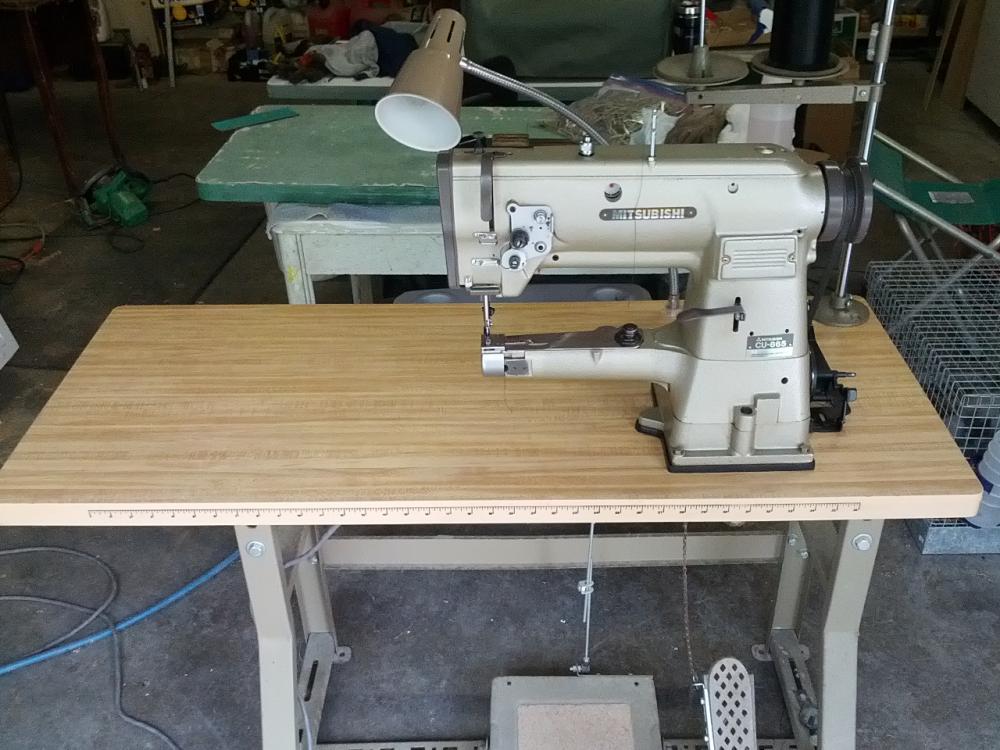
This machine looks more like the Singer 53/Consew227 or a Pfaff 345 "fat arm" style rather than the Pfaff 335 small arm type machines like my Mitsubishi.
-DC
-
When changing the stitch length on this type machine, I always unthread the needle before rotating the handwheel to engage the adjuster stop, as this prevents an occasional tangle in the hook area like you may have experienced.
Its the left button on the bed you depress to adjust the stitch length, the other one (safety clutch) will completely stop the handwheel from moving backwards, and will only ratchet when turning fwd.
-DC
-
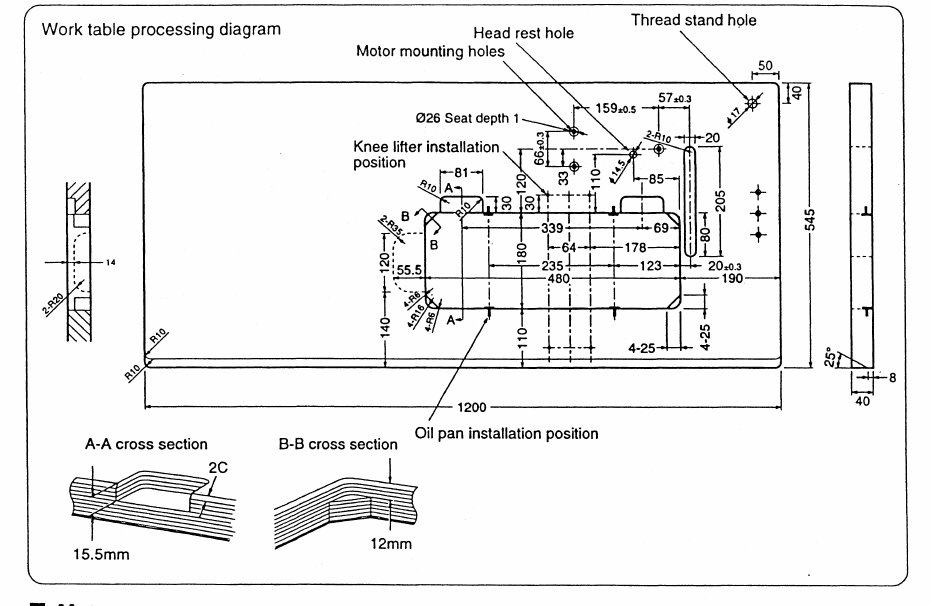
Absolutely beautiful and a great machine to find and preserve!
-DC
-
I've had quite a few of the older Consew CM-1000 servo motors....still have 4 of them in the room, plus two different examples of the newer "CSM-1000" variety.
On the optical speed controllers, I've had better results using a solid black, 100% opaque cam/vane rather than the gradient....its difficult to consistently ramp the response with most of the gradient media I've tried. I settled on a little piece of very dense but thin black cardboard from a flashlight box I had...and I use a sort of crescent shape to progressively subtend the light beam as it rotates. Its very easy to reposition and adjust...I stick the new vane to the original blunt foot with a bit of the Sail-rite double sided tape and do some trial and error with it out on the bench. None of them I've modded have needed any further attention for years, and they work very well.
The hall effect controls on the newer CSM-1000 models are a bit too abrupt for my taste when they hit their *on threshold* and I don't care for them as much, but I use the two I have on higher speed fabric machines (without reducers), both programmed for their max RPM. Maybe one of the electronics folks will dive off into one eventually and teach them some manners, as the separate components make it possible to do some *very different* mounting configurations with them.
-DC
Forgot to add the swflholsters video was my original inspiration to start playing with the shapes.
-
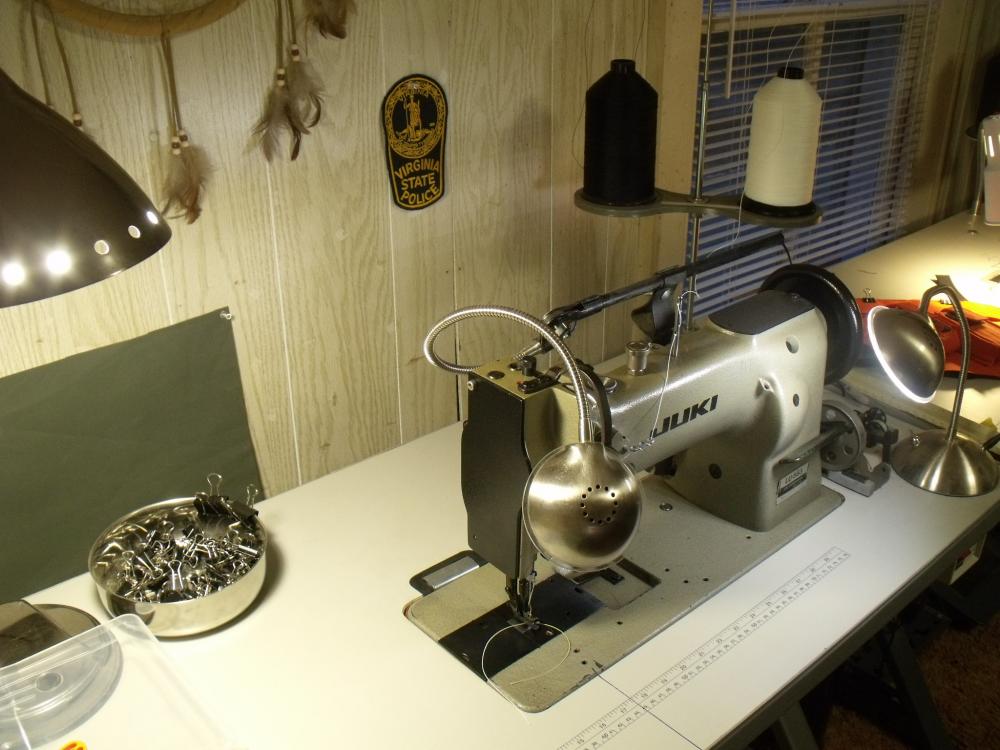
Table dims for many industrials:
-
I've had a 20U33 for some time....My comments would be....
1. It uses a "stop motion" washer to release the handwheel when winding bobbins just like a *domestic* machine....this limits how much load you can actually expect in terms of penetrating power.
2. Mine is quite temperamental about thread tension as the material you sew gets thicker, even with T-70 thread.
3. I consider the bottom-feed-only transport to be marginal for difficult materials.
4. The bobbin capacity is quite small for doing long runs of a wide-throw zig-zag which REALLY consumes thread.
I think a heavier, sticky material may compound all the above issues. The older blue-colored machines are said to "act" slightly more HD than the later bronze painted machines like mine, and had a slightly wider ZZ throw capacity. Both were made in Japan, and decent for what they were intended to sew.
-DC
-
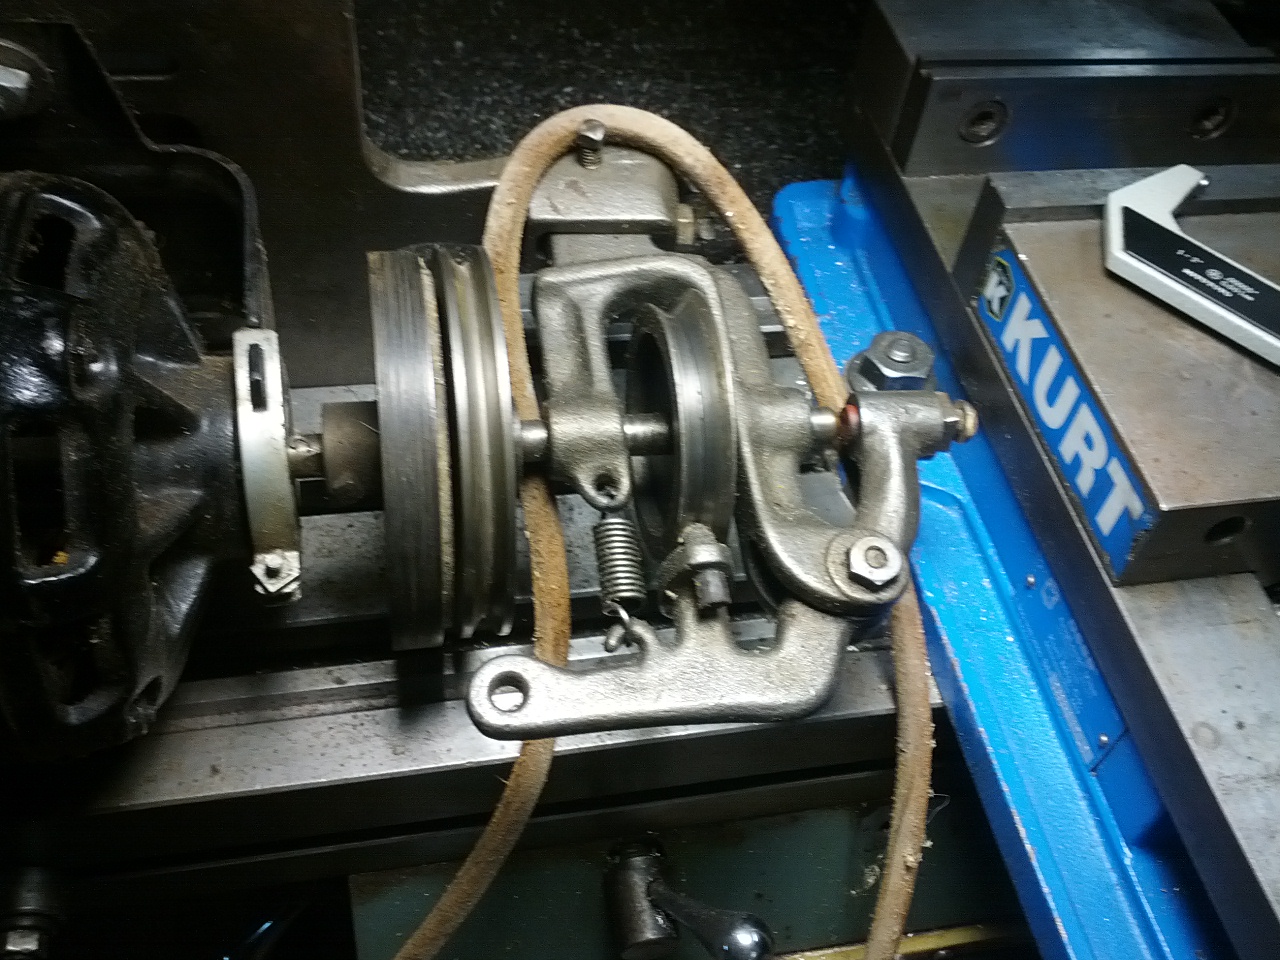
He is probably referring to an old external clutch motor that was common on these older machines. Oddly, one of the few clutch motors I've ever found to be tolerable was just such an antique, as pictured.
-DC

-
My impression is that the mystery device may be a type of Lilliputian "roto-phase" converter rather than a static or electronic phase converter. I use a larger one (very old school) for some my equipment that requires 3PH power. It has the same general components...three large capacitors w/ circuit boards connected to a single phase motor.
-DC
-
The Parable of the Clutch Motor:
You'll probably never see steam tractor buffs recommending their personal darlings to an aspiring youngster who actually wants to take up farming.
-DC
-
Sorry, that is misidentified as a "user's manual" but its just another parts list.
-DC
-
-
The drip pan for the 206RB-5 I bought has an inlet "clearance shape" formed in the front, under the machine's bobbin case area. The underside of the table is also relieved with a scooped out shape right above it. Its fairly easy to get your hand up to the bobbin case from under the table, and I'd bet one of the usual suppliers has a lead on how to get one for your Seiko. As many times as one has to get that case in and out, I'd really miss the convenience.
-DC
-
Seems to be an ancestral form of "pinball"....possibly a type of Billard japonais.
https://en.wikipedia.org/wiki/File:Early_Pinball.jpg
-DC
-
I don't have a machine that is remotely similar to yours, but if one of my smaller machines was showing frayed thread in the stitches, I'd look closely at the operation of the check spring. The needle could be clipping the top thread if the tension is released too early on the downstroke, also, if the loop is formed a bit too close to the scarf of the needle when the hook arrives, it could nip the thread a bit as its picked up. That is something to double check-Your manuals should outline the adjustments.
-DC
-
Seiko STW-8 or STW-8B, much the same machine as the Consew 226 judging by the casting.
-DC
-
6 hours ago, Chain said:DING DING DING! Looks like the winner!
-DC
-
I make "rope pads" for our technical rescue team out of multiple layers of heavy (though not waxed) canvas, using my Pfaff 481-34/02 needle feed machine. I've used it with T-80 Nomex thread on heavy seams doing other things like FR aprons for welders and smiths...it is not the slightest bit temperamental. Pfaff made several very similar models of this needle-feed machine, and you can find them for nearly give-away prices if you watch the markets and lists carefully. The only *ding* I'd give them is the standard sized bobbin capacity, which is still not too bad for T-70 thread. Documentation for mine is simply excellent.
-DC
-
The motors I have been using don't protrude past the rear edge of the table at all, once you get the correct belt length worked out. I have 3 walking foot machines with these mount plates installed that are all set within an inch of the wall, not because they won't go any closer, but because I frequently work on longish straight runs and I need the material to be able to go *somewhere* besides INTO the wall.
-DC
-
>>& with that plate that moves the motor back the motor will stick out of the back of the table & you won't be able to push the table against a wall because the motor will hit the wall. <<
Not so much with the ones I posted. The plate *may* stick out past the rear edge of a "factory" drilled table about 3/8ths of an inch; That is dimensioned to accommodate the largest reducer pulley I make (9"+), and its just to give the outboard foot plate of the servo motor more stability while its bolts are tightened. I've only done a dozen or so like this, however. Its one possible solution to the "no tilt" problem that arises when using these stand-alone reducers, and for that *one* aspect of the conversion, its a bolt-on-and-done as well. Its still geared for the DIY crowd, and as they say, some assembly required. Photos available on request.
-DC
-
Hi Kwalk- Your Seiko is a very nice machine. A couple of things you might mention: What is the max thickness of the material you need to sew? Large needle/thread or? Is it mostly going to be detailed, fussy stitching in short sections, or more wide open? What motor and pulley size is on your machine now?
The most economical approach is to mod what you have, if possible. Some servo models may meet your needs without the reducer at all, depending on your situation. If you are currently using a lower RPM (1725+/-) clutch motor, this forum has several practised adherents of that school, and they may be able to get you doing the fabled stitch-at-a-time by tuning your current hardware, replacing the pulley, and tricking out the cork pads of the clutch discs. Larger handwheel pulleys can also change the ratio for the better.
The offset mounting plate in my post is more geared to DIY types as a means of slicking up the alignment of a reducer and the servo while utilizing the predrilled holes already in the table. Basically, it just moves the servo's position towards the back of the table so that the centerline of the reducer's shaft is able to be located a bit past the pivot point of the machine head's hinge pins, thus allowing normal tilt of the head. You also gain some extra clearance between the larger reducer pulley and the motor pulley-needed more as the diameter goes up on the reducer's driven pulley. Essentially the plate can be made of anything strong enough to hold the servo under load- I like aluminium plate since I can get that easily.
-DC
-
The only machine I remember seeing with a screwed-on flange for the stitch length dial is the Juki DSC-245...not remotely the same type of machine, but it may share some other heritage further up some back street.
-DC
-
I was sort of intrigued by his other listing....
ISMACS lists this model as an up-the-arm feed but his photo seems to show across the arm with a wheel presser. Price is more inline with reality too.
-DC
-
Uwe has provided an excellent video of the adjustments:-
-DC
-
I remember this one, which in its black carrying case, certainly has to be the *anti-featherweight*.
-DC


Help with setting up Mitsubishi servo motor
in Leather Sewing Machines
Posted · Report reply
Try:
http://store.keysew.com/catalog/product/b819f635109f4534823e49a57715644b
www.supsew.com/download/Mitsubishi/Mitsubishi%20Limiservo%20X%20E%20Series%20Instruction%20Manual.pdf
-DC