


gearsmithy
-
Posts
54 -
Joined
-
Last visited
Content Type
Profiles
Forums
Events
Blogs
Gallery
Posts posted by gearsmithy
-
-
I'm with Grumpy, after you oil it, throw some pecards on it. Puts a nice natural shine on the piece
-
Barge contact cement from Ace hardware. that stuff is nuts!
-
Mockup? I think it looks cool just like that!
-
I do mine like Beez, somtimes I use 2 straps just in case. I like to do pigskin lining as well.
-
I like it. I would've opted for tooled bones on the front but I kinda like the color. How'd you get that color Kev?
-
Not sure if it's period correct but IMO, copper rivets are the most durable.
-
I made mine out of spare high-density polyetheylene (I use it to make plastic shells for my motorcycle accessories), graphing paper, a drill bit and soldering iron. you can fabricate it just like metal. total cost: $0
-
They both have their place. The round definitely has more strength than the slot, but slots make for quicker lacing jobs (if you have a 3-4 slot chisel). if your braid requires that you go back through the hole like a mexican round braid then a round hole is the only way to go. For simple cordovan braids I prefer slots because it gives you a cleaner edge. In any case if the joint is under stress you should go with a punched hole. You can close the gaps left in the leather from hole punches by lightly wetting the edge after lacing, this will tighten up the seam and make for a nicer edge. For a bible cover I imagine you could get away with slot, depending of course on the braid you're doing.
-
I found a recipe online for homemade desalter. Basically just water and white wine vinegar. I might give that a try first and if it doesn't work I'll spring for the commercial stuff. I'll post some before and after pics too
-
bummer!
 I hate it when that happens. You can always dye the whole thing black.
 -
Just got a new pair of boots and I accidentally walked through a salted snow bank with them. Anyone got any tricks to get the salt off?
-
you can find it all over the place on line. I get mine from small parts (http://www.smallparts.com/)
-
Yep bruce, my first one.Thanks guys for the kind words. I hope i can find some more time to do this now..lol I am going to do this pattern a couple more times, then try a wallet. Hopefully all goes well. I do have a quick question though, do you guys cement your leather down before you case or after?
Thanks,
Chris
I used to spread rubber cement on with an old credit card on both the leather and the carboard before casing. Now I rarely even cement my workpiece to the cardboard. With smaller pieces it helps to move the piece around when tooling and keep it from stretching but with larger one's there really isn't a need for it. Make sure you're using the cardboard that has a shiny side. It repels water better than the rouge side, otherwise it can get soggy if you opt for the "soak and wait" casing method.
-
That's pretty good for your first attempt. You should've seen my first piece. I felt like a pig on skates making it and the craftsmanship looked like it was done with a lawnmower.
-
Can you make a matching holster?

-
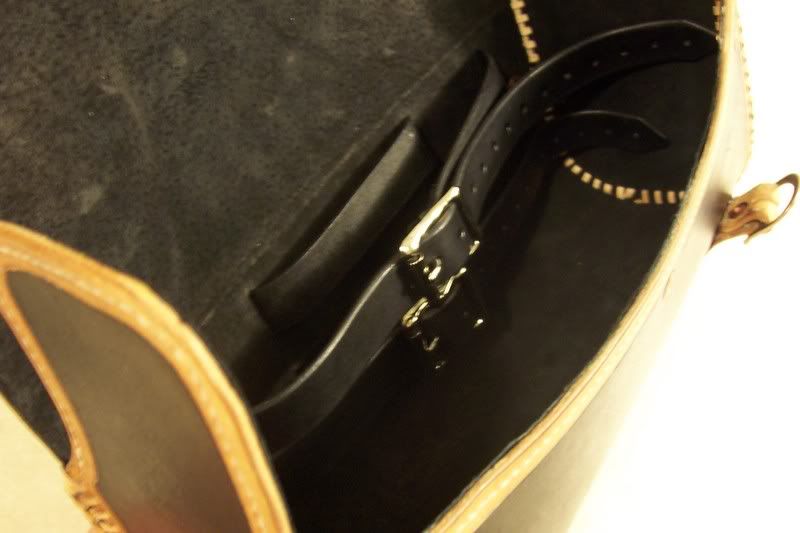
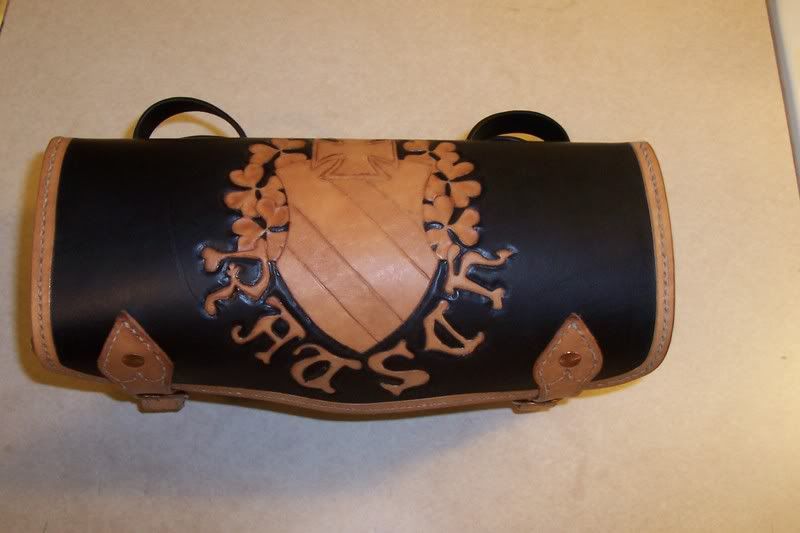
I was discussing a similar project with one of my biker bros this last weekend. He has a version that is rather nice except now that it is old and comfortably broke in his tools fall out. In talking looking at it we both realized it was because the ovals (in his case circles) at the end of the bag did not have "ears" that folded in over the tools and the result was a hole that the tools could fall out of.
I don't have a pattern, but I would absolutely not build one without the ears or flaps that could fold in over the tools.
I had the whole distortion problem too. Eventually I started making plastic shells for my toolbags. Now I put them on everything that needs structural support. a lot of my customers tell me that my pieces feel like "a piece of armor" because of the shell. Look into high density polyethylene. You can fabricate it just like steel and all you need is an exacto knife and a soldering iron. shells will keep the bag in shape and prevent distortion.
-
I've never been very good at following instructions so I learned the hard way. I would get an idea in my head and then try to figure it out on my own. I would lean a little bit about how to do something and then take a little further on my own. I screwed up many projects but sometimes I come up with new ways of doing things. I think I prefer it that way, keeps me on my toes. I started out carving leather on my kitchen floor (space is an expensive comodity in Chicago). Now I have a little dedicated workshop setup in my bedroom entirely paid for by my pieces.
-
I wanted a cool custom seat for my new bike, but I couldn't afford to have someone make it. So I hit up Tandy and started making stuff for my friends. The irony is that I've enough money into my tools to pay for a custom seat and I'm still making stuff for other people and haven't had time to make anything for myself. :biggrin:
-
Kate,
Picked some up today and tried on scrap. Really easy to use and to lift off. One and two coats worked but, I'd feel safer with 2 coats. I didn't spray but, daubed the dye on.
But, it's a good thing yours sat on the shelf for a year....WOW, strong amonia odor while the lid is off.
I'm working on a simple holster and will use the resist on the initials and post (if holster turns out ok).
Thanks for the tip/idea
*UPDATE* Heavy daubing is NOT a good thing. It came up under the latex. Spraying like Kate would be much better....so much for the black holster with brown initials..
Spray works the best, but you can daub it too, just be sure to get the latex into your cut lines. When you cut the grain you expose some of the flesh, which acts like a wick that dye can seep through and get under the latex. If you want to brush your dye on my experience has been to cover the area you want to resist with latex including the cut lines beside the raised portion. this will cover the flesh side and prevent wicking. Then after you brush on your dye, peel back the latex and with a very fine brush "finish" the piece.
-
Pecards is the only way to go. It's gooey so you might want to hit it with a blowdryer to get into nooks and crannies.
-
Very nice Kate. I use this all the time now. No more ruined projects!!
-
thanks everyone!
outcast, I posted it in dye's and finishes a while ago. Check it out http://www.leatherworker.net/forum/index.php?showtopic=2529
-
Kevin,
I love your work! It's very distinctive. I was thinking about making a wallet for my buddy's birthday. What dimensions do you use on your wallets?
-
MatthewD,
Thanks, I have no idea how many hours are in this. I've messed it up a few times and had to start from scratch. The shell was something that i've never done before so i had to figure out how to fabricate plastic. I think in the end I'm charging the customer for 10 total hours of work. In actuality I probably spent closer to 25 but I don't charge for my mistakes and i don't charge for things I've never done before (i.e. the shell).
Johanna,
Sure! I never know where to put things
Just a thought
in Motorcycles and Biker Gear
Posted
been working on a set of meideval "horse armor" for my chop. Planing on doing lots of stringray inlays. The hard part is getting the patterns to fit properly. haven't had much time to work on it but i think it would look pretty cool.