ElfLeather
Members-
Posts
24 -
Joined
-
Last visited
Content Type
Profiles
Forums
Events
Blogs
Gallery
Store
Everything posted by ElfLeather
-
basics first i ) I immediately replaced the needle that came with the machine ii ) The new needle is an organ 135x16, diamond point, tried 20 and 22 iii) The problem is of a comparable scale with a 22 needle or a 20 needle iv) I tried adjusting the presser foot tension. The factory setting turned out to quite low, and raising it made the issue a little bit worse I'm using a link belt and I have a margin of only 1-2 links before it's too short. Any tension inside that 1-2 link margin and it the belt slips when running stiff leather, any other material feels fine and moves predictably. Turning it over by hand with no thread or workpiece, I can feel a little more resistance at certain points in the cycle, but that's probably just the walking feet right? It's really only when I hit 2 layers of stiff 5 oz that the machine bogs down. I'm also in a leatherworking discord and got a rec to find a v-belt of the correct length. The only reason I'm using a link belt is because the v-belt is way too long for my setup. If that doesn't do it, I ordered some pulleys to try gearing it down a bit, seeing if the added torque gets me over that hump. I'm still scratching my head though, people have sent me pics of comparable machines sewing through an 8mm stackup with the stock setup, so yeah, not sure.
-
After mounting the machine, getting the drive belt & encoder set up, and puzzling out the automatic oiler, I'm running some test pieces. Everything is running smoothly & predictably up to 92 through 5 oz oil tan. When I switch over to a stiff 5 oz combination tan, the drive belt starts to slip from the force required to punch through. I'm running a consew cs1000 and the belt is pretty damn tight. The only thing that seems amiss is that the handwheel paint feels a bit on the smooth side. Kinda scratching my head over this one. I was thinking of just swapping the pulleys to get a ~2:1 reduction. Anything else worth checking before going through with this?
-
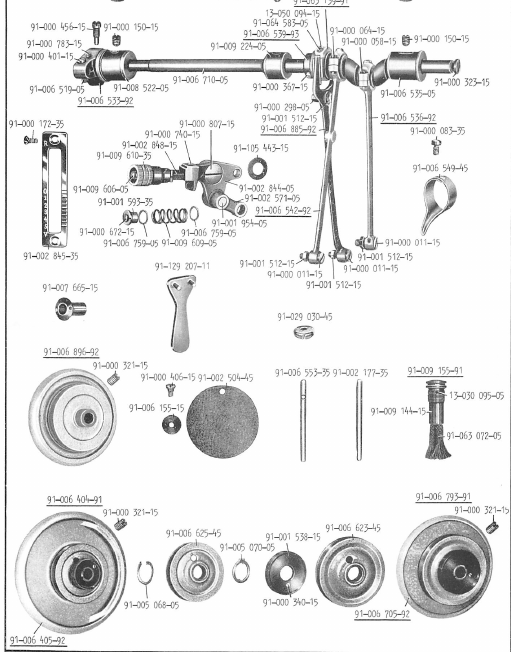
Nice. yeah that's the plan, see if I can flush out any residual chips or anything. I thought about degreaser but I don't know if it would play nice with the seals and the oiler hoses. Total cost was around $700, $500 of which was the machine itself. I spoke to Ben throughout the whole process. All the questions I asked, he went to either the line supervisor or mechanic to get me an answer, send pics, videos etc. Thanks for pointing out the Qr code on the side. It links to an online parts catalog & manual for this and a range of similar machines. If you're interested, here's the link, proceed at your own Risk. It's in a mix of english & chinese.
-
Some background: By day, I'm an r&d tech for a California hardware startup. By night, I'm a hobbyist, and I've been doing leatherworking on & off for 10ish years, mostly stemming from my involvement in the local leather scene. Most of what I make is with snaps & rivets, but I got the itch to work on garments & bags recently. After a few months of research, I decided to order a machine direct from China, as I don't have the budget for a name-brand machine and I'm willing to put in the shop hours to get the machine working to my satisfaction. My level of familiarity with sewing machines is limited, some resto work I did on an old pfaff and an old singer. I used to work for a machine tool startup and I've done a fair bit of tool resto & repair in my own time, so I'm reasonably confident in my ability to figure it out. Early in January, I ordered a cylinder arm machine from a Chinese manufacturer, Jiang Long. They're mostly a CM for other brands, and I picked them because I was able to speak at length with a few people who have ordered their machines in the past and claimed to have good experiences. I chose the 246 because I plan on working more with garment leather than heavy veg-tan. They sell on Aliexpress, but on a friend's recommendation I looked them up and spoke to their sales rep directly. I asked for the head unit alone, as I plan to use my current table & motor setup. I also asked them to grind the foot smooth I was initially quoted $750 with standard shipping, but I name-dropped the people that referred me and they took $100 off and threw in some minor extras. Quoted ship time was 20-30 (business?) days. 5 weeks later, it arrived at my doorstep. The packaging was pretty good, styroform surrounded by fiberboard plates in a decent box. I saw the fedex driver cartwheel it once or twice before grabbing a dolly, but so far I haven't found any shipping damage. I went through it, cleaned off some of the shipping oil and checked for broken parts. So far, so good. It's not covered in rust or cosmoline, but now I know what Chinese cigarettes smell like. The fit & finish is reasonable. The finish machining looks pretty good on the contact surfaces and the bearing surfaces. The internal non-contact surfaces got either paint or the China special (some fettling + a wire wheel). There's a few small chips in the paint job on the outside, mostly on corners. I popped on the pulley and gave it a few turns, can't tell if the motion is tight or just needs lube. Next steps: open it up, check internal parts for shipping damage, and clean the factory oil off all of the sliding surfaces. Run some oil through the lines and cycle it out. There's no manual, so I'll dig deep and see if it's a close enough clone of a brand that does have good documentation. After that, check timing, then first stitches. Assuming first stitches go well, run it in for a bit and test some more. Any recommendations for next steps? Anything you see that's grossly amiss with it?
-
Thanks for the suggestions everyone, I'll check the throat plate and needle adjustment when I get home. The needle is an LR point, and should be in good shape. I can't get needles in a larger diameter, unfortunately, or at least not in system 34. Is it possible to use a larger needle from another needle system and adjust the needle bar height to match the needle timing?
-
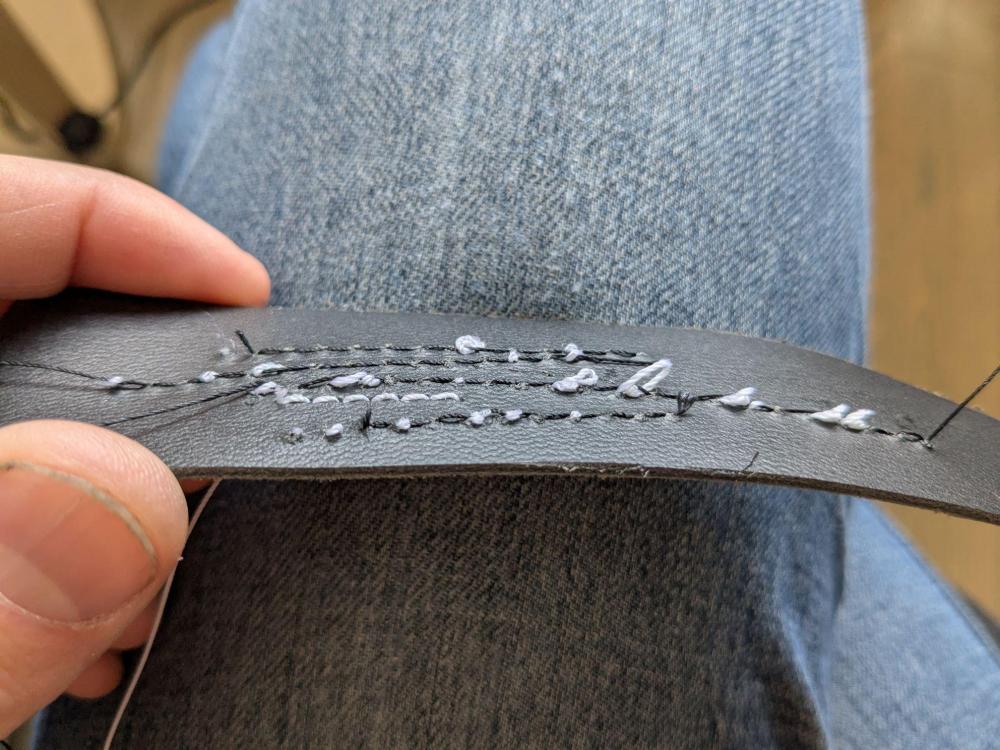
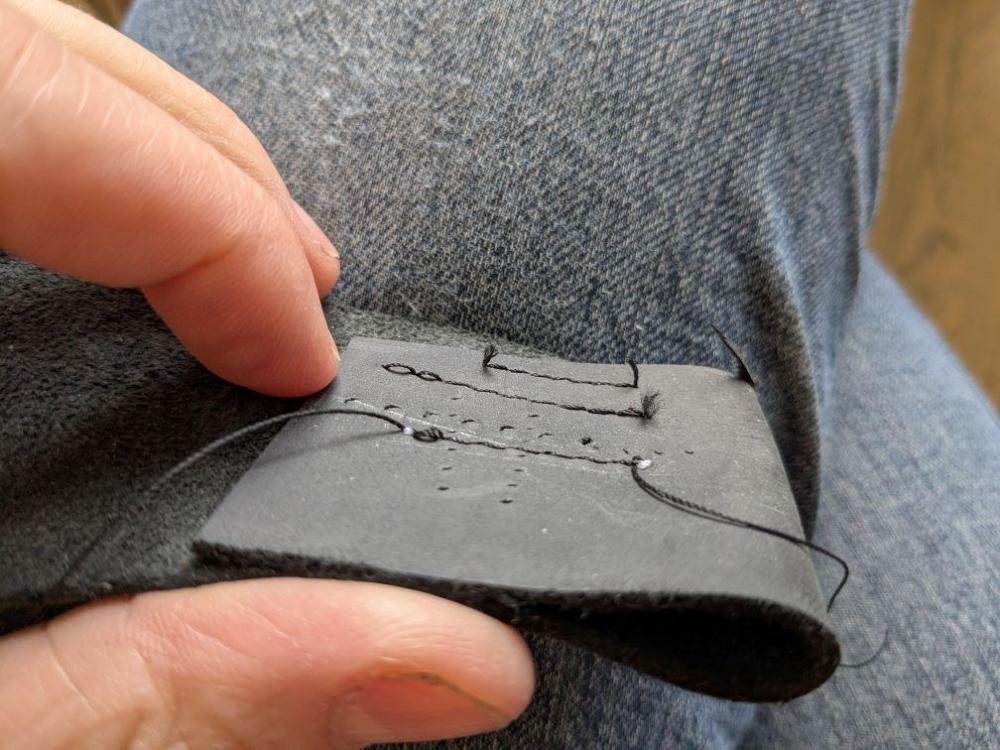
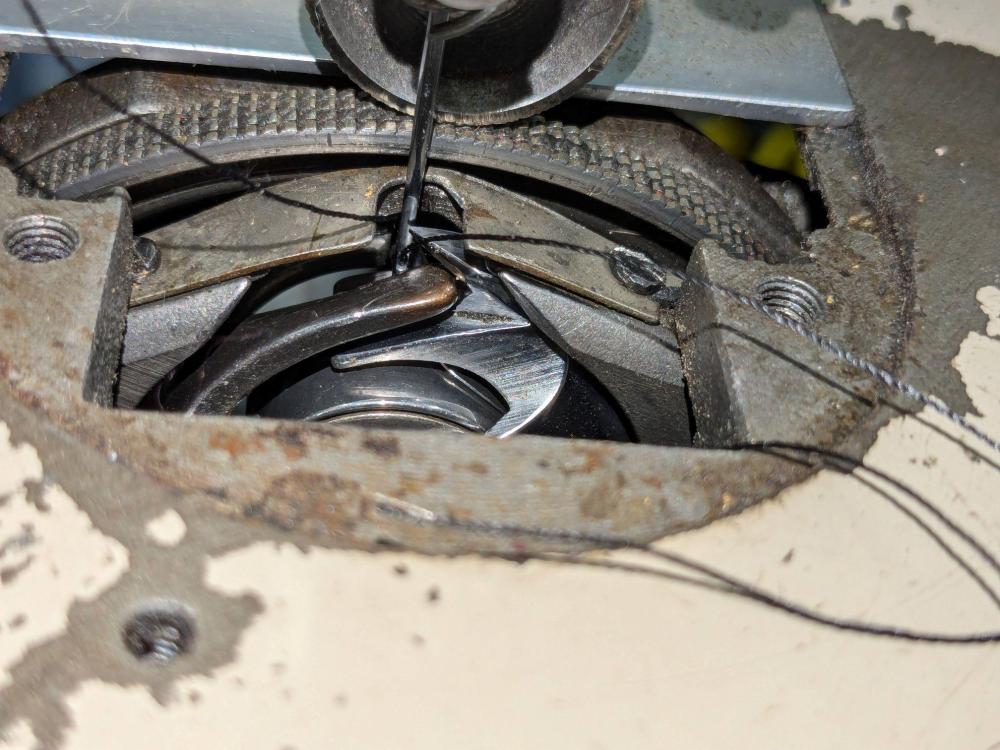
I have an old Pfaff 34 that I'm having trouble with. I'm setting up to make a hip purse, and no matter how I set the tensions, the top side of my work looks fine but I'm pulling occasional loops on the underside. At best, I can get 5-6 stitches between instances. See left picture. Top thread is white Amann bonded nylon in 138, bottom is black Amann bonded nylon in 92. Needle size is 22. The thread is moving gracefully through the thread path, no apparent snags or burrs. I tried it with some soft combination tan and some medium-soft oil tan and it sews beautifully (see first picture) but this stiffer stuff, no dice. Anything else I can check? Or is this stiff leather asking too much of the machine?
-
I've got a 246 clone on order. manufacturer is Jianglong, should be here in a few weeks. I figure it's a dice throw, but so far I've heard nothing but good things about these machines. They handled the customs and shipping, I paid $650 all told. Talking with the rep wasn't too bad, but a friend walked me through how to deal with Chinese manufacturers. If anyone wants info, pics, video, etc., let me know, I'll happily post about it, sink or swim
-
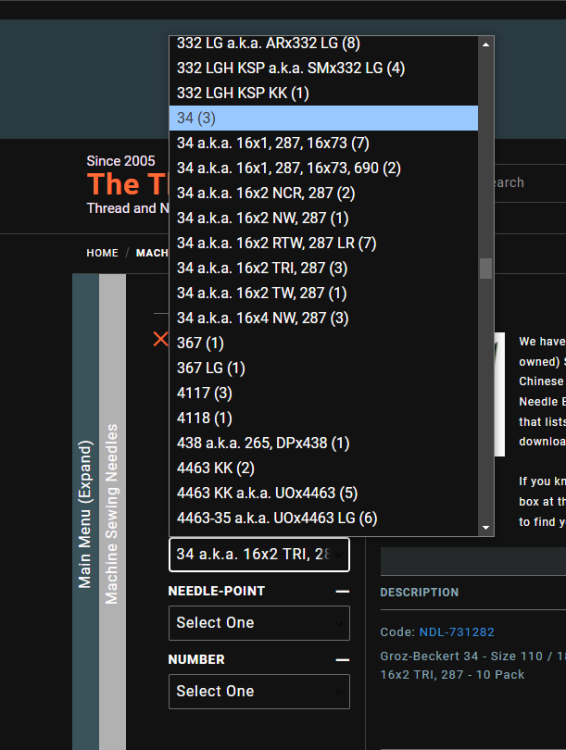
I'm shopping for system 34 needles and kinda scratching my head. The thread exchange has a lot of options, or maybe not? Does AKA mean all of these needle systems are identical? Non-identical but interchangeable sytems? or the specific needles fit each of these distinct systems?
-
Does anyone here offer splitting service? I'd like to split ~30 sqft of 2 or 3 kinds, chrome tan and combination tan. Bonus points for being in the SF bay area. How much does a job like this run?
-
Walking foot China made sewing machine
ElfLeather replied to john11139's topic in Leather Sewing Machines
Good post, a good demonstration of "made in China" in that you get exactly what you pay for. American, Euro, Japanese manufacturers can make a great product in China if they source quality components from reputable manufacturers, go with a (less cheap) CM that will do rigorous incoming/line/outgoing QC, and pay to produce good documentation and maintain good support. There are Chinese CMs that do all of this for a price, and there are Chinese drop-ship manufacturers that do none of these and sell on Alibaba for 1/2 - 1/3 the price, and many in between, all of which are priced accordingly. Glad to see you were able to troubleshoot the machine and get it working to your satisfaction. I'll flip back to this post every time I get tempted by those Aliexpress listings. I like working on machines, especially iron, but I'm nowhere near good enough with sewing machines that I could pull this off. -
Wheel feed issue - problem or design limitation?
ElfLeather replied to ElfLeather's topic in Leather Sewing Machines
yeah it was the feed wheel height. Now to work out the tensions and the check spring position -
I have a Pfaff 34 (thank you all for helping me set it up!) from the 60s with wheel feed. I've mostly got the tension figured out, but another issue I'm finding is it will just fail to feed properly. With thin vinyl it feeds fine, but I'm having issues with 2 oz nappa lambskin and 4-5 oz latigo (waxy chromexcel). Testing with 1 layer of the 4 oz or 2 layers of the 2 oz, it doesn't seem to feed consistently, it'll just stop at a certain point, whether I'm actually sewing or not. My (uneducated) inclination is to say that the feed wheel is too low and the presser foot can't consistently keep it in contact. But I've never used a wheel feed machine before, so I don't know if it's supposed to be like this. It's a good mm or so beneath the level of the needle plate, which doesn't look right to me. Edit: Or is the needle plate too thick? it's a good 1+ mm thicker than the cover plate next to it.
-
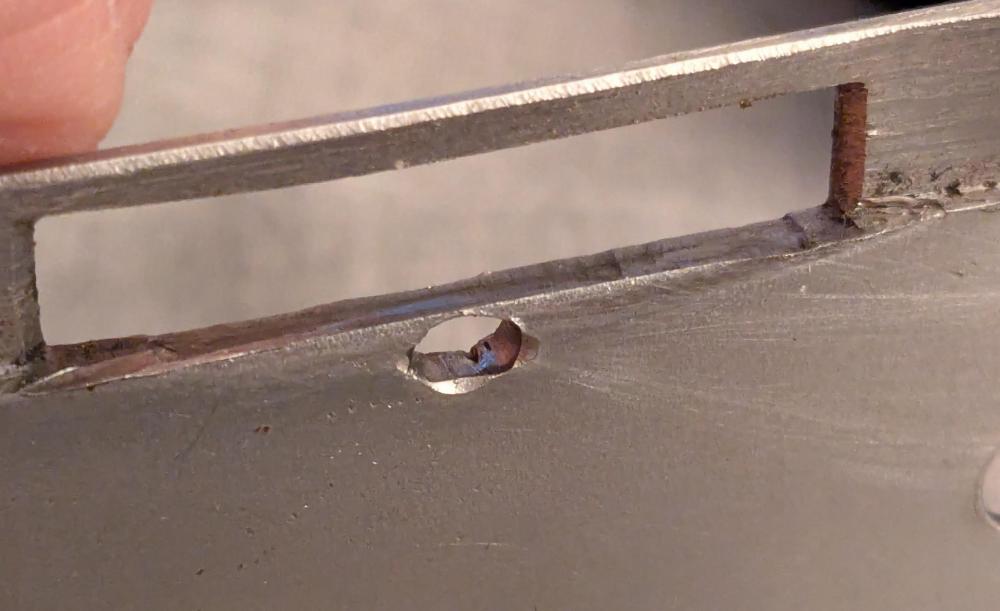
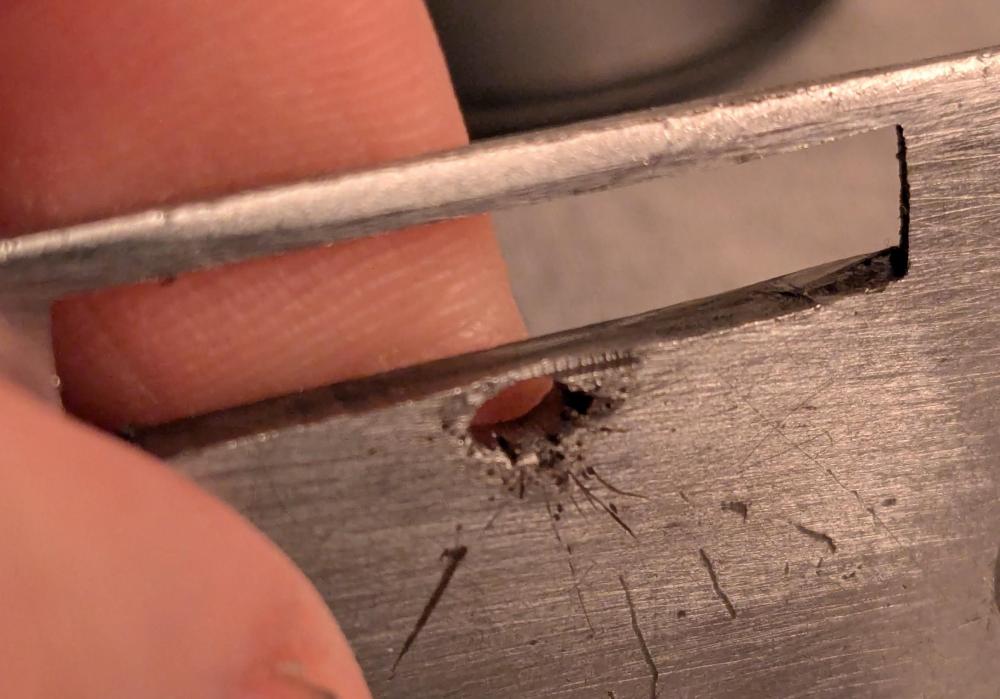
Late to the party, and someone's prob already mentioned but when people say "No, SILVER solder! Not silver SOLDER!" they mean high-silver brazing wire, and they mean brazing, not soldering. Traditionally this meant 40% or 45% with cadmium, but since cadmium is no buena to breathe in, you want 56% silver. As thin as you can buy it. I used to use this stuff all the time at work. If your workpiece is small, you can probably get away with a ordinary plumbing torch with mapp gas. Clean the surface down to bare metal, wash the hell out of it with degreaser and water, rough up the exact zone you want to braze with sandpaper, and brush your zone of interest with a thin layer of white or black brazing flux. The alloy will ONLY wet where there's flux. Mount your work so gravity works for you, the stuff flows like water when it melts. Bring the work zone to a dull red glow. When the flux melts clear, start feathering the flame and dab some brazing alloy onto your zone of interest. It should melt mostly from the hot flux on the workpiece, and it should leave a clean melt, not a half-melted thing sticking out. Pull the heat away, let it cool a little, and quench it in water to loosen the flux residue. If the plate is made from heat-treatable steel, this will likely ruin the heat treat. If that happens it'll be glass-hard extremely brittle, and you'll have to ask someone else about tempering it. Don't try to use "silver" plumbing solder (silver jeweler's solder is a wildcard, i don't know which alloy it is). Don't try this without the right kind of flux. The alloy won't wet the surface. Harris stay-silv white or black brazing flux is good and Harris safety-silv 56 is the alloy I use. The technical grade for the 56% silver brazing wire is AWS BAg-7, (or BAg-1, which is the grade with cadmium), and the flux is AWS FB3-A for the white or FB3-C for the black.
-
Leather Sewing Machine Drive Belt Sizing (thickness)
ElfLeather replied to DG1's topic in Leather Sewing Machines
What about link belts? Good? Avoid? -
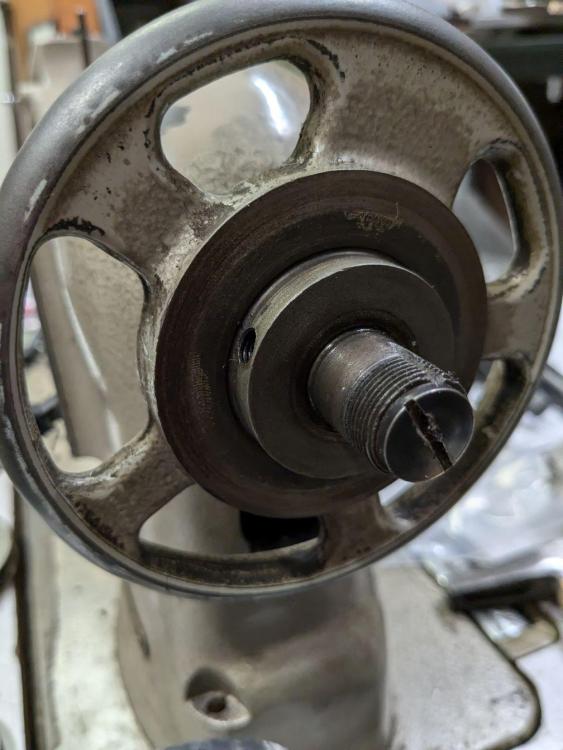
2nd edit: Is there any reason I shouldn't remove the stock pulley and handwheel and replace both with an 8" pulley, now that I've figure out how to remove it? Disregard the following post, unless you made the same mistake I made and mistook the goofy 17.5 mm "shaft" behind the handwheel for the actual driveshaft. Unrelated question I'll put here, so as not to clutter up the front page - I can't figure out how to remove the handwheel from this machine. Looking at the parts catalog and the machine itself, all I can see that holds the handwheel to the shaft are 2 set screws. I removed both of them and dropped some oil into the holes, but even with a pulley puller, all I'm doing is damaging the screw head at the end of the shaft. Any recommendations? Anything obvious I'm missing? edit: If you're wondering why I'm trying to remove the handwheel, I need the shaft length it's occupying for a larger pulley. I want to replace the 3" pulley with an 8" pulley, but the length through the bore is much much longer, more than an inch. I figure if I have an 8 inch pulley, it can do double duty as the handwheel.
-
It's a 34-5AL, and it's not one of the variants listed as an exception, so it's system 34 neeldes. I went back and forth but ended up getting system 34 needles, and it seems to be right. oof dropping another hundred-something dollars on a speed reducer. but that does seem the most straightforward way of resolving the speed issue. I'll try it for a bit without and keep this option in my back pocket Thanks for all these suggestions. Before making any changes, I tried sewing some slightly stiffer pleather-y material and of course it sewed beautifully immediately. The "work is lifting during sewing" hypothesis is probably the right one. The lambskin is very soft, and I did see bunching and difficulty keeping the stitches even when I tried it. There's nothing holding down the right side of the stitch so maybe this is something to look into. if preventing the work from lifting doesn't resolve my issue, I'll look into the check spring and needle position/timing. Thanks again everyone for helping me troubleshoot this machine, this is all really helpful.
-
Thank you for this manual, it's helpful in getting a sense of what to adjust on this machine. The needle scarf is facing the center of the machine, the hook hooks through it, maybe 3/32" above the eye. It looks like the needle's eye is a pinch low, if anything, and it's set as high as the needle bar permits (I took off the needle lock and cleaned any possible debris from the needle bar). I'm pretty sure the hook is at or close to the right clearance from the needle (a paper's width) The other thing - I'm having trouble buying a larger pulley. I've seen pulleys for sale with shaft bores of 3/4", 1/2", 5/8", or 15mm, but I measured the pulley on this machine and it's 11/16", or 17.5 mm, which I've found precisely zero of, for sewing machines or anything else really. Am I just going to have to get a 5/8" bore pulley and have it machined to open up the bore? Or does anyone sell a bushing to bring a 3/4" bore down to 11/16"
-
tl;dr - what's the order of troubleshooting for skipped stitches? I posted a little while ago about that Pfaff 34-5AL I bought the other week, thank you to everyone that gave me info. I replaced the 3-phase clutch motor with a servo, gave the machine a cursory cleaning, oiled it, and crash-coursed my way through birdsnesting issues. Eventually figured out that the tension assembly wasn't seated right, it wasn't releasing right, and my threading was a little off. After fabbing a replacement tension release pin and reseating the tension assembly, a few minutes messing with the upper and lower tension and no more birdsnesting. Now that the birdsnesting is resolved, I'm getting issues with skipped stitches and failure to feed properly. I don't know if these are related issues. I'm testing with pigmented goatskin and nappa lambskin with 70 tex polyester thread The feed issues look like - I'll sew maybe 10 or 20 stitches, everything looks fine, then the leather just stops feeding. This system comes with a wheel feed mechanism, which I'm unfamiliar with. The skipped stitches are a consistent problem, maybe every 5th stitch. Sometimes 2 or 3 in a row. What are my options for troubleshooting look like for feed issues and skipped stitches?
-
What do you investigate or service when you buy a vintage machine? This machine is from 1962 and hasn't been used in 12 years. My plan is to degrease all the internals, deal with any hidden rust, re-grease the gearbox, and oil everything else. Parts I know I'm going to replace: The pressure spring on the feed wheel race. PO replaced with an off-the-shelf spring that isn't quite right 3-phase clutch motor for a brushless servomotor.
-
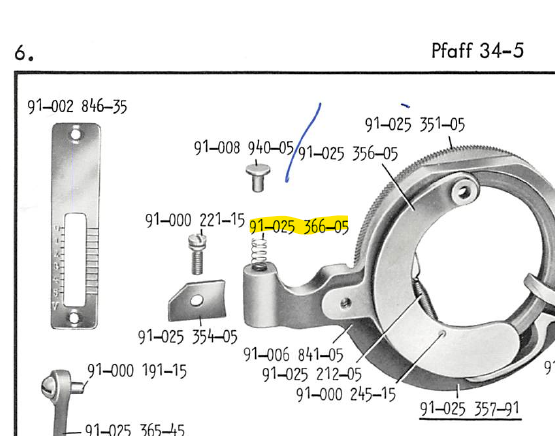
Thanks for the info and the brochure, exploded diagrams are always helpful. I've got the needle plate, I just took it off to get a look at the feed wheel. I've never used a wheel feed machine, is there anything I should keep in mind? Any limits or caveats to watch out for?
-
-
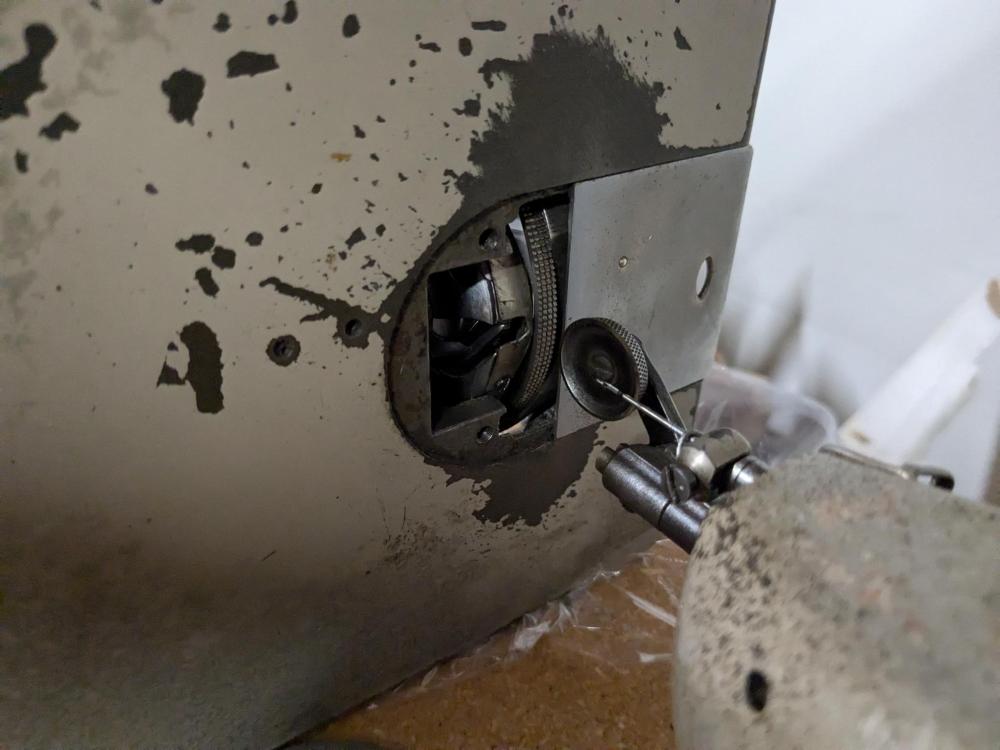
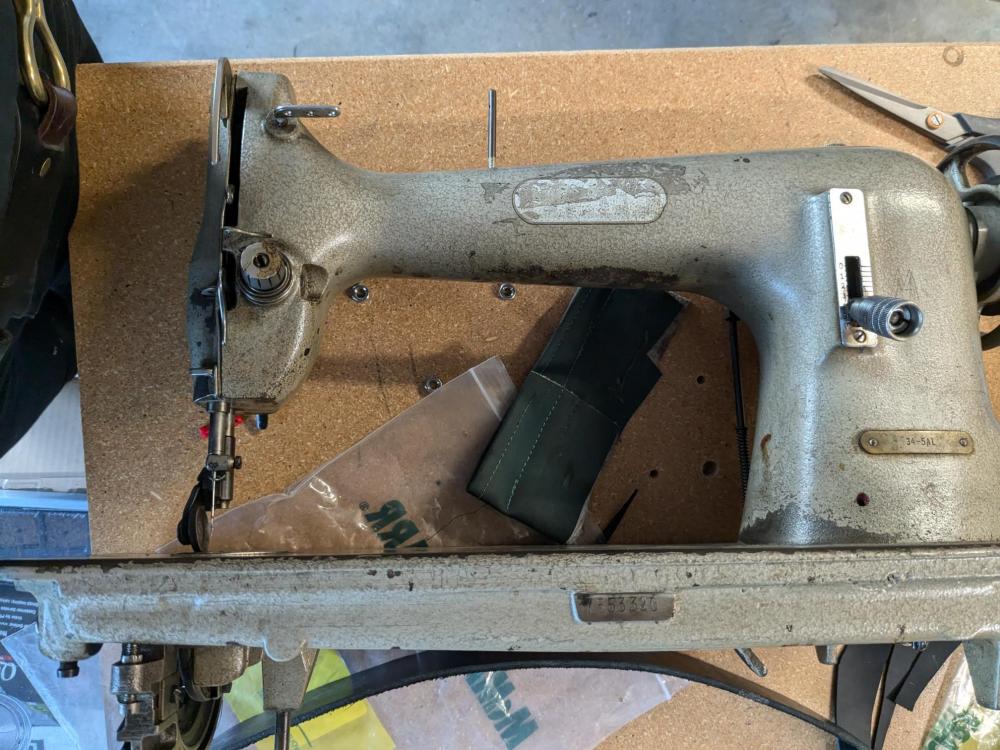
I recently acquired a Pfaff 34-5AL and I'm having a hard time finding any documentation about this machine. From the scattered info I've been able to find about reading the model number, I believe this machine is for work in lightweight leather. I can't find what the A refers to in 5AL, though. The serial is 7553320, which would put its date of manufacture at 1962. The previous owner had very little information on this machine, mostly that it didn't have a reverse feature, and that he hadn't used it for ~12ish years. It seems to be in good mechanical condition, moves smoothly, though I'm going to go in and give it a cleaning before running it. It also came with a 3--phase motor which I'm going to replace with a brushless DC. Does anyone have info on this machine? Any specific advice for using or caring for it? I plan to use it for garment leather, though I'm curious if it's capable of working with anything heavier.
-
Hi folks! Long-time listener, first-time caller. I have access to a Bantam Tools Desktop PCB Milling Machine and I want to use it to make an embossing stamp in brass. The way I'm planning on doing it is taking an SVG file, importing it into fusion, extruding it above a surface to give it depth, and making a CAM toolpath to mill it as a relief in 360 brass plate (probably 1/4" stock, but I could do 3/8" or 1/2" if 1/4" doesn't give me enough depth to work with). My main questions are: 1. What's the usual height of the relief pattern on a stamp for embossing? The graphic is about 1.25" in each dimension, and I intend to stamp it into either stiff, 8-12 oz latigo or 8+ oz veg tan. The endmills I have access to can cut to a depth of like 3 mm with sharp definition, or a lot deeper if I don't care how crisp the inside corners are. 2. Are the edges of the relief on a stamp square and sharp, or are they chamfered or filleted? Will a sharp corner cause the stamp to cut or otherwise damage the grain, or do I want as sharp an edge as I can get? 2. What's a good way to ensure that I can easily manipulate and stamp with even, centered pressure? My first thought is milling a groove on the back to put a steel rod (I have a scrap 1/2" tool steel rod I can cut to length) that I can hammer. Is it feasible to just hammer directly onto the back of the flat brass stamp body, or is there an easy solution?


.thumb.jpg.b1f76ef228405b886f355178c70c623a.jpg)
.thumb.jpg.320d810af2ee30a5d8be0ab10e481585.jpg)
.thumb.jpg.0e9f3aac234deb63b8095610d28de4a6.jpg)
.thumb.jpg.6c57f99f1eb5dfd7b3374069652c45b6.jpg)
.thumb.jpg.1f8bc6760b704994c8431910b51ffbfd.jpg)
.thumb.jpg.7946abcf3ec7fe302ee5791501883d51.jpg)
