


ojd
-
Content Count
31 -
Joined
-
Last visited
Posts posted by ojd
-
-
Looks like an interlock topstitch on a shuttle stitch seam. Common on old jersey sportswear, but in that application you have a spreader thread on top
If you look closely it looks as if there are loops on the wrong side typical of chainsewing machines.
Union special made feed up the arm machines for top stitching seams like this, i.e. needle plates, feed dogs and presser feet for shaping the seam allowance like this. Never seen it in leather though but the machines are more than capable of garment weight leather.
-
51 minutes ago, TomE said:Not sure of your application -waxing thread? sealing leather? - but borax might not be leather friendly. It dissolves in water to form a solution with a pH > 9.0. Above 70 oC borax decomposes to unspecified compounds and gives off gases that are reportedly toxic. https://pubchem.ncbi.nlm.nih.gov/compound/Borax#section=Chemical-and-Physical-Properties
In those small concentrations (i.e. 5%) it is not harmful. It is harmful to some chrometanned. Not veg tan.
-
Its for wax container on machine. I do't like nears foot oil. Or any oil on leather.
-
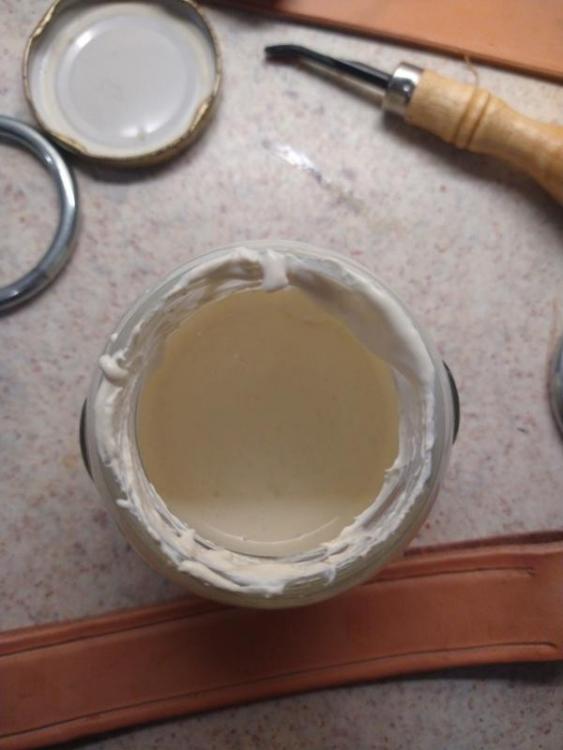
Hi. I tried buying wax solution to no avail (without ordering from the US). I would like to avoid solvents so I did a 5 minute google "research". It turned out borax can emulsify beeswax. Since I have no impulse control whatsoever I made some emulsion.
I'm gonna test it in my machine later. A bit thicker than water, like cream.
What I did was:
-one part bees wax
-one part 10% (by weight) borax solution. I used tap water, probably better with distilled.
Heat both, until the wax has melted in a water bath. Recipe said to 70 degrees centigrade (no idea what that is in freedom units™️) but my wax melted at 78 degrees. In a third likewise heated container mix the two under vigorous stirring. Keep stirring until 40 degrees centigrade.
Obviously it's an emulsion, just gotta test if it's good as a wax.
Please try and see if it works for you.
-
Yes, needle feed. Also has a little extra guide bar below the needle plate which pushes on the needle. The bobins are like a small thread spool. Two discs on a hollow axle. I can make a video when I get the time.
Max. Stitch length is rather short, about 6-7 mm. Foot lift is good tho.
-
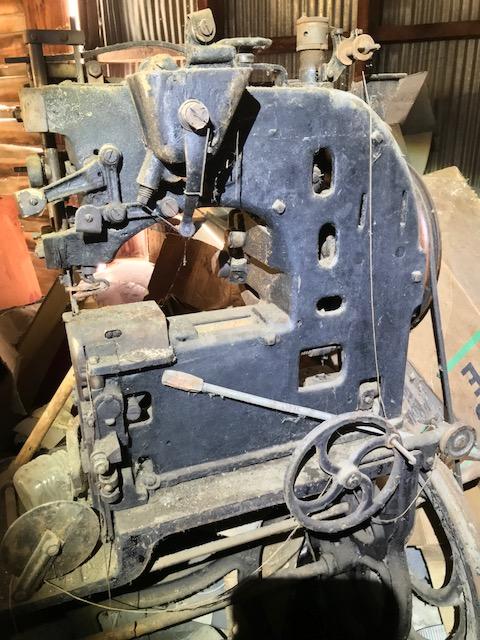
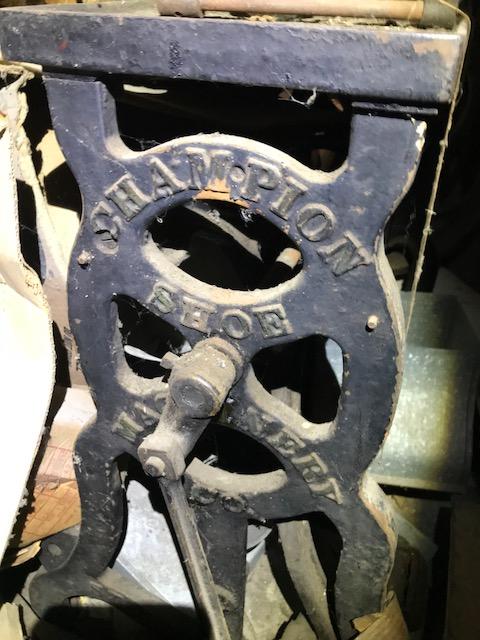
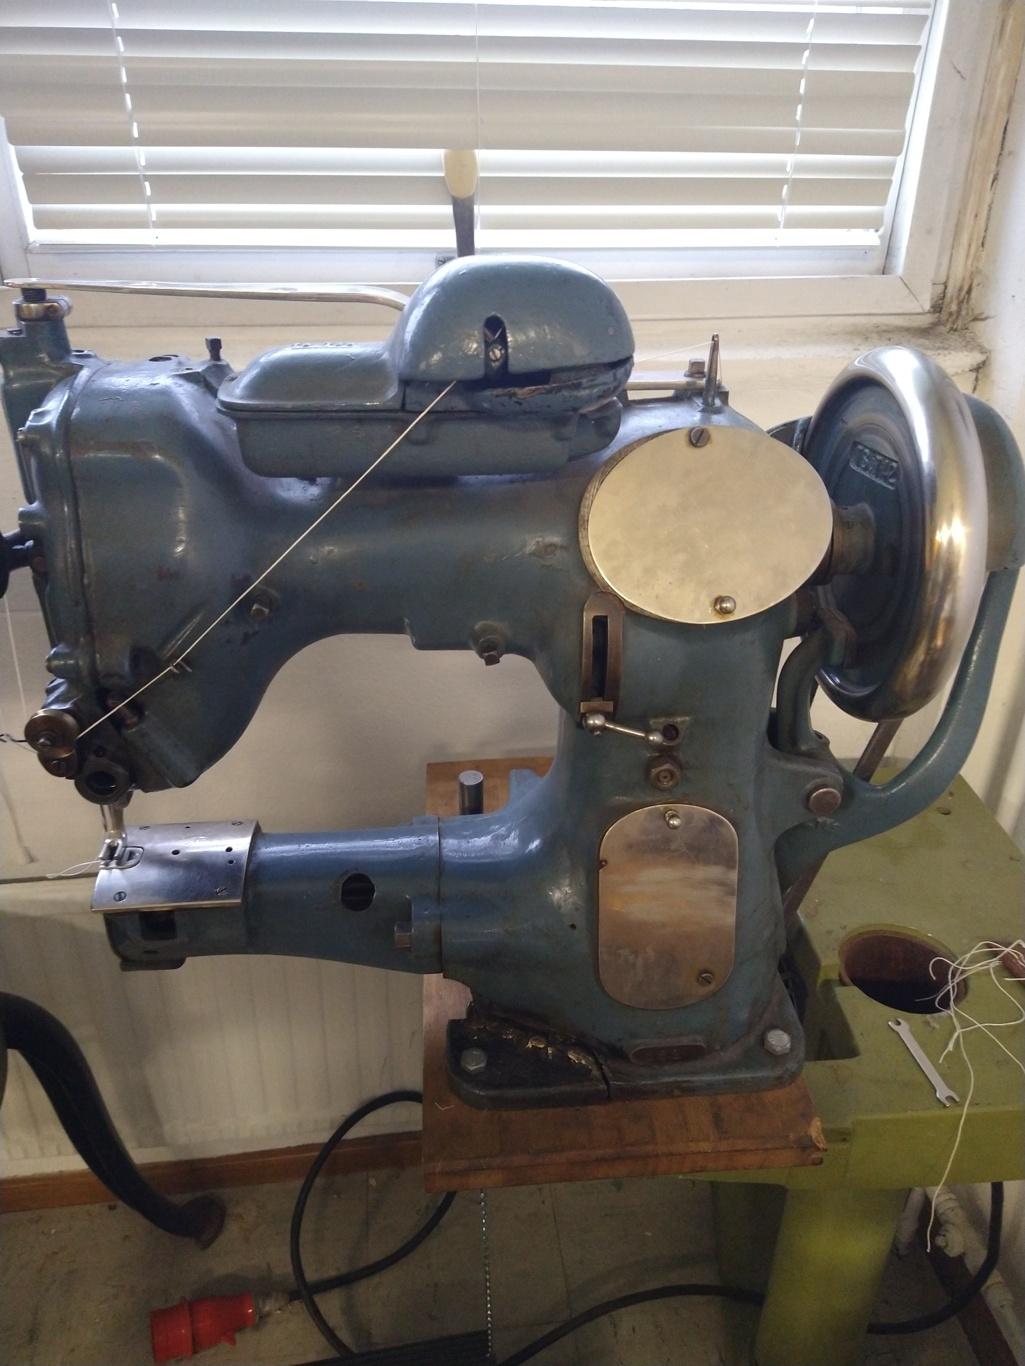
Yes, excellent. Thanks to the manual I managed to get mine up and running. Or, maybe more like I prioritised it. Now I need a supply of needles. I'm running low on 45 degree cutting point needles.
Attached a photo of my machine. (Annoying file size limit, we're not living in the age of fax modems anymore).

Not my fudgy looking weld on the cracked base! I can do it better than that!
-
On 11/14/2022 at 8:35 PM, samadlingtonleather said:I can email you a copy
Yes please do that. Sent you a pm with my mail
-
On 9/13/2020 at 5:40 AM, Wizcrafts said:My first ULS had every conceivable foot, including one with a blade on the bottom front. It cut a channel in front of the awl and the stitches were perfectly placed in it and were concealed. My favorite feet were stepping feet, but only on straightaways.
Wizcrafts, all your positive response in virtually EVERY thread on needle and awl machine is about to hurt my economy, my relation and my peace of mind.
-
Bumping this
-
Thank you for answers. I will try. I have an australian stock saddle with a attachment thingy for a crupper. I think it will help my saddle from creeping forward during steep descents. Yes, I also need to awl it and restuff it.
-
Hello, I'm looking for patterns for a crupper. Does anyone have one?
-
I'm still trying to find a manual for BUSM pilot sewing machine. Anyone?
-
Heinke or Martin/Price. Hasluck I have.
-
Singer industrial has most manuals and part lists online.
-
I operate and manage a knitting mill as my 'day job', we use a lot of binders for various seaming operations on knitted apparel. From my experience, there is no field where the old saying 'you get what you pay for' is more true than binders. The amount of time I've spent desperately trying to file, bend and braze bad binders is something I would like not to Think off.
We only buy suisei (japan) or rimoldi (italy) these days. Make sure you buy the right 'gauge' for what you're gonna sew. Otherwise the tape will cause a drag, and you will get a really bad finish. On Machines for knits there is almost Always a differential that you can adjust to somewhat counter the drag from the tape, but it can't rectify even modest faults caused by bad binders.
We buy some from college sewing machine parts as mentioned above. They're a real gem for sure. We also deal a bit with local machine dealers, not really good prices, but we get binders that do exactly what we want them to do, and they can be used 12+ hours a day without moving around, causing drags, or even worse, production stops. We also want to have local machine businesses around, so by buying locally we're voting with our wallets. Long time ago when I started out I bought a few cheap binders without really knowing what I was gonna use them for, they're all scrapped now. No use. If you're sewing as a hobby, by all means, go ahead and buy a few cheap ones to figure out your needs, but if you're serious and wanna do it as a business, I can't see any other way than forking out for professional Tools.
We have made a few ourselves, but to be honest, it's cheaper to have them custom made than to make them ourselves, at least for us.
(My browser keeps capitalising random Words, sorry for that)
-
On 2018-02-26 at 9:57 PM, Wallyworld said:to who? Let me know if you need additional pics.
Wow. Where is this beast located?
-
Hello. Following a conversation I had with the proprietor, australian publishing house the rams skull press has recently released a small book/booklet on collar making, called "Collar making the traditional way" by Ron Edwards. The information therein had previously been available in some other book, but is now available in a single little volume. I got it yesterday in the mail. The literature on collar making is very scarce, Haslucks book harness making being the only one I know of in English. And as correct as it might have been it does lack a lot both in information and how it is presented. Looking thru Haslucks bibliography it is quite evident that he either was a dilettant or just an editor. I mean seriously, motor cycle building, plumbing, electroplating and harness making, the feller must have been a jack of all trades..
Anyway, the Edwards book is good, albeit very thin. But it does cover tools, materials, patterns for various parts (only for one size horse), techniques, general tips and a few recipes for leather treatment goos (the latter seems to be taken from hasluck). I sort of researched the subject myself by Reading thru hasluck, looking at photos and videos, pestering collar makers with stupid questions, and of course making one. This book answered a lot of the questions I had, and confirmed some of my thoughts on how to do things. So for me it was a very good read. The illustrations are fantastic.
Note, this book is about making collars built up with long straw, not the chaff filled, seamed up jobs that is common in the US.
Overall I would give the book a solid 5 out of 5. If you're worried about postage from oz, have a look at the stock saddle book and how to make a saddle tree (which is the only written account i have found on how to make a english-ish tree), lower postage per book if you order a few...
No affiliation with the rams skull press, just a happy customer.
-
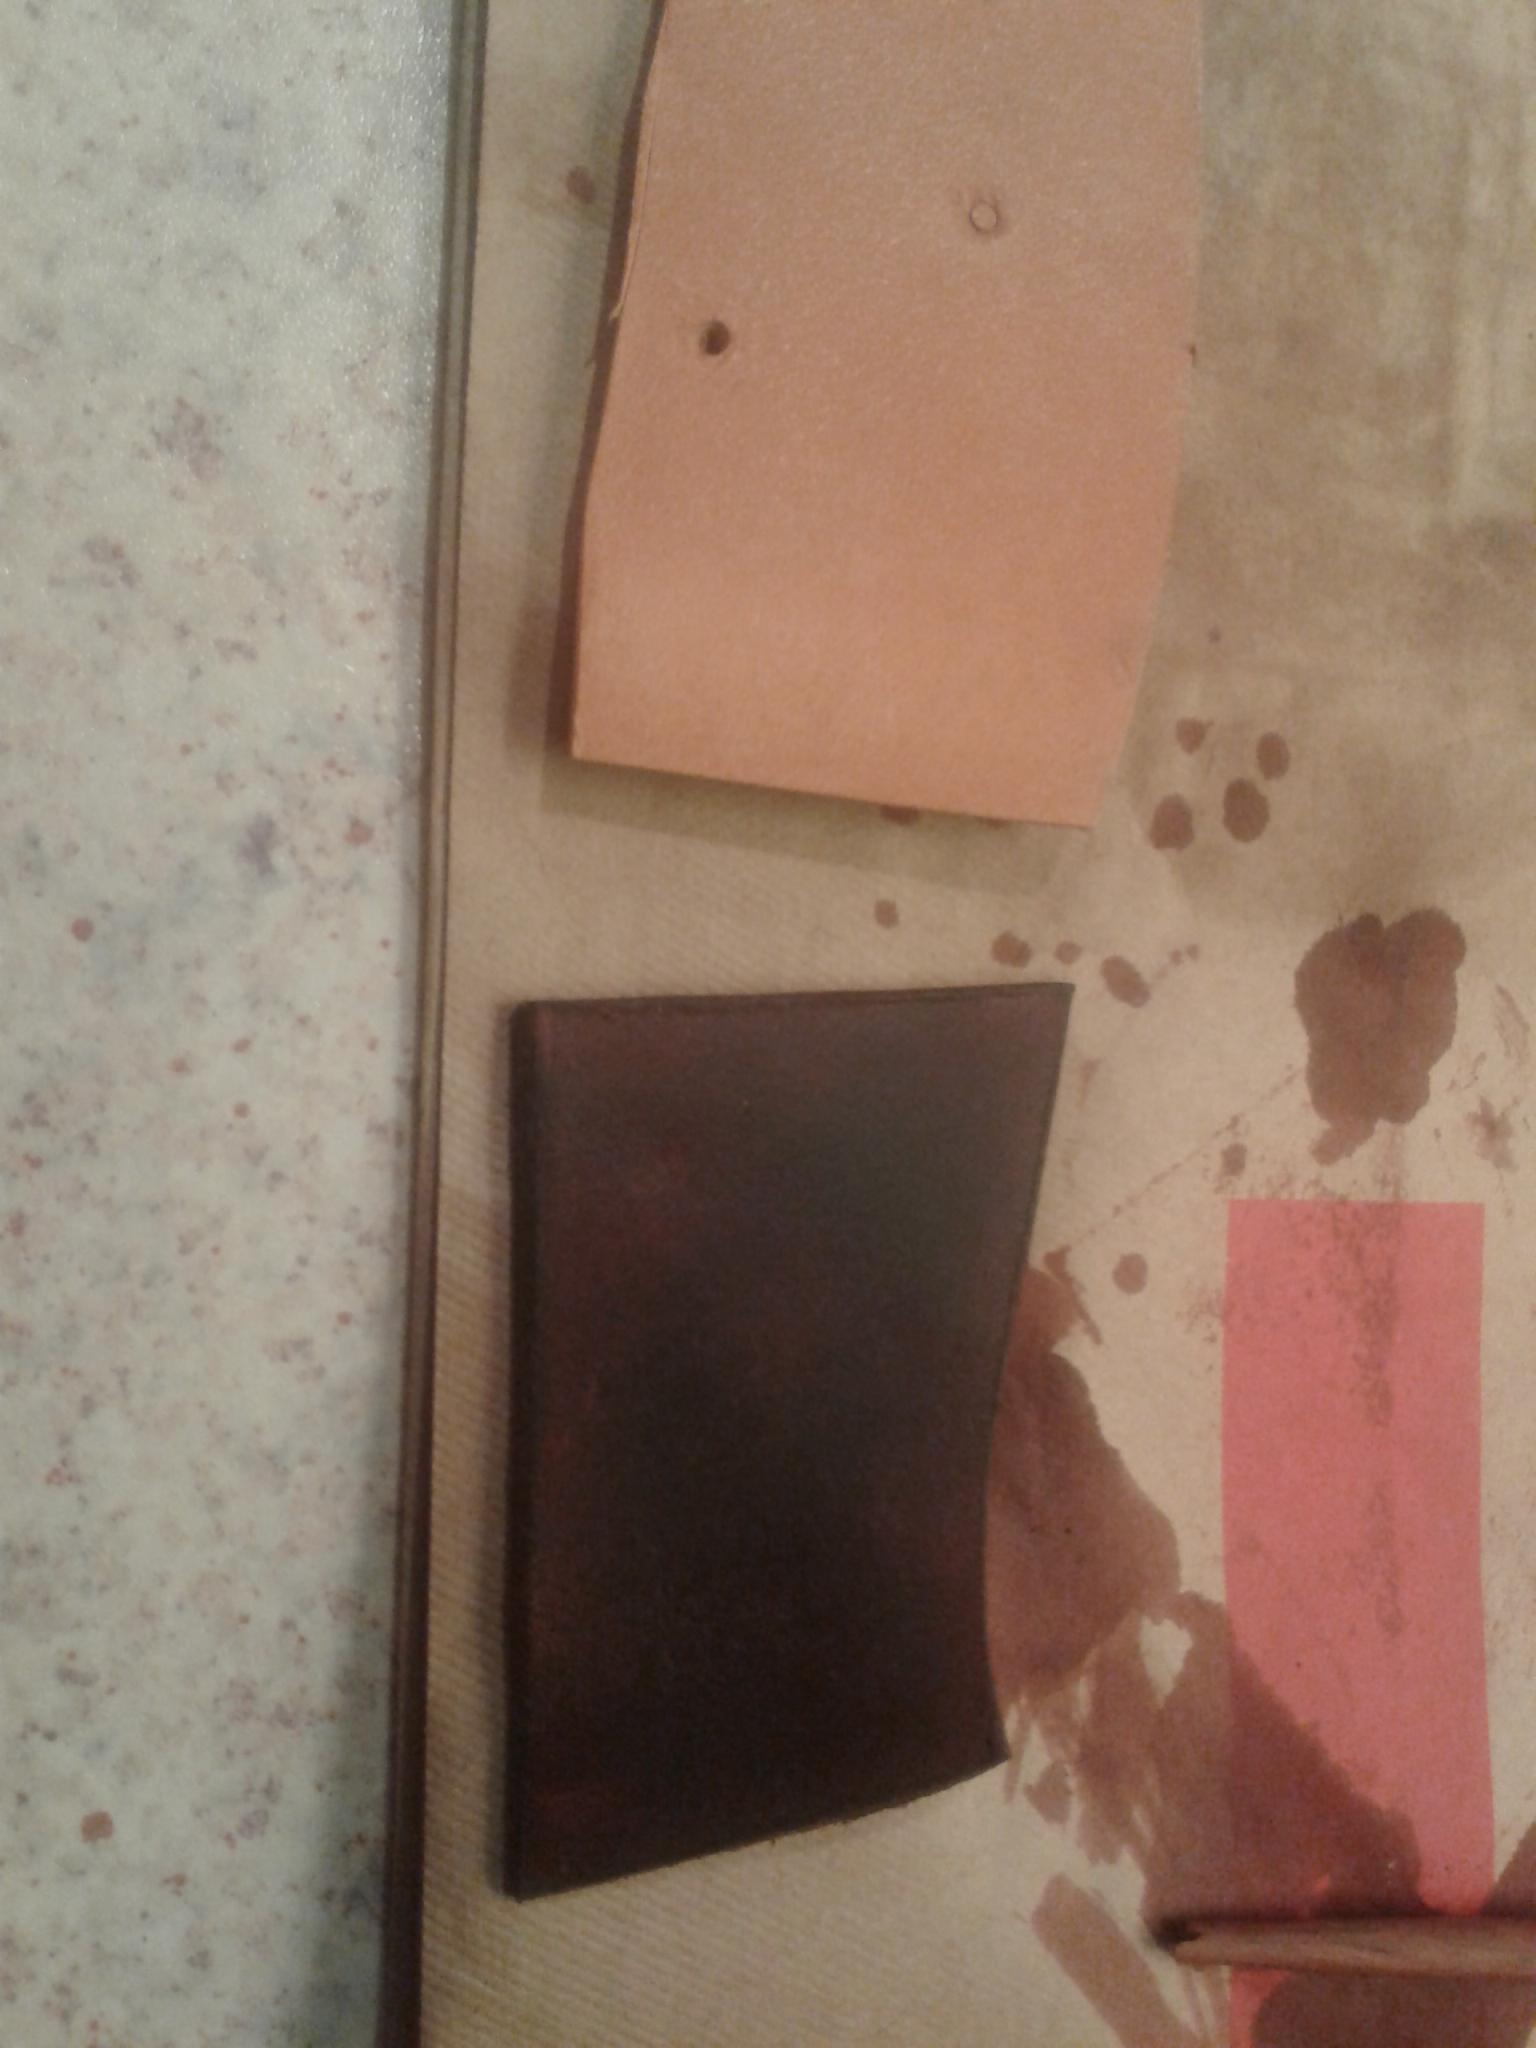
Also, a photo might help. Unstained on the top. Stained below.

-
Hi, a bit late maybe but I'd like to share an experience with wood stain on leather.
I live rurally and always try to support local businesses. I very seldom buy stuff over the net. Mostly books though (abebooks or amazon). I can't get leather dye/stain locally so I thought I'd give wood stain a try. My local paint shop (very old school, they sell all the good stuff and are very friendly and will get most things others do not carry at all, like borax and shellac flakes) had a wood stain which comes in powder form in small satchels. I had a look at the msds and it turns out to be sodium chloride (table salt) and azo dyes. Which can be used for leather. The instructions said the powder should be dissolved in boiling water, or for stubborn woods, 50% water and 50% ethanol.
Had a look at the fieblings dye msds and it's mostly alcohols plus a mixture of azo and methine dyes. Hmm worth a shot.
Turns out it works fine. The leather sucks it up fine. That the dye can rub off might be an issue, so it needs sealing with wax/oil but otherwise it works ok. Works well on edges to.
Conclusion, try to find as pure dye as possible, without any additives. Azo dyes works.
-
On 2017-12-08 at 3:05 PM, Big Sioux Saddlery said:The answers to your questions will depend on what style of harness you intend to make and the intended use, ie, buggy vs field work. I will get some pictures of my breechings, although my intenet service the last couple days has been lousy, so I can't promise that I'll get them downloaded to my computer and then loaded to this site. I don't care for a breeching base wider than 2-1/2", as a horse's hindquarter is not flat where the breeching rests. Past a point, the wider the base it, the poorer it will fit. While most people adjust the hip straps to let the breeching hang too low, even properly adjusted it still does not lie in a flat spot on most horses.
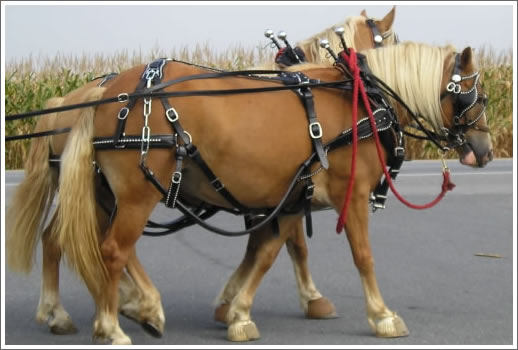
Your first harness picture is the style of team work harness most commonly seen in the US, with the exception of the hip straps buckling into uptugs. More commonly, our work harness uses a longer hip strap with a Conway buckle (reverse style). The harness in the second picture we do not see here, and I have no experience with, although the principles of construction of the actual breeching appear to be similar.
The third picture shows just about exactly the type of breeching that we see on a majority of work harness here. The hip straps attach by way of a reverse with a Conway style buckle. Using hip straps that buckle directly into uptugs attached to the breeching hardware greatly complicates the building process, the degree of complexity depending on style of uptugs (endless number of variables when building harness.)
I do not know of a breeching dee currently available built on the same principle as a halter square. At one time, at least one harness manufacturer offered that type of a dee. With that style, all the straps had a flat surface on which to wrap around the dee, and it was a big selling point in their catalog (1930's). As far as I know, they have not been available for a half century, or more.
I will try to take pictures of my hardware. A layer loop is a hardware item designed specifically for the rear hip strap on a breeching. They are available in a number of styles and sizes.
Regarding traces: again, it depends upon what you want to do Buggy style commonly are all leather, with slots in the end to accommodate either a sword-end single tree, or any number of metal attachments designed to go on the end of a single tree. Work style traces will generally have a 6 or 8 link heel chain on the end to hitch to a single tree with hooks attached to it. Building traces rivals building breechings in time spent getting everything level and tight, as well as being a tough sew. I have a set of work traces I recently built that I will also try to get pics of. I cut all my trace pieces full length of the hide. Work traces for heavy horses finish at 6'3" or 6'6", depending on type of hardware (or lack of) on the front end, as well as horse size and intended use. The chain is not included in this measurement. There is more variation in length of buggy traces. My work traces consist of 3 layers thick. I will not use the whole length of every strap when fitting up, but I cut them full length so that when fitting up, I can jockey them around to use the best area of each strap and adjust them to level the thickness of the trace. I do not know the actual breaking strength of a trace, but 1-1/2" and 1-3/4" covers most of the widths for normal work harness. Pulling harness for competitive pulling or heavy logging would be made wider and heavier. Very rarely do I see a broken trace, and that is usually on old harness that is full of dry rot. They nearly always break at the ends. Buggy traces are usually double thickness, with a third light layer at trace end, although I do see some singlestrap traces on cheaper light harness. Again, breaks happen at the ends, usually the trace end. Only occasionally do we see chain traces here, usually on mule harness. Rope traces are next to non-existent. Years ago, I did find one trace made from a cable, covered with a leather sleeve. It was hanging in my grandfather's barn with several complete sets of harness that had been hung up when they quit using the horses. Given the fact that there was only one, and it not attached to a hame or harness, I believe it had been purchased as a spare or came with a pile of other parts purchased on a farm sale or some such thing. I've never seen any other harness with that type of traces.
There is a harness making book available over here that was written in the last ten (?) years. Even though I've been building harness for over 25 years, of course I had to buy it when it came out. I found it to be of limited use, as there is much info left out for someone that has never built harness before, but I don't doubt you could probably find some helpful information in it if wanting to build an American style harness. It was written by Martin and Preston and is titled Making Harness, A Step By Step Guide. They assume that the reader has some existing leatherwork knowledge, but then repeatedly go into great detail on simple things. They don't give any cutting instruction, as far as how to cut your parts to best utilize a hide, which I feel will either make or break a harness, no matter how well put-together.
The second Picture shows an English cart harness, made for single axle carts. I kind of like the idea of the shaft loop strap on the saddle, I have a lot of hilly terrain.
Funny thing about that dee, I didn't know they were made, but they ought to be made again. It can't be that hard to weld together.
Thank you very much for the information on traces. Hopefully I can find some photos.
Also, I found the book you were talking about, the one I linked to above was the English version. I found the american one at a much better price.
Cheers
-
I will write a longer answer when I'm in front of the computer. But had a look at the book. A bit expensive, eh?

-
4 hours ago, Big Sioux Saddlery said:Do you have the hardware available to you in Sweden? You'll need either two breeching dees or a couple large O-rings for the ends. Most of them in the states are made with a base (body) that ranges from 2-3 inches wide and a layer of either 1-1/2 or 1-3/4" wide. The breeching dee for a 1-12" layer has too small of a ring in my opinion. By the time you get the hip strap, lazy strap and quarter straps through it, and especially if you use wear leathers, it gets pretty crowded. If you want to tie two horses together in the breechings, like a pair of colts, there is no room left for a snap. For a horse that large you'll probably need at least a 52" breeching, measured fold to fold. Cut your layer about twenty inches longer than your finished length and turn back the ends to make the layer double all the way back to the layer loops. I plug the layer loops and put a ramp behind them, as well as putting a liner in the ends. Remember, you will have one good end and one poor end on a strap of that length. While the good end would last a long time with no liner, the poor end will not. There is a pretty well known harness maker here in the states that does not put liners in his ends, and I've seen many of his harnesses where one end of each of the breechings wear out prematurely while the other end is still good. If you look at all the old harness, made back when horses worked for a living, the ends were lined on all the better grades of harness. You'll need to do a lot of skiving and fitting up to make a nice, level end that you can still get under the foot of your stitcher. My work horse breechings approach 7/8-1" at the very ends, and it is a tough sew keeping everything from moving and twisting. There may be other ways to make them; I'm not very familiar with the harness in Europe and other countries. When you say 4", will you have a layer sewn on top of that or will you just turnback the 4" piece through a dee ring? I just made up a set of breechings the day before yesterday. It took me most of the day to fit them up and sew them. That was just a single strap base, no folds. That takes longer and a LOT of careful skiving to be able to build it heavy enough to stand up but still be able to sew it. You end up sewing through up to 7 layers with the folded breechings. Lots of cheaper harness is made here without the ramps, liners and plugs at the dees and layer loops. That's the stuff that comes in for repair sooner or later.
Whoa! Long post. Will try to answer. Ok, breeching dees I can get from Aaron martin or Abbey England. Or forge myself. Not sure which route to go. I'd like to have a separate dee on the topside of the big dee for the hipstrap. Like a two strap halter ring. That would be awesome. I'm not really sure how you put the layers and ramps, could you provide a photo or drawing please? Ok, 4" was a bit reactionary, it's just that the local ones maxes out at about 1 1/8". Let's say 3". So you have the base, and then layer folds over to hold the D-ring? How well do you fasten the side strap billets? Or do you have smaller dees for them?
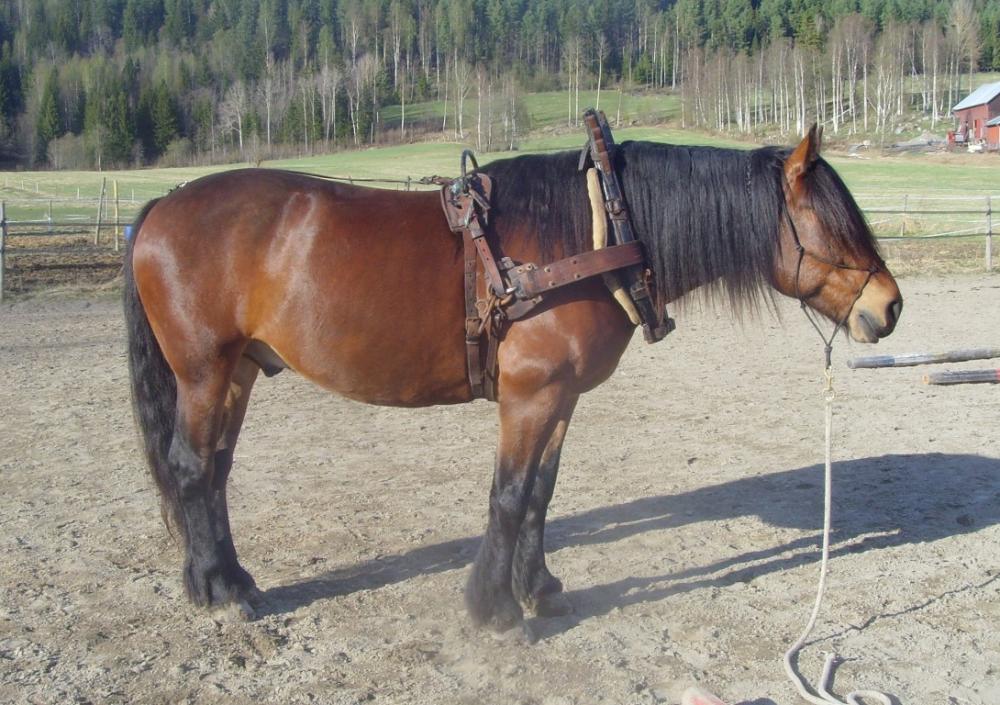
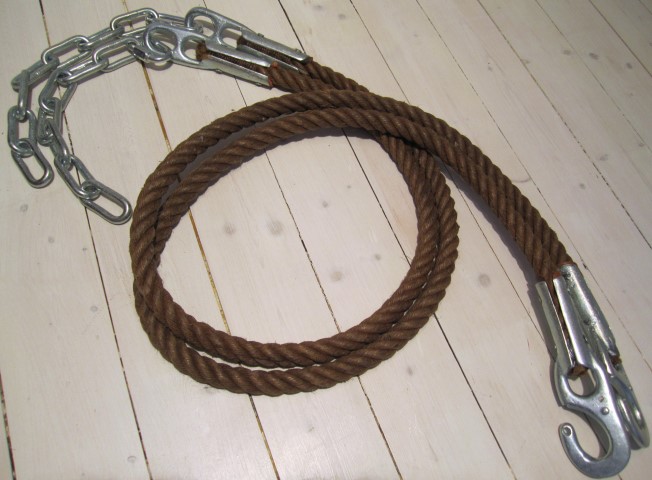
Also while I have you on the thread, how do you make your traces? I'm not sure I can get all the length for one trace from a hide. Should I cut traces as long as possible and then use chain for the rest of the length or is it even remotely possible to piece them together? Is it only one single ply of leather in a trace? What's the breaking limit of that? I until now only used tarrep hemp ropes (1" diameter) that attaches to the pull rings in the short traces from the wooden hames. (see attached photos of typical Scandinavian harness and rope traces). But it's clumsy, and I now need longer ones as the traces attaches directly to the hames. And I can't figure out a way to attach the ropes to the trace attachment thingy.
-
9 hours ago, fivewayswelshcobs said:Have you got pictures of what you want
Hi, yes. I can't really decide if I want the side and hip straps to meet at Point (in a pad or in a welded ring) or if I want them to cross over on the back strap (the one going to the crupper). The thing is, the breechings made and sold locally are all very weak, and usually comes from breast strap harnesses.


-
Hello. Is there any good instructions on how to make breechings available? I know haslucks book, but it's a bit odd. I plan to make the 4" wide in 5mm leather (sorry for two measurement systems in the same sentence). And I defo want a big sturdy Dee in the end, not weird hooks as hasluck talks about. It's for a working draft horse (18.2 HH) so it's a bit on the big side.
Suggestions, experience, ideas? Just shoot.


Making Harness by Martin & Preston
in Old/Sold
Posted · Report reply
I would really like a copy as well.