Lieckio
-
Posts
8 -
Joined
-
Last visited
Lieckio's Achievements
New Member (1/4)
-
Hello This might not really be the right place, but I assume there are at least some reenactors here that are familiar with the stuff I need. I do film & theater stuff and reproductions for museums etc. I am currently looking for cowhide, 3-4 mm thick that has pebble grain texture on it, much like what the German army used during World War 1 and World War 2. Leather working is not my main area, so I have no idea of the suppliers - I've personally just used Tandy Leathers and Laederiet until now - neither have pebble grain leather available. Anyways, any help and hints towards the right direction would be much apreciated.
-
While that would indeed give me a rough estimate on the lenghts, I am not sure if I could get the curve correct... except perhaps with trying a few times. The result I am talking about can be seen in this video:
-
Unfortunately I can't do this in the elaborate and nice fashion as you describe (even though if this was an original hat I was making, this would definitely be the approach I'd take). I have to make an exact repro of original type of a hat, similar to the type I've posted a picture of below. The originals have a simple, pigskin sweatband with no fancy edging and just simply sewn directly to the hat. Probably because for a military hat a fancy look is not something you are looking for, but cheap and quick alternative I imagine... However, your explanation is excellent on the process and I'll see if I can add some sensible tags to this post for future reference (and for myself to remember in case I ever get the opportunity to make one). Meanwhile, any ideas or hints how to figure out the needed curvature? I imagine it could be done in autocad by drawing two lines, with a 90 degree angles on the "height" on the longer edge and then shortening the other for a certain amount (1cm? 2cm?)... hmm..
-
Hey everyone Not an expert hat maker here or anything along those lines, I am a prop maker for films etc., and I am currently having to reproduce few hats for a film. I've made patterns for the hat and sewn a few together, but I am having a bit of a trouble with the sweatband shape. I have an original hat that I am reproducing but I can't take it apart. The sweatband is really simple in these hats, it's just a cut piece of thin pigskin which is then sewn to the hat with a single straight stitch about 3mm from the edge. However, in my testing I used a simple, straight cut piece of leather, 2cm wide. This doesn't give me an ideal fit to the hat, there is some wrinkling on to the top which is not ideal. The problem seems to sort itself out with a bit of wear, but is nowhere near professional look that the hat should have. I browsed google furiously and watched some clips from Youtube, which showed people essentially having a precut, curved patterning tool they used for the sweatband. From my understanding, the longer edge of the curved sweatband will be sewn to the hat and the shorter end will be the "top" of the sweatband. Now my real question is how I would go about figuring the curve I need for the hat? The videos seem to show panama hats and fedoras etc., which are fairly round in their shape so a constant curve is great for them. The hat I am making has a slightly different curve (sample picture is attached). Does this have any effect on the curve? A constant curve is enough? What would be the ideal curve and how can I figure that out?

-
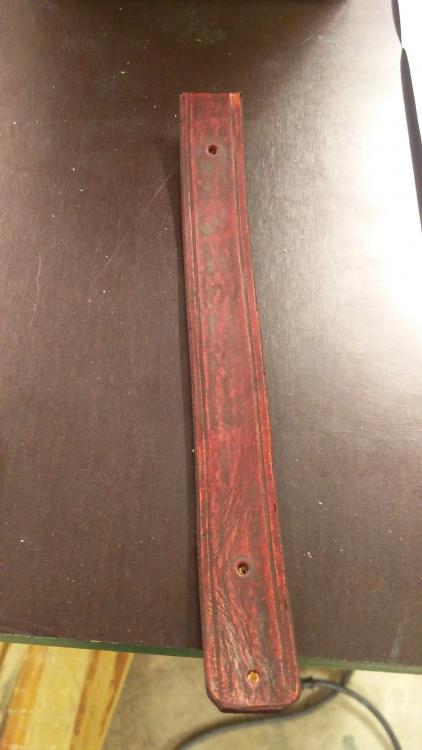
Yeah, I am slightly annoyed with the change and the fact that I didn't know about this. :D Oh well, did some test runs now and it seems that I just need to keep on rubbing it in rather than just quickly swipe the area to cover it. This mean's I can't get the nice reddish brown colour anymore, but end up with a slightly darker red-brown colour. But that is fine with me, will have to look for another dye for the future though. So in case anyone ever does a forum search and finds this, just rub it in properly for some 20 seconds and the dye will come out even and smooth.
-
I contacted the supplier and apparently the composition of the dye has been changed without them knowing it at some point. I did open a new bottle for these, but had bought the bottle some 6 months ago so they didn't know I would be affected by it. Apparently the dye needs more rubbing and working now to get it to soak properly, unless I mix acetone in it.
-
Hmm, that is fairly strange as this is the same leather I've always ordered, from the same supplier as well. There's nothing visibly wrong with them either. I guess I can just dye them really dark, but it's not really ideal... It affected two separate pieces as well... I guess I'll have to contact the supplier and see what they have to say.
-
Hello As a new member, I am not quite sure if this is the right place, but.... First off, let me start with a bit of a background info. I am by no means a professional leatherworker. My day job is prop making / replicating for films, theaters, reenactors etc. This includes doing some work on leather every now and then (wish I could do it for a living though). For past 4 years I've used the same supplier of leather and other leather working products just fine. But yesterday I ran into a problem I haven't faced ever before. As you can see from the attached picture, I was in the process of making some leather items for a project and moved on to dyeing the leather. Previously I have gotten desired results with just slapping the dye on, two layers and gotten a nice, even, smooth, reddish brown colour on the leather. This time after the first layer all my leather was looking like in the attached image. Blotchy etc., as if I had been using too much dye (which can't be the case). The thing is, like I said, for past 4 years I've gotten my leather and dye from the same supplier and I've had 0 problems with my process, so I am a bit at loss here. I've ended up wasting a good 100 euros worth of leather now and a days work so far which annoys me. Is this caused by grease or some other contaminant on the leather surface? Should I be cleaning my leather from now on before dyeing to avoid problems like this in the future? How to clean the leather? Any products to recommend or so? The leather dye I've used with great success until now is ROC Narusværte, Danish leather dye.