


Seamus
-
Posts
29 -
Joined
-
Last visited
Content Type
Profiles
Forums
Events
Blogs
Gallery
Posts posted by Seamus
-
-
At an absolute minimum, you should look for a swivel knife and a modeling tool or two. Honestly, looking for a carving class at a local Tandy, if you can get to one, probably wouldn't hurt.
I think the nearest Tandy to me is in Richmond, VA. Maybe a 2 hour drive. Might be a good weekend thing to pull off when I don't have a Ren. Faire to get to.
I'll also be living about 4 hours from Zack White Leather, so maybe I can get there at some point to take a class they might offer.
Also, are you wetting the leather before you try to tool it?Yes. I learned quickly that it needs to be wet to get anything done. lol
-
Ok, I've been stitching/shaping leather for a little over a year now. I've made several pouches and sporrans as well as a couple mugs and some bttoles.
The mugs and bottles have brought me to a juncture where I need to start tooling the leather. So far, I've done large, less detailed designs and have used and ink pen to get the depression I was looking for. Once I've gotten the depression, I go back and use paint or a fine point sharpy to give the depressions some color.
Now, I'm trying smaller, more intricate designs, and the use of the pen is killing my hand. Is there some sort of tool I need to get myself to make this process easier?
-
I have made my own burnishing tool simular to the one above but I use a piece of hard fir on a shaft mounted between 2 bearing blocks from princess auto. with a pully at the end to the motor I can choose the speed with the pully size . I started out wit a square 3x3 and used my setup as a lathe with a wood plane to turn it round, then filed in with a couple of round files 3/8 deep grooves to facilitate the various thicknesses of leather so as to finish the round edge as well.
I just recently added a strip of leather to one section as a power strop
Cost:
Motor free
wood free
rod and bearings about $20.00
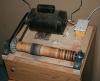
It looks like your motor is a starter off of a car. Is it? I mean... I could hit up a junk yard for one of those. I could use an old car battery as the power supply, with a heavy duty switch to turn it on and off. My battery charger would work fine to keep the battery topped off when it gets low on juice. Seems like an easy build to me.
-
In my mugs, I usually go for about a 50/50 ratio, but I don't measure. And it seems like there is a bit of separation of something in the pitch when it's blended with the wax, because I find this thick, tarry substance along the bottom of the can I use for the mixture. I'm assuming it's the pitch as it's very sticky. With that long diatribe, my ratio is probably weakened somewhat from the pitch side, and a bit heavier with the wax...
I remember reading up on someone else who was mixing the beeswax and brewer's pitch, and I want to say they mentioned a 4/1 ratio... But I can't remember if it was 4 wax to 1 pitch, or the other way around.
All in all, I stick with 50/50 and eyeball it, it's just easier. My blend is still still somewhat sticky, but after a little use, it goes away... I'd just rather put up with the sticky than get the mix too brittle.
Looks like I'll just take a stab at it. I'll do small batches just big enough to seal up one mug. Once I have it down, I can make bigger batches and use it on my mugs and bottles.
Oh, and I'm the one with the popcorn trick...
My hat's off to you. To steal a quote from the Guinness (yum!) commercials: "BRILLIANT!"
-
and after you do the burnishing with saliva, you need to put a finish on it....Super Sheen.
works for me.
Does this seal it up so it doesn't "unburnish" itself, which is essentially what's happening?
-
It's true. I've read elsewhere on these forums that burnishing can be done with some spit and a dowel rod. So I tried it on a couple items. Looked really nice... until about 24 hours later when it looked like I had done nothing at all.
Am I doing something wrong? Have I missed a step? Is there some sort of prep work involved besides rubbing copius amounts of saliva on the edge and rubbing it to that "burned" stage with the dowel? I'm at wits end with this one!
-
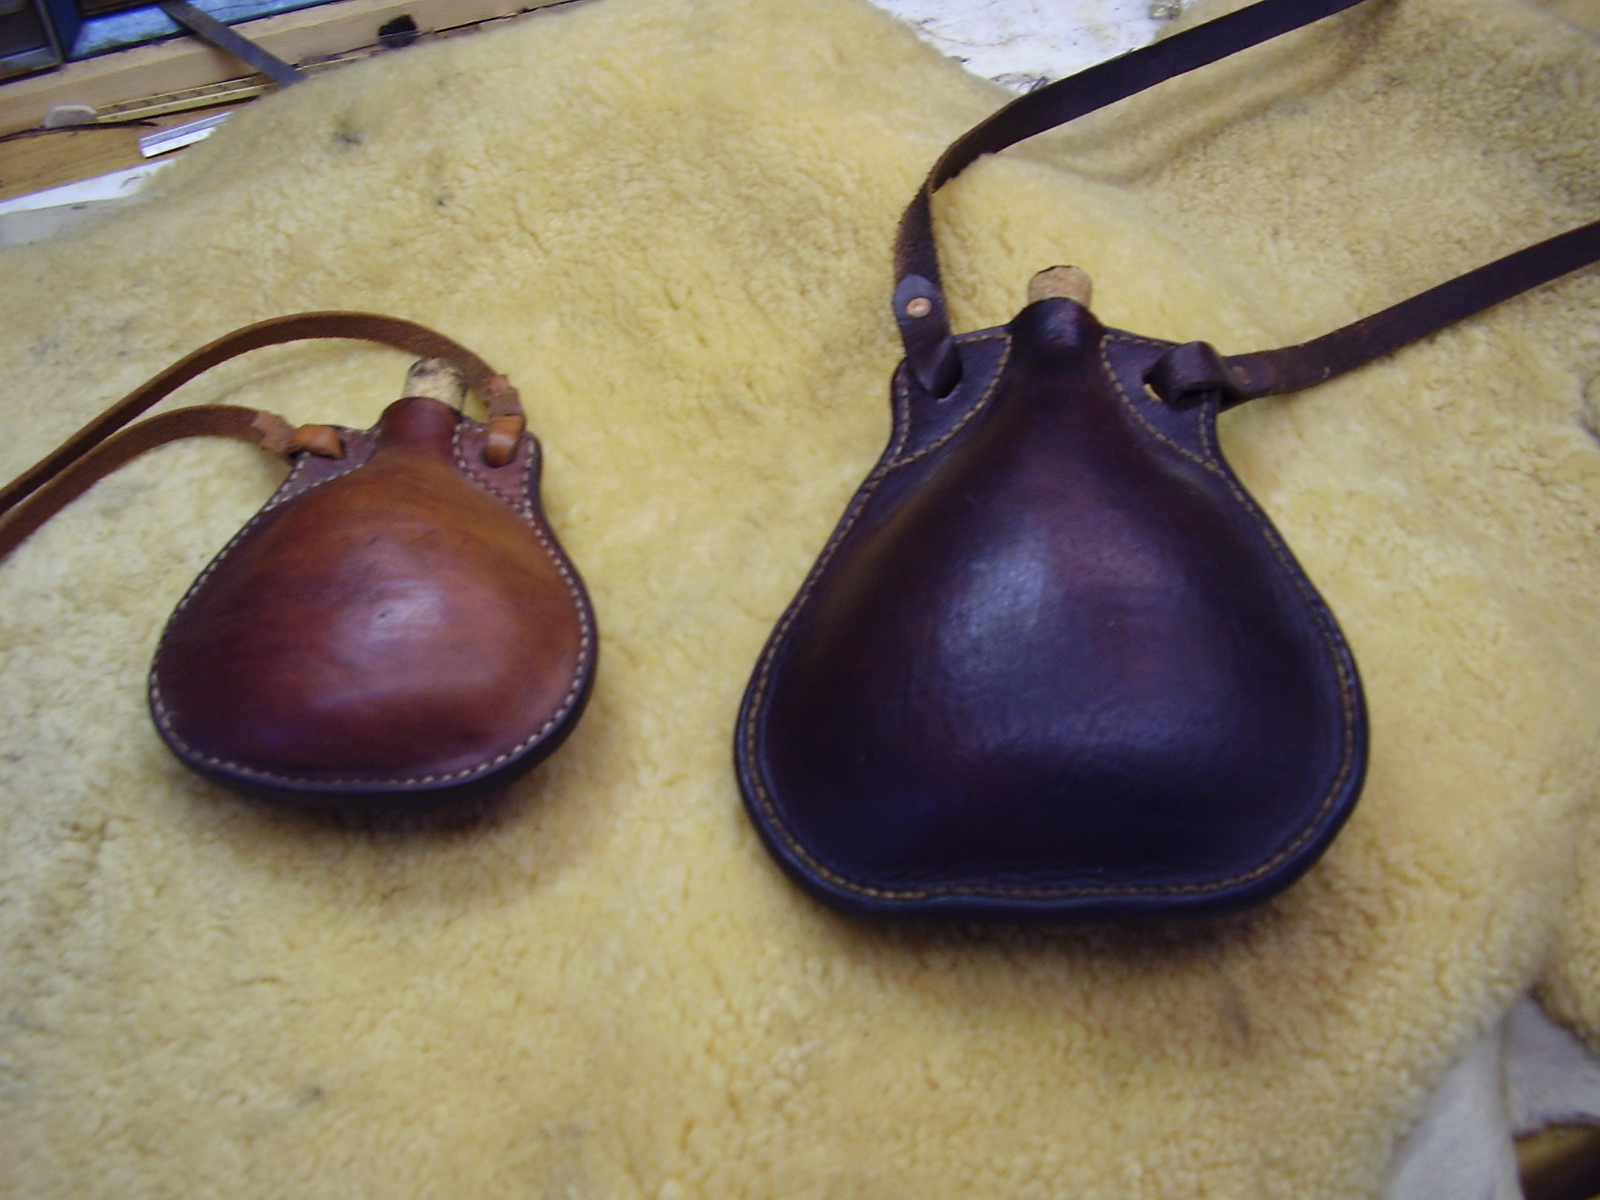
Fiebings Oil Dye...........little black in dark brown also the Hot Water darkened it up some.
( these are the last of the Real Bewers Pitch)
Speaking of brewers' pitch... I've read a few places about blending it with bees' wax. Apparently, the brewers' pitch by itself is "sticky," but flexible. The bees' wax, by itself, is brittle. If you blend the two, you get a not too brittle, not too sticky sealer. Any ideas as to the ratio?
-
:
 thanks for the Heads up on popcorn.......i won't be washing Sand from my
Bottles any more............
Glad I could spread the word. I can't take credit for the idea, though.
How do you get the deep mahogany finish like the bottle to the right of that photo? Do you dye the bottle or is there coloring in with the wax?
-
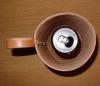
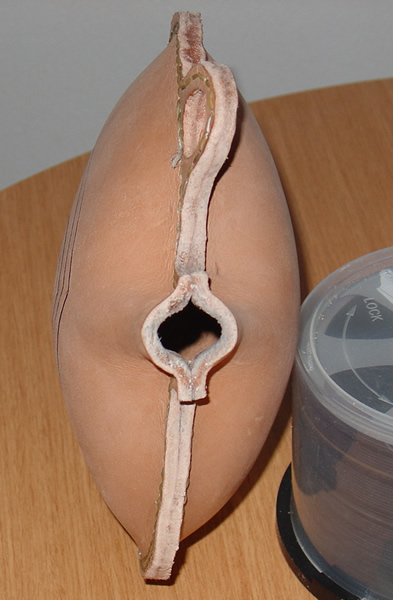
And, now a look at the bottle I need to wax:
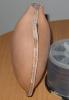

Shaped it using popcorn kernals. I owe thanks to someone off of these forums for that idea. I was going to use BBs, but the popcorn was much cheaper, and more readily available.
-
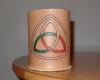
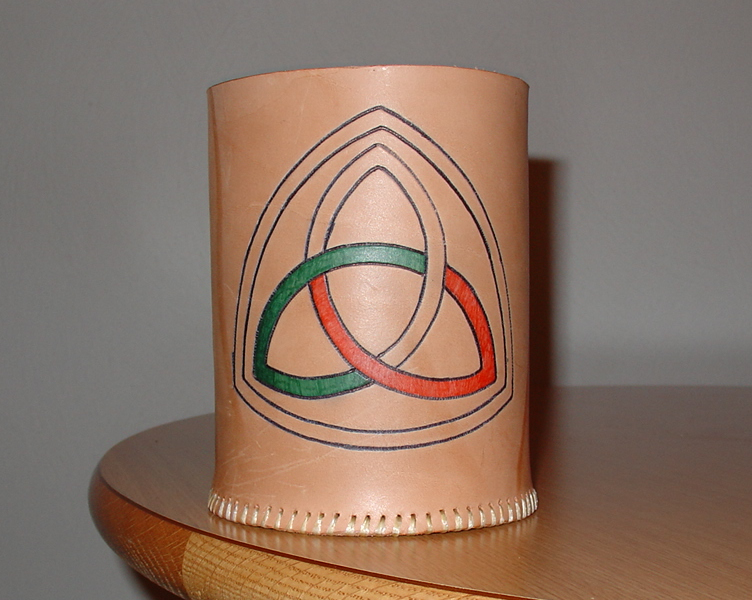
If this is your first shot at making a mug, then it was very well done. I'm currently working on building a new work bench for my leatherworking, and as soon as it's done, I'll get a tutorial on how I make my mugs. Again, very nice job!
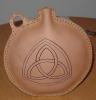
Yes, this was my first attempt at a mug. Not my first leatherworking endeavor, but my first mug. I'm still learning how to tool leather and what not, which is why I went with the simple triquerta design.
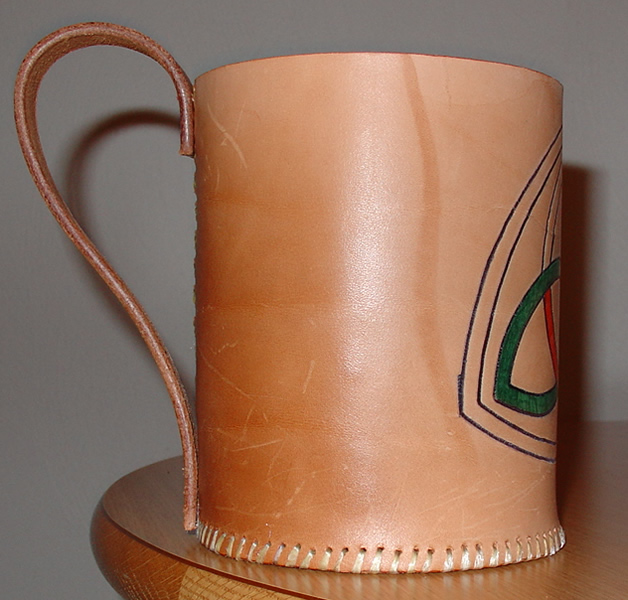
I have made a second mug, which I will get shots of tomorrow evening. It's considerably smaller (it actually fits completely inside of the first, with room to spare on the sides and above it), but I did a little more extensive tooling. I scored a lattice work into the sides all the way around. Looks very nice, if I do say so myself. I'll post here and let you folks be the judge.
Thanks for the complement, and I look forward to seeing your tutorial as I'd like to see if I can improve on my own self taught method.
-
I just realized that I said 1/2 gallon is 1 quart, yadda yadda. It's actually double all those. I must have been pretty tired.
-
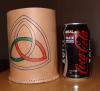
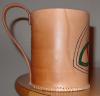
How much will that mug hold ?
looks like about 1/2 gallon.
Well... umm... I'll geek something out and calculate the approximate volume. I can't test it imperically at the moment as the stitching holes would leak.
It measures 4.375" in diameter (2.1875" radius). It's 6.875" deep. Doing the math using 3.142 for pi gives us 3.142 x 2.1875 x 2.1875 x 6.875 = 103.365 cubic inches. OnlineConversion.com tells me that this converts to .447 gallons... so... yeah... 1/2 gallon. That'd be 1 quart. 2 pints. 4 cups. 32 ounces. Ultimately... plenty of mead.
 For our metric friends... thats about 1.6L.
 -
One more shot to demonstrate the size:
-
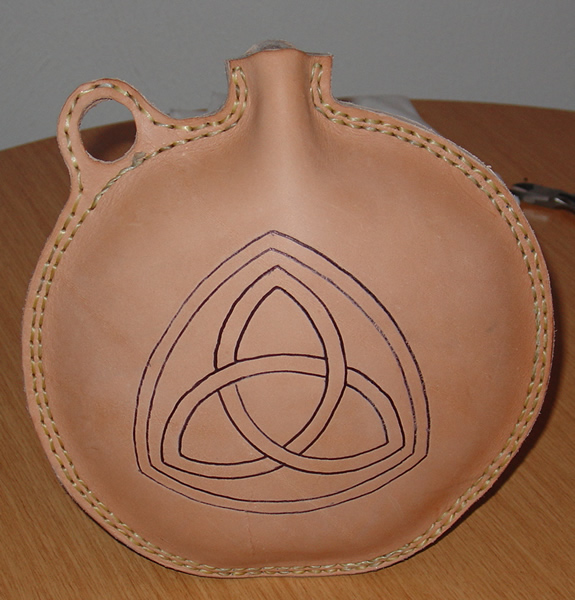
I've been wanting to make one of these for quite some time. Though I have read about a forthcoming tutorial, I've not found one that already exists. So I had to wing it.
I haven't finished the painting I want to do, and I haven't lined it with pitch or bees' wax, and I still need to burnish the lip.
For a first attempt, though I certainly went over board on the size, turned out pretty nicely in my opinion (and I'm usually pretty critical of myself).
I'm open to opinions and suggestions from those of you with more experiance than me in this area:

-
I have a belt that I bought quite some time ago. I don't wear it incredibly often, so it's still in near mint condition. It's plain, though. The edges are burnished and the belt is dyed black, but there's no sort of decoration (unless you count the buckle, loop, and rivets). Given that this belt is a "finished" product, is it still possible for me to hit it with some stamps, etc., and end up with a really finished product? Or would any tooling I do not take?
-
I have seen shoes like these (made in Germany) that have rubber soles and they are superb. My only regret was that I don't speak or write German well enough to chat with the makers but I did have a few very pleasant emails from them. Nice folk making good leatherwork and well worth a look.
Check out www.lederstrumpf-und-wichtelland.de
but specifically: http://www.lederstrumpf-und-wichtelland.de...uhe/schuhe.html
Looks like some good stuff. Aside from only understanding a very small number of words, the detailed pictures speak plenty of English for me.
I'm definately going to try my hands at a pair for myself done up in the suede I have. The suede is presently a gray color (see the sporran in my avatar... the sporran was cut from the same 17sq-ft stock I plan to use for these shoes), but I'm sure I can hit the stuff with some brown or black dye. Once I do a low pair, I'm going to play with my pattern to try to produce a mid-calf pair. I also plan to look into some regular cow hide and maybe some buffalo hide. I participate in Renaissance Faires, and could never have too many pairs of shoes to wear to faire!
-
At the risk of reviving a thread that has been dead for quite some time... how do you folks think these would fair if they were made from a 2mm thick suede? Mind you, the sole would be thicker, and eventually rubber (probably Vibram).
Any thoughts?
-
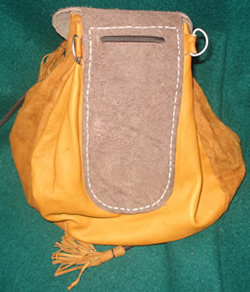
You say you used 2-3oz for the card slots. What weight did you use for the main body.
Also... did you by chance make some sort of opening for cash?
Again, incredible work, and thanks for an anniversary gift idea!
-
I sooo need to get me one of those! A maker's stamp that is. Hafta come up with a cool idea though.
That stamp looks grand. It goes without saying: Use it with pride!
-
The more I look at threads like this and shoes like those, the more I want to try my hand at a pair (or two or three). Of course, I do the Ren Faire thing, so historical accuracy, though somewhat important, can allow for modern bennies. (Read: I would make mine with a vibram sole. *grin*)
Definately some fine looking shoes. Excellant handiwork.
-
Beautiful work.
You've just given me a wonderful idea for an anniversary present for my wife. I've got 5 months and 4 days.
-
Looks very good.
After having seen this (and some other stuff on this forum), I've come to the conclusion that I need to learn how to do lacing.
-
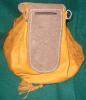
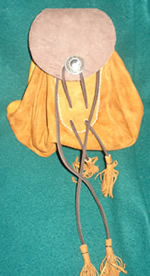
No experience with sporrans, etc. but I REALLY like your avatar!!!

Why, thank you. I also made the sporran you probably missed in that photo. lol
-
Truth be told, my leather working skills are nowhere near some of what I have seen on this forum so far. I intend to fix that soon enough... I'm headed to shore duty.
Anyway, I just thought I would share an example of my own work.
What you are about to see is a "Rob Roy" style sporran fashioned mostly from some kid skin I picked up at the CT Ren Faire in 2007. As it turns out, I think I should have used something thicker, but that's my own opinion.
Tips/pointers/compliments appreciated.


Burnishing sans specific tools
in How Do I Do That?
Posted
Thanks. I'll have to have the wife watch freecycle for an old vacuum that has a good motor.
Thanks to everyone for the input!