donohueleather
-
Posts
37 -
Joined
-
Last visited
donohueleather's Achievements
Member (2/4)
-
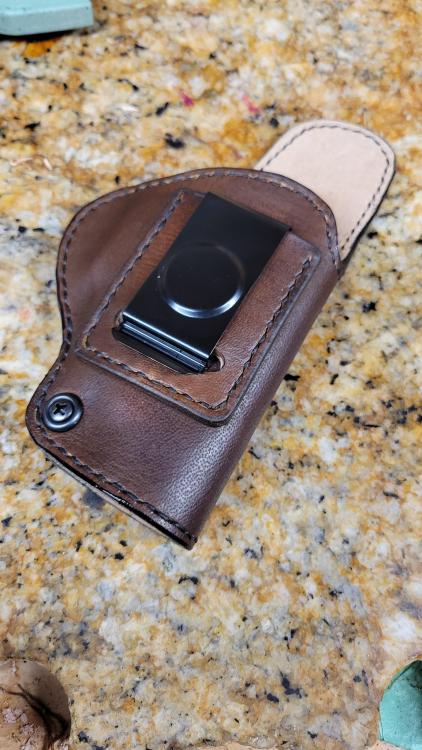
Working through a few orders lately, and had a request for an inside the waistband holster with tensioner. Worked up some changes to my normal template to accommodate. With the adjustable tension, it might be my new favorite inside the waistband design.
-
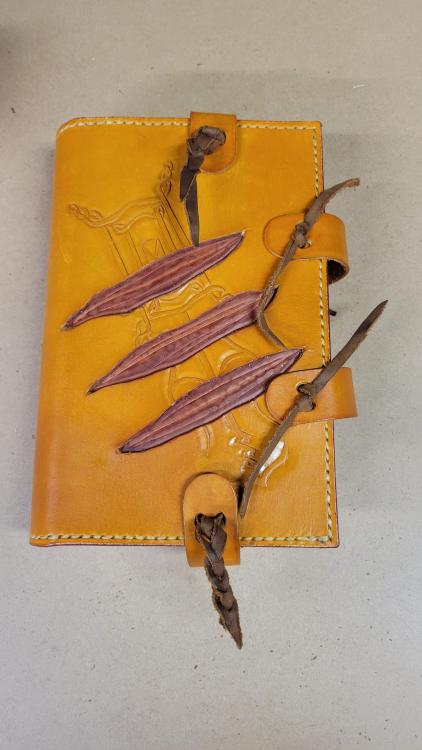
Just finished a book cover for a friend. She was recently published and wanted to get a special edition cover to commemorate it. I thought it would be cool to layer up the shell so I could create some "scars" under the tears. I like how it turned out. (see the link for the book's cover art) book cover.webp
-
Custom 3 slot OWB Holster
donohueleather replied to donohueleather's topic in Gun Holsters, Rifle Slings and Knife Sheathes
Purely cosmetic -
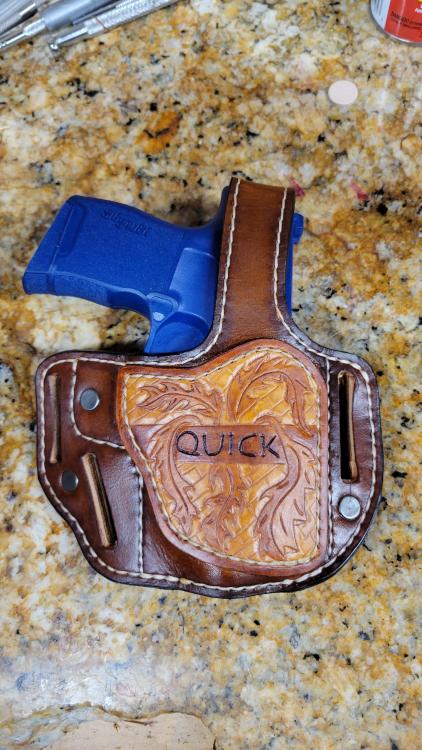
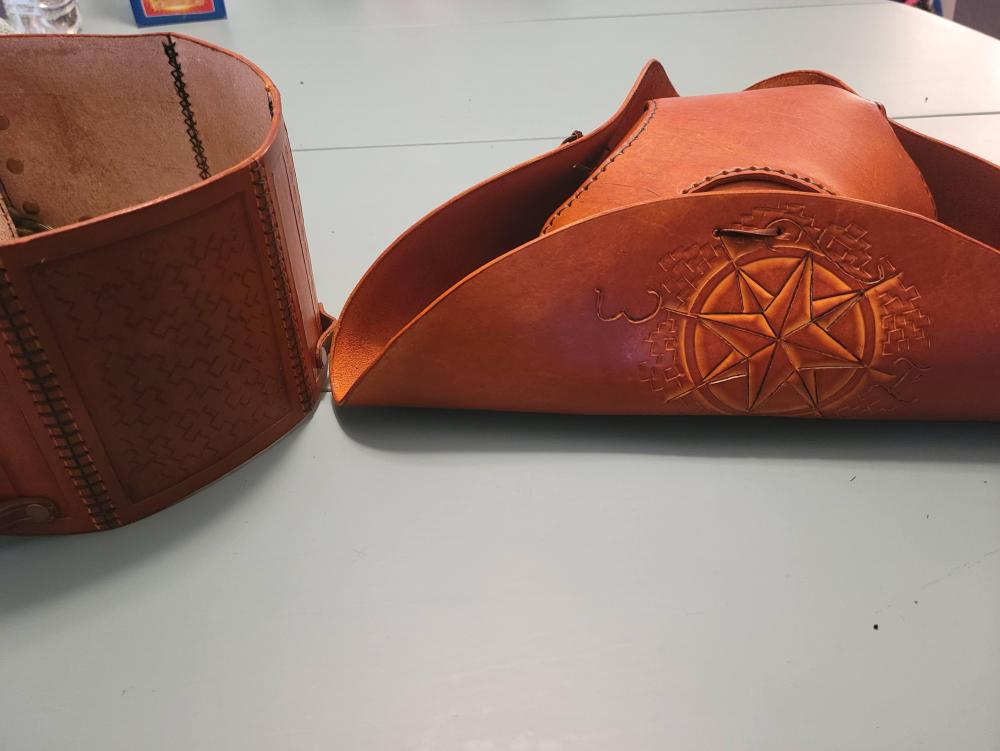
Had an order for a custom 3 slot holster for a sig p365, the customer wanted some kind of fanciful artwork with his brothers nickname added. Did some drafts, went back and forth and ended up with the artwork you see. Once the pattern was worked up I ended up building the holster out of a 6oz (ish) veg with full suede lining (all chrome free suede). All sewn togther with some Ritza 1.0mm in white. I went ahead and put the two slots for adjusting cant on the back vs. front to keep the whole unit roughly in the same place so it wouldn't be so floppy on the straight draw. Couple of minor things I might change if I built this one again, maybe a slightly lighter veg body as it got rather thick after all the lining was added. Maybe 5oz.
-
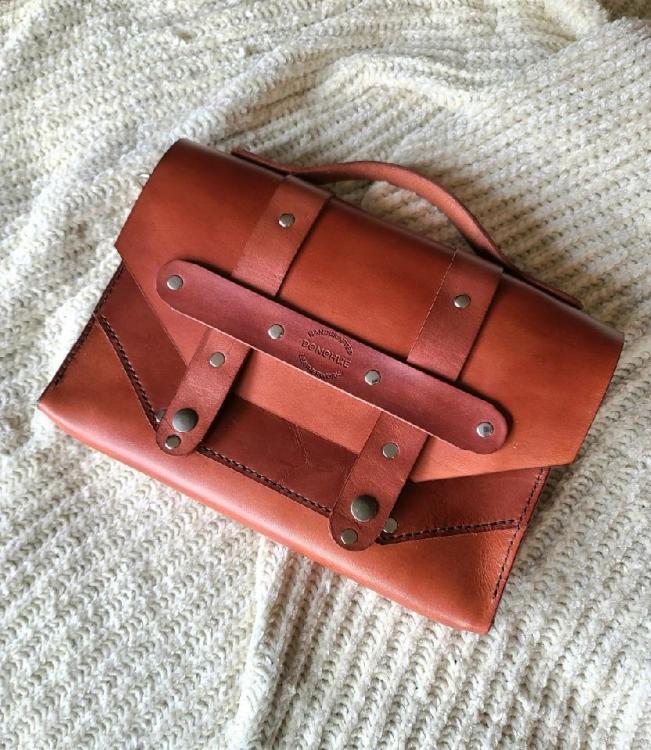
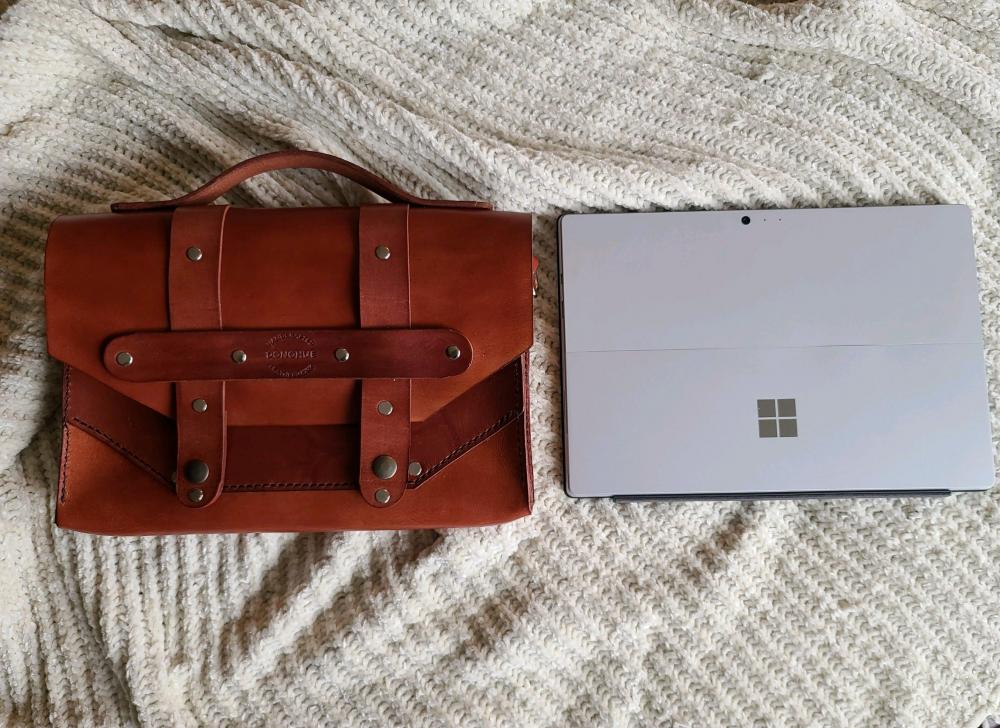
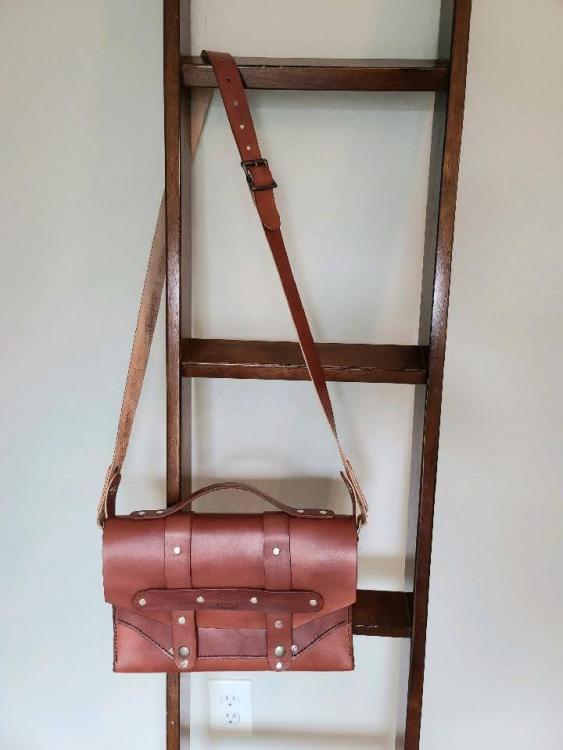
Haven't posted in a while, been kinda busy. Had some time this past weekend and felt like I needed to go out and make something. Didn't have much of a plan to start with, then decided to just lay the laptop down on a bit of 5oz and.. well.. one thing lead to another.
-
Ren Faire Armor Set - holy cow it's a lot of work
donohueleather replied to donohueleather's topic in Leather History
true, thought it was not conceived for actual SCA use or anything like that, purely costume. Thank you! I might work something up just cause! That said, the "project" has grown with more and more stuff being added from the original setup to include a re-worked sword frog, a drinking horn holster/holder, costrel for water or whatever.. a hood, a matched set of short sword sheaths, and some other stuff. then stuff for my friends. One wanted a custom costrel to match her hat I made previously.. That's what I love about this craft, you keep learning, new techniques and processes and you get to the point when some projects are finished where you look at it like "wow.. i made that from a flat piece of leather"
-
yes, but letting it dry with a...non period correct metal wine stopper... Bonney Lake, over the next few weeks. Not TOO far a drive from Ellensburg. unless a fire closes the passes....
-
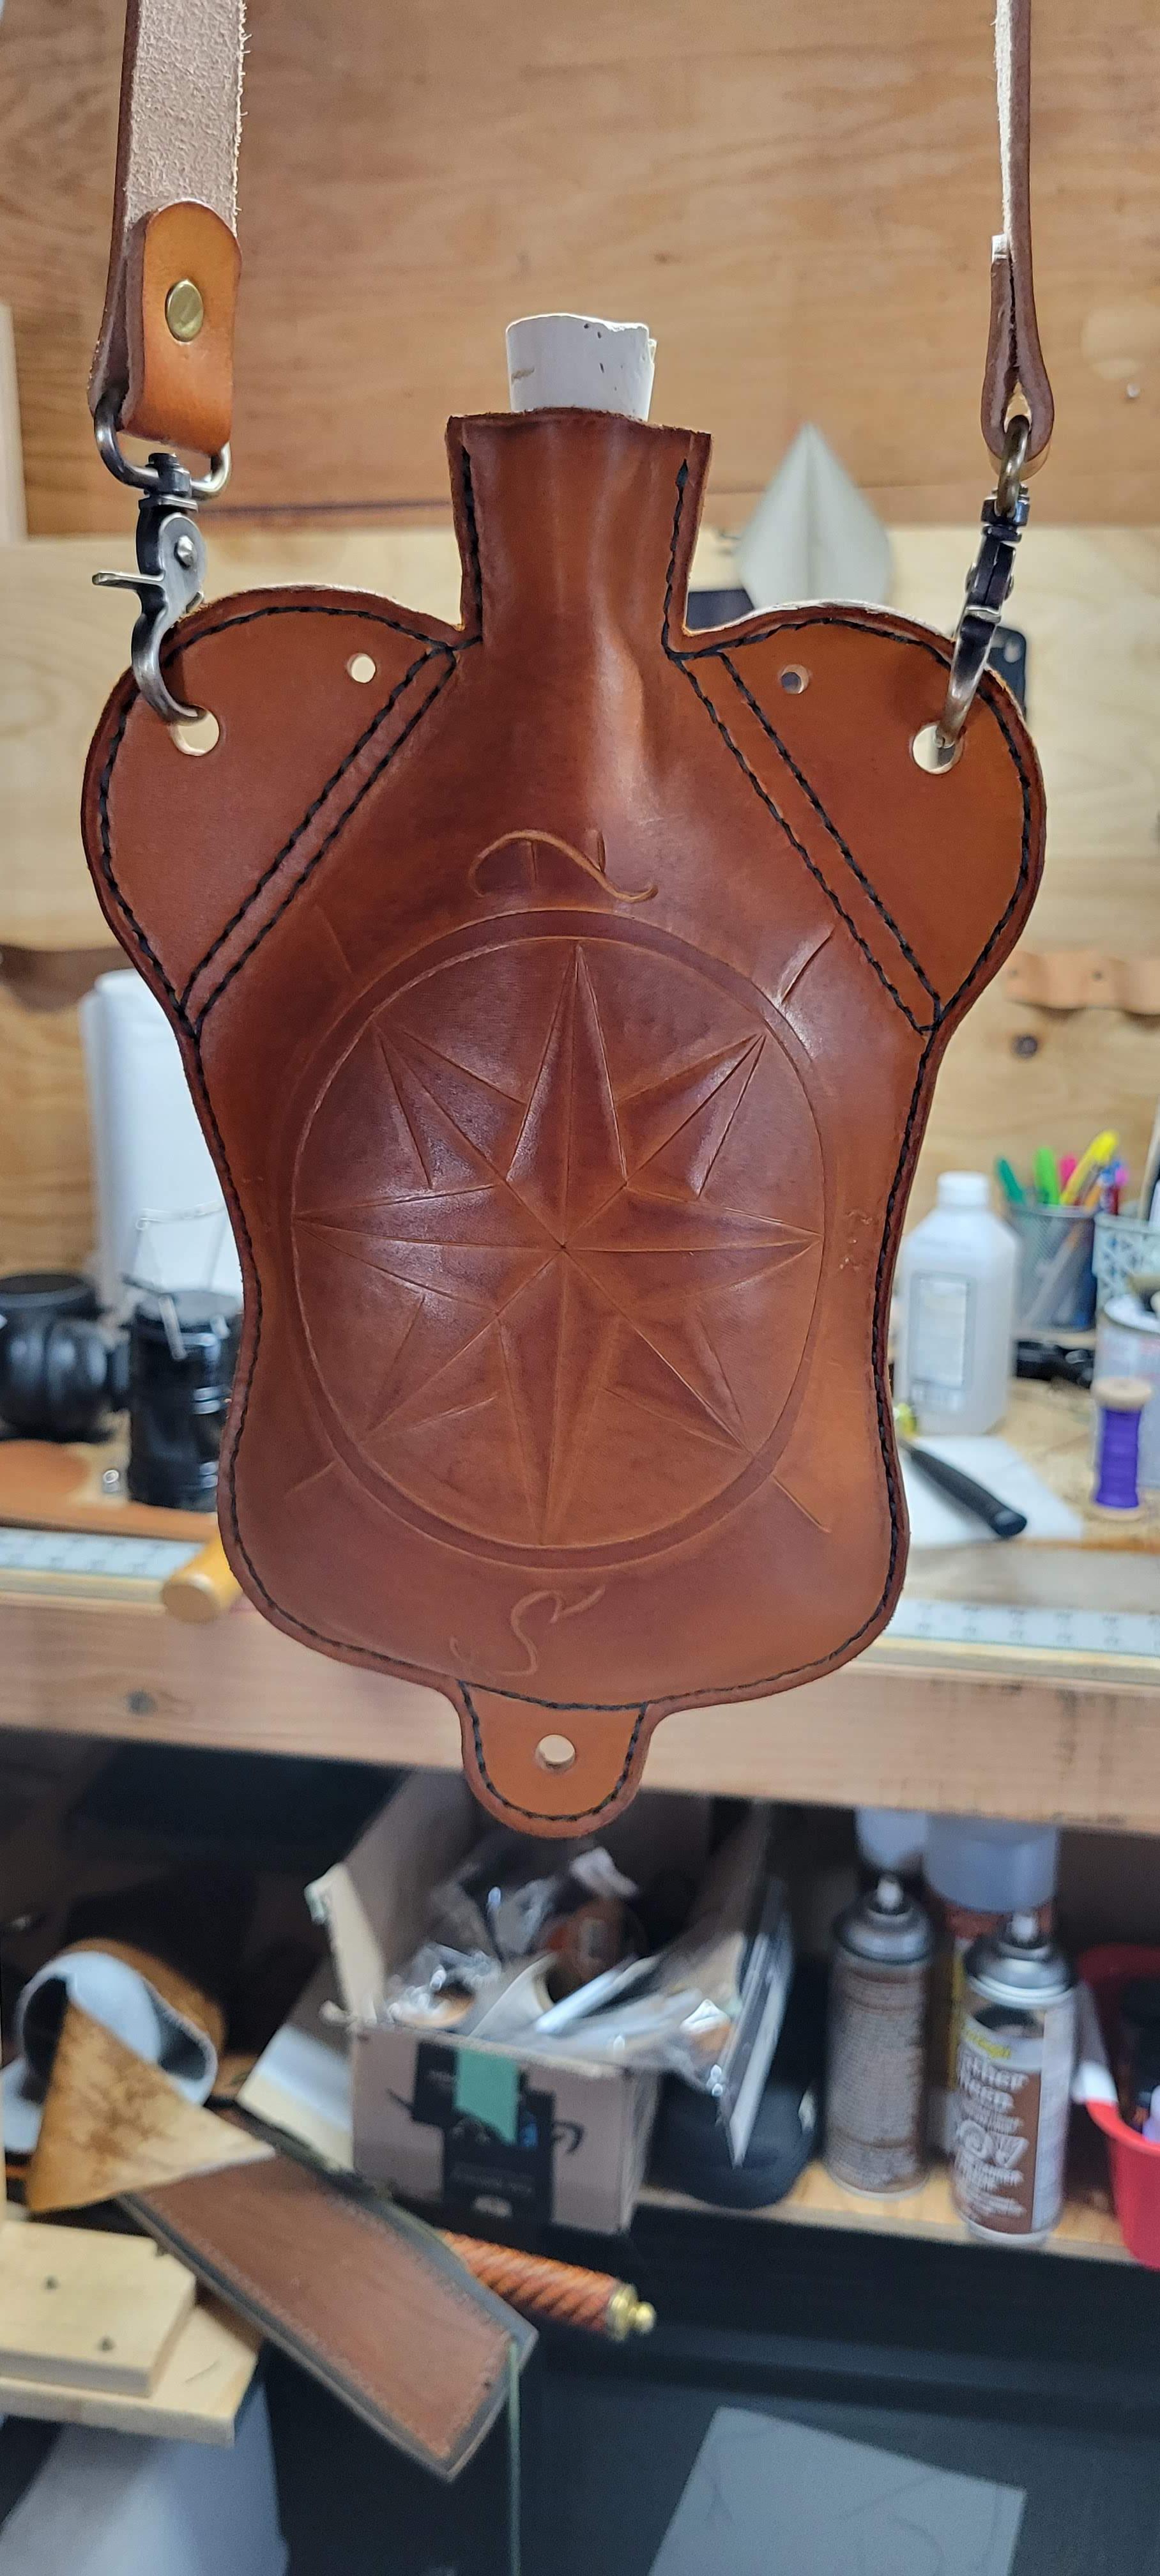
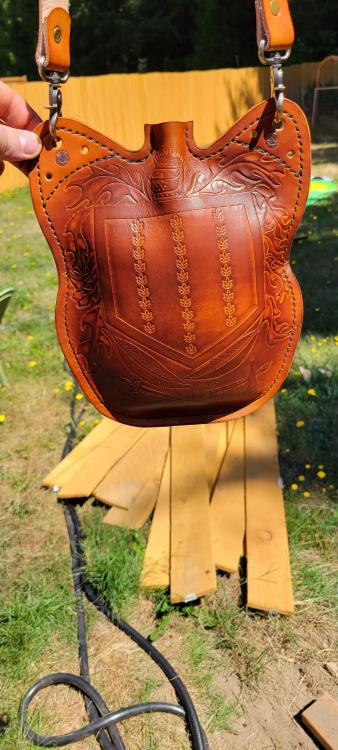
Getting some final items made up before the upcoming renaissance faire, decided a plastic water bottle was going to throw the whole costume off, decided I'd go ahead and make a Costrel / water/wine skin.. whatever it'll end up being called, it'll hold a lot of whatever goes in it... An upside to the unusually warm weather we are having here in the PNW is the outdoor curing after wet molding items!
-
Custom Holster
donohueleather replied to donohueleather's topic in Gun Holsters, Rifle Slings and Knife Sheathes
I had a few concerns too, so I did a "test" rig without any of the finish work. Doing the testing on that, wearing the holster strong side at more of "duty" carry position and with a properly supportive belt.. there wasn't much flex at all, with the curve at the waist right there it locks it pretty tight. Drawing the mag with off hand works almost no different than than spare mags on the same side as the weapon (common with some agencies). My concern for the design really was the lack of angle on the draw for the weapon and the magazine. but they wanted straight draw and as compact a design as possible.. If I were building it for me, I'd include a 10degree forward cant on both. Thanks PB, some day I may progress to a sewing machine (for speed) but I enjoy the hand sewing element. Kick on some music, hot cup of coffee and sew away. Cathartic. -
I'm not sure if there is any right or wrong way per se, but, I've found that if I use it where the middle of the blade touches my granite, then I can apply pressure to get an even bite / skive as you draw along the edge. That said, I also buried my super skiver right into my thumb when it bound up on me and I wasn't paying adequate attention. Sometimes when it bites, it bites a lot, then not at all. (watch your finger placement!!) I've since switched to using the Tandy "Safety Skiver" and honestly have had much better results, much more consistent skives. I also have a few of the Japanese skiving knives, they work great on thinner stuff but skiving belts i get a bit antsy...
-
Agree 100%. When I'm making a project, I'll sometimes wet the leather (very light case) to see where some of that might come up so I can incorporate it. Custom / one off / unique items are that much better when they have their own character. The same goes with applying colors / dye. (other than paint) when you apply dye to different leather, you'll get different results, even on the same piece, it's just how they absorb. I say embrace it. For what it's worth, I apply neatsfoot first, then dye. It seems to use less dye as well or maybe just goes on more evenly than otherwise.. I also use round pads for applying dye where I can (the kind you use for waxing your car), they apply a very even coat whether it's Feibings or Ecoflo. If you REALLY have to have super consistent color.. you can buy pre-dyed / finished leather panels for the project. More $$$ per piece, but it'll be the same color throughout.
-
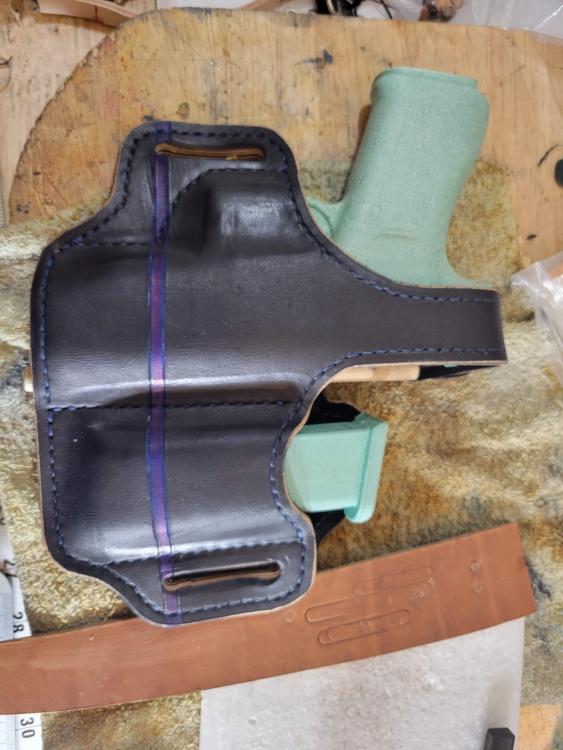
Recent project / order. Custom setup for Glock 48 with integrated spare mag pouch. Fully lined in chrome free suede. Thin blue line motif received thin blue thread as well. The final product was edge coated so no raw edges were visible, but I apparently did not save that photo...
-
Ren Faire Armor Set - holy cow it's a lot of work
donohueleather replied to donohueleather's topic in Leather History
Thanks for the feedback! This project just seems to grow and continue to growing. Working on matching drawstring bags, dagger frogs and plan on doing some kind of hooded leather cape (haven't decided on exact design). The plan currently is to have a full set including possibly a wool cloak and leather boots ready by the next Renaissance Faire. But like everything in this craft, the more you do, the more you realize you can do, the more you want to do, and around you go. -
Holster and seeking advice
donohueleather replied to papaleaf's topic in Gun Holsters, Rifle Slings and Knife Sheathes
my two cents... First cent - nice looking piece. Seriously.. just... Nice. Second cent - *(if you have to be a perfectionist.. ) to me it looks like the cutout puts the pressure right at the ejection port. It appears to actually mold slightly inwards right at the ejection port. I can see the cutout is for sight clearance but the sight doesn't seem to need that much. My suggestion would be to reduce the depth of the cutout (as I hastily drew). Perhaps the forming around the full width of the slide vs. the profile of the ejection port will allow for secure retention as well as natural clearance for the front portion of the ejection port... assuming that, then perhaps the stitch grooving, hammering,etc. will have more of the effect you are shooting for.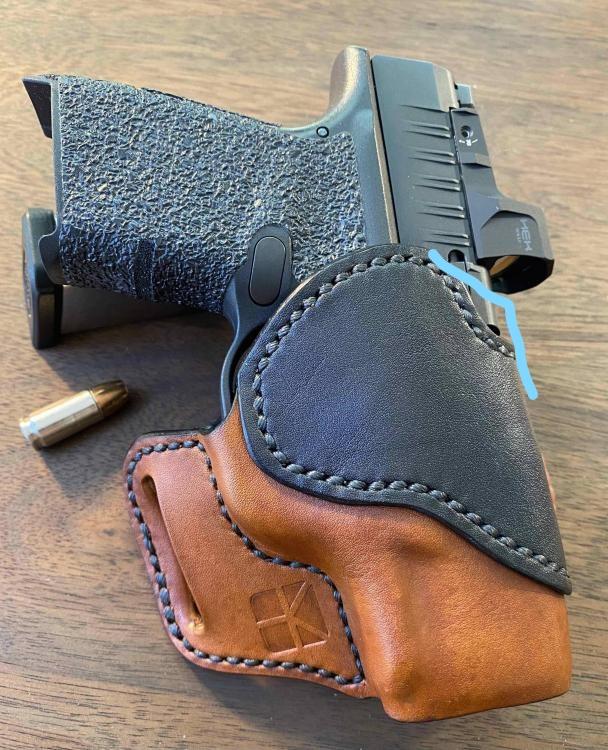
-
Ren Faire Armor Set - holy cow it's a lot of work
donohueleather replied to donohueleather's topic in Leather History
Thanks!