


Piko
-
Posts
70 -
Joined
-
Last visited
Content Type
Profiles
Forums
Events
Blogs
Gallery
Store
Everything posted by Piko
-
Update: First of all, I was today years old when I learned that Uber has a courier service and it is awesome. Spared me 3 hours of traffic. Had the pedal and controller at the store at 10 am and 10 mins later the owner called me that he fixed it. He said the problem was the cable between the controller and the pedal, there was a pc board in there that failed: he replaced it. Got my delivery from Uber and tried it and now my machine works again. So, many of you were correct in your hypotheses. I appreciate you taking time to read and trying to help me out. You are good people. For future reference, lets say that I wanted to buy a whole set of Motor, controller and pedal like @kgg and others mentioned, would I have to buy a specific one or it would not matter since replacing all 3 parts would basically replace the whole system? If yes, could anyone link me one? I might just get one to leave in the basement to hot swap it if somewhere happens again so that I can still work while they fix the broken one. This is the one i have now, but do I have to buy an Artisan or can anyone recommend a better one? Thank you. https://bobssewvac.com/product/acf-680-880-watt-servo-motor/
-
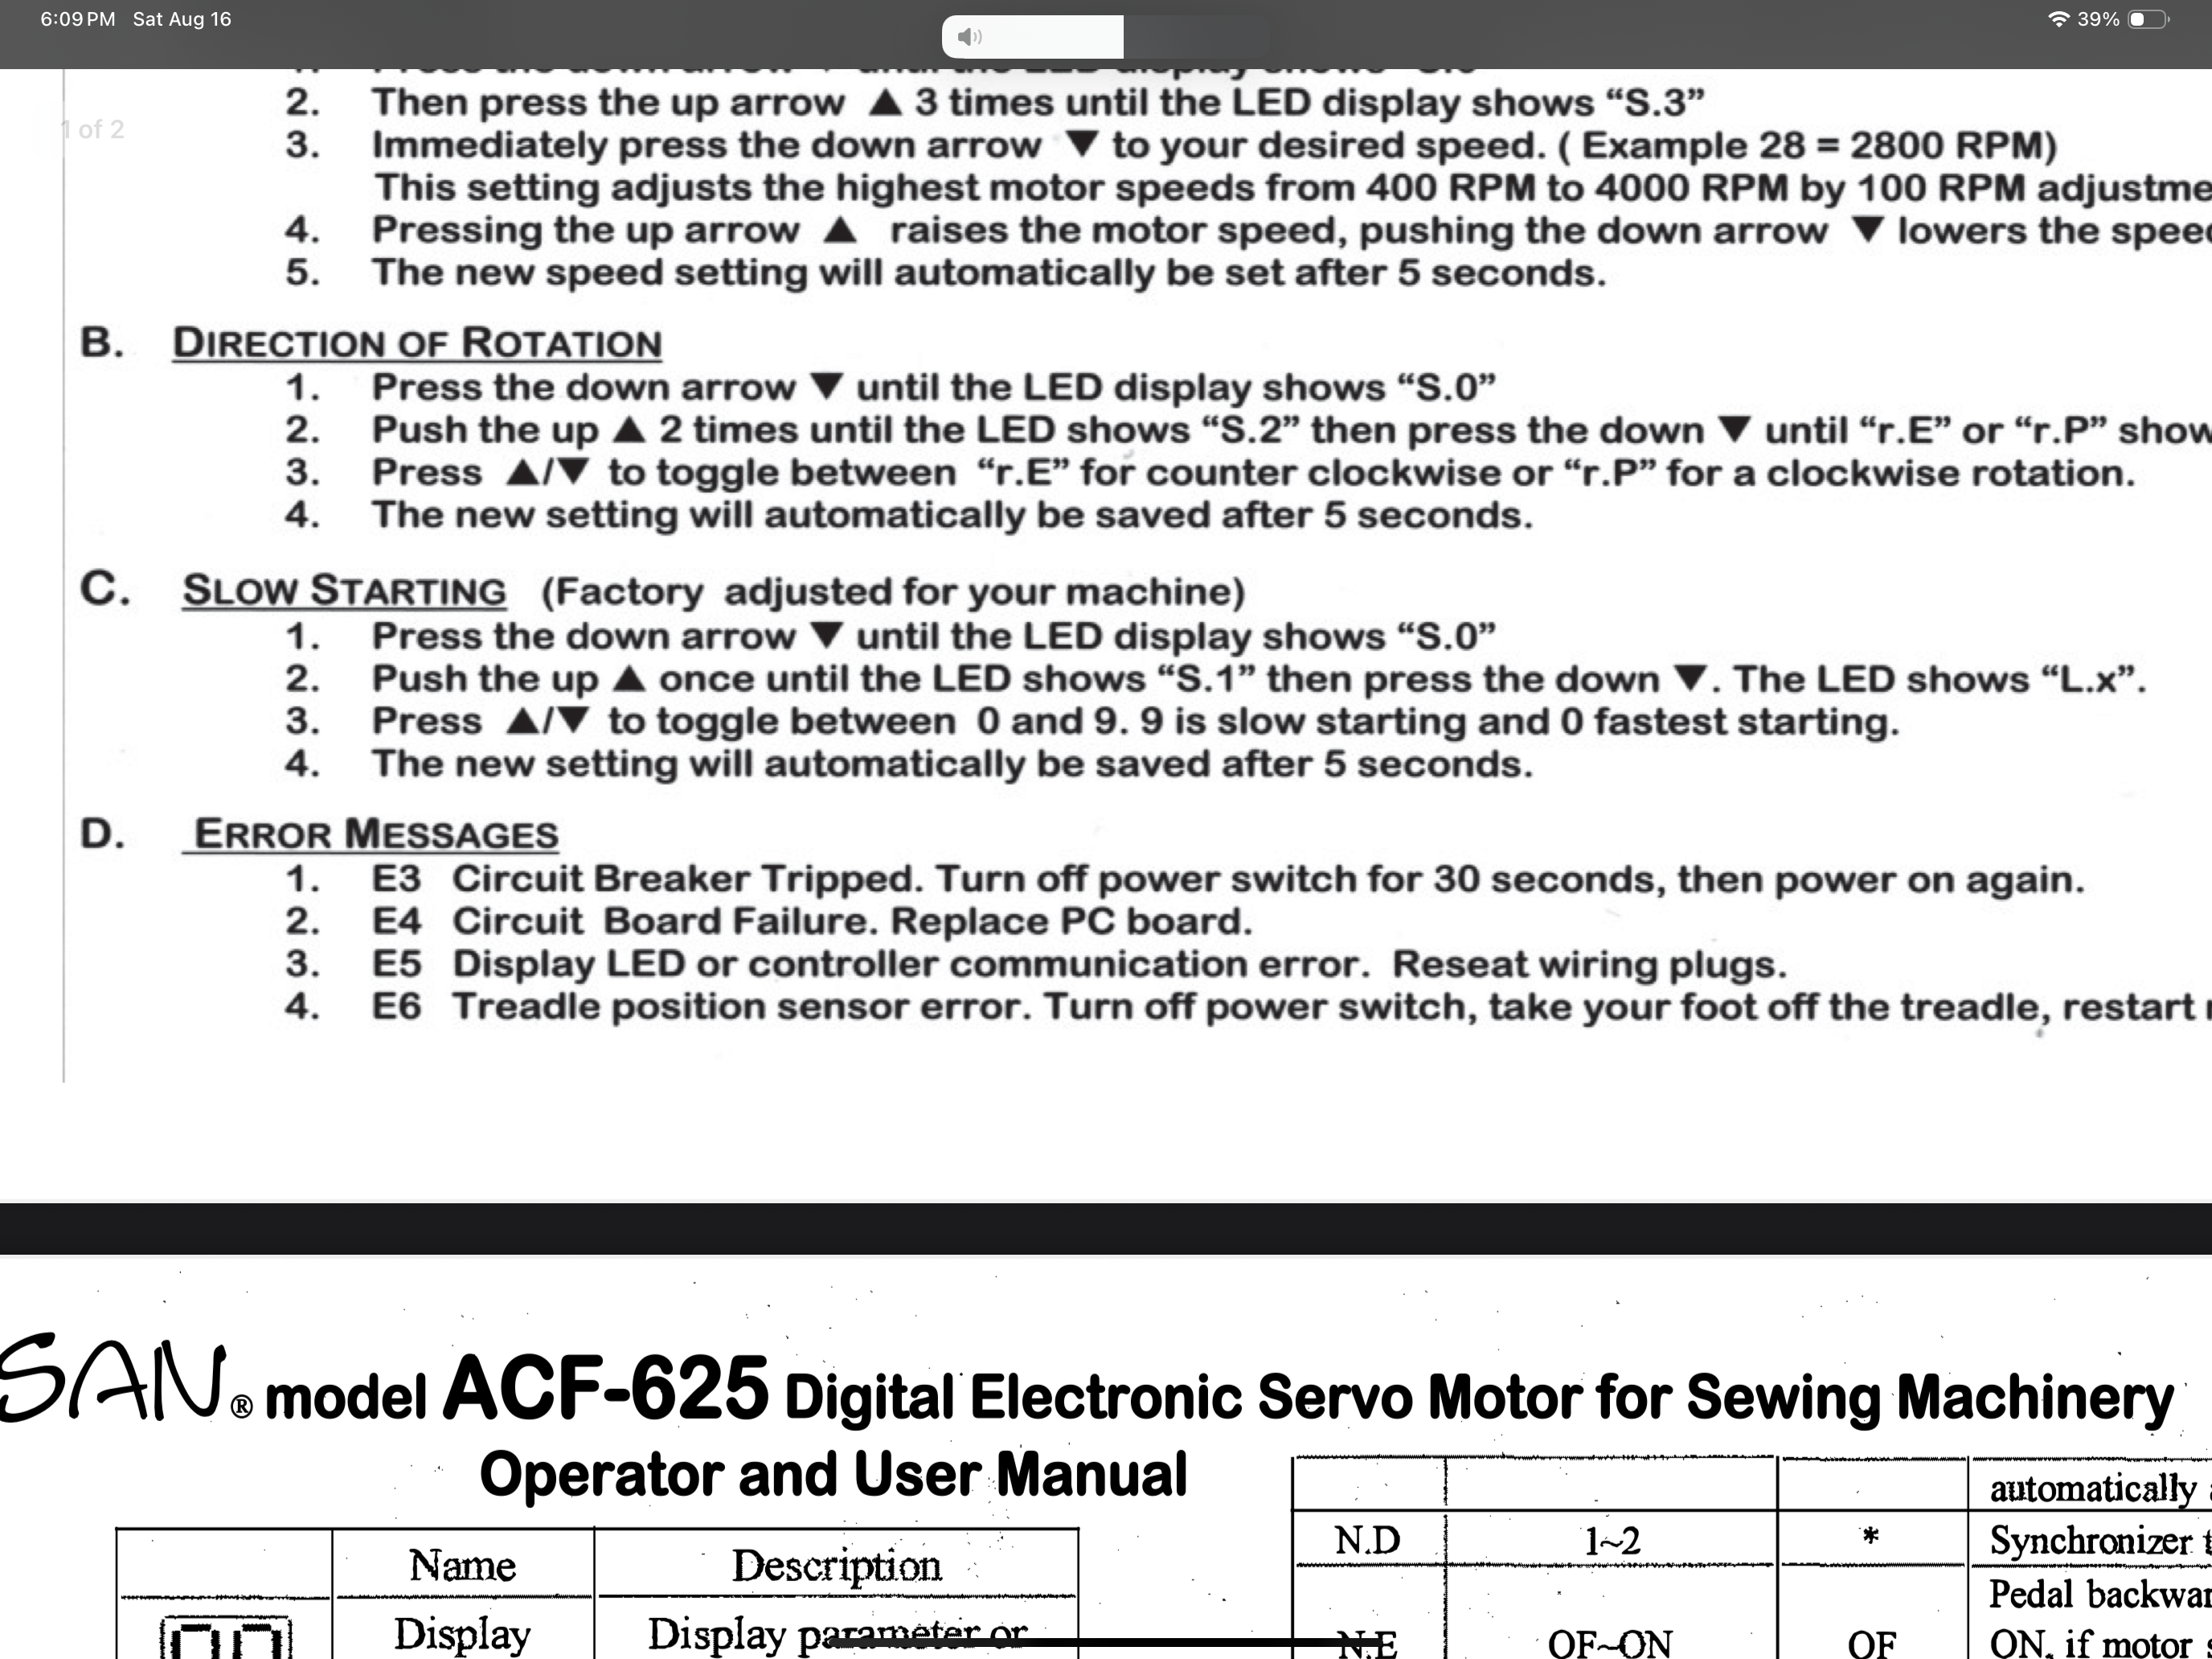
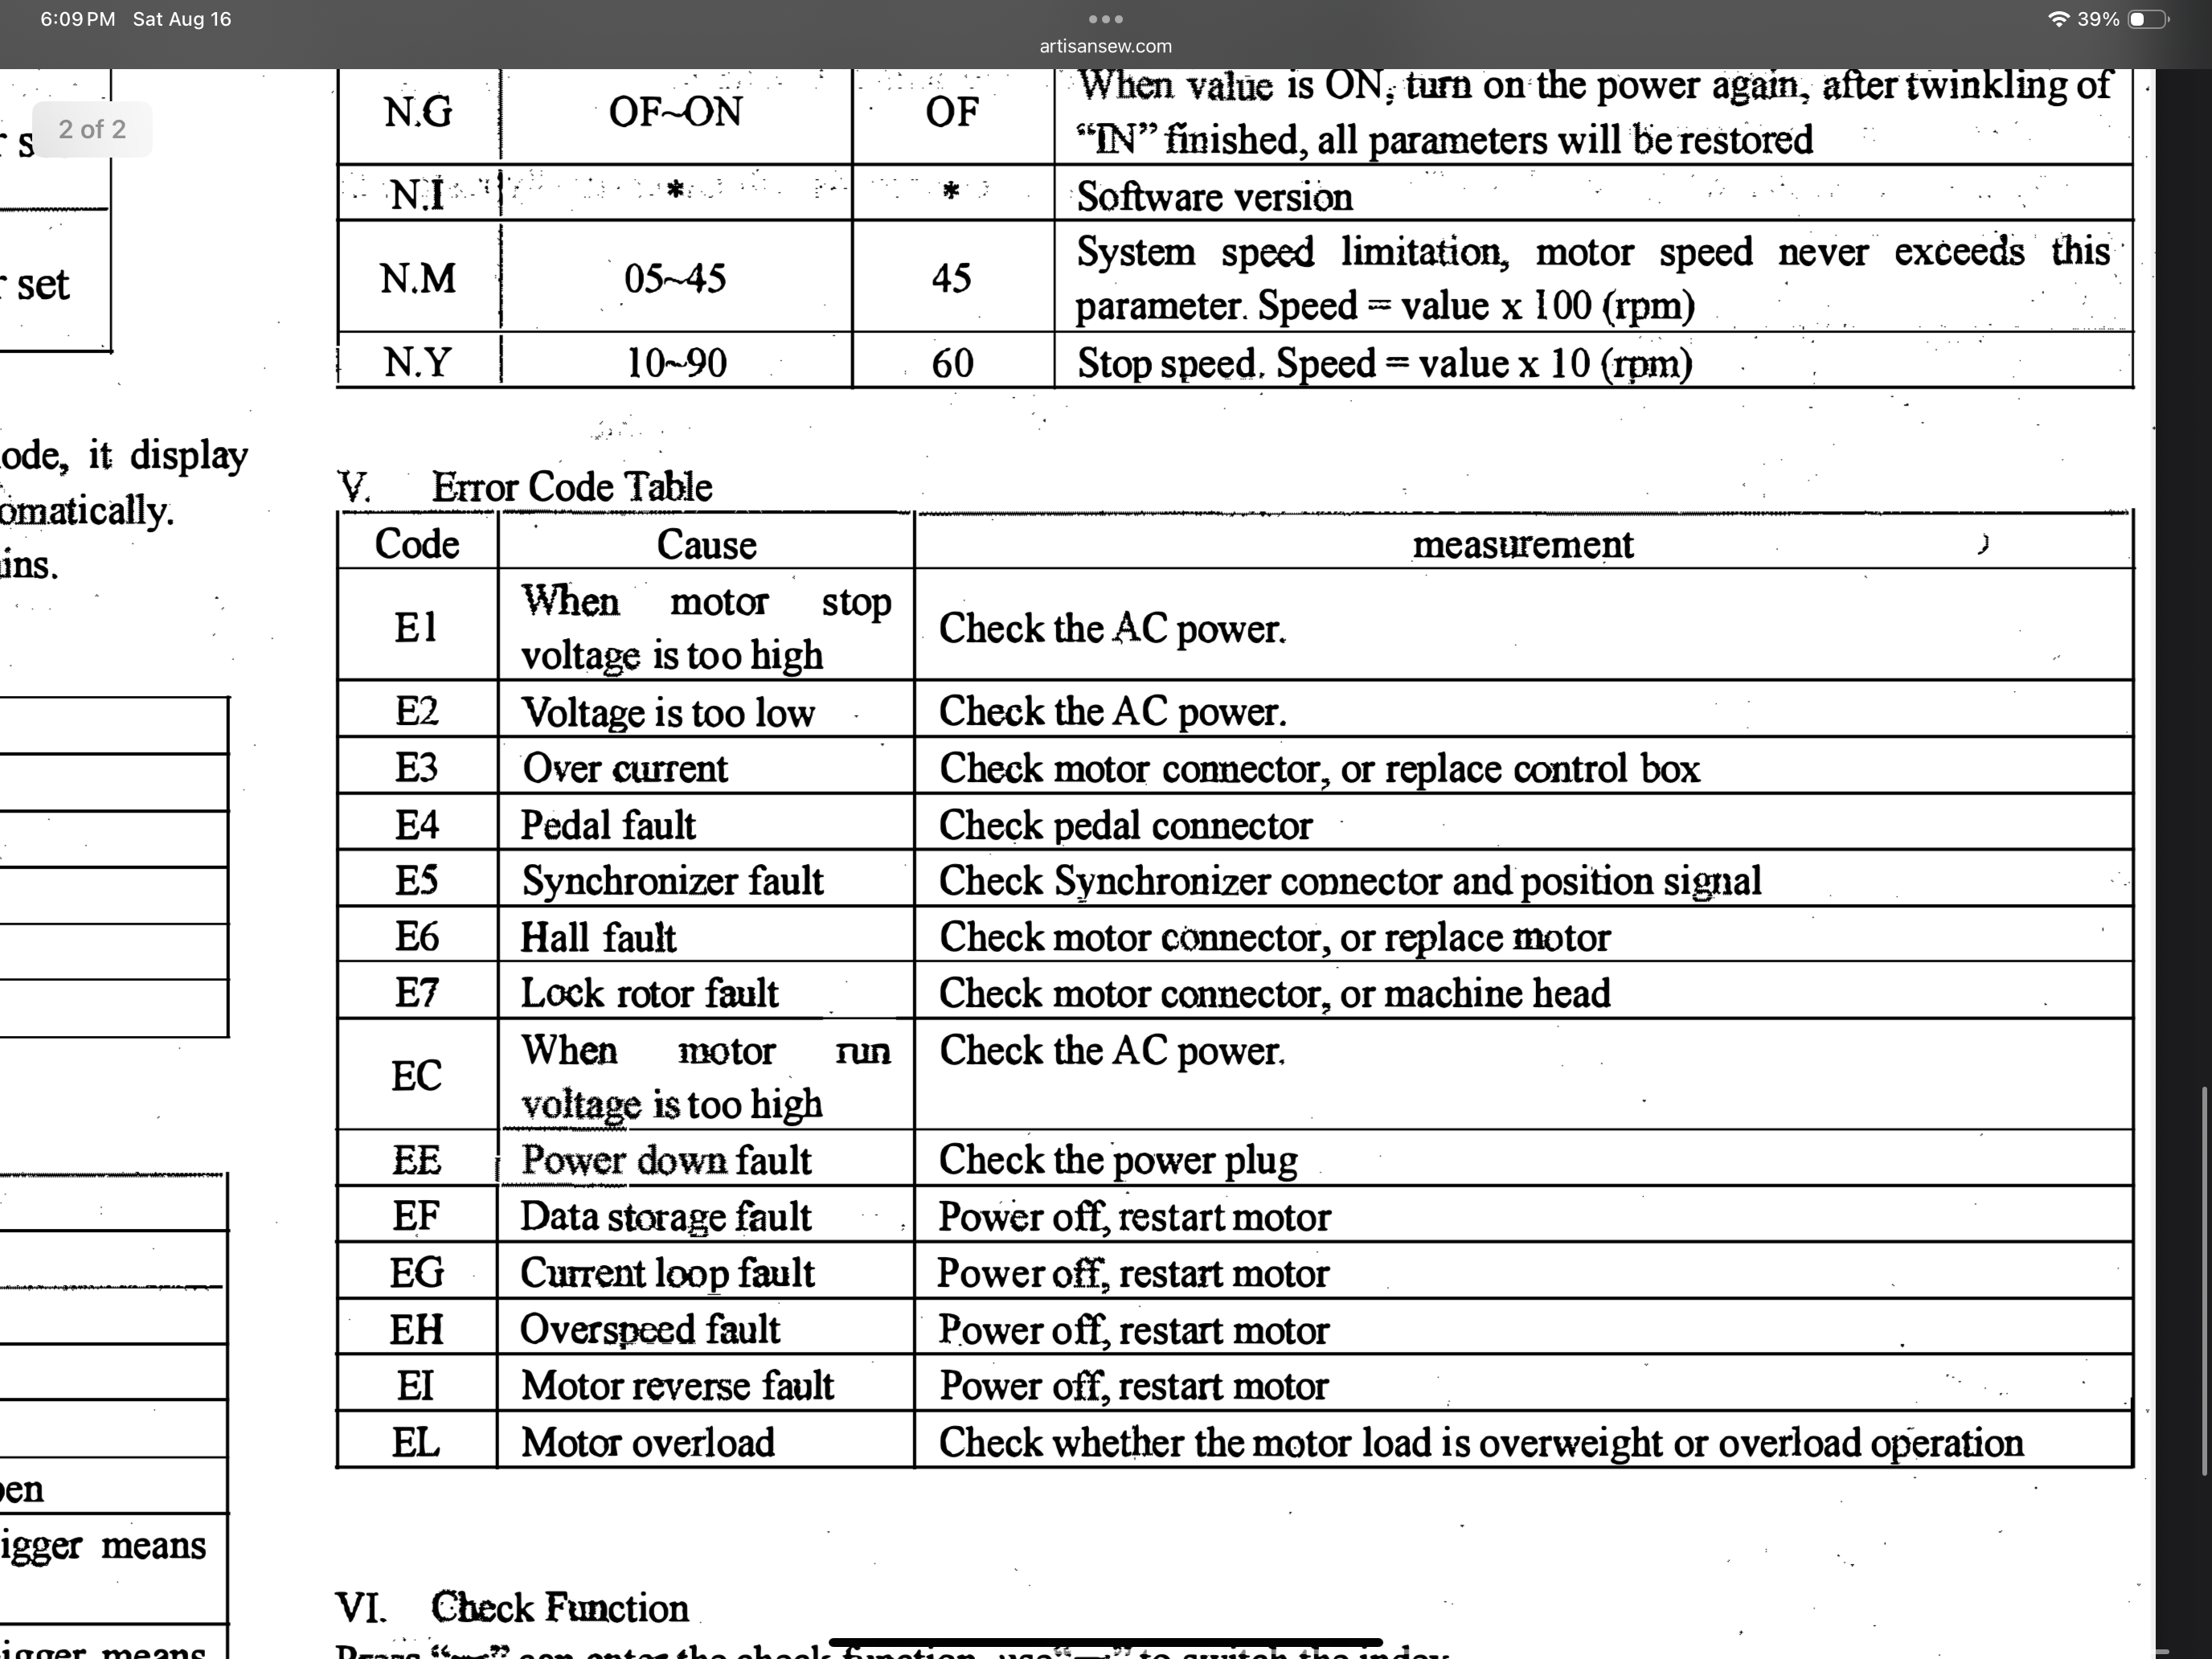
Thank you for your help. Unfortunately I am stuck. I cannot reset to factory because it goes straight to Er 4 and does not let me do anything. I checked tye connections and the pedal: everything seems fine. I have not opened the controller yet but I am not sure what I would be looking for either. it is surprising how little info I can find about this controller. I’d think they must have sold a few of these. When I purchased I was not overly impressed by the interaction with the store people. They had a machine in the back of the store they wanted to sell me but it was very dusty and I asked if they had a new one. They told me ti go back the next day and I am pretty sure they just got the dust off that one and pretended they put a new head on. The whole thing felt wrong but I thought that these are pretty strong machines so I should not have any problem: I did not even consider the electronic parts. I hope they will be able to help me out on Monday but I wonder if they just sold me a lemon. Anyhow. Thank you for your help.
-
Everything looked fine earlier but I will look better when i get home. The unit gives me the error even if nothing is plugged in. On a side note, i did damage the cable that goes from the unit to the pedal, it took off some insulation. I’ll check it. I hope tat’s the problem. And I’ll open the pedal too. do you have the same machine?
-
Thanks for catching that, man. I’ll try as soon as I get home.
-
Alzilla, It would be nice to reset it to factory but I do not see it in the meanual. Where do you see it in the photos ? thank you
-
So, I turned on the machine today and I keep getting an error, Er 4, on my controller unit. THe machine won't run. I hav eto sew something for a show next weekend and am trying to find the fastest fix. If anyone can help I would appreciate it. I don't understand the manual. From the controller manual, E4 means the board needs to be replaced. But a few lines below it says E4 is the pedal. I get the message even if the pedal is not connected. Anyone knows what can be going on? I emailed and called the store but it is Saturday so no luck. Is a controller board supposed to fail so soon? Should I expect this to be replaced under warranty? I am not even sure what the warranty is on this machine.
-
Replacement feed dogs for my Artisan 246. Suggestions?
Piko replied to Piko's topic in Leather Sewing Machines
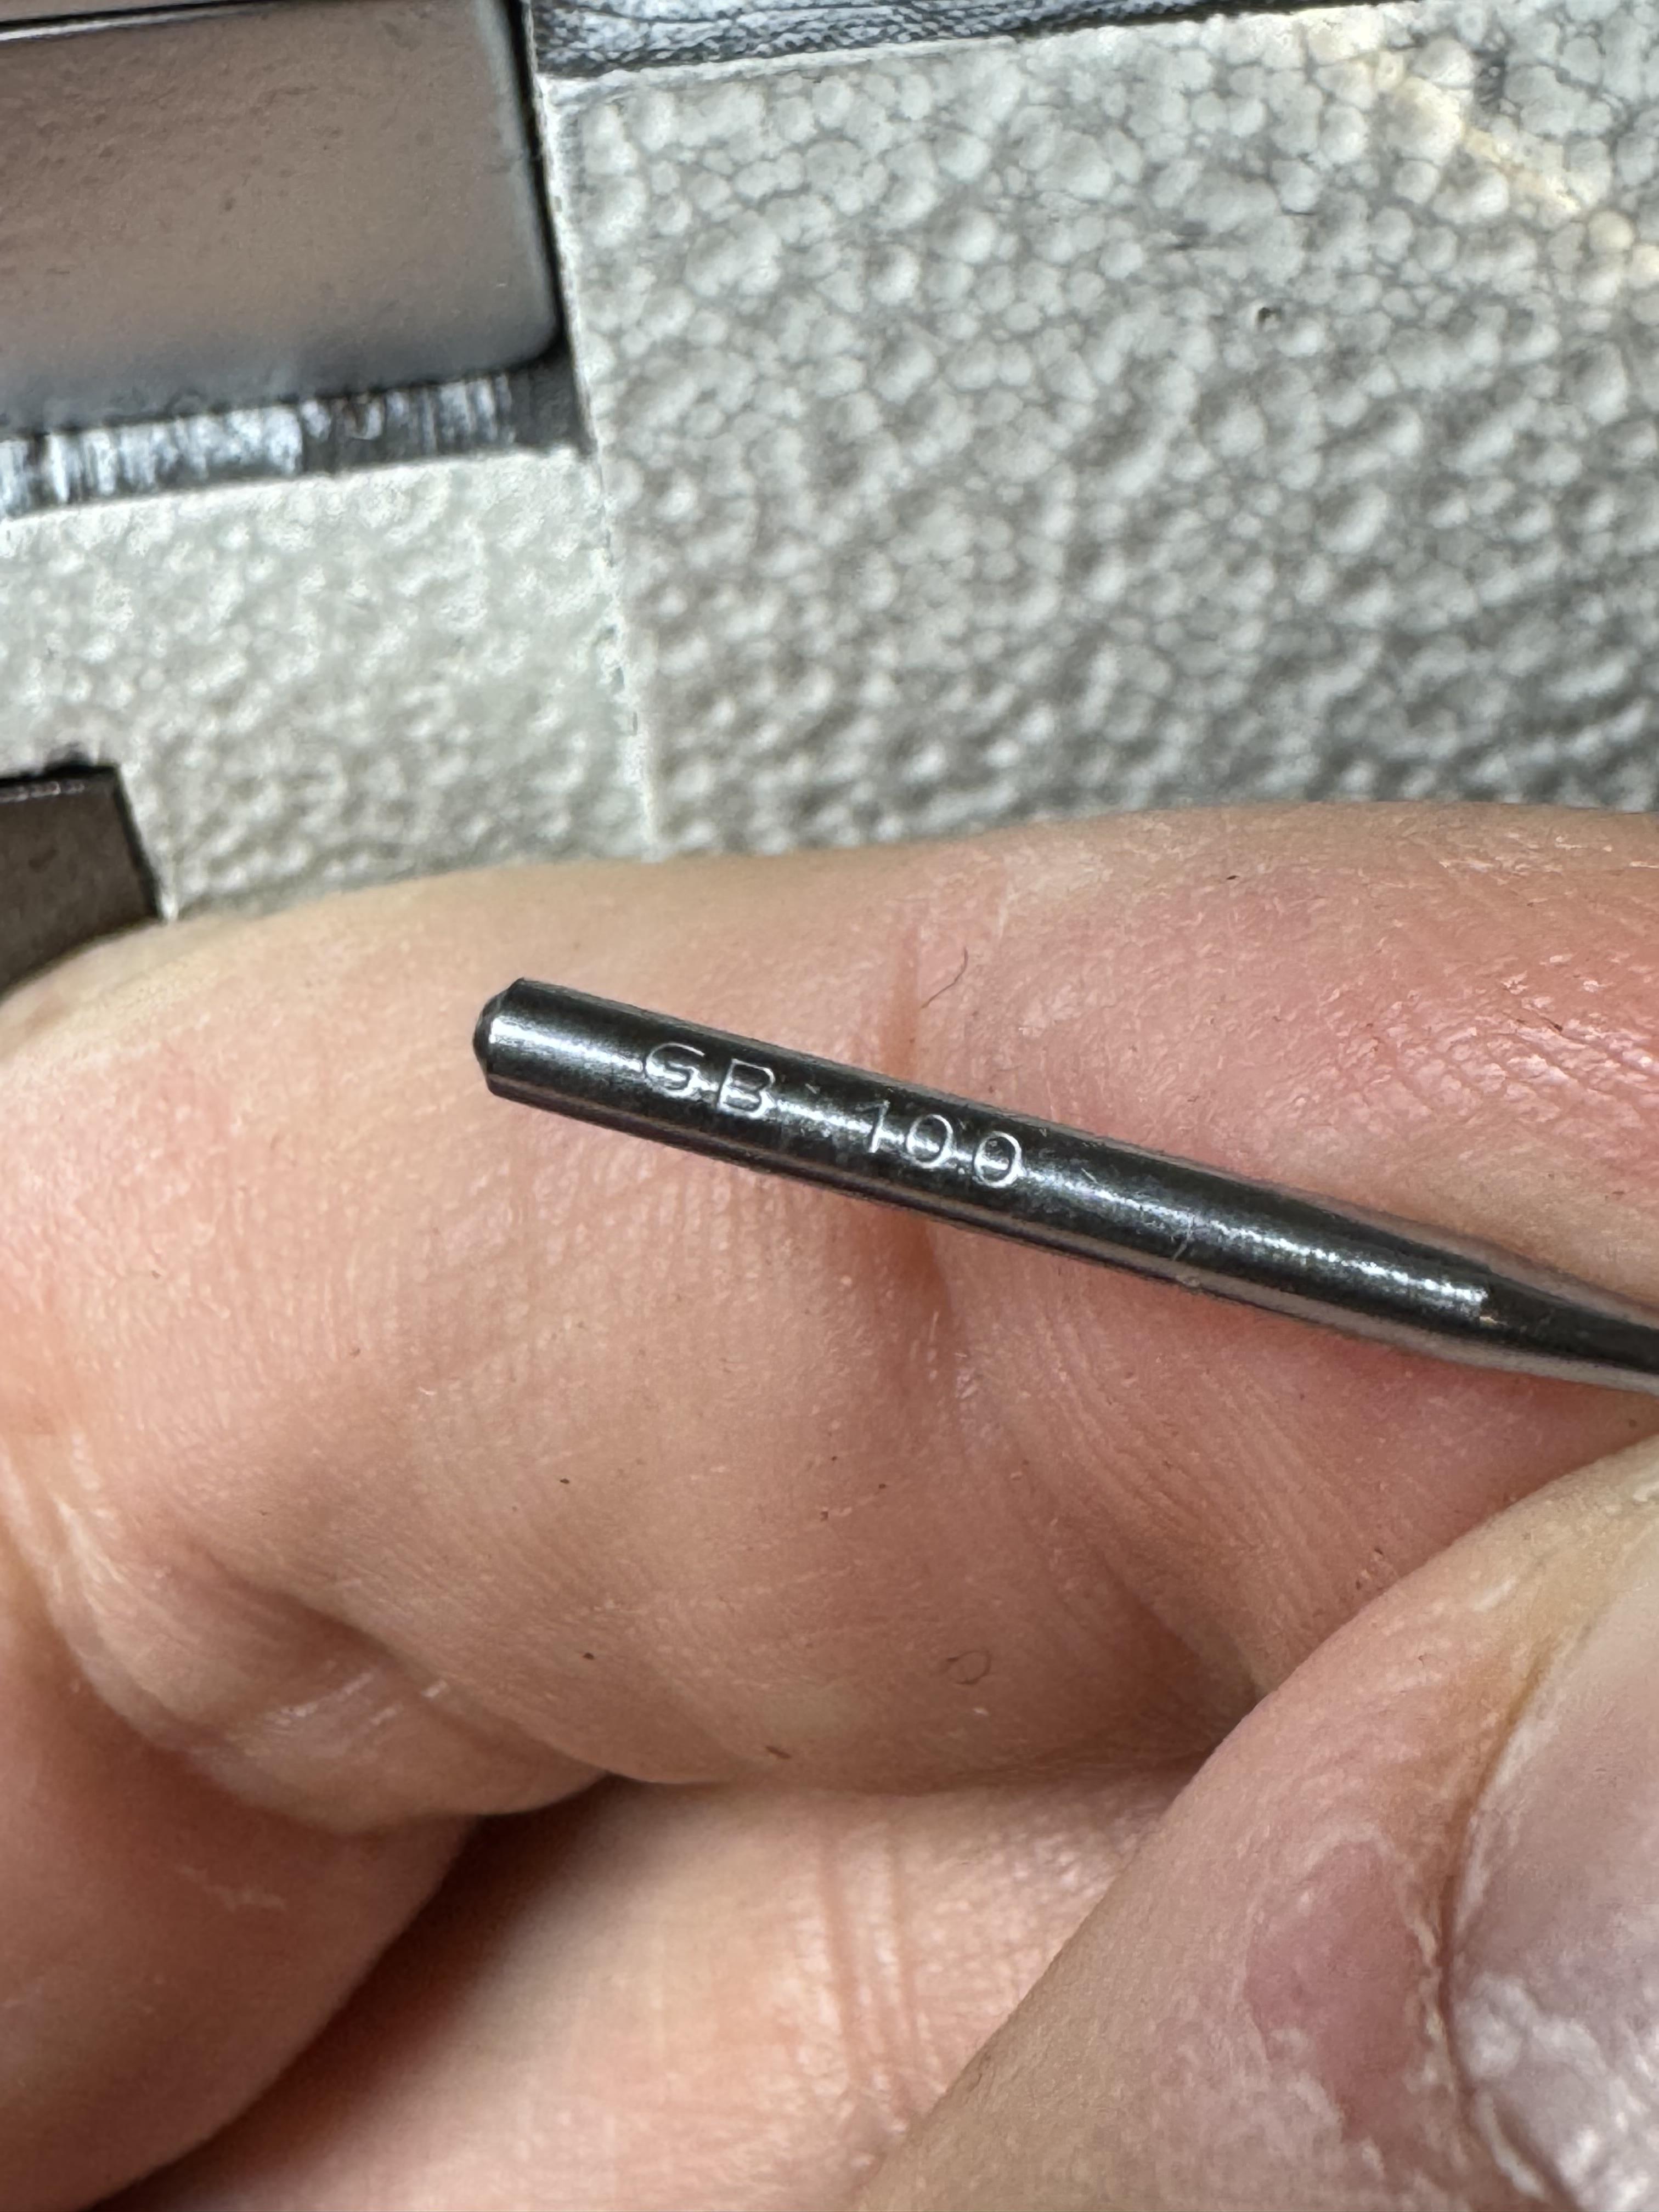
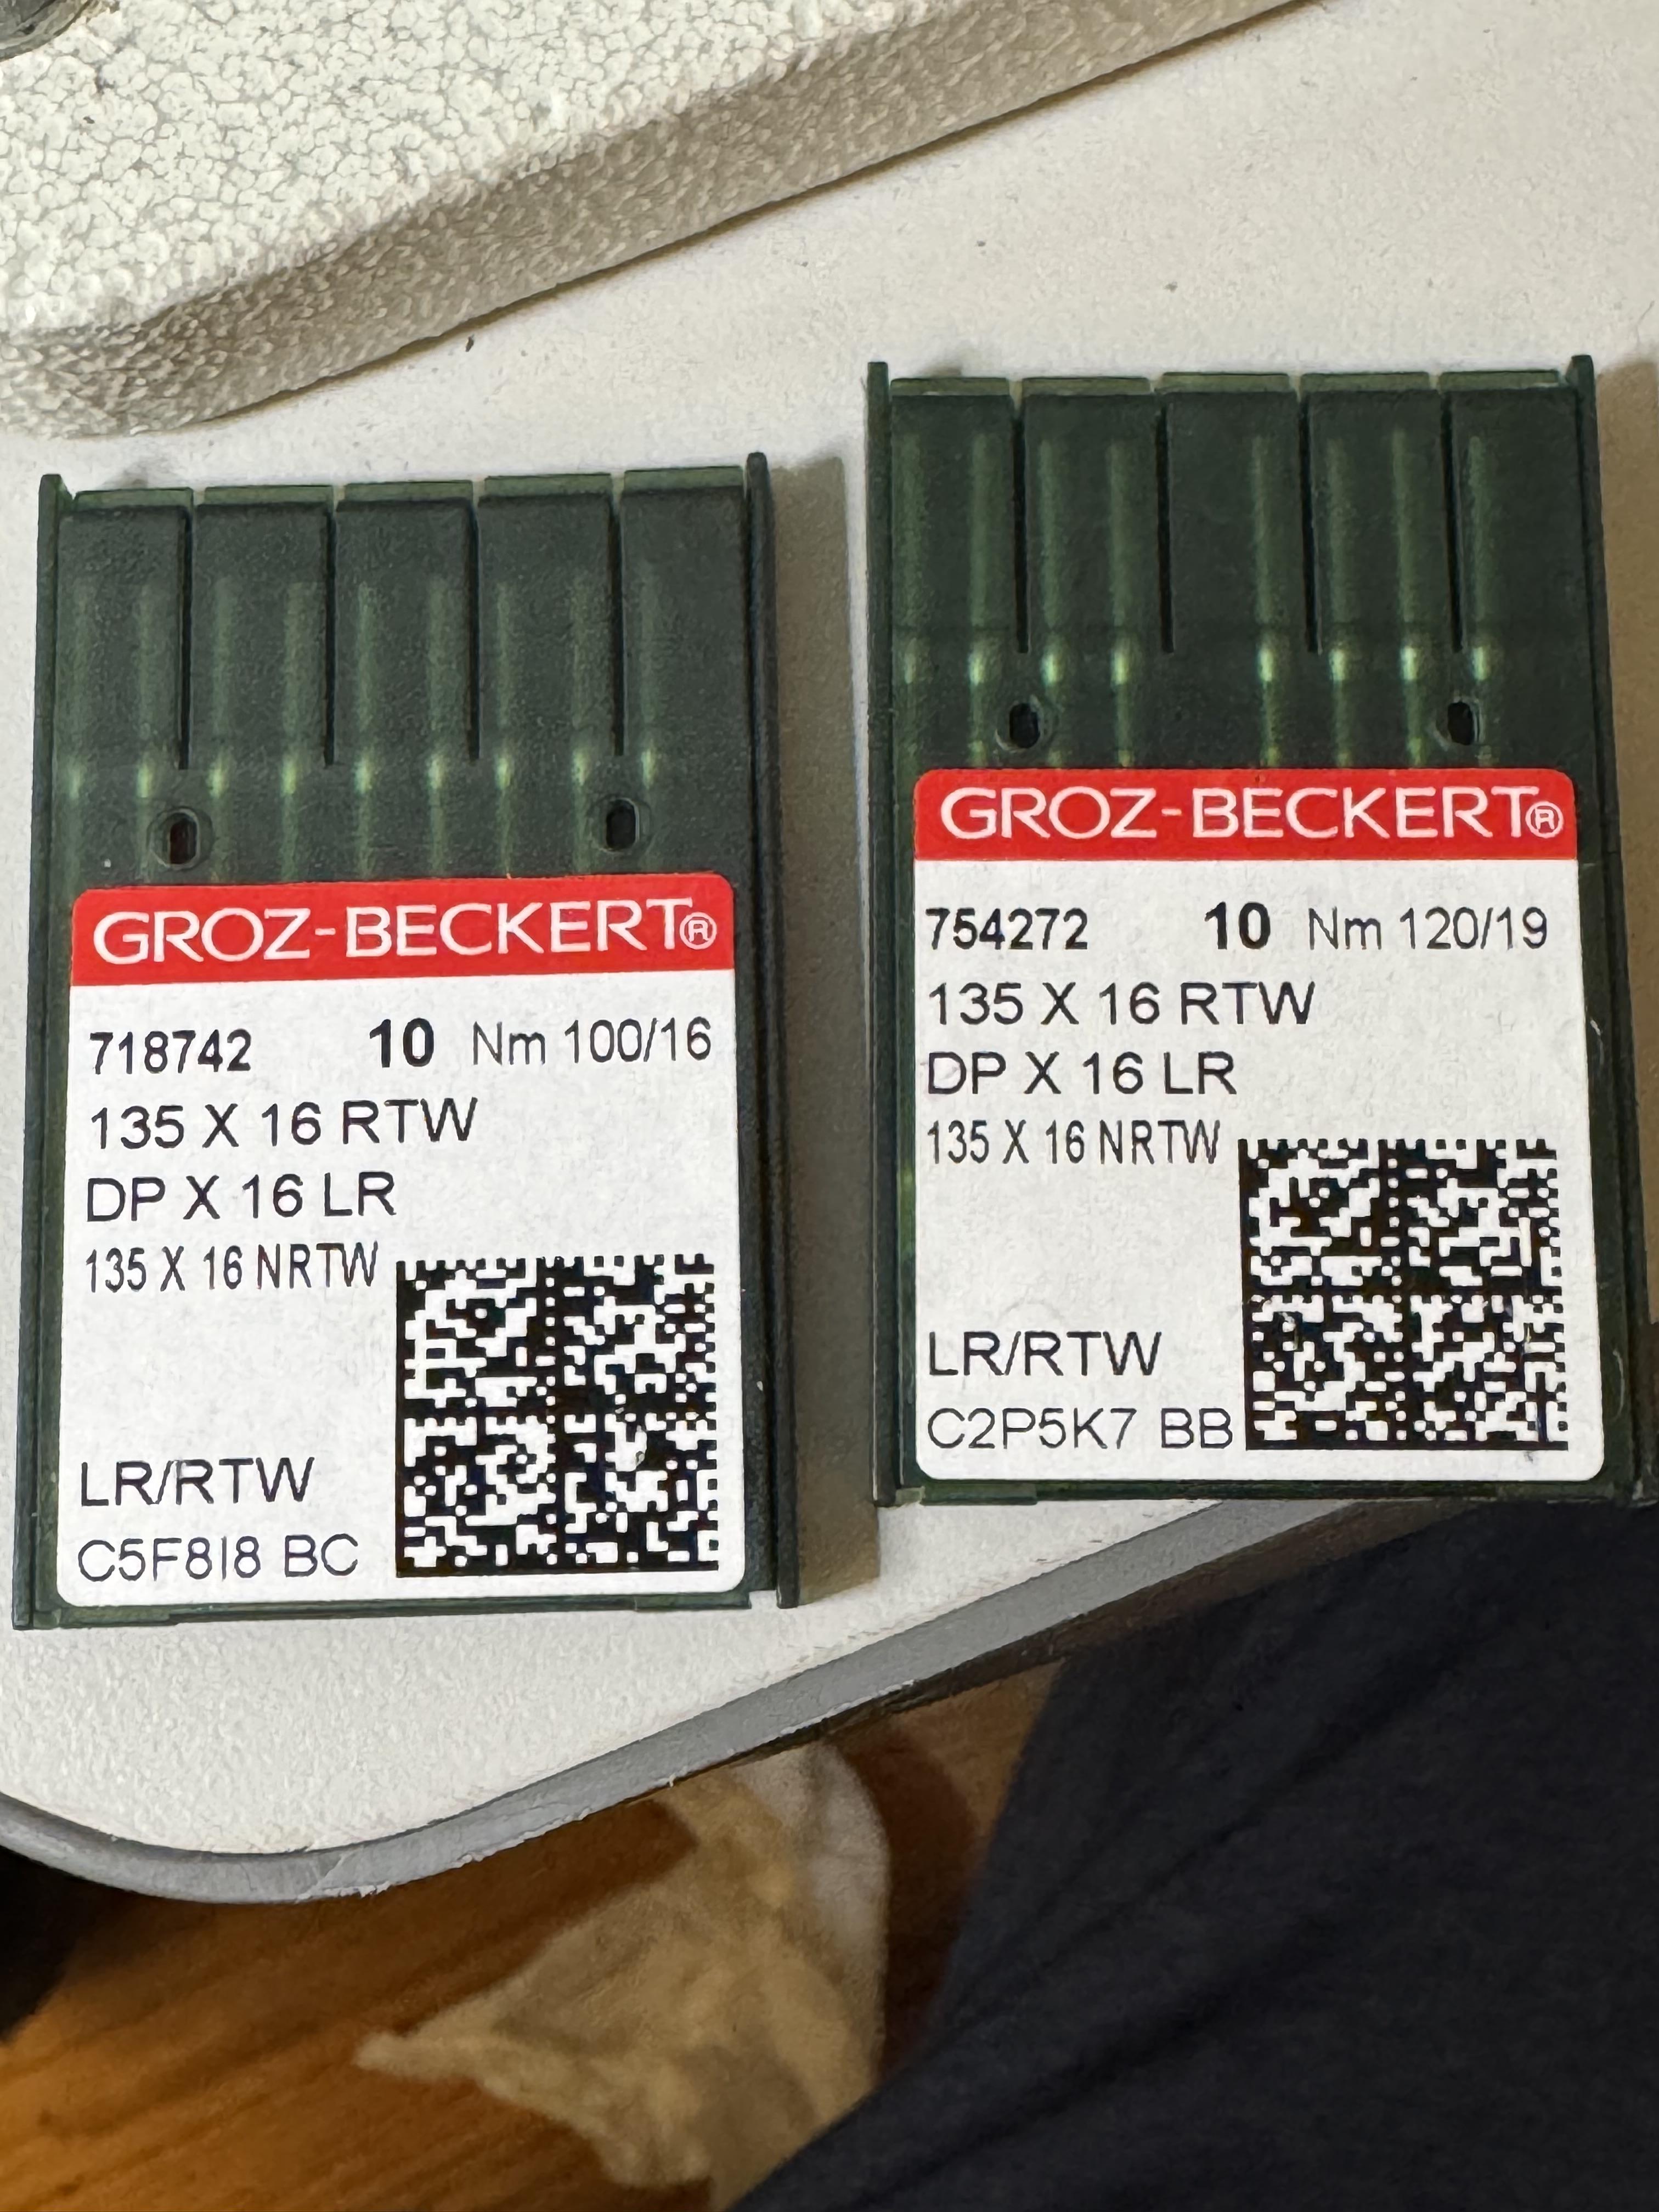
I am pretty sure it is all of the above. Do you know where i can buy needles? The only place i know is Amazon or Sailrite and they only have those points. -
Replacement feed dogs for my Artisan 246. Suggestions?
Piko replied to Piko's topic in Leather Sewing Machines
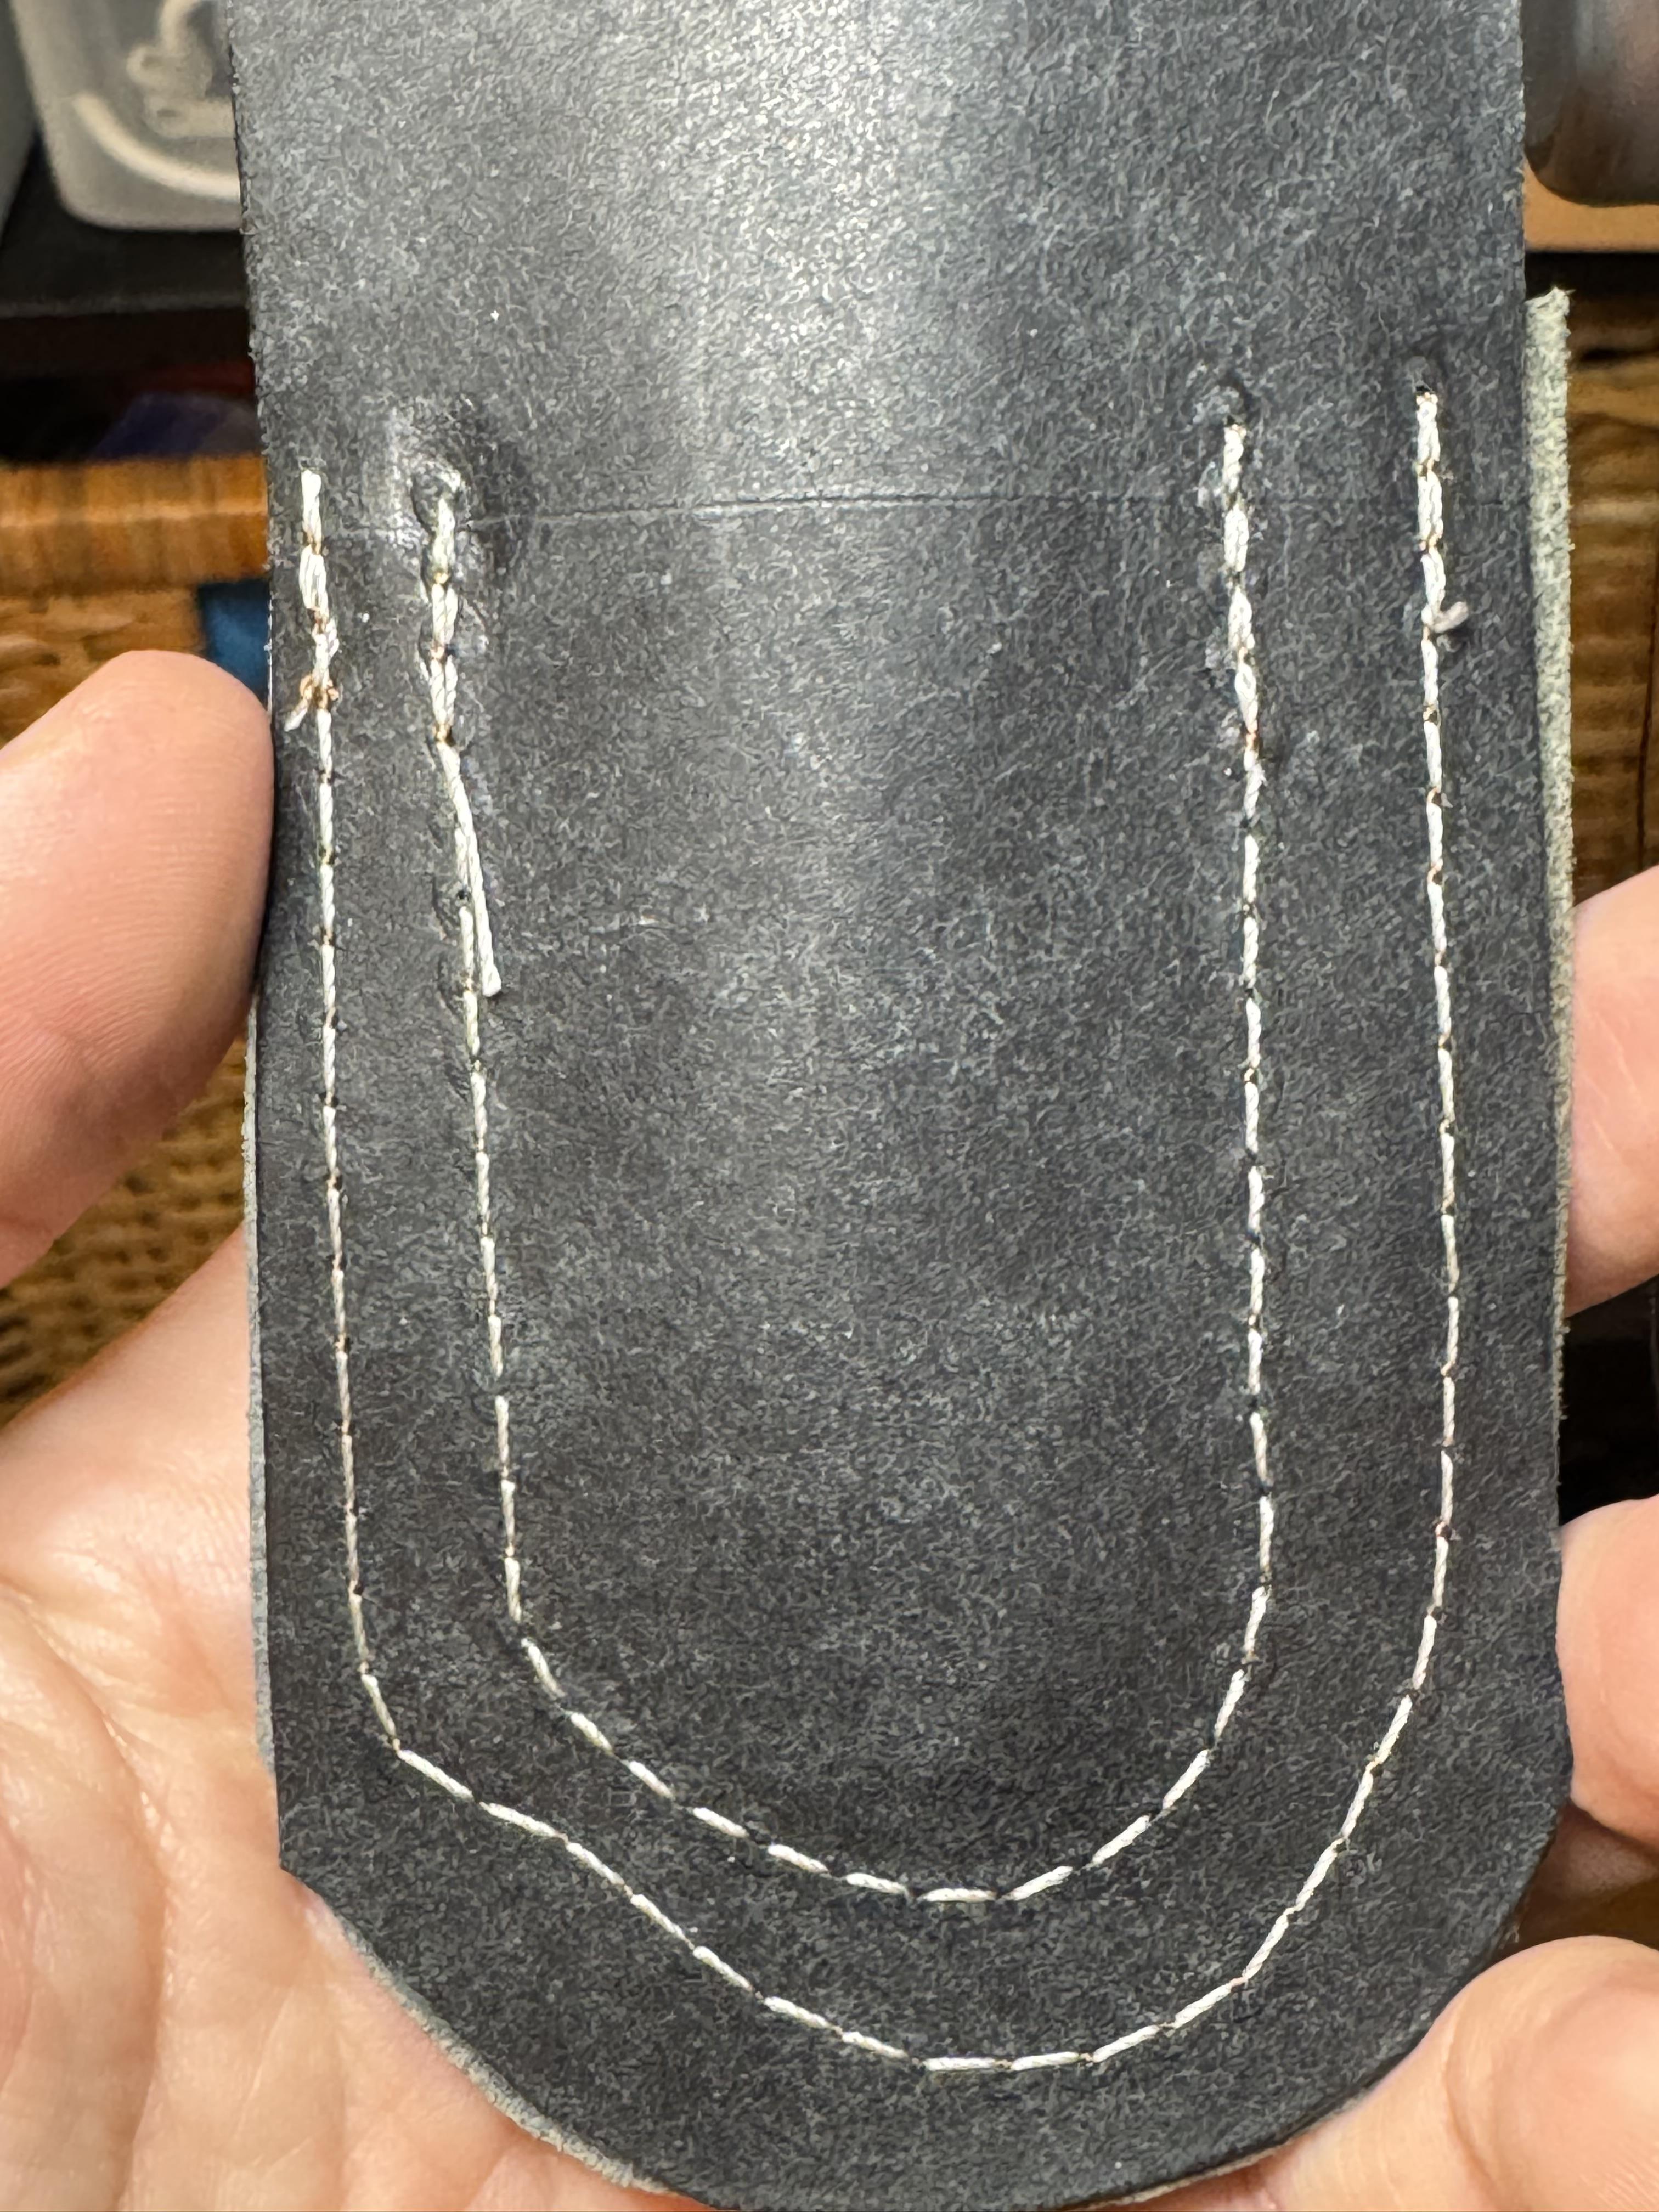
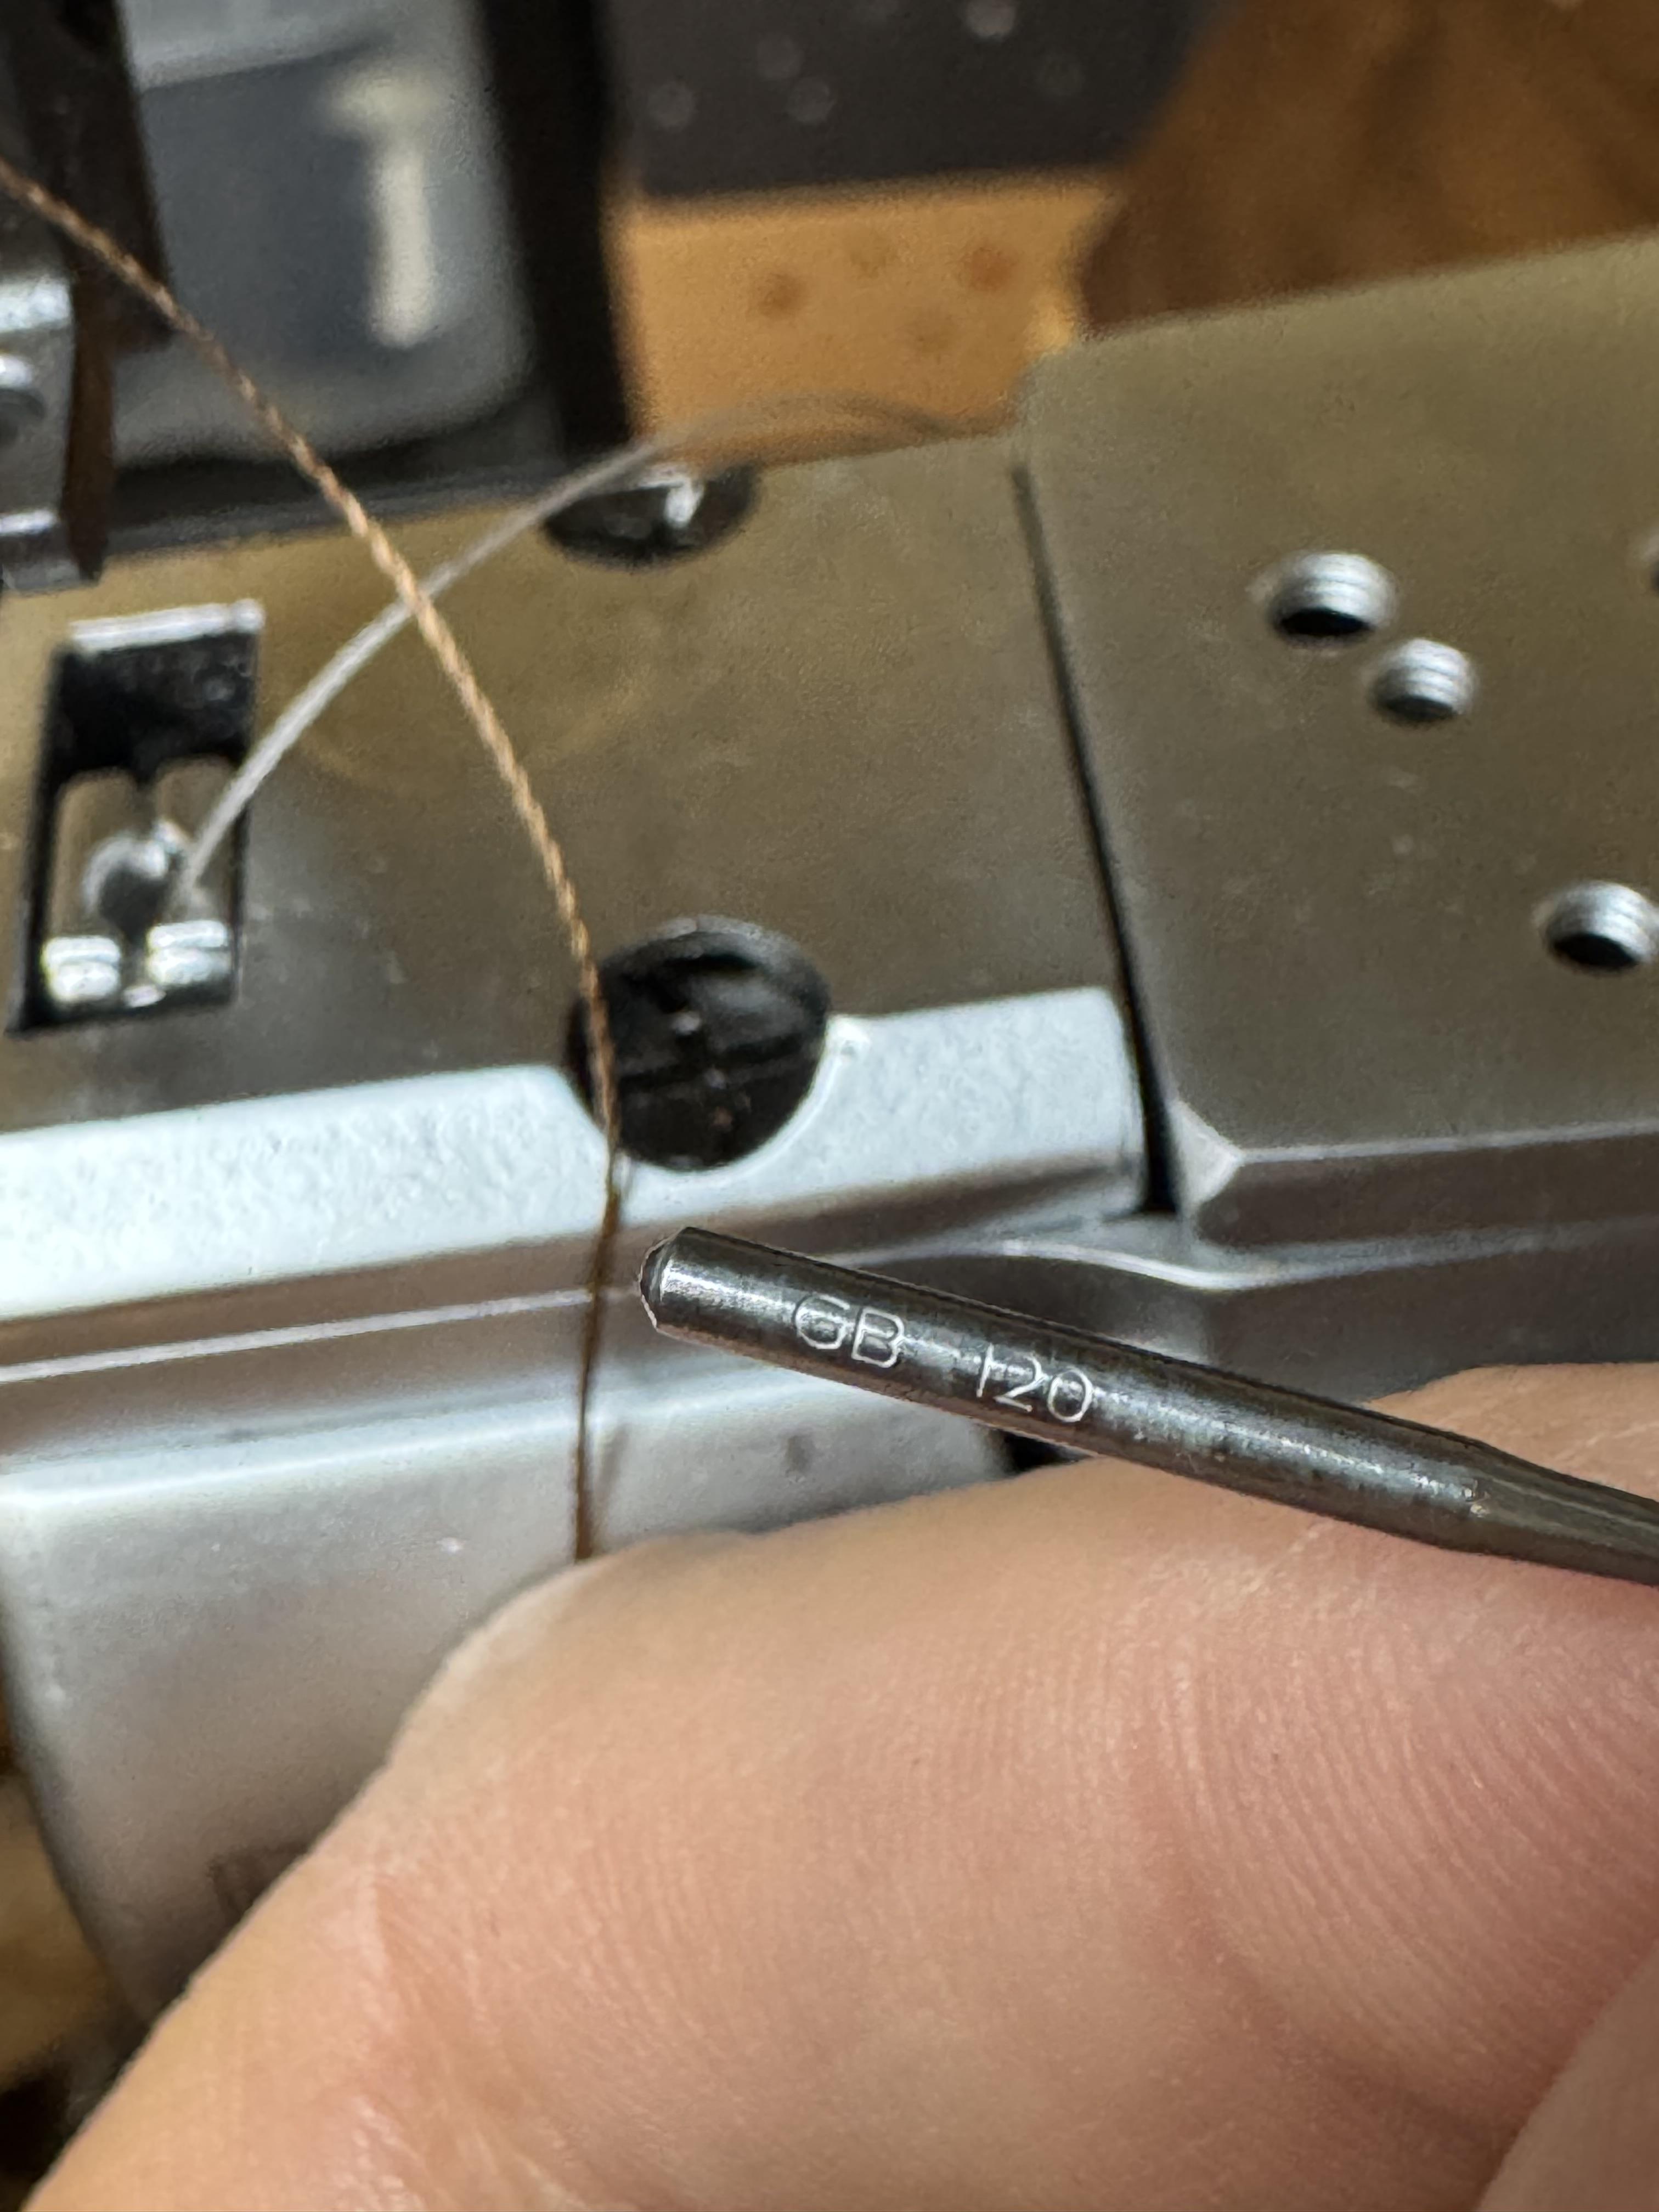
The outer line is done with the #16 and a thread a bit larger than the v92. The inner line is the same thread with a #19 needle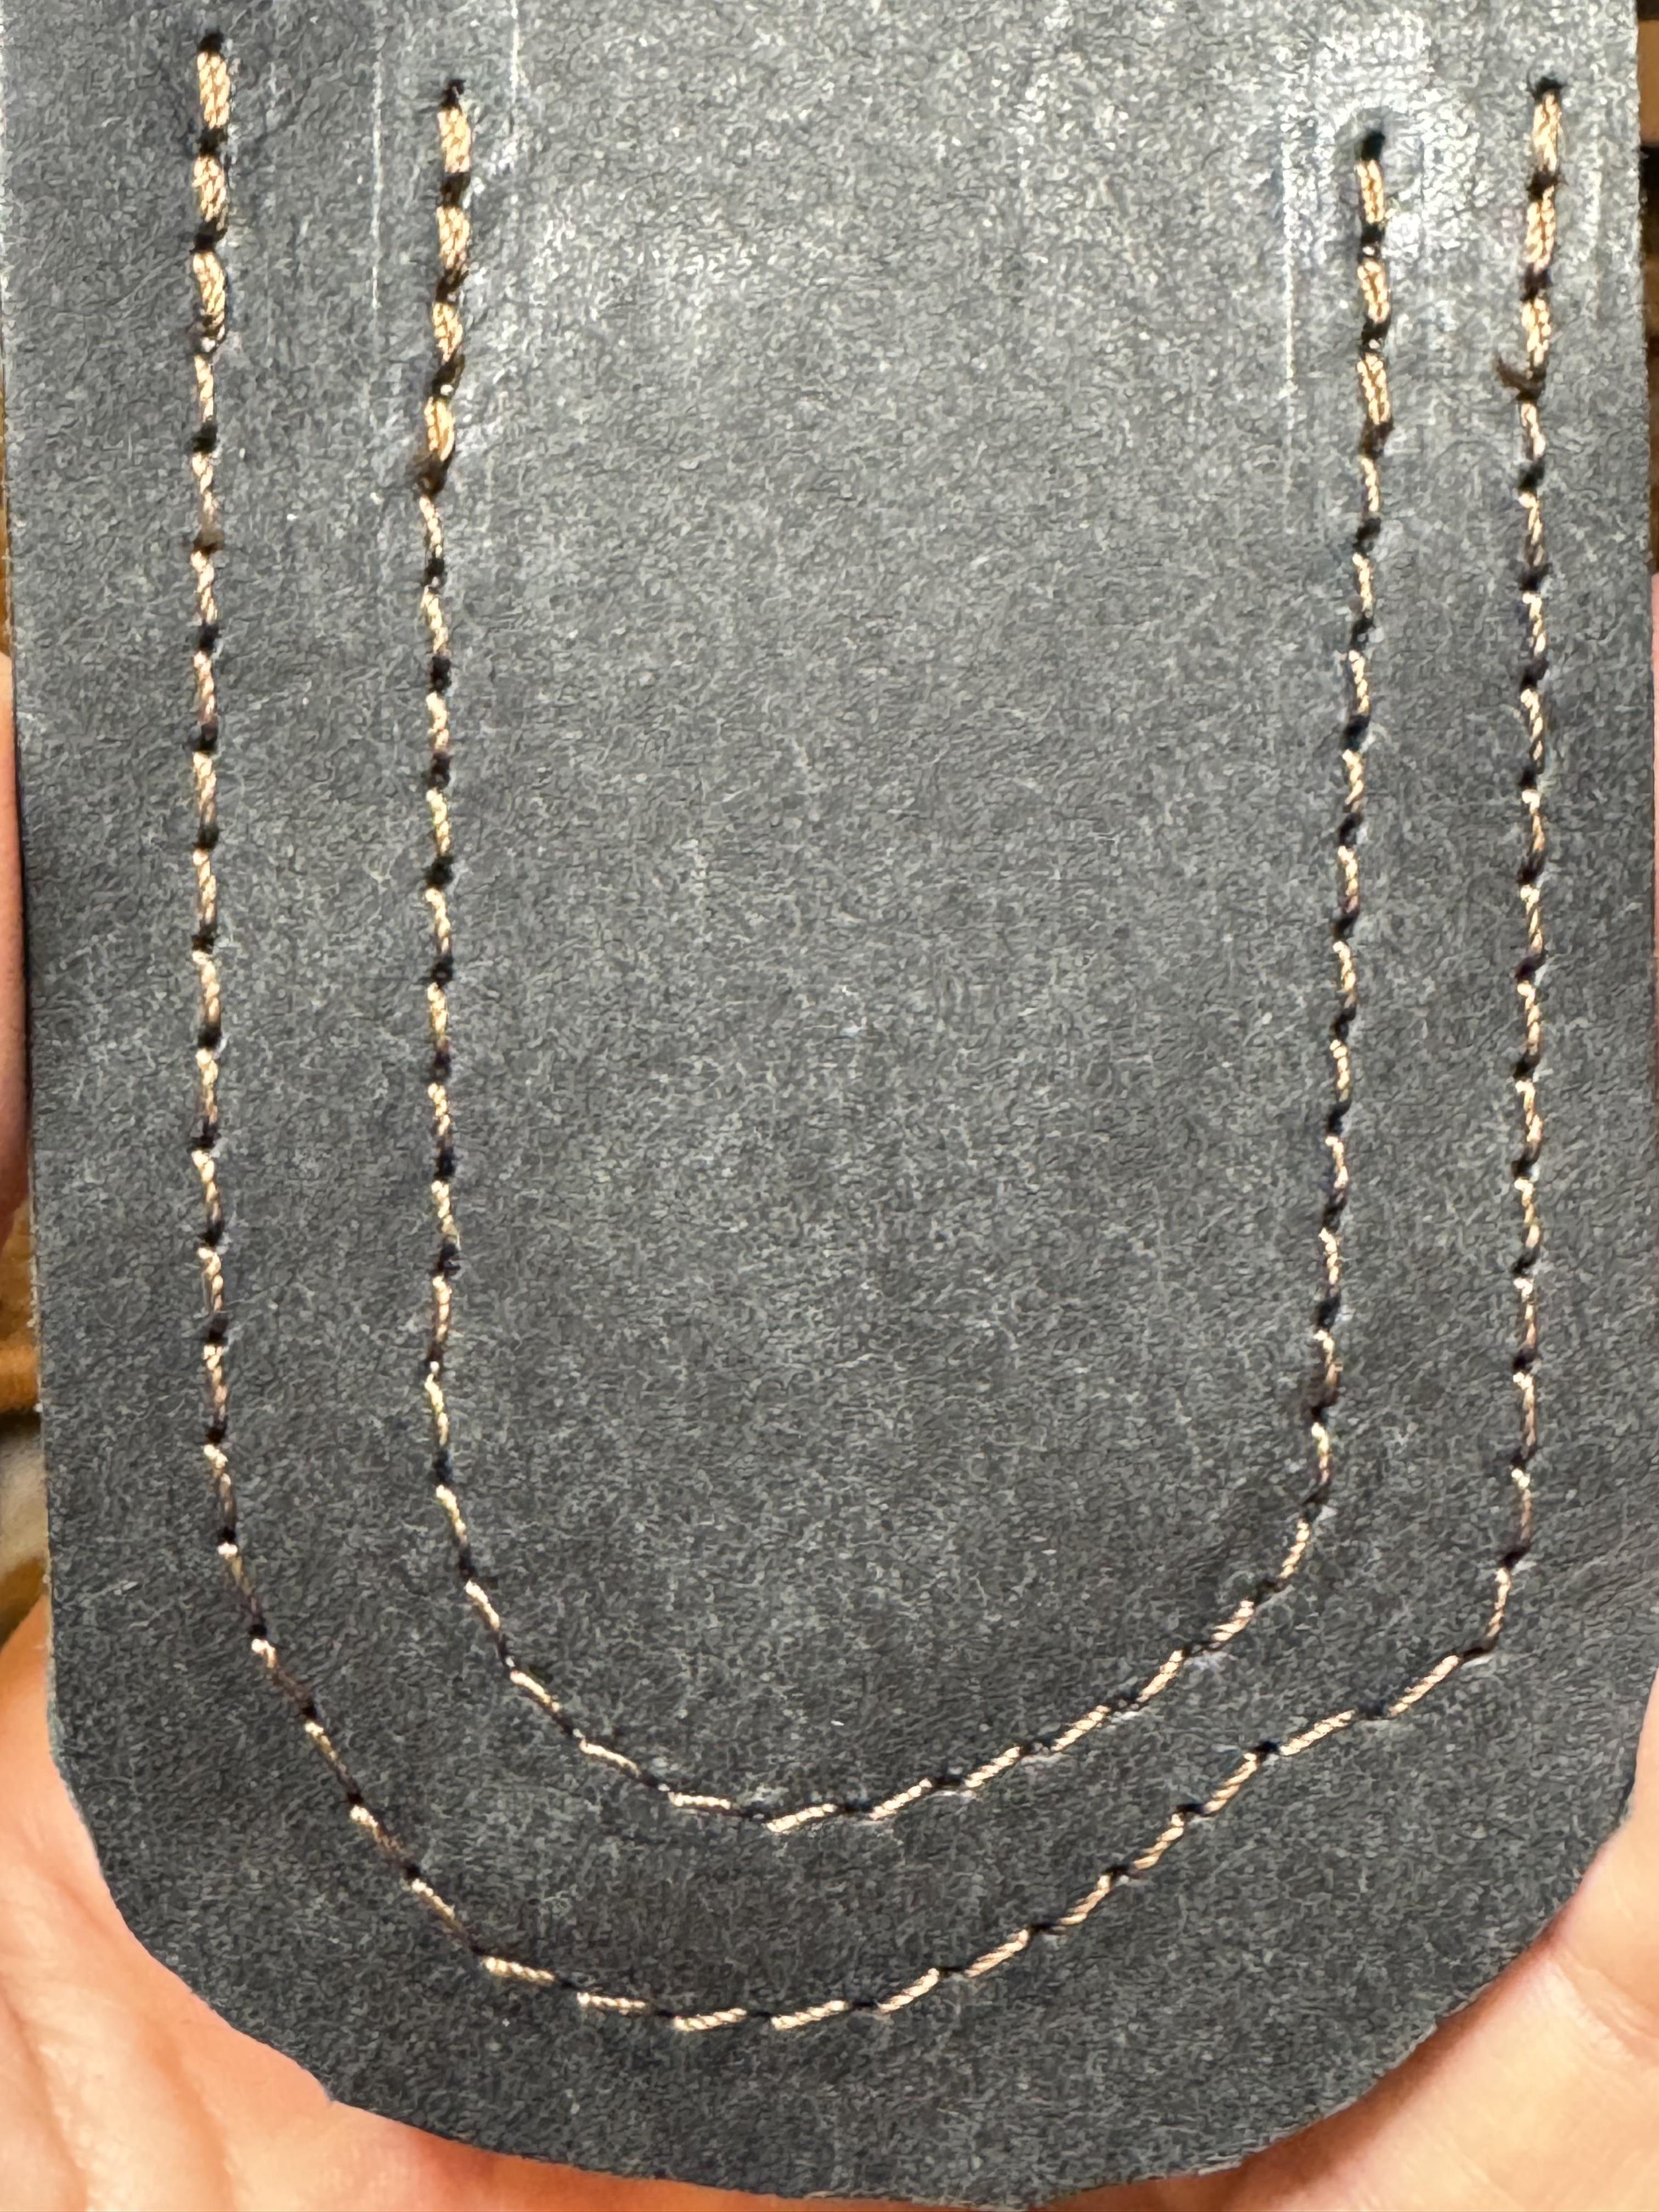

-
Replacement feed dogs for my Artisan 246. Suggestions?
Piko replied to Piko's topic in Leather Sewing Machines
Thank you! No idea how that happened. -
Replacement feed dogs for my Artisan 246. Suggestions?
Piko replied to Piko's topic in Leather Sewing Machines
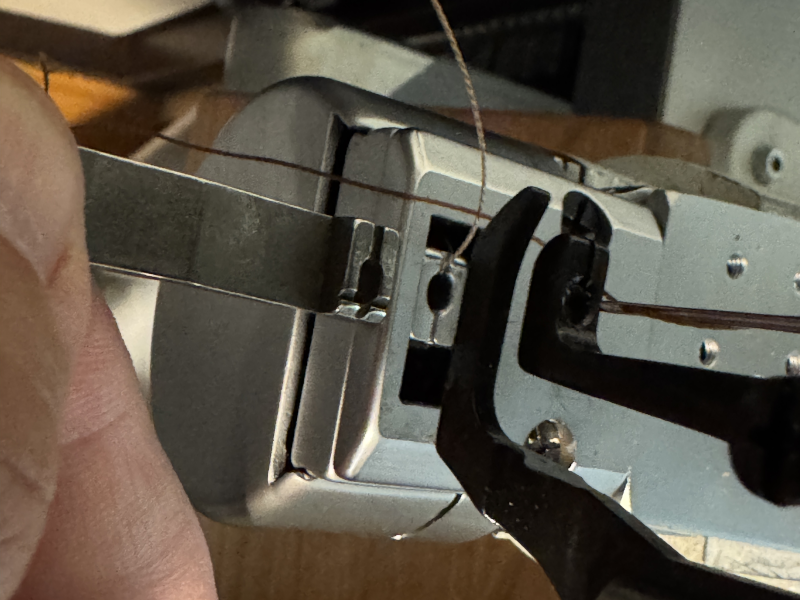
I already changed it and, as you said, it made no difference with the size of the hole in the leather. Could you show me a photo of the hole in the feed dog of your 246? It is strange because I leather purses out there sewn with very thin thread, must be v92, and the hole left by the needle is unnoticeable. Mine is always very visible. -
I got the replacement doggy thingy for my Artisan 246. The problem I am having is that the hole in leather is very large even with smaller needles. Someone said the hole in my dog feet thingy was too big so i bought another one. Looking at it, it does not look much different. What do you think, should I change the part on the machine? Would it be worth it?
-
Thank you! I am not too new to leather craft but I just started with sewing machines. I like how this one sews. #16 needle with v92 looks good and holds strong. Just need to figure out the liner for the flap…I might have to use barge for that: that cement is the best but the fumes are a problem. We ll see. Thank you for the encouragement!
-
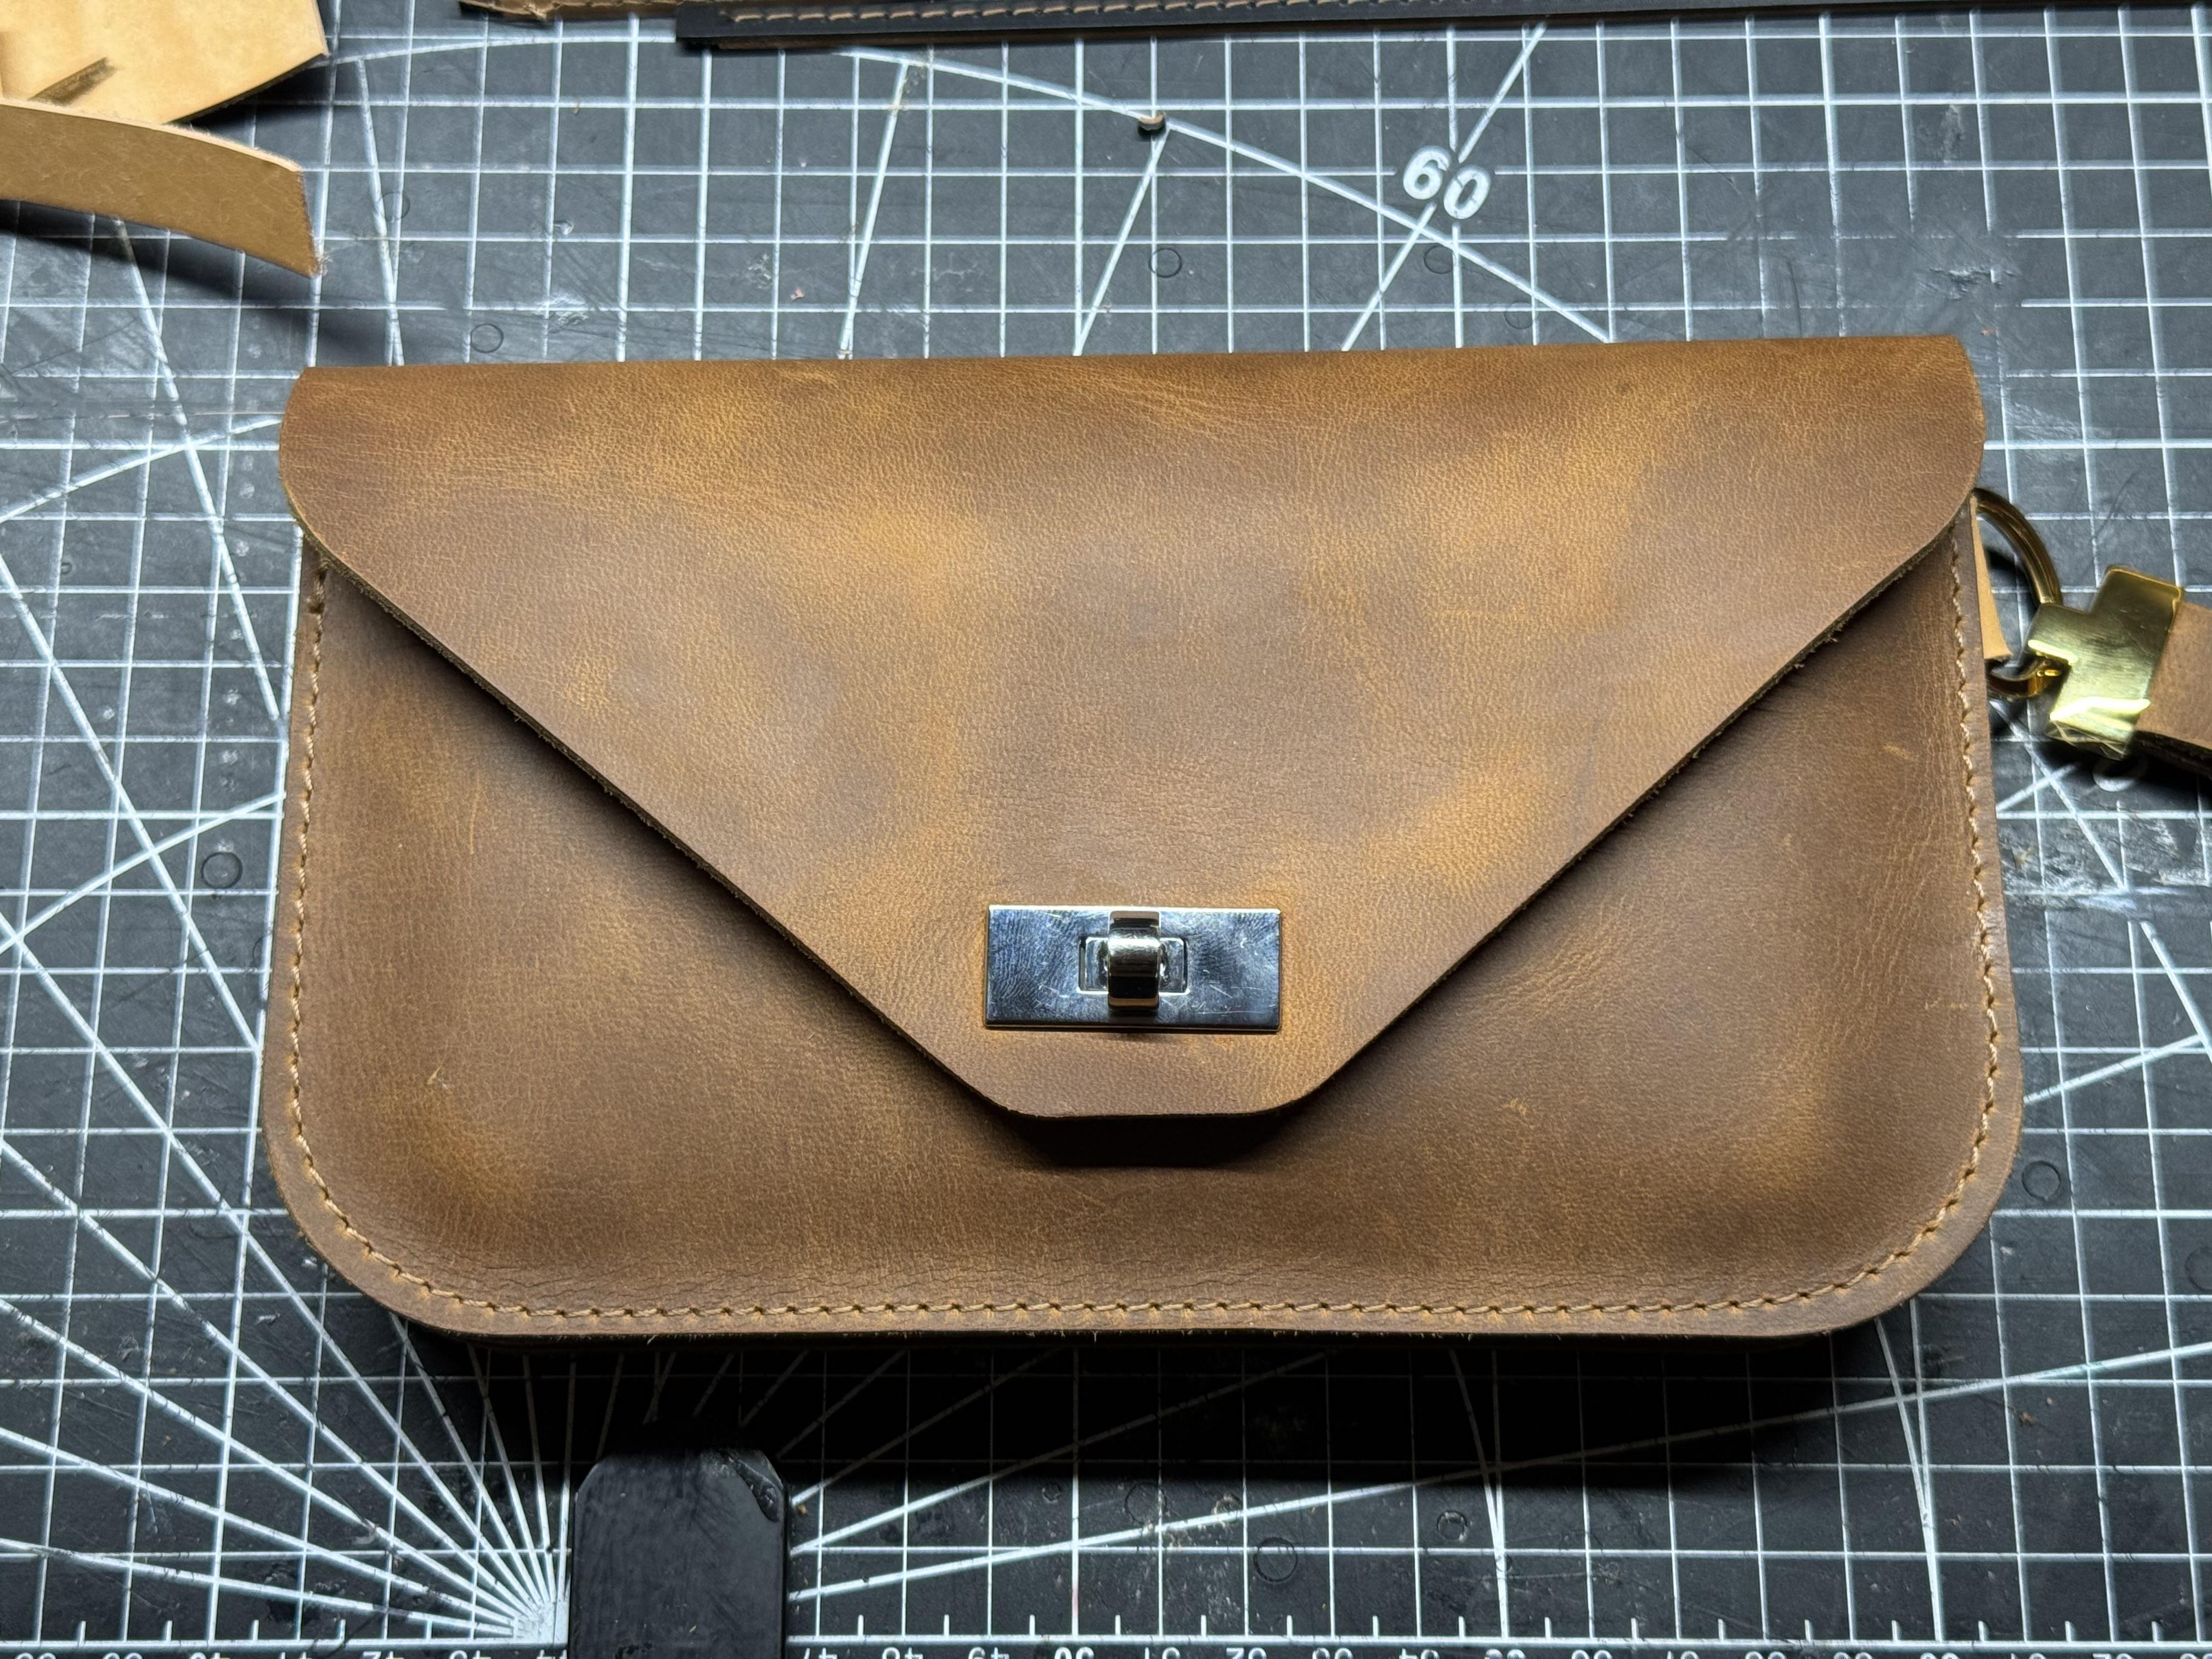
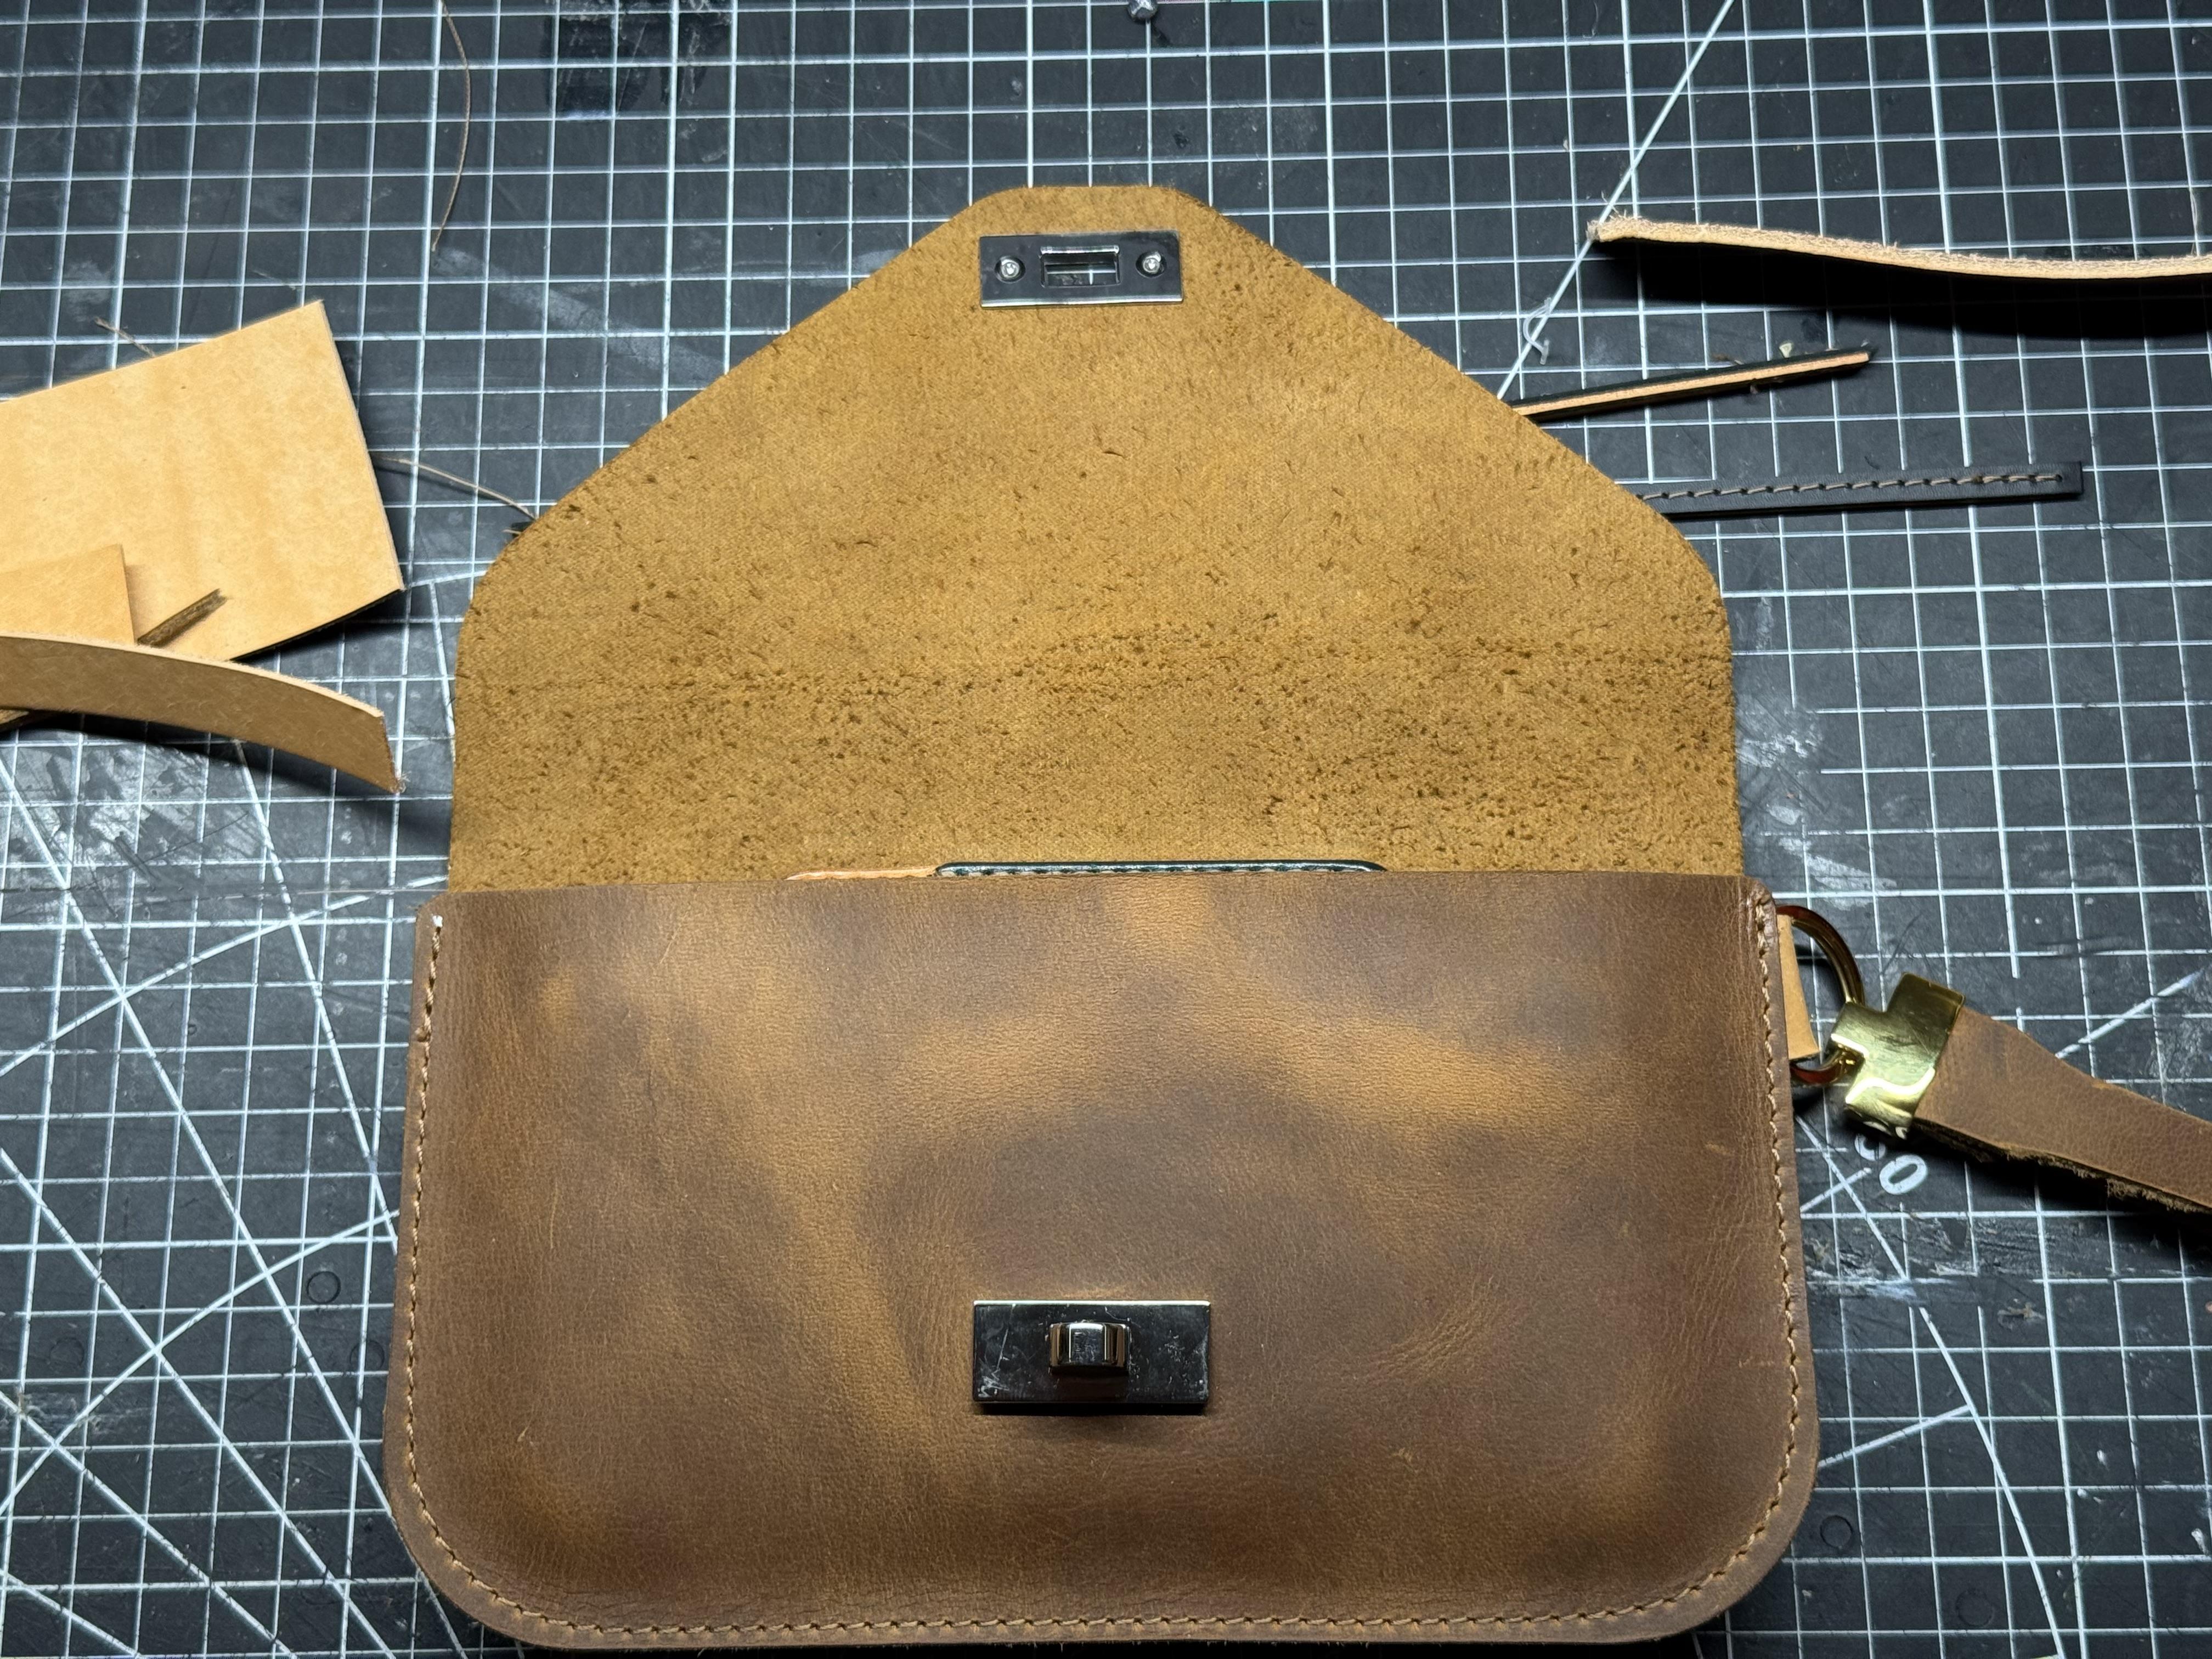
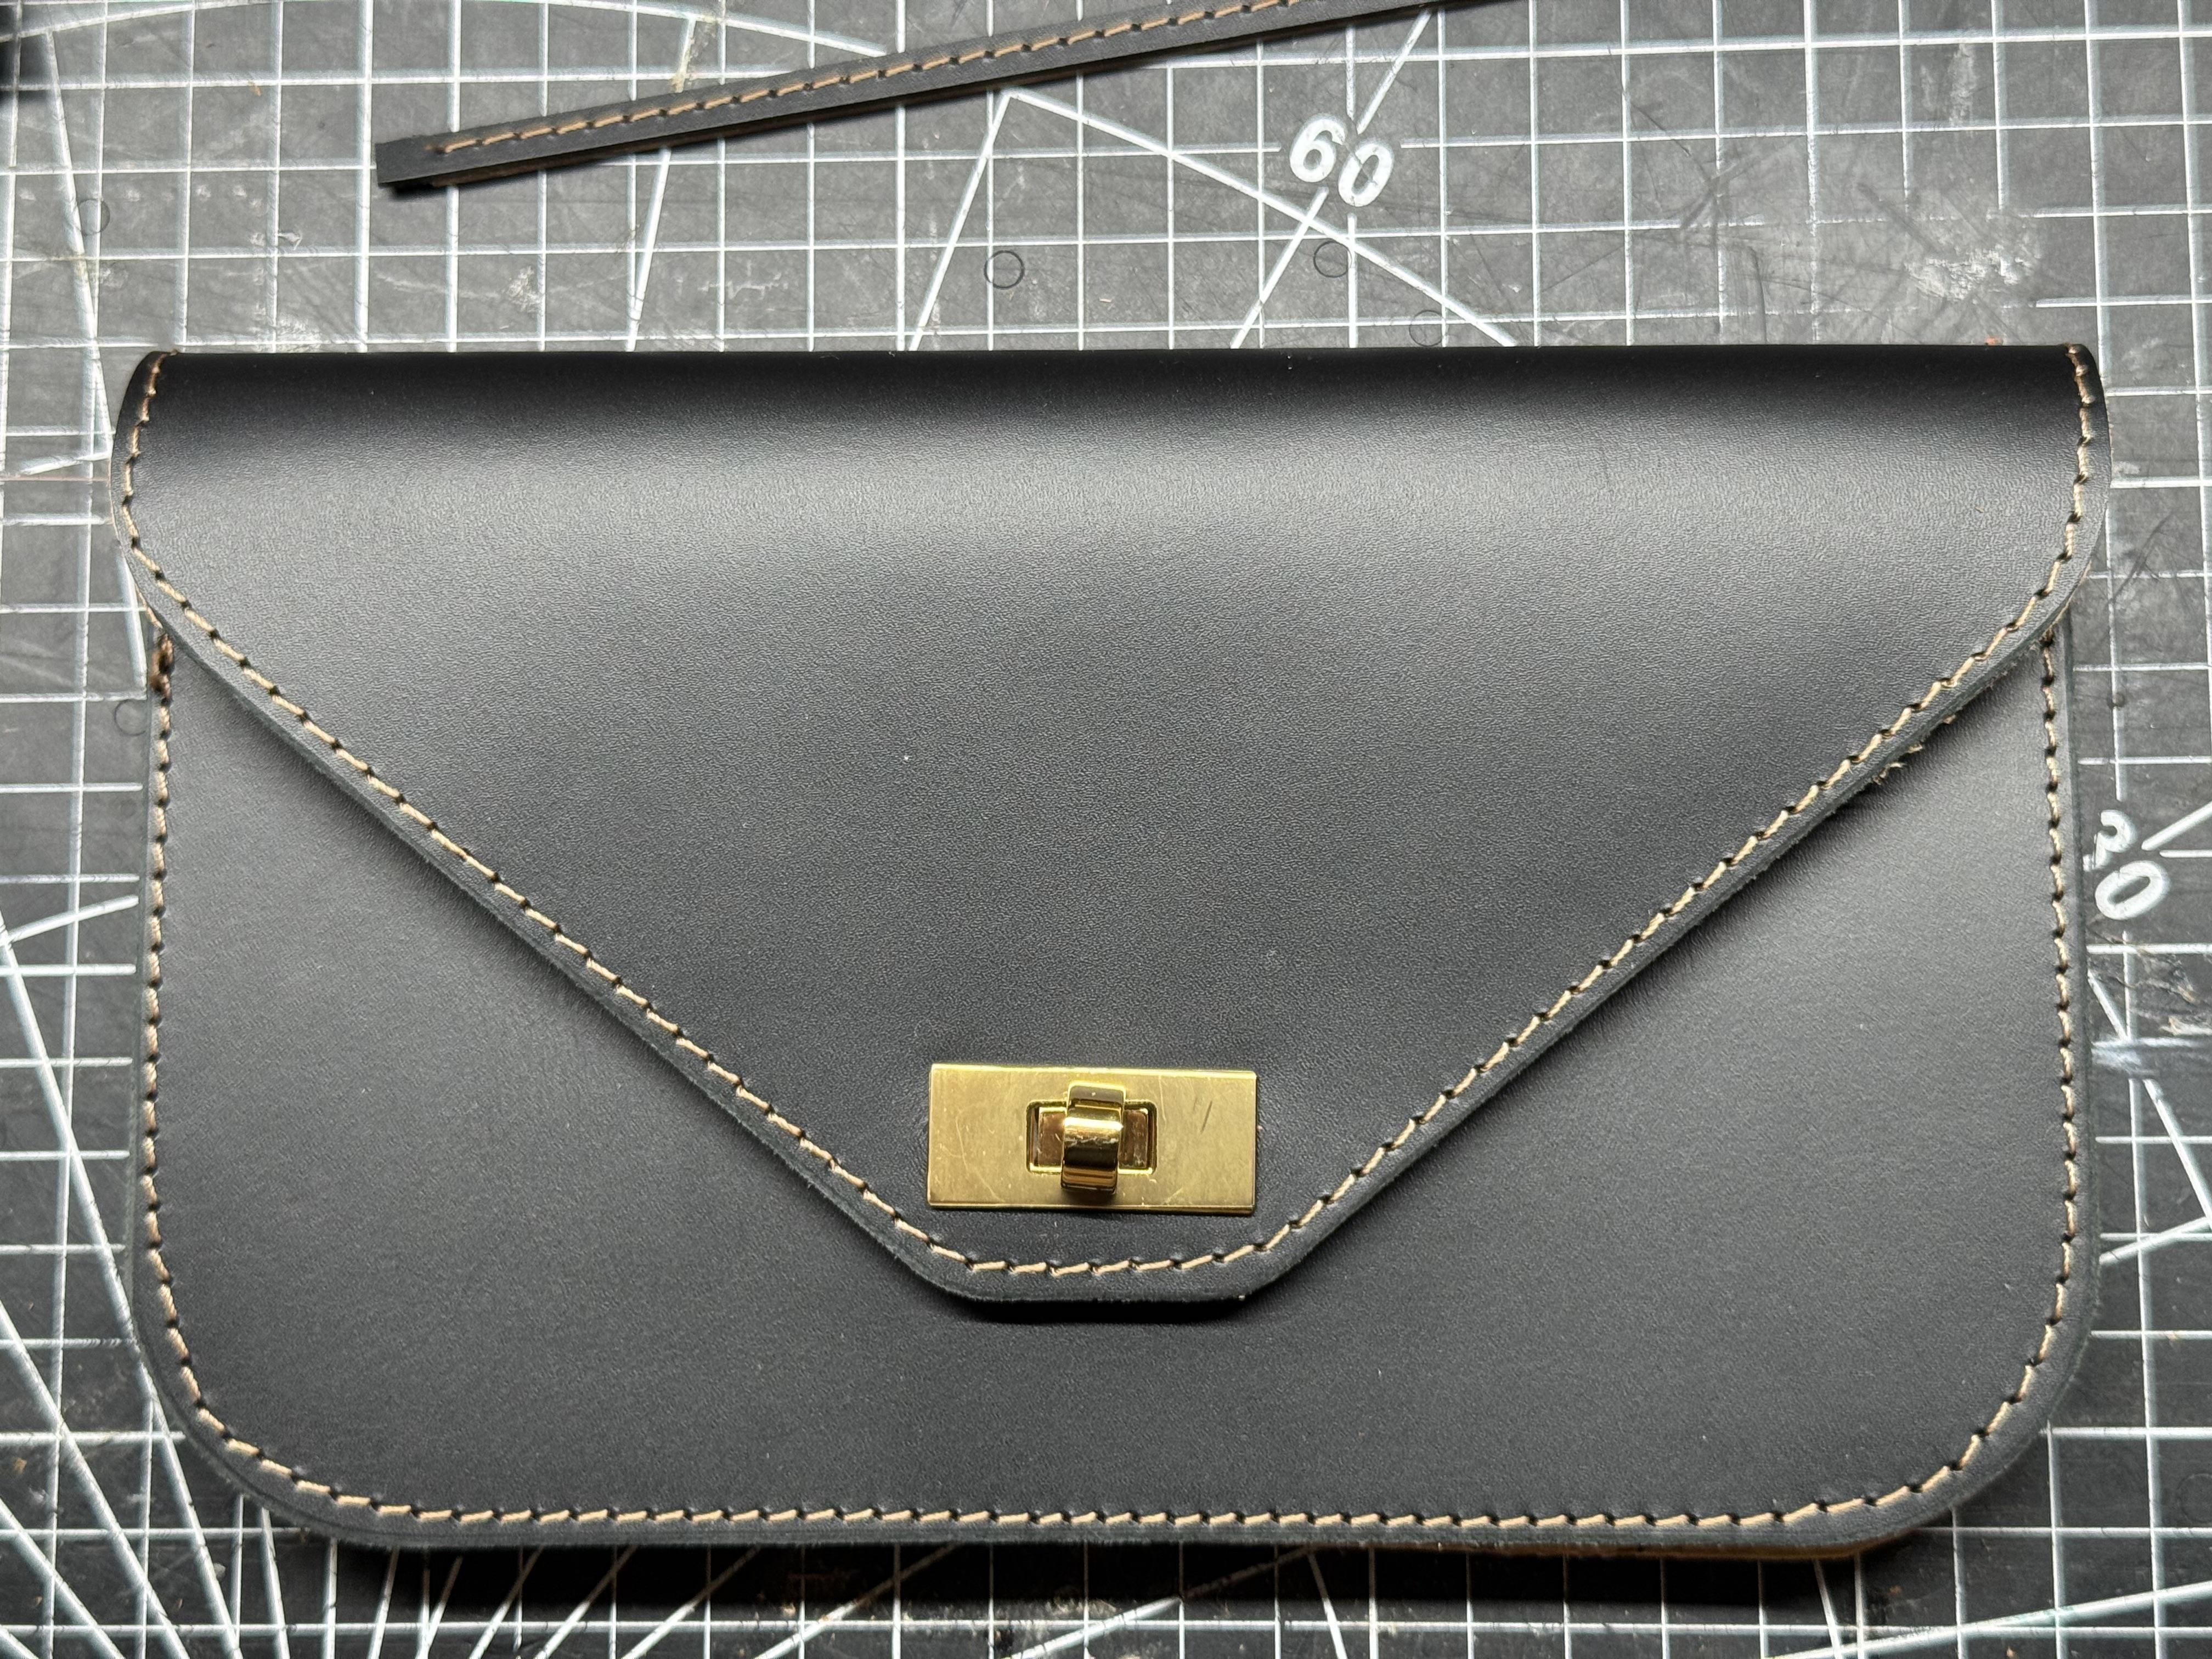
I narrowed down where things are gonna go and the only thing left to do is a laser cut the templates to precisely set the hardware and start production. But I do have one thing to iron out. I will line this clutch and i am not worried about the edges of the compartments without stitching them because I line my wallets and the adhesive does not come apart at the edges even after 3 years of use. I do worry about the flap. I do not like how it looks with the stitches around the edge. I like it without stitches. Any tips on glueing the liner for the flap? I do pre bend the flap before I glue them and an user here suggested me not ti glue the liner to the flap where it folds. But he stitches the sides. What would be the best way to do this if I plan mot to stitch the perimeter of the flap? Thank you. here a pic of what i mean. And one with stitches which i do not like.
-
I see what you did, you made yourself a stirrup plate. Thanks for the tips. I’ll get 2 or 3 in a few days cause i am leaving for italy tomorrow.
-
Nord California. I found this on Ebay. Looks like what you are talking about. Does it look right? Yes, I’ll do that, thank you.
-
Thanks for finding that. Yeah, $200 is not ideal but if it is what it is I am ok with buying that part. When I click the link it goes to the juki machine and not the part. Where did you find the part?
-
Thank you for spending time to show me which part you were referring to. I see what you mean but, honestly, that’s way above my skill level. I’d have to stop drinking coffe for a week and loose about 100 lbs so my stubby fingers could even grab that pin. i’ll look for alternatives for now but thanks again.
-
Lol
-
Ok so, I have used the trick shown by one of the members of this forum (thank you again) to backstitch into the same holes and it’s turning out great. What I don't understand is why the hole left by the needle is so big. I am Using Vinymo #8 for top and bottom which is supposed to be close to a v92. The outermost line was made by the #16 needle while the inner line was done with a #19 needle. I can barely tell any difference in the hole size and it still looks huge compared to the thread which looks very thin. The brown is the top stitch and the gray is the bottom. the leather is very thin Badalassi Pueblo which is very easily indented thats why there is the marks from the bottom hole on the feeding dog even though I greately reduced the top feet pressure. Anyhow, about the hole/thread comparison, please any suggestion? I don’t think I can fit a v138 through the eye of the #16 but I would like the hole to be smaller compared to the thread. Thank you.

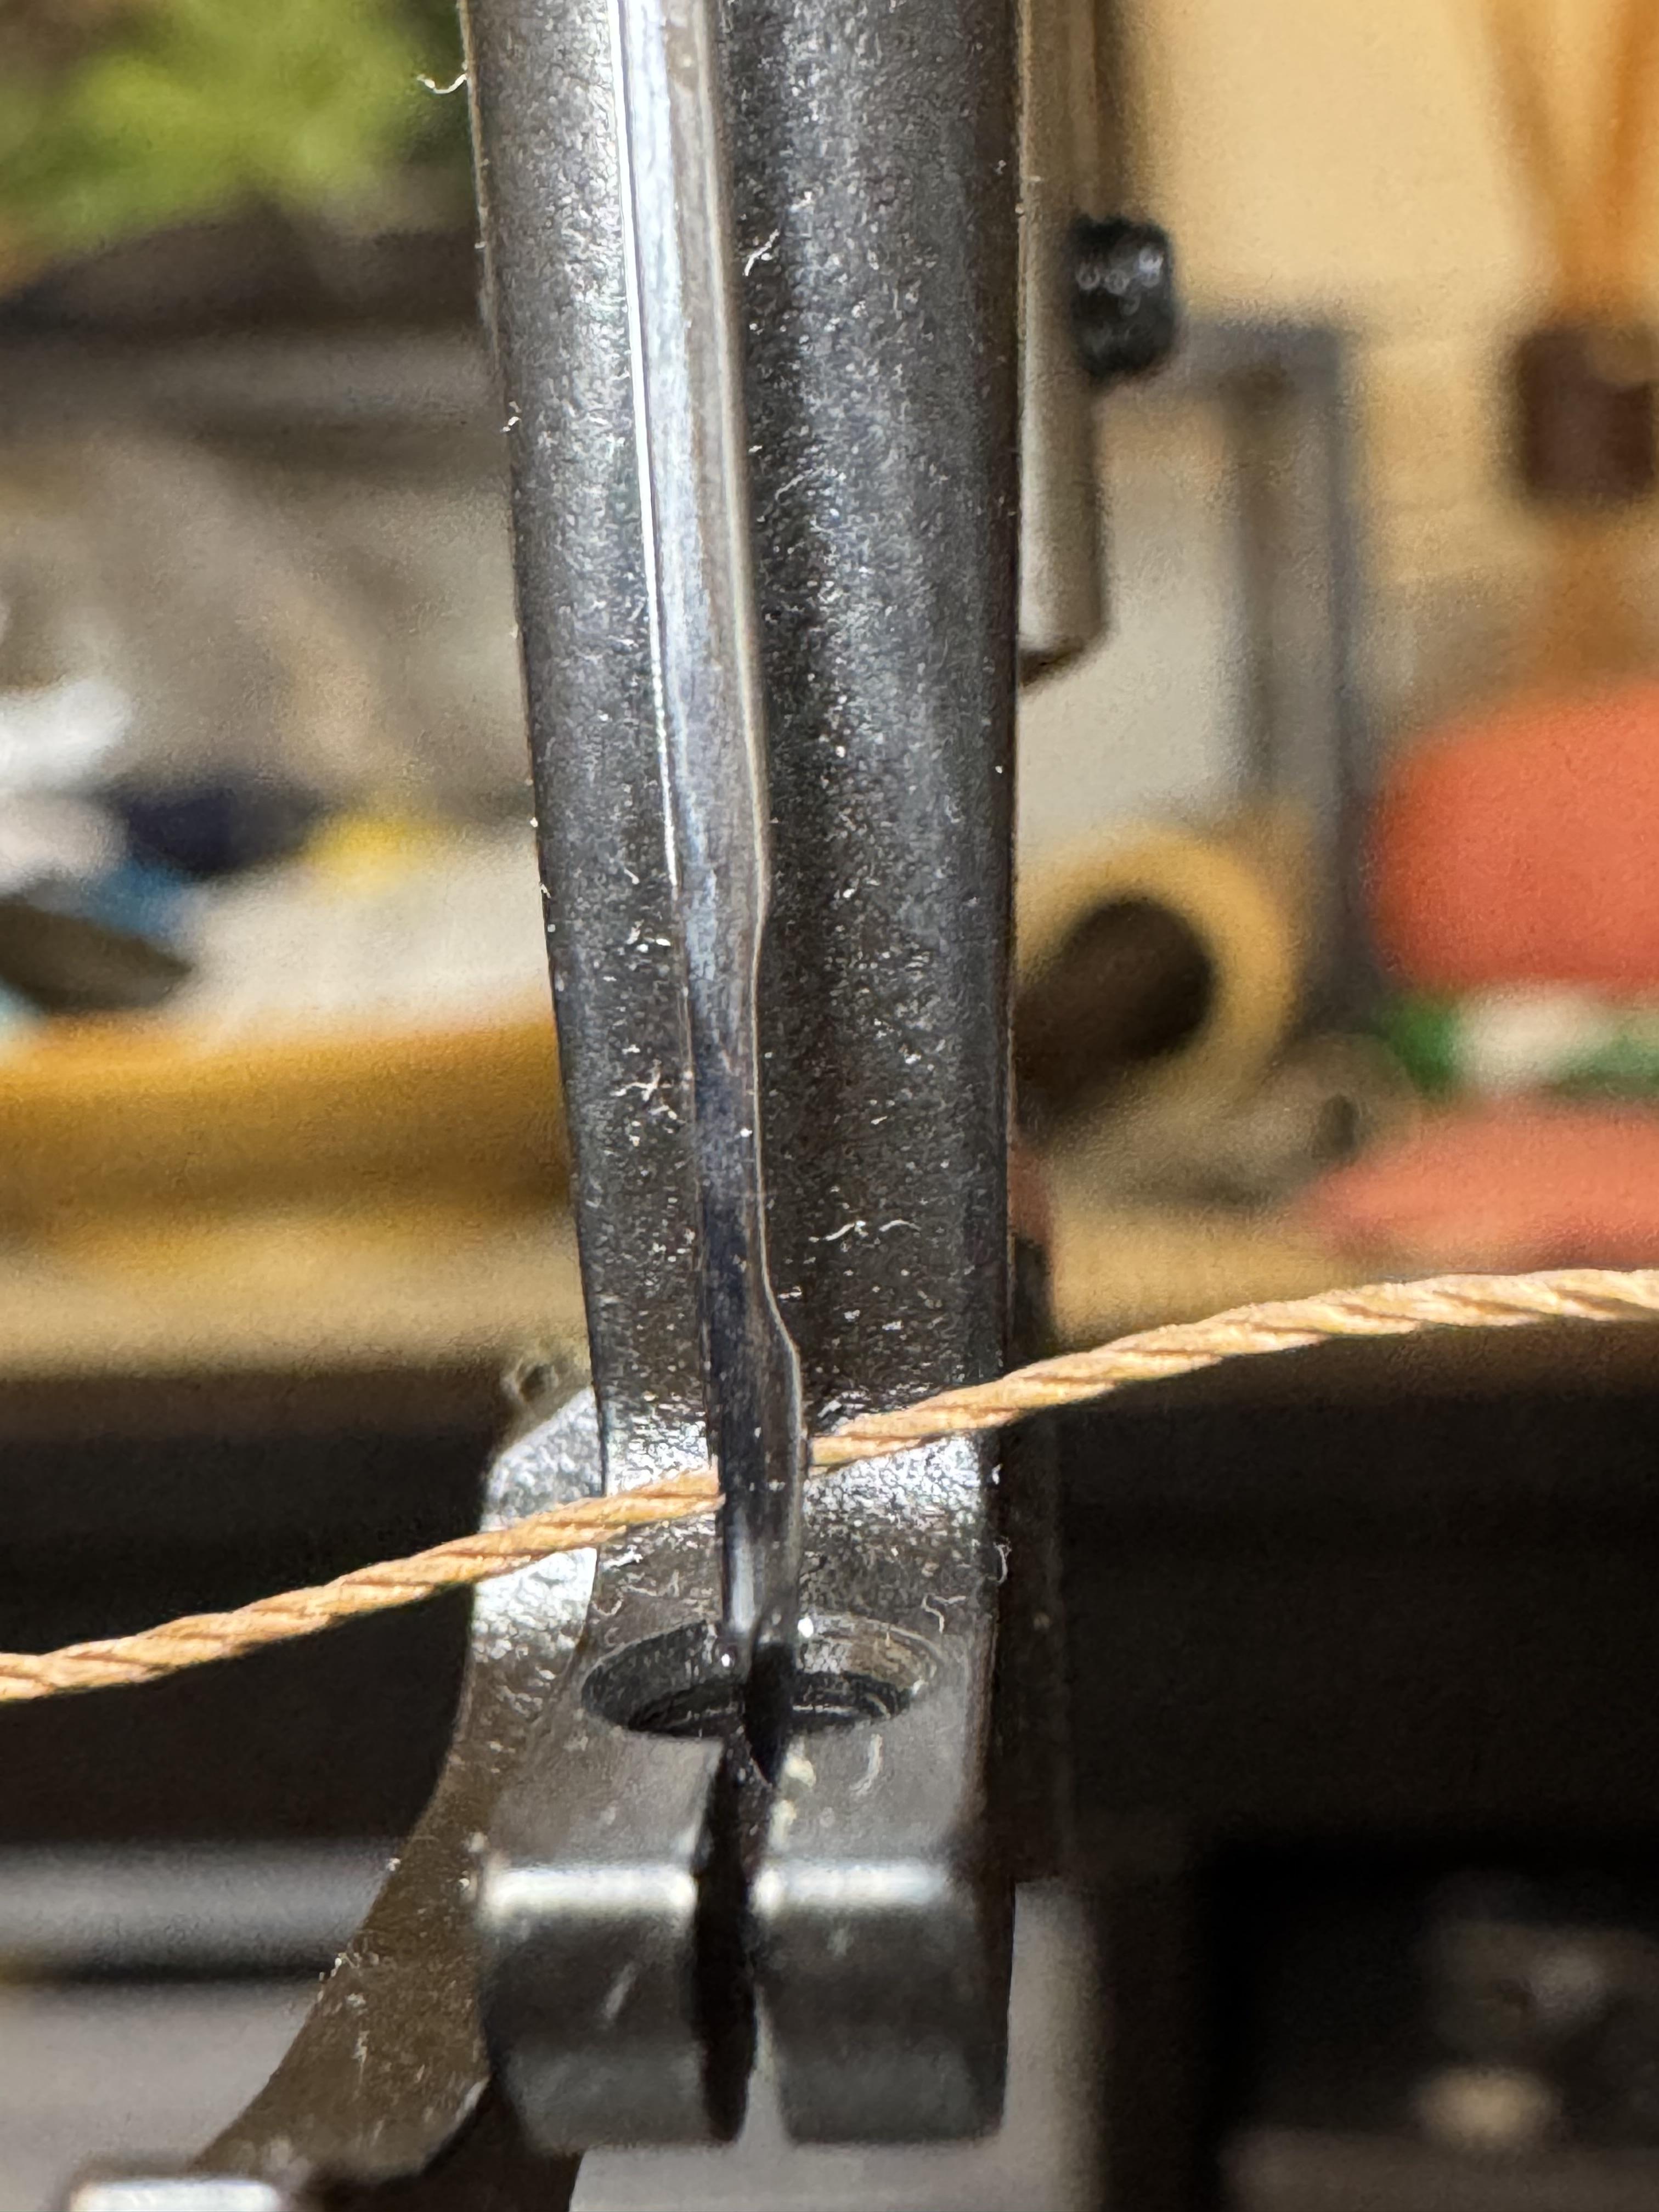
-
That sounds like great advice. I didn't think I could change that hole. I have read elsewhere on this forum, which btw is amazing, and I have learned that I could change the pressure of the presser foot (of both presser feet actually) so I did and the dimple is much less noticeable. However, I would like to know hot to change the bottom transporter. I am not sure I know exactly what it is and, is it something I can do myself? Do you have any suggestion on where to find parts that work on my machine? I know it is aclone of a juki dsc246 but when I look on Amazon, ebay or jus tgoogle it nothing really comes up in terms of parts that I could be sure would be compatible. Thanks for your help.
-
So far I only bought those. I guess I'll stick to those. Thanks for the head's up.
-
Thanks!
-
I never even thought of that! Thank you!
-
Thank you! I've watched a video where the guy lifted the foot and lowered the needle to fit in the previous hole (like I see you do in this video as well) so I don't need a foo that lets me see better now. I'll look up the feet anyways to have them just in case. I see you swapped the feet when did the handle. Thank you again
-
Thank you I'll look the 111W feet up!!