


Piko
-
Posts
70 -
Joined
-
Last visited
Content Type
Profiles
Forums
Events
Blogs
Gallery
Store
Everything posted by Piko
-
Hey, thanks for the tips. Those are some good looking bags you make there. I also learned you can lift the foot and keep the needle down to do the back stitching: I never knew that! Again, I hand stitch mostly but these old bones od mine are clueing me to switch to machine so I am learning as I go. I don’t really know where to get needles. I mostly buy from Amazon and Sailrite but I dont see options often like LR or DI etc, most of the time if I find an #18 for example it will only be one kind, so either TRI or DI etc. never seen multiple options. Do you recommend a place to buy needles? I also need other feet etc but again, still learning as I go. The trick I saw you using in the video for the backstitching is really helpful. I ll try not glueing the fold, but I get the bunching even at the edges. Also, I saw not planning on stitching the sides of the lid, I wonder if nit glueing the fold except for the edges would still work if I dont stitch the edges. Yes, I ran one stitch line around the whole bag but was supposed to have the top stitch on the other side of the lid. I am still prototyping at this point. I was using an #18 needle with a 138 thread which is also not recommended but I like it better. So i hope that the not recommended #16 with the v92 will work the same but there is only one way to find out. if I can find a website with different needle options I’ll buy the LR. thank you for your time and tips. Much appreciated.
-
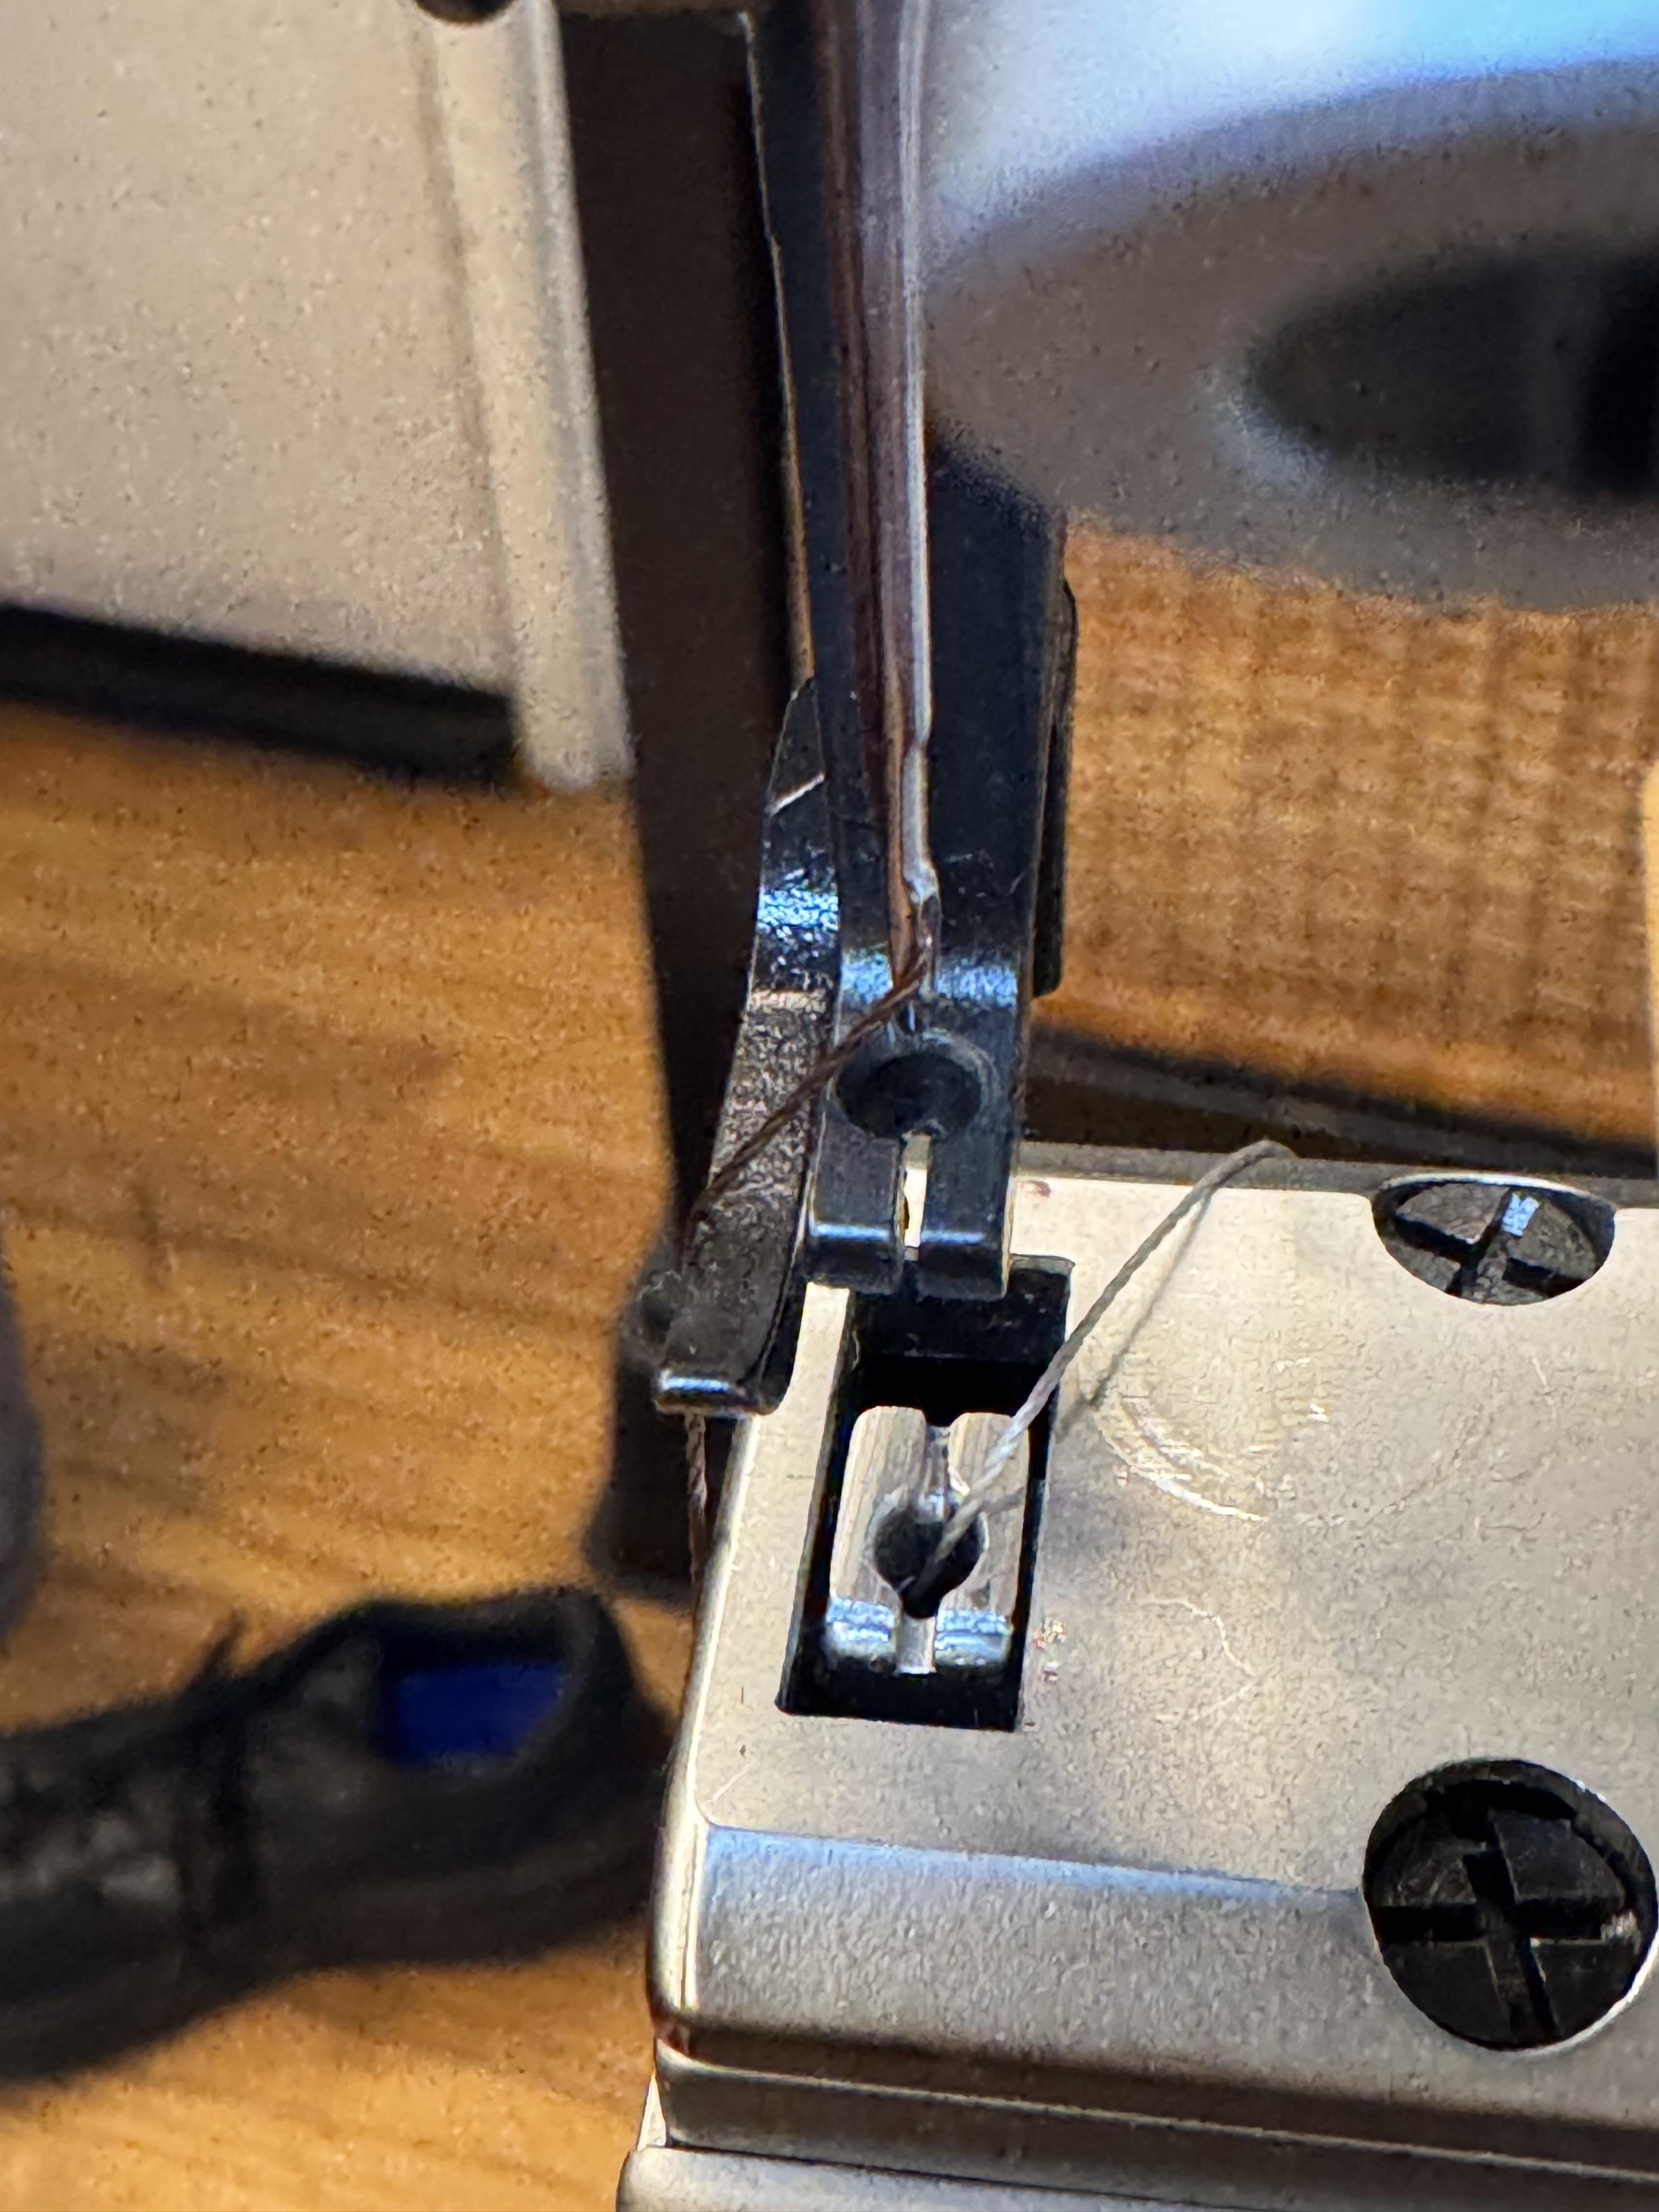
This is the foot my Sewing machine came with. My sewing machine is an Artisan 246. I cannot see the holes made by the machine well enough to backstitch right into them. Do I have options? Any suggestion to try out different feet? Thank you
-
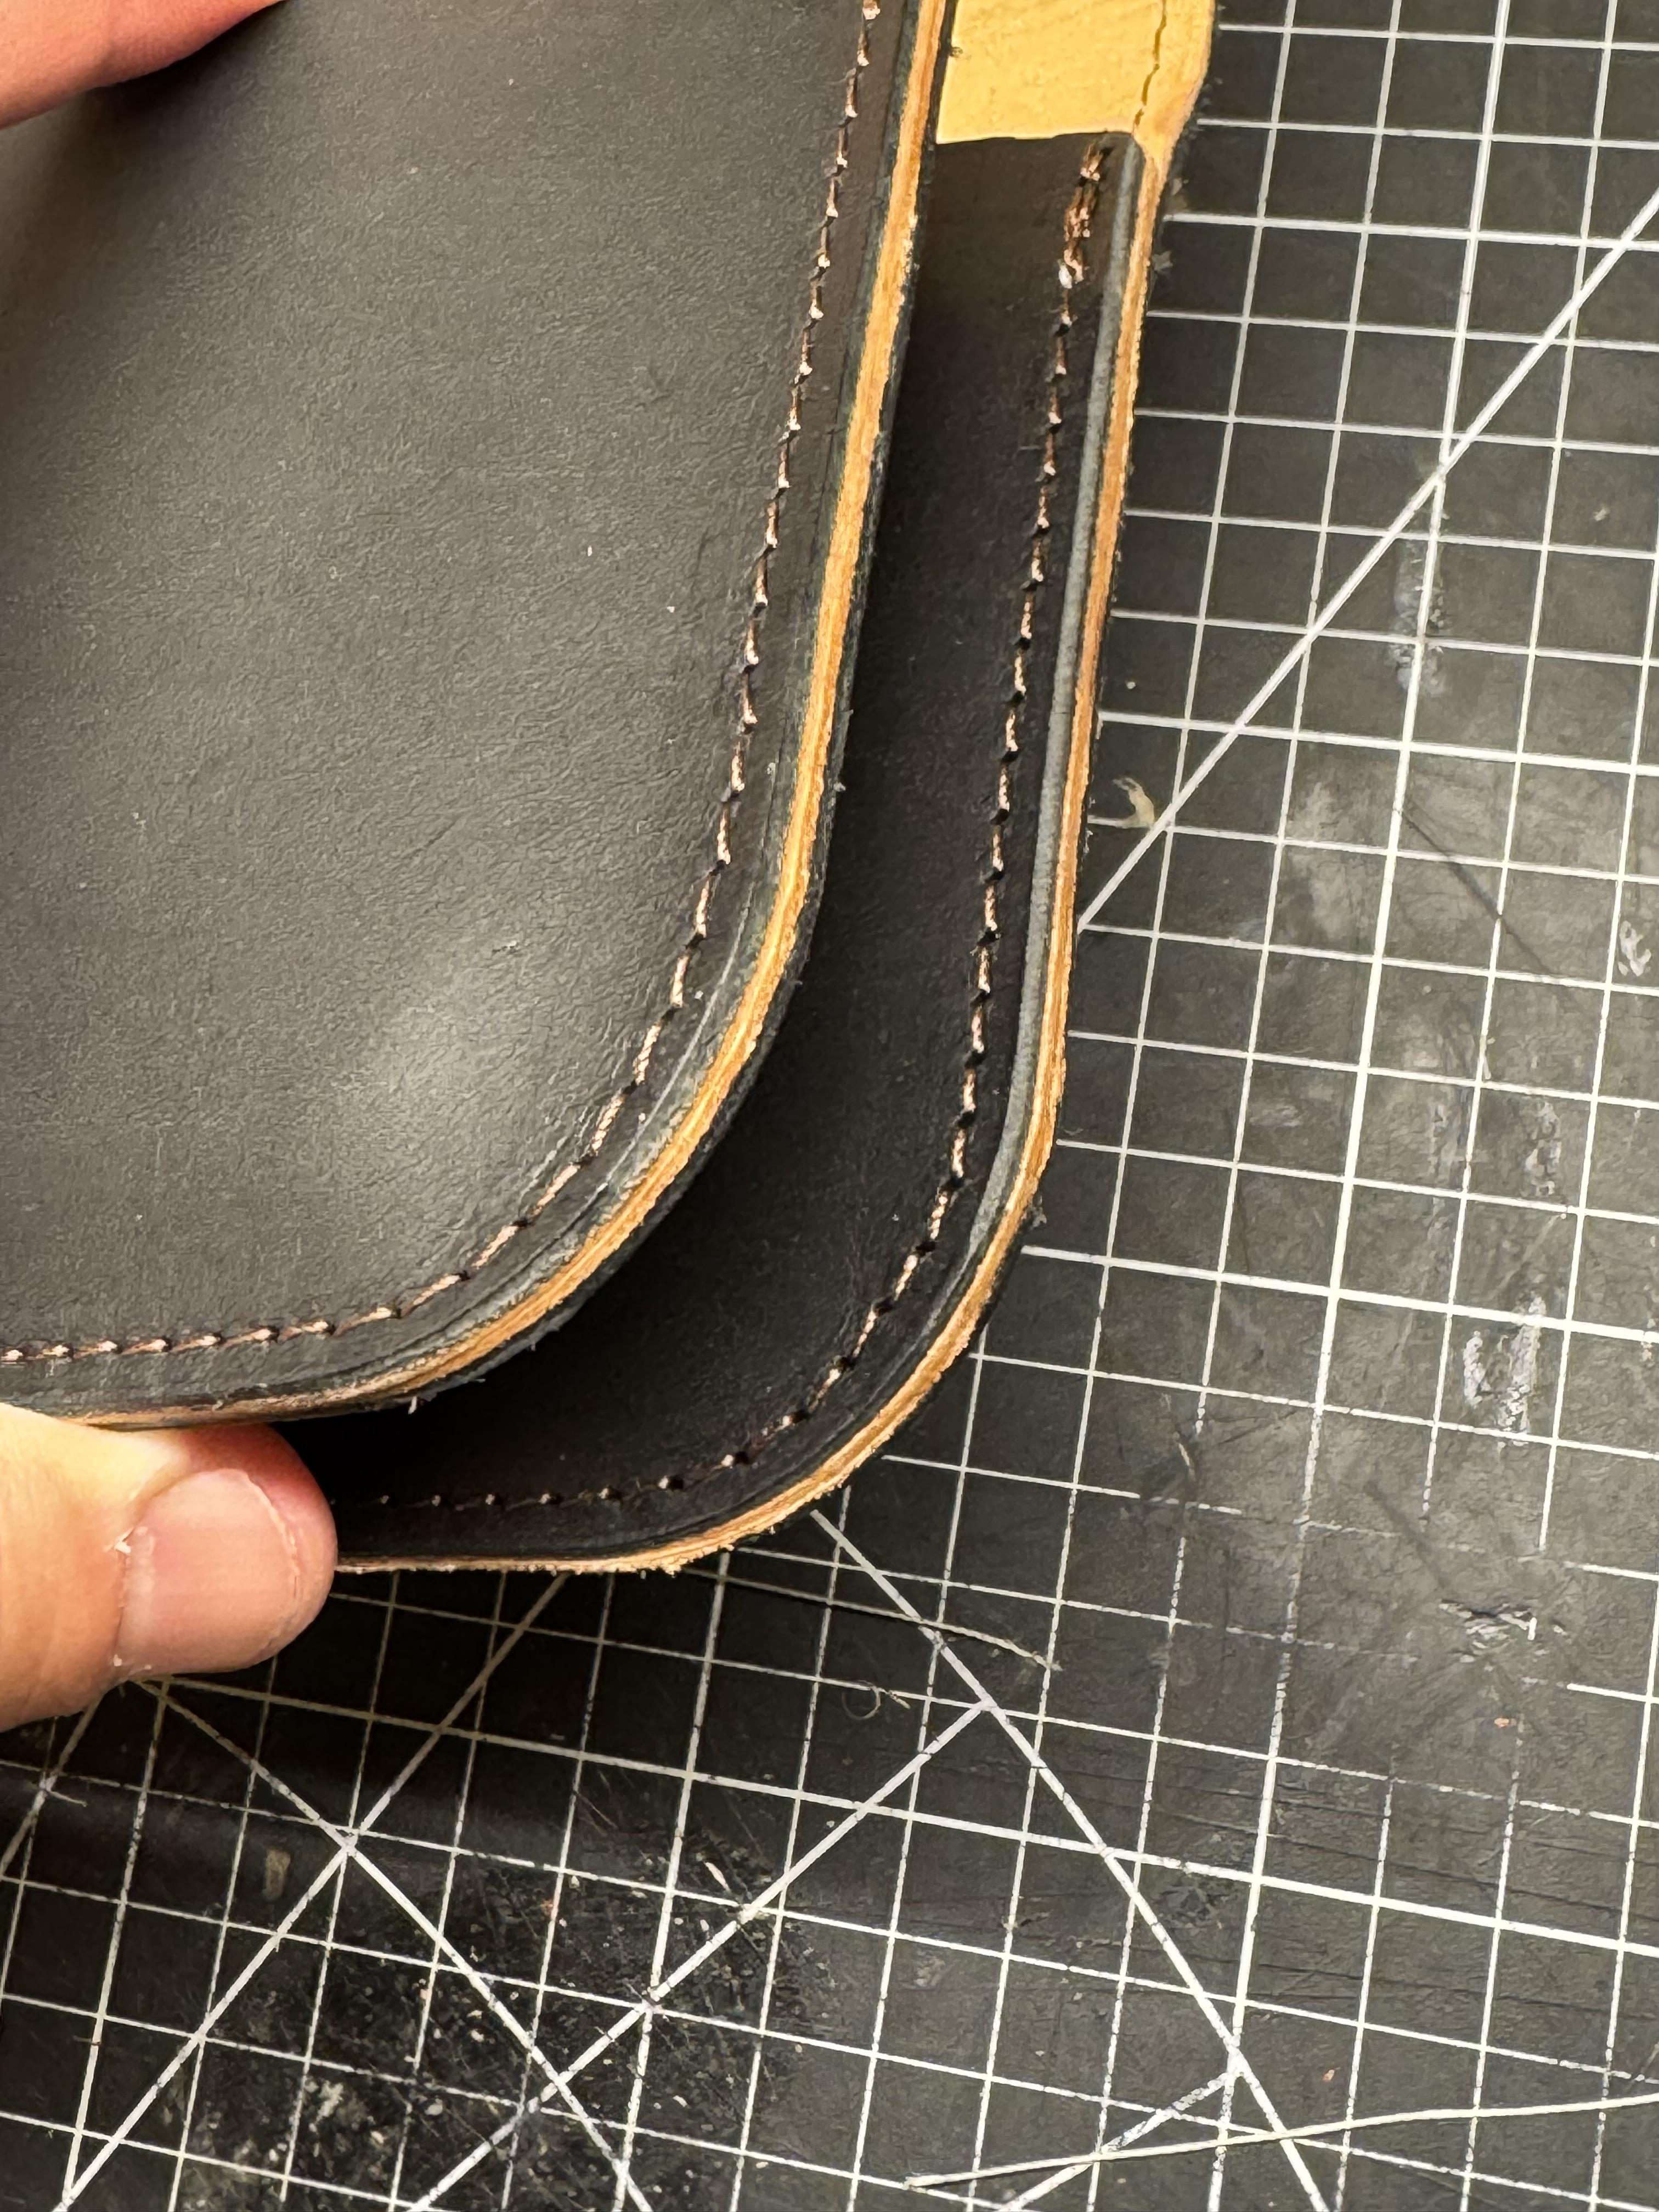
Hi Hans, and thank you for making those points. I am new to stitching with sewing machines so I am still learning. so, I had just switched from a v138 to a v92 so the tension must have been off. Also, going from sewing through 4 layers of leather (2 plus 2 of liner) and then moving straight to sewing through jus t2 layers (1 plus liner) might have affected the tension as well. I might have to change the tension as I go from the thicker leather stack to the thinner one. Again, sill learning. If you have tips I am all ears. The ugly hole mark I have no idea why it happens. It happens with my Sailrite as well and people have said it is normal maybe because they dont know how to fix it but I am not sure. I am definitely using a leather needle. The one that pocked these holes was a Groz Beckert 135x16 TRI #18 which I think is a chisel with triangular shape. I suspect it may be the pressure on the walking foot to be honest: I will experiment with it once I get the new needles. As for the large holes I totally agree and I am trying to fix that. These were pocked with an #18 needle and a v92 (approximately) thread. I am waiting for #16 needles even though they are not recommended for that size thread, I am doing in an attempt to reduce the size of the hole left by the needle. Of course it could also be the tension hat stretches the thread too much. I am not sure. Again, any tips, I am all ears. Thank you for your time. Much appreciated.
-
Thank you! The wooden triangle is very well made, I wish I could take credit for it but I bought it from Etsy. I actually used it for the first time yesterday after having purchased it more than a year ago: i never lined objects that fold before. Here is the link to the triangle: https://www.etsy.com/listing/1504253838/leathercraft-triangular-prism-jig-mold?gpla=1&gao=1&&gQT=0
-
I had to google it because I did not know what you were referring to with the lacing thing. It looks nice. I am trying to move away from doing things by hand too much, that is why I am trying to implement my machine to sew. I 'll keep an eye out on the slipping needle at the edge of the leather. Thank you for the tips.
-
I already bought them from Sailrite but thanks for the website, I’ll save it for next time. So, I understand the thread recommendation about the #16 needle but, I also read that I should not put a v138 on an #18 and, to be honest, i think that combination works great on my machines. No skipped stitches and no tension problems that I can tell but I am no professional. The only problem I am having is when I backstitch even if I go in the same hole it messes up the bottom stitch but that happens even if I use larger needles keeping the v138. Also, I do use the vinymo on my Tippman Boss and Sailrite Ultrafeed. Since the not recommended v138 on the #18 needle works for me I am hoping it would be the same with the #16 and the v92 (Vinymo #8). I wont be able to tell until I receive the needles though What should I be looking for to see if the match is not a good one? Skipped stitches or anything else? Thank you for all of your help.
-
I get what you are saying about marking the last few stitches and adjust a little but at a time until the last stitch. Good idea. I’ll try it later. My reverse bar only reverses the direction it does not shorten the stitch (my Sailrite works as you described but not my Artisan) but I can try to line them up manually. i see your point with the stitching on the flap. I am debating. If I did the stitches like 2mm closer to the edge of the leather and get the stitches closer together, I think that would look good on the flap. Unfortunately my rolling guide cannot get closer to the foot without hitting it so i don't think i can stitch closer to the edge but I’ll look for a solution. In my mind, without stitches looks more refined but, I get what you are saying about the ‘incomplete’ feel when there are stitches on the gusset and not on the flap. I think getting the stitches a little closer together and closer to the edge may look good. thank for your help, much appreciated.
-
I do glue with the leather bent into shape. I still get bunching. Ironically, I even got deformation of the other shell leather when i straighten the flap open (after the glue has set). I wonder if edge paint would help covering the bunching at the edges of the flap. I normally don’t use use it but I have some Vernis at hand and tried it and it looks really good. Although I dont know if it would help my problem or make it worse. the handstitching the ends is clever: I did not think of that. So, I would just start seeing with the machine and just go forward (leaving long tails at start and end of the line) and then do the backstitching saddle stitching? Sounds great. I’ll try it thanks. Would you have any tips on getting the first and last stitch with the machine at the same distance from the edge of the leather (the top edge, not the sides, for that i use - guide). getting the first stitch where I want it is easier but the last one it really depends on coincidence based on how many stitches and how far apart. Is there a trick to get the last stitch exactly where you want it? thank you.
-
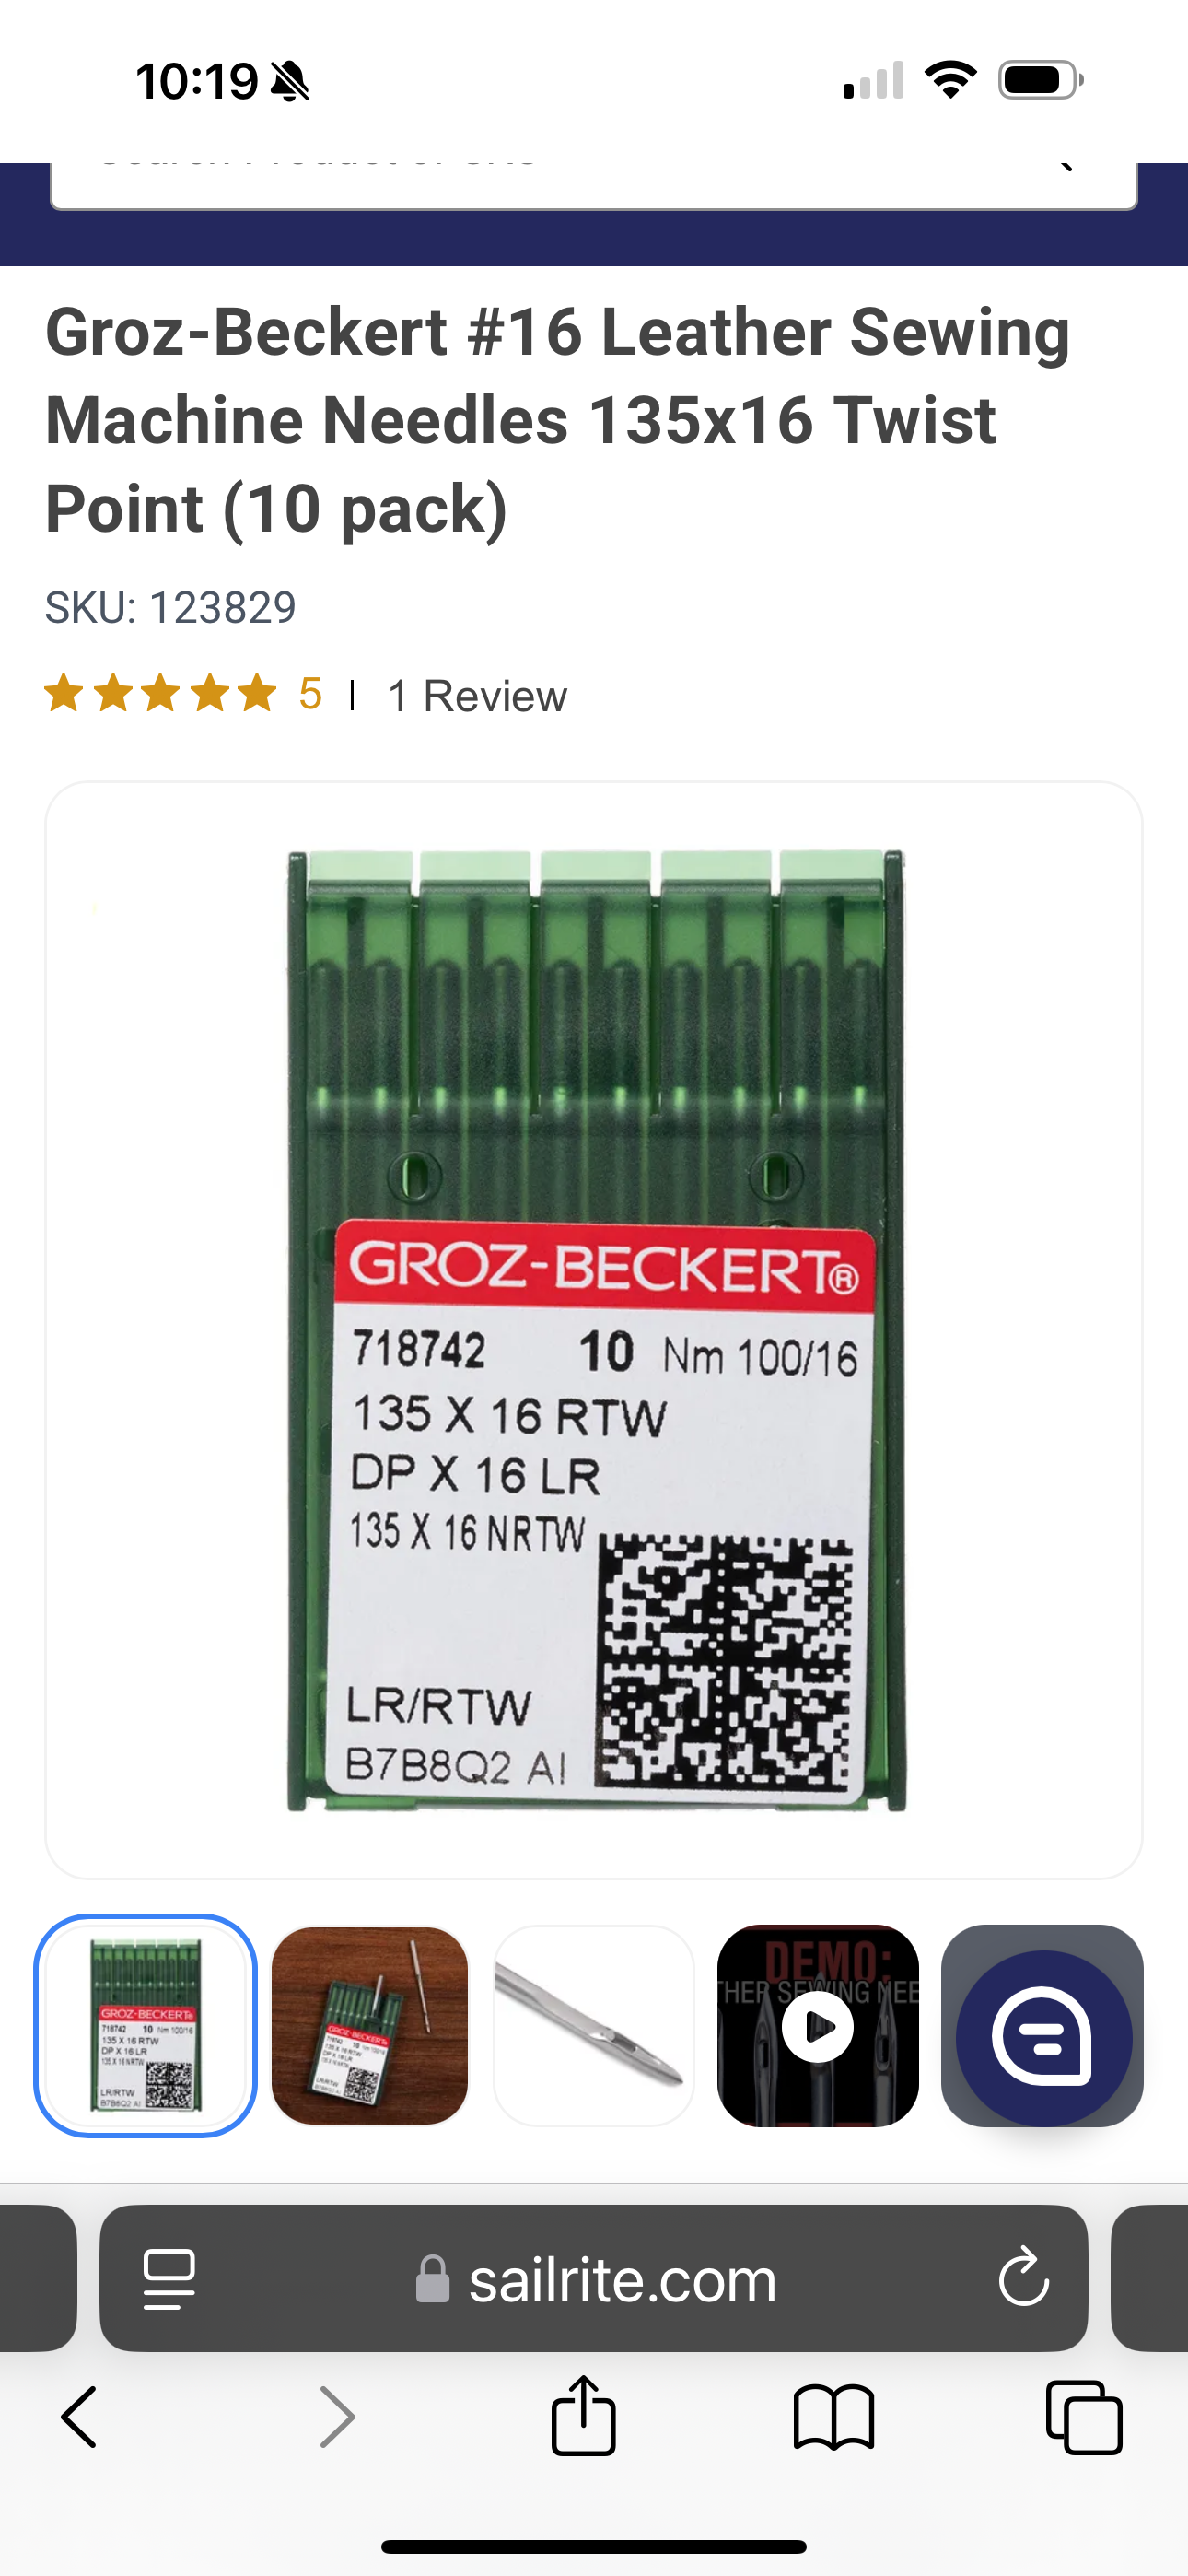
I ve found this at Sailrite.
-
Hey Kgg, Thank you so much for the info. I remember reading the needle sizes somewhere on the Artisan website and was searching through the manual etc but missed it right in front of me on the first page. Thank you for that. Now I just need to find the right needle. I am gonna look for 135x16 size #16 leather point, right? Thank you. i have used Vinymo for a long time for saddle stitching and it is my favorite. I was pleasantly surprised when I read it could be used for machine stitching because I know it is very strong as reliable. Thank you for your help.
-
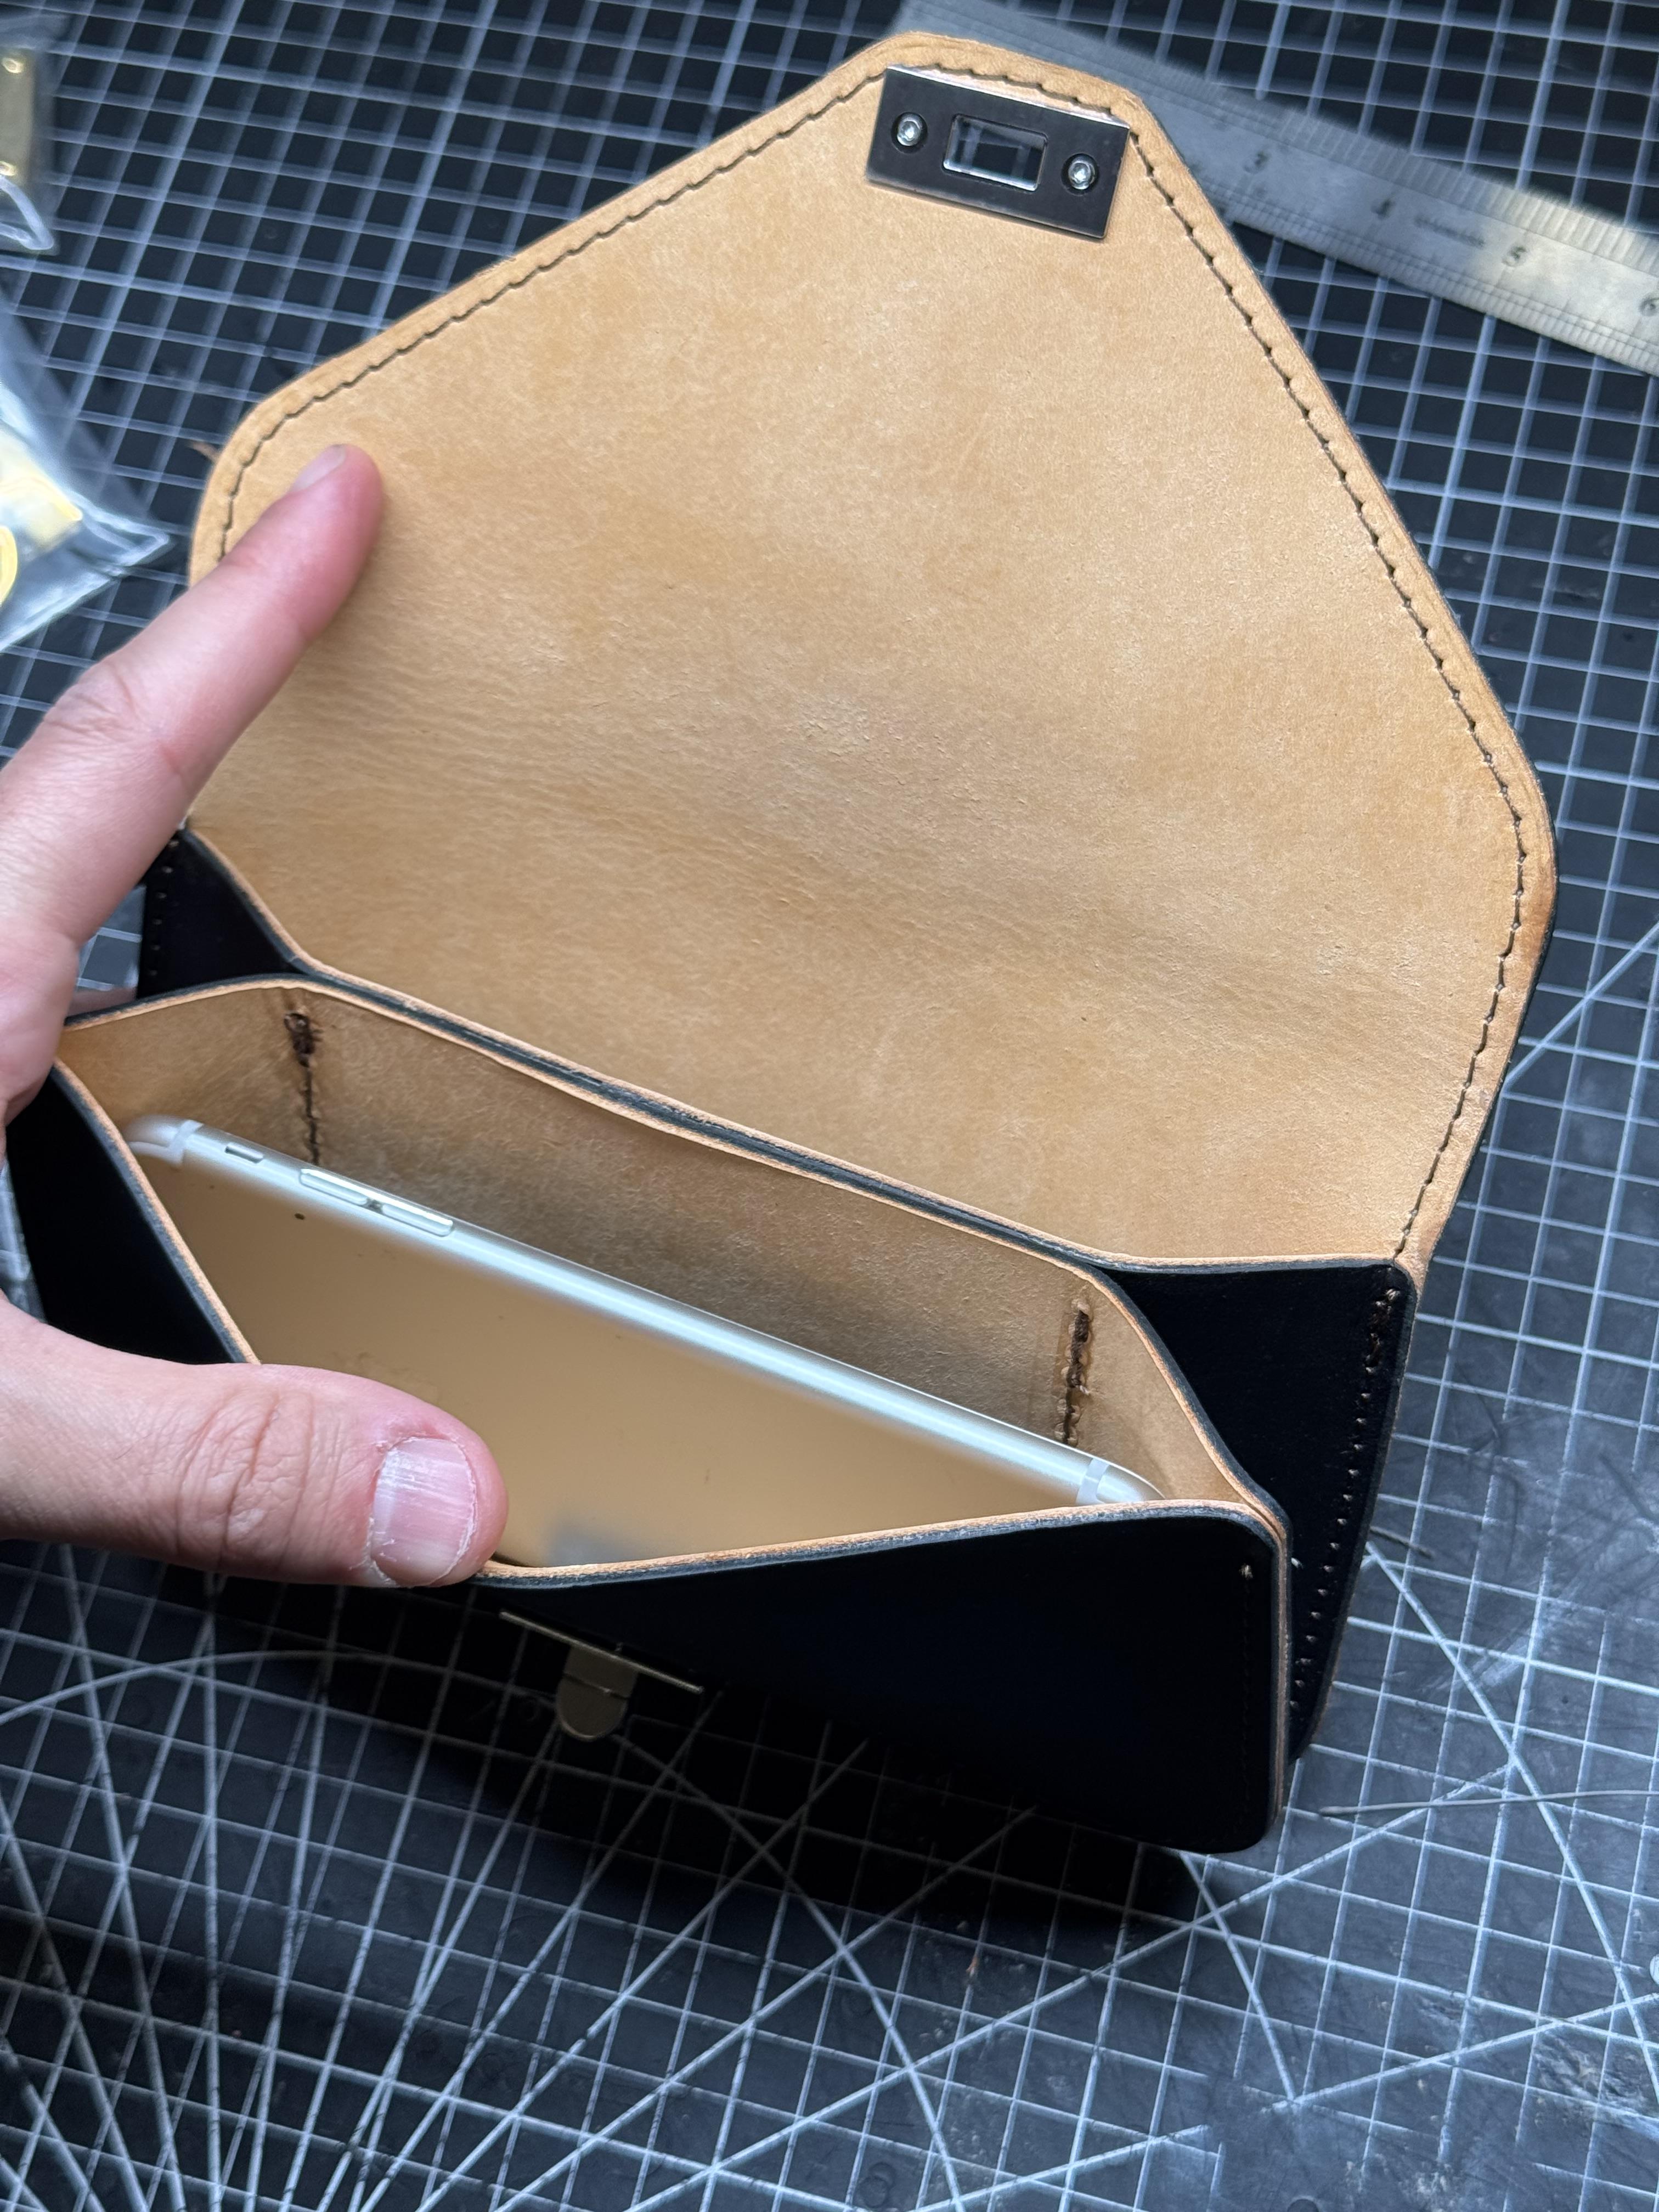
Hi, I m having troubles with 2 things. 1) Bunching of liner. The liner is .9 mm and that is the thinnest ai can get. There is a place in Italy that can do 0.6mm - 0.7 mm but I don't have any at the moment so. I want to avoid bunching of the liner where the clutch’s flap folds. I read that stitching the sides helps but it does not seem true and, I would rather avoid stitching the flap for a cosmetic reason. I am using a water based contact cement called 1618b I think. I tested it against Barge Contact Cement and it holds pretty closely to it considering that it is water based. As for longevity of the bond I cannot attest to. My point is that the adhesive should not be the issue. Anyone knows how this can be fixed? 2) Back Stitching. I can’t seem to do it right. I wait until the needle is coming back up from the leather (Artisan 246) and I stop, press down the reverse lever, and then continue. I often miss the previous holes but I understand that is just lack of skills. However, when I do get the holes, the thread either gets bunched up on the bottom stitch side or it fails to make the knot. Anyone can suggest a solution for this? Thank you in advance.
-
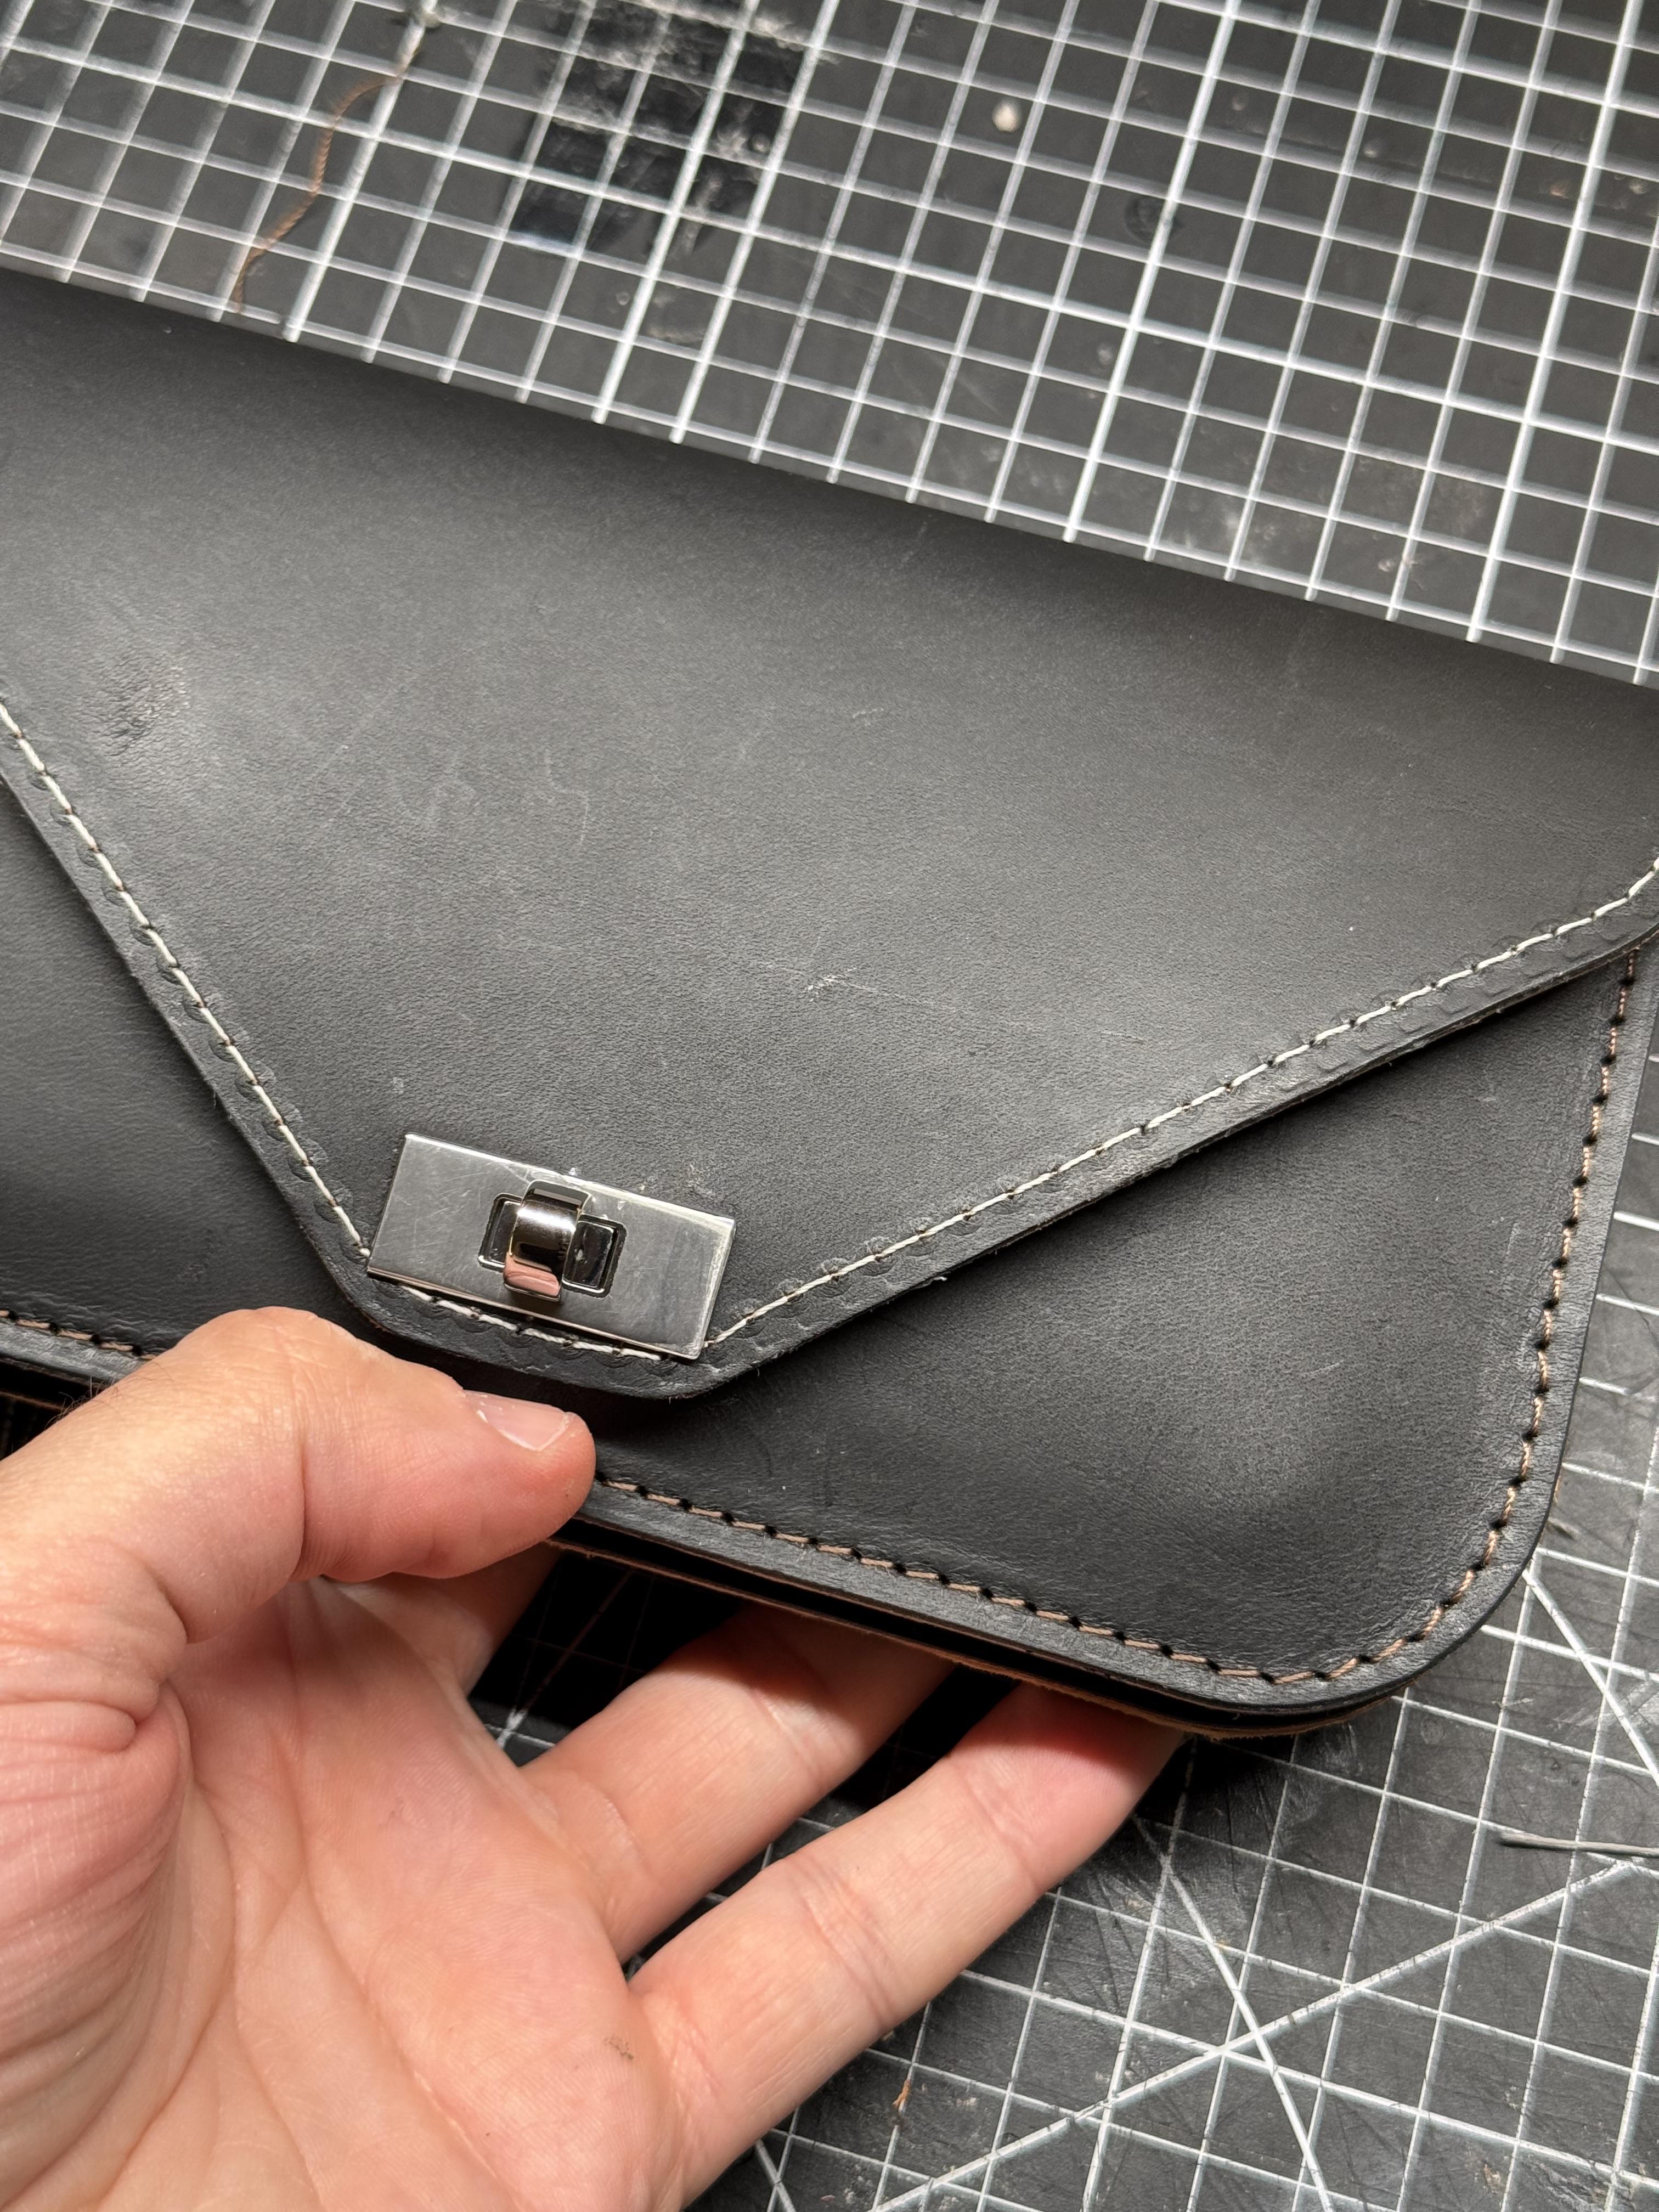
Hi Alzilla, I did not end up cutting the table shorter: I got lazy and decided to use the extra room to mount the bobbin winder. The wooden triangle under the machine is just there because that is where I keep it: not functional for the machine balance or anything. The wooden triangle is to glue the lining to the shell of wallets and clutches at an angle to reduce the bunching of the liner. I have not burnished the clutch on purpose as it is one of my last tests before I start selling them on my site. I meed to fiddle with the foot pressure to avoid marks, and figure out how to back stitch. I am having 2 issues (I might as well ask since someone here may know the solution): 1) Bunching of liner. The liner is .9 mm and that is the thinnest ai can get. There is a place in Italy that can do 0.6mm - 0.7 mm but I don't have any at the moment so. I want to avoid bunching of the liner where the clutch’s flap folds. I read that stitching the sides helps but it does not seem true and, I would rather avoid stitching the flap for a cosmetic reason. I am using a water based contact cement called 1618b I think. I tested it against Barge Contact Cement and it holds pretty closely to it considering that it is water based. As for longevity of the bond I cannot attest to. My point is that the adhesive should not be the issue. Anyone knows how this can be fixed? 2) Back Stitching. I can’t seem to do it right. I wait until the needle is coming back up from the leather and I stop, press down the reverse lever, and then continue. I often miss the previous holes but i understand that is just lack of skills. However, when I do get the holes, the thread either gets bunched up on the bottom stitch side or it misses to make the knot. Anyone can suggest a solution for this? Thank you.
-
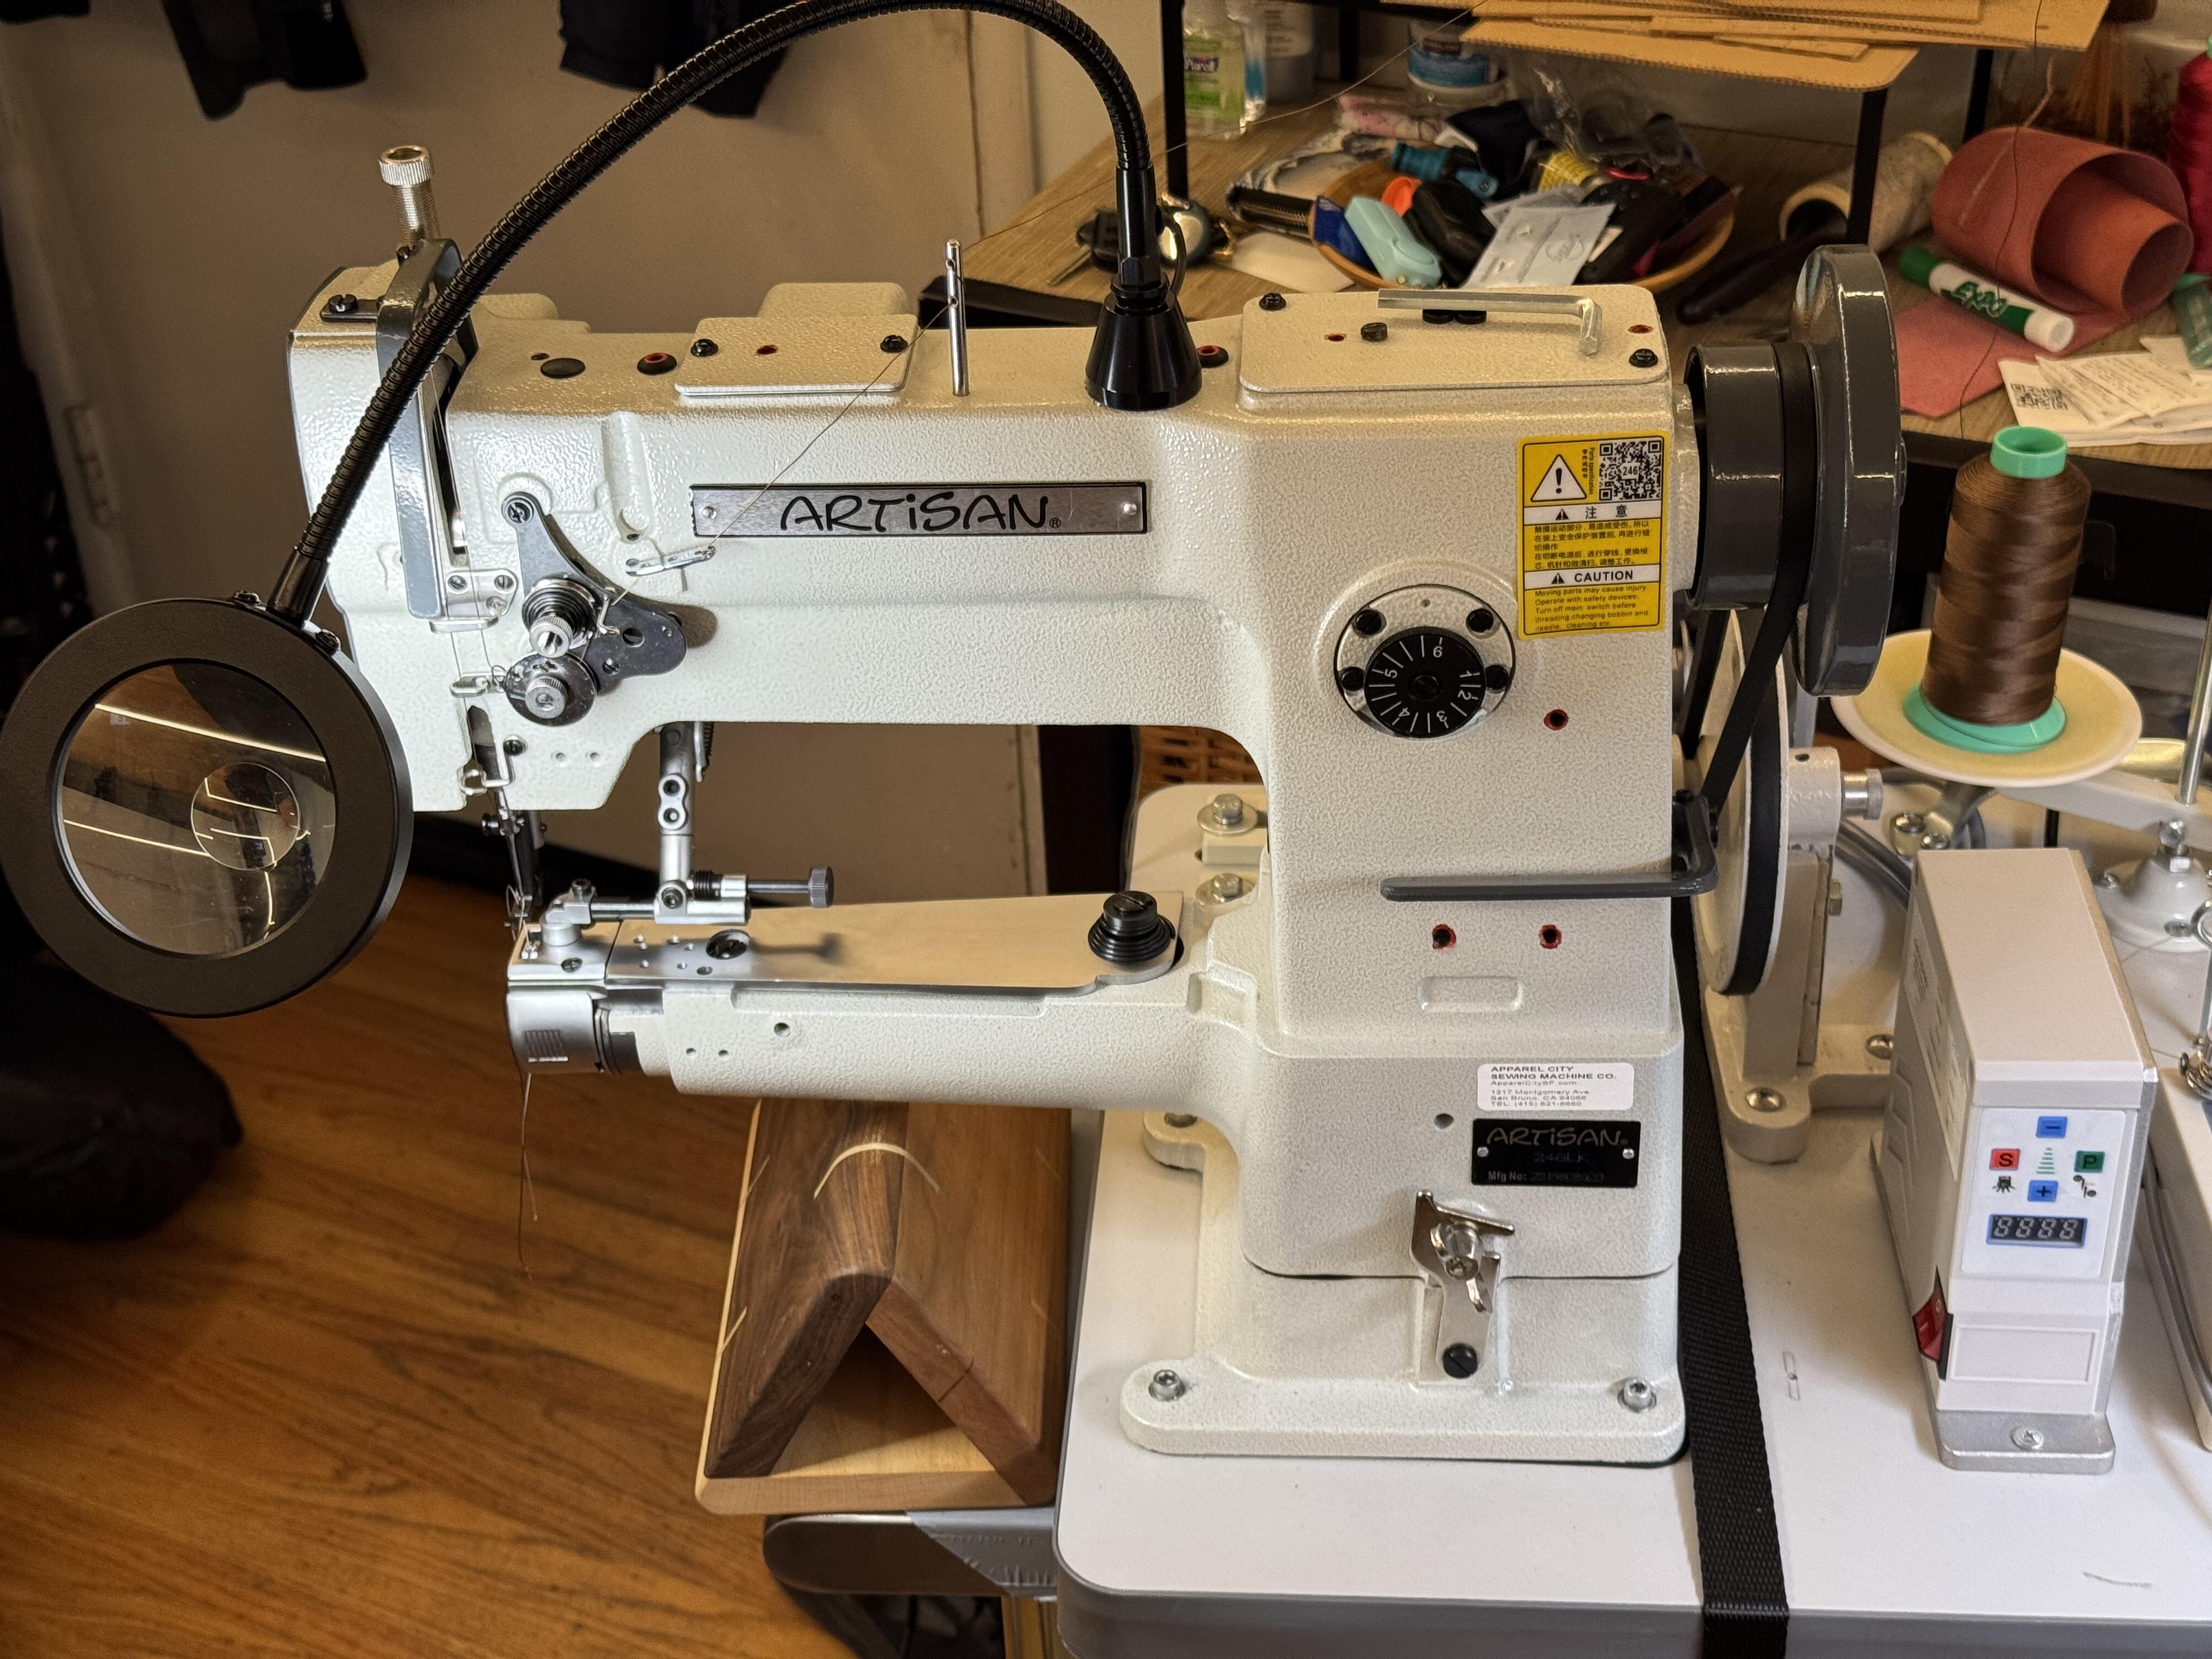
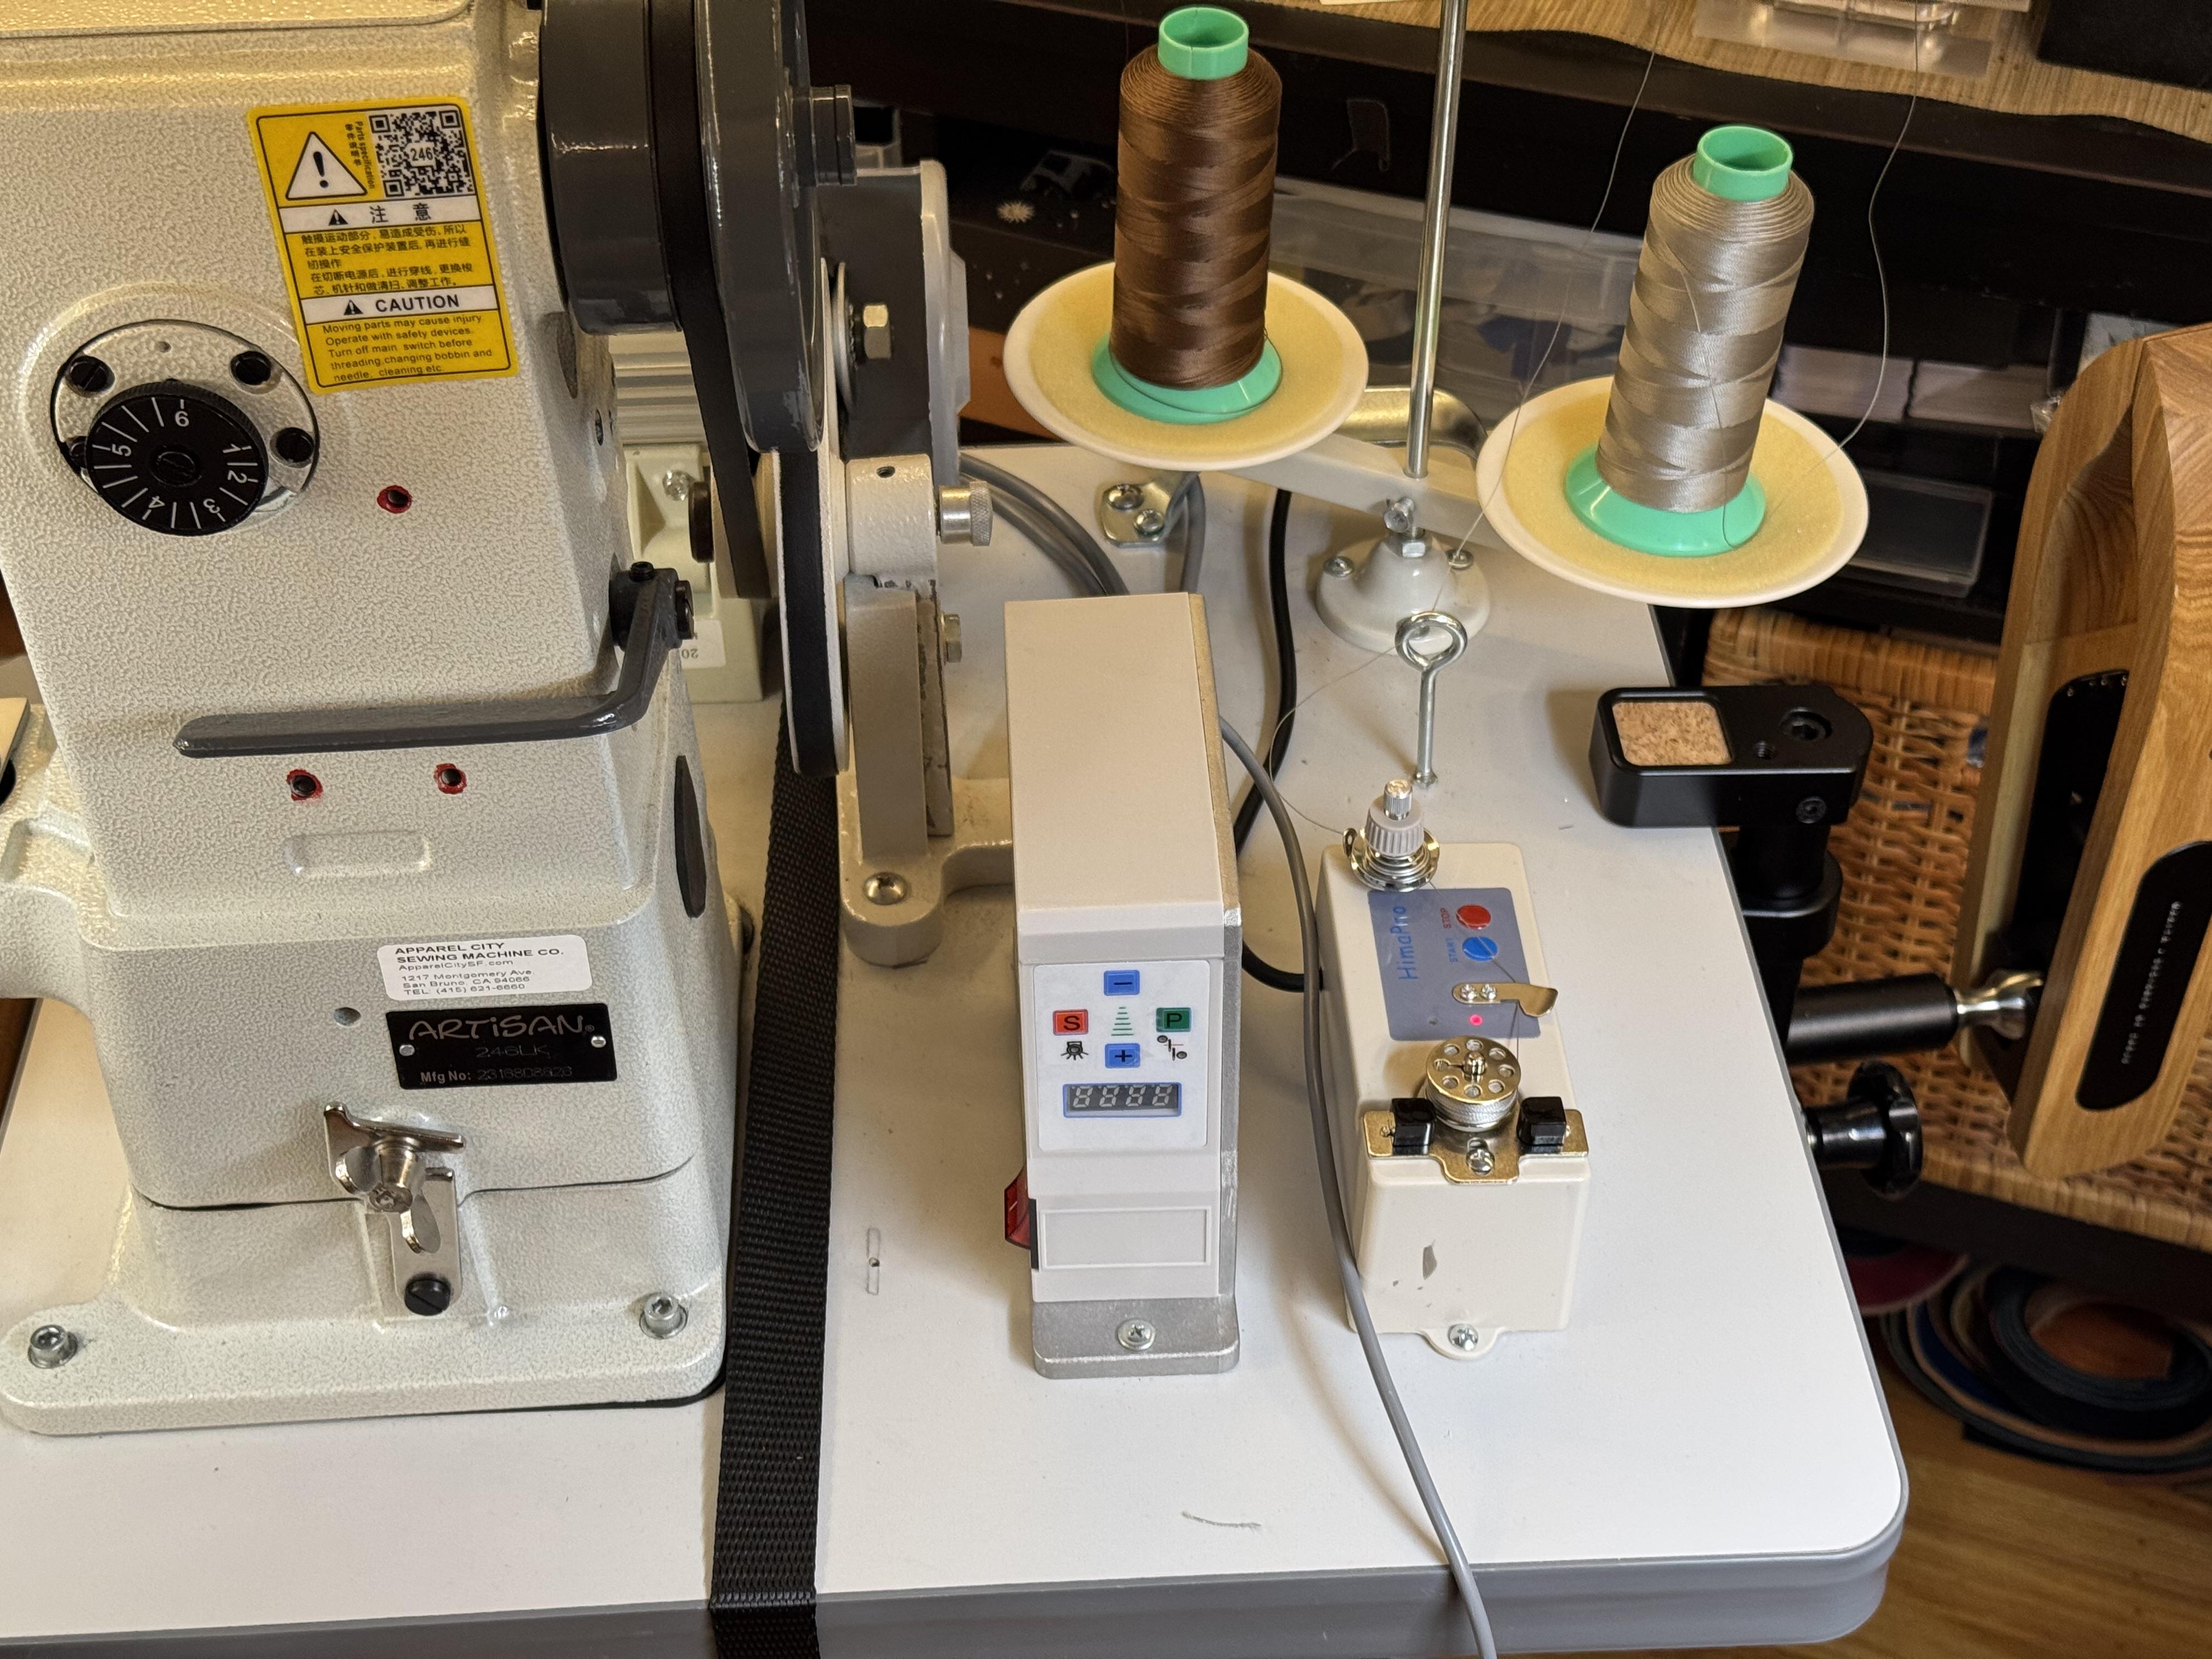
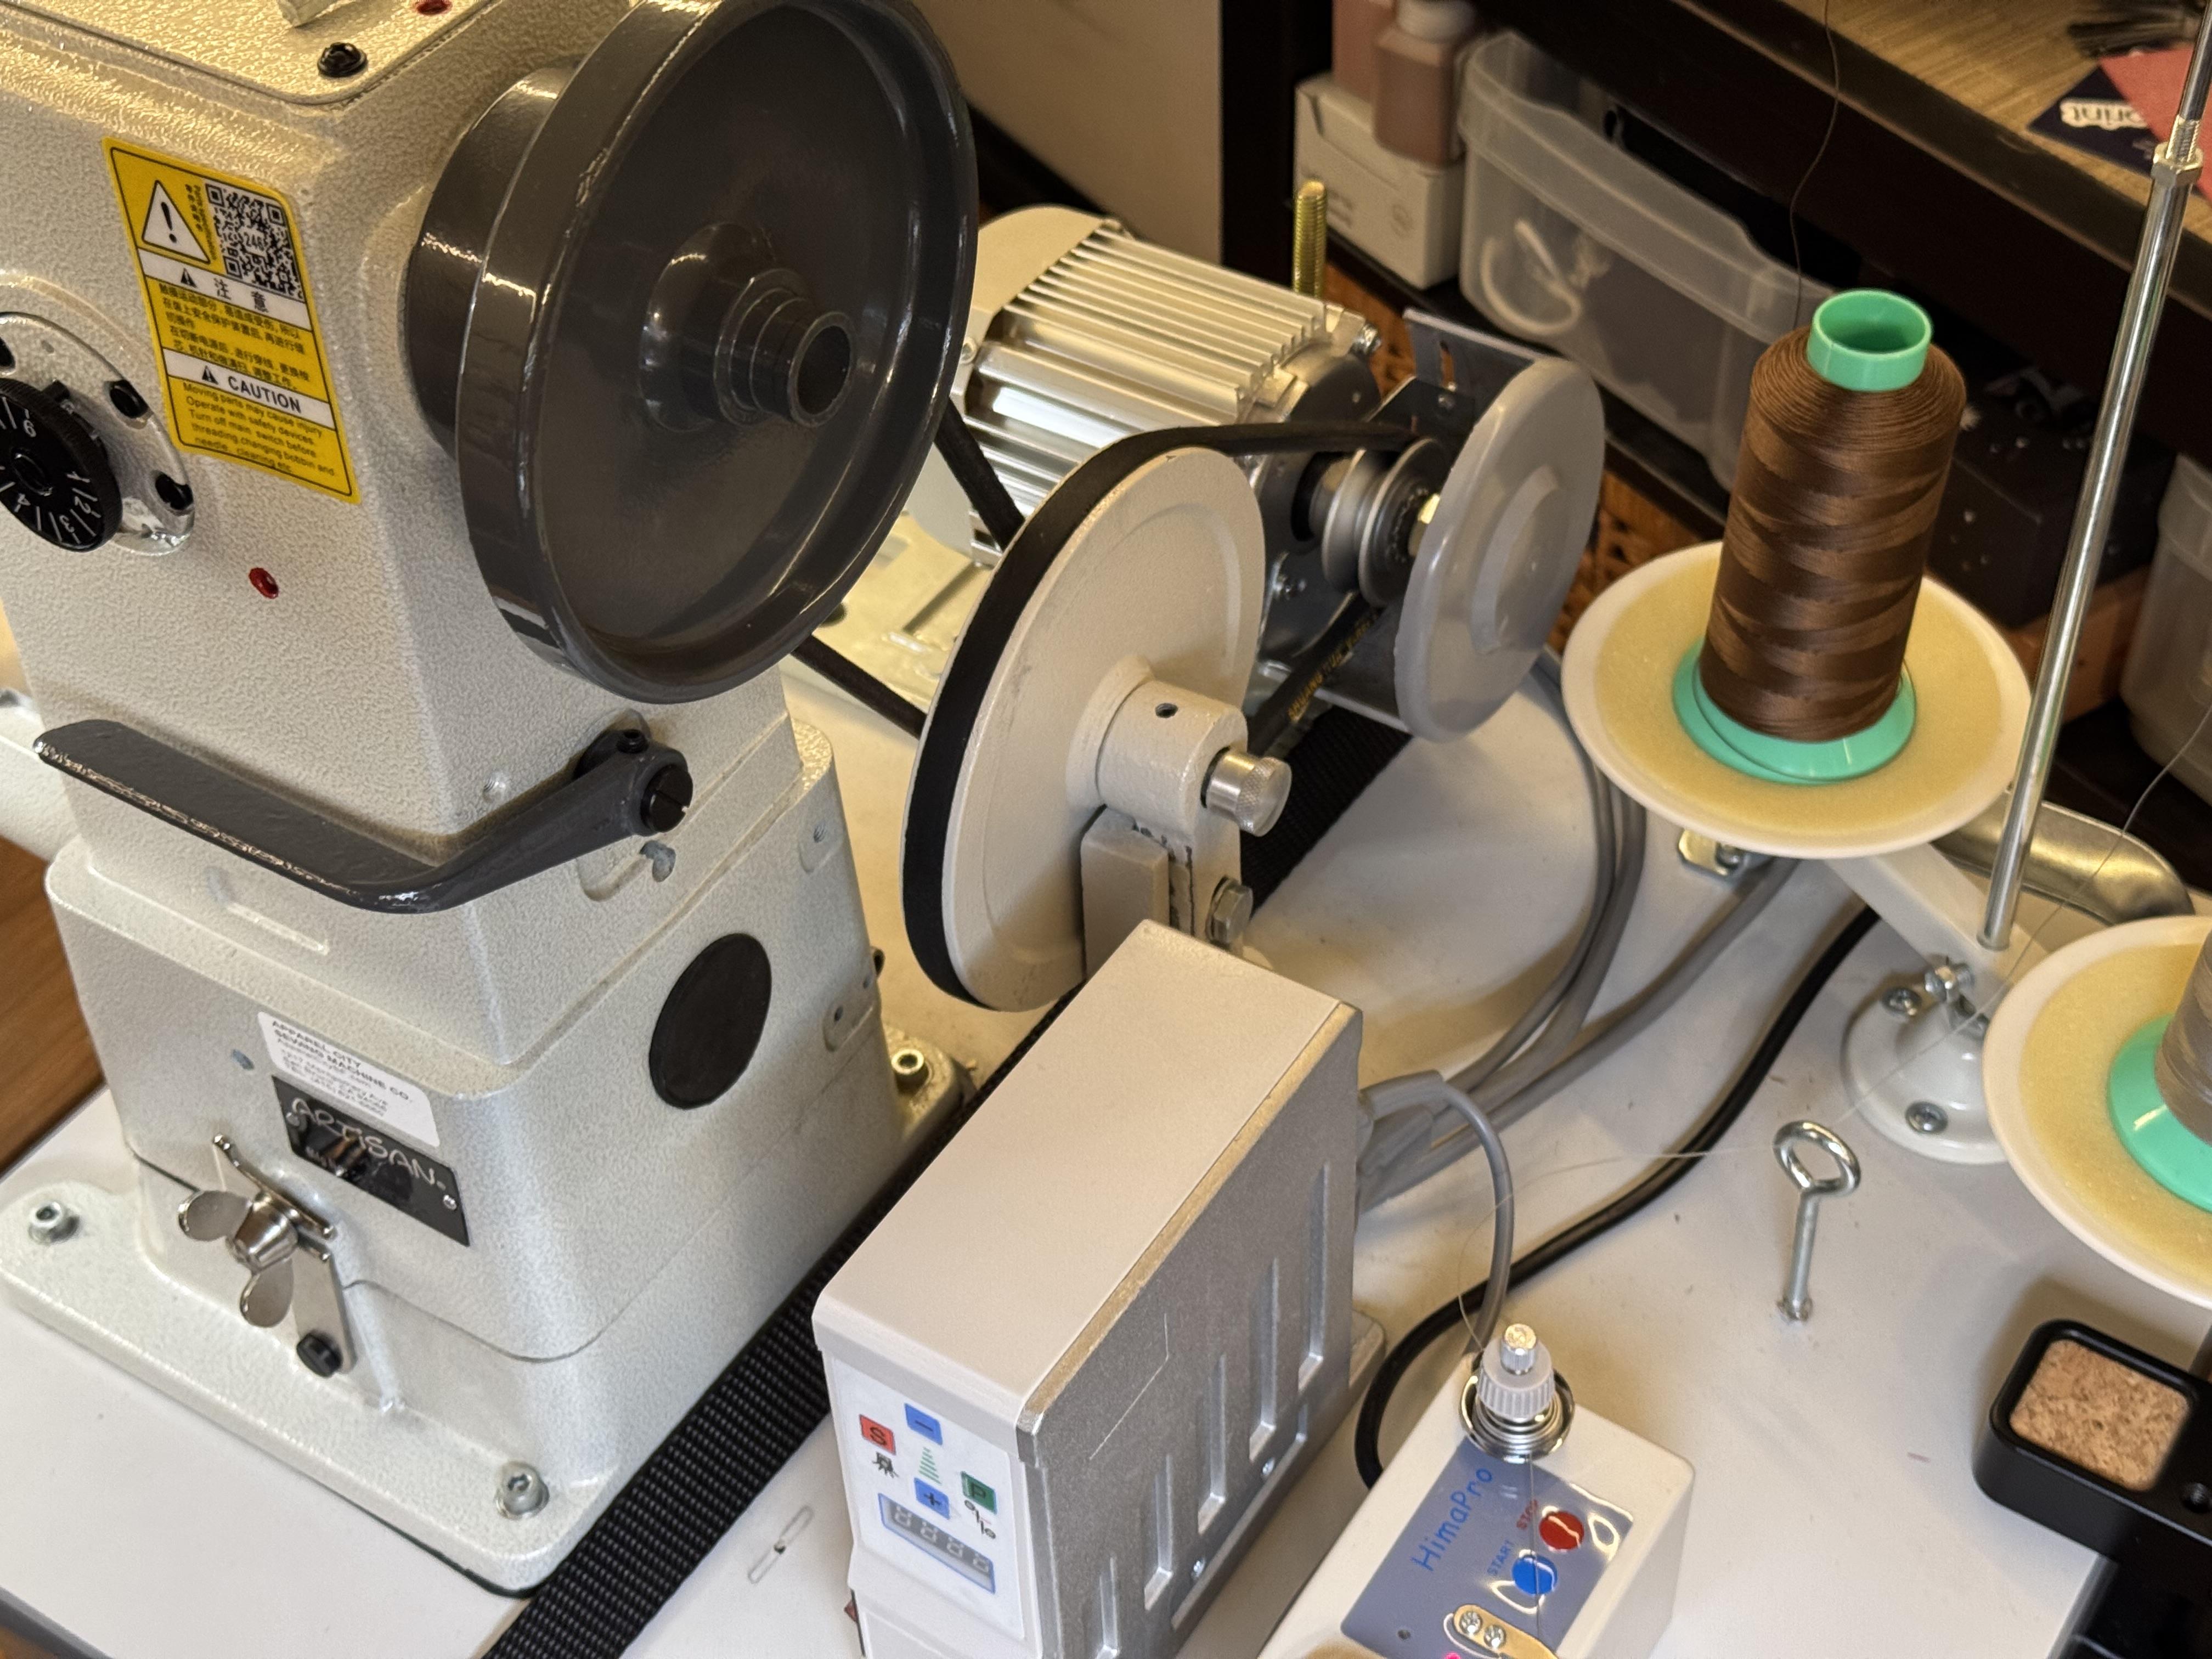
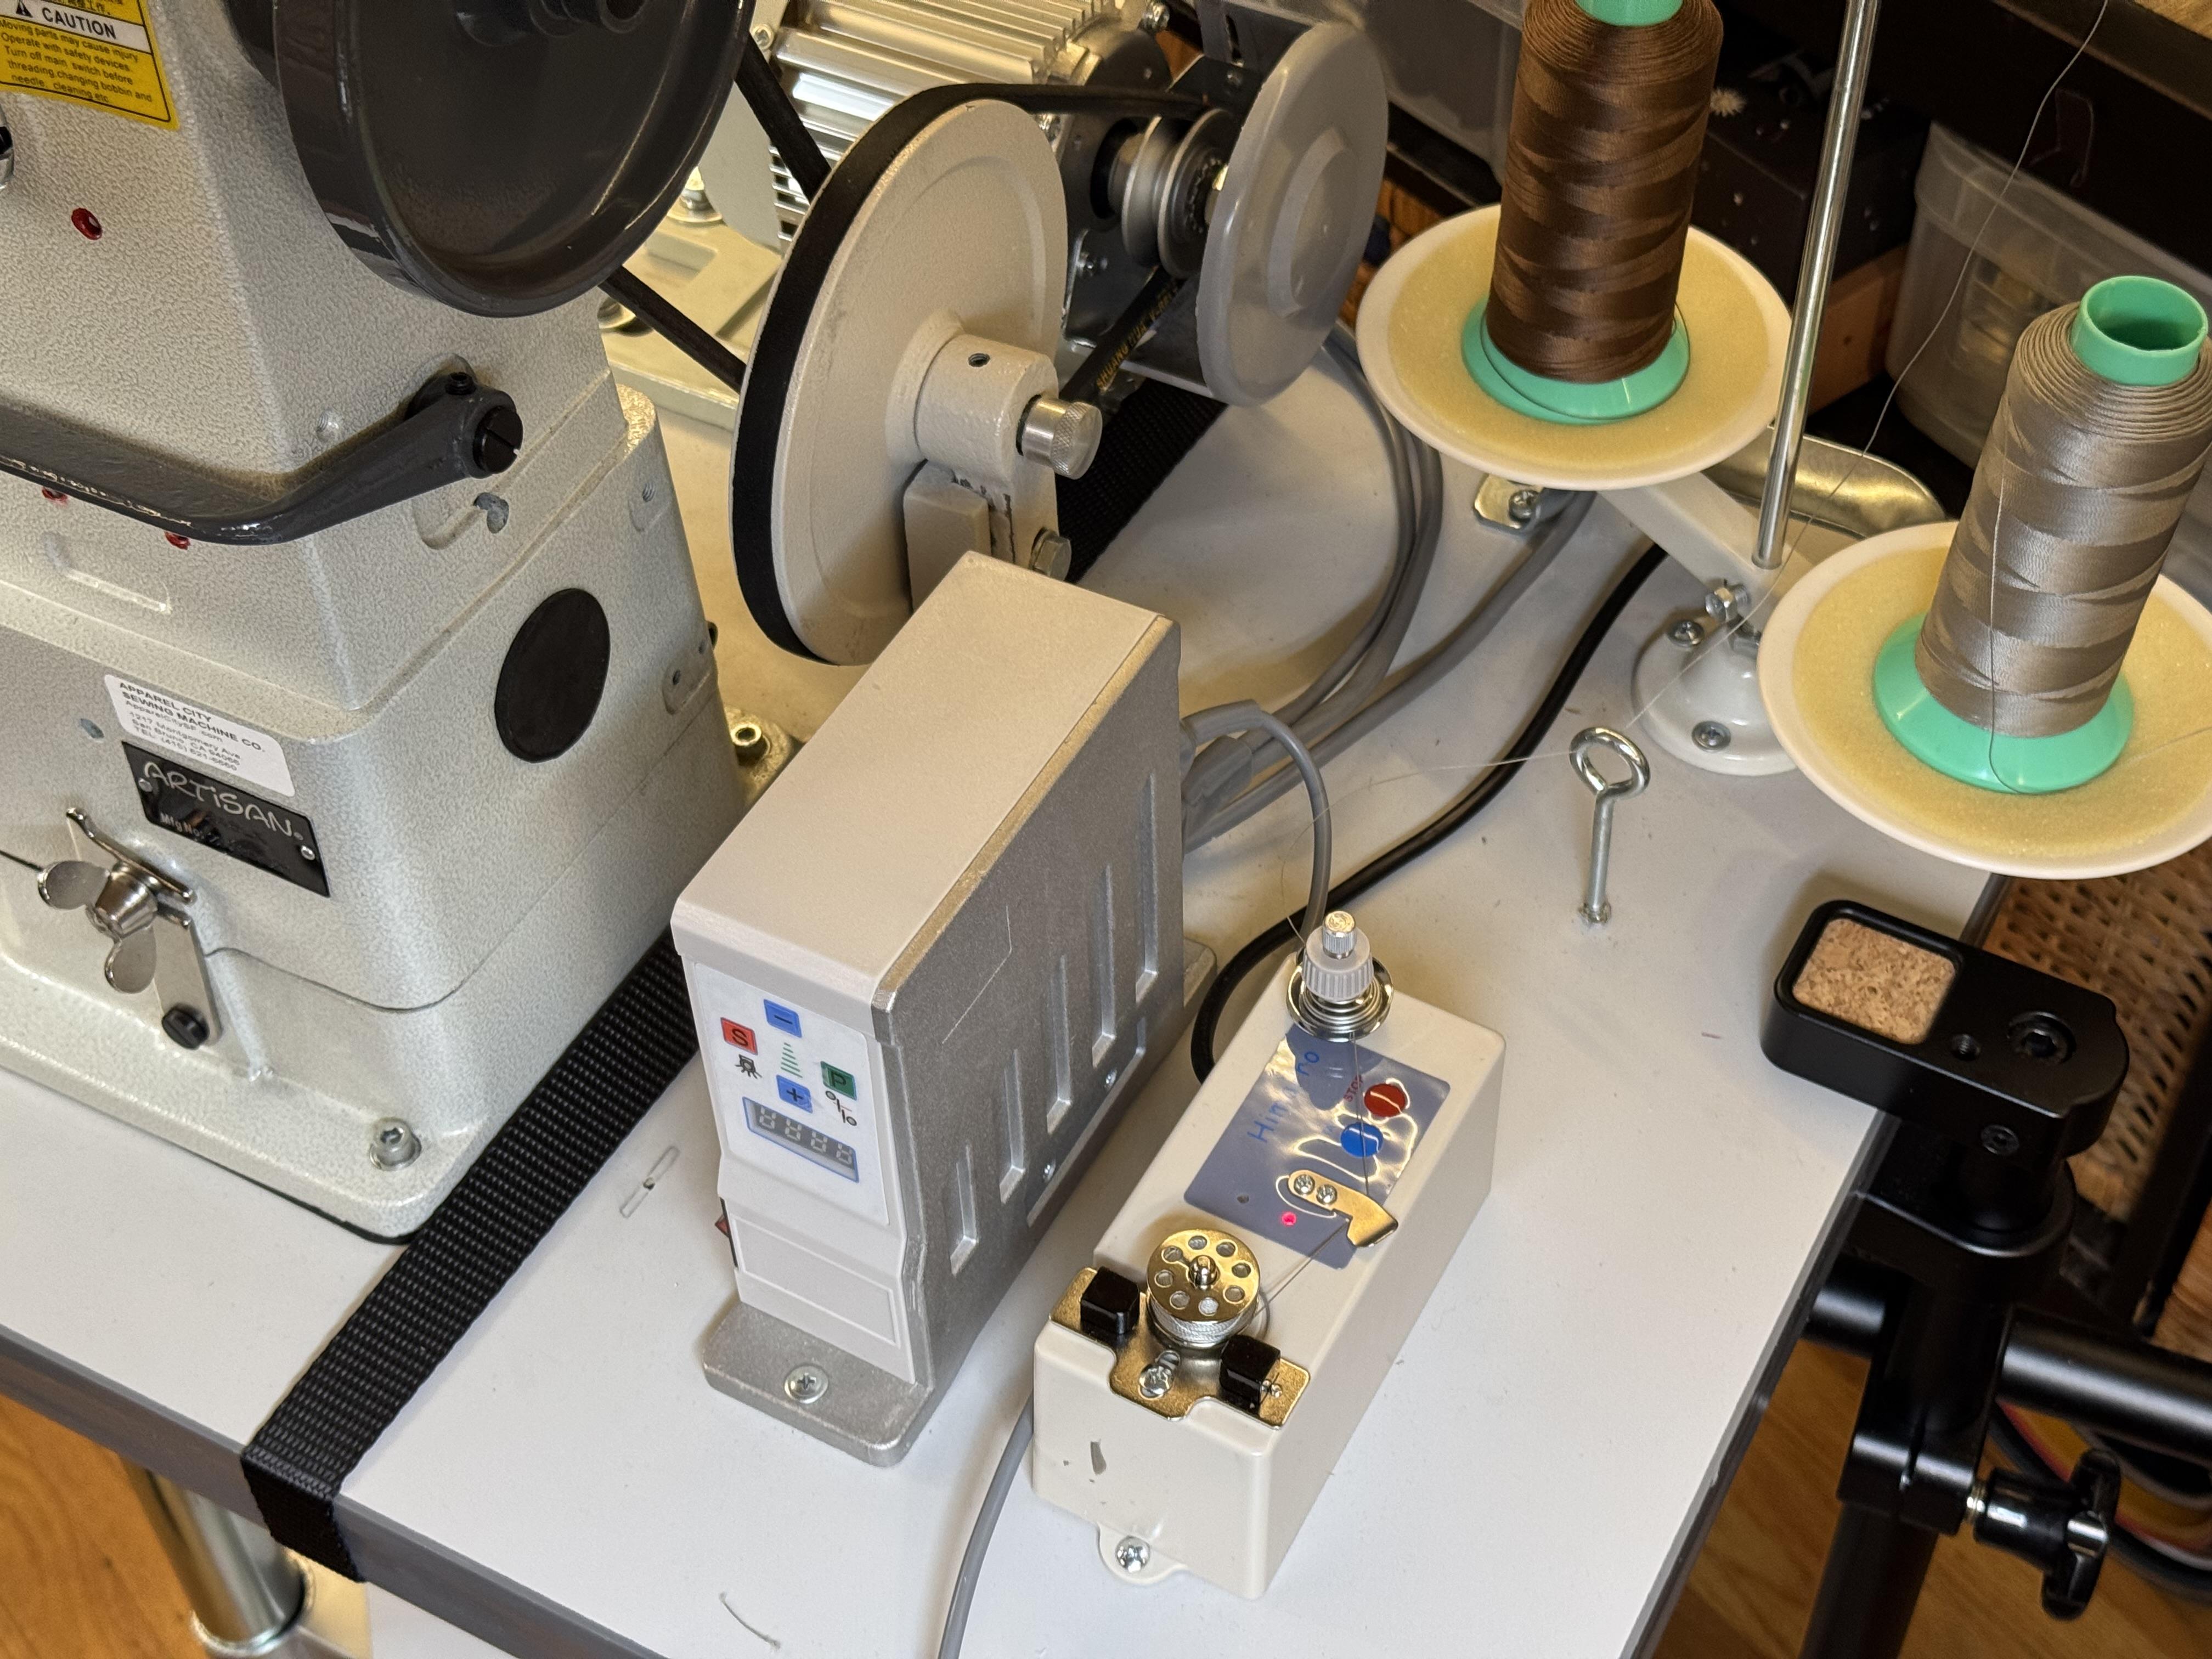
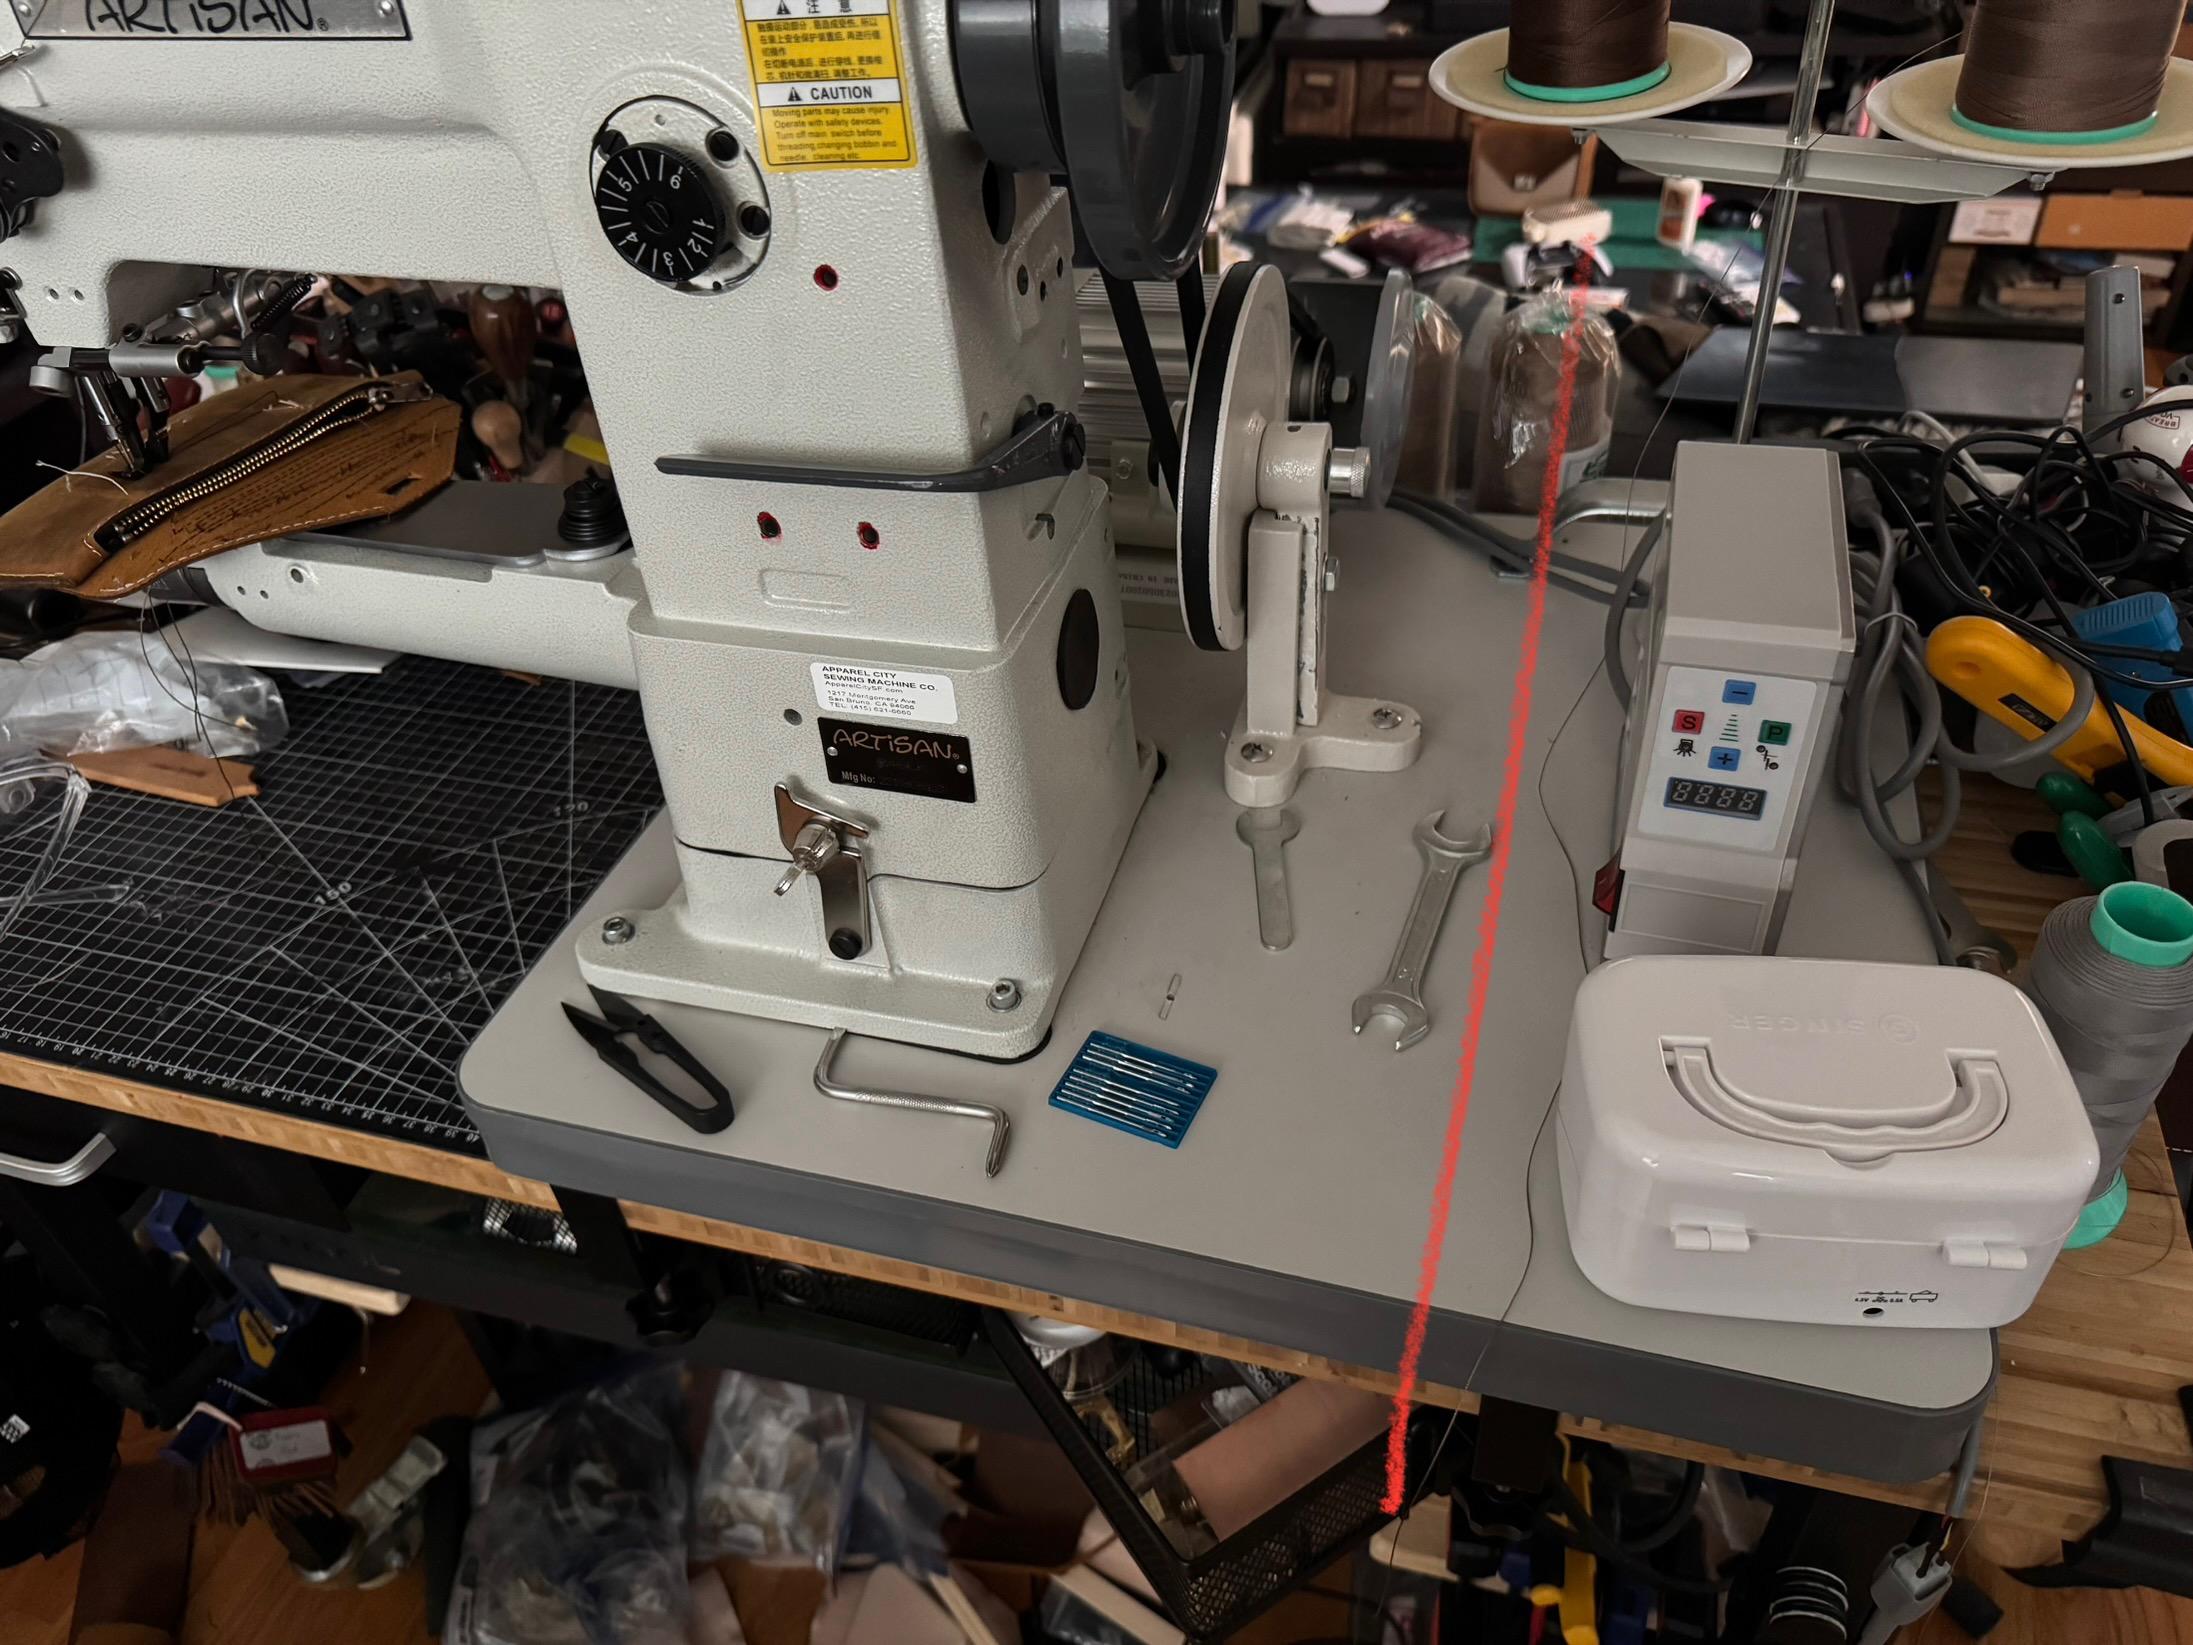
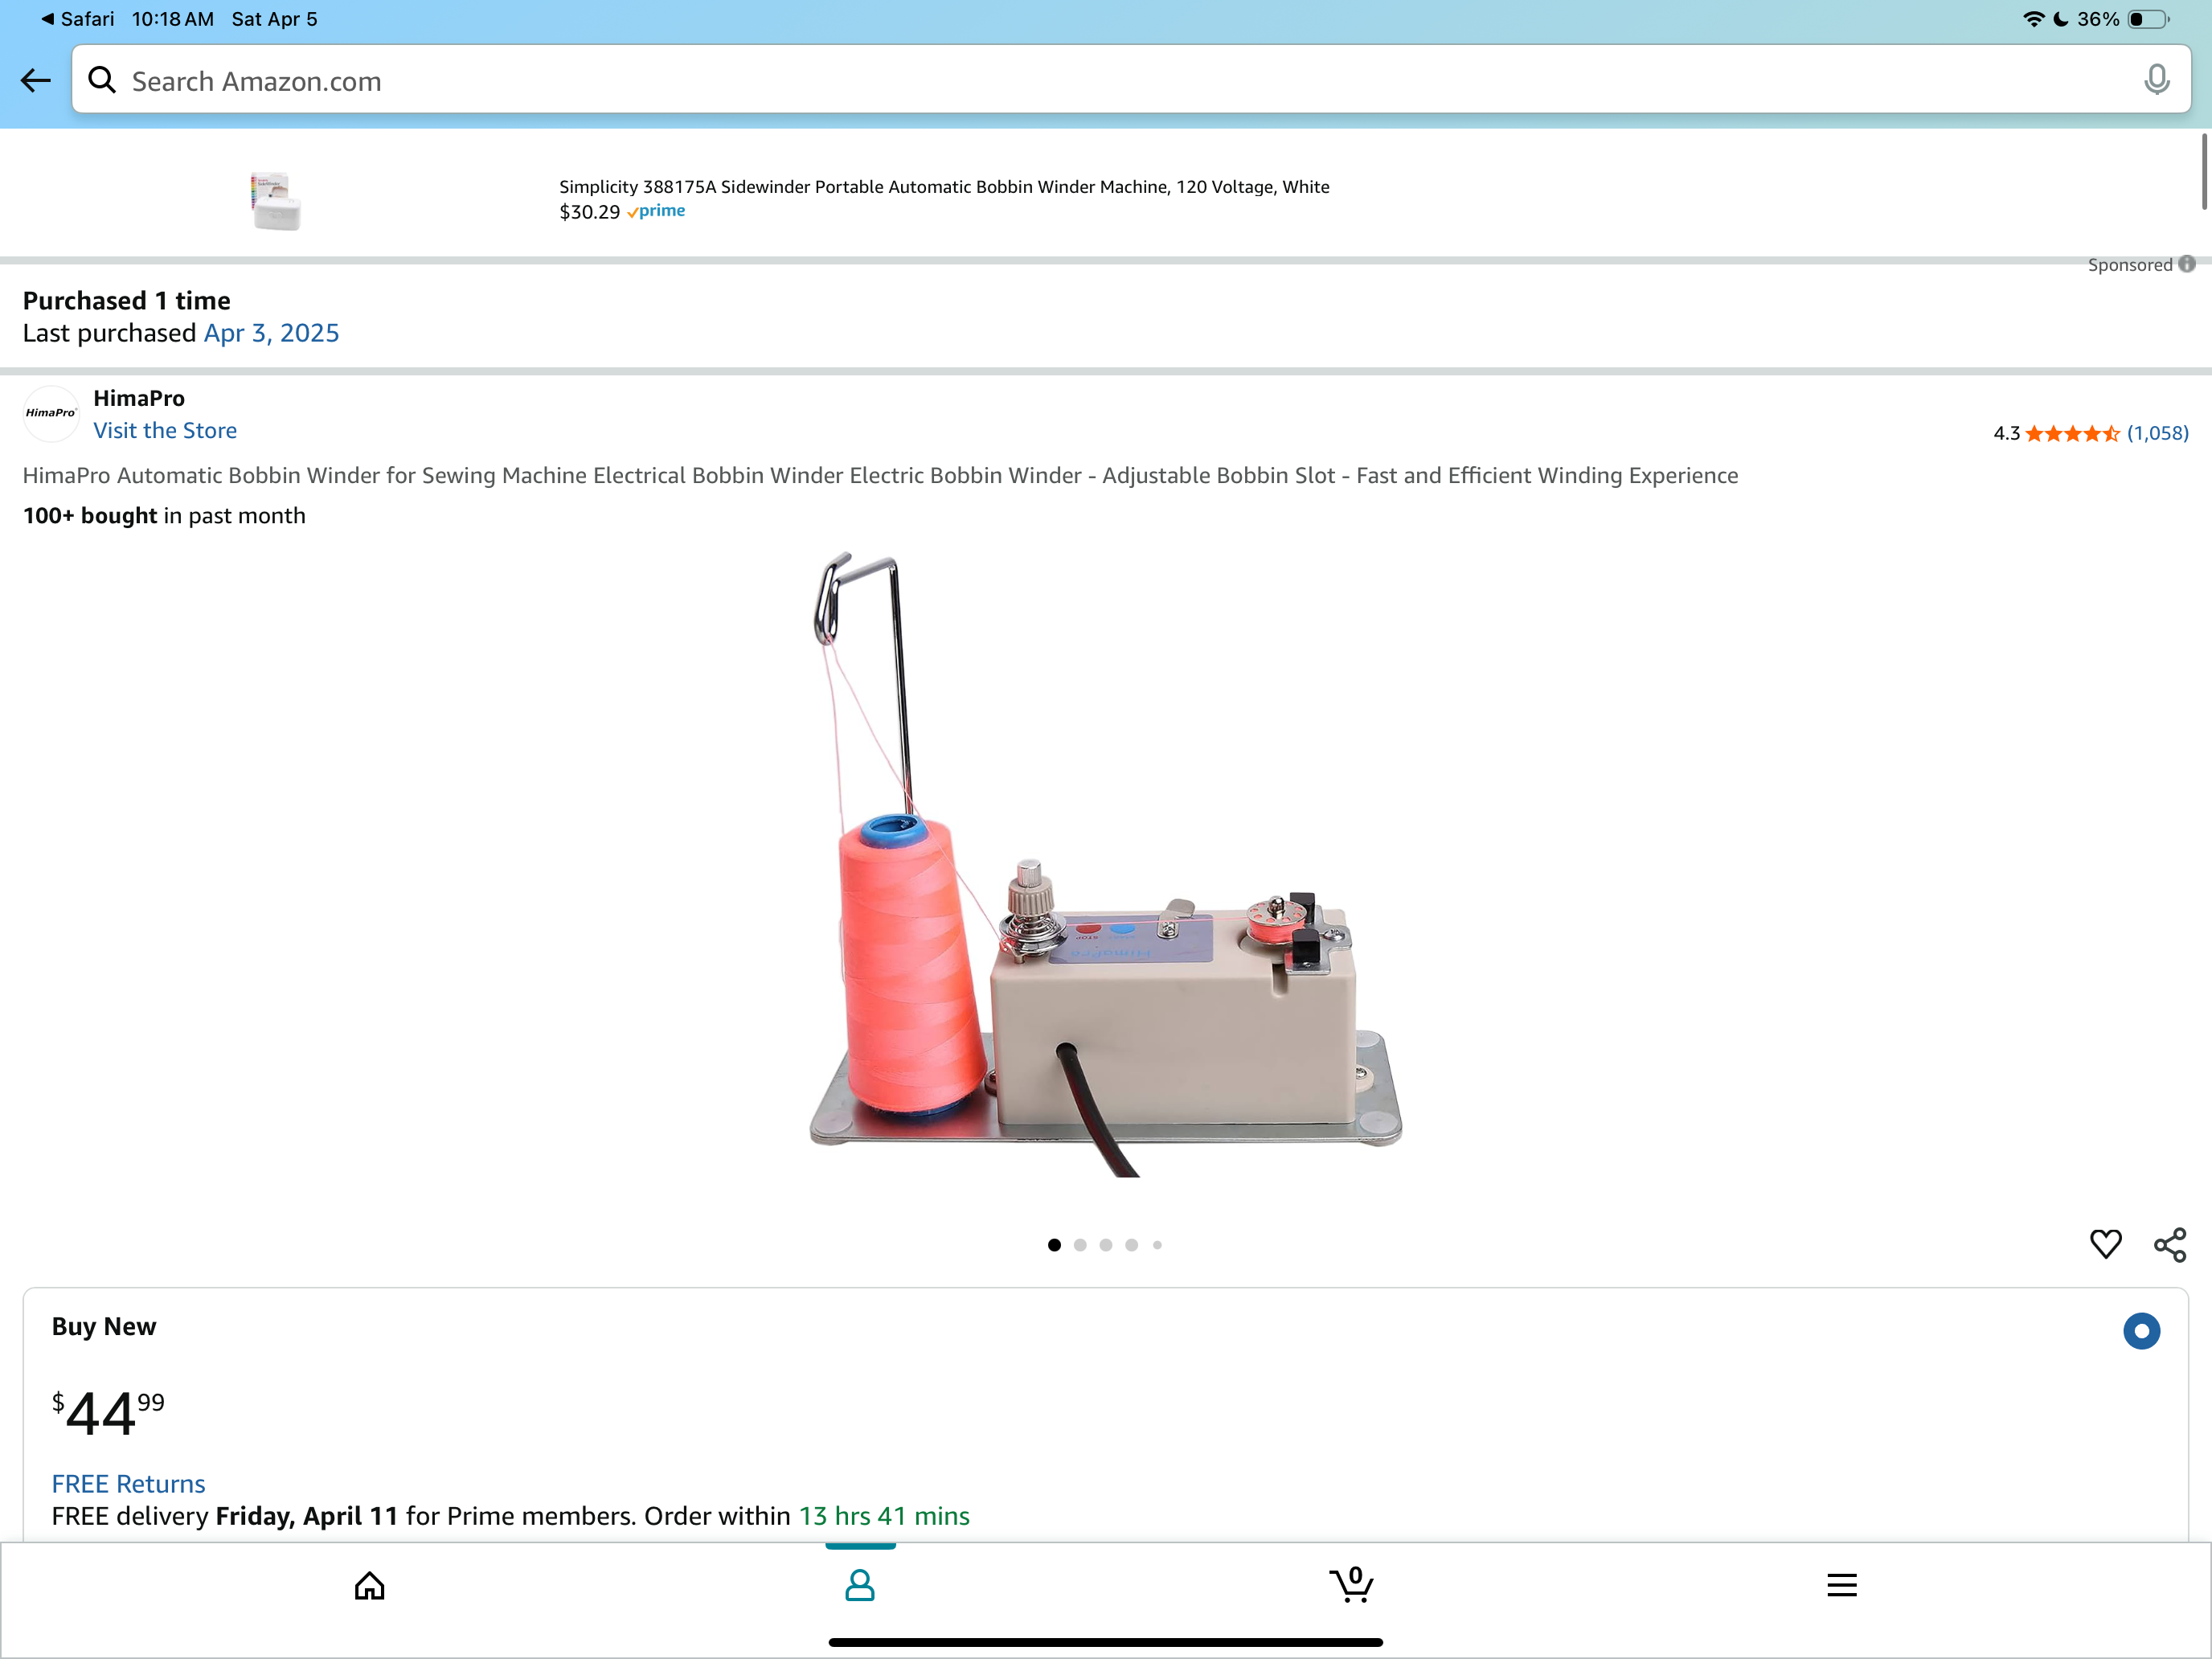
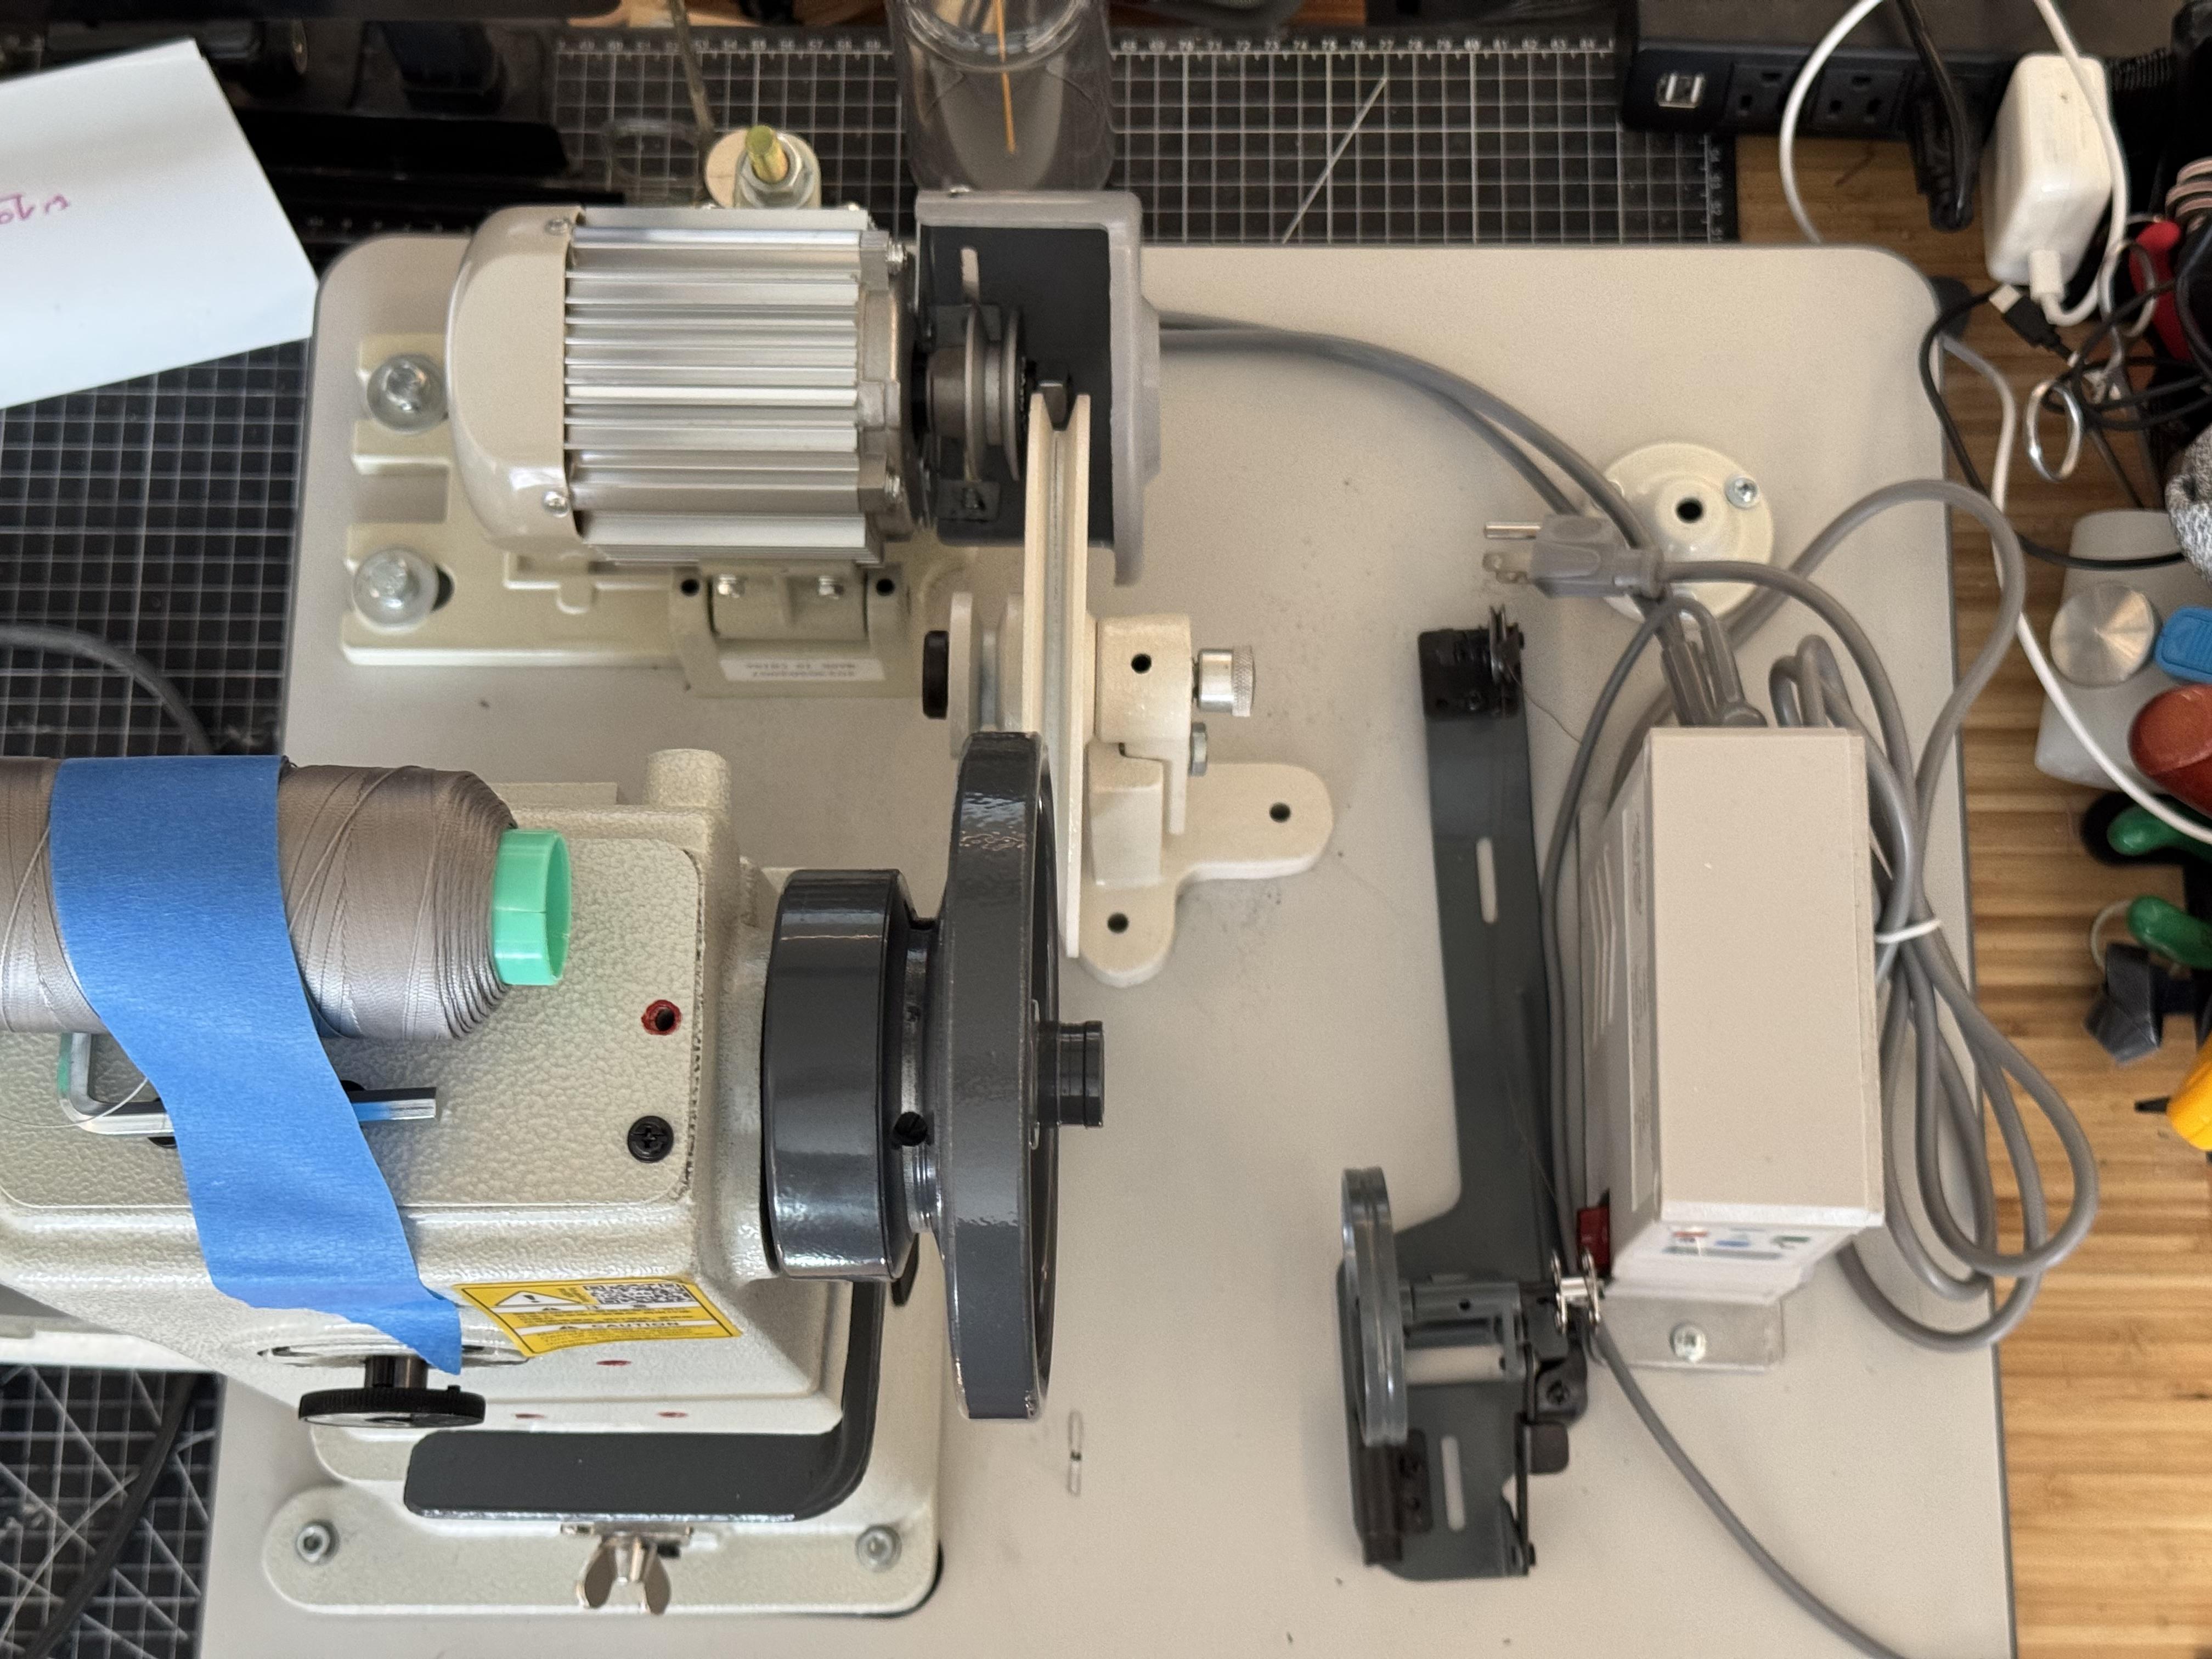
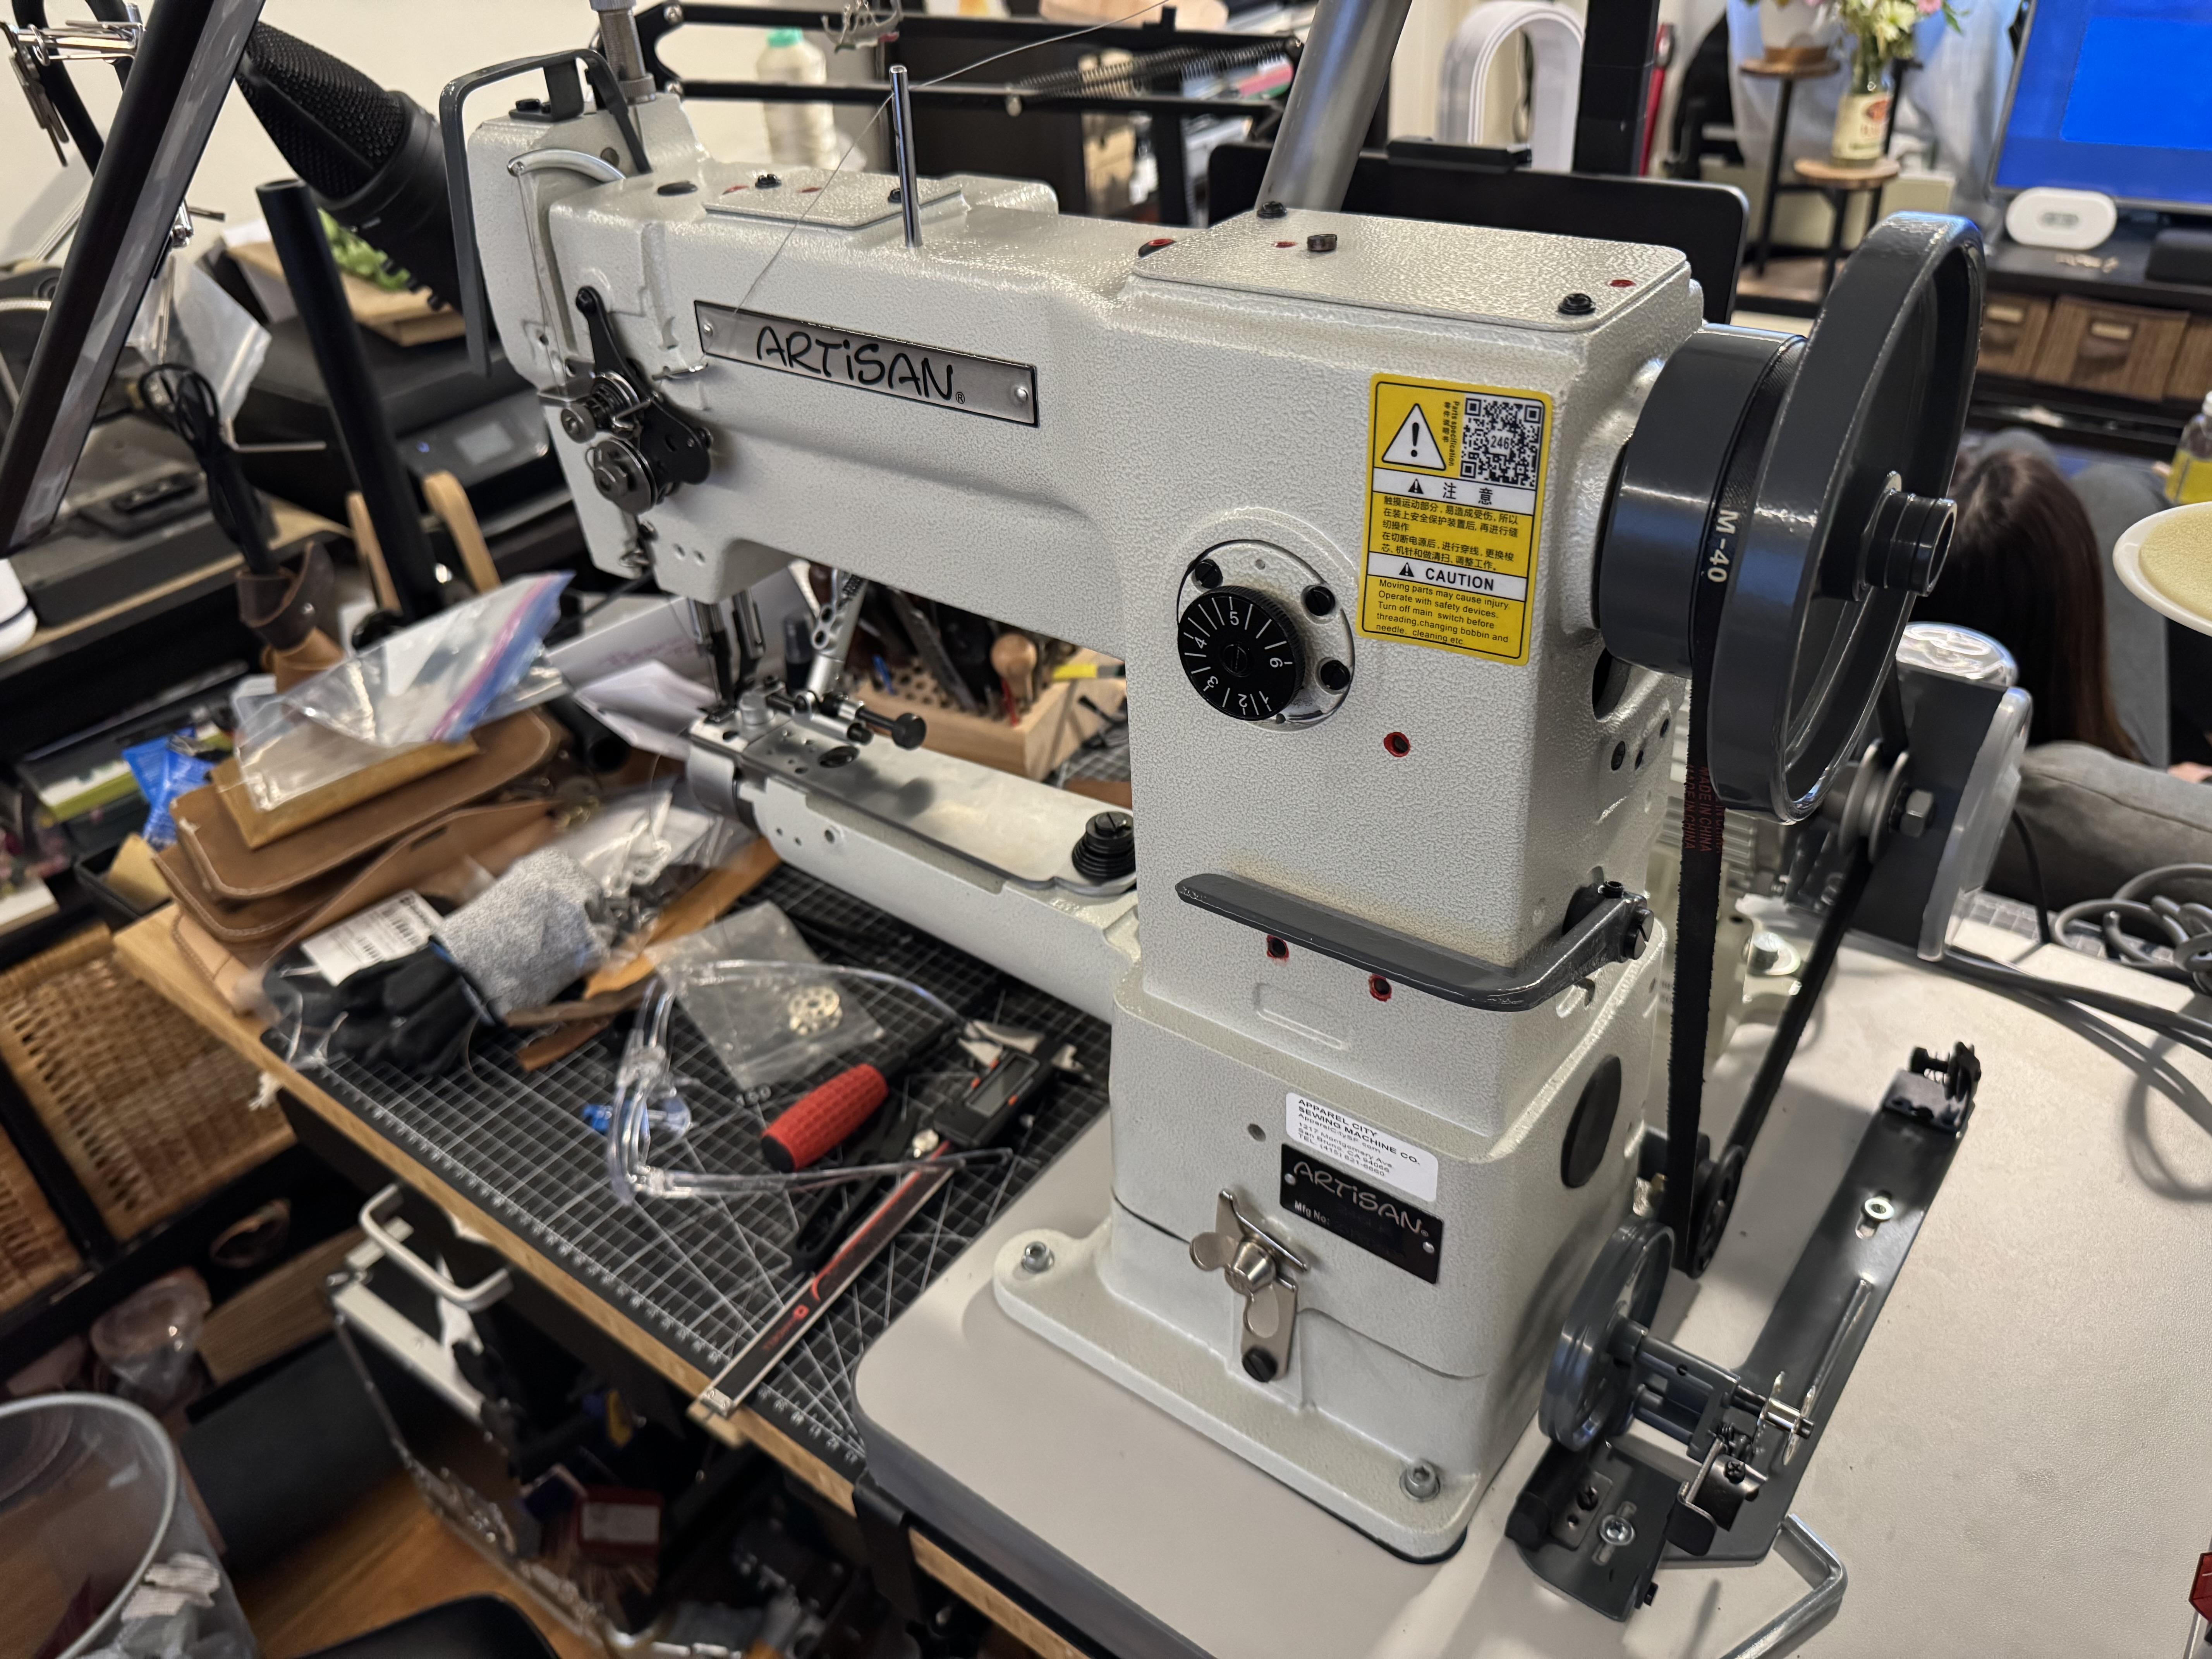
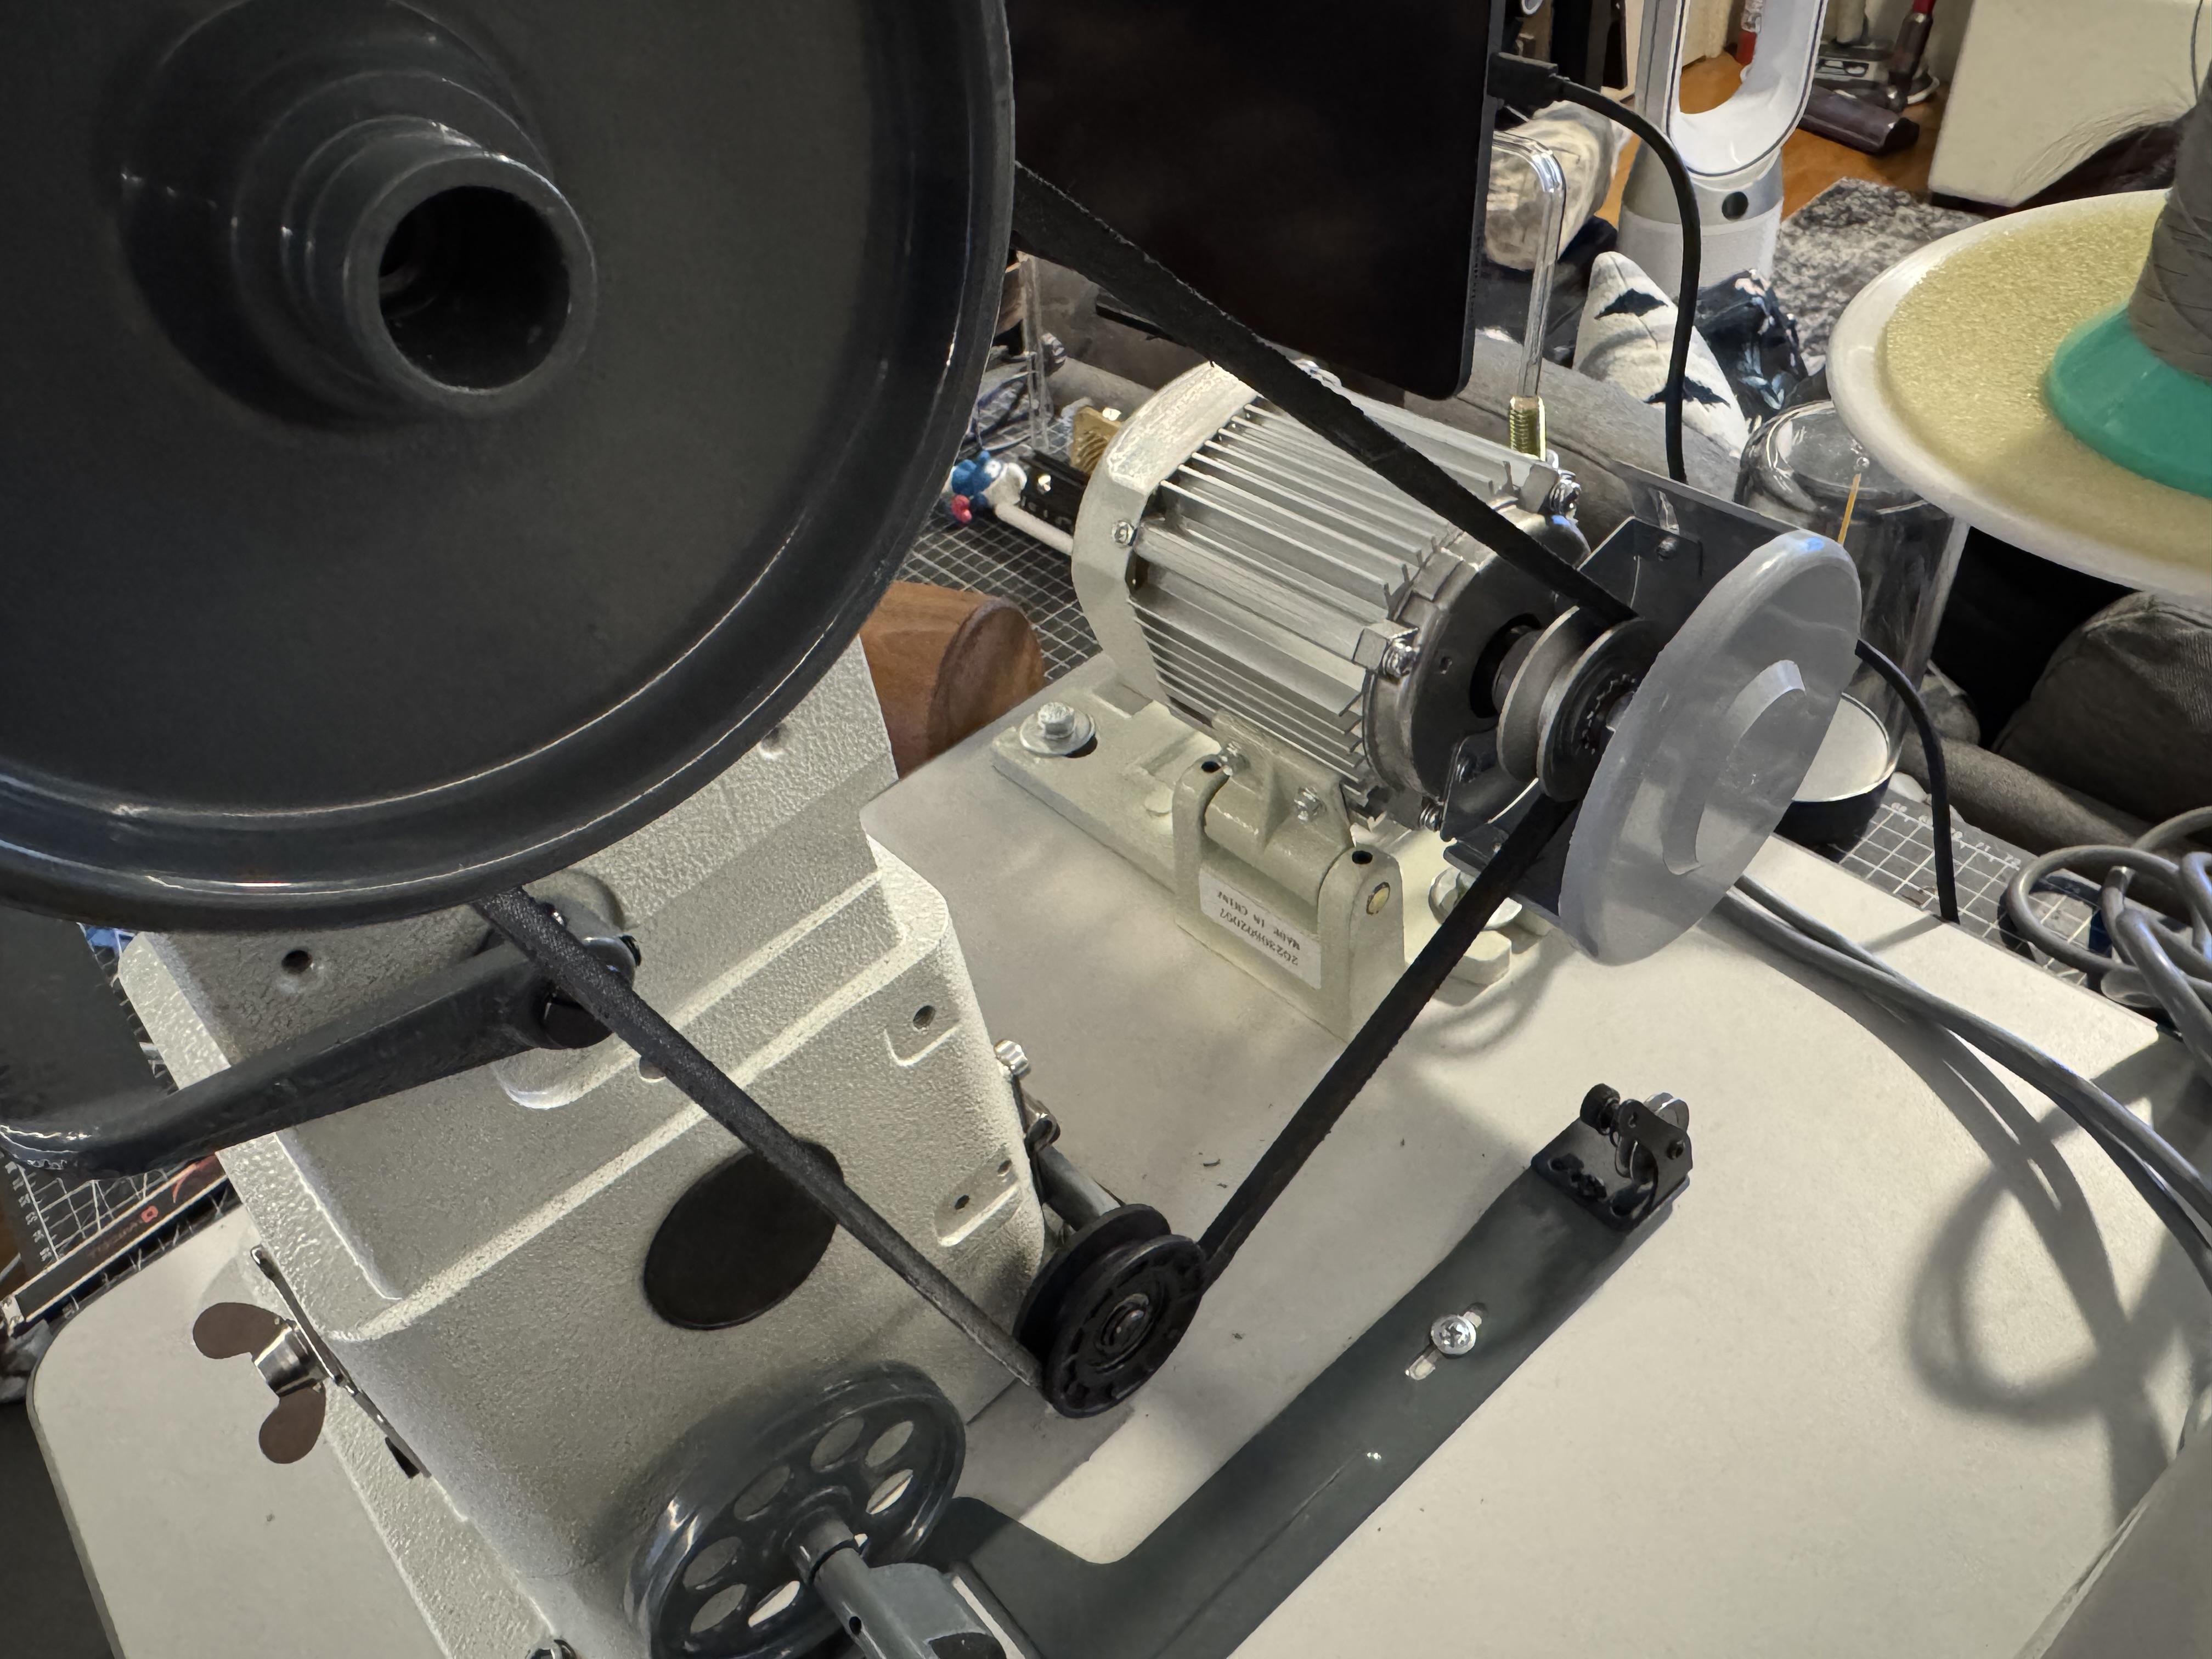
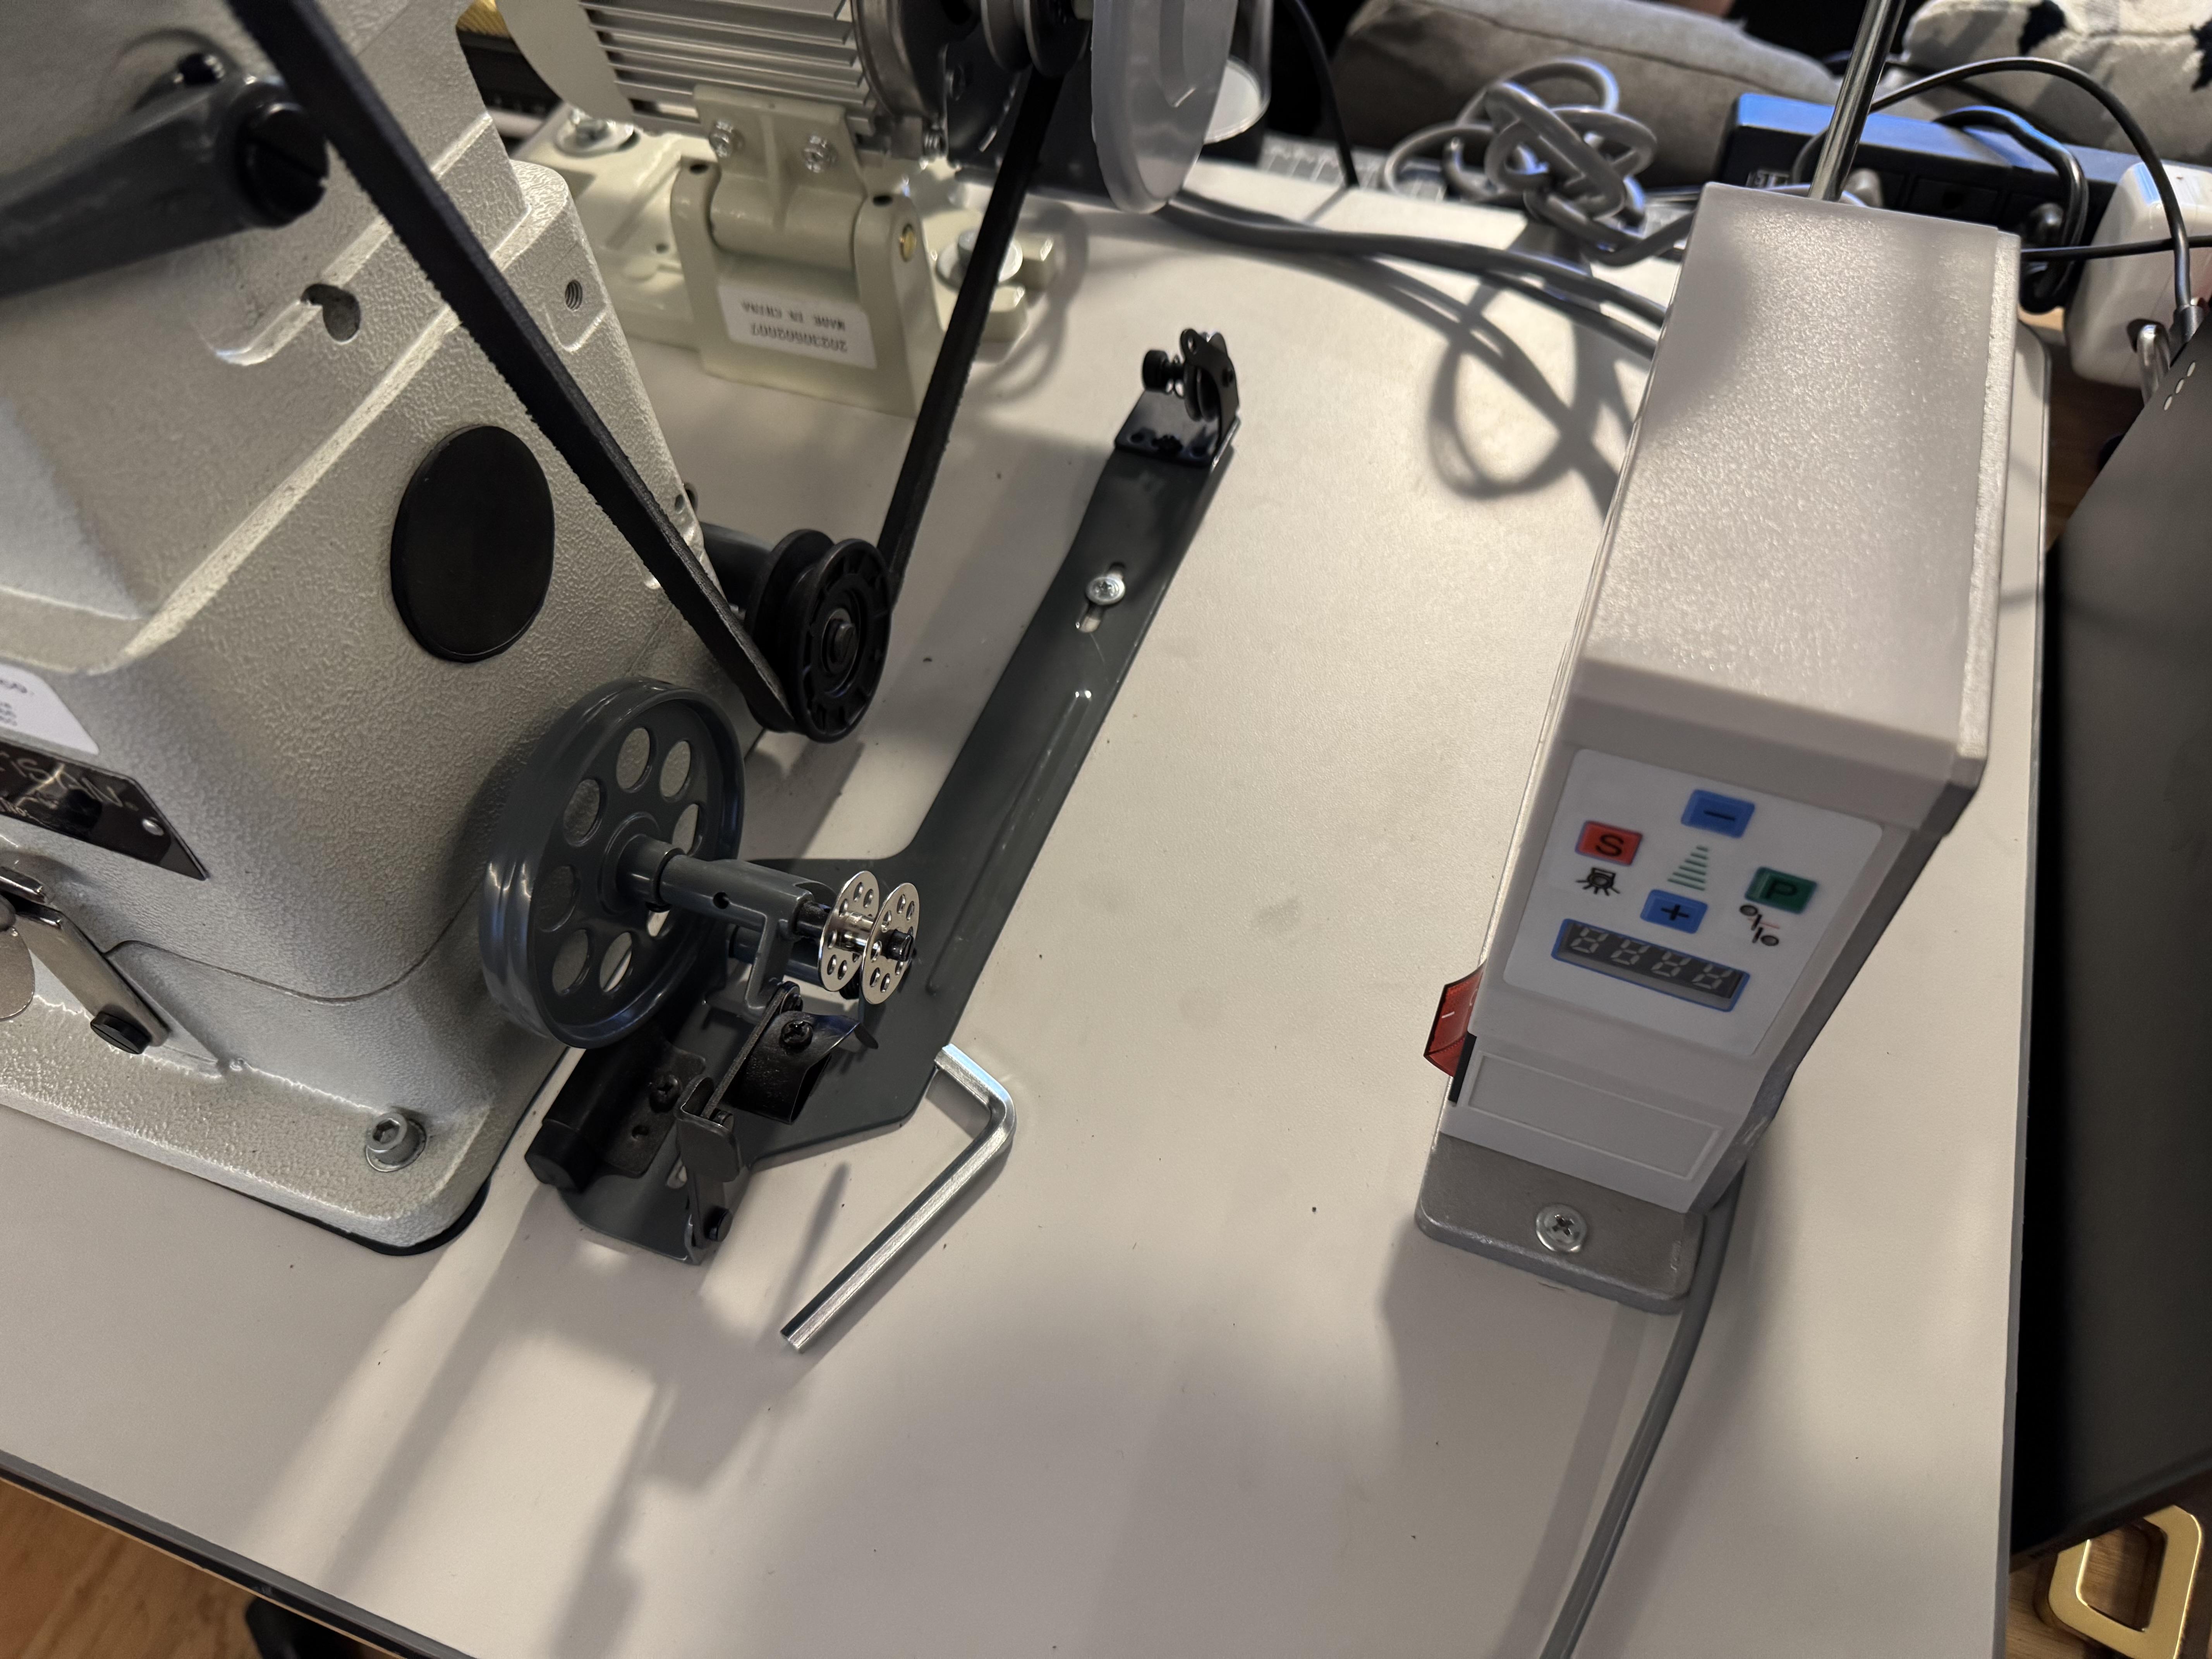
I just wanted to share the fruit of my hard work. It may not look good but I am working from a one bedroom with battery tools etc. I did not want to get the table mounted machine because i was planning on using it on my bench but, after mounting all the pieces together I realized I could not safely lift the setup from the ground to my bench top repetitively. I can lift it, but I gotta be very careful not to hurt my back in the prices and it is a very awkward shape/balance/height. So I did decide to get a table in the end and git one with a shelf so my Nippy Mini Skiver is also housed on this table. I use the vertical set up to store more things since, as I said, I love in a one bedroom. Anyhow. I moved the motor and added a speed reducer. I added a handle for moving it more easily. I relocated the controller box closer to the machine to accomodate a bobbin winder since I lost mine by adding the speed reducer. I added an eyelet thinghy to reroute the thread to the bobbin winder and, this thing is amazing. It winds bobbins in like 5 seconds and it stops when they are full. I had to cut the legs of the table because after adding the coaster wheels it was too high. Overall I am very happy with the whole set up and I can move it into the closet when I don't need it. The added speed reducer has made this machine so slow I can control it with ease and I think it has more punch now. It goes through veg tan like it iisnt even there. I am still learning how to back stitch into the same holes since I cannot see them and also learning to stitch better but that’s the beauty of the journey. Here are some photos of the set up and of a manly clutch I made myself today. Thank you all for all your tips and suggestions. Your knowledge is truly appreciated.
-
Hello esteemed leathercrafters from which I am learning everything about this new machine of mine. i have been using the Artisan 246 for a few weeks now and, after I was able to add some extra pieces, it’s running great. I have a Groz Beckert #18 on it now with the Vinymo #8 (close to a v92) and it works great but I would like smaller holes. I used the size #18 with the Vinymo #5 (close to a v138) and it works better because the holes from the needle are less noticeable due to the thread being thicker. My question is, can this machine use a size #16? I think I would like the smaller hole but I am not sure if it will mess up the whole tuning and dont want to damage the machine. anyone knows? As always : thank you in advance.
-
Thank you for the many answers. I do not have a circular blade saw...I just have a saw that looks like a serrated knife that moves back and forth operated buy an electriic motor: no idea what the tools are called. I do have a router and used it in the past but I was gonna leave the corbner sharp angle : not going for beauty here. Not removing the speed reducer, lol, it took me a while to put it on. Glad to hear the table does not have metal in it. from what you guys are saying it seems like a lot of work. I was just planning on hanging the table over the edge of my desk and chop it off with my saw. I might have to keep it like this until i come back from Italy though. yes, the setup is bench top because i live in a one bedroom nd have way too many toys. This thing is so heavy but it is mainly it's size that makes it hard to move. i guess the easiest way would indeed to get a smaller piece of wood and reinstall everything on it. It's more work i hoped for but if I ve done it once I can do it twice I guess. thank you again for taking the time to help me out. I appreciate it.
-
Would any of you guys know if I’d be able to cut this table with a normal power saw? I was going to make a new one out of wood but realize cutting this will be way faster. When i drilled in it, particles came out indicating that this is most likely composite wood. I am planning on cutting where the red line is and relocate the controller and the thread stand closer to the machine. After I cut it I am planning either to clamp it down on the right so that the heavy head won’t topple it or placing a Y shaped support under the cylinder arm to achieve the same. The reason for this is that, as it is, the damn thing is too big and lifting it up and down from my desk is killing my back also for the awkward shape and weight distribution. I just don’t want to start cutting in it and find out there is a metal armature in it or something. Anyone knows? thank you.
-
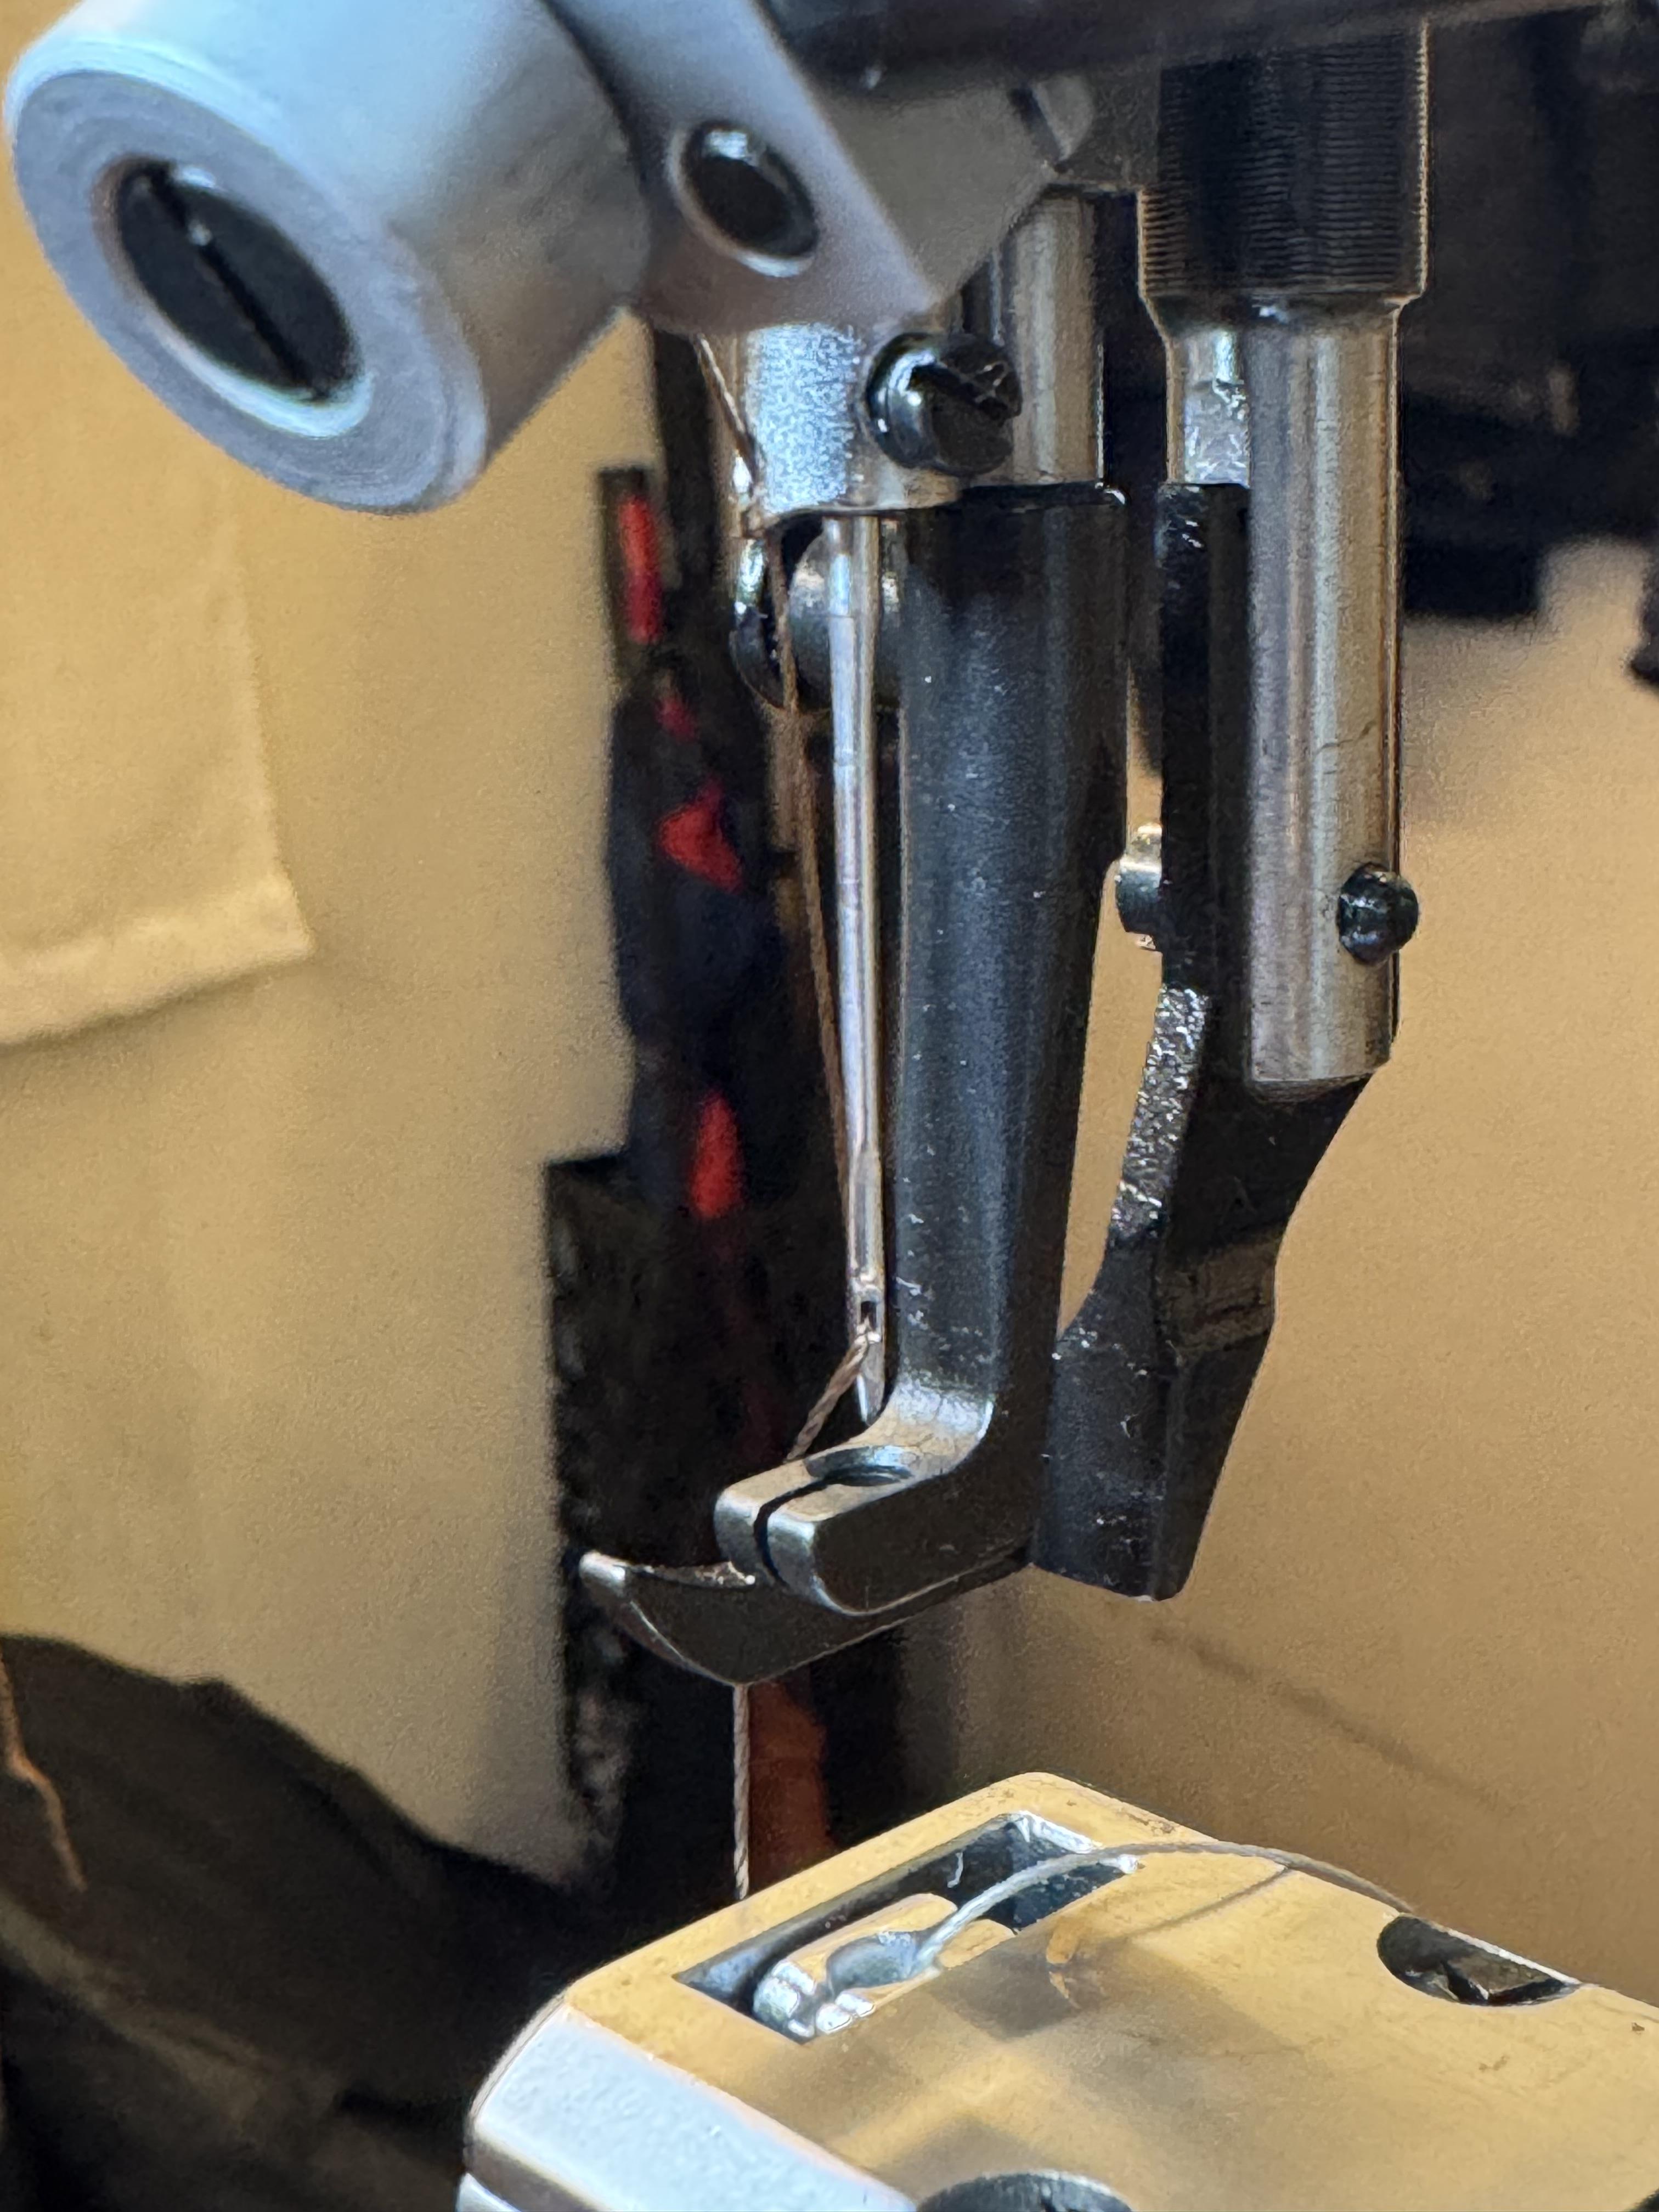
I am hoping to use this. It should work but I won't know until I try it.
-
It worked!!! The machine runs so smoothly and it slowed down a lot! I feel like it punches through more smoothly as well but that might just be bias.
-
Got it, thank you!!! Yeah I don’t think i need that small wheel anymore, good point. I’ll see if I can remove it. Thank you again.
-
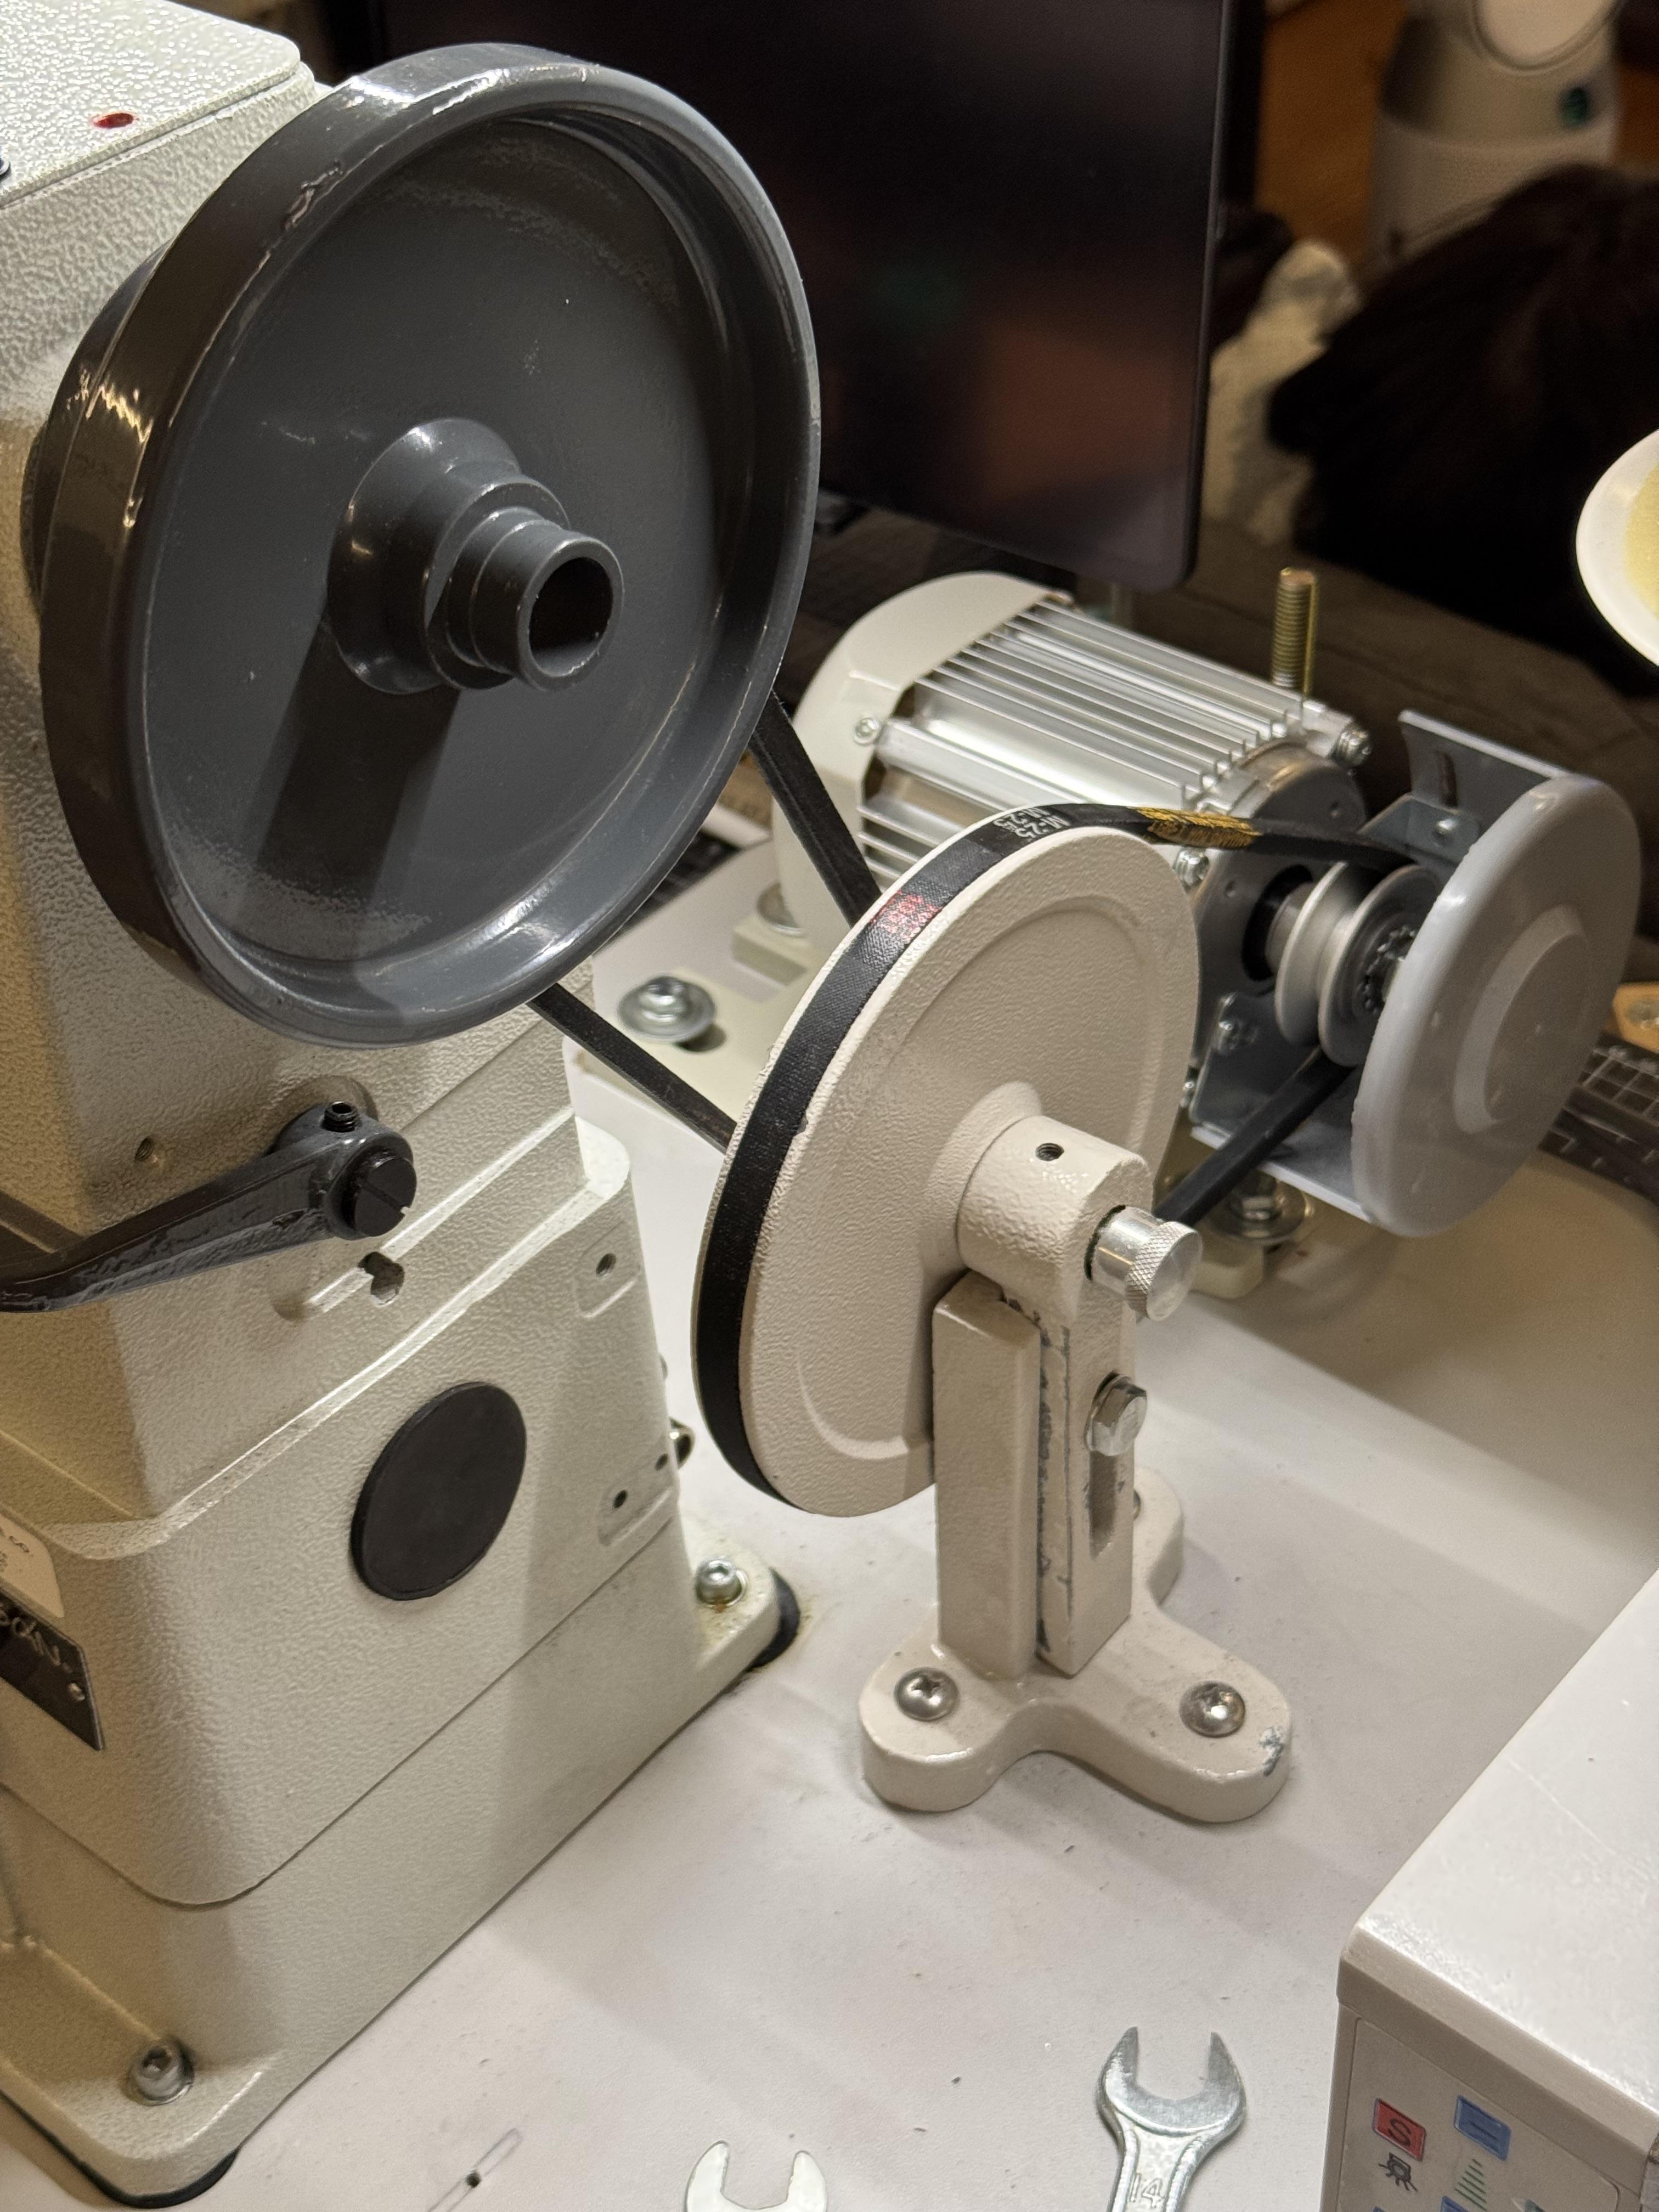
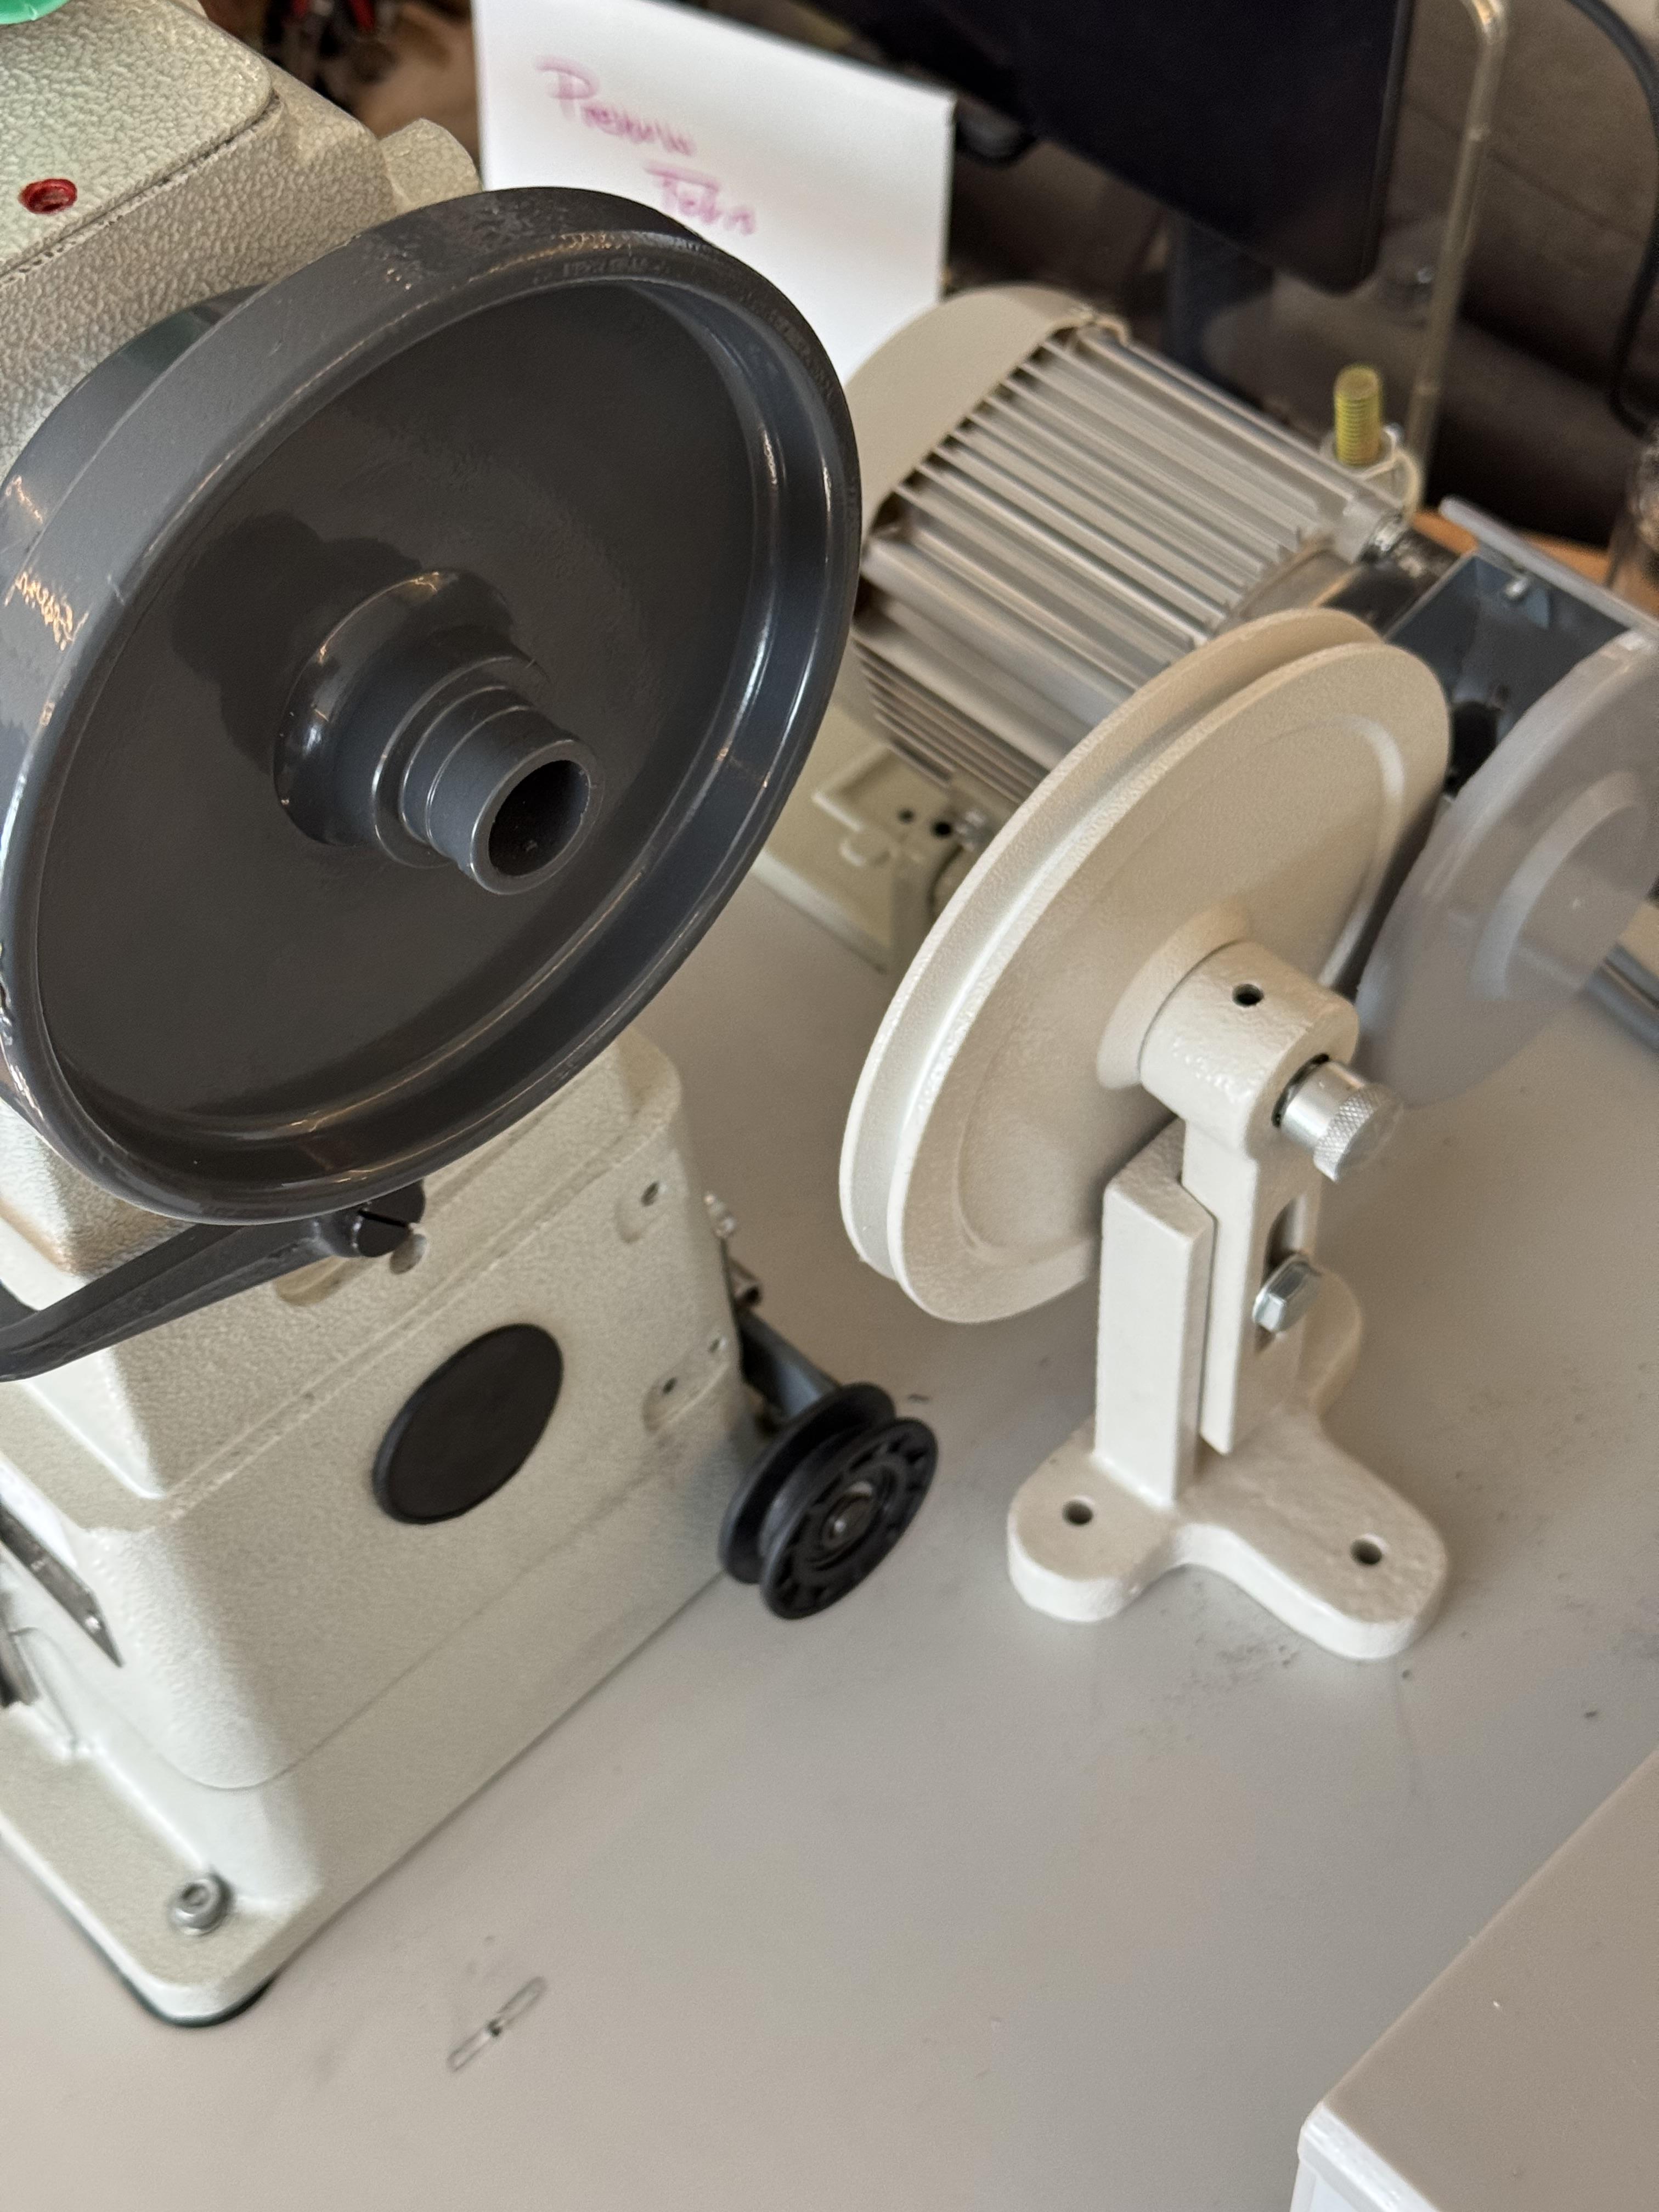
I ended up getting this speed reducer. Now I am trying to figure put where to put it to drill the least amount of holes. If I install it like in the picture, I just have to move the motor over by an inch or 2 so possibly drilling just one hole (for the motor). But I lose the bobbin winder. If I placed it between the machine and the motor instead, I would need to move the motor further away from the machine drilling 3 holes for it but I would retain the bobbin winder. i am thinking of the first setup and loading the bobbin using a battery operated bobbin winder i purchase online. But it would be noce to also have the mechanical bobbin winder functional as it saves time. Anyone can think if a way to install the bobbin winder with the set up in the photo? Also, how do I measure the size of the belts I will need? One of them will have to be very small. Thank you in advance.

-
NylonRigging, I dont see how the box style would help me as I would still have to remove the motor and install the box. Unless I am missing something. i bought the machine from a reseller near where I live. I think they had this machine there for god knows how long but it works fine and yes, it is new. I know the model, it is an Artisan 246VA. Do you think they'd have access to parts I can't find on the web? I mean, it makes sense. I'll give them a call next week. thank you for the suggestions. Thank you dikman for the input as well.
-
Hi, I bought an Artisan 246 and really like it but I want to slow down the stitching speed. I bought a speed reducer system which is basically a larger pulley with a smaller one next to it but I'll have to screw it to the table which means i need to move the motor. So, I was thinking, on my Sailrite, I only had to change the hand wheel (i hope this is what it is called the wheel to the right of the machine that you turn by hand when lifting the needle to remove the leather piece from under). Shouldn't I be able to just change that wheel to a larger one and get a new vbelt to slow the machine down? I know nothing about these machine so I dont know if they all have a standard way to mount the wheel or if i need to look for a specific one. Anyone knows? thank you.
-
So, wallets. I saw people skiving the T pockets and it made sense to reduce the thickness of the pocket so that when a credit card is inserted, the edges if the T picket don’t show up as they are slimmer. So I started doing it. I understand the skiving of the top part of a card pocket if you want to fold it back on its own to glue a thinner materia to create folded edges…makes sense to me. What I don’t understand is the slicing of the edges of the wallet than you end up glueing together. When I make my wallets the thickness is pretty much consistent edge to edge. Why would I want the edges of the wallet 3/4 of the thickness of the wallet itself? That should not help reducing the overall functional bulk of the wallet. If anything, after I place the cards in the wallet, having thinner edges would make the wallet look even thicker, ‘pillowy’ like. I do not skive my edges now as I still don’t understand its functionality. I do scrape the gran side of the leather that I am gonna glue fir better adhesion but that’s pretty much it. If you have info that would help me understand please do. thank you in advance.
-
I truly appreciate your gesture, but I ended up just buying leather from Rocky Mountain, some pueblo and other stuff so I didn’t get the HO yet. but thanks again for offering. Much appreciated. I am gonna try to use this pueblo today.