MariaMS
-
Posts
51 -
Joined
-
Last visited
Content Type
Profiles
Forums
Events
Blogs
Gallery
Store
Everything posted by MariaMS
-
Who uses a Pearson #6
MariaMS replied to T Moore Medicine Hat Saddlery's topic in Leather Sewing Machines
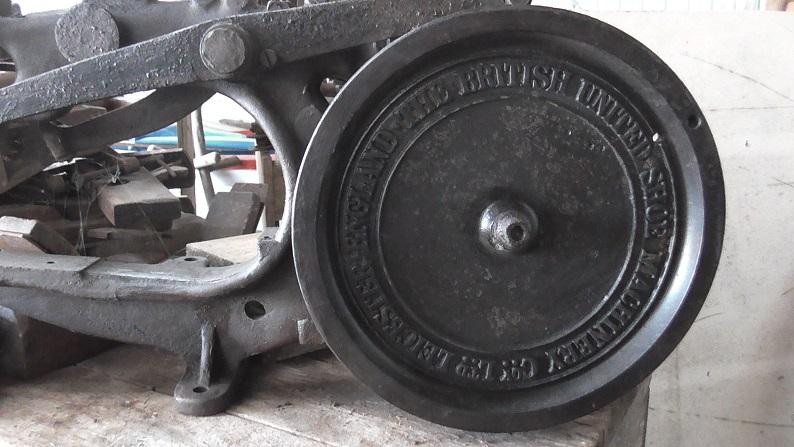
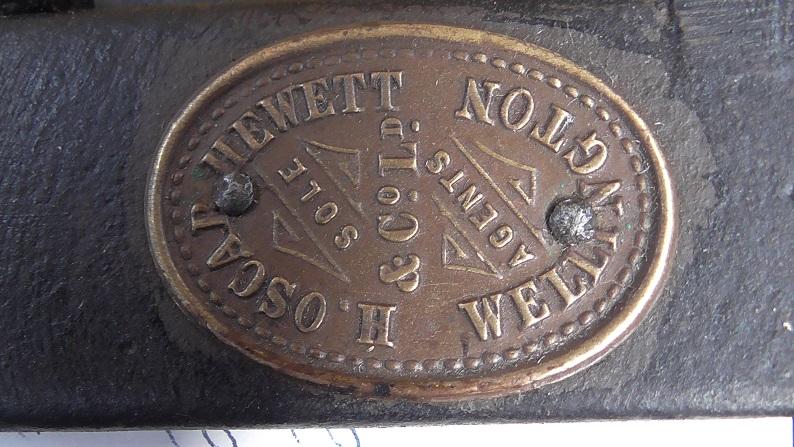
Where are the serial numbers? I did track the brass plaque of the supplier H Oscar Hewwit to around 1910 via Papers past..... there is also a bit on the BUSM on Wikipedia, so I can add that in too for now. Ta for your help!!! -
Who uses a Pearson #6
MariaMS replied to T Moore Medicine Hat Saddlery's topic in Leather Sewing Machines
great, thanks! Any idea of dates for either of the two models? At the moment I simply have "pre 11900" -
Who uses a Pearson #6
MariaMS replied to T Moore Medicine Hat Saddlery's topic in Leather Sewing Machines
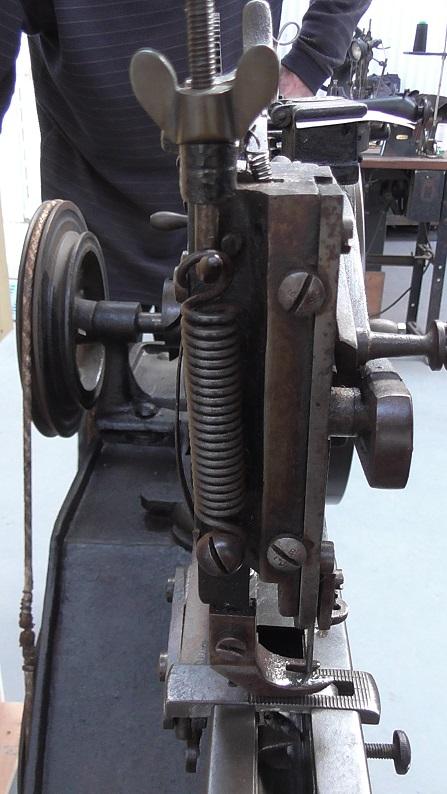
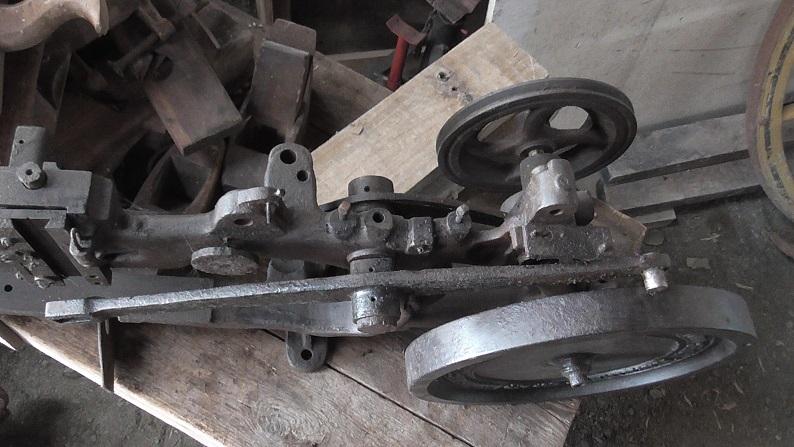
The other machine we have is somewhat the worse for wear, having possibly been involved in a fire at some point in it's life...... thoughts on the model, again possibly a Pearson of some type? I have a feeling I saw a container which could well hold some of the missing pieces, but I hold little hope of getting it back to a working machine. I will uplift it from the Livery onto my operating table once the Singer 7-5 has a place to sit, and have a closer look.
-
Who uses a Pearson #6
MariaMS replied to T Moore Medicine Hat Saddlery's topic in Leather Sewing Machines
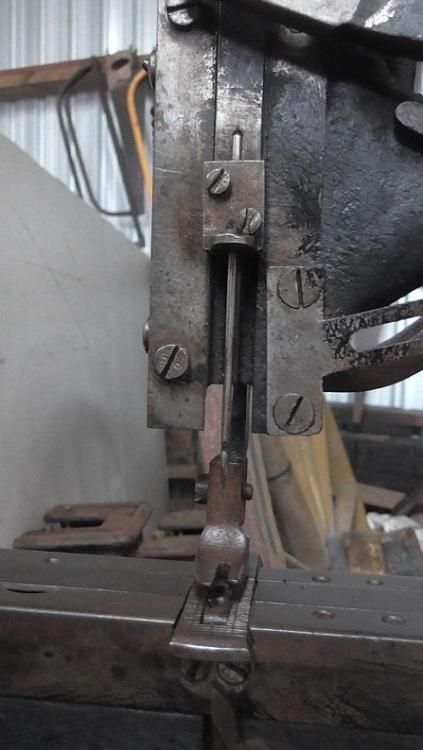
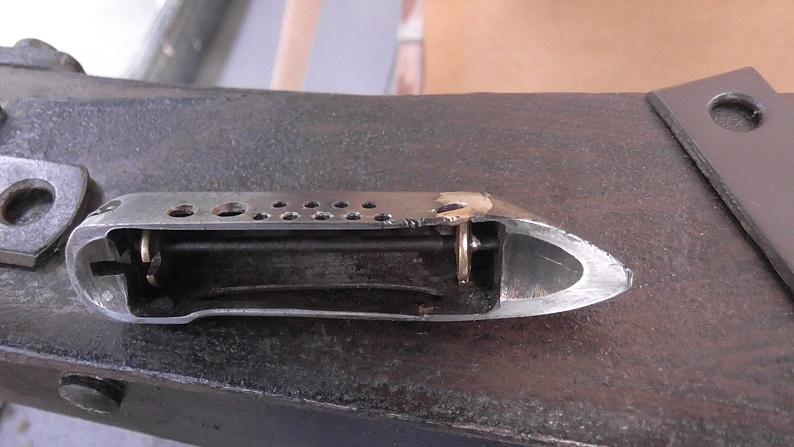
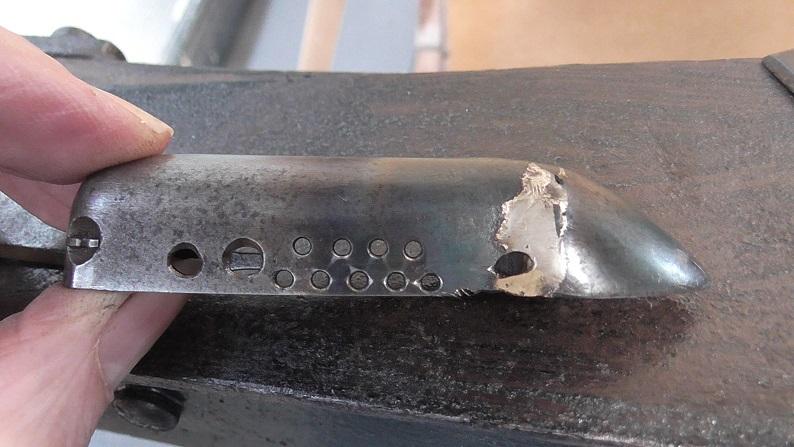
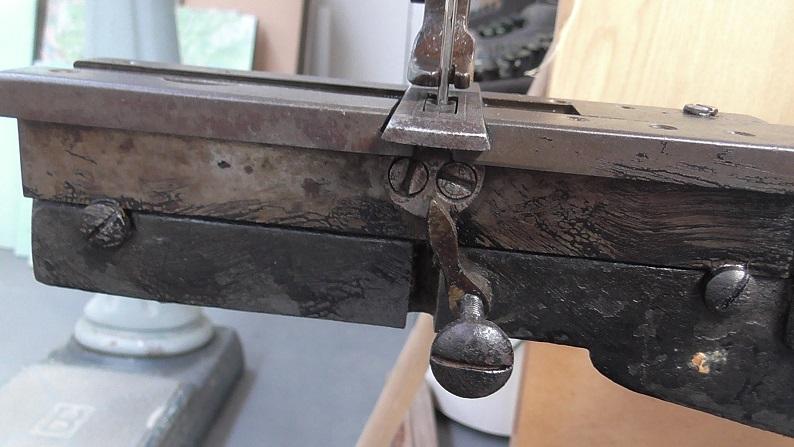
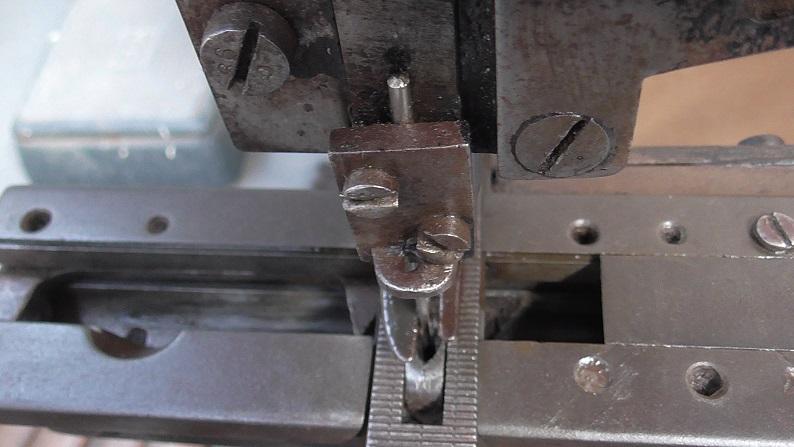
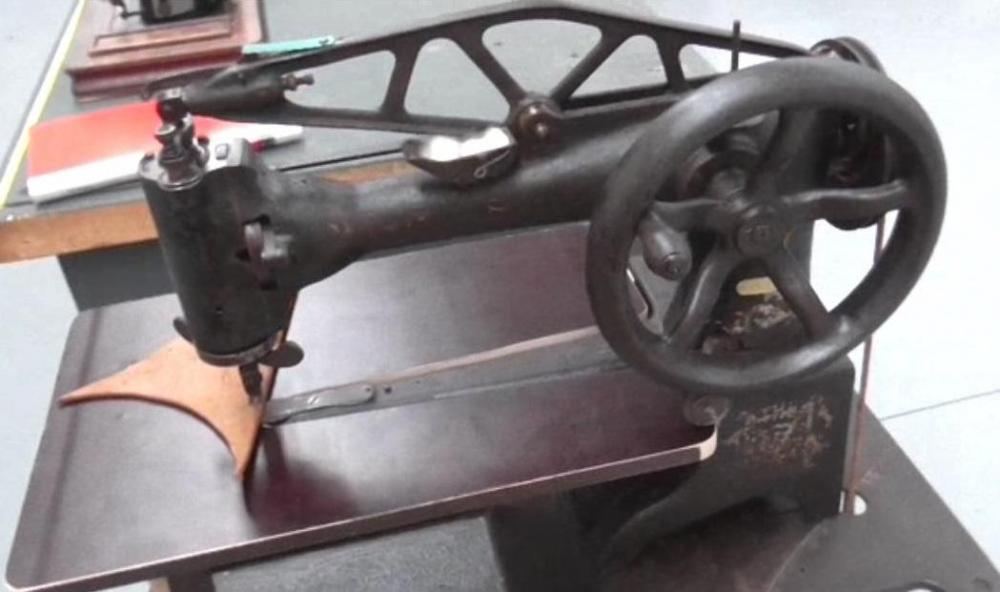
Hi all. We have what I think is a Pearson HM, possibly pre #6. The main difference I've noticed is in the shuttle, in that it has a series of open holes and no tension springs except for the one under the bobbin, perhaps to stop the thread loosening off. Does anyone know which model machine this is, possible date? Also how the shuttles are threaded? I was wondering if each hole marks 1/8 decrease in leather thickness? TIA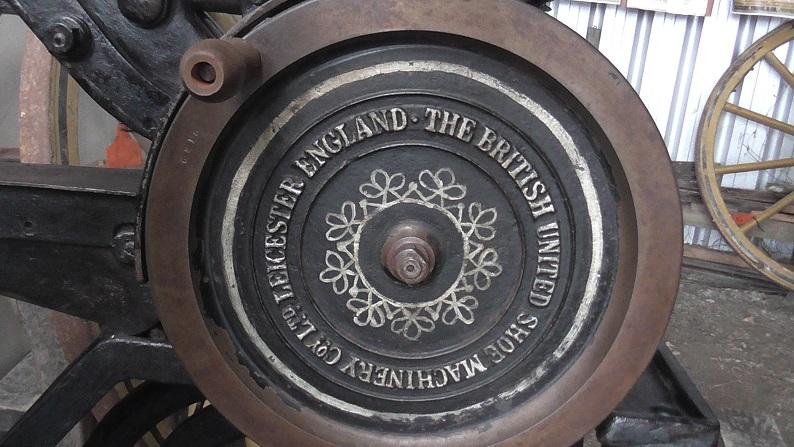


-
for now she has a coat of Rustoleum Flat Black..... and it looks pretty good..... old, but tidy. She has lost her badge so I wasn't going to add decals either.... none of our sewing machines at the Park have been restored back to looking new.
-
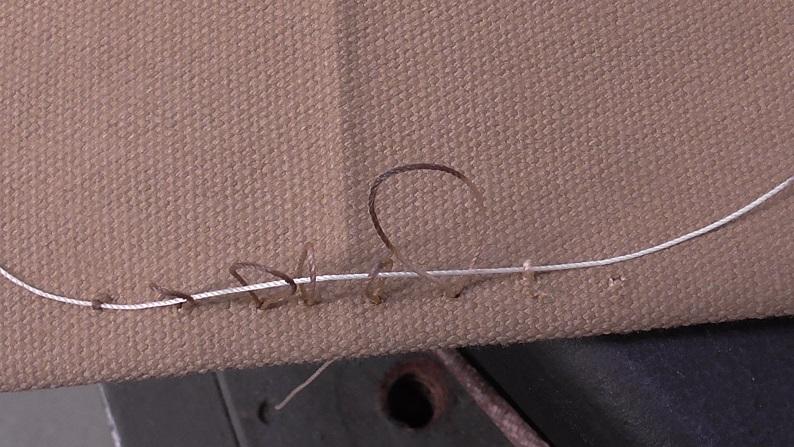
Thanks! I'm still figuring it out - I think it skips on the odd occasion because I still don't have a proper take up spring and the wooden feed dog plates, which doesn't have a proper needle hole (it is more of an open D) as I misjudged the cut by a fraction. So the tension fluctuates a little.... when it gets a bit tight, it skips, I'm thinking because the loop it too small for the hook to get through. The needle bar height is good I think but I can check it in case it has slipped.. It was hectic today with it being Easter and an open day, so hordes of kids all sewing on the hand cranks and domestic treadles and having a huge fun good time. It will be quieter the next few days so I can have another look at the hook/needle distance. I only have the one size leather point needle at the moment. I didn't want to get them and then find I couldn't get her sewing..... but I'm sure I can get it better as I get to know the machine!!
-
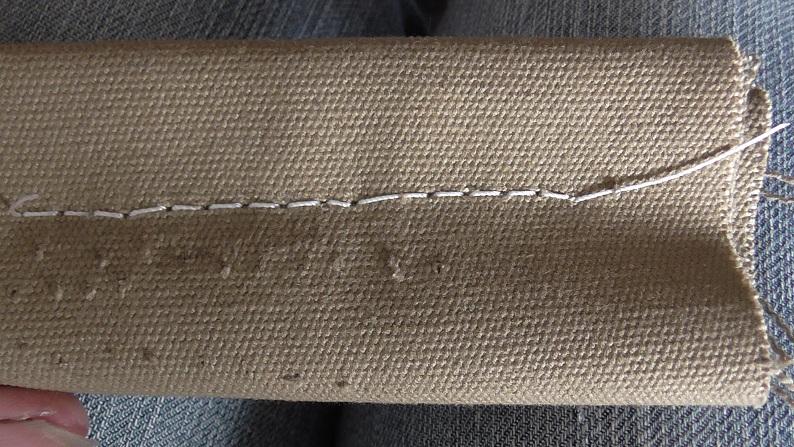
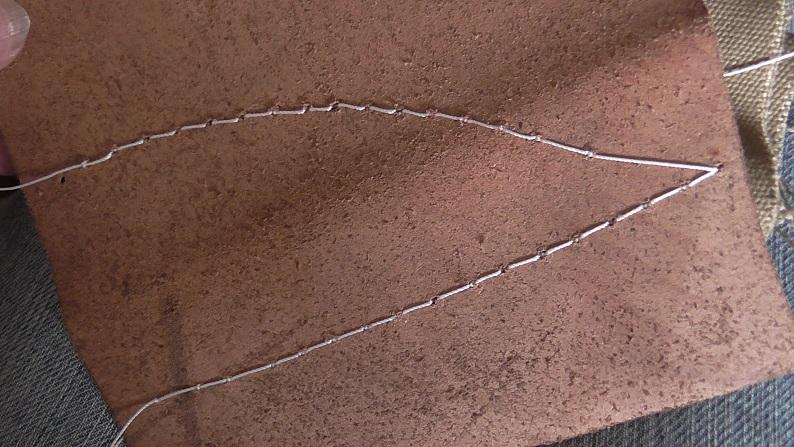
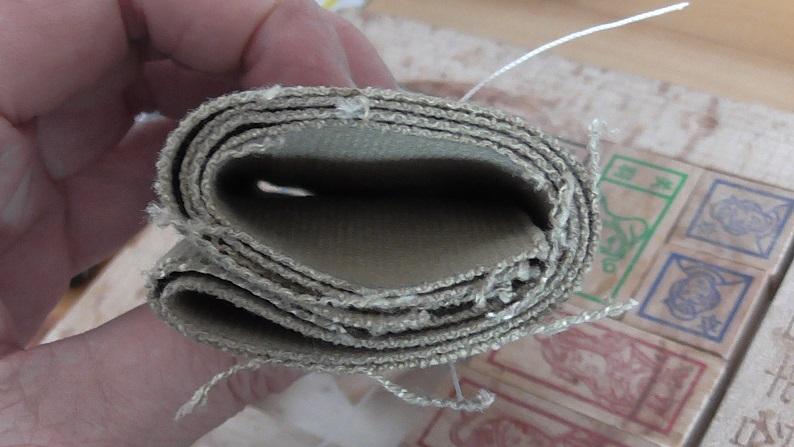
I've get impatient waiting for stuff to arrive in the mail, so this morning I made a take up spring from a bit of 1.2mm MIG wire. It actually works - my stitches aren't baggy anymore!! I guess now I need to work out if the thread I'm using is the right size for the needles..... more research coming on. I am so happy to have got this far. The canvas is the same 12 layers of 16 oz. I'm not sure about leather measurements but it is about 3mm thick.

-
first stitches!! Terrible I know, but a handmade slightly too thick wooden throat plate and no tension springs..... it is another step in a forward direction
-
LOL a dragon lady..... that's fun!! I see you have a few interests that align with mine - I am also a printmaker (a Farley letter press and an etching press) and a weaver with 6 looms including a dobby loom I built...... so things mechanical.
-
Great to know, thanks. What is the distance between hook and needle usually?
-
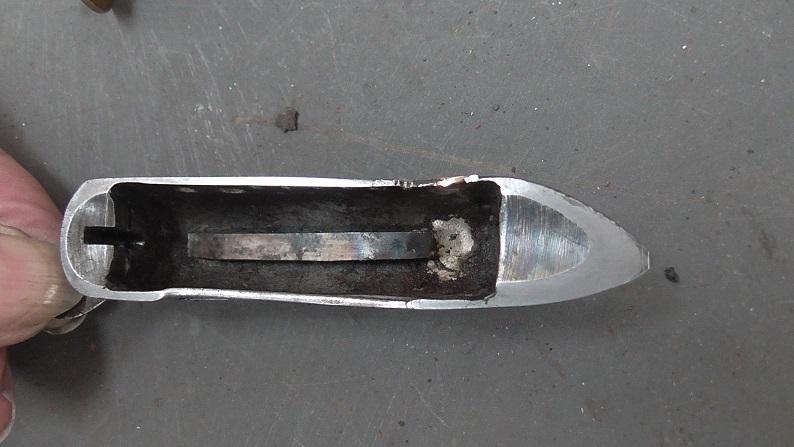
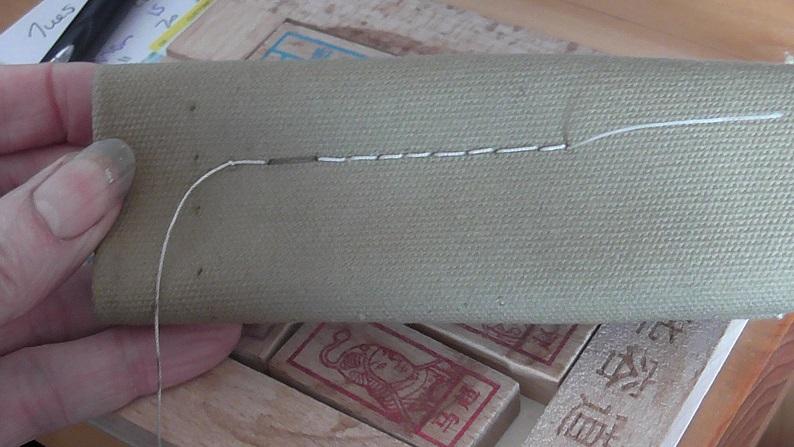
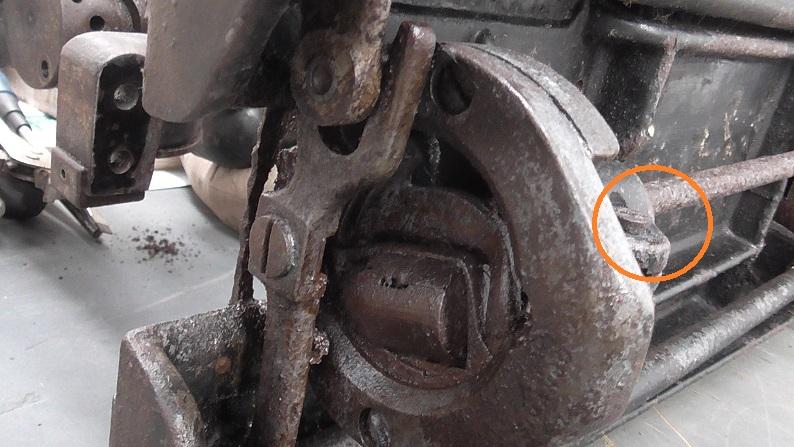
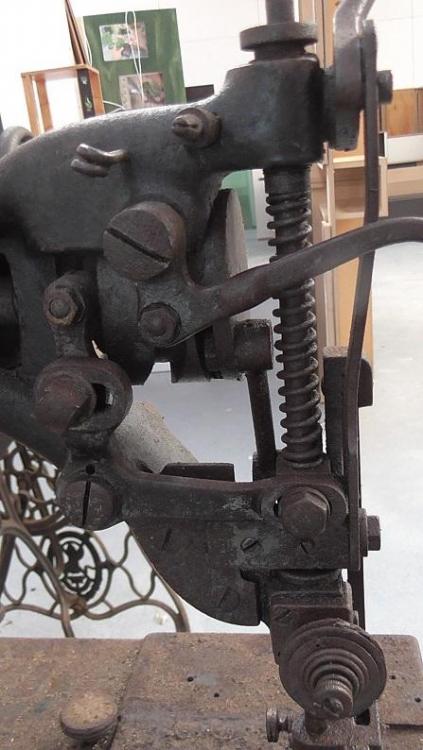
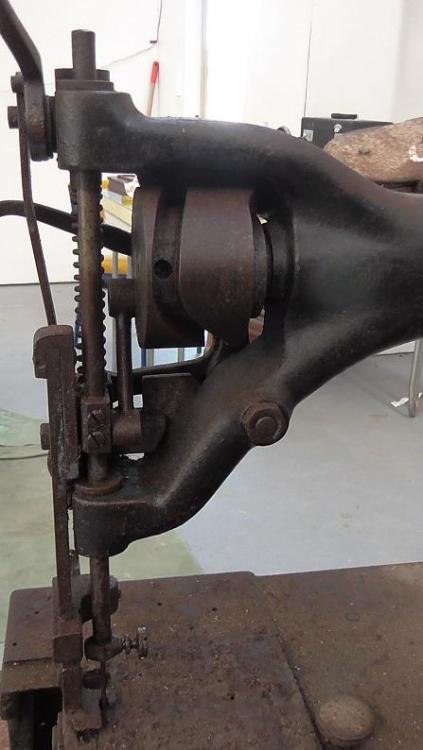
Today needles arrived....... and it managed to pick up the bobbin thread with a bit of artistic hand movement and adjustment of the needle bar height, yay!! So the timing/ at least is OK. I think the main issue being there is a gap of about 1mm between the hook and the needle - how much gap is normal for these machines? Obviously there will be a way to adjust it given the variety of needle sizes.... is it via the bearing that the assembly runs on (orange circle)? if I don't hear back I'll have a look at that tomorrow...... I need to bear in mind I still don't have the needle/throat plates or tension springs so there is only so far I can go until I get them (next week hopefully for the plates). PS this is an old picture pre clean up, but shows the machine screw I'm thinking of)
-
I'm used to a domestic hand crank which is geared so I was turning it up and away. It should be turned down and away, like when you start a treadle..... hoping to get to the next town up the coast to sort out cutting some steel plate to make the throat plates, which should sort the issue of the canvas rotating with the feed dogs. Sadly we are too small to have a foundry with a guillotine in our town so I have to be a bit patient!!
-
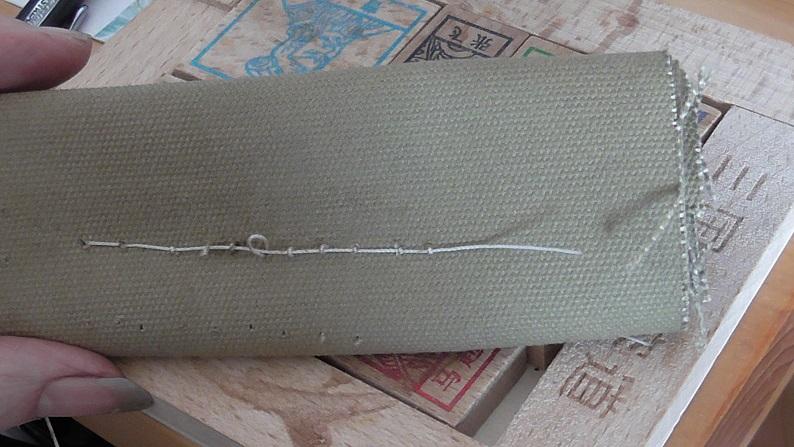
I managed to get the lower mechanism working yesterday, although it worked better turning the hand wheel the wrong way ..... I think the issue was there are no feed dog plates so the canvas just walks in a circle with the feed dogs when I turn the hand wheel properly down and away. And today I managed to free up the shuttle retaining spring, so the hook is now complete and in place.
-
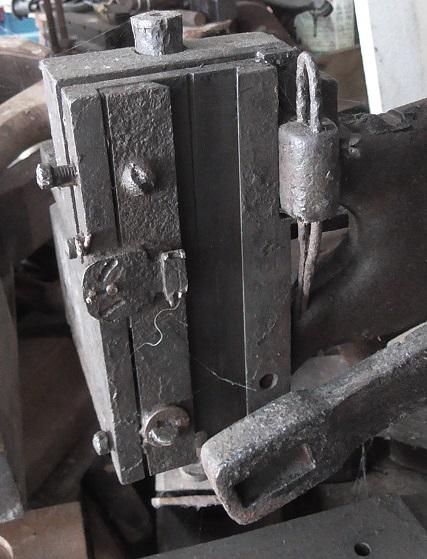
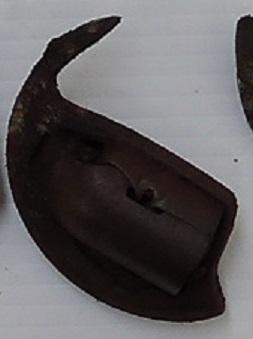
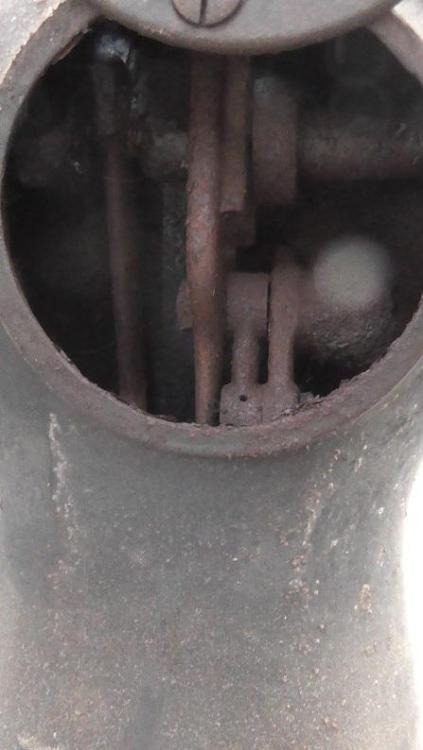
Has anyone got thoughts on how to disassemble the hook? The spring lever that holds the bobbin carrier in place is stuck down. I managed to take the carrier out by removing the tapered pin, to give more room to move, but the pin that holds the sprung part doesn't appear to go right through. I wondered about grinding in from the back to allow me to punch the pin out....... has anyone ever had to do this?
-
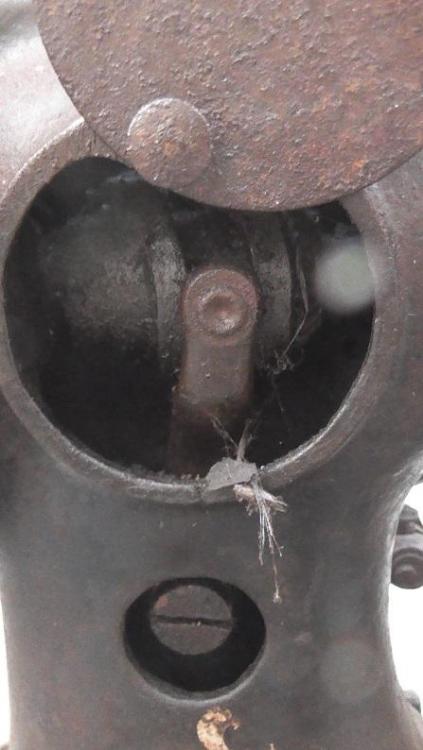
it does, doesn't it. I think everyone here is amazed - I'm still doubtful I'll manage to get her sewing, that partly depends on whether the thread we wrecked can be rebuilt or not......I don't know the names of the parts but its the bearing shaft that holds the oscillating cam that in turn drives the hook. Looked like it got water inside, so the bearing cap was fused on to the shaft and there was a ton of rust inside where the shaft is machined down for the oil reservoir. We had to wind the whole thing out as one piece. Put a lot of stress on the thread. It is one of the few bits I needed help with, I simply wasn't strong enough. The other end unwound no troubles!!
-
here it is after a week of work https://vimeo.com/696381119
-
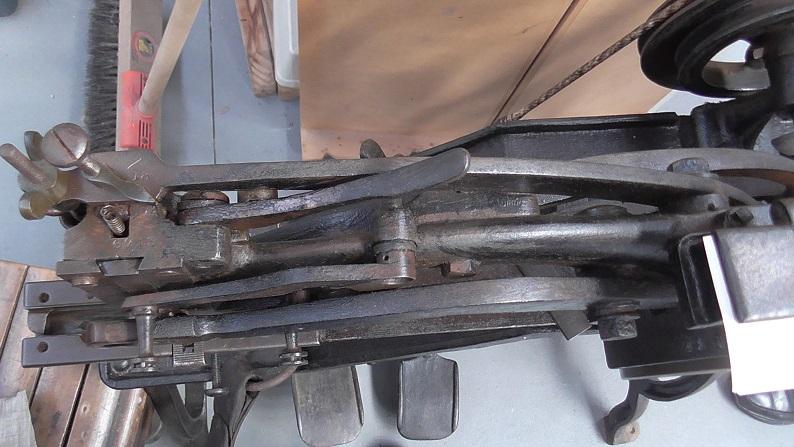
Jim - you are not the only one. The guys at the Heritage Park are glad they didn't lay bets - today I got the last bolt undone that connected the upper and lower sections, and by the end of the day the top end was freely rotating with presser bar hopping along and needle bar moving as it should. The lower mechanism is also rotational, but I have a bit of work to do cleaning up the con rods and the bearing rod is a mess...... but it's only been a week today since we pulled her out of the tank so I'm pretty happy. I forgot my camera but I'll get pics at some point.
-
This morning's work involved heating....... the result was the rust welds opened up, and WOW I got movement in the main shaft!! So we heated up the top end and got a dragon LOL - I'm lucky I have helpers for things like using a gas torch.... one of the many things on my list to learn about.


-
I built it a table too.... fun!!
-
great, I'll check with Gary, thanks!! I got some bits from him when I was working on our 29K - again it was fully seized and rusted. Managed to get her cleaned up and sewing!!


-
LOL - my brain gets bored easily and my time is my own so any costs are offset by the entertainment, learning and an incredible sense of achievement...... especially as I am the only woman working with machinery at the Park!! Here it is after I put the front end back together from memory..... I did it a bit wrong and had the foot lift left over so had to look that part up, but just listening to the mechanism and watching the foot rise and fall when it had been frozen solid - wahoo!! I used my finger on top to act as a tension spring as that hadn't been cleaned at that stage.


-
-
OK, I'll check out the bobbin size next time I'm up there. There are a few good machinists (including an ex aircraft engineer) at the Heritage Park, so yes, making the throat plates might be the better option. As you say, they are pretty simple!! Do you happen to know if bits off a new tension assembly would fit? I tried a Singer 201 tension nut on and the thread is the same..... but I don't know whether the modern ones have the same thread still. it would be a simple fix that way. I still have both the posts and the threads at both ends are pretty good. I'll put off making overseas contacts until I know which parts I actually need that I can't make locally! I'll only need a better hook assembly if I get any where near being able to sew. For a static "turn the handle and watch the needle move" scenario the hook quality won't matter. This is the new tension assembly I sw https://www.trademe.co.nz/a/marketplace/crafts/sewing/machine-accessories/other/listing/3534129442?bof=XqS8HeVd


-
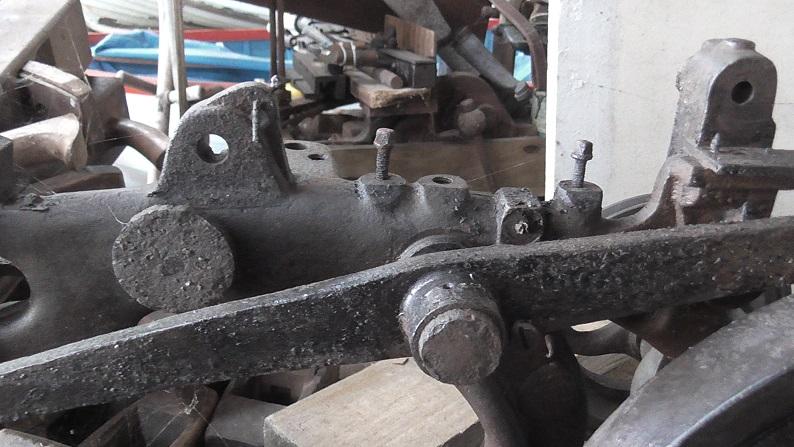
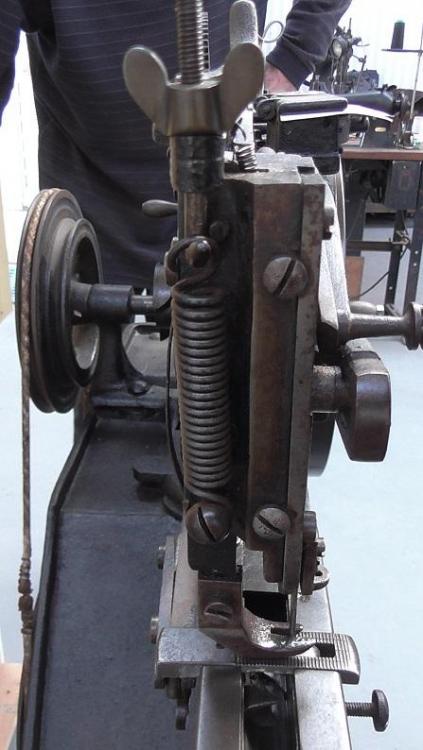
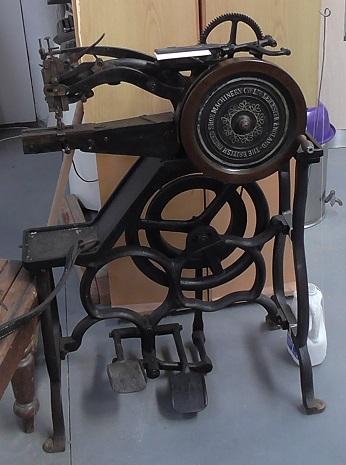
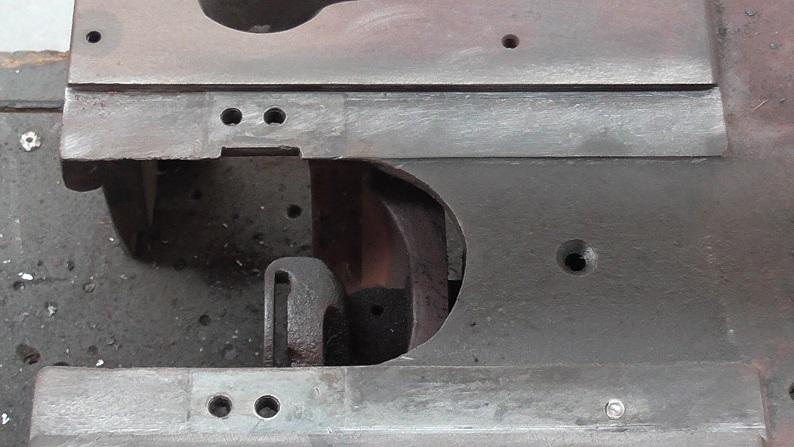
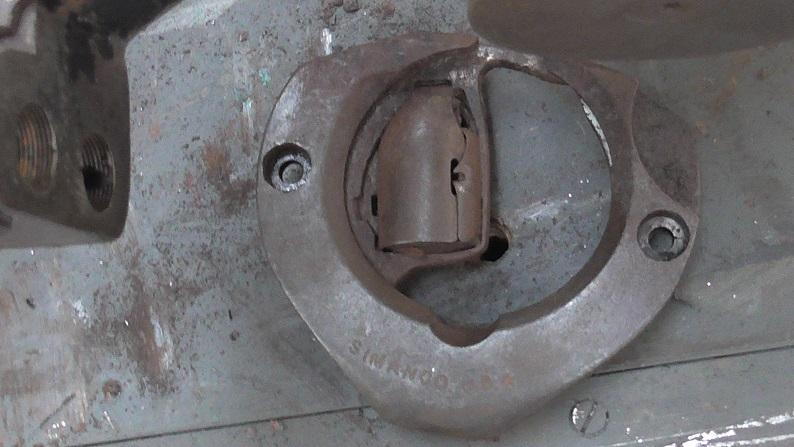
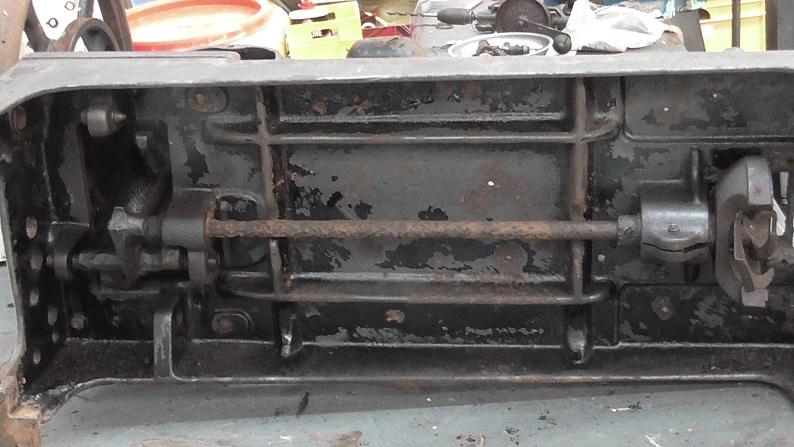
Hello! We are at the Westland Industrial Heritage Park, in Hokitika....... the serial is G7048614, which tracks it to a model 7, but the sub class number is almost rusted off..... I can see one number after the 7 and a friend suggested it looks like a 7-33. Looking at your machines though it does look like a 7-5, which is what I thought when first inspecting the numbers, thanks for that confirmation. At this point I'm only after the throat plate set (the plates look like a layered pastry) and replacement tension assemblies for static appeal. As the main conrod connected to the central drive shaft is really badly rust welded (image with the orange circle) and the top end is just as bad, I'm not very confident I have enough knowledge to actually get the whole mechanism turning. We are going to get some heat on there in the next couple of days - if we manage to get the weld to crack open there may still be hope that the whole system will eventually rotate.
-
OK, thanks for that!!