Hey, all. My name is Steve, and in my first post here, I wanted to introduce myself and also say thank you! After scouring the Internet looking for inspiration and ideas on crafting mauls/mallets for leatherworking, I stumbled across this thread, and discovered leatherworker.net:
https://leatherworker.net/forum/topic/71204-making-leather-working-mauls/?tab=comments#comment-465294
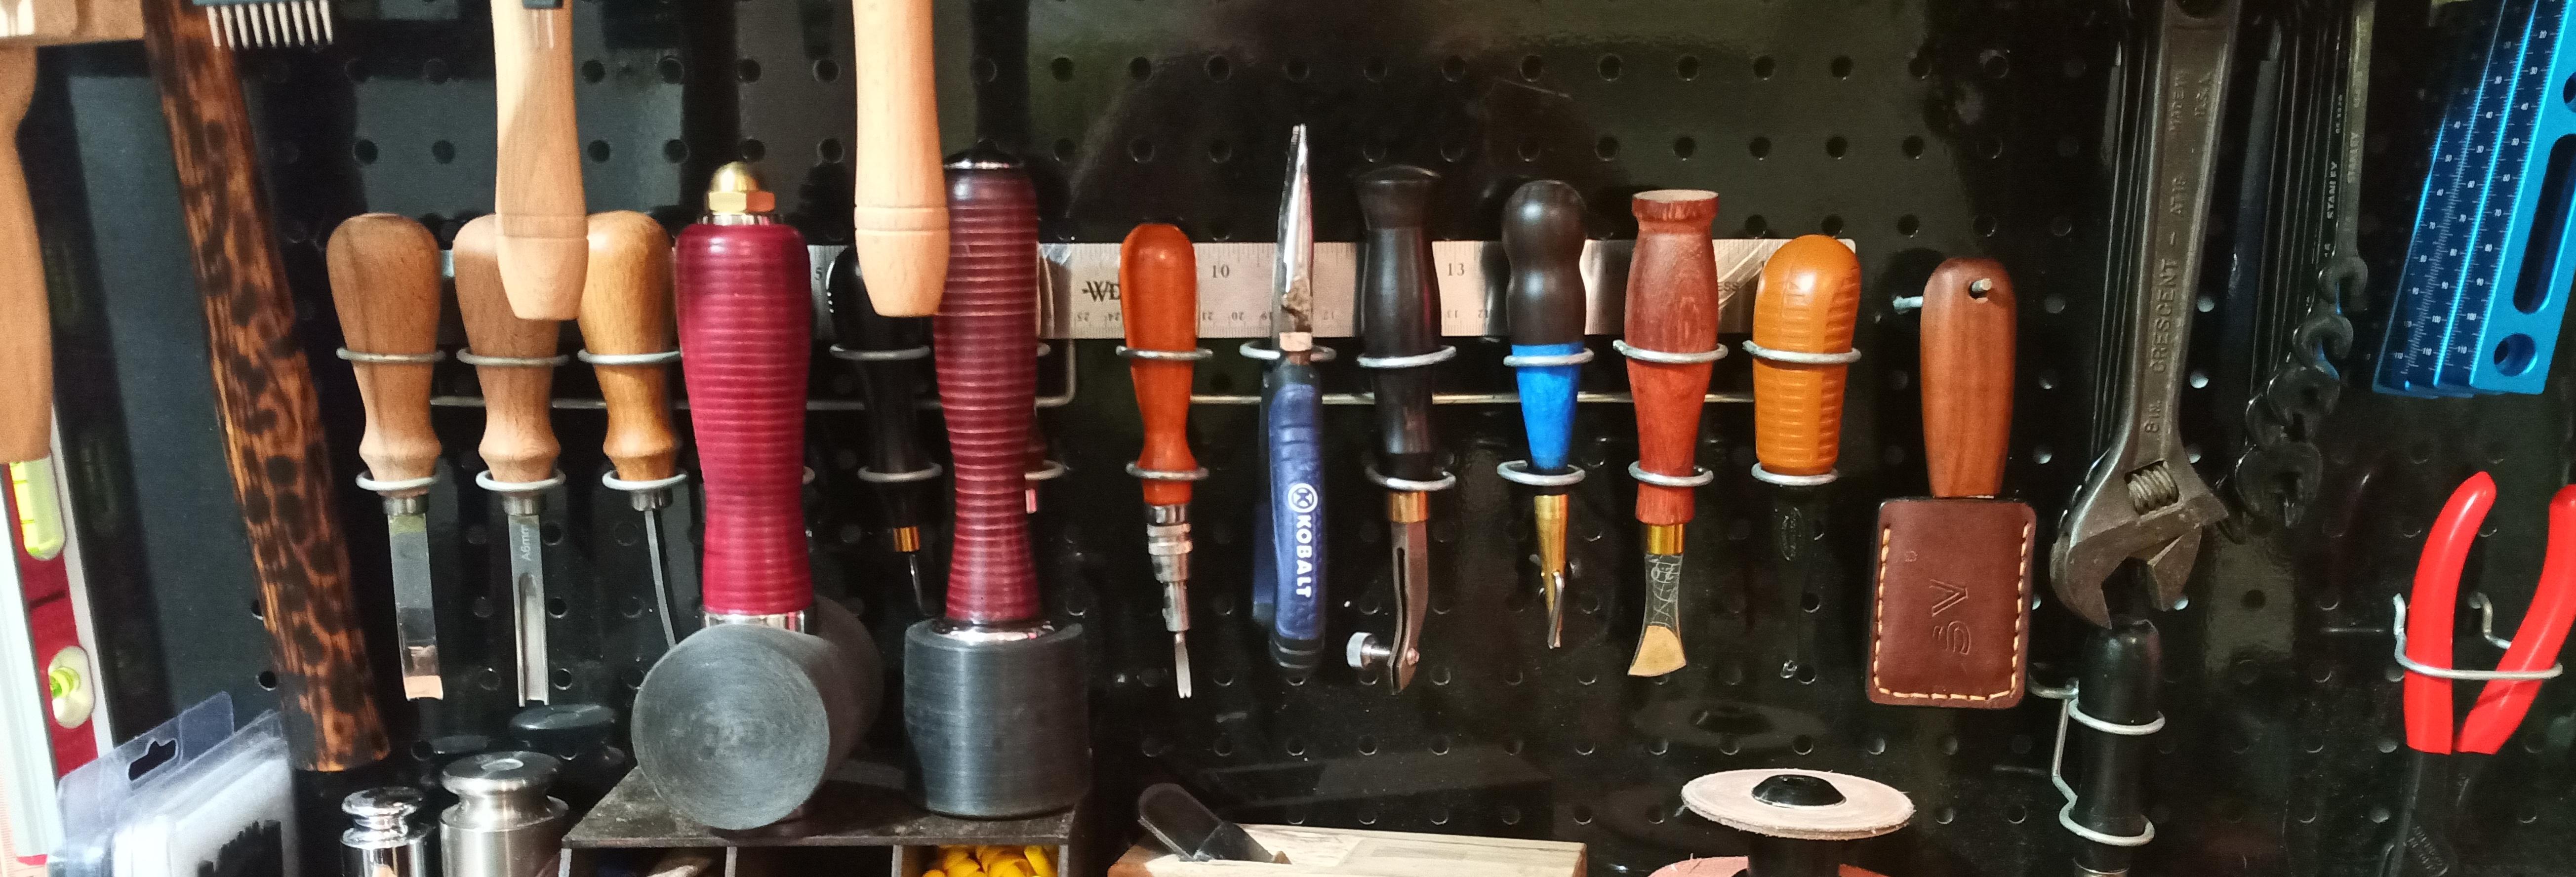
That thread is one of the best online resources about crafting a maul or mallet designed specifically for leatherworking. There just isn’t a lot of information available on how to make them. There really isn’t a gigantic assortment for sale, either, with only a couple players in the game. At the high end are the Barry King mallets and mauls: Beautiful and polished. Perfectly balanced and weighted. High-quality tools with exceptional curb appeal, they function as good as they look. At the bottom end of the scale are the endless assortment popping up all over Amazon: Utilitarian and rough. Not really balanced, and lacking enough weight, they don’t feel good in the hand, and they don’t draw your eyes when they’re on the shelf. After being disappointed with my first Amazon mallet, I tried twice again before I realized that they are all, more or less, just copies of one another. There are also a couple of intermediaries worth noting. I’ve put my money into a couple of them, so I feel qualified to offer my experience here. The first is the Maulmaster II, from Tandy. At 22 ounces, it’s heavy for a small maul, and it’s solid and well-built. But the striking surface is just too small. For me, anyway. Your mileage may vary, but I strike glancing blows every time I use it. It’s pretty good for repetitive tapping, but that’s about all. And while it’s not exactly ugly, it’s no shelf queen, either. Especially at 65 bucks, or whatever it was I paid for it. The other contender is a mallet from Frogjelly Leather. I had high hopes for this one, I really did. I wanted to like it. I tried to like it, and I gave it an honest chance... before finally tearing it apart to see if I could somehow add some weight to it. That didn’t make me like it any better, and I realized that I’d wasted $49.99 plus tax and shipping on yet another mallet I didn’t like. So, here at last are a few of my solutions. The one on the far left in the first picture is the Maulmaster II, from Tandy. Obviously, I didn’t make that one, but I wanted to include it for size reference.
Construction:
I cut 10/12oz veg tan leather into 2” squares, and then used an arbor press to punch holes in the center of each square. I made a little jig so that I didn’t have to keep eyeballing the center:
After cutting and punching enough leather for the handle, I threaded each square onto an eight-inch carriage bolt held upright by another little helper I made. Each layer was glued on top of the next with polyvinyl acetate adhesive (white glue, Elmers, Gorilla, etc). The glue drying around the threaded bolt is easily overcome by a liberal slathering of leather conditioning balm to the bolt. That’s a lug nut I re-threaded from fine to coarse to fit the carriage bolt because I wanted to try out a new tap and die set. I tightened it down until the glue dried, approximately overnight.
Once dry, I twisted the stacked leather off the jig, and onto another carriage bolt so it can be chucked up on the lathe. I kept forgetting to take pictures of everything I did along the way, but you can get an idea in this picture as I was applying leather dye. I formed each handle using standard HSS lathe tools. A bowl gouge and negative rake scraper worked perfectly, for those of you familiar with lathe tools.
The striker of each maul or mallet is made from Nylon 6 (66? 6,6?). I tried a variety of plastics before settling on Nylon, including HDPE, UHMW HDPE (ultra-high molecular weight, high density polyethylene. Say that ten times in a row backwards, standing on one foot), and acetal co-polymer (Delrin). The Nylon just felt the best. It didn’t deform as much as the other plastics, had little to no rebound, and overall, was more satisfying when it made contact with a leather stamp. The nylon came as one long tube, in whatever diameter x whatever length you specified. I cut it into the lengths I needed with a hand saw, chucked it up on the lathe, and machined it using HSS lathe tools. My go-to tools are usually bowl gouges and negative rake scrapers.
The brass caps serve two purposes: to hold everything together and to add weight. They were cut from flat bar stock with a tiny Wen drill press and a carbide tipped hole saw. Brass isn’t a joy to machine on a wood lathe, and it will chatter incessantly about the whole process, but with carbide tipped tools it can be done with enough precision for my purposes. HSS actually cut the better initially, but I had to keep stopping to sharpen my tools so often that it was faster to just stick to carbide.
Tapping and threading the center holes to tighten down on the carriage bolts:
The heads of the carriage bolts had raised nomenclature that needed to be removed (belt sander, not shown), and then they needed to be polished. Back to the lathe to make them as shiny as the top of my balding head seen in the picture lol!
A few more pictures... I wanted to use higher resolution to capture more detail, but I was limited to 1.46MB total max size, and I didn't feel like messing around with image hosting:
I guess that's about it! Once I kinda figured out what I was doing, these mauls were a pleasure to make. I enjoyed each step in the process, but to be able to hold a high-quality, decent-looking tool that I created myself was its own reward entirely. I've already thought of some improvements I could make for the next batch, that would both streamline the process and give a more polished look to the finished product. Please feel free to comment and critique- I don't mind a bit if you think they suck, just please let me know why you think they suck, and how I could improve upon them.
It’s been over a year since the OP of the thread I mentioned at the beginning, Mr. Colt W. Knight, has been seen around here, but I want to give a big thanks to him for the wealth of inspiration and knowledge he put into that thread. And a big thanks to everyone else who contributed, as well.
Cheers!
Steve