


LakeOtter
-
Posts
31 -
Joined
-
Last visited
LakeOtter's Achievements
Member (2/4)
-

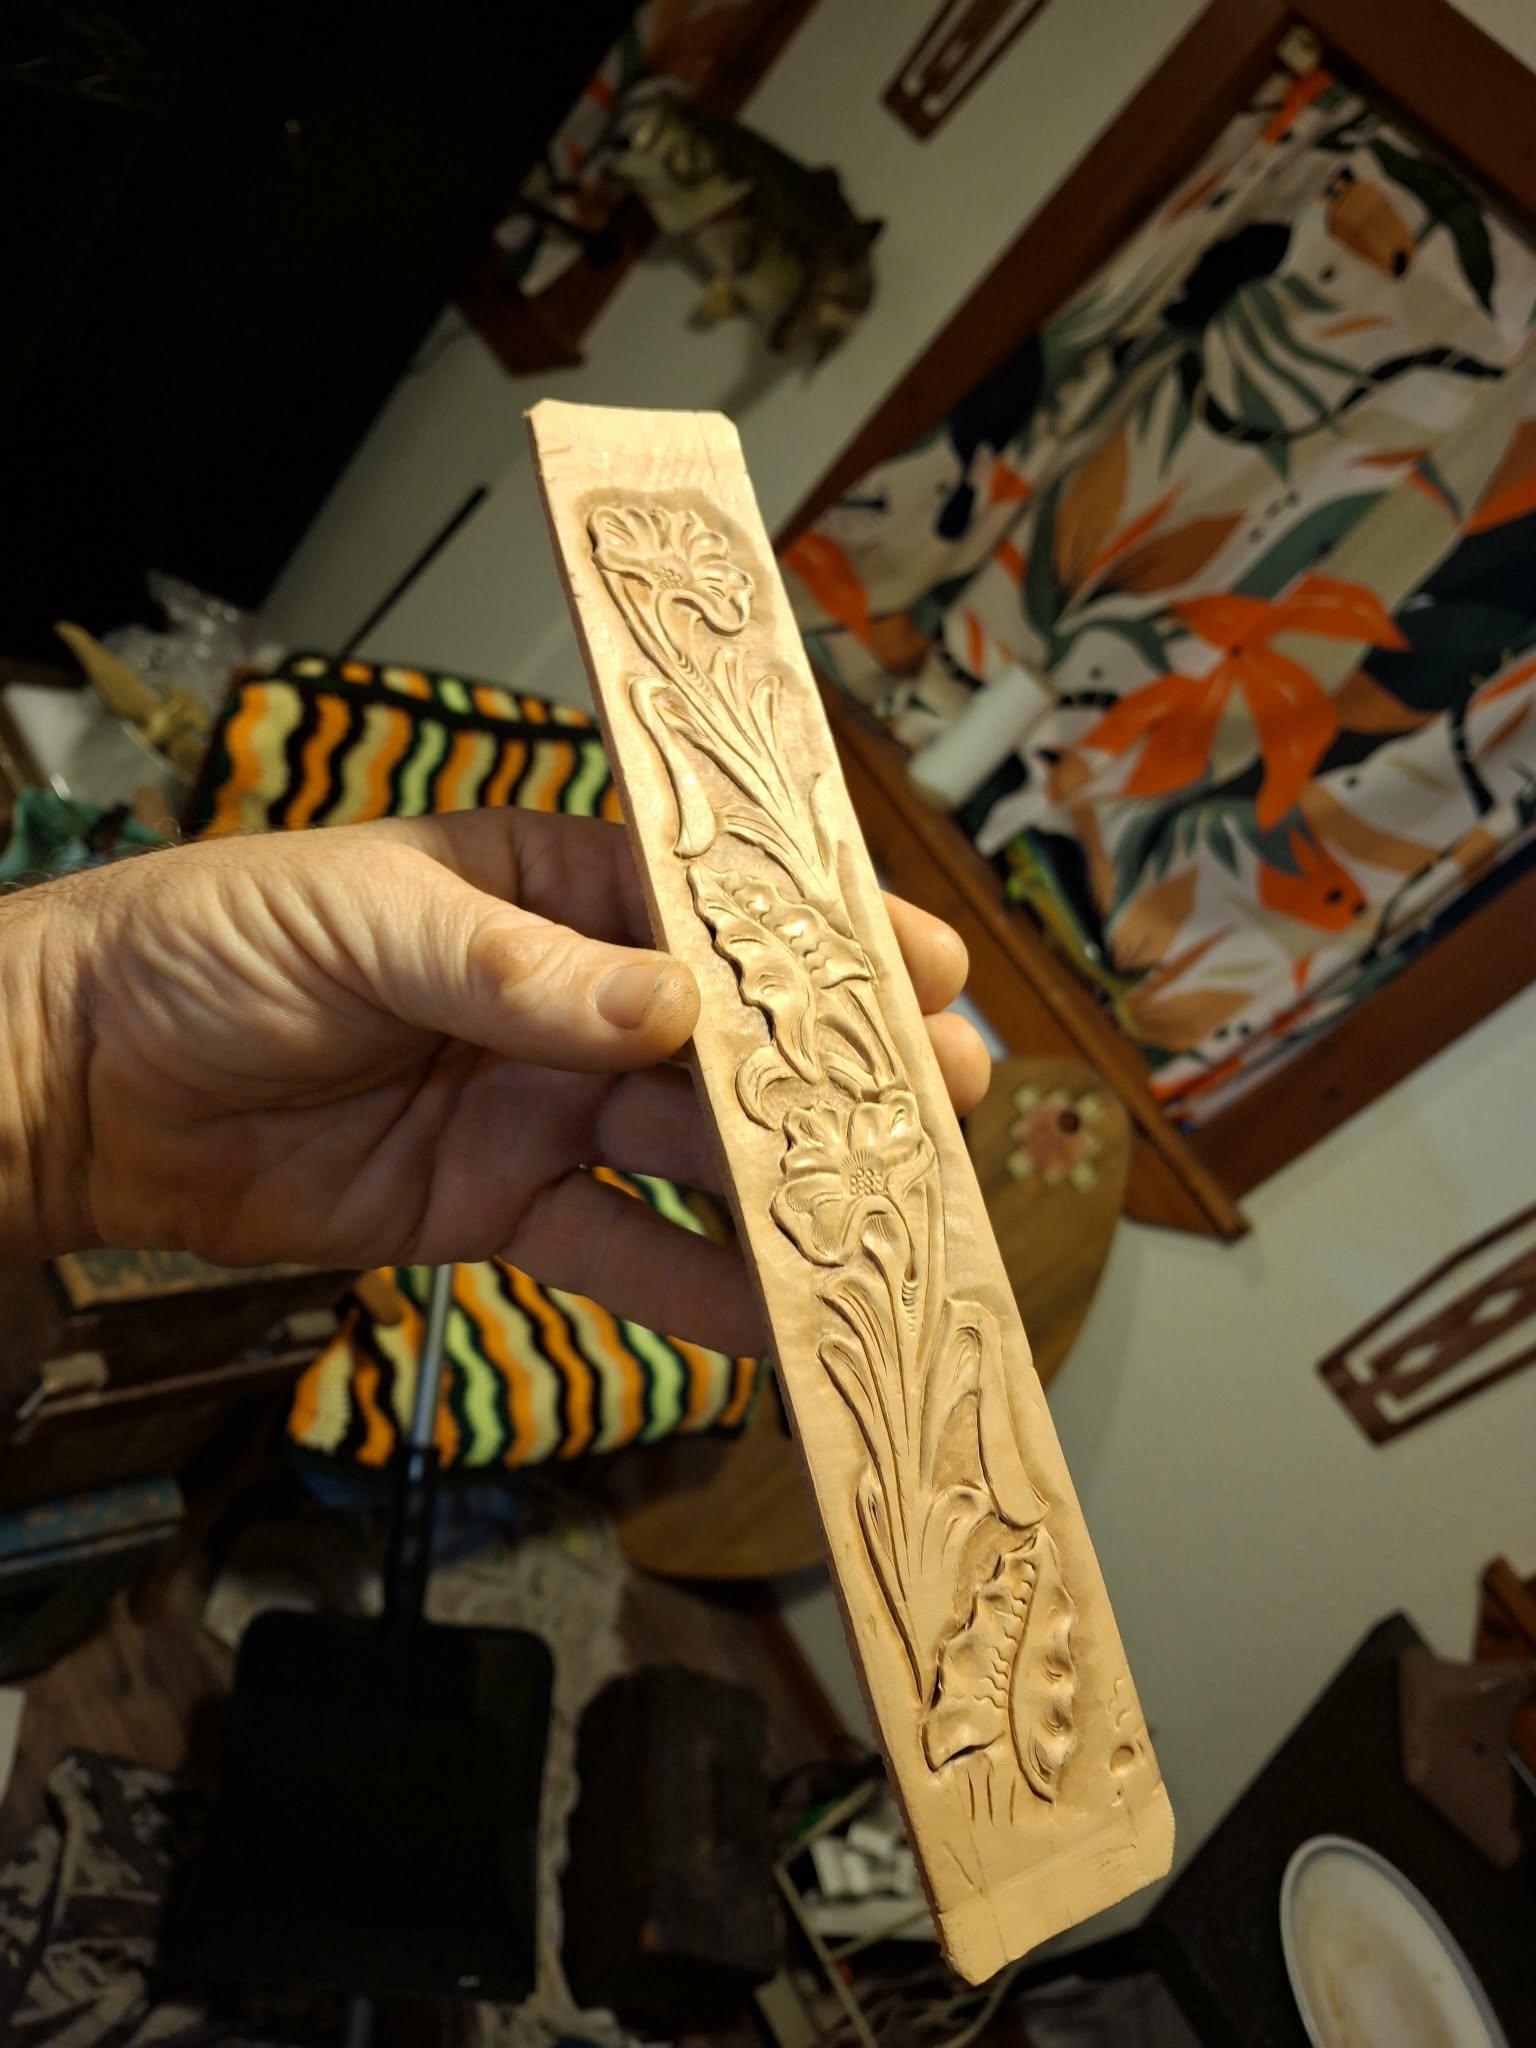
spring flowers and good food
LakeOtter replied to chuck123wapati's topic in All About Us and Off Topic
I can whip up a reasonable faux-haggis pretty well... not many sheep stomachs right on hand in the Florida forest but there's steel cut oats and meat (maybe beef w/some lamb), seasoning & fat, and some organs to make it convincing. Can't skip the offal altogether or else it's just oat-burger. I liked it so much when I got to stay in Aberfeldy I had to seek out something similar at home. Haven't replicated beans on toast, though O.O. I could go for wood pidgeon breast again, though! -
I might just stick to a little Olive Oil (OO) but -- Since I don't make a lot of items or big items, more expensive oil isn't a big deal if there's any, eventual non-spoiling advantage. I have Neatsfoot Oil (NO) but, as you guys know, it makes things darker than OO in short order. My question is -- have you tried fractionated coconut oil and does it immediately darken more like NO, or is it lighter like OO? Thanks! Commentary: I'm still green at tooling and many construction techniques, but with basic veg tan DIY items like quivers, simple little sacks, andsoft cases for Native American-style flutes (NAF's), I have some experience experimenting with different oils for a couple decades, branching off my experimenting with oils for the NAF's (esp. mouthpieces). I really like oiling at least a little, rather than skipping it. Since Neatsfoot NO darkens so much more than OO, I use OO lately in my tooling practice (make the antique paste stand out better... esp. when I do better, hehe). I also like the bacteriostatic formula I made for the wooden mouthpieces but, because it has essential oils to abate spoilage, you have to like a blended whiff of essential oils. I like it, but some people mightn't, and some have allergies. I was thinking of trying fractionated cocnut oil (that doesn't solidify at too high of a temperature like a mild winter day, like regular coconut). I've never had any, Just regular coconut oil that was not noticeable much until it got cold and I had a lightly-buttered flute case. Thanks for weighing in if you have any fractionated coconut oil thoughts.
-
I want to thank everyone for their input on this! I think I'm reasonably sharp on the blade but will keep an eye on angle (even subtle angle seems to matter when too moist), and the 'fridge method is keeping the leather a bit weird-moist including the very, very surface, at first (what with condensation adding to the mix). To answer a question or two put forth and explain a bit further: Isee to have no real issues, regarding moisture, when doing a small hat patch, or doing scrap practice, anything where I get the job done fast, including how much to moisten of keep moist all in one session. But I want to make giant-breed dog collars (ornately tooled, decently, eventually). But I work slowly, just yet, and a belt or giant collar can take numerous sessions of slipt-up-time, as time allows. My schedule is weird and it could take a couple days before I get back to a project, spend a while, skip two more days, etc... And So: 1) Fridge option: I am afraid that leather kept moist all week, working off and on during "spare time", will rot or spoil after that long, unless it is refridgerated (but I'm inevitably staying too moist or weirdly-distributed moist) 2) Dry/Moist/Dry/Moist option: I am also afraid (and it would be nice if I were wrong...?) that if I just let the leather dry out completely (out on a shelf, open) and moisten it enough to tool more, and potentially repeat numerous times... this goes against my suspicions that yu are not supposed to let leather dry out completely if you have more tooling to do. Somewhere I got this in my head that it sort or work-hardens (?)... that a piece of Herman Oak leather wet, dried fully, then wet again won't tool quite like virgin Herman Oak anymore, and that it starts acting like cheaper or crummy leather the more you moisten and fully-dry and moisten again. That's why I thought you had to retain some level of moisture until fully done tooling. That would be great if concern #2 was non-existent, at least in terms of wetting/drying/wetting less than 4 or 5 time, lol. Then I'll just let 'er dry overnight and re-wet the next day/hour I have available to tool. Otherwise, my second choice seems to be to compromise and let the leather's surface dry a bit out after taking out of the fridge so it behaves better, but isn't totally drying out between sparse sessions. Eventually this 'fridge or no fridge / storing in between tooling options should become moot as my tooling speeds up and I just commit to get tooling done in one session, or at least to get the rest done the very next day (and then I can keep it covered at room temp like I think Chuck123wapiti was suggesting). Thanks to Chuck and everyone who reads and answers my posts! I tried to do this scrap fairly quickly... I can see where I messed up and/or can do way better, but I'll keep practicing. I had to blow out the pipes after being tied up for weeks (months really) and wanted to work toward a viable or practical speed (so definitely skipped the bargrounders for nlater, lol)
-
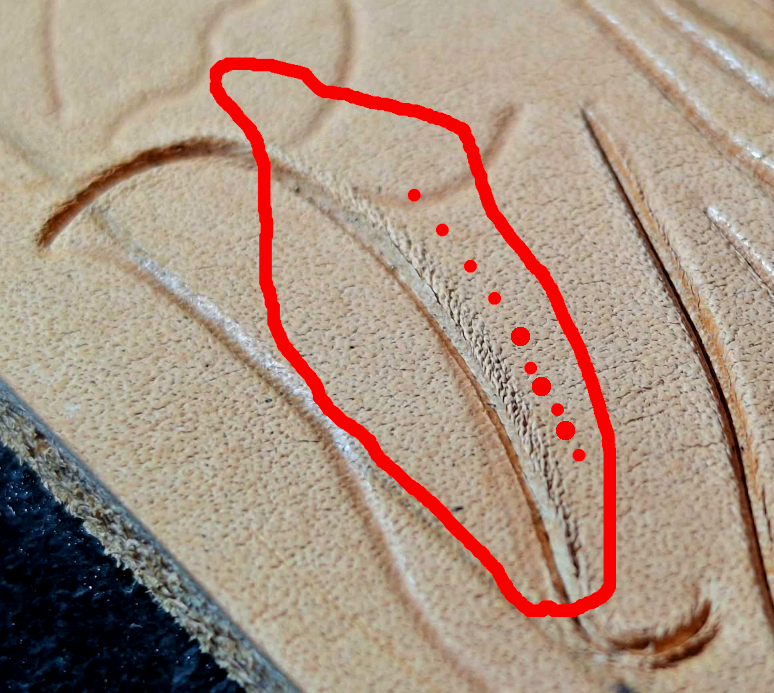
I'm embarassed to ask this when I have experiented with tooling this long already. Seems fundamental or elementary. I put red dots near what I mean. The slightly raised ridge lines with tiny stretch marks pulled along with them. It's good leather; HO. I did have to stick it in the fridge overnight after tracing lines, to work more later on when I had more time, but that's going to happen a lot in my life. If I'm moistening it too much, esp. to bag and refridgerate, I'll have to get a handle on it. t's more moist than the color looks here; a whack on a shader burnishes nicely. If it's because my blade isn't sharp enough... I don't know what to do. I have worked at that art of sparpening until it will shave some skin off my thumb. Surely that's at least as sharp as some guys who do great and claim personal sharpening deficienies. It is stroped to mirror smooth and all. I didn't start or end those visible lines very gracefully but, neverminding that -- ...could I be cutting just too deeply? It's 9 or 10 oz. and it just didn't feel like I was cutting through too deeply relative to the leather's thickness. But I guess going deep enough may force the line so wide, with a standard blade, that it eventually reaches the end of the bevel on the blade, even. Maybe that could cause pulling as well. I'm a little lost on something here that's obviously such a beginner thing I should never have gone this long without asking. Sometimes I luck up and only have this happen on one side of lines that I'm going to bevel enough to cover it up. Back beveling doesn't help as much, lol. Thanks for your thoughts. Too moist and too deep?
-
Floral scrolling step by step
LakeOtter replied to FrenchMich's topic in Floral and Sheridan Carving
I don't want to irritate anyone bumping an old thread but I was doing a deeper study of variations on scroll work and really enjoyed this that was posted 3 years ago. It's another I've chosen to download the pics just to look at in a personal, private study gallery of my own, as inspiration and variety. Thanks to FrenchMich -
I got so used to working on small items I could tape down to a modest stone slab, and stick it in the fridge in plastic, when I'm not finising it in one evening. This is about keeping the work moist until the next go. Now that I'm moving to giant-breed dog collars (and probably human belts) I was wondering if there was any option other than carefully, loosely coiling the belt and placing it in the fridge on its side...? It gives me the willies not lying flat becasue I don't want it to deform r get squished etc. Or... presumably people put work in the fridge because they don't want to start rotting the leather, moist in a bag without cold, but I'd never tried just leaving work room temperature for two or three days, in a more convenient spot to spread out than a fridge. I don't know how much preservative is left over in veg tan leather. There seems to be something. I mean, I've used oils that go rancid smelling in wood or rags, but which seem to do so much, much less in leather. This made me think there is at least some light preservative left over in veg tan leather, but I don't want to start unecessary bacteria colonies. The real pros seem to trace and tool a belt all in one go. If you don't, I'd like to hear how you store the long, moist leather belt overnight for finishing the next day or so. Thanks! Jeff in FL
-
Oh wow thanks! This was a post I made back in June but I'm glad I popped in just now and learned this term escapement files. I looked at some based on your reply and, indeed, found files useful to this end which I'd not found, before.
-
Hi and thanks in advance for specific advice re: making keeper loops for collars or belts from veg tan. I don't have a splitter and just have bought veg tan 8-9oz. leather, 9-10oz., 2-3oz., maybe some 3-4oz. again soon. I assumed I would just use stock thin leather for a keeper loop for nice dog collars I'm trying to get serious about. In preliminary playing around, I noticed that the thin veg tan leather I have is noticeably softer than even Herman Oak thick stuff skived thin, experimentally with a knife. Is this an extra reason to have, at least, a small strap splitter? I mean, I guess I can wet my stock thin veg tan and dry it a few times to firm it up a bit, dye, crease or even stitch it and it will firm the end resulting loop up a bit. But I guess I'm realizing if I had a splitter I could use the exact same grain leather, a bit stiffer and, even, the same hue if it made a difference with light dye. Any thoughts confirming or denying the validity of this thinking is appreciated. Thanks! Jeff in Silver Springs, FL
-
Focus is on large dogs and lining 8-9 oz tooled leather tops. I have 2-3 oz veg tan leather that seems tough as blazes (yet soft like Herman Oak is in any thickness) and can still get more at the great price. But do any of you have experience in abrasion wear for such linings, with dogs? Would you recommend a different lining, like some synthetic? I have this 2-3 oz for lining belts. I'd probably go 3-4 oz lining in a perfect world (like the rodeo belt I watched made) but the deal on the 2-3oz was sooo much more affordable. Soft and super tough but I know nothing of abrasion resistance over a bit of time. Thanks for your thoughts. Jeff in Silver Springs / Ocala Forest, FL
-
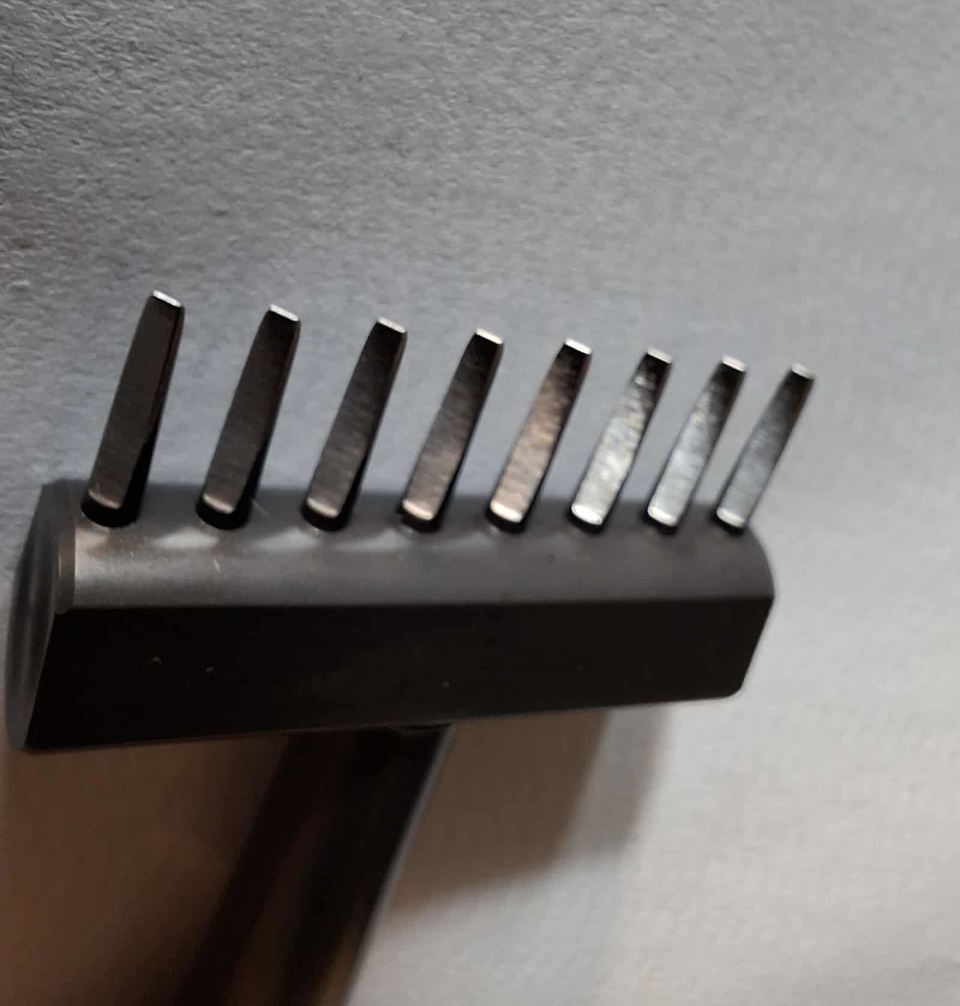
(image attached) I'm stoked to get my KS Blade Punch brand … item, lol. I like it! I say “item” because I want to know whether to call them pricking irons or stitching chisels that happen to be French style...? If I looked at this, with my limited sewing experience, I'd have said “French Style Pricking Irons” you'd use to mark the leather, then follow with an appropriate awl rotated at that marked angle. But then everywhere I look I see people using these same types to punch all the way through like a chisel, be they KS Blade Punch, Sinabroks, or 4Z. Even Mr. Armitage talks about how they glide all the way through, in his great PDF article, here (although I couldn't tell if he was referring to the round or flat). What's the deal with that? Are these an “either/or” that can be punched through or used as a pricking iron? I got them to use as pricking irons, and follow with my C.S. Osbourne Saddler's Stitching awl. I have adequate, more affordable pricking irons in other sizes, that work fine, but couldn't find them above 4.5mm, so I got an 8 blade and 2 blade KS brand in 5mm I like the look of with 1.0 and 1.2mm thread. Often, the ads for these products say both Stitching Chisel and Pricking Iron. Thanks for your thoughts! -- Jeff (optional reading babbled below) : P.S. -- Commentary on my choosing KS over Sinabroks or 4Z, I chose KS because I saw Nigel Armitage's pricking irons/chisels reviews article from 2020. He stated in a very benign way (not taking sides) that Jin from Sinabroks left KS and went independent. Having business experience I saw this seemed to mean the development and design was taken from KS. When I bought these and mentioned loyalty to such companies vs. opportunists, Mr Son confirmed they felt very betrayed and their feelings were very hurt for some time (that they literally lost sleep at first), and didn't even mention any lost business. I cannot fully judge because I don't know if Jin was mistreated or something, but I've experienced appropriation of this in the past, where we paid for development time only to have an employee take off with designs and go make money, and it smelled like that. So I went to KS. Now it appears a third party in China is in the mix with 4Z but, go figure. Anyway, I'm no expert in any of this sewing knowledge, as my experience lies in other fields. I appreciate any thoughts about whether you'd use this as a pricking iron, chisel, or if it's a 50/50 that can be used as either. I've even been using chisels as pricking irons until I got pricking irons, and just dealt with them having unneeded points, lol. (That's not what is pictured... below is the KS ones I intend as "real" pricking irons... certainly better than fudging marks w/pointed chisels then using my awl, in any case)
-
Choosing durable dog collar thread... linen, Nylex etc...?
LakeOtter replied to LakeOtter's topic in Sewing Leather
Chuck123wapati and FredK -- re: wiggling awl : Thanks for confirming this so I can practice exactly that, a bit more, as it worked but left too much traces my first time wiggling. I thought I saw J.H. do this, but when I tried it on some thick veg tan leather, either I didn't use enough finesse or the leather is bad or a bit of both. Or I need to sharpen my new Osbourne saddle harness awl, or all of it, lol. It left wee, raised divots or artifacts from wiggling that I could still see after stitching. I intend to improve tooling pictoral designs, so I'm using bare veg tan (dry for stitching). I have some Herman Oak butt but I experiment with cheaper stuff I bought earlier, and save the HO for real projects. Some came from Italy, but last night's was a quick purchase of some 8oz or so from Hobby Lobby, and so it's possibly the worst of the 3. It was as bone dry as a FL air conditioned cabin allows. Maybe the HO would do the same thing, though, since it takes good impressions (good and intended or not). Probably not the leather's fault... Practice practice, I'm sure will just be key, so thanks for confirming wiggling is normal... I did notice doing so, on top of the unexpected free JJ saddlers harness needles that came with the Riza thread, allowed the work with the existing awl, which was nice. The needles worked fine and were one size smaller than I had, so that helped and was serendipitous when I opened my first Riza thread 😊 Sounds like just practice is needed and things are looking good. -
Choosing durable dog collar thread... linen, Nylex etc...?
LakeOtter replied to LakeOtter's topic in Sewing Leather
Ugh... I like this Osbourne haft and awl blade but it seems the Saddler’s harness awl blade is listed as "1.2mm" and the holes are a bit small to have to yank thru the needle with 1.0mm thread (fairly flat thread, even). I'm using a John James saddlers harness needle, "18" size or 1/0 (single 0) which seems fine but the locked thread just past the eye is what's a bit fat for the awl holes. The awl blade is listed where I bought it as "1.2mm" ...it measures more like 2.7mm at its widest point of the diamond blade and, yes, 1.2mm thick the other dimension (length doesn't matter here). SO many sellers of Osbourne saddler's harness awl blades just list the length of the blade and not the thickness or width. They say things like "#45" and "2 1/4 in. long" but so far just the one sell lists the thickness which is obviously very important here, and I can't find a master C.S. Osbourne list of numbers that specifies their widths. So I guess I'll order from my same seller (not that they have all the choices others have, by number) and get the shortest 1.5mm and the shortest 2.0mm wide saddler's harness awl blades and eventually use them all. Not sure which I'll need for the 1.0mm Riza thread... the 1.5mm or the 2.0mm-wide saddler's harness awl blades until I try, lol... Thanks again for all the great experienced input -
Choosing durable dog collar thread... linen, Nylex etc...?
LakeOtter replied to LakeOtter's topic in Sewing Leather
Thanks again not only for this but for everyone's comments including KillDevilBill above and everyone... Cool re: Tove... I have an overstitch wheel I can identify the sizes of and use but, at least, instead of hammering the cheap chisels thru tonight, I'm using the size array of diamond chisels like a crummy pricking iron, at least this week. The points are short, and I can pierce the 9oz leather a small fraction of the way and still get a slant to match up my CS Osbourne diamond awl angle, which was pleasing. I won't be using them long, I'm sure. That's great stuff about using different awl blades sometimes... I am currently using a CS Osbourne saddler's harness awl, but noticed they make a "stitching awl" blade (not the Speedy Stitch tool thing, these have no hole and say use with the same, regular Osbourne hafts) that looks like the same blade up front as the saddler harness awl blade, but the rear half is just cylindrical like they didn't forge that half into a diamond... an elongated Roman spear shape. I'm sure I'll discover the benefits of all the types including what you mentioned! Oh KillDevilBill mentioned not liking very slanted stitches... I am noticing my diamond awl, at the angle I'm using, provides enough slant for me. I like that much and I like the way the diamond awl operates easily. I guess I'd need to punch (or awl?) circular holes to have straighter stitches, but I'm liking these. I'm now wondering what the end difference is using French pricking irons or diamond pricking irons (also real ones not chisels), when using the same awl to pierce the leather, anyhow.... is the marked angle actually different? I can see each mark is wider with some French, but I can't tell from pictures if the actual angle is steeper than the non-French pricking irons. In any case I'll probably wind up with diamond pricking irons as long as they're not actually pointed chisels...? I'm thankful to discover people willing to share such valuable stuff, as every single reply has been. I've been in circles where that was hard to find. -
Choosing durable dog collar thread... linen, Nylex etc...?
LakeOtter replied to LakeOtter's topic in Sewing Leather
I would like to thank everyone including the ones zeroing in on dog collars like Tove09Tilda and chuck123wapati! I really didn't expect sewing to be such a rabbit hole. I'm used to tooling a novelty and either not sewing it or just getting by a bit. I really want to get serious about using my tooling (stamping) in dog collars and, since I'll have the thick veg tan leather wet, when or if a groove seems prudent I will have that aforementioned chance to just compress a token groove to my liking and not necessarily have to gouge one with a groover. I really appreciate the takes on when it's needed and not (or even counterproductive). In fact, I started looking at French style pricking irons (which are hard to find in larger sizes... I finally found a 5.4mm spacing) but then it hit me -- goodness, that's a pretty wide groove needed to accommodate the slants! This adds another twisty turn to my stitching rabbit hole. Maybe I'd better stick to diamond style for now, whether pricking iron or a punchy stitching iron/chisel. I am serious about things I embark on, and I initially liked the idea of practicing and achieving success with pricking irons and an awl. I got an Osbourne awl haft and a 1.2mm diamond awl blade to go with it. I got 4mm pricking irons (Wuta) but for the 9oz leather I have (I already have a lot of Herman Oak 9oz and I know a lot of people with huge dogs) I started looking at larger pricking irons (for larger thread like .8 and 1.0mm thread) like 5.4mm spacing (which is some of the largest I could find at a doable price, Sinabroks). But I don't want to sink $180 (after shipping) on a pair of them in French style and wind up wishing they were diamond or straight. Actually Tove09Tilda mentioned using up to 1.0mm thread with 4mm pricking irons like I have... I'll have to experiment, since I thought that might be too chunky, hence the eye on 5.4mm pricking irons, be they French or not. Now I'm not even sure what style to get. I'm all about experimenting and practicing but I like to buy the right items the first time (because I know I'm committed to what I begin, as I was making archery bows and decent woodwind instruments) but outfitting right the first time, with premium stuff, seems challenging with stitching, lol. Again, thanks for the wonderful posts! Very useful. P.S. Update -- I did just find some wider-spaced prong diamond irons that, while economy, had surprising reviews and will help me learn, because I was able to get several spacings in 3,4,5, and 6mm all for pretty cheap, to try, and get a handle on what I'll use the most. I figure I can either all the way punch thru or, even, use them like pricking irons with my awl, to start with, if I like, so long as I give them a tap enough to get past the point. Then, if I buy expensive ones, later, I'll know which I need. I just get scared because sometimes, "later", I don't have any money, lol. -
Hello and thanks in advance. I have more tooling practice, by far, than sewing, and so I'm studying two handed saddle stitching, got a pony, etc. I just want to chose a saddle stitching thread that is practical for durable use on H. Oak veg tan butt dog collars I'll be concentrating on, and trying to eventually get a few into the local tack shop with tooled designs. And I'd like to get used to what I'll continue to use, up front, and not start all over, soon, with how something behaves. I have been looking at saddle stitch info... Al Stohlman was back in the day and, even today, Jo H. is purposefully traditional. These sources recommend non-waxed linen thread, because they recommend not waxing the ends so that better ends can be made But what about my modern options like the awesome sticky thread mentioning Nylex in passing? Synthetics sound durable, and I've seen a burner tool... maybe that helps with "proper ends" in this manner? I just want a reliable product; I don't thing my customers will care if it's synthetic. The main feature is some hand-tooled designs and custom lettering. Thank you for your thoughts (or links) on pros and/or cons of threads, pre-waxed or otherwise. Jeff, Silver Springs FL, Ocala Forest