johnnysingerfan
Members-
Posts
20 -
Joined
-
Last visited
Content Type
Profiles
Forums
Events
Blogs
Gallery
Store
Everything posted by johnnysingerfan
-
Singer 136w100 stitch length gears
johnnysingerfan replied to johnnysingerfan's topic in Leather Sewing Machines
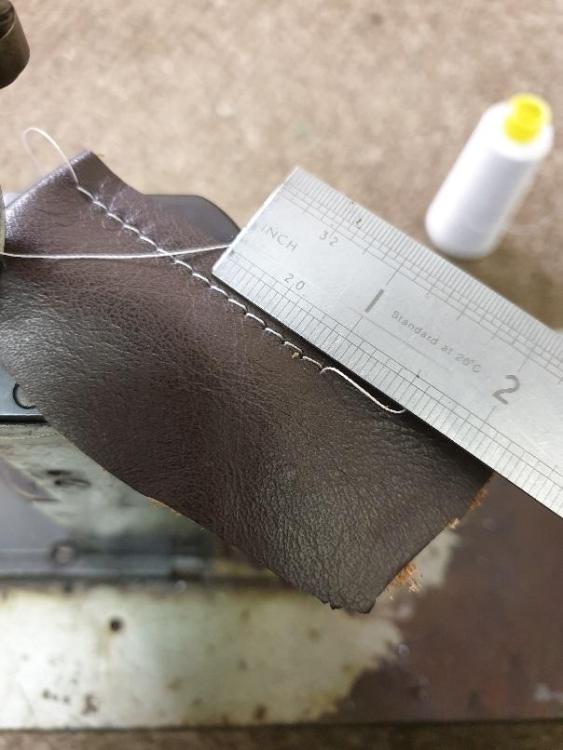
Ok guys, so I've cut a new twin start thread and machined off the original single start worm. I can confirm that the stitch length has doubled and the machine seems to be stitching really well! I'm only turning it over by hand at the moment. Under the top cover plate there is adjustment for the swing of the needle front to back. There's easily enough adjustment so that the needle doesn't have any strain or bending. Now I will go ahead and restore this machine, it is properly filthy! I needed to know that it would make a decent stitch length before I bothered to restore it. Have a good weekend guys. -
Singer 136w100 stitch length gears
johnnysingerfan replied to johnnysingerfan's topic in Leather Sewing Machines
Thanks Bob, I understand what you're saying. I suppose the leather thickness and hardness will play a part too? I'm having a play with what is possible with the machine from an engineering point of view really. I've got 7 industrial sewing machines now, so I can tinker on this one a bit. I've managed to make a new twin start worm gear for the feed mechanism before the gearbox, so that still allows me to keep 3 stitch lengths, as the original machine. The stitch lengths will have doubled though, now 2mm, 3mm and 4.4mm, which would make the machine much more useful to me. I would use it with 1.5mm chrome tan leather. Once I have reassembled the machine I'll let you know if it works at 4.4mm or 3mm stitch lengths. If it only works at 2mm then I guess I've not changed it from the previous maximum length, so I won't have gained or lost anything. Fingers crossed it might work. -
Singer 136w100 stitch length gears
johnnysingerfan replied to johnnysingerfan's topic in Leather Sewing Machines
Thank you for the info Constabulary, that is very kind of you. Looks like I'll have to make a custom gearbox. I'll let you know how it goes... -
Singer 136w100 stitch length gears
johnnysingerfan replied to johnnysingerfan's topic in Leather Sewing Machines
-
Singer 136w100 stitch length gears
johnnysingerfan replied to johnnysingerfan's topic in Leather Sewing Machines
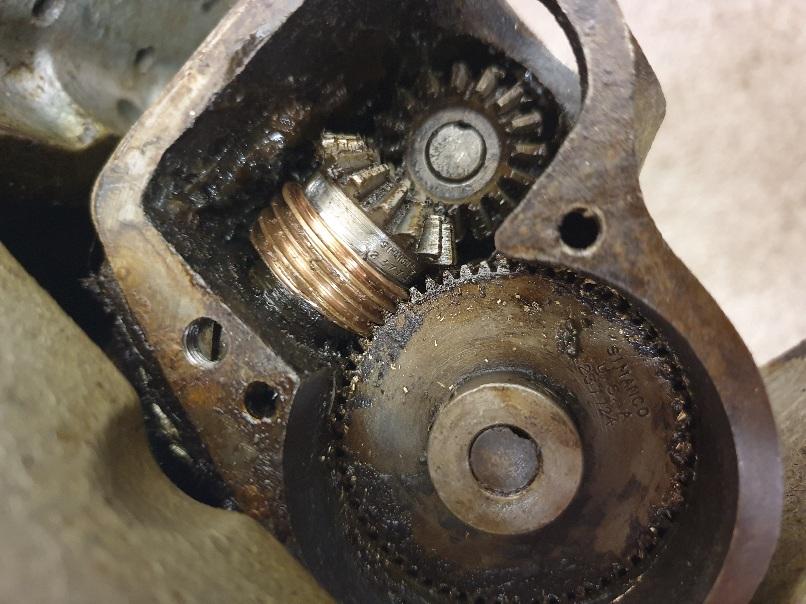
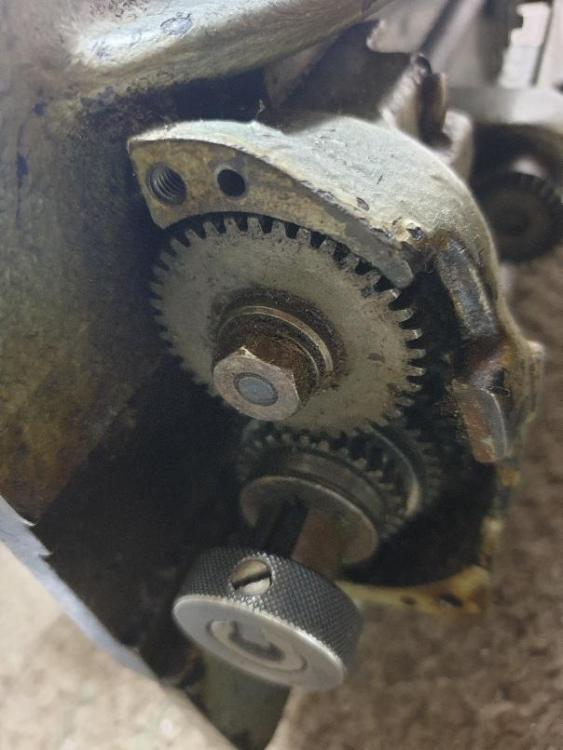
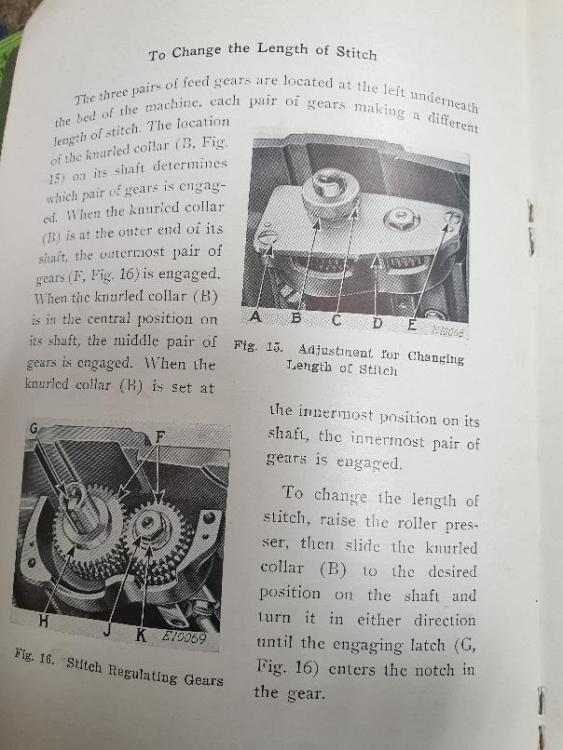
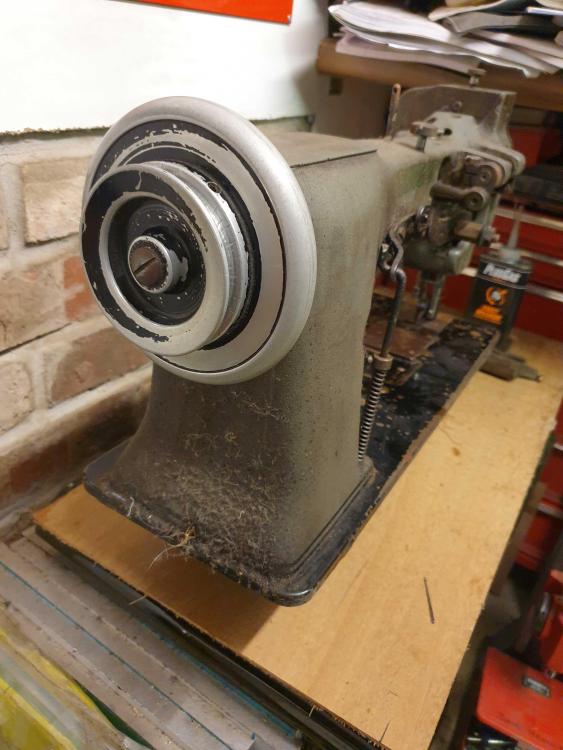
Here's some more photos. I've removed the gearbox cover plate and you can see the 3 pairs of gears. Any help would be great thank you. -
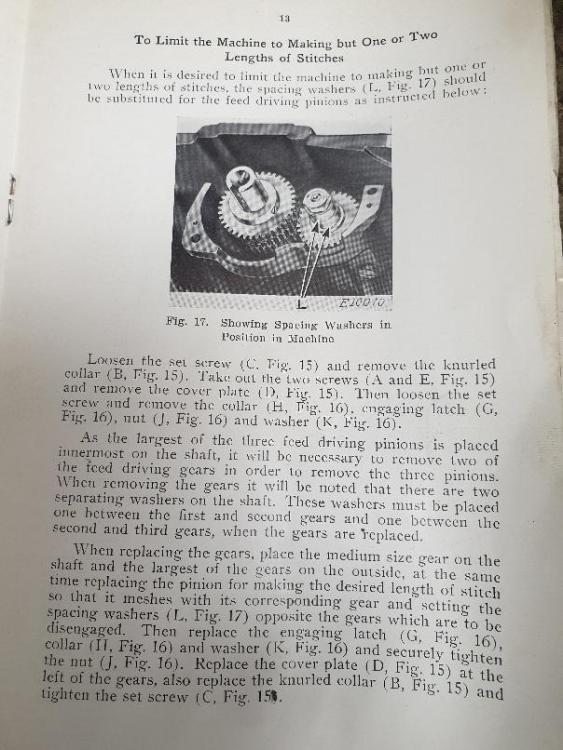
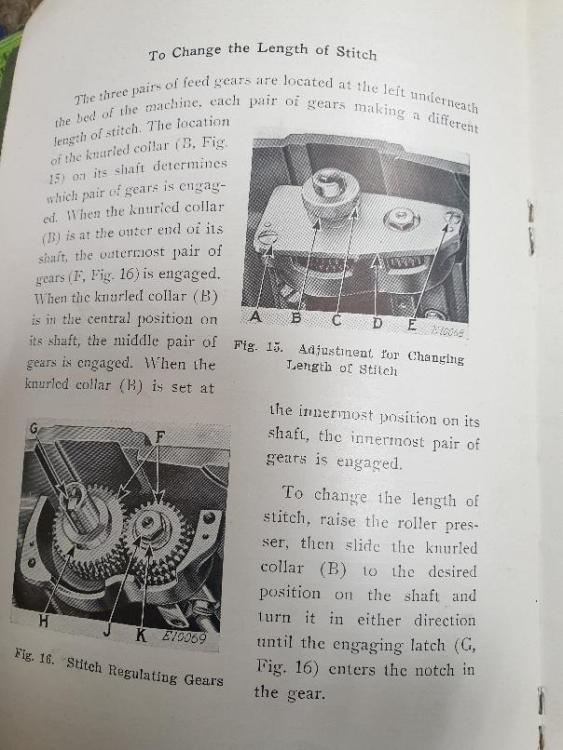
Hi guys, I've just bought an old singer 136w100 postbed roller wheel machine. The stitch length adjustment goes from super fine to fine, there are only 3 settings. I've got the manual and it says you can change the gearing to only have 2 settings but the manual never mentions stitch lengths. I think the maximum stitch is 2mm at the moment. The finest setting is probably half that! I'd like to get 4 or 5mm stitches if possible? Can it be done by swapping the gears about? Or will I have to make some custom gearing solution? Many thanks John
-
Singer 111G156 saved from landfill
johnnysingerfan replied to johnnysingerfan's topic in Leather Sewing Machines
Wow, I love it. A fantastic machine on a wonderful old bench. I have the Hightex clone copy of the 335, it was the first machine I bought. I made the leather interior for my Fiat 600 Multipla with it and the convertible roof for my Fiat 500d, plus a few other projects. I made a flat bed aluminium table for it because I didn't want to buy two expensive new machines. It's much cheaper to restore an old quality machine than to buy a new clone. Although a brand new machine is easier to learn on I think. -
Singer 111G156 saved from landfill
johnnysingerfan replied to johnnysingerfan's topic in Leather Sewing Machines
Thank you! I can't believe how smooth they sew. Looks brilliant! -
Singer 111G156 saved from landfill
johnnysingerfan replied to johnnysingerfan's topic in Leather Sewing Machines
Yes, you're right about the bench, the old ones just look better though Cheers! -
Singer 111G156 saved from landfill
johnnysingerfan replied to johnnysingerfan's topic in Leather Sewing Machines
Love that long arm machine! Quite a rare beast I think, I haven't seen any of those come up for sale. Love that you saved it and that you use it. Great size comparison against the small sized home machine. -
Singer 111G156 saved from landfill
johnnysingerfan replied to johnnysingerfan's topic in Leather Sewing Machines
Thank you! -
Singer 111G156 saved from landfill
johnnysingerfan replied to johnnysingerfan's topic in Leather Sewing Machines
Thanks, the table will be saved but I wish I had an old cast iron industrial Singer table for it. The red is actually so much darker in real life, it's RAL 3003 I think. The main thing is that it works very well, in fact it sews through thicker leather better than my brand new Hightex machine. Amazing considering the age and abuse this poor machine has had. -
Singer 111G156 saved from landfill
johnnysingerfan replied to johnnysingerfan's topic in Leather Sewing Machines
Thanks! I couldn't let this one go into the skip. It was just about to if I hadn't bought it..... The red is much darker in real life, the camera makes it look really bright. The great thing is all the cool stuff you can make with one of these lovely walking foot machines. -
Singer 111G156 saved from landfill
johnnysingerfan replied to johnnysingerfan's topic in Leather Sewing Machines
Thanks, I wanted them to be the same as the industrial ones but could only find the more ornate Singer home ones online. -
Singer 111G156 saved from landfill
johnnysingerfan replied to johnnysingerfan's topic in Leather Sewing Machines
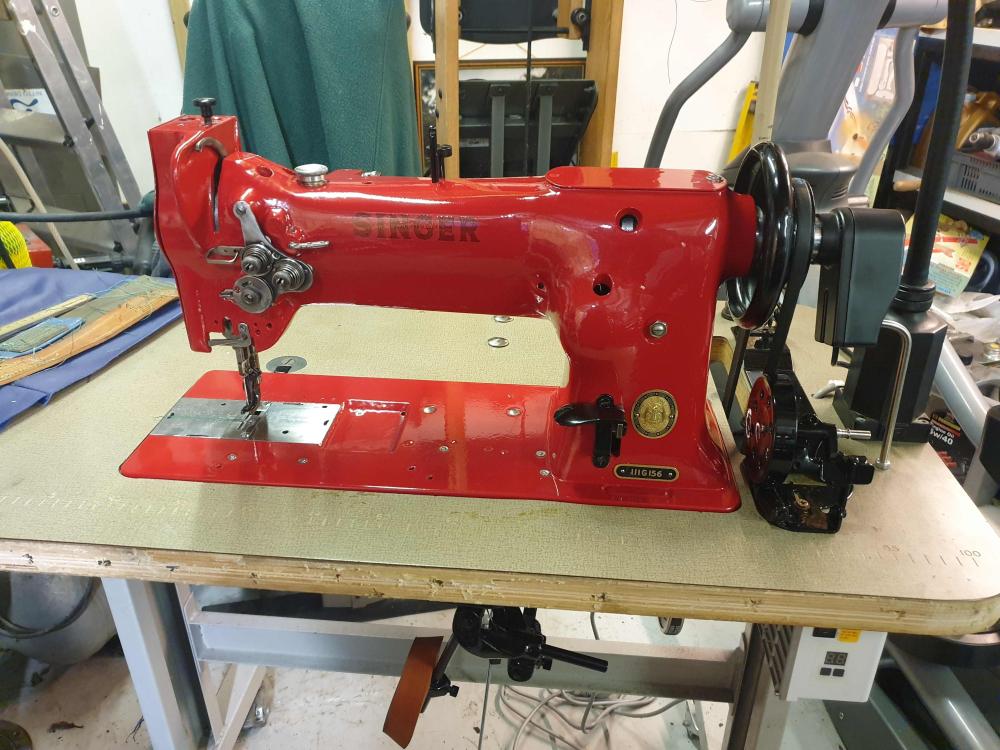
Ok, so not original colours I know......... I thought that as the machine was pretty much a lost cause, it wouldn't hurt to spray it a different colour. After all the machine is for me and not to sell on. The machine has been slowed down to 1 stitch per second using homemade speed reducer pulleys and a servo motor. I added a synchroniser. The singer logo was made from the photographs of what was left on the machine, it was supposed to be gold but turned almost black when applied to the red paint, so I won't worry about that. As for sewing, I have been through 4mm thick veg tan using 20tkt thread without a problem. Next up is to replace the edge of the sewing table (wish I had an original Singer industrial table but never mind!) and to start using it in the evenings. Good luck with all your sewing projects, I hope my little rebuild pics might inspire someone else to save a machine from the skip. -
Singer 111G156 saved from landfill
johnnysingerfan replied to johnnysingerfan's topic in Leather Sewing Machines
-
Singer 111G156 saved from landfill
johnnysingerfan replied to johnnysingerfan's topic in Leather Sewing Machines
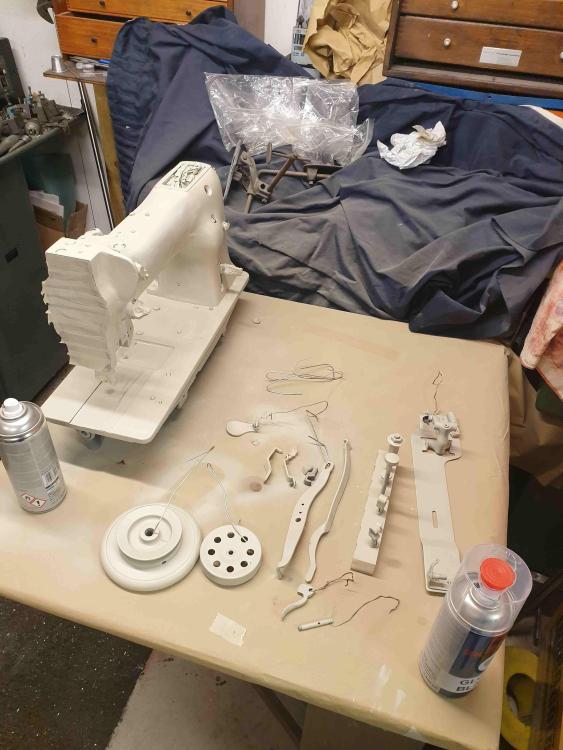
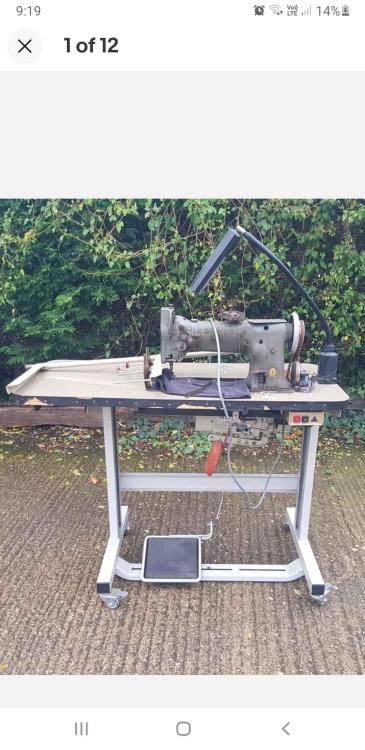
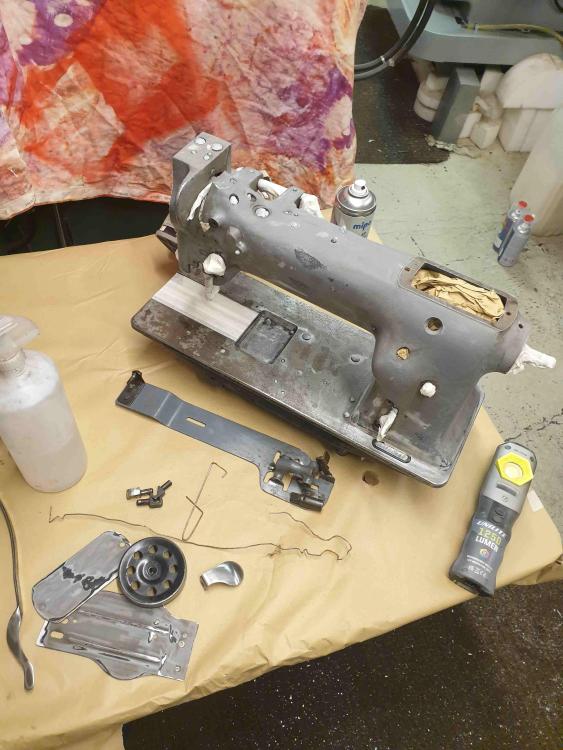
It didn't look too bad on the ebay photo. Note that the material under the foot is covering up the rust. The next photograph shows the machine ready to be sprayed -
Singer 111G156 saved from landfill
johnnysingerfan replied to johnnysingerfan's topic in Leather Sewing Machines
-
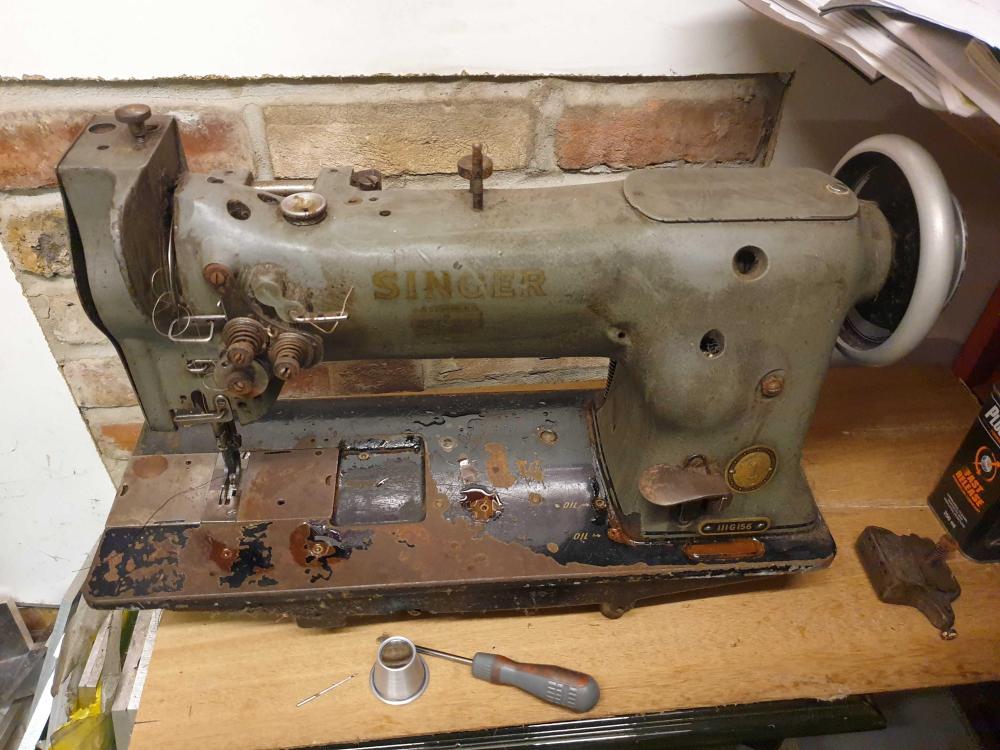
Hello everyone. This is John from Norfolk England. I've just bought this rather sad looking Singer 111G156. It was from a house clearance company who sold it to me on ebay. As you can see it is rather rusty and dirty. I already have a new Hightex cylinder arm machine, I was looking for an old Singer flatbed to compliment the cylinder arm, especially when working on larger items like car interiors etc. I am relatively new to leather sewing and it is my hobby, not my job. I have used your site a lot for hints and tips. So I thought I would share my sewing machine rebuild in case it helps someone else like me in the future. My machine is finished now and I just have the table edge to complete next. I'll see if I can post some more photographs of the build. I replaced the hook, the timing belt, the motor was seized, so I now have a new servo motor. Everything was out of adjustment and needed lots of cleaning and polishing. The final machine has been sprayed with 2k epoxy paint, so it should be quite hardwearing for many years to come. The original serial number has been ground off and was painted over with the original grey paint, so it must have happened when the machine was made? It means I can't possibly date this machine but never mind. All the parts were original Simanco numbered parts, I don't think it had had much service history! It's been a fun project, as I'm more used to working on old cars, or making high tech parts for industry.
-
I want to restore a Singer 111W153
johnnysingerfan replied to kevinkay's topic in Leather Sewing Machines
What a wonderful job you've done of that Singer! I've just restored the exact same model, however mine wasn't on the beautiful original table and the paint was almost all gone, plus it had gone rusty, so I painted it deep red.


