Search the Community
Showing results for tags 'chancey77'.
-
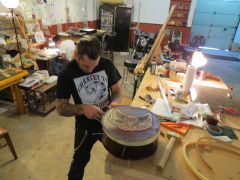
Welcome to the introduction of How To Wrap a Leather Guitar. After I spent months figuring it out and sending emails to some great guys who do this..I received NO HELP! I am willing to share my growing pains with you as fellow leather workers! So here we go! Materials; A: Guitar Body: *****I am using a custom made Alder Body based off a 1952 Tele Shape, that has 1 TV Jones Pickup and 1 Tone/Volume Stacked Pot. 1.Leather should be at least 8-9oz or 3mm thick in order to be thick enough to cut a 45degree angle on to join the sides and top and back together. I have tried it with thinner leather and it just doesn't have the proper height to do it properly, so after some trial and error I figured starting with a 3-4mm thick piece works teh best. 2.Contact Cement 3.Leather Lace 5/16 4. Edge trimmer 5.Good sharp Knife. STEP 1: A: Cut you side strap or at least a small piece about 12" long for the thickness. B: Lay your guitar face down on the backside of your leather. C: Using your strip that you cut for thickness and a pencil trace around the perimeter of the guitar making a very good dark line D: Repeat action for the back of the guitar. STEP 2: A: Cut out your pieces B: Using a wing divider set the gap to 5mm and make a mark around the perimeter of the leather pieces you just cut out. STEP 3: A: Wet the backside of the leather and using you hand press the leather and rub where the string holes come through for the Bridge,Pickups and Neck notch. B: Using a 4mm hole punch punch out the string holes and also punch holes in the near corners of the pickup hole and neck corners. Do not punch directly on the edge give yourself some room to play with so make sure the holes are punched away from the edges. *****We will be cutting out the leather for the bridge later so that we direct contact between the wood and metal bridge for bet tonal outcome...but more on that part later.***** The String holes are a guide for glueing it down and lining up everything together. STEP 4: A: Using your wing divider marks and a slot 3 prong punch and a 1 prong slot punch start making slot holes around the perimeter of the top and rear pieces. ***When you arrive at the neck joint you must be very careful to leave yourself 5mm from the last hole so it takes some lining up and eyeballing not to go past where the leather will be cut out from the neck pocket. B: After you have punched out your lace slots; STEP 5: A: turn over your leather top and back B: Using your wing divider check and set the tool to the thickness of the leather. C: Mark all the way around the backside perimeter with the wing divider. ***** It should be very close but not past or on top of your slot holes. STEP 6: A: Get out your Edge trimmer and set yourself at 45Degrees and cut from the edge of the leather to your marks you just made. Press down VERY hard so you don't get under the leather. You want to be just on the edge at a 45 degree angle not cutting into your slots. Step 7: A: Line up the string holes with the prepunched holes on the leather for a string through body guitar. *****Then around the edge with you small side strap check the clearances and edges that your overhang is lined up properly. B: Fold back Half of the leather and start applying Contact Cement. Apply first to the wood, then to the leather. *****You may want to divide gluing it down into 3-4 parts depending on how fast the glue is setting but you should move very quickly on applying the contact cement! After applying and pressing the leather down in sections you can place a board and maybe even as I do a large piece of stone on top for 12 hrs for the contact cement to be pressed by weight and have the best bond possible. ****** REPEAT THE SAME FOR APPLYING THE BACK PIECE. MORE TO COME!
- 39 replies
-
- custom leather guitar
- leather pickguard
- (and 5 more)
-
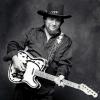
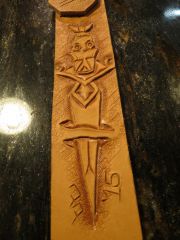
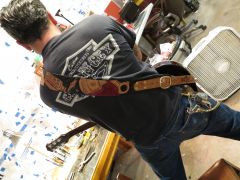
This is the pattern and sizes for the Waylon Jennings Strap and most guitar straps with a buckle and wide for names. Feel free to modify the widths to your wishes! This is just a basic design. I hope this helps answer some questions. I have been making guitar straps for a long time and this is one of my favourites. Personally I prefer my front strap end a little wider and shorter...but like I said feel free to modify what you want! I am just trying to help the newer folks and people just getting into straps. As you can see on the Ronnie Hymes strap; since he plays a jumbo acoustic like I do I tapered the front of the strap more. Good Luck and HAPPY POUNDING! IMPORTANT MEASURING TIPS! 1.Always measure hole to hole for clients straps, so you have a overall length. The buckle adjustment and extension strap length can vary. But always use that 1st measurement as a guid to have as a middle point in the buckle holes. Incase they change the guitar and the profile is different and lengths need to be different for say an Acoustic or a Strat.. 2. Always measure from the front hole to the Collar bone on you/Clients if this is for a customer for NAME STRAPS. the worst thing is if the name ends up going up over the shoulder. So ALWAYS, ALWAYS, ALWAYS make that measurement! Feel free to ask questions there are enough of us here that can lend an ear and spout some comments. Cheers! Chancey
- 15 replies
-
- chancey77 custom leather
- chancey77
- (and 4 more)
-
- 4 replies
-
- solo seat
- motorcycle seat
-
(and 3 more)
Tagged with:
-
From the album: Chancey77 Custom Leather
-
- custom leather
- chancey77
-
(and 5 more)
Tagged with:
-
From the album: Chancey77 Custom Leather
-
- tattoo flash
- sailor jerry
- (and 6 more)
-
From the album: Chancey77 Custom Leather
-
From the album: Chancey77 Custom Leather
-
From the album: Chancey77 Custom Leather
-
- chancey77
- custom leather
-
(and 1 more)
Tagged with:
-
From the album: Chancey77 Custom Leather
-
- chancey77
- custom leather
-
(and 1 more)
Tagged with:
-

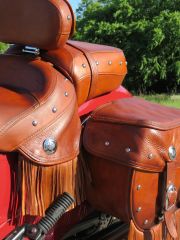
Indian Motorcycle Leather Restoration and re-color
chancey77 posted a gallery image in Our Leatherwork Galleries
From the album: Chancey77 Custom Leather
-
- indian motorcycle
- chancey77
-
(and 2 more)
Tagged with:
-
From the album: Chancey77 Custom Leather
© ©chancey77customleather 2015
-
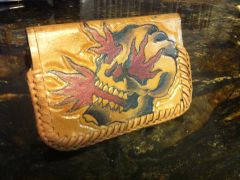
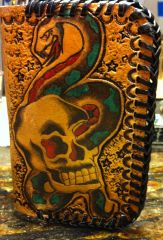
- tattoo
- skull tattoo
-
(and 3 more)
Tagged with:
-
From the album: Chancey77 Custom Leather
-
From the album: Chancey77 Custom Leather
-
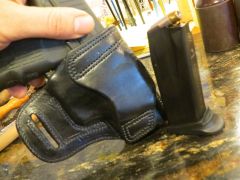
- holster customholster
- lefthandedholster
-
(and 3 more)
Tagged with:
-
From the album: Chancey77 Custom Leather
-
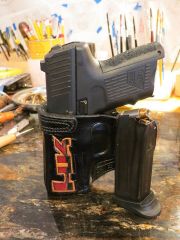
- holster
- customholster
-
(and 4 more)
Tagged with:
-
From the album: Chancey77 Custom Leather
-
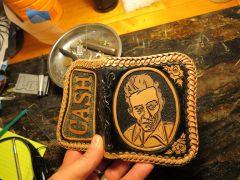
- johnnycash
- cash
-
(and 3 more)
Tagged with:
-
From the album: Chancey77 Custom Leather
http://leatherworker.net/forum/index.php?showtopic=47727#entry302396- 2 comments
-
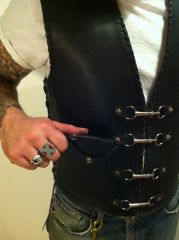
- biker vset
- custom leather vest
- (and 4 more)
-
From the album: Chancey77 Custom Leather
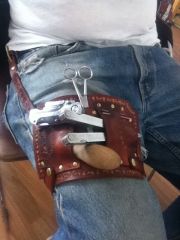
This is my leg tool pouch for lacing and stitching. Saving time with a quick draw leg rig.- 1 comment
-
- chancey77
- tool pouch
-
(and 1 more)
Tagged with:
-
From the album: Chancey77 Custom Leather
-
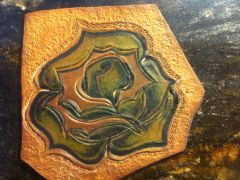
- tattoo
- tattooed leather
-
(and 5 more)
Tagged with:
-
From the album: Chancey77 Custom Leather
-
- indian girl
- tattoo
-
(and 4 more)
Tagged with:
-
-
- pickguard
- leather pick guard
-
(and 4 more)
Tagged with:
-
From the album: Chancey77 Custom Leather
-
From the album: Chancey77 Custom Leather
-
From the album: Chancey77 Custom Leather
Tattooed and Tooled Leather-
- quihn dihn
- chancey77
- (and 3 more)
-
From the album: Chancey77 Custom Leather
-
- chancey77
- chancey77 custom leather
-
(and 1 more)
Tagged with:
-
From the album: Chancey77 Custom Leather


