Jump to content
Sign in to follow this  
1985

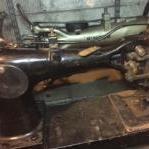
Singer class 7 double needle has a issue

Recommended Posts

Hi to all, 

I am quite new to forums, so hope this will reach any one who may help please,

A few years ago I got hold of a couple  Singer class 7 one was a  7-33 and the other a double needle Singer class 7, I think ,

I now decided to take a good look at the Double needle one, and check its functions, as its been under cover in my garage waiting to be worked on, but I only have limited knowledge with sewing machines, I need to call upon people with a lot more experience in this field than I. 

 After placing  oil on all moving parts again as I have done through the year`  there seams to be an issue, or a few I think"

When turning the hand wheel, there`s a point where its stiff then loosens up, then I noticed a few things under close inspection, There is a scraping shiny mark on the Cam thread take up in the grooved area about a inch long , And at the back of the machine is the another shiny scrape mark on the Connection feed forked . But it was about 7 mm in length and 2 mm in width but seems to of nearly gone now after me rotating the wheel, trying to find out the issue`s, but I will still show as it may be significant to some one. These two issues obviously must be rubbing at them points,and I don`t know why,

The other issues is on the needle assembly thread take up leaver , I notice when slowly turning the hand wheel round there`s a certain point the thread take up leaver stays stationary even though every thing else is rotating,

The Cam thread take up will rotate about a inch before the needle assembly take up leaver moves again, this will happen at the point where the shuttle hooks would be passing the scarf of the needles, just as the shuttle hooks grab the loops from the needles, So I don`t know whether that is normal, for non movement at that point of the needle take up leaver,

Also I had just noticed that both sides of the Driver shuttles start to rub up close to the plate above as they move to a certain point ,I will show in the photos pointing with screw driver showing a gap then showing there`s no gap at a certain point,where I feel it slightly may rub,

So first two photos are showing the long mark in the cam thread take up,

third photo shows shiny part of metal where on the connection feed forked 

Next two photos show the gap then no gap on the shuttle drivers,

And the last two photos show the double needle Singer class 7  I think, if any one knows what class it may be it would be nice to know


04.jpg

05.jpg

03.jpg

01.jpg

06.jpg

08.jpg

09.jpg

Share this post


Link to post
Share on other sites

I just noticed photos when entered topic never went in order sorry.

Share this post


Link to post
Share on other sites

It looks like a 7-38,the wear your looking at is normal,the takeup doesn't move @ that point so the thread can be picked up by the hook.Oil everything on it that moves & there are places when you spin it it might get alittle harder to turn like when the feet lift do to the action against the pressure foot spring.

Share this post


Link to post
Share on other sites
On 1/8/2024 at 12:01 PM, CowboyBob said:

It looks like a 7-38,the wear your looking at is normal,the takeup doesn't move @ that point so the thread can be picked up by the hook.Oil everything on it that moves & there are places when you spin it it might get alittle harder to turn like when the feet lift do to the action against the pressure foot spring.

Thank you,Cowboy Bob

Yes !!  all makes sense,cant find pics of the 7-38 I was starting to think it might of been a ADLER because I have not seen a 7 class with that plate at front of it like mine yet ,the serial number is AD 046017 

So after you pointed stuff out to my questions , logically and mechanically thinking now after reading your reply` the bolt was applying more pressure to the pressure foot spring, So I had to release the down wards pressure on the pressure foot spring, by going anticlockwise on the bolt , Which would at that point place less pressure to the pressure foot ,that eases pressure on the material ( between )the pressure foot, and feed dog.

I also realize now when adjusting the pressure bar spring to have (more) pressure to the pressure foot. the hand wheel is stiffer when rotating , even before the pressure foot makes contact with material, So this is why force and friction on all parts play a big part to the stiffness as well, so very important that I oil the moving parts frequently,as you state.

So over a period of time the friction made between two services if left dry , will wear causing parts to become looser, the tolerance level is acceptable within certain parts to the sewing machine, but in others sections of the sewing machine it would be unacceptable I guess.

Why don`t sewing machines not have high speed sealed high temp greased bearings in certain places to ease friction? 

So I also noticed that both shuttle horns that showing in the pics where gaps closing up  at a certain point on its oscillation  rotation at there certain point they both look as if they ( jilt / move ) slightly up or down in the timing basket, when they move towards me.entering under the cast of the machine base ,is that normal ?

I also noticed if I grab hold of the basket and push inwards towards the back of machine and then forwards there`s about 0.5 mm movement and it is not where the basket joins to the bar as that is pinned tight, should I adjust to make sure there`s no back and forth movement, or should it be left with some,? 


Edited by 1985

Share this post


Link to post
Share on other sites
15 hours ago, 1985 said:

So I also noticed that both shuttle horns that showing in the pics where gaps closing up  at a certain point on its oscillation  rotation at there certain point they both look as if they ( jilt / move ) slightly up or down in the timing basket, when they move towards me.entering under the cast of the machine base ,is that normal ? Yes,it might not hurt to take the screw out that holds the horseshoe spring & the there's a ring behind it that get dirt & thread between it & clean it out.And be sure the oil the race where the shuttle rides against often.

I also noticed if I grab hold of the basket and push inwards towards the back of machine and then forwards there`s about 0.5 mm movement and it is not where the basket joins to the bar as that is pinned tight, should I adjust to make sure there`s no back and forth movement, or should it be left with some,?  I don't understand ,can you take a pic of this?


Share this post


Link to post
Share on other sites

Okay `sorry Bob, let me try to explain it in a better way ` as I am possibly not using the correct names for the parts in question, I will show a pic front on with screwdriver touching to what I call the basket, it oscillates the two shuttles,may be you could give a correct name as I can`t seem to find its known name for that piece, So ill just keep calling it a basket until stand corrected,;)

The basket is connected to a bar or rod from the rear end part of the basket, they are connect by the rod entering into the stem from the rear of the basket,  

They have been pinned together which means when the bar or rod moves the basket oscillates at the same time,as they are connected with a pin .so when the basket oscillates also do the two shuttles, .

And my question was ,

When I grab the basket then push on it towards the hand wheel` and then pull back to the front there`s about 0.5 mm movement , I here it knock underneath at the far rear towards the hand wheel ,does this 0.5 mm movement need to be adjusted some where underneath at the back to where the other end of the rod is connected  so there`s ends up with no 0.5 mm movement. 

I also here a knocking noise when it moves 0.5 mm the noise is coming from underneath at the rear of the machine ,I think it might be where the other end of the bar or rod may be connected to the connected rod,  but don`t quote me on it being called connecting rod :head_hurts_kr:lol. 

So here is a pic of what I call the basket and another pic where I am pointing at the rear section of the basket and to where its pinned to the bar or rod.

There was also no play where the pin is joined so its not a loose pin.

Ps take no notice of the screw driver with the brown handle it was just left in the back ground,

Hopefully I have 

bb.jpg

bb2.jpg

Edited by Northmount
moved post from the quoted box

Share this post


Link to post
Share on other sites
2 hours ago, 1985 said:

Okay `sorry Bob, let me try to explain it in a better way

Please post your info outside of the quoted box (usually below) so it become obvious it is a new post not quoted.  It gets confusing to users when new info is added to quoted text.

Share this post


Link to post
Share on other sites

Sorry ` my bad, not 100% sure some times , just getting use to forums, 

Share this post


Link to post
Share on other sites

Yes,there is a bolt with a tapered head on it that is at the end of the rod.Turn machine & watch on the rightside underneath you'll see where the rod comes down to make the hook shaft go back & forth.You just need to tighten it alittle & will have to hold the head of the screw when you tighten the locknut it so it doesn't get too tight.

Share this post


Link to post
Share on other sites
23 hours ago, CowboyBob said:

Yes,there is a bolt with a tapered head on it that is at the end of the rod.Turn machine & watch on the rightside underneath you'll see where the rod comes down to make the hook shaft go back & forth.You just need to tighten it alittle & will have to hold the head of the screw when you tighten the locknut it so it doesn't get too tight.

Brilliant Bob a Thank you ,:thumbsup:

I know exactly what you are are on about, I really do appreciate you taking the time and having the patience to give your knowledge and experience to my questions, it really helped me out to understand the machine better . and it also may help others who may check this out.

I suppose every one can remember how daunting messing with there first sewing machine not knowing whether they will adjust something out of sink, if they had not had any training first or some one not watching every move to advice them,

 I have studded and watched hundredths of hours on footage to do with sewing machine, but since having bad reactions to COVID jabs and getting brain fog with speech issues for months and then getting COVID a few times my memory suffers from brain fog allot, its almost like short term memory loss to things I try to remember, so I have to film or photo most stuff for reference now,

Anyway`s I need to possibly at some point strip this Singer double needle class 7 down for a good clean as its starting to patina with fine rust in places I can`t get to easy with out taking bits apart and there`s loads of gunk in hidden places, But I am worried I might mess up the timing set buy the factory, but I think the factory have place a screw in the front cam joining the bar .


So this is my thinking on how the parts control certain areas ,

From what I gather now if I split the machines workings into 3 sections in my mind it makes it easier to see whats doing what, if correct starting from the hand wheel crank bar that runs through the head of the casting,

Section 1) The crank bar is where everything is timed by, moving from the back to the front CAM that has a connecting bit that moves in the cam groove` this connection bit also joined to the moving parts on the out side that controls the needle thread lifter ,and the foot bar that is having pressure from above by the spring foot pressure bar at the same time. And at the front of the cam there`s a joining piece that moves the needle bar clamp up and down, which moves the needle bar that hold the needle, few!! .

Section 2) The back end of the crank bar rotates moving a forked piece back and forth,the forked piece also has a forked piece at the bottom that`s connected to a bar , that bar is rocked back and forth ,witch intern moves the  shuttle hook holder I call the basket,

Section 3) Then staying with the underneath at the rear end joined onto the forked bar there`s a connected bit that goes to another bar, that moves the feed dogs, Have I missed anything out,in principle

I don`t want to mess up the original factory timing , I also not sure should the needle bar be at its highest or lowest point when starting to dismantle everything or does it not matter,

And what should I (not) dismantle with out marking its original position first ,

I really need advice here from you guy`s on the does and don`ts that need to be done or not when stripping the machine down in the near future,:helpsmilie:please,


Share this post


Link to post
Share on other sites

Yes,I think you understand what is going on here.The best way to clean it is & take it to a car wash (with hot water) use spray some degreaser all over,then soap it spray all the parts & rinse off.Then when I get back to the shop blow out all the oil holes & everything else off with air.When people take them apart they can damage or loose parts & some of these are impossible to find.It really doesn't need to be super clean as people might like them to be.

Share this post


Link to post
Share on other sites
18 hours ago, CowboyBob said:

Yes,I think you understand what is going on here.The best way to clean it is & take it to a car wash (with hot water) use spray some degreaser all over,then soap it spray all the parts & rinse off.Then when I get back to the shop blow out all the oil holes & everything else off with air.When people take them apart they can damage or loose parts & some of these are impossible to find.It really doesn't need to be super clean as people might like them to be.

Okay , no car jet for me the car is down but do under stand what your getting at, with dismantlement ,

So iv put it on its side on table, and started giving a clean , I am checking out the forked bit on the rear that rocks back and forth it is pretty slanted not straight and looks like its to close to the stitch adjuster two pieces of metal, that move when adjusting for stitch length, the forked bit is just skimming them by a Rizzla paper thickness,which worries me , this might be the reason why the forked part has fresh rub marks where some of the metal is or has rubbed just like the front cam marks as shown in pics earlier on

The forked part at top leans toward the back hand wheel and the bottom leans more toward the front of the machine,so I am cautiously  studying the mechanism,to why?its not straight down,

I also sending picks because there are no adjustment STOP collar`s that you usually find on this bar, well on a 7-33 there`s at least one, but not sure on this suspected double needle 7-39 , should there be any ,?and pic of the slated forked at back,

I have removed pin and grub screw holding the race basket because I do want to remove it as some one had done some weld to the ends and not smoothed of well for my liking ,but also means removing the outer feed dog moving things ,

back.jpg

u1.jpg

un3.jpg

u2.jpg

back.jpg

Share this post


Link to post
Share on other sites
21 minutes ago, 1985 said:

Okay , no car jet for me the car is down but do under stand what your getting at, with dismantlement ,

So iv put it on its side on table, and started giving a clean , I am checking out the forked bit on the rear that rocks back and forth it is pretty slanted not straight and looks like its to close to the stitch adjuster two pieces of metal, that move when adjusting for stitch length, the forked bit is just skimming them by a Rizzla paper thickness,which worries me , this might be the reason why the forked part has fresh rub marks where some of the metal is or has rubbed just like the front cam marks as shown in pics earlier on

The forked part at top leans toward the back hand wheel and the bottom leans more toward the front of the machine,so I am cautiously  studying the mechanism,to why?its not straight down,

I also sending picks because there are no adjustment STOP collar`s that you usually find on this bar, well on a 7-33 there`s at least one, but not sure on this suspected double needle 7-39 , should there be any ,?and pic of the slated forked at back,

I have removed pin and grub screw holding the race basket because I do want to remove it as some one had done some weld to the ends and not smoothed of well for my liking ,but also means removing the outer feed dog moving things ,

back.jpg

u1.jpg

un3.jpg

u2.jpg

back.jpg

also just realized now why the forked thing is leaning on the two picks it showing the adjustment is looking to far over to the right

bbb2.jpg

bb1.jpg

Share this post


Link to post
Share on other sites
7 hours ago, 1985 said:
  •  

bbb2.jpg

bb1.jpg


eg1.jpg

eg3.jpg

eg.jpg

Share this post


Link to post
Share on other sites
Just now, 1985 said:


eg1.jpg

eg3.jpg

eg.jpg

So after examining all part the left feed dog holder is slanted, does not really show on photo, the forked is slanted and the first rod just after hand wheel is slightly slanted, it is like every think needs moving over to the left ,I have a feeling who ever set this never had a good eye for alignment, or thought it works so its okay,or the casting is out slightly out and all been adjusted to the casting to work,

So ignoring where I point my finger that is not what I thought on first looking ,my bad,the play in the shuttle holder that bar i think may of had a big collar with grub screws ,there is also a groove in the metal bar where I thought cir clip may of gone but to wide for that, , its puzzling that bit, any one now how to get rid of photos i don`t want in as I keep accidentally allowing duplicates 

Share this post


Link to post
Share on other sites
18 hours ago, 1985 said:

So after examining all part the left feed dog holder is slanted, does not really show on photo, the forked is slanted and the first rod just after hand wheel is slightly slanted, it is like every think needs moving over to the left ,I have a feeling who ever set this never had a good eye for alignment, or thought it works so its okay,or the casting is out slightly out and all been adjusted to the casting to work,

So ignoring where I point my finger that is not what I thought on first looking ,my bad,the play in the shuttle holder that bar i think may of had a big collar with grub screws ,there is also a groove in the metal bar where I thought cir clip may of gone but to wide for that, , its puzzling that bit, any one now how to get rid of photos i don`t want in as I keep accidentally allowing duplicates 

 Have had to remove parts to get the drive hook out, On removing the Lower rock shaft crank part number 58335 belonging to the possibly singer 7-39, I noticed a crack, I suspect might be cast iron so may be tricky to weld,so looking for alternative ,

I seen some pics similar to my damaged one but not sure if they will fit, but they seem to be mostly in America  sites ,when putting in for this part these come up on the web,does any one know if any of these can be a replacement,but I will show pics of my cracked part , and what comes up on web,

z1.jpg

z2.jpg

z4.jpg

z5.jpg

z.jpg

00000.jpg

Edited by 1985

Share this post


Link to post
Share on other sites
On 1/17/2024 at 12:44 PM, 1985 said:

 Have had to remove parts to get the drive hook out, On removing the Lower rock shaft crank part number 58335 belonging to the possibly singer 7-39, I noticed a crack, I suspect might be cast iron so may be tricky to weld,so looking for alternative ,

I seen some pics similar to my damaged one but not sure if they will fit, but they seem to be mostly in America  sites ,when putting in for this part these come up on the web,does any one know if any of these can be a replacement,but I will show pics of my cracked part , and what comes up on web,

z1.jpg

z2.jpg

z4.jpg

z5.jpg

z.jpg

00000.jpg

Well decided to make one from mild steel from my old multi gym plate ,  Using a press drill, an hacksaw , Disc cutter disc,  sander disc ,files and wet and dry, I wish I had a metal lathe but never learnt to use one, it was the exact size as the original until I got carried away with the disc sander on the out side on the smaller section ,but worked great,after I gave it a final polish with compounds,

A bit worried about it rusting so might have to quench in warm oil then wax and grease it,

k.jpg

k1.jpg

k3.jpg

k4.jpg

k5.jpg

Share this post


Link to post
Share on other sites

Thank you so much, to all of you for great advice and assistance and specially to some in particular who stuck with assisting me with several concerns I had with this singer twin needle 7 class. Machine is running smooth stitches well so all great now,

But one of my question were ` why is there shiny marks on the rear and front cams this was one of my major concerns as it looked like metal on metal rubbing in certain areas causing or wear on these spots and because they looked new from the rest of the cam material, I had been told its normal wear, But in my case this info was not correct as I later found why this happened,

When I got the machine the hand wheel was bolted quite away from the back of the cast body, this allowed to much play forwards and backwards on the horizontal shaft that had the cams were on, it was`t until removing the wheel and replacing it back I realized it would not go up to the end due to a nick in the horizontal shaft,after removing the nick on that part the wheel went up to its correct position,butting up to the rear end of the cast body. "knowing that now, this stopped the play back and forth to the shaft and stopped the hand wheel having to much intermittent stiffness and ease while rotating when not under tension and no load, 

So obviously not knowing that the hand wheel was not placed all the way up to its correct position and I not recognizing this being new to sewing machines, could of been seen as wear if all fixings were in place correctly and given its age very understandable from the answer given, but sorted now,

And I think it was Bob who said when cleaning don`t bother stripping parts all they can break, well in my quest to clean and adjust , you were correct,I never realized that one of the parts were cast steel and it had a crack in it ,I assume I over tightened that part,hence pictures above me making another from steel,

This material is not cast iron and possibly Will be prone to rust more than original piece . but if could not find a original replacement, but all good in the end.  


Share this post


Link to post
Share on other sites

Join the conversation

You can post now and register later. If you have an account, sign in now to post with your account.
Note: Your post will require moderator approval before it will be visible.

Guest
Reply to this topic...

×   Pasted as rich text.   Paste as plain text instead

  Only 75 emoji are allowed.

×   Your link has been automatically embedded.   Display as a link instead

×   Your previous content has been restored.   Clear editor

×   You cannot paste images directly. Upload or insert images from URL.

Sign in to follow this  

×
×
  • Create New...