mlapaglia Posted August 11, 2011 Report Posted August 11, 2011 Ok, hopefully I took to heart everyone's advice and learned something. Here is what I believe will be the final version. 6/7oz outside 2/3oz liner. The dark gray is the gun outline before molding. stitch lines are dashed. Let me know what you think. No need to be gentle. I appreciate the constrictive criticism. Michael Quote The key to immortality is first living a life worth remembering. Bruce Lee
Denster Posted August 11, 2011 Report Posted August 11, 2011 Much better, but still far too angular for my taste. If it is for you and you like the look then go for it. Quote
mlapaglia Posted August 12, 2011 Author Report Posted August 12, 2011 (edited) Not my day. It should read V3.0 in the topic and this is the picture I wanted to upload. If a mod could change the pic in the first post with this one I'd appreciate it. Denster, Not everyone will like every style. As long as the issues are likes and dislikes I'm happy. This is actually for someone else. They liked the last version with the angles and this one. I appreciate all the help. Thanks Michael Edited August 12, 2011 by mlapaglia Quote The key to immortality is first living a life worth remembering. Bruce Lee
Contributing Member TwinOaks Posted August 12, 2011 Contributing Member Report Posted August 12, 2011 One thing you need to know about angles and corners is that they can be a weak point in the leather. For the holster, it shouldn't be much of an issue on the 'inside' corners, as there won't be LOTS of stress on it (hopefully). For the 'outside' corners, I strongly suggest you radius them, at least a little. Radiused corners are far less likely to snag on garments or anything else. They're also more comfortable if they end up poking the wearer. Perhaps the biggest issue is that you can maintain a constant distance from the edge with a radius- with a corner, there will always be a little bit that isn't supported by the stitch. The can lead to the corner de-laminating and getting dog-eared......which looks kinda bad on a custom holster. I'm not suggesting you use a 6 inch radius or anything drastic, just that you 'round off' the corners where possible. For example: where the wings depart the main body, use a 1/4 inch punch to make the transition, instead of an abrupt corner. Same thing with the tops and bottoms of the wings, except you're using just the 1/8th" radius (half the 1/4" punch). This should allow you to maintain that critical stitch line to edge distance, and still have an angular holster. The way you've drawn the second pic is exactly what I'm referring to. One of the most used tools I have is a circle template from my old drafting supplies. I use it to correctly align my radii and have a consistent radius. You could also do something like lightly press a punch against the leather to get the line. After all that......The customer determines what you make. You can offer opinion backed up with fact and advice, but in the end, it's up to the customer. Quote Mike DeLoach Esse Quam Videri (Be rather than Seem) "Don't learn the tricks of the trade.....Learn the trade." "Teach what you know......Learn what you don't." LEATHER ARTISAN'S DIGITAL GUILD on Facebook.
mlapaglia Posted August 12, 2011 Author Report Posted August 12, 2011 (edited) One thing you need to know about angles and corners is that they can be a weak point in the leather. For the holster, it shouldn't be much of an issue on the 'inside' corners, as there won't be LOTS of stress on it (hopefully). For the 'outside' corners, I strongly suggest you radius them, at least a little. Radiused corners are far less likely to snag on garments or anything else. They're also more comfortable if they end up poking the wearer. Perhaps the biggest issue is that you can maintain a constant distance from the edge with a radius- with a corner, there will always be a little bit that isn't supported by the stitch. The can lead to the corner de-laminating and getting dog-eared......which looks kinda bad on a custom holster. I'm not suggesting you use a 6 inch radius or anything drastic, just that you 'round off' the corners where possible. For example: where the wings depart the main body, use a 1/4 inch punch to make the transition, instead of an abrupt corner. Same thing with the tops and bottoms of the wings, except you're using just the 1/8th" radius (half the 1/4" punch). This should allow you to maintain that critical stitch line to edge distance, and still have an angular holster. The way you've drawn the second pic is exactly what I'm referring to. One of the most used tools I have is a circle template from my old drafting supplies. I use it to correctly align my radii and have a consistent radius. You could also do something like lightly press a punch against the leather to get the line. After all that......The customer determines what you make. You can offer opinion backed up with fact and advice, but in the end, it's up to the customer. Mike, I used to be a design engineer, years ago, and I have the same template. I dug out my T-square, French curves and my Circle template on this one. I tried to make sure there were no "sharp corners" on the leather. Your comment of " The way you've drawn the second pic is exactly what I'm referring to." tells me I must have been listening, at least a little. The first photo is just the wrong one. I did not plan to post that but It's one of those days. What about the stitch line. Can those be straight like I have them or do they need to be curved also? Thanks for all the great help. Michael Edited August 12, 2011 by mlapaglia Quote The key to immortality is first living a life worth remembering. Bruce Lee
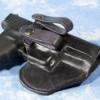
Members Sixer Posted August 12, 2011 Members Report Posted August 12, 2011 Are you sure there is "no need to be gentle"? Along with with the outline of the pattern being too "square" ... it looks like the gun is seated too deep in the holster to get a good grip. Just a thought. Quote http://www.hoppcustomleather.com https://www.facebook.com/HoppCustomLeather
Members particle Posted August 12, 2011 Members Report Posted August 12, 2011 Looks pretty good to me - my only comment at this point would be to add a little length to the end at the muzzle. A holster that's a little too long can be curved inward at the end to help protect the crown and reinforce the muzzle opening. A holster that's too short just looks like jeans that are too short... Once you're comfortable with the stitch line placement and the way it comes out once it's boned, you can trim off the exact right amount from your pattern because you have a finished product to reference and measure to adjust your pattern. Quote Eric Adamswww.adamsleatherworks.com | Facebook | YouTube | Instagram
mlapaglia Posted August 12, 2011 Author Report Posted August 12, 2011 Looks pretty good to me - my only comment at this point would be to add a little length to the end at the muzzle. A holster that's a little too long can be curved inward at the end to help protect the crown and reinforce the muzzle opening. A holster that's too short just looks like jeans that are too short... Once you're comfortable with the stitch line placement and the way it comes out once it's boned, you can trim off the exact right amount from your pattern because you have a finished product to reference and measure to adjust your pattern. particle, Great suggestion. Thanks Michael Quote The key to immortality is first living a life worth remembering. Bruce Lee
mlapaglia Posted August 13, 2011 Author Report Posted August 13, 2011 Are you sure there is "no need to be gentle"? Along with with the outline of the pattern being too "square" ... it looks like the gun is seated too deep in the holster to get a good grip. Just a thought. Sixer. The gun is an H&K USP-9. I checked it on a mockup of the holster and there is enough room to grab the grip comfortably. Thanks for your concern Id rather take the time to double check something than waste leather. The basic shape is a request for the guy I am giving this to. I will be honest and say I like it too. Either I learn to make them more curved or convince all you nice people that it's not totally ugly. As for gentle, no problem. I am used to submitting plans for review. You have not seen criticism until you have submitted the fire system plans for a 12 floor hospital to a Fire Marshal. They are rough. Thanks Michael Quote The key to immortality is first living a life worth remembering. Bruce Lee
mlapaglia Posted August 13, 2011 Author Report Posted August 13, 2011 (edited) Sorry Double Post Edited August 13, 2011 by mlapaglia Quote The key to immortality is first living a life worth remembering. Bruce Lee


Recommended Posts
Join the conversation
You can post now and register later. If you have an account, sign in now to post with your account.
Note: Your post will require moderator approval before it will be visible.