Members Dwight Posted January 14, 2012 Members Report Posted January 14, 2012 James, . . . when you get a chance, . . . stop by Lowes or a local hardware store, . . . buy a can of Weld Wood Contact Cement. It makes doing leather work a whole lot simpler, . . . just remember to never use it near a fire or flame, . . . and where ever it is, . . . dye will not penetrate. Other than that (and my wife hates the smell of it), . . . it is a top of the line product for leather workers. May God bless, Dwight Quote If you can breathe, . . . thank God. If you can read, . . . thank a teacher. If you are reading this in English, . . . thank a veteran. www.dwightsgunleather.com
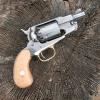
Members Dieselman Posted January 14, 2012 Author Members Report Posted January 14, 2012 So I decided that rather than just throw this holster away and start on a second one, I would apply some of the things mentioned by katsass to this one just to see what would happen. I stitched it up close to the gun and that definitely fixed my loose holster problem. Its tight now! I also cut out around the magazine release as he also stated to do. I figure what the hay, might as well make some use out of this one as a test bed if nothing else. Quote
Contributing Member TwinOaks Posted January 14, 2012 Contributing Member Report Posted January 14, 2012 Now that you've got the looseness mostly resolved, I'll also add that the high detail boning (following the exact lines of the pistol) is less important than correctly molding the holster. The boning LOOKS good on a holster, but the purpose is to increase the amount of leather that's in contact with the steel. Increasing the surface contact increases the amount of friction that's holding the pistol in place. Having a deep dent at the trigger means that there's only retention at the trigger. Getting the leather tight around the slide provides tension/friction along the entire length of the slide. When you get the molding and stitching right, then the additional boning just adds to it.....but as you've seen, it doesn't replace it. Quote Mike DeLoach Esse Quam Videri (Be rather than Seem) "Don't learn the tricks of the trade.....Learn the trade." "Teach what you know......Learn what you don't." LEATHER ARTISAN'S DIGITAL GUILD on Facebook.
wizard of tragacanth Posted January 14, 2012 Report Posted January 14, 2012 (edited) Dieselman, I can see in that second pic that your edges need more work too. Round the edges with sandpaper, start with 120 grit or finer and follow with 320 or such. Then burnish the edges. You can find details on how to burnish, pinned to the top of this forum, titled "Burnishing edges on a holster". You can also improve the belt slots by wrapping some sandpaper around a paint stir stick, dowel or even a screwdriver to sand them down and make them straighter. You can also use a screwdriver to burnish the inside of the belt slots. Seal all of the burnishing with a top coat. Nick Edited January 14, 2012 by wizard of tragacanth Quote Wisdom from an old Missouri farmer, my Grandpa: If it's not sharp, it's not a knife.
wizard of tragacanth Posted January 14, 2012 Report Posted January 14, 2012 BTW, if you decide to that you want to do more than a couple of holsters, you will probably want to pick up a coupld of tools: an edger (to trim the edges prior to sanding) and a stitch groover (to cut a trough for the stitching to lay in, which is perfectly parallel to the edge of the holster). Right now, I do not have time to post links to these. For a stitch groover, I highly recommend the one that can be used free-hand or with a guide... or you can buy two different tools for that if you don't want to fiddle with it. I use a #2 edger but many people use a #3. Nick Quote Wisdom from an old Missouri farmer, my Grandpa: If it's not sharp, it's not a knife.
Members malabar Posted January 14, 2012 Members Report Posted January 14, 2012 Dieselman, good idea to try restitching. In my experience, you learn a lot by trying to fix mistakes. Think of the stitching as the framework for a molded holster. If the stitching isn't right, the molding won't be right, and the gun won't be held securely. Take a look at the pictures below, of a pancake holster I made for a SIG P225. The majority of the pistol rides above your belt instead if below it. To make that work, you need a really stiff back plate for the holsters, and a tightly molded front plate. And to make the molding work, your stitching lines have to be on the money. Quote
Members Dieselman Posted January 15, 2012 Author Members Report Posted January 15, 2012 Dieselman, good idea to try restitching. In my experience, you learn a lot by trying to fix mistakes. Think of the stitching as the framework for a molded holster. If the stitching isn't right, the molding won't be right, and the gun won't be held securely. Take a look at the pictures below, of a pancake holster I made for a SIG P225. The majority of the pistol rides above your belt instead if below it. To make that work, you need a really stiff back plate for the holsters, and a tightly molded front plate. And to make the molding work, your stitching lines have to be on the money. I see exactly what you are saying. Your holster looks good! I am very appreciative of all the help that the folks here are offering. It has opened my eyes to lots of great techniques. Quote


Recommended Posts
Join the conversation
You can post now and register later. If you have an account, sign in now to post with your account.
Note: Your post will require moderator approval before it will be visible.