


LRBespokeGoods
-
Posts
16 -
Joined
-
Last visited
Content Type
Profiles
Forums
Events
Blogs
Gallery
Store
Everything posted by LRBespokeGoods
-
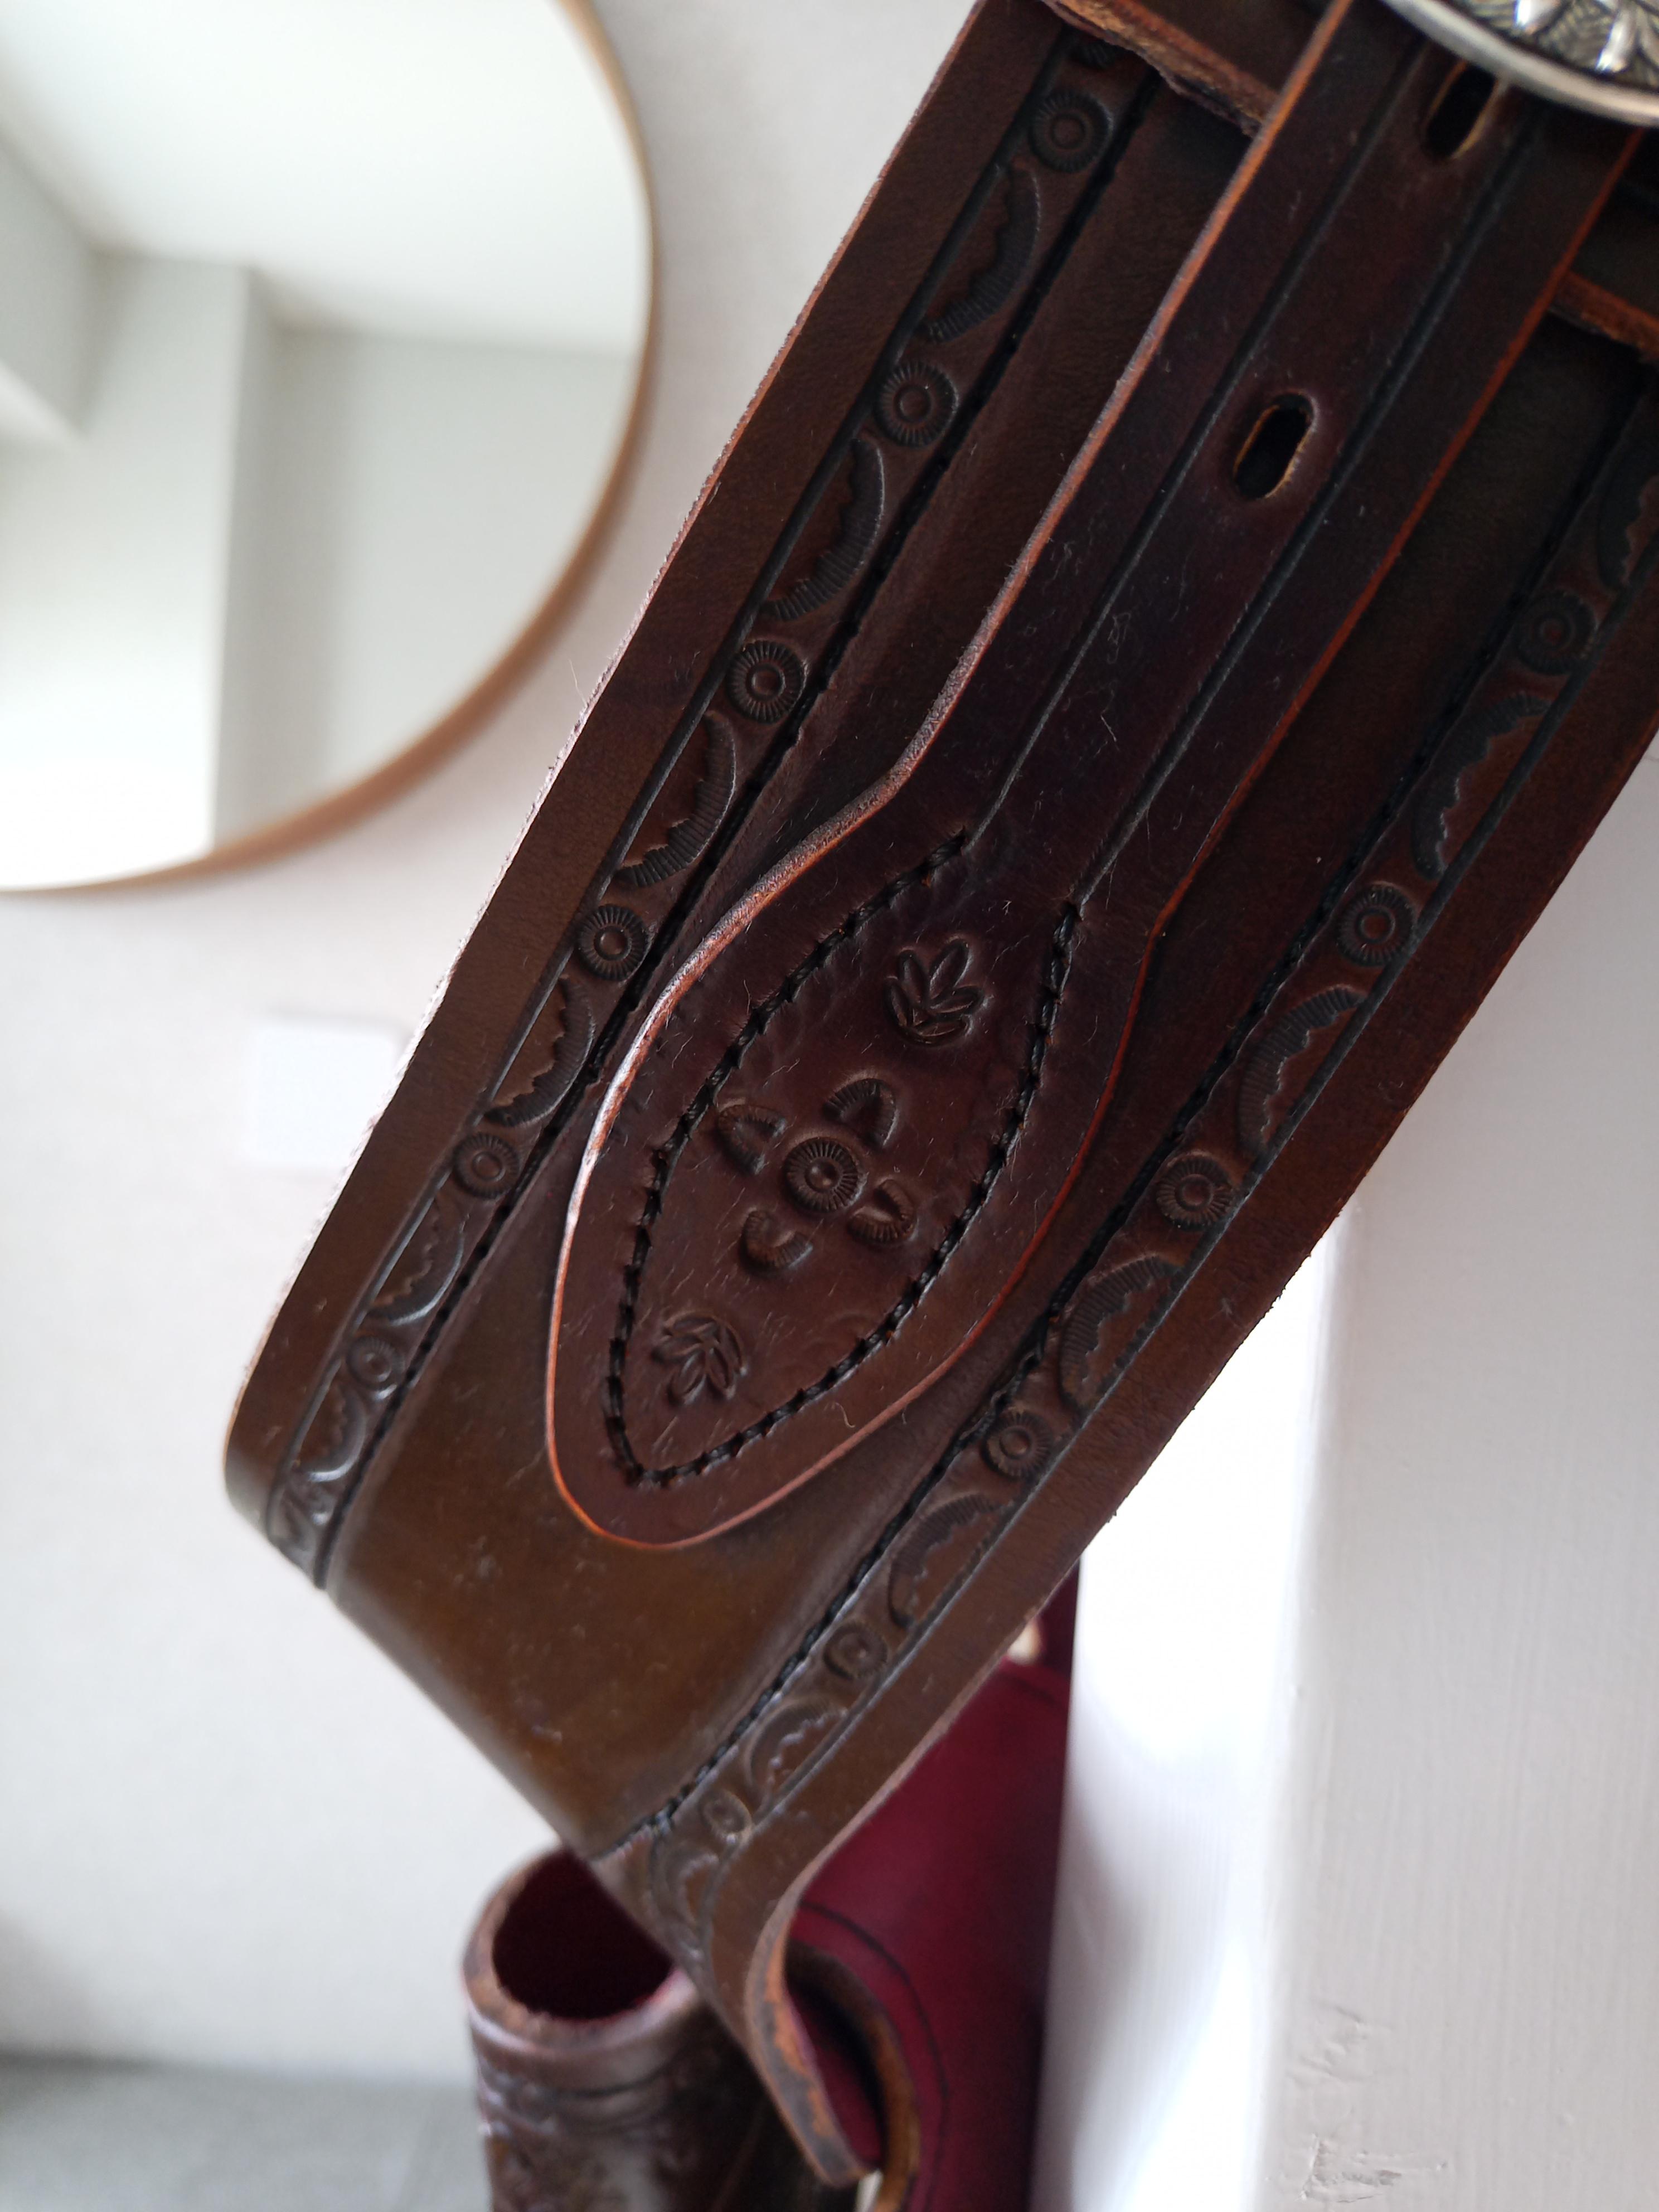
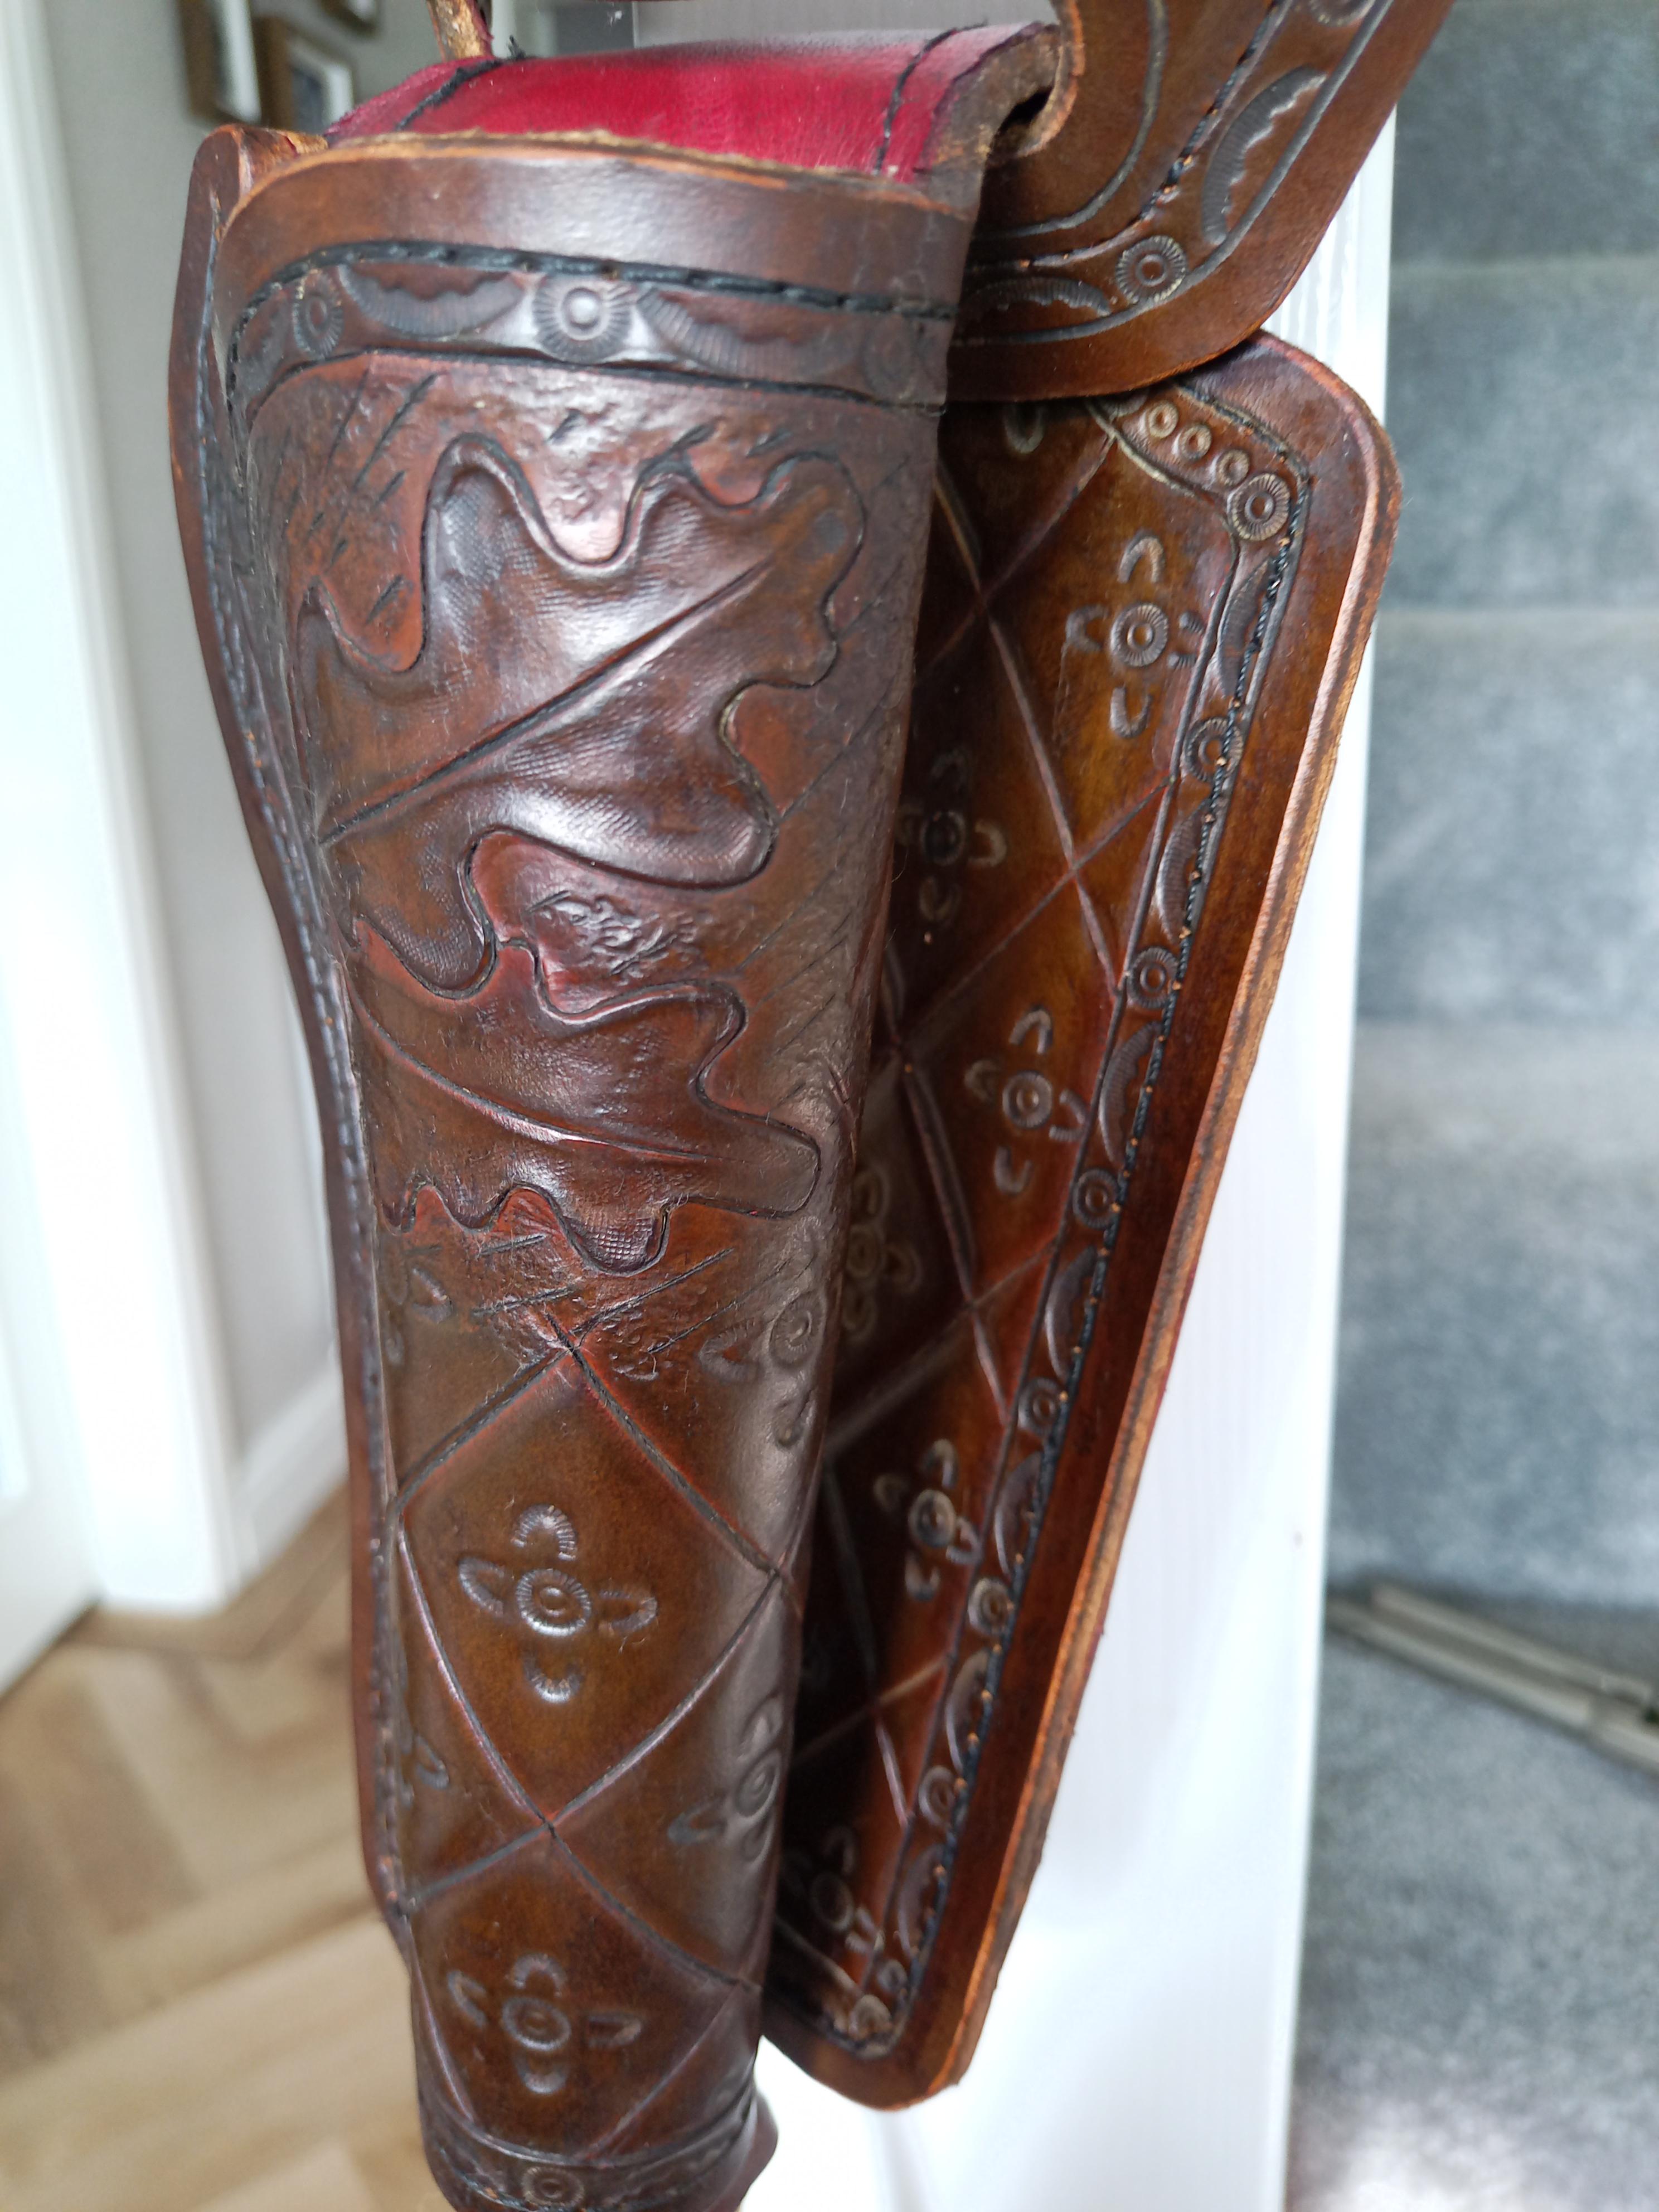
I'd have to agree with the acorns and leaves being a poor mix with the geometric pattern... But... It was a request from the end wearer, who wanted a nod to the Major Oak in Sherwood Forest (Robin Hoods tree) which is only a stones throw from my workshop and her home. As the Selfridge saying goes, "the customer is always right, in matters of taste"
-
-
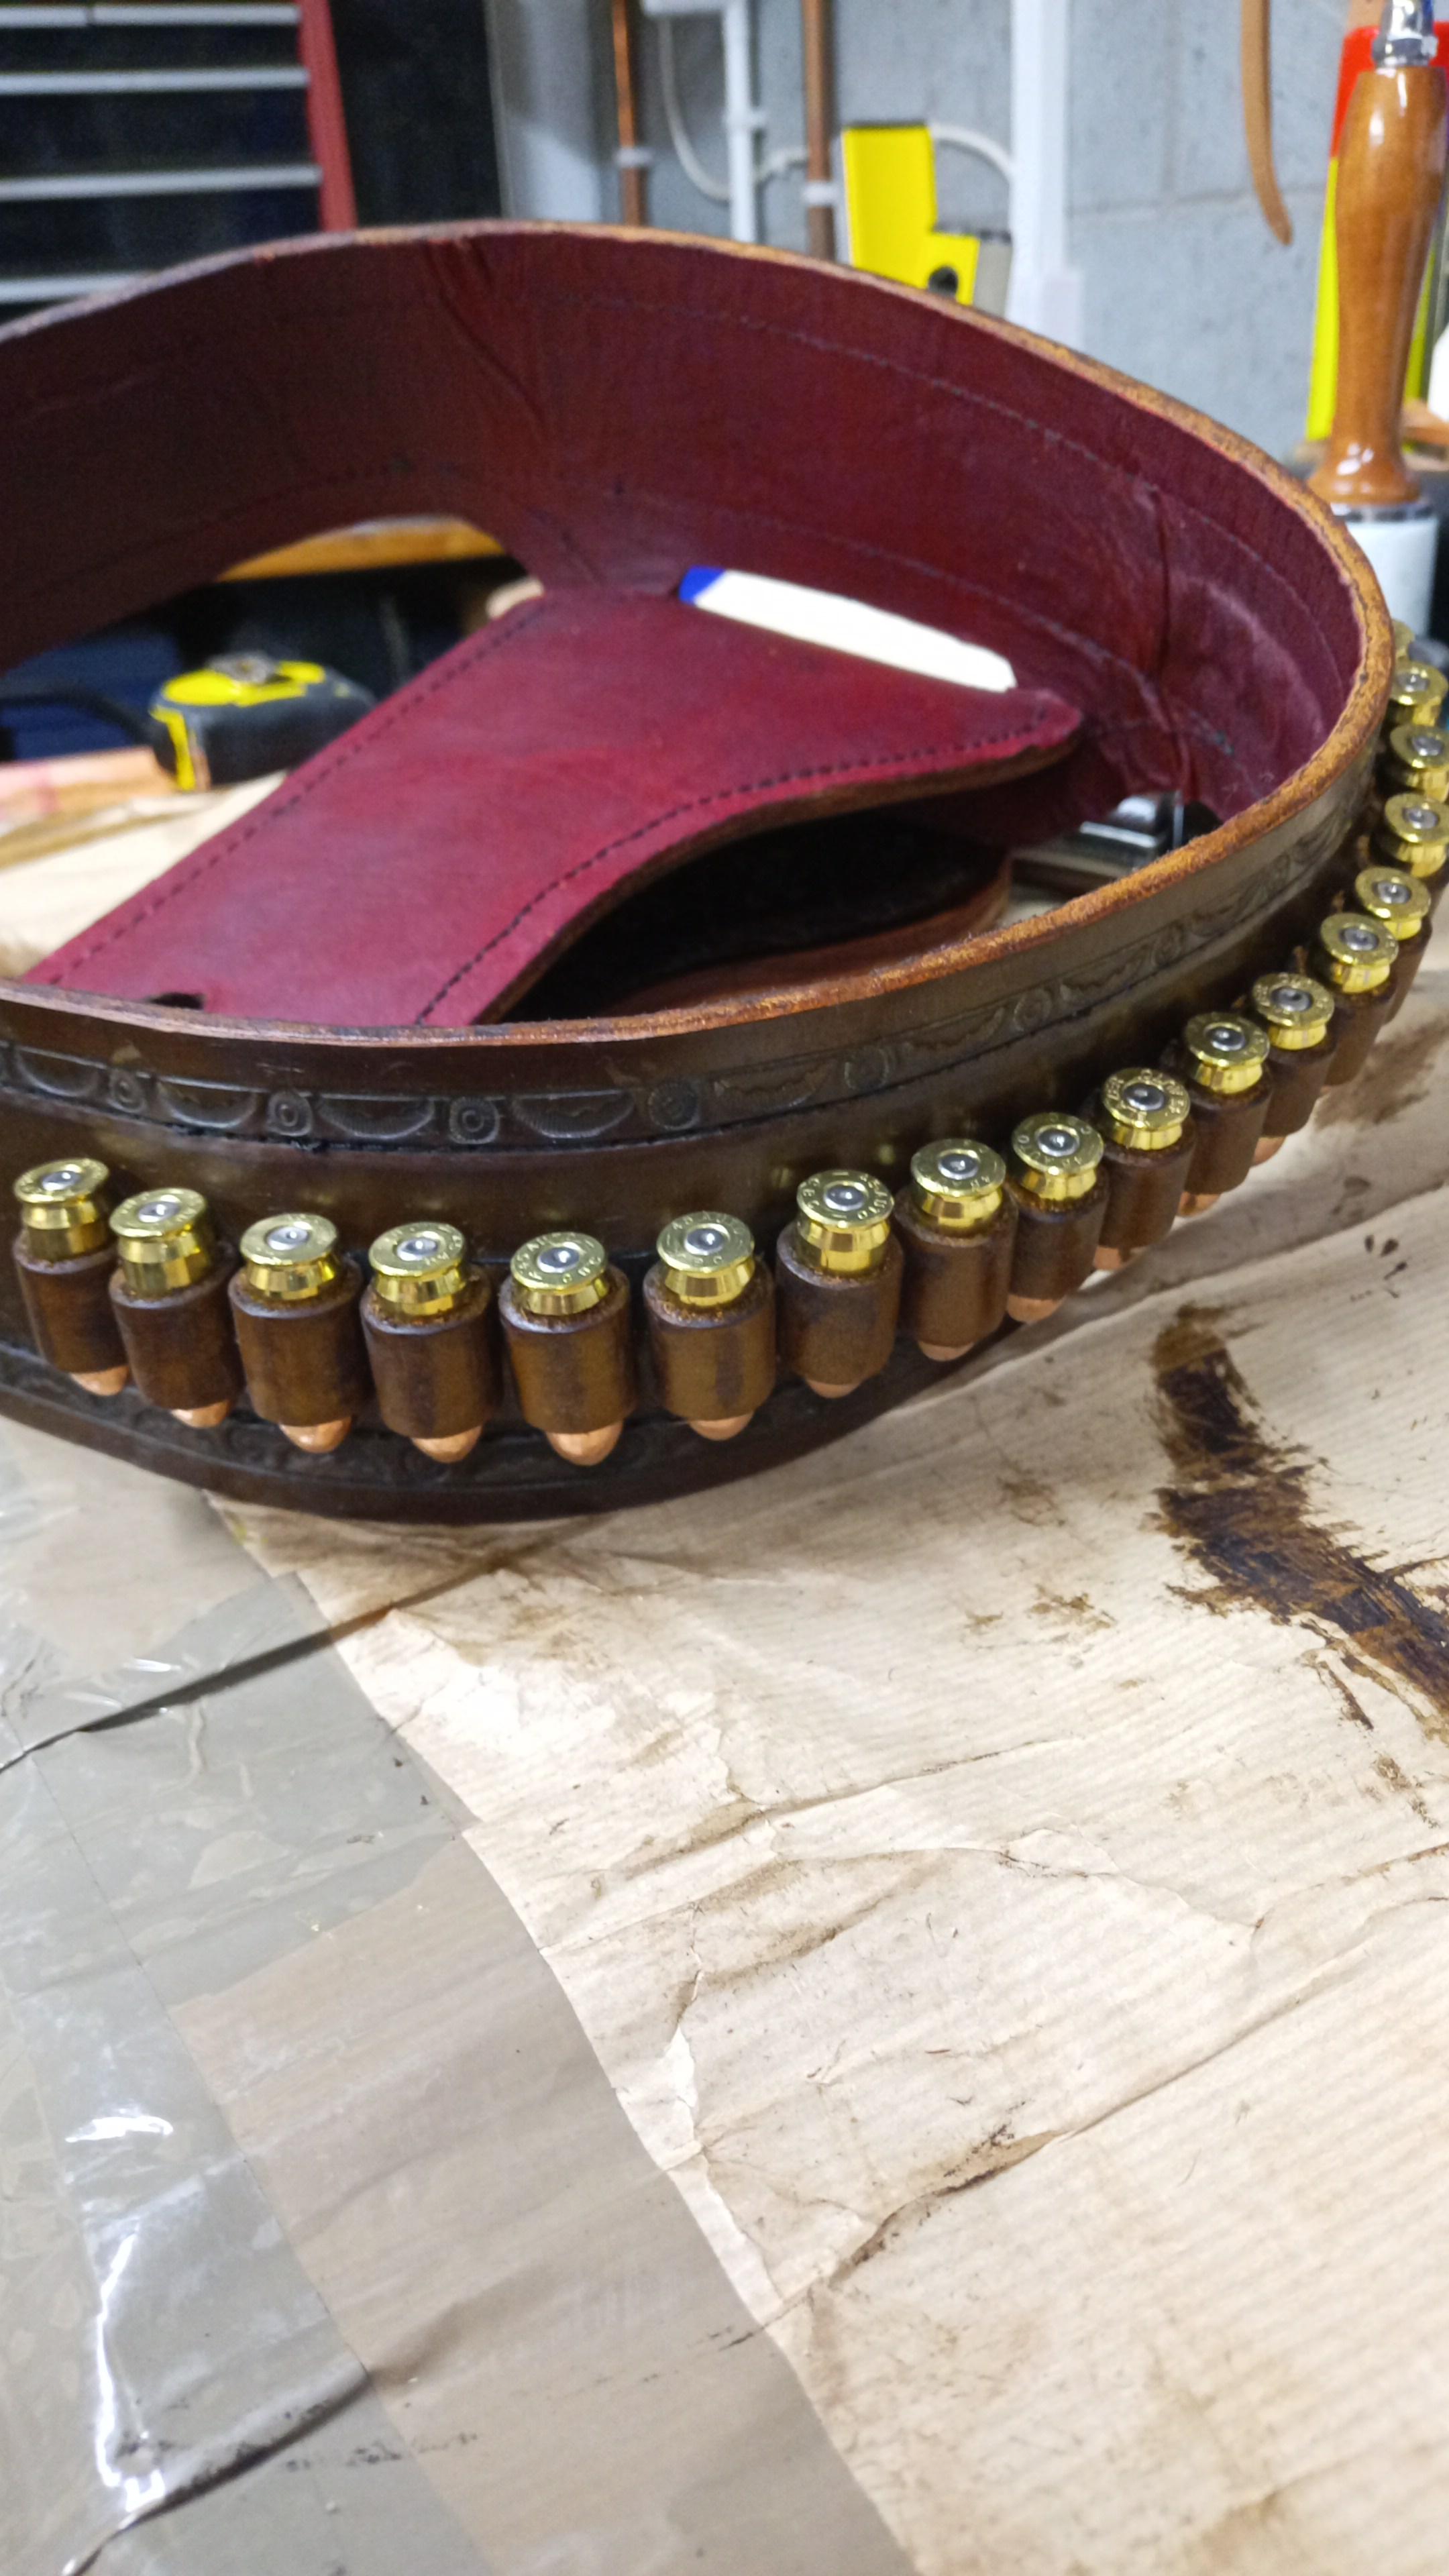
I'll get some close ups going shortly since you're interested. The ammo was from a guy I found that reloads. Sorry, please do forgive my ignorance, after a Google and comparing the results, you are totally on the money it's .45acp... Another thing to add to the learning curve.
-
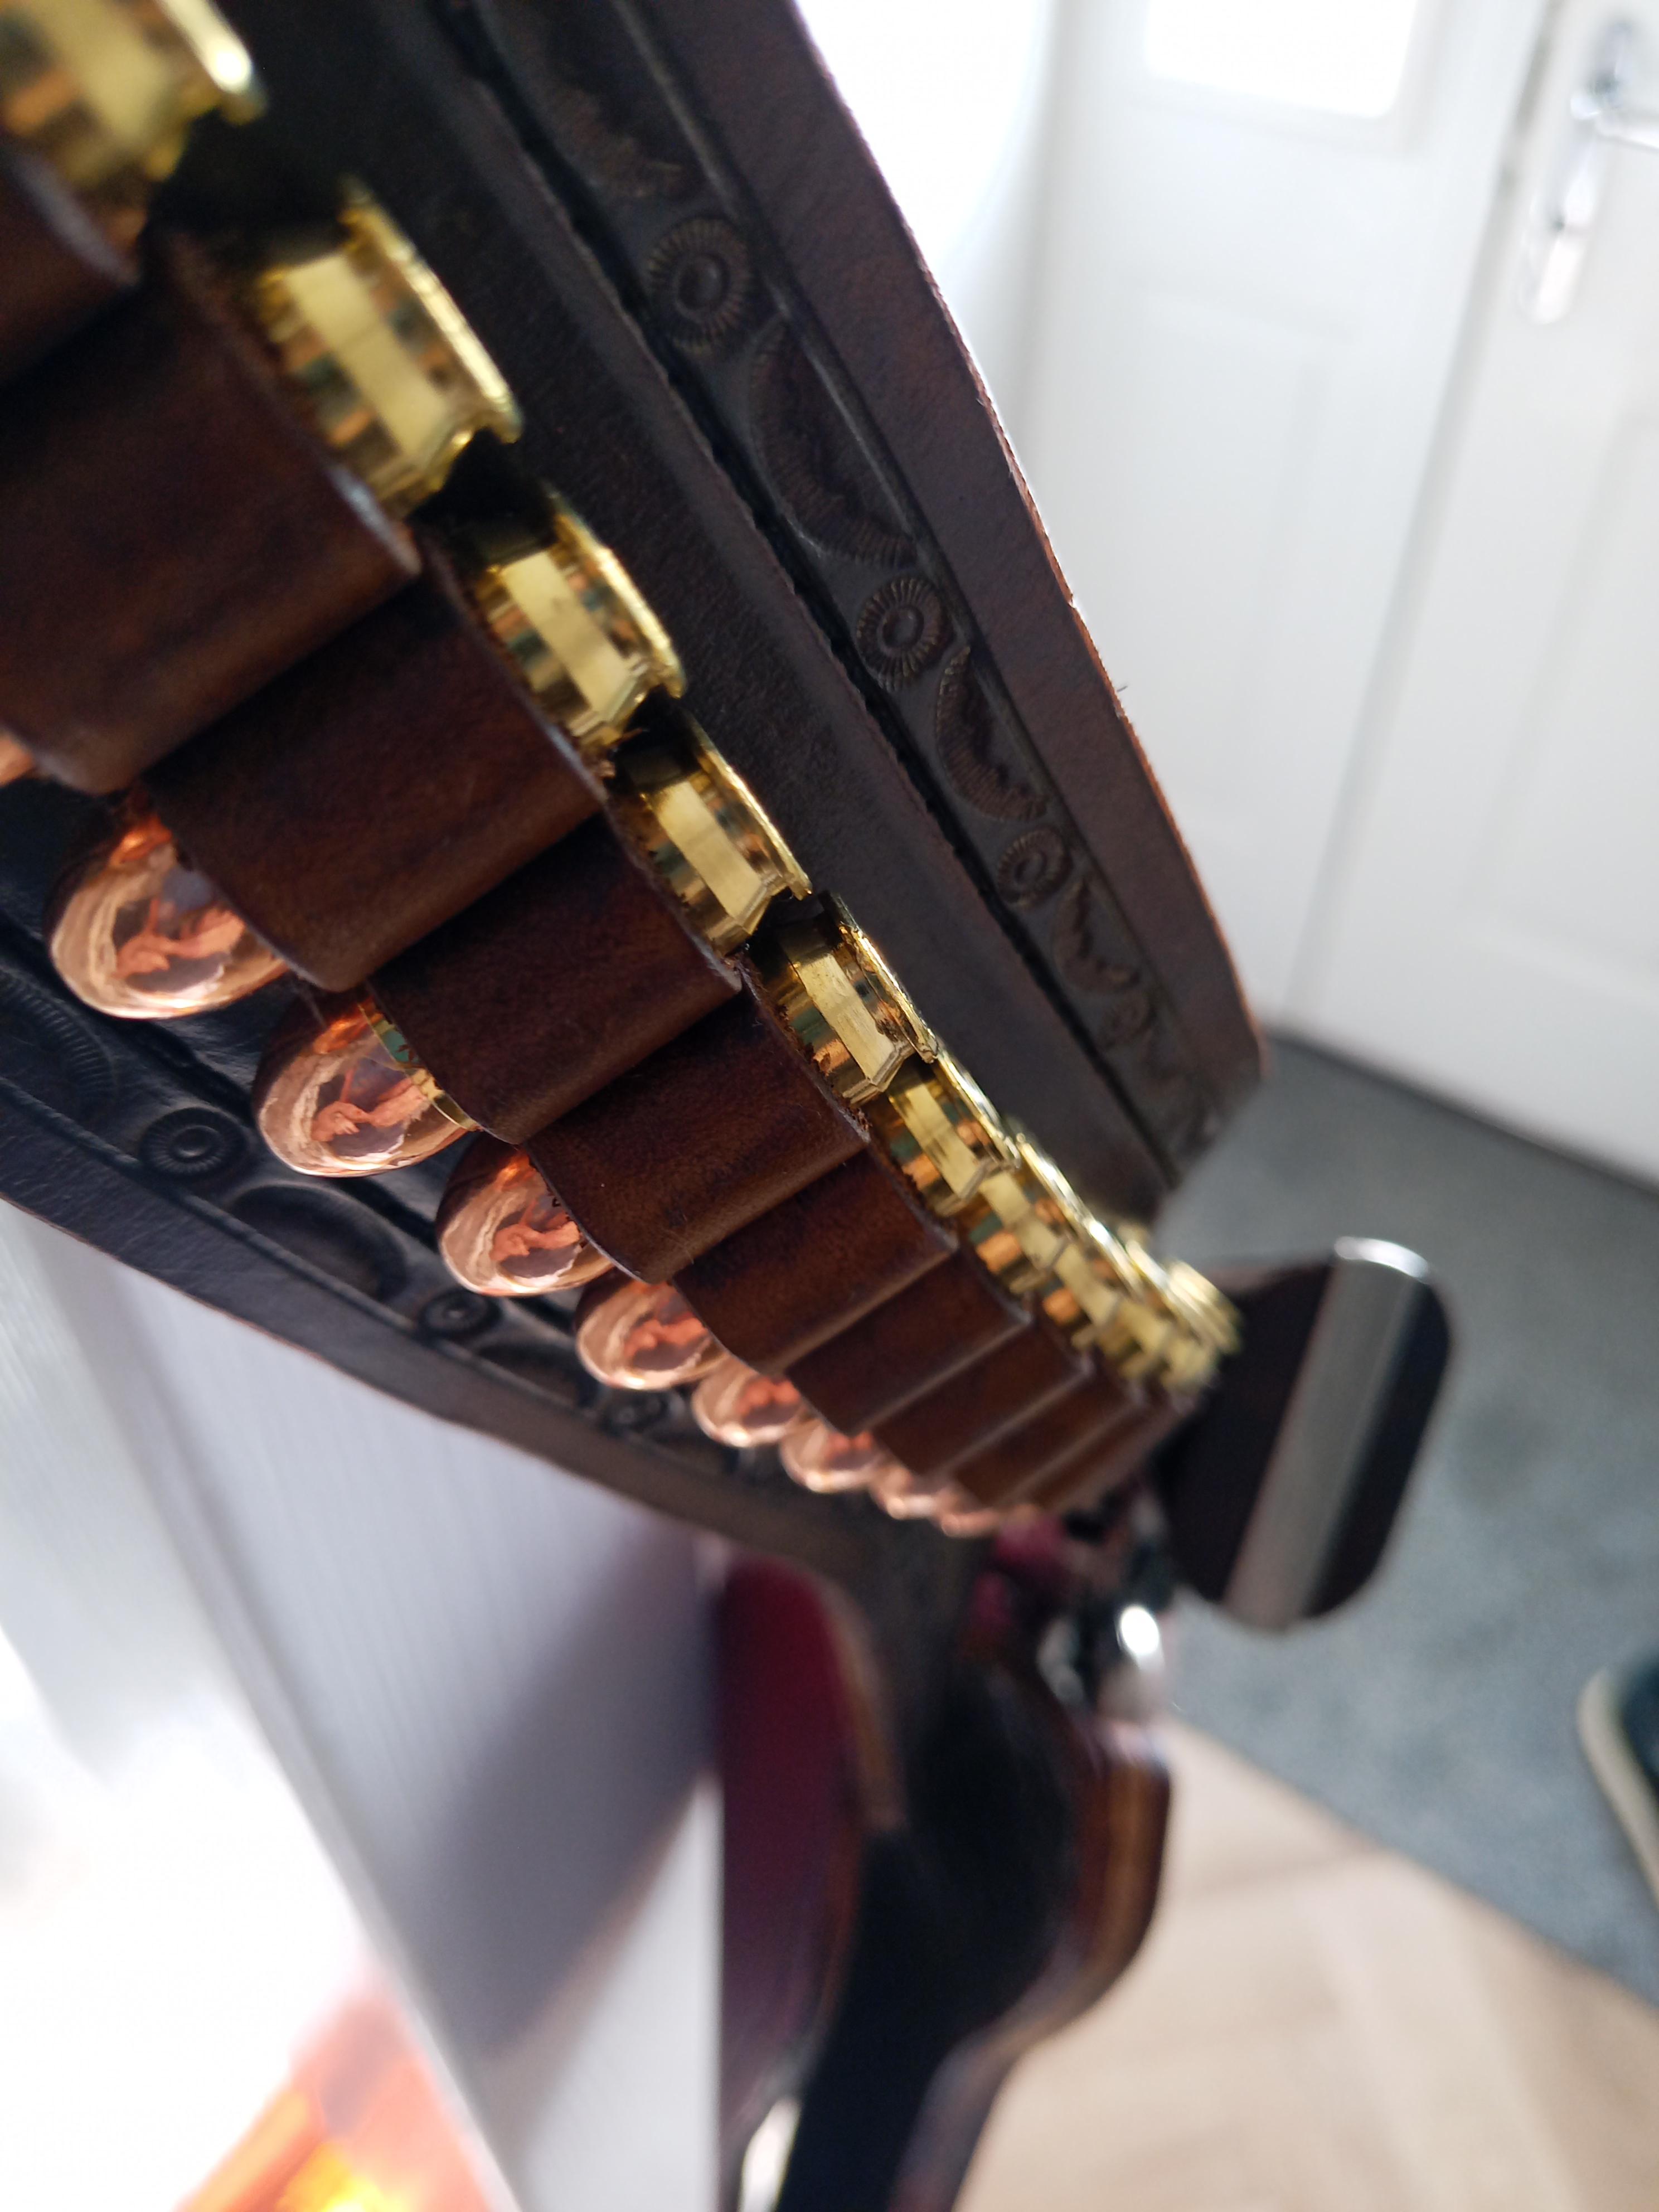
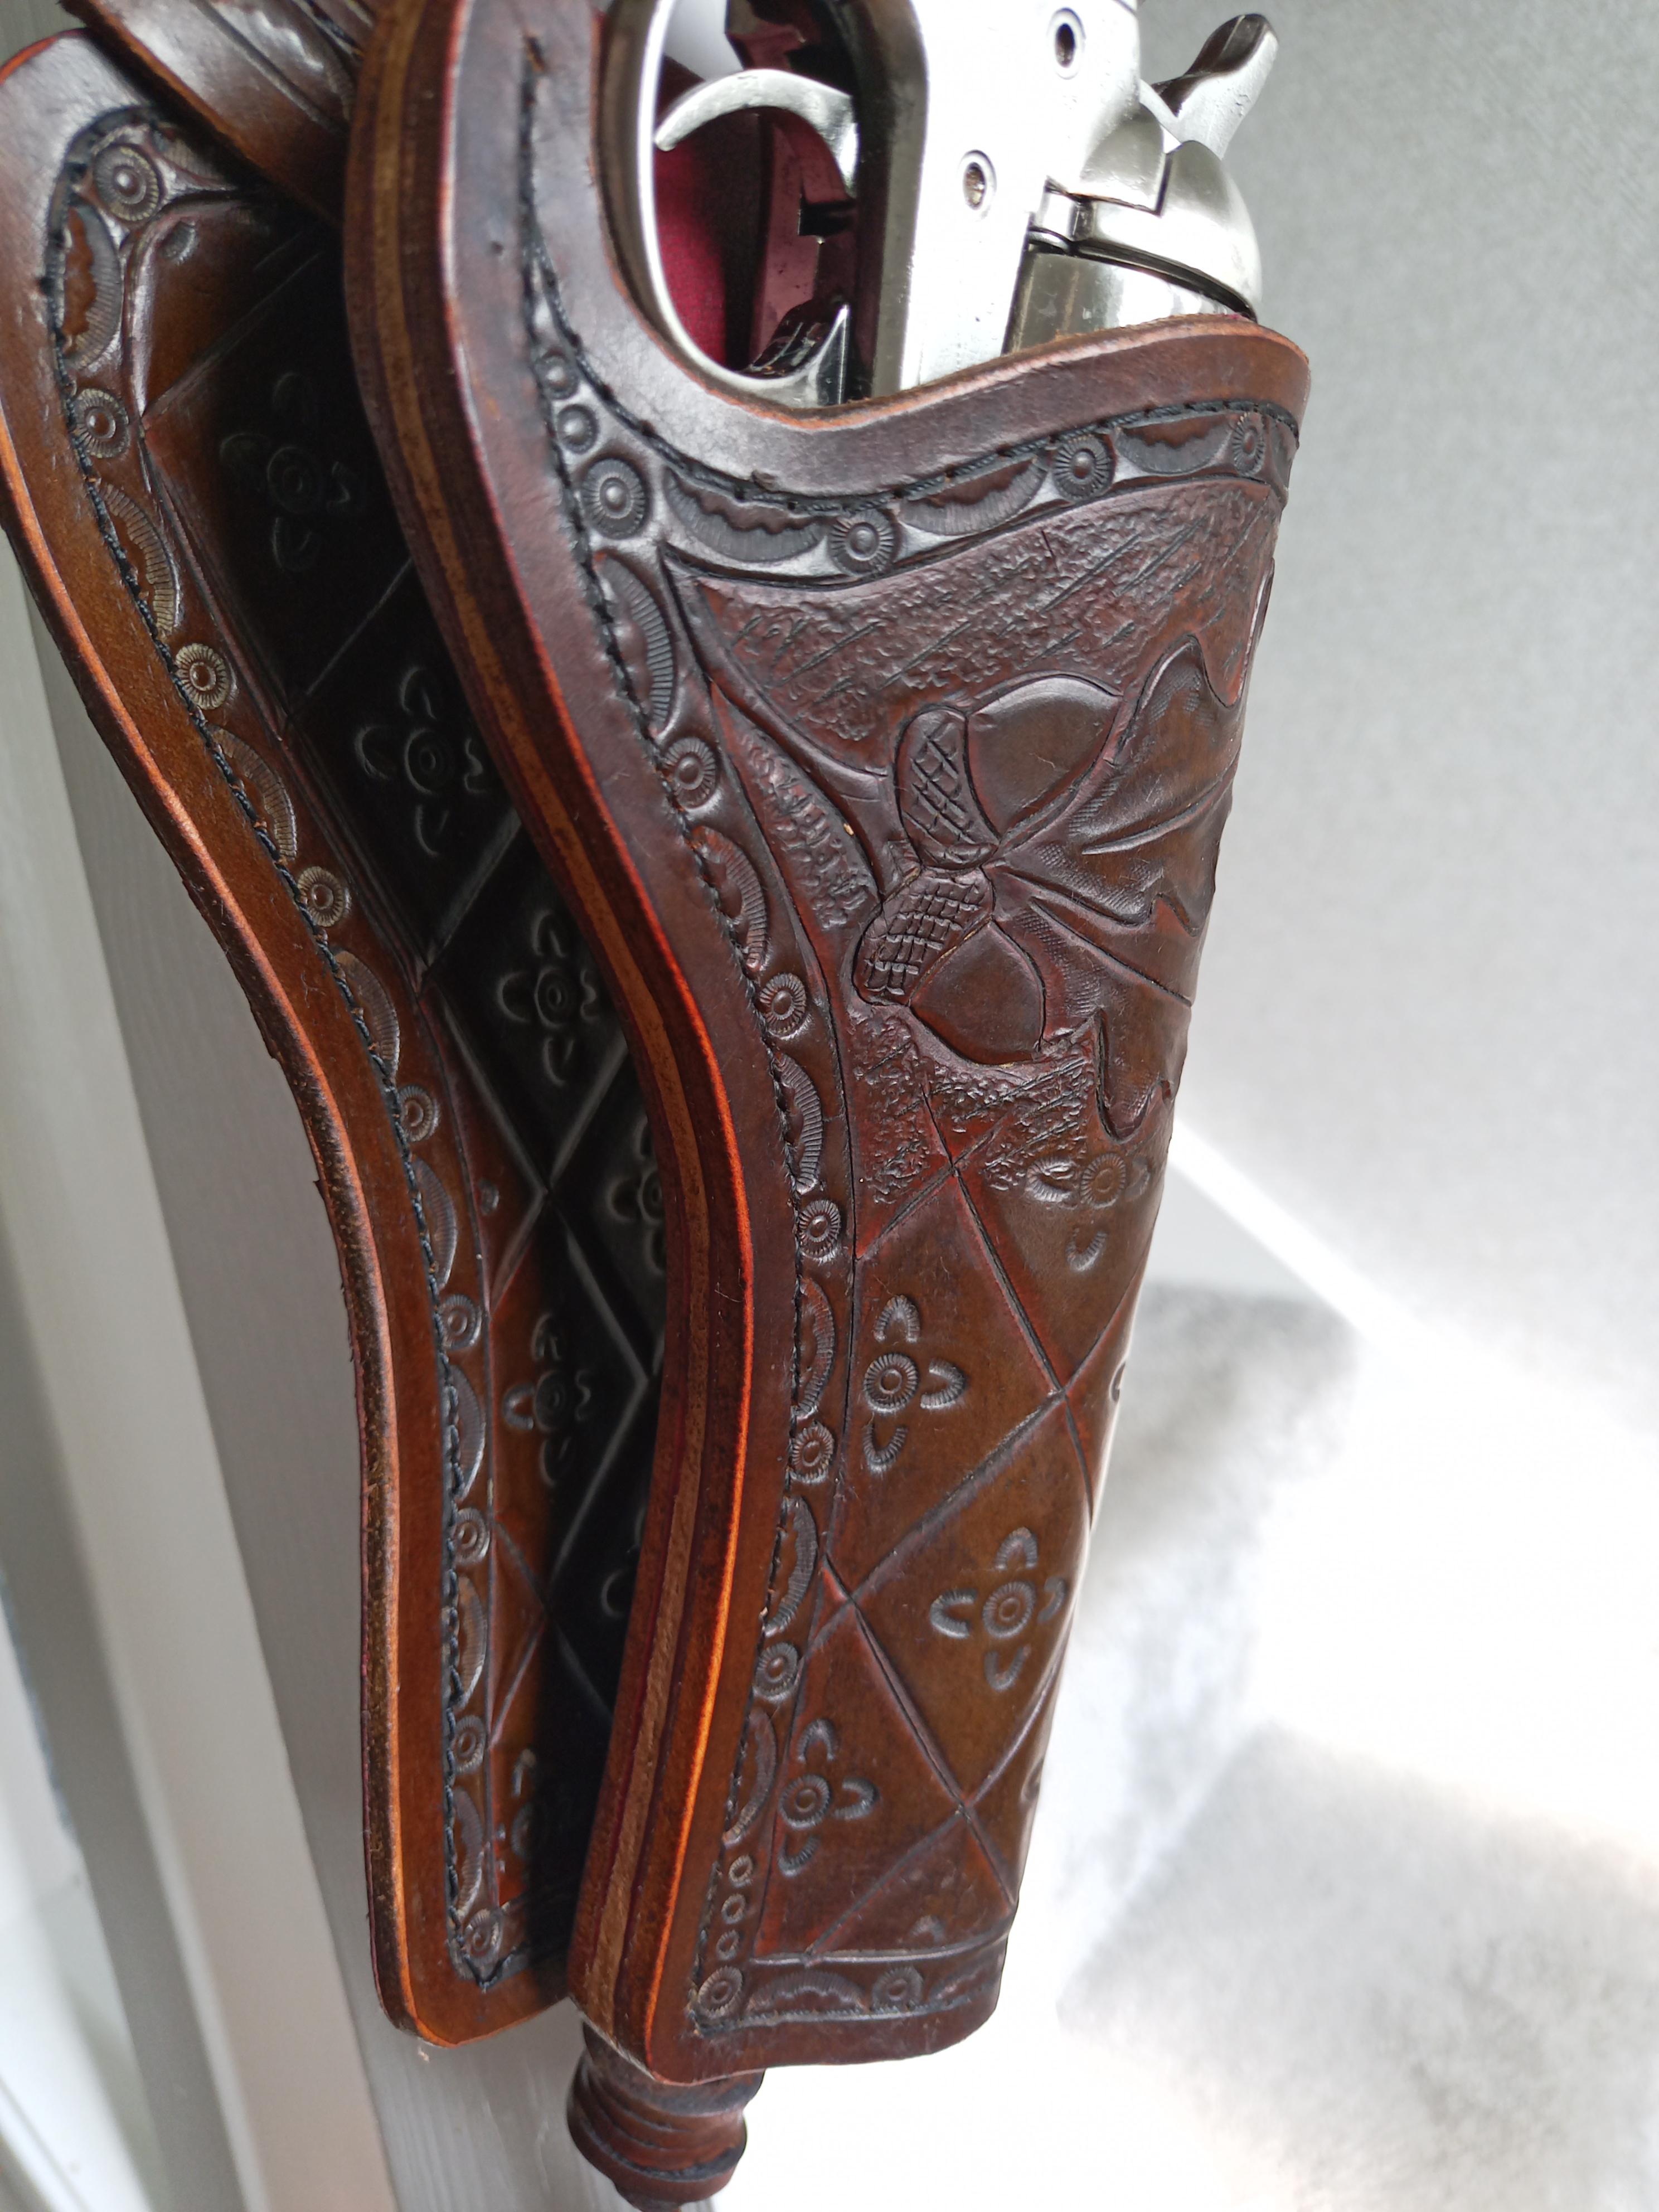
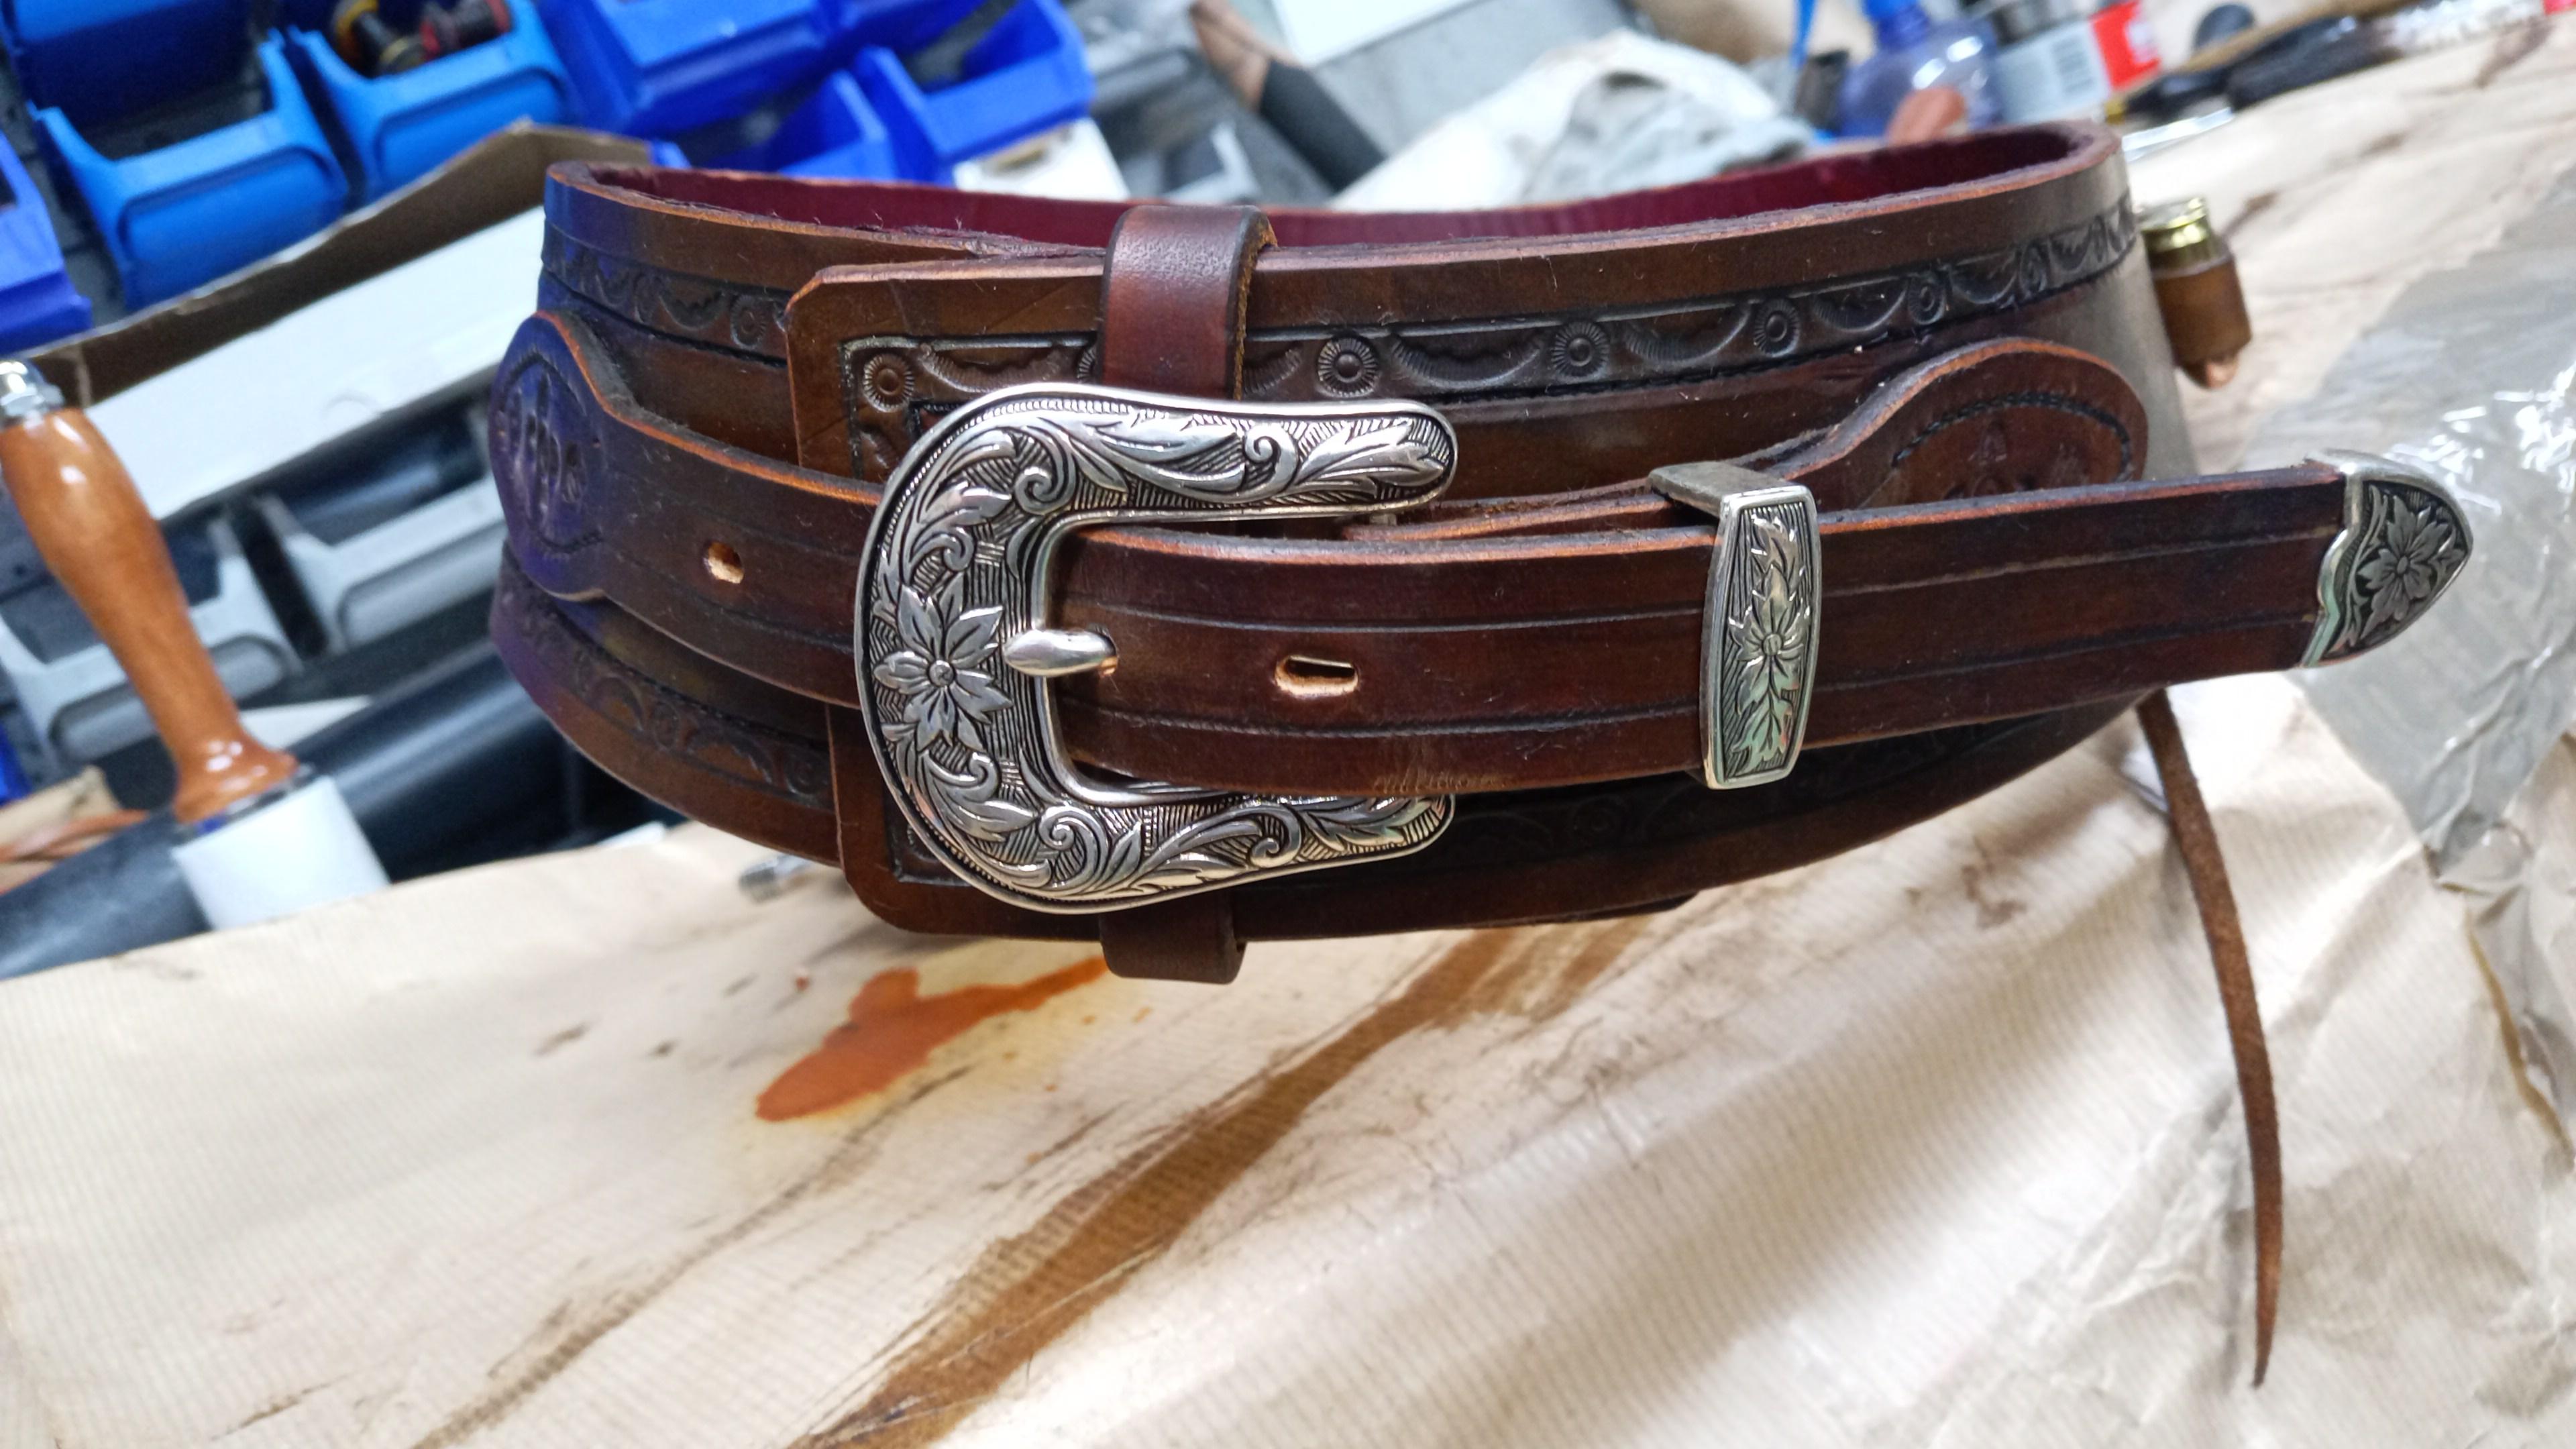
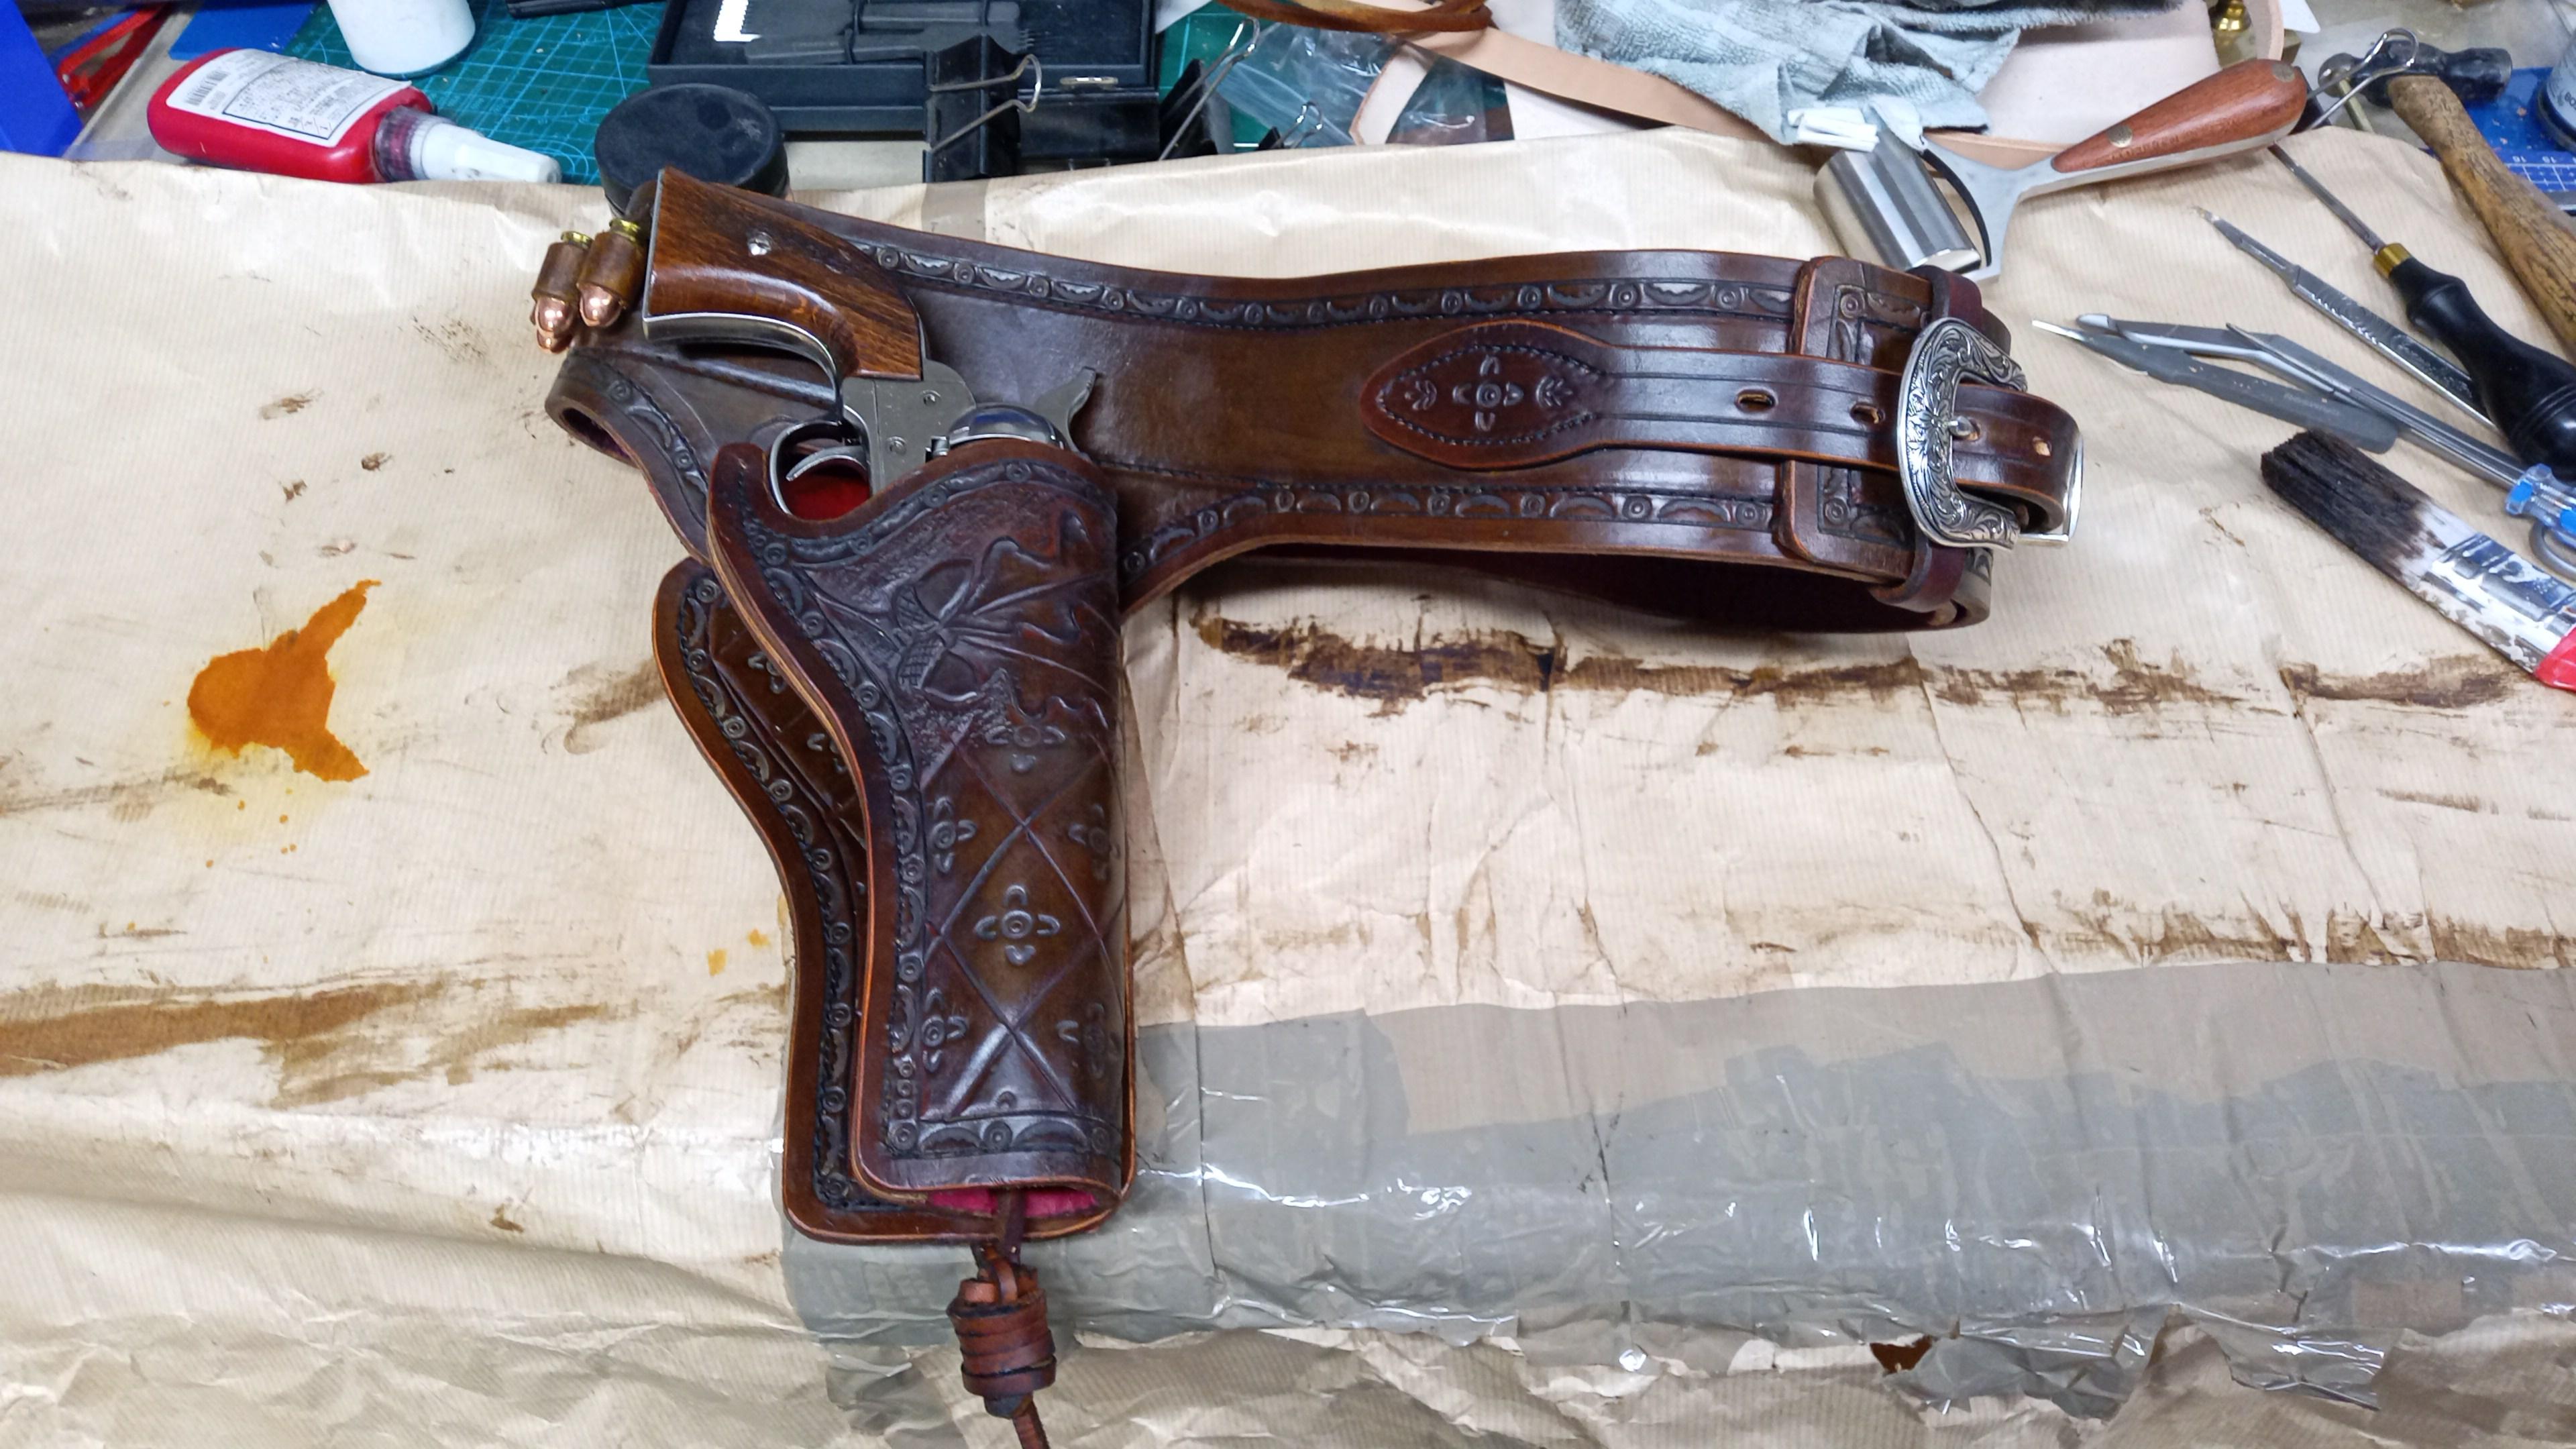
A while ago I asked what I now know to be a daft question, since then I've been playing and building a project between regular orders... 7months and it's finished. The first project I've stamped, the first I've carved, the first I've dyed, the first I've antiqued and the first time lining anything. (I've played with each but never on a project) I was asked to step out of my lead and folio cover comfort zone and build a show holster and gun belt to go in a fantasy cowboy outfit. I've never done anything like this so of course I agreed. This project is made with 10oz natural veg-tan body, a 3oz heavily milled natural veg-tan goat (a super ropey piece). All dyed with feibings in the respective colour ("chocolate brown" and "ox blood"). The buckle, keeper and end tip thingy are 925plated copies of a late 80's steel set. Antiqued with feibings dark brown paste. The holster and ammo are fitted to a "single action army .45". Being in the UK this is a non-functional replica scaled down 2% so that it cannot be easily converted to functional. Unfortunately due to the size difference the genuine inert ammo doesn't fit but becomes pretty bling. Feel free to offer constructive criticism but please bare in mind this is a whole world of firsts for me and I have a list of things to improve on my next project already.
-
Wimsew W-0618-1 Walking Foot Sewing Machine - Staffordshire UK
LRBespokeGoods replied to machineage's topic in Old/Sold
I'll send you a DM -
Wimsew W-0618-1 Walking Foot Sewing Machine - Staffordshire UK
LRBespokeGoods replied to machineage's topic in Old/Sold
You're getting closer to a manageable figure I'd be comfortable parting with for a reliable machine (first time I've seen the post today not just waiting for a price drop). I'll have to do a bit of reading up on the machine as I know nothing at all about them and need to check it would work for my specific interests but I'll shoot you a message if it would suit my requirements. -
^^ This is exactly me, a lurker... I always template paper copy first but use leathercraftCAD to get them digitised and easily reprintable/distributable. Its very rare that I contribute to forums, i'd rather sit back and soak in the knowledge unless I have something meaningful to add (which is rare) but when it comes to this piece of software I have actually been blown away by its ease of use and the support offered by its developer. I've been using the software for about 3 years and it has had several significate changes along the way but I really cant express enough how valuable the software is to me after the initial learning curve dropped off.
-
Thanks for all the help folks, as it turns out I needed to get the leather what I would call "really wet" so it was almost "squishy" and then let it really dry out for almost 3 hours before getting a reasonable result. Seems rather strange given the last couple of tooled pieces wanted waaay less moisture. At least I'm learning, even if I have to go back to pulling my hair out from time to time!
-
@Beehive thanks for the recommendation, it looks great but seems to be the opposite of what I was expecting.
-
Thanks, I'll give it a go tomorrow. And I've just seen this is probably in the wrong place... Is it possible to move it?
-
I've been having a bit of an issue with my tooling but I've tried several things to sort it with no success. When I tool or stamp I'm not getting the satisfying burnish on each tool stroke consistently. Initially I thought it was my casing so I've tried several different moisture levels from a little damp to nearly dry, then I considered the amount of pressure on the tool and struck with a range of pressures on the varying moisture levels... Nothing was working so I bought different tooling leather and repeated the process.... Am I going totally quackers and missing something? I also won't be offended if the answer is simply I'm doing something fundamentally wrong. I'll drop a photo of the piece that started my conundrum in the comments when I work out how to reduce file size on my phone...
-
How tight is too tight?
LRBespokeGoods replied to LRBespokeGoods's topic in Leatherwork Conversation
Thank you Dikman, I wasn't aware that was the correct name for the belt but is what we were thinking of. I can't wait to get something built to try out everyone's suggestions! -
How tight is too tight?
LRBespokeGoods replied to LRBespokeGoods's topic in Leatherwork Conversation
Thank you all for your help! -
How tight is too tight?
LRBespokeGoods replied to LRBespokeGoods's topic in Leatherwork Conversation
Thanks BlackDragon for the expansion. Just to double check my understanding then, majority of the retention is provided by the hammer thong or strap? and I have to get on to my friend for his exact thoughts on usage. -
How tight is too tight?
LRBespokeGoods replied to LRBespokeGoods's topic in Leatherwork Conversation
Many thanks Bland, not nearly that tight is the answer For one mock up I did follow a very in depth methodology from somewhere on this site (unfortunately I cant remember who to give credit) but it came out fairly tight just as the non LWN method did... so wanted to check if that was the norm, which I now understand is not the case... Maybe i'm doing something fundamentally wrong! -
So... I'm hoping this isn't too much of a daft question after the lengthy back story... But... I've had a friend of mine ask me to push my still fairly limited skillset and build them a holster and drop gun belt for a replica Colt .45 SAA single action pistol (his description based on the replica he has provided me to work with, looks like a cowboy gun to me as i'm not a pistol person). I have followed a couple of very detailed descriptions on how to template and assemble the holster and have been somewhat successful... however, with both methods used after some gentle wet forming around the replica firearms the pistol is rather firm to both insert and remove from the holster unlike what I see in movie magic or the youtube gunslingers. I can hold the holster upside down and shake it quite vigorously without the pistol coming out. I will be remodelling the template anyway as it looks a little wobbly in places and I am planning on lining the holster for the final build so will require a touch more space. My question is this, how tight is too tight for a holster?