


RWB
-
Posts
159 -
Joined
-
Last visited
Content Type
Profiles
Forums
Events
Blogs
Gallery
Posts posted by RWB
-
-
I just wanted to say thanks to everybody for their advice. I look forward to trying it out on the next pair. I've got a Full flower saddle coming up that I will get alot of practice in on, and we will see how it goes. Again I appreciate everything. Anything thing else would be more than readily accepted. Ross
-
Ross, I don't think I like them that much, they look to much like a big red X
 LOL
LOLjust kidding your photos did not show, at least on my computer.
Steve
edit; ross after looking around the forum this AM I see all the pics are gone. Look forward to seeing your taps not red X when the site gets fixed.
Hey Steve,
That big red X is my stamping, what are you laughing at?! I try and I try, sheesh. No, just kidding. I would love to hear what you think about them when you take a look. I'll post a pic after I tie a stirrup in them. Thanks
Ross
-
Hi,
Anyone is more than welcome to give this a critique, but I would be very appreciative Bob if you could help me me out. My stem work is always this clubby looking. I just can't seem to figure out how to make the stems have more symmetry an flow. Are my circles to big and to far apart? I used the same size of circle for both the large flower and the two small flowers together, but I think that the small flowers were just to small for that size of circle. But even with the big flowers my stem work just looks clubby I guess, thats the only way I can describe it. Like I said ANY critcism is more than welcome, you can't hurt my feelers.
Thanks,
Ross Brunk


-
If your having trouble with a glue line, then just stay about a 32nd of an inch away from your edge with your glue. That still gives you enough glue to hold it while you stitch.
-
There are several custom tree makers out there. All who do a good job, Bill Bean, Swanke Trees, and Quality Trees are all a pretty good tree. Personally I prefer Bill Bean's trees. His work is super clean when he puts them together. But he's also one of the highest priced tree makers out there. Personally I think that Quality Trees would be a great beginner tree. Lower cost, but also not bottom of the barrel for quality. I think they make a pretty good tree. Rod and Denise Nikkels, who are on this site, make trees, and they could chime in and give you the low down on their trees because I've never used one.
My advice for you would be to get with an experienced saddle maker, and have them help you with the measurements. That way you don't order a tree that is to narrow or wide or something else you don't want. What Steve said is spot on, just save you money until you can get what you want. A nice custom tree is going to be far easier to learn on than a tree that isn't put together very well.
Ross Brunk
-
Well I got the handle put on. I used oak because I had some and some copper tubing for the same reason. RWB even tho I drilled my holes before shaping I still managed to drill out the side. I didn't realize this until I started shaping the handle. I figure I can fill it with putty if it starts bothering me. The tang and ferrule fit so tight I didn't use any glue mainly because I didn't want to go to town and get any. So I drilled a hole through the handle and tang and pinned it. I'm pretty happy on how it turned out especially with the tools I used (cordless drill, belt sander, compound miter saw, and a palm sander) It's kinda of like me not as pretty as most but it will work.LOL I want to say a BIG THANK YOU to everyone for there advice on helping me get this done.
Mike

Looks great, Mike. Pinning it was a great idea. If it works that way do it. Kinda like leather work if works, why do it some other way? As far as drilling out the side, things happen. That blade is still going to get murderously sharp and that is all that counts. Looks great!
Ross Brunk
-
RWB
Thanks for the help I was wondering if I should shape before drilling. After reading your reply I think I'll drill first and then shape. The original handle was all cracked and busted. But seeing as I only paid 25 bucks for the knife I figured I could attempt to put a handle on it.
Mike
$25.00?! Wow, that was a steal. I would like to see pictures of it when you get a new handle on it.
Ross
-
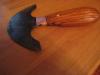
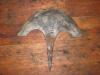
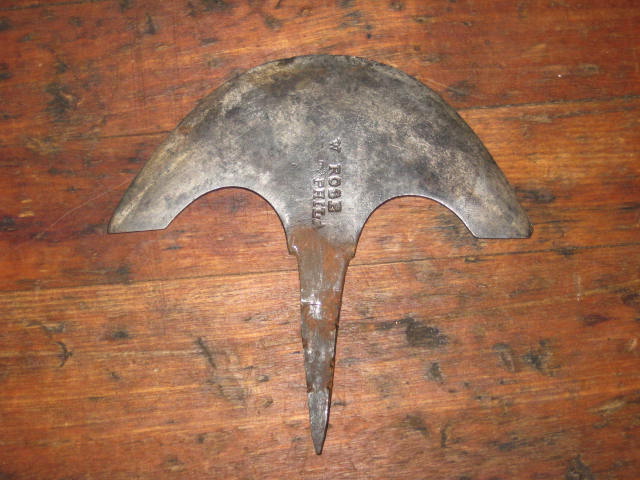
I'm looking for a little help on putting a new handle on a rose round knife. My big question is what do you use for the ferrule. Do you make your own (from what)or buy them already made(from where). And any other pointers on drilling the handle or anything else ya can think of to make this project easier. All and any help is greatly appreciated.
Thanks, Mike
Mike,
Thats a really nice W. Rose blade. I have two in my shop that I use every day. I personally think that Rose knives have the best steel of all the antque blades out there. Personal opinion is all, I'm sure others would disagree, but no matter.
The easiest way I have found to put a new hand on is this: Cut a blank of hardwood close to the size that you want it to finish out at. Drill a hole in the top large enough to accomodate the entire tang of the blade. Then make sure its going to work, dry fit the knife and such. When it is were you want it, then go ahead and fill that hole with JB Weld. Not only is JB Weld a glue, but it also acts as a filler that is sandable. It will fill in the gaps thats are created by a round hole and a flat tang. (Hint if the tang doesn't fit right and that JB Weld sets up on you, you will have to cut the wood off of the tang. Just make darn sure its right before you glue it in.) When it's set, then all you have to do is sand or cut the handle to exact shape, polish it and it's ready to use. If you want a more finished look go ahead and wrap the top with either copper or brass and braze it together. But if you JB Weld it in there is really no reason to this other than provide a finshed look. That JB Weld will hold it to dooms day.
You can also shape the handle before you drill the hole, but it's tough to get the hole exactly centered. I have accidently drilled out the side of a handle before trying to do it that way. Tell me if that helps.
If you have the original handle you can also just JB Weld that back on. I've fixed numerous tools that way too.
Ross Brunk
-
I've been working on several belts. Had one all tooled and ready to finish.
Did the usual drill: a little clean up with oxalic acid, let it dry, a light coat of olive oil and let that dry, then a light coat of Neat Lac as a resist.
Then here's were things got off track.
I normally use Sheridan Brown or mahogany antique and after wiping off and buffing let it sit 24 hrs, then a coat of Tan Kote. Normally with those colors the Tan Kote takes off quite a bit of the antique, in fact if I'm not careful it will take most of it off
This time to try something different I used Dark Brown antique. Turns out that was a bad idea. After doing the normal steps, wiping off excess with a paper towel then with woolskin scraps and buffing it sure did look dark. Pretty extreme. But I decided all was not lost, I figured I could take a lot more off with the Tan Kote. So 24 hrs later I apply the Tan Kote and it sure didn't seem to remove near as much of the dark brown as I'd hoped it would.
So my question here is how long are you folks who use this same finishing process, (Hidepounder, Leather 1214, others....) letting the antique dry before you apply your final finish coat, Tan Kote or Neat Lac.
Maybe the dark brown is just too harsh for this process?
I may try to post a pic of the belt. It doesn't look bad, it's just that the guy who ordered it didn't want a lot of color on his belt. I may have to make him another belt and try to sell this one to somebody else?
Thanks,
Bill
Bill,
It depends on how much of the antique you want to pick up. I typically use Neat-lac immediately after I wipe off my antique. If you scrub really hard in a circular motion you are obviously going to take up more than if the Neat-lac is applied lightly. A trick that I have learned is if you want more color then antique it twice. Apply the antique, wipe it off, Neat-lac, let it dry and do it again. There is no rule that says you can only do it once. For that matter there is no rule that says you can't apply two different colors of antique to the same project. For example mahogany antique over the top of black antique gives an incredible dark cherry color.
Another thing that is going to determine what kind of color you get is how much oil you apply. If its lightly oiled chances are your color is going to be light. Nothing is wrong with light color, but you will have a tendency to get more vibrant color with a slightly heavier oiling. But on the flip side of that coin to much oil is not good for the leather and it darken the color to much.
Play with it, that is the best advice I can give. Try different things.
Ross Brunk
-
Does anyone have a source for Williams Saddle Dressing other than ordering it from Australia? Seems like all the places I knew of who carried it quit because it was so expensive and there was no mark up in it. Champion in Ca. was/is the U. S. distributor but I can't find any retail suppliers?
Thanks
I think Kings Saddlery in Sheridan, WY still carries it, but I could be wrong. Google them, they have a web site with a phone #.
Ross
-
I'm lookingto buy a new swivel knife BLADE.
I'm sure this has been discussed before, on the forum.
But maby some of you could leed me in the right direction.
I have a couple of OLD blades from Tandy, & a ceramic blade, also from tandy.
The ceramic blade has to be stropped very often.
So it's time to invest in a good blade. HELP PLEASE !!!!!
I notice that you put your emphasis on blade. The unfortunate thing is that most swivel knife makers don't make universal or interchangeable blades. So what you probably looking at, (and what I would recommend if all your using is a Tandy swivel knife) is buying a whole new swivel knife. Someone else has mention Paul Zalesak an Bob Beard I personally have no experience with these two tool makers. However I have heard that they make nice tools, and are worth a shot. Barry King form my experience make the best affordable tool out there. I your interested in Sheridan Style Stamping I would suggest that you start by looking athis web site. He carries nice stamping tools as well as good hand tools. A swivel knife from Barry is going to run $45.00 and a Blade$15.00. They come fairly sharp and with a little honing are great. www.barrykingtools.com
Another one I would recommend is Chuck Smith. He makes a really great swivel knife, probably the smoothest spinning knife out there. His blades get and stay sharp easily. But you are going to be looking at paying about $120.00 for a knife and blade, if I'm not mistaken. I couldn't find a web site so maybe someone else can jump in for you with that information. Hope that helps.
Ross Brunk
-
Clean little rig. I like it alot.
Ross
-
Ok, I guess that I may have unintentionally, stepped on a few toes, when I said that using a tin strainer was a short cut. Mostly what I said was not taken the way I meant it. Perhaps what I should have said is , that the dozen or so saddles that have come to me in my shop to be re-done because they were deamed uncomfortable by their owners, were, saddles with metal strainers. When I took them apart to rebuild them, it was evident that the maker was taking shortcuts to get the job done and the end result suffered from it, not just in the seat but also in many of the various different areas that, taking time to skive and fit properly result in a good saddle. I did not mean, that anyone that uses a tin strainer is making junk! When you talk about the likes of the many saddlemakers that are both known and unknown out there that take the time to build top saddles, they do not do that by cutting corners. If you are going to use a seat tin, and take the time to fully shape and contour it properly, you are not taking a short cut, it takes time and effort to achieve proper shape. On the other hand, the ones that I have removed and placed full leather ground seats in, were originally like sitting on a 8" wide board. These tins were simply tacked in place the way they came from the maker. That is a shortcut and does create an inferior product. I am sure that the guys you are mentioning by name, would never simply do that . As someone else said here, "If the seat is well done, it's well done...period". I agree with that, whole heartedly. As for me, I will continue to use the leather method, because it gives me the opportunity to shape and skive as I go, and finally, whenever possible, I have the owner come to the shop and sit the seat before I go on. That gives me a chance to do a final skive to be sure it is pleasing to the owner. That ain't no short cut, but; it does make sure that the results are perfect. That should be the results you are looking to acvhieve , if you aspire to have your name mentioned in the same breath as those that have gone before us.
Sorry if I hurt anbody's feelings!
Bondo Bob
Bob,
You don't have to apologize for your comment. A tin strainer in a lot of ways is a shortcut. And we all use some sort of shortcut at some point. Some short cuts are great and some aren't. I use a strainer and like to do my seats that way, but you didn't offend me. In fact the only person you seem to offended is someone who likes to tell everyone that he is the best. Don't worry about your comment.
Ross Brunk
-
Some individuals can learn more in one day with a guy like Steve than others can in a few months. Educated viewpoint- it's quality, not quantity that counts. As any thinking person would know, it's based on what you've done up to that point that dictates how much of the "finer points" can actually be learned, and the quality of it. I'm still applying what I learned from Mecum (a guy who I might add never speaks on such forums as this, maybe that states something?) - endless photos and endless notes, not from production videos. I had made many nice saddles before ever hooking up with Steve, so, yes, I DID learn a heckuva lot of finer points from him, and am still applying the lessons in my shop. I am not condescending, nor am contradicting what I state on my website. My goal is to make every saddle better than the last. Your statement about strainers being a shortcut is an opinion, your opinion. Reserve your judgment and show a little respect for others' ideas.
Huh, well I guess it's a good thing that you are such a speedy learner. I might be out of luck, considering I had to spend about 5 years learning from Don Butler, and I still have the balls to admit I'm not the best.
C'mon man I'm sure we can all throw around who we learned from, and make people feel bad or insufficient if we all try to. But that's not what this forum is for. The purpose of this forum is to help people. We all have different ways of doing things, some of the people here are better than others, and some are just starting out. If we are going to get caught up in the things we do different, then nobody learns anything. Personally I use a seat strainer. Whoop dee freakin' do da. I've rode a bunch of saddles with seat strainers that would eat your butt off. I've also rode all leather seats that are the same way. Personally I think that a proficient saddle maker can put several different types of seats in and not have them sore a customer. Am I there? NO!!!!! Are we ALL constantly learning? YES!!!!!!!!!! Even those who have learned from some of the best in the business.
I went to Wichita Falls this past weekend for the first time, and learned stuff from guys I had never heard of before. Saddle makers and leatherworkers that most of us have never heard of, but they have that cool little trick that I was looking for. There is no point in ignoring that kind of information. Even if it wasn't Steve Mecum who came up with it. None of us are as good as we love to think of ourselves.
Ross Brunk
-
Are you using roughout skirting or a split chap seude?
Ross
-
So I guess my question is still if I use oxalic acid to clean, then oil, can I apply stain and expect an even color?
Sure, if you oil evenly your color will come out even, but if you oil unevenly you color will probably come out uneven. But acid your leather, let it dry out, apply a coat of oil, and then wait for about 12 hours. That will give the oil enough time to soak in and you will generally be able to tell if it's oiled evenly. If not then LIGHTLY re-oil the light spots,let that soak in, and when you have it even then go ahead and apply your Neat-lac. When that's dry apply your stain or antique and what ever your using for your top coat finish or sealer. You can drastically change the color of an item by how much oil you apply to the leather. So just experiment with it.
Ross
-
Can you use Neat Lac over dye? I've got a piece that has oil and spirit dyes on it and I want to make sure this isn't going to smear when I Neat Lac it.
It shouldn't smear the dye as long as it is really dry (approx 24 hours after the dye is applied is long enough to wait). I use it all the time over a dyed background and dyed edges with no problem. That Clear-lac stuff tends to smear if you not careful though.
Ross
-
I hope someone who is in the know replies to this because I just had the same problem.
Tim Worley
If it is a regular spirit dye, I have to say I've never found a way to get it out. No amount of profanity will help either. Oil dye, not sure, I don't use the stuff. Maybe someone else can come up with something.
Ross Brunk
-
HEY all.....
I am in desperate need of some help and am hoping to find someone in or near billings that would be interested in teaching some leather basics- hands on.
I KNOW that Sheridan is just down the road, and believe me I am soooo thankful, but I was hoping to find someone I could take a class or two from in the evenings...... I am working on a pair of spur straps at the moment, and want to evolve into more horse gear. The leatherworker forum has been so much help to me- but need some hands on help.....
Thanks in advance for any help!
Give me a jingle. I'd be more than happy to work something out with you. I'm right in Billings.
Ross Brunk
www.nrcowboygear.com
406-672-1398
-
Built this one today and made changes as I went. I don't know if I like how it turned out yet. One thing I can say is my machine and I were working together alot better than on the first one.
Great job, nice clean lines. I do have a question though, what do you have behind it in the background?
Ross
-
I assume you wet it then twist it. How do you keep each in place until it dries? How do the twists hold up over time? I guess they eventually straighten out.
Thanks,
Art
Art,
I just sew my fringe on to the leg, and cut it the way I want it. ThenI soak the fringe in warm water (I try to avoid getting the leg wet),and start start twisting it. I'll twist up a piece of fringe real tightand then stretch it as much as I dare. If you yank on it to much youwill break it off, so just firmly pull on it. Stretching it out seemsto set it and keep it from untwisting so bad. Then just let it dry. I've never had to do anything other than just let sit and dry out. I've also never had a problem with the twist coming out over time. It will to a small degree but for the most part its there to stay. Hope that answers the question.
Ross
-
Beautiful work! Do you make custom chaps for anybody? What kind of machine did you use for the stitching?
Thanks for the compliment. I do make custom chinks, chaps, and armitas for whoever wants a pair. I also have a wholesale line that I do for higher end retail tack shops. I have an Artisan 3000 that use for most of my stuff. On smaller stuff like this you have to crank it down pretty far, but it works fairly well if you do it right.
Thanks again,
Ross
-
Very nice. Is there a special way you have to twist the fringe so that it stays?
Thanks Butch, A couple of posts up I replied to someone else asking how I twist fringe. Take a look at that and see if it helps. After I get it twisted I just let it dry out and it stays that way pretty much for the life of the chinks.
Ross
-
Ross ~
Wow! Really, really nice.
Would you mind sharing how you get the fringe to twist like that?
Hope you treat us to some more examples of your work soon!
Wyldflower
I just sew my fringe on to the leg, and cut it the way I want it. Then I soak the fringe in warm water (I try to avoid getting the leg wet), and start start twisting it. I'll twist up a piece of fringe real tight and then stretch it as much as I dare. If you yank on it to much you will break it off, so just firmly pull on it. Stretching it out seems to set it and keep it from untwisting so bad. Then just let it dry. The thing that I don't like is it makes your fringe all different lengths. It think that the only way to avoid that would be to cut it long, twist it and then trim all your fringe to the same length. But that would be alot of work. Took long enough as it is.
Ross


Flower Stamped Tapaderos
in Floral and Sheridan Carving
Posted
Here is one that is Laced down the nose, and has a finish on it. I have yet to decide if I should tie stirrups in them or just stamp another pair that I like better.
Ross