


friquant
-
Posts
518 -
Joined
-
Last visited
Content Type
Profiles
Forums
Events
Blogs
Gallery
Store
Everything posted by friquant
-

Replacement Pulley for Tapered Shaft
friquant replied to friquant's topic in Leather Sewing Machines
Black on black: Stylish! What's your belt diameter? I've started buying round polyurethane belt instead of V-belts. -
Remove the two endcaps from the left end of the cylinder bed. Turn the hand crank and you'll see the vertical feed cam in action. You can loosen the setscrews in it and rotate it to taste. In terms of order of operations, you will want to adjust the vertical feed cam first. (Probably such that the feed dog is at its highest point when the needle is at bottom dead center.) Afterwards you would adjust the eccentric that moves the rock frame (such that the needle arrives at the throat plate at the same time as the inner toe)
-
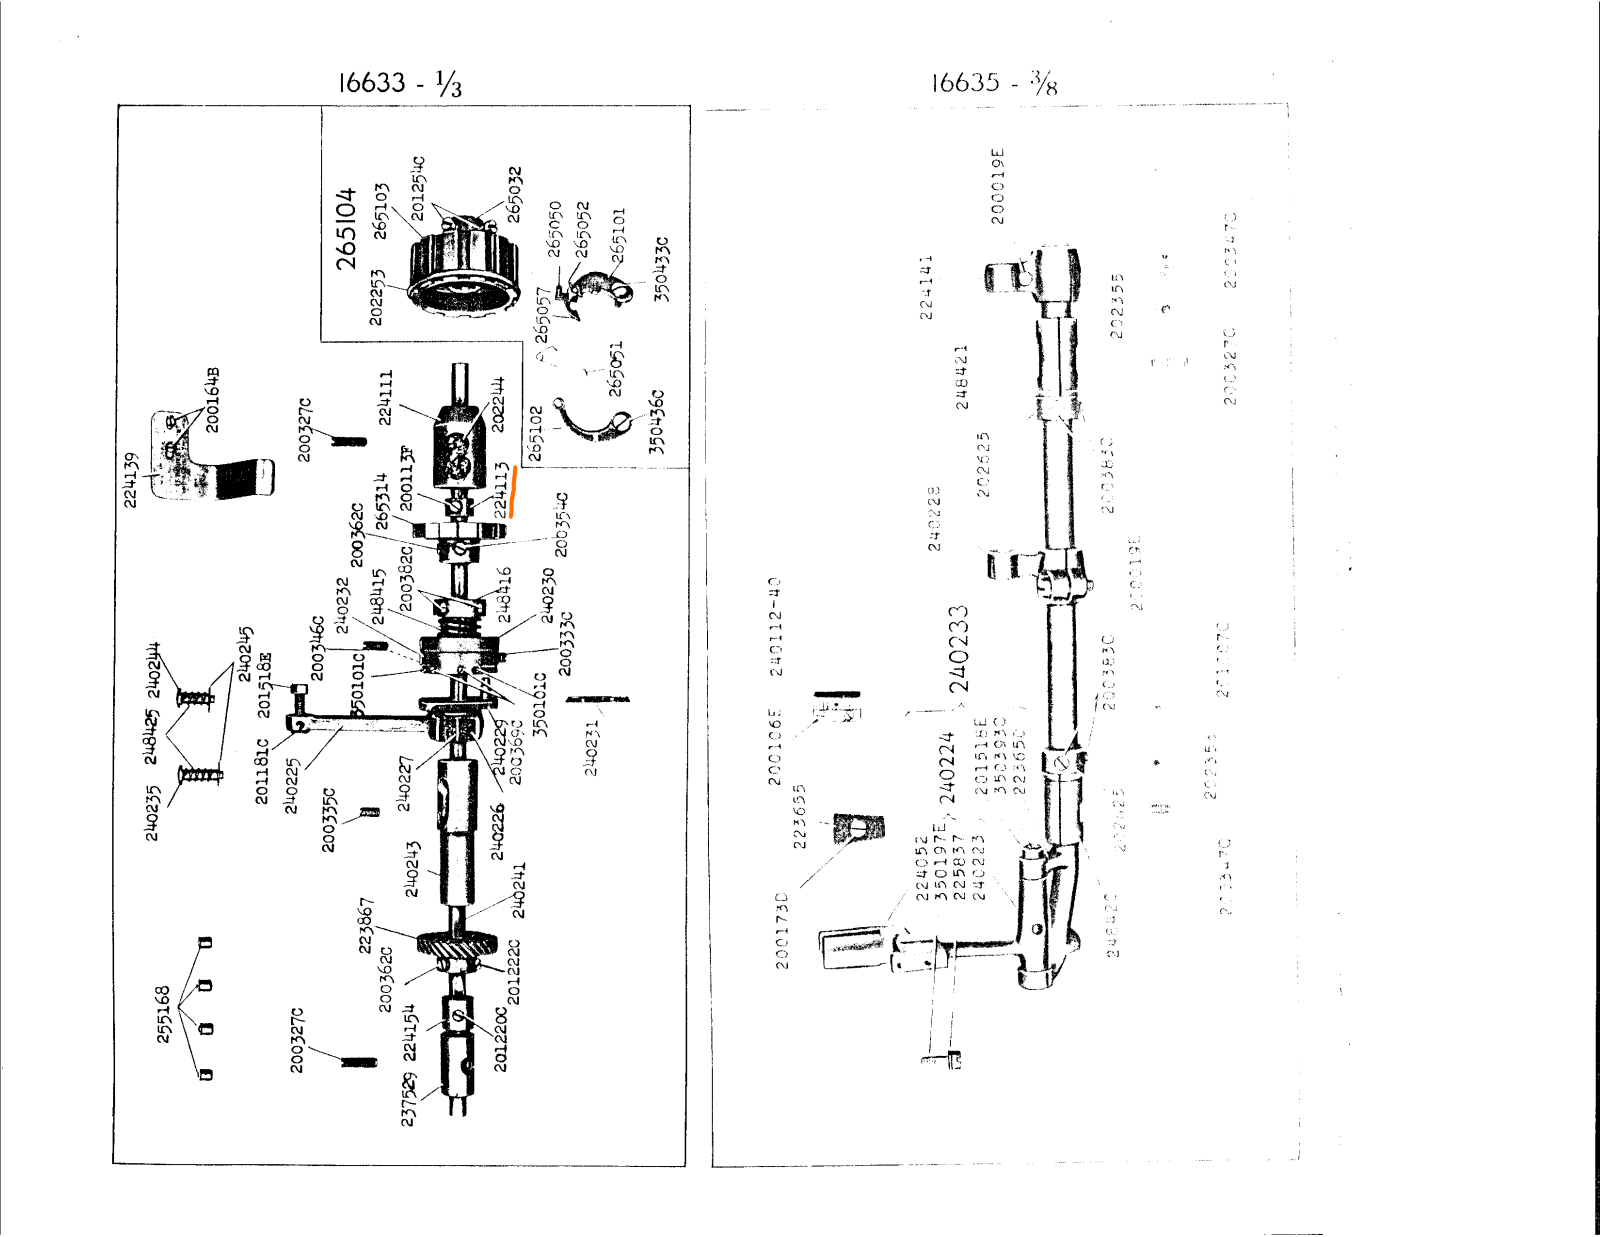
In this photo from the parts manual, see part #224113. It's a collar that clamps to the shaft to prevent play. But I'm not seeing such a collar in your video.
-
Unknown Chinese servo motor controller manual needed
friquant replied to Einherj's topic in Leather Sewing Machines
Ah that's cool. -
With the motor disconnected, and the bobbin cover plate slid to the right, you can watch stitches form as you turn the handwheel. Once you can identify what it looks like when a good stitch is made, and what it looks like when the thread jams, you can start to trace out how the jams are happening.
-
Unfortunately, in gearing the machine down we reduce the mechanical impedance that the clutch motor sees. That is, it will be harder to feather the clutch once it is geared down because the motor will have an easier time bringing the machine head up to speed. That said, now is a great time to practice feathering the clutch if you're game. And to make sure the clutch slide linkage is good and lubed so there's no hysteresis.
-
For mine, I removed the hand wheel, measured the diameter of the arm shaft, and ordered a generic pulley (300mm diameter) to fit that size shaft.
-
Have you oiled up the slide on the clutch motor so it doesn't stick? And short stitch length is your friend when learning a clutch motor. Won't run away so fast You can also replace the handwheel with a 300mm pulley 🎡 😀
-
For industrial machines, this start/end sequence works for me: Start each seam with the take up lever at its highest position. (Otherwise thread yanked from your fingers) Hold the top thread for the first couple of stitches (Otherwise thread jams) Finish each seam with the take up lever at its highest position. (This locks the final stitch and allows you to pull the material away from the hook)
-
Unknown Chinese servo motor controller manual needed
friquant replied to Einherj's topic in Leather Sewing Machines
The synchronizer that came with the stitchman controller has only three wires. Here is a photo of the plug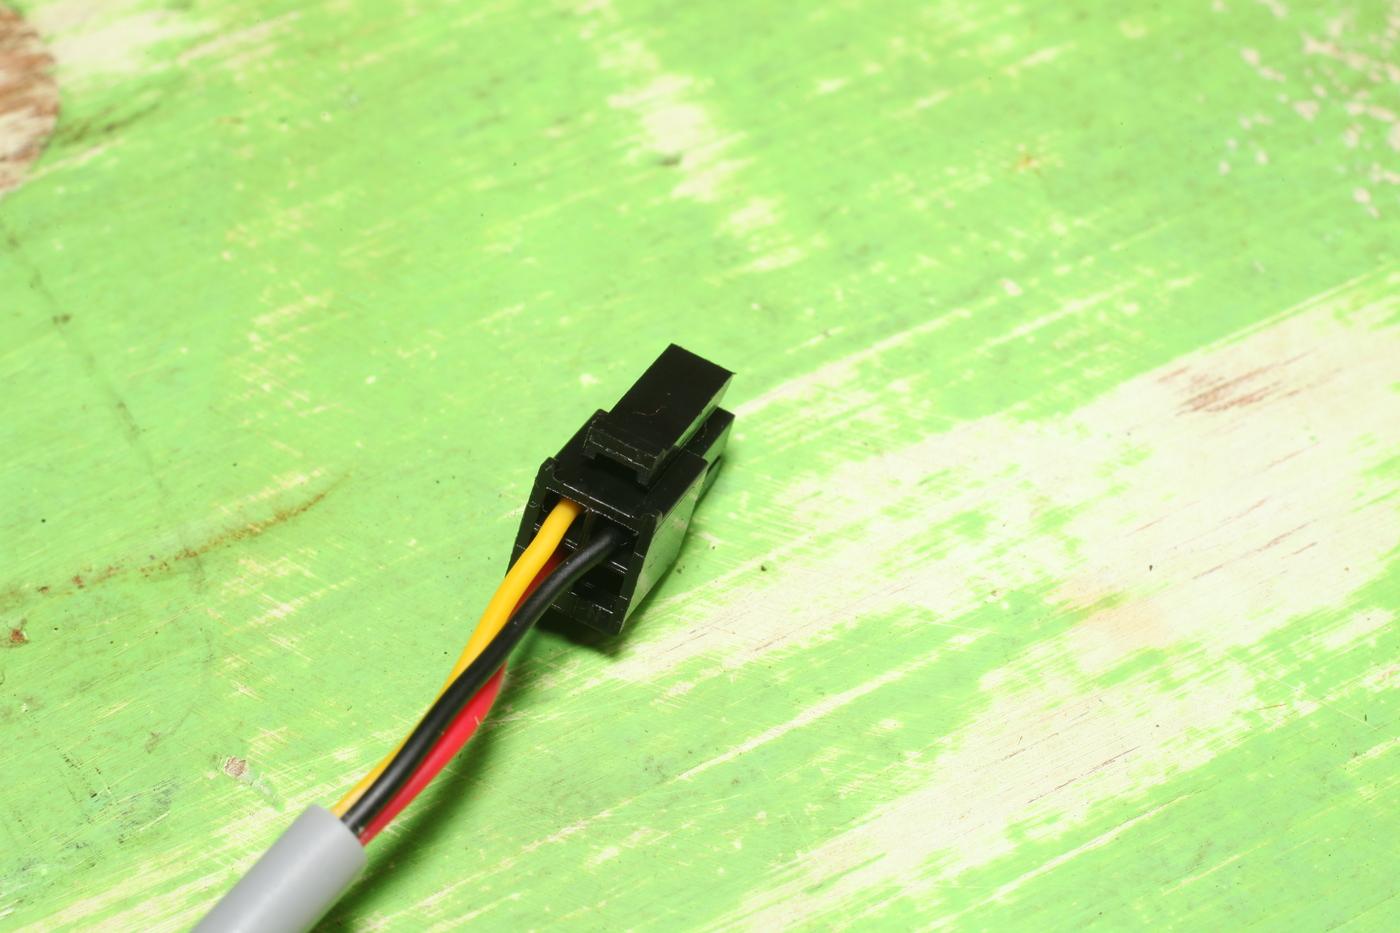
-
Unknown Chinese servo motor controller manual needed
friquant replied to Einherj's topic in Leather Sewing Machines
I've updated my original post on the stitchman motor to include error codes from the manual I was given. -
To get it moving freely, you can oil all the moving parts, remove the bobbin and the needle, and put a brick on the foot pedal to hold it down. Let it run for 5-10 minutes at full speed. Monitor to make sure it's getting freer (faster) with time, not slower. If it gets slower with time, see if there's an oil spot you missed, and see if there are any warm spots on the machine.
-
Ok, congratulations are in order for missing some stitches. Especially that last photo of the prototype cushion! 🌠 An informative exercise would be to put something like that cushion seam back under the machine so you can see some skipped stitches as they form. With the material under the presser foot, tilt the machine head back so you can see the underside of the machine. Get a good light or a flashlight, and reading glasses if they help. Then turn the handwheel by hand to make slow stitches, but watch what's happening from underneath. Pay attention to what it looks like when it actually makes a stitch, and to what happens when it skips. Let us know what you see! (More to come)
-
I'm not familiar with the tension release on the Consew 225 specifically. Feel free to post pictures of the thread tensioner and the cavity in the machine head where it sits. On the Juki DDL-8700 clone I worked on, the tension release was adjustable by how far into the machine you inserted the whole tensioner before you tightened the lock screw.
-
Unknown Chinese servo motor controller manual needed
friquant replied to Einherj's topic in Leather Sewing Machines
Yes in another manual I've seen it explicitly called "Break-in". I've updated the doc to say "Break-in" -
Has anyone noticed the attractiveness of the bottom stitches to be machine-dependent?
-
Unknown Chinese servo motor controller manual needed
friquant replied to Einherj's topic in Leather Sewing Machines
You did your homework, showing us what the ranges and defaults are for each parameter. At a quick glance that menu looks like the "Stitchman" -
Is there a sewing machine for me?
friquant replied to D.jsherwood's topic in Leather Sewing Machines
Pfaff 545 is a flatbed with triple feed (aka walking foot) that I see come up on marketplace for $600 - $800. That's what I bought as my first machine. It's biggest fault for me was the stitch length only went up to 4mm. -
Around the disc? Meaning more than what is shown in the photo? (The photo looks correct to me)
-
Awesome! 💃 Make sure the handwheel turns freely (easiest to check with motor drive belt disconnected), and that it forms stitches. If all checks out you can reconnect the drive belt and go back to stitching under power. The safety clutch may disengage again if too much load is placed on the hook driving shaft. Two things that will make it go much better for you: Start each seam with the take up lever at its highest position Hold the top thread for the first couple of stitches
-
You may need to engage the safety clutch manually, with a screwdriver. Here is a video that shows how the safety clutch mechanism works, and how to disengage/engage using a screwdriver.
-
Here's a service manual for the 1341 in case you don't already have one. Assuming your machine has a hook safety clutch, you'll need to re-engage it. If the handwheel is hard to turn after engaging the safety clutch, you'll need to look for more clues. Disconnect the motor drive belt and remove the needle so the machine can turn as free as possible. Oil the machine, especially the bushings for the hook driving shaft. Also check that the timing belt is spinning the lower cog. Is the hook stiff to move, or is it colliding with something and coming to an abrupt halt? As for removing the hook from the machine (if you still find the need to do this), after removing the center screw if the hook does not come out easily soak it in a few drops of diesel or other penetrating oil. I broke the first hook on my pfaff 545 trying to pry it out when it had been dry for years. (Some dried up old lubricant seemed to be sticking it together). Eventually I got the broken pieces out with penetrating oil, a kitchen torch, and some light tapping with a small hammer. Bottom line is, hooks are very hard and brittle so be gentle with it. Good news is, you'll never deform one such that it is out of tolerance And yes we do like videos and photos 🤩
-
Review of Jianglong 341 after 4 months
friquant replied to friquant's topic in Leather Sewing Machines
A 10-lb (4kg) weight out at the corner pulls that corner down 5/8-in (16mm). -
Review of Jianglong 341 after 4 months
friquant replied to friquant's topic in Leather Sewing Machines
Mine fits a little high. Meaning the table sits a couple millimeters higher than my throat plate. When I see pictures of other table tops, the table sits maybe 4mm below the throat plate. I filed on mine some to bring it down, but not enough I guess. I don't use the table top much. It's easy to install/remove (two knobs to tighten/loosen), but AFAIK you have to install it BEFORE you start your seam. Sometimes I get into a seam and think "This would be easier on the table top" 😂 -
Can you post pictures of your machine (including close-ups), for those of us who don't immediately know what a Techsew Strobel is? Is it lockstitch? Chainstitch? Can you post images of your failed seams so we can speculate as to the cause?