


mbnaegle
-
Posts
87 -
Joined
-
Last visited
Content Type
Profiles
Forums
Events
Blogs
Gallery
Store
Everything posted by mbnaegle
-
Help making leather Label/ logo for my mattress company
mbnaegle replied to Amys Vintage's topic in Leatherwork Conversation
With process's like this, it's best to try to fit your application to the equipment and methods that are already in use and available. Stamped tags like you want are frequently used for all leather goods, such as saddle makers stamping their logo on part of the saddle, handbag makers on the side of a purse, or jean makers on a swatch of leather. I'm not sure about having another company make the tags for you to sew in (perhaps others can give you some leads there), but should you choose to make them yourself, the process would be to first find what kind of leather you want to use (leather supplier) and then cut those pieces into the shaped blanks. This can be done with a "cookie cutter" type Rule Die and a clicker (kind of hydraulic press), or with a CNC cut-out machine. You may be able to improvise a clicker to by adding a platen and plastic cutting pad to a press, and some companies make benchtop machines like this, but they are manually operated and can wear you out if you are doing a lot of tags. To stamp the tags, you would first have the die made by an engraving company that specializes in it, and they are typically made from brass (better) or aluminum (ok). That die would be mounted in a Hot Stamping Machine which electrically heats the die to a determined temperature, and manually (by hand or foot operation) or pneumatically (needs an air compressor hooked up) embosses it into the material for a determined time. Time and Temp are the biggest variables on machines like this. Pressure too, but once that's set, time and temp will have a bigger influence on how deep and defined the impression goes. Leather hides are often bought at thinner thickness's for jobs like this, but that doesn't mean they are perfectly uniform thickness. If you have one swatch that is thinner on one side than the other, that will make the stamping imperfect. You might be able to compensate by using a soft felt backing, or you might need to split the swatches to a thinner but uniform thickness after they are cut. In most other leather stamping applications, they would stamp a piece of leather before it is attached to the final product, for the same reason of needing a uniformly flat material to stamp evenly. As with everything, a lot of this will depend if you want to make 10 tags, 100 tags, or 1,000,000 tags. Each step has a more primitive hands-on approach that will be fine for a few, but seriously slow you down the more you need. There isn't really a machine made that you can throw a hide of leather at and have it spit out a bunch of finished tags. They all have a certain level of hands on operation due to the variation that comes with working with a natural material like leather, but there are different things you can do to automate the process and speed it up, like using a pneumatic hot stamper in place of a manual one, or using one with a rotary table that allows you to load the next piece while the prior one is still stamping. CNC cut-out machines are very expensive, particularly if you are only using it for this one job, but are way more efficient and faster than cutting them out with a rule die on a clicker. You might be able to use a more commodity type cut out machine like a Cricket, but they have thickness limitations and don't typically have room for a whole hide of leather, meaning you'll be pre-cutting it into smaller chunks end ending up with a lot more waste (Leather is not a cheap material). The clicker and the hot stamper would be your main equipment investments, and the rule die for cut-out and the brass die for stamping would be your only custom tooling. The hot stamper likely will need some kind of centering guides too, but typically they can be supplied with something basic that would work fine. Even if you have another company make the tags for you, you are essentially paying them to use their equipment, but you will still need to invest in your own dies for them to use. If your swatches are rectangular, you may be able to use a jack-shear instead of a clicker and rule die, which is essentially a massive paper guillotine big enough to cut a whole hide of leather. They are often used for things like belt production to "block" out panels that will be cut into strips, but can also cut smaller finish pieces. Just know that if your swatches are varying in length, width, or squareness, those differences could look more apparent once they are stamped. If you need to split the pieces after they are cut to get them to a uniform thickness, thicker denser leathers could be done with a small fixed-blade benchtop splitter, but soft thin leathers would require a Band Knife Splitter, which are only available as powered machinery. We've worked with Lotus Creations for brass dies before and been pleased with their work. They can take a digital image, some specifications of the length, width, embossing depth, etc. and produce a die. For the Hot Stamper, most production type machines are made in Italy these days by companies like Galli, Omac, and some others. There are some companies here in the states that do more manual operated machinery too. For cut-out, I'm partial to Atom (made in Italy) for clickers, Comelz for CNC (Atom also makes CNC cut-out machines). Galli makes a decent guillotine shear, and there are lots of old US made shears like John Jacques that will work fine if they are complete with a good blade. Jacques is no longer in business so if it's got busted castings or really messed up blades, walk away from it. Most blade sharpening companies can sharpen shear blades of any length. To do a hyde of leather, you would want a shear with 55 to 60" cutting area. -
Fixed Stirrup leathers - parts questions
mbnaegle replied to ZiggyP's topic in Saddle Identification, Restoration & Repair
It doesn't look like factory made hardware to me. Judging by the grey "scale"(called mill scale, from when it's rolled out at the steel mill) and the silver lines by the bends, it looks like they (the OEM saddle maker) made it by cutting and bending some 1/8"x5/8" Hot Rolled Steel, which you can get from most welding/fabricating suppliers, sold in sticks by the thickness and width. I think Home Depot and similar box stores might even have a rack of various sizes. If it was factory made, I'd expect it would have ben die-stamped (no grind marks on the ends) and plated, zinced, or at least painted. Use the one you have as a template, then hacksaw, drill press, and belt sander gets you the flat blank. Sturdy vise and a hammer gets you the bends. Heating it red hot with a torch before bending would make it easier to bend and make the bends stronger, but for what it's doing it likely isn't necessary. If you do heat it, quench it afterwards in some oil (used motor oil works) to give it a uniform blackened finish. -
It's based off of a Seiko CH-8B which are easier to find parts for. They started with those machines and modified the foot lift walking mechanism. I'd download a manual for the Seiko and work off of it. Anything in the Seiko manual that doesn't match your machine was custom made by Ferdinand and I'm not aware of anyone who is making those parts (unless someone has old stock).
-
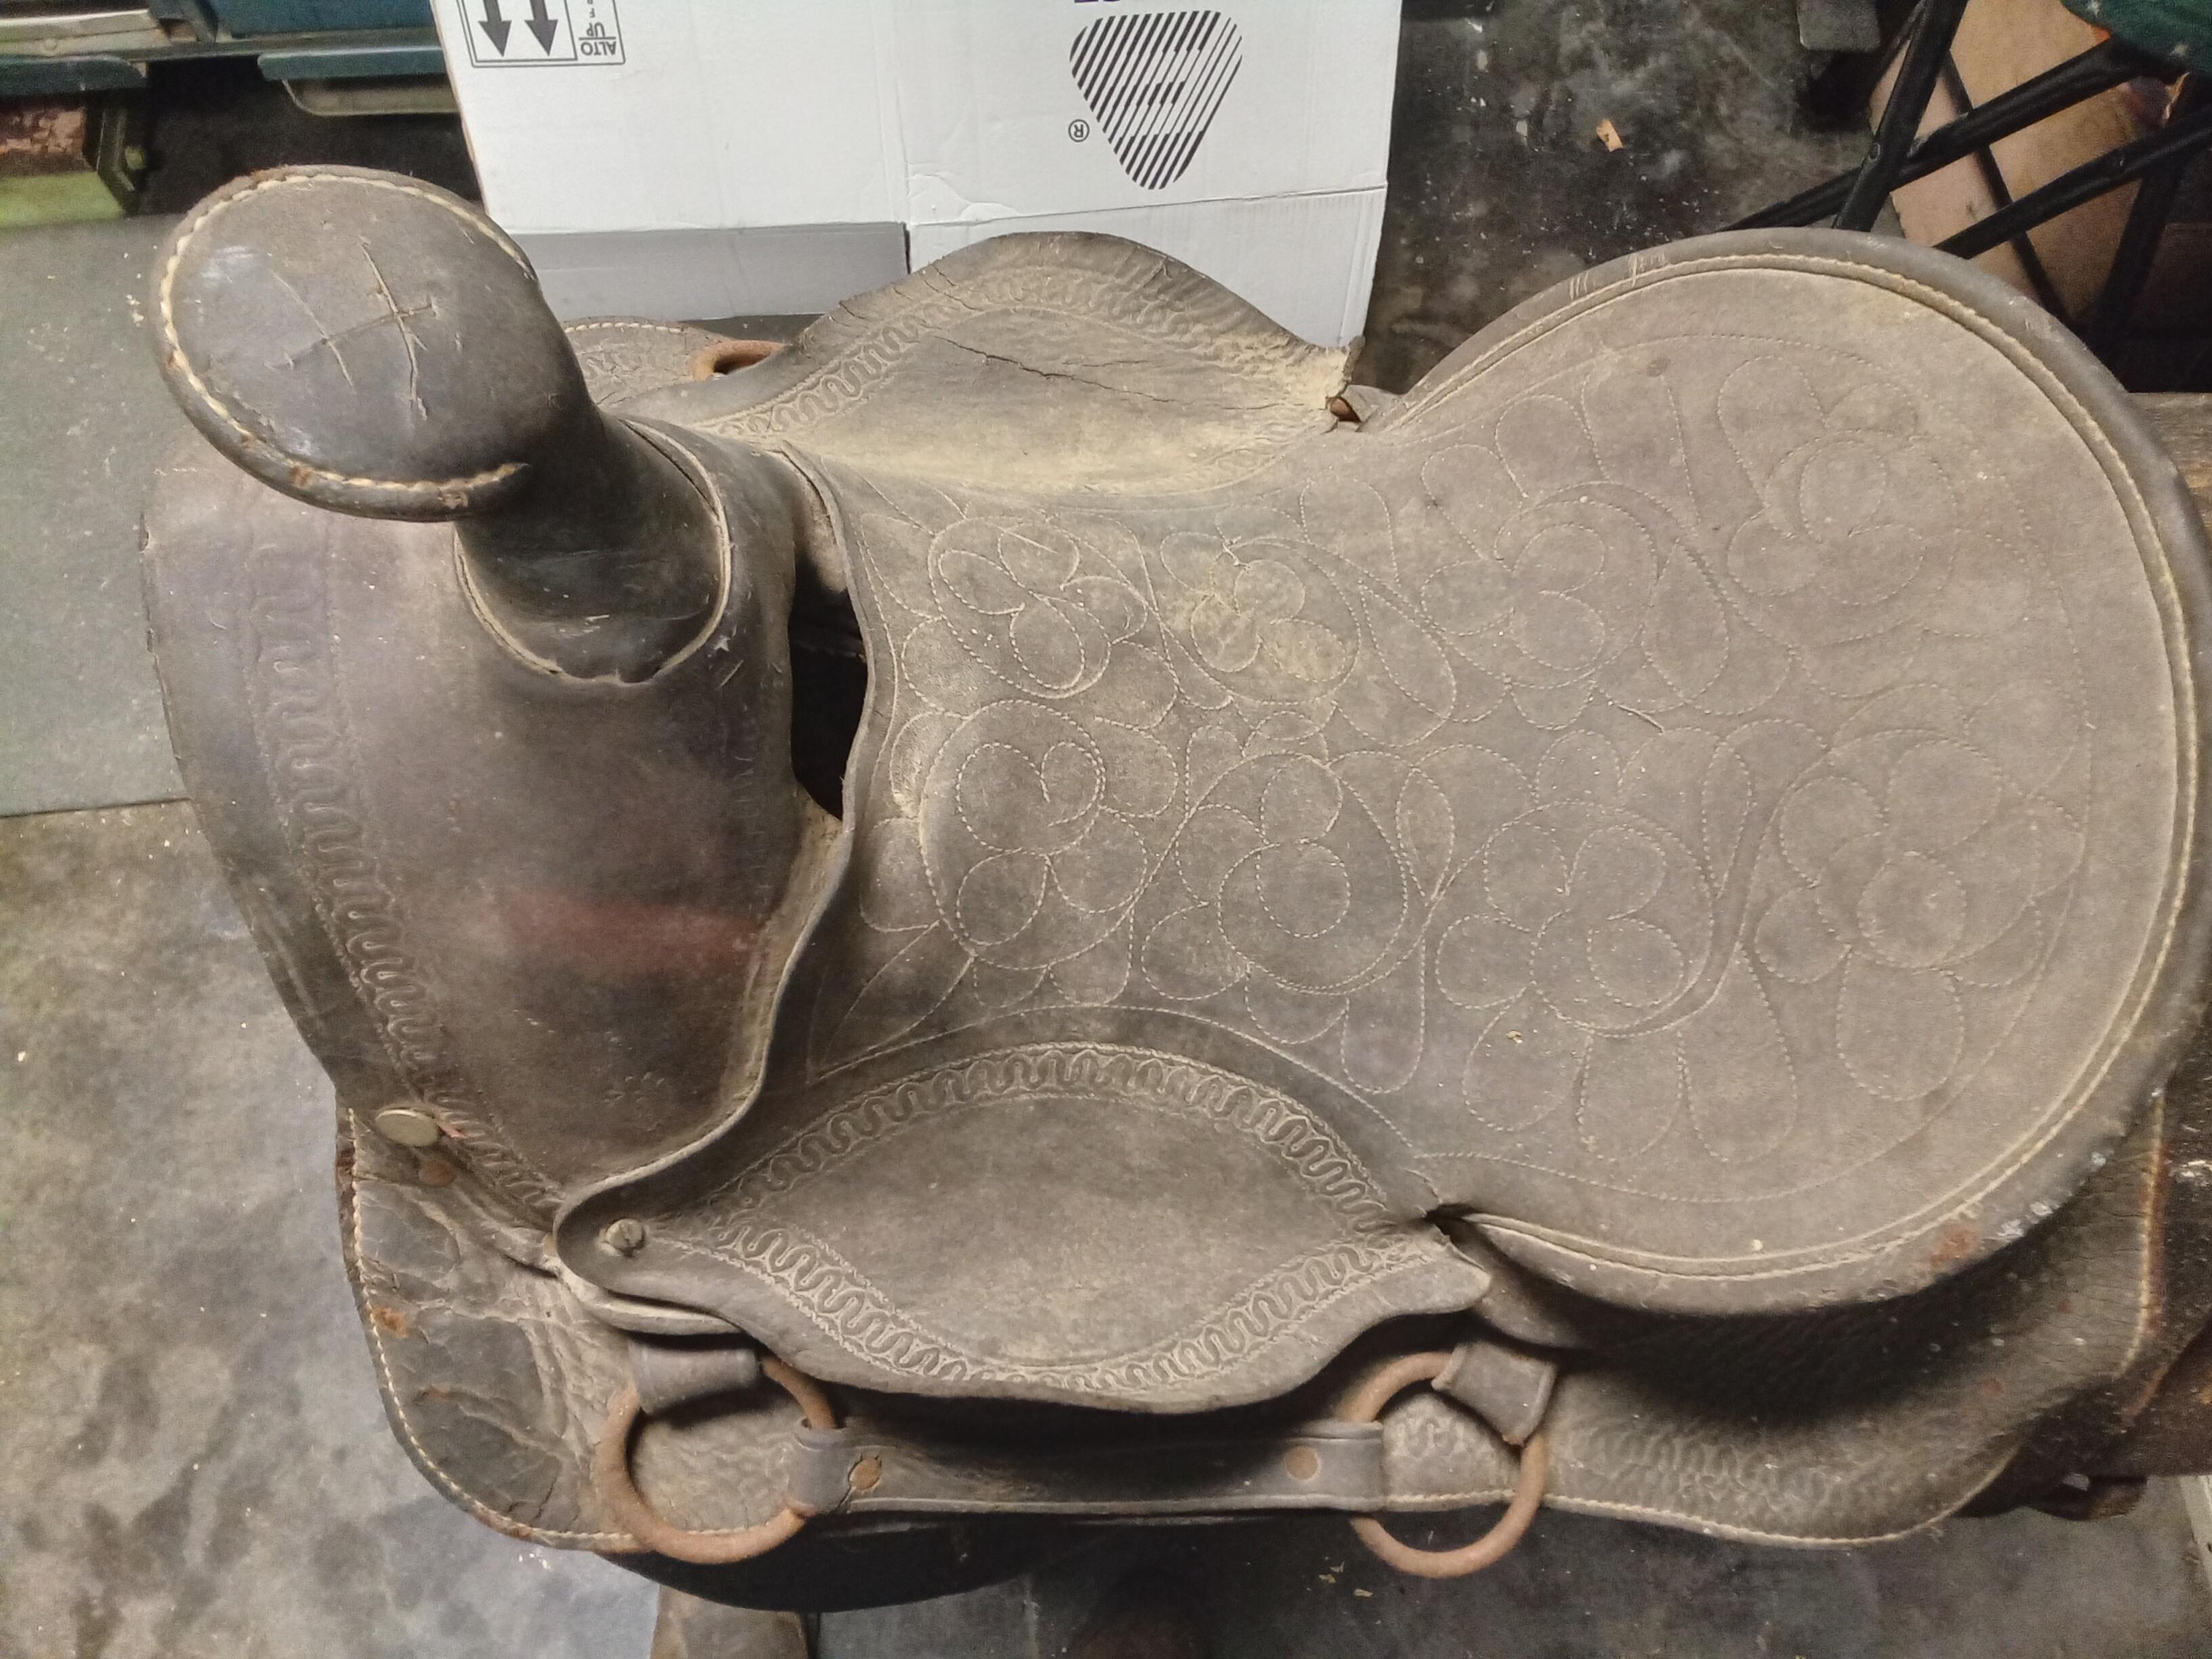
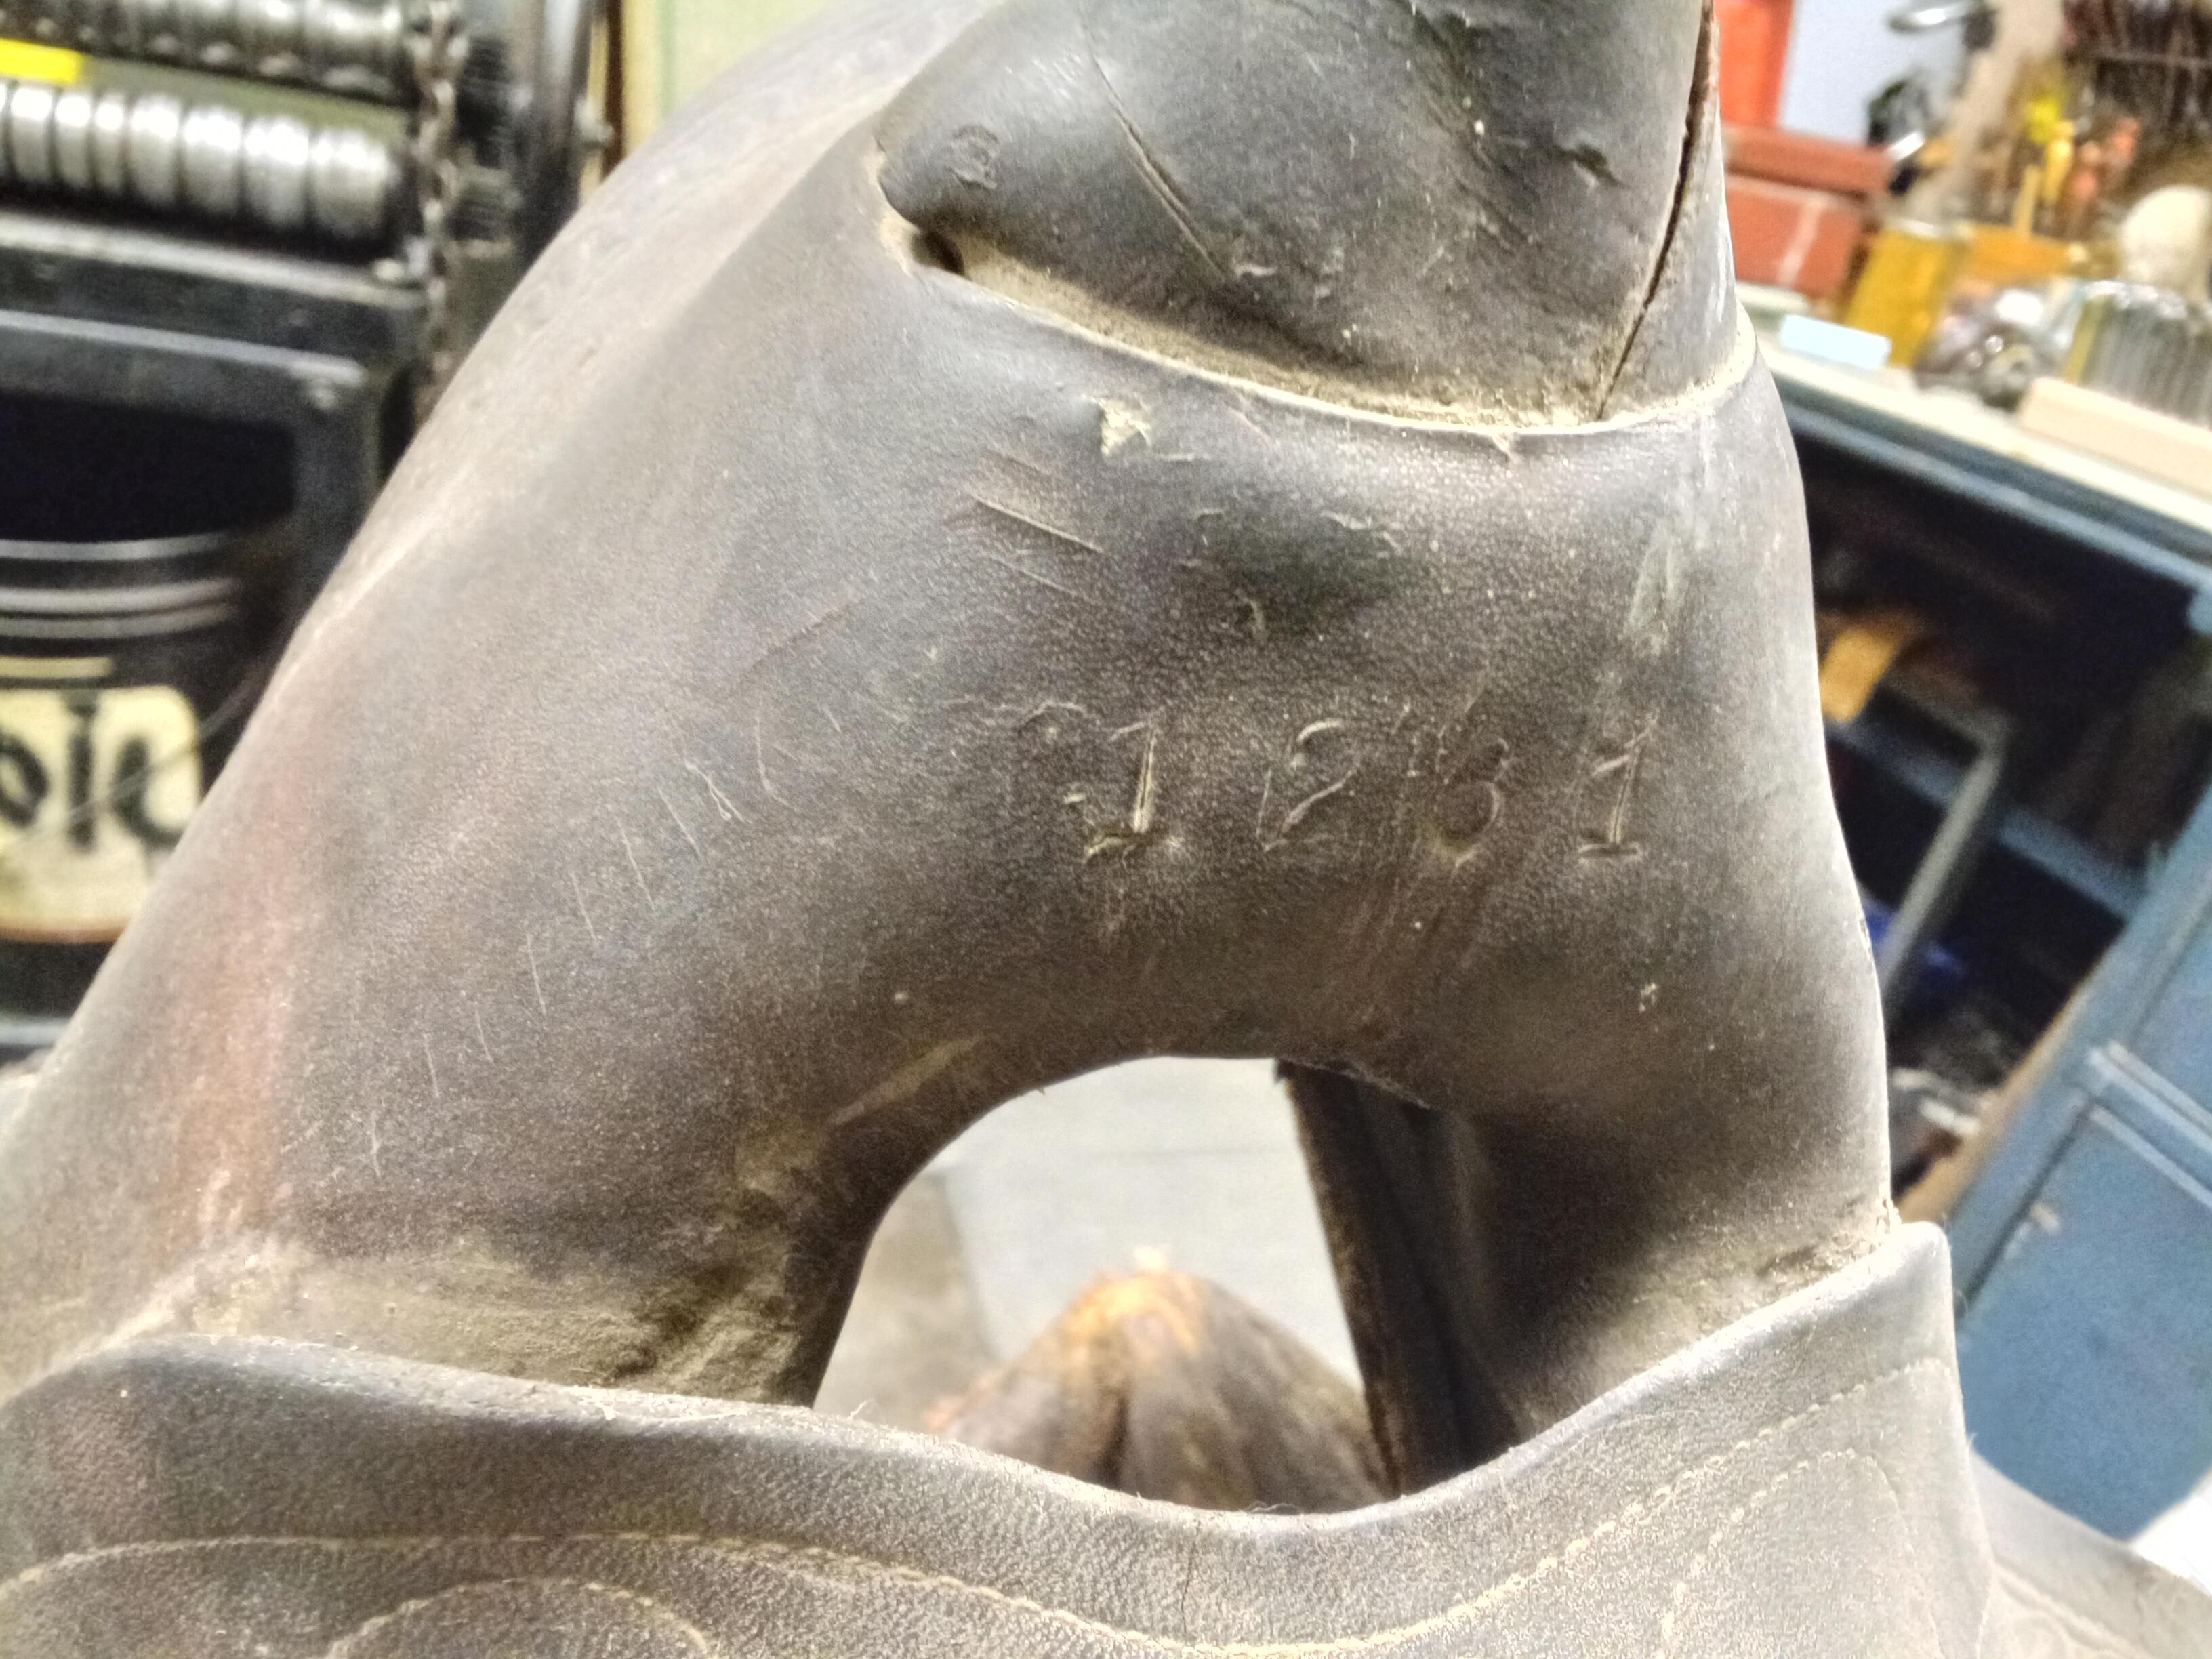
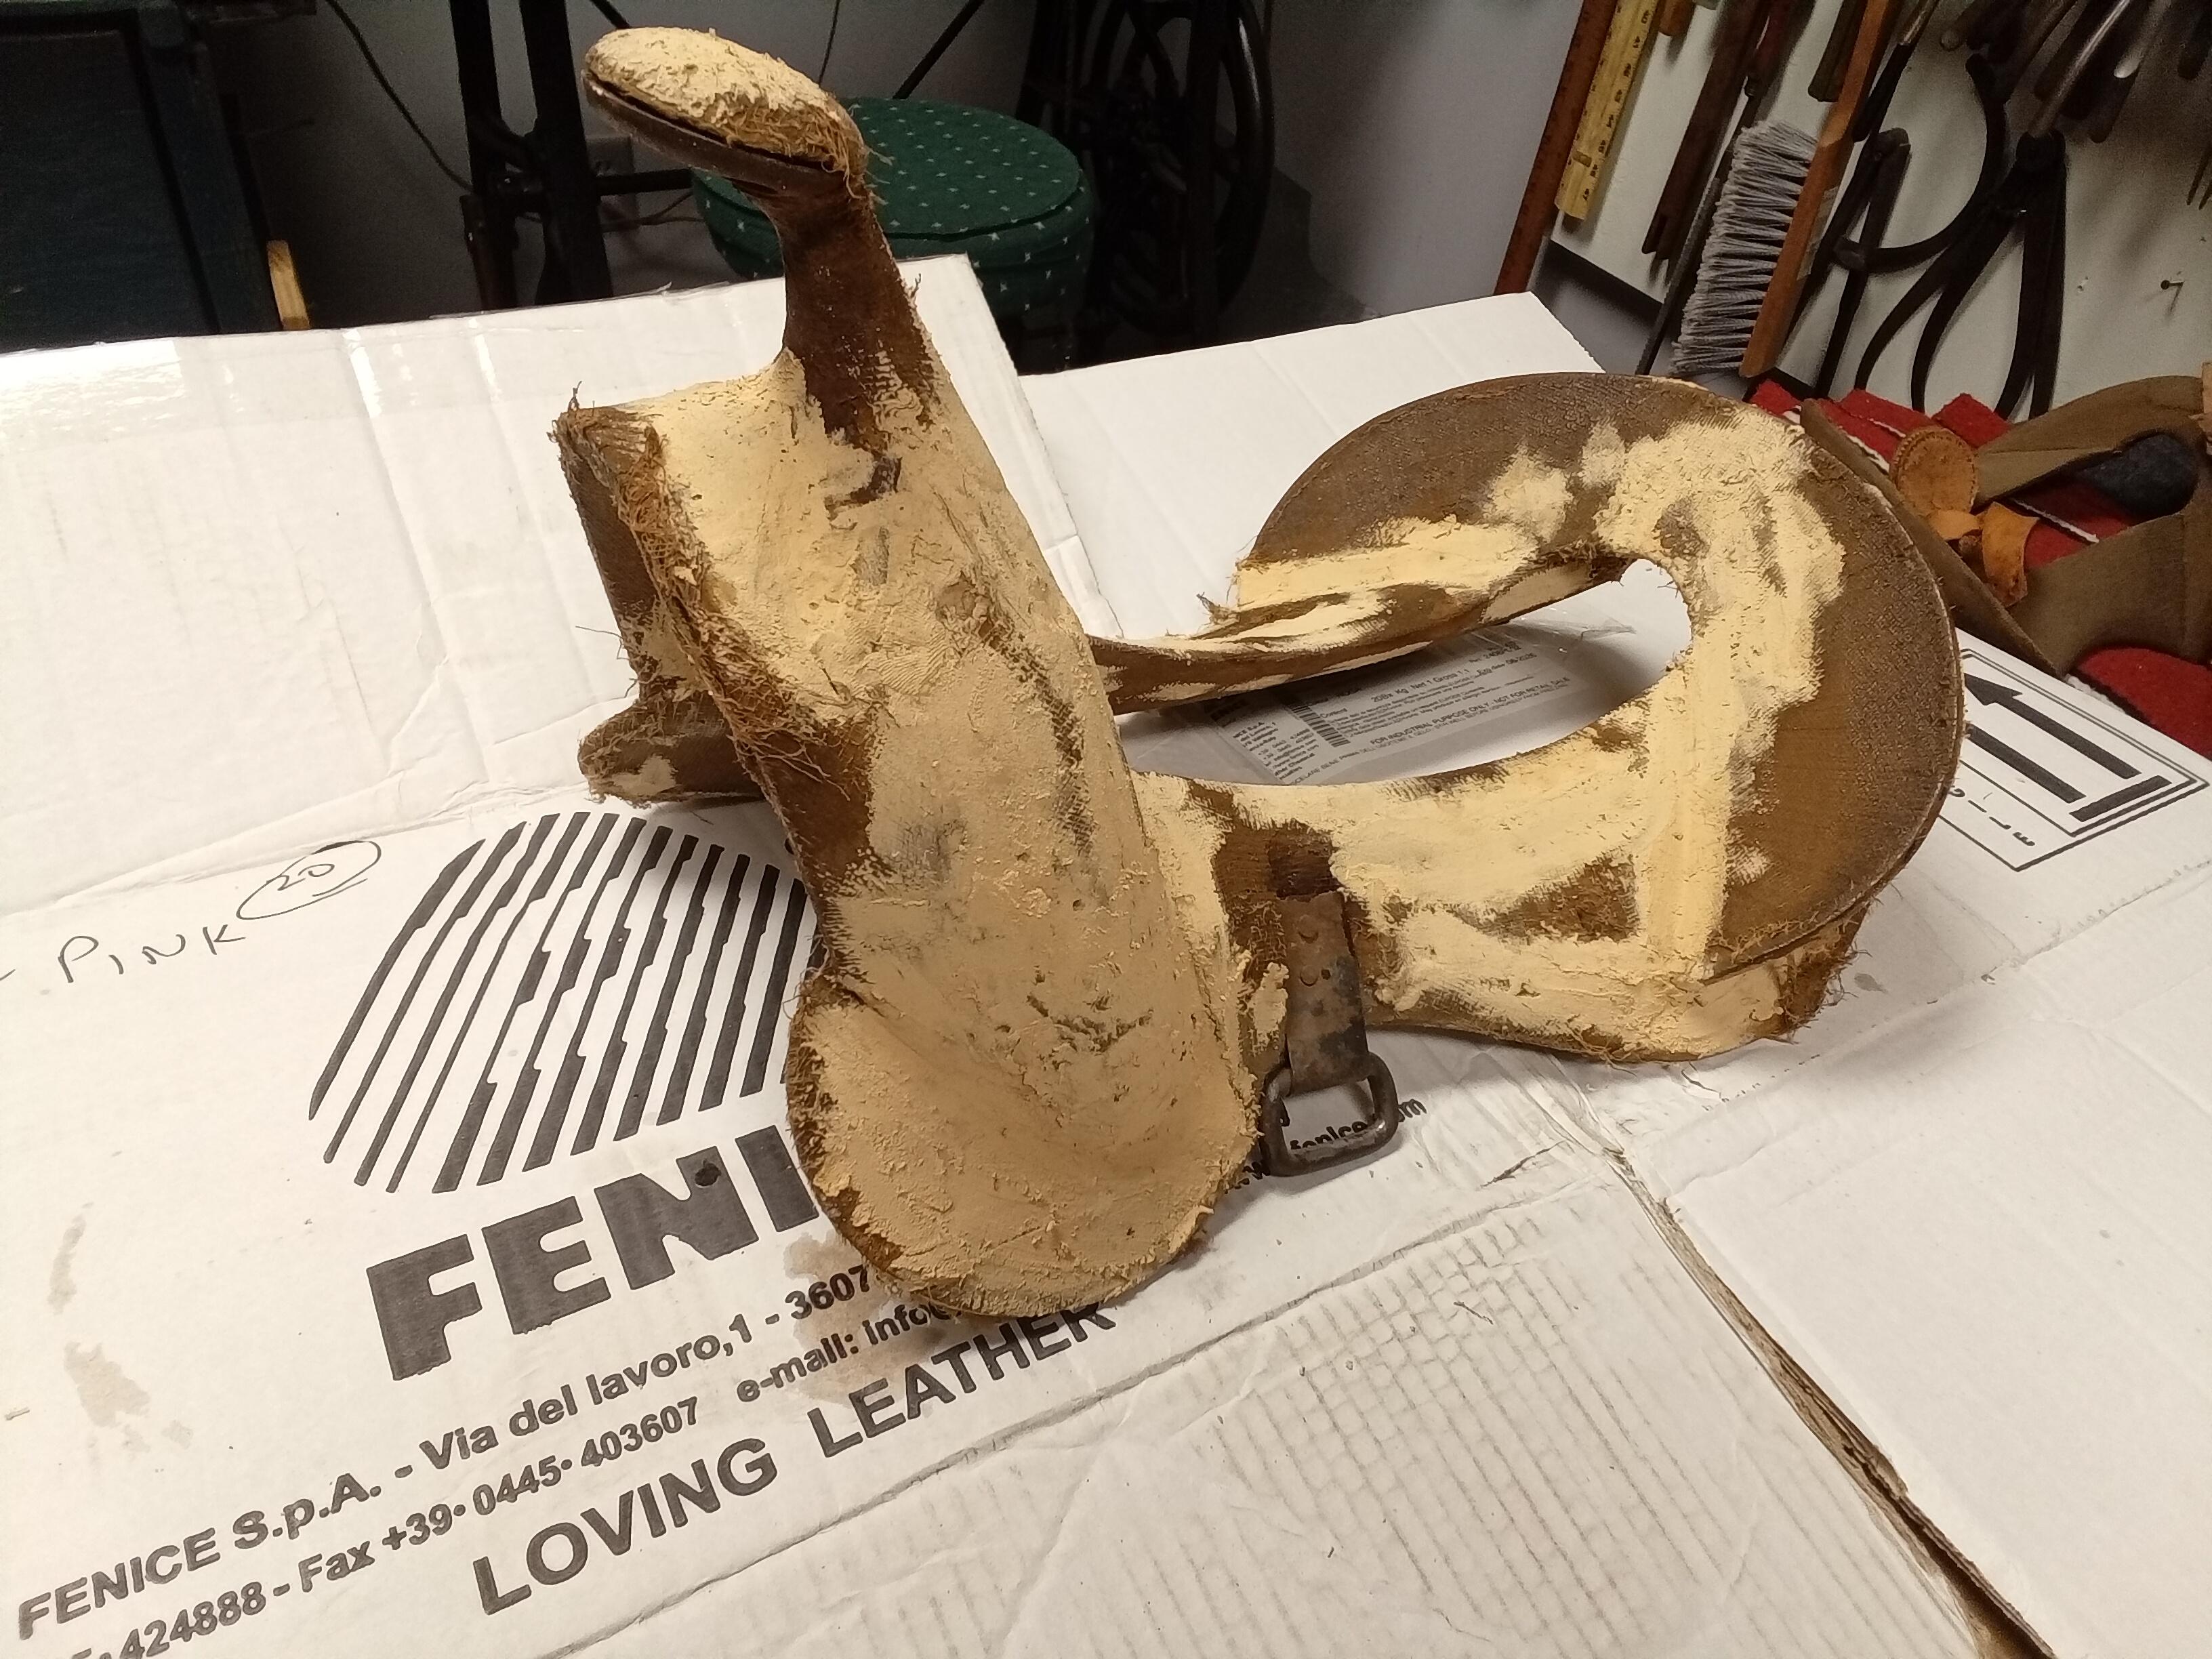
I dug out a "junk" youth saddle from storage (not sentimental or anything. I think my parents found it in a junk store years ago.) And while its missing the stirrup straps, it turns out it has the same stirrup leather ring arrangement and a similar shape/style of tree. The leather is all dry rot, so I might rebuild it too at a later date for practice, but for now I gives some good design, tooling, and proportion guidance. There's no makers marks that I can see so far, but it does have a couple of numbers on the back of the swells (1261), and on one of the skirts (8054). Not sure if they are serial numbers, dates, or inventory numbers. I could see economy saddles like these being from a youth camp or a dude ranch or similar commercial endeavor where they might have been numbered.


-
Hand Tool Organization Tips, Tricks, Methods, etc.
mbnaegle replied to mbnaegle's topic in Leather Tools
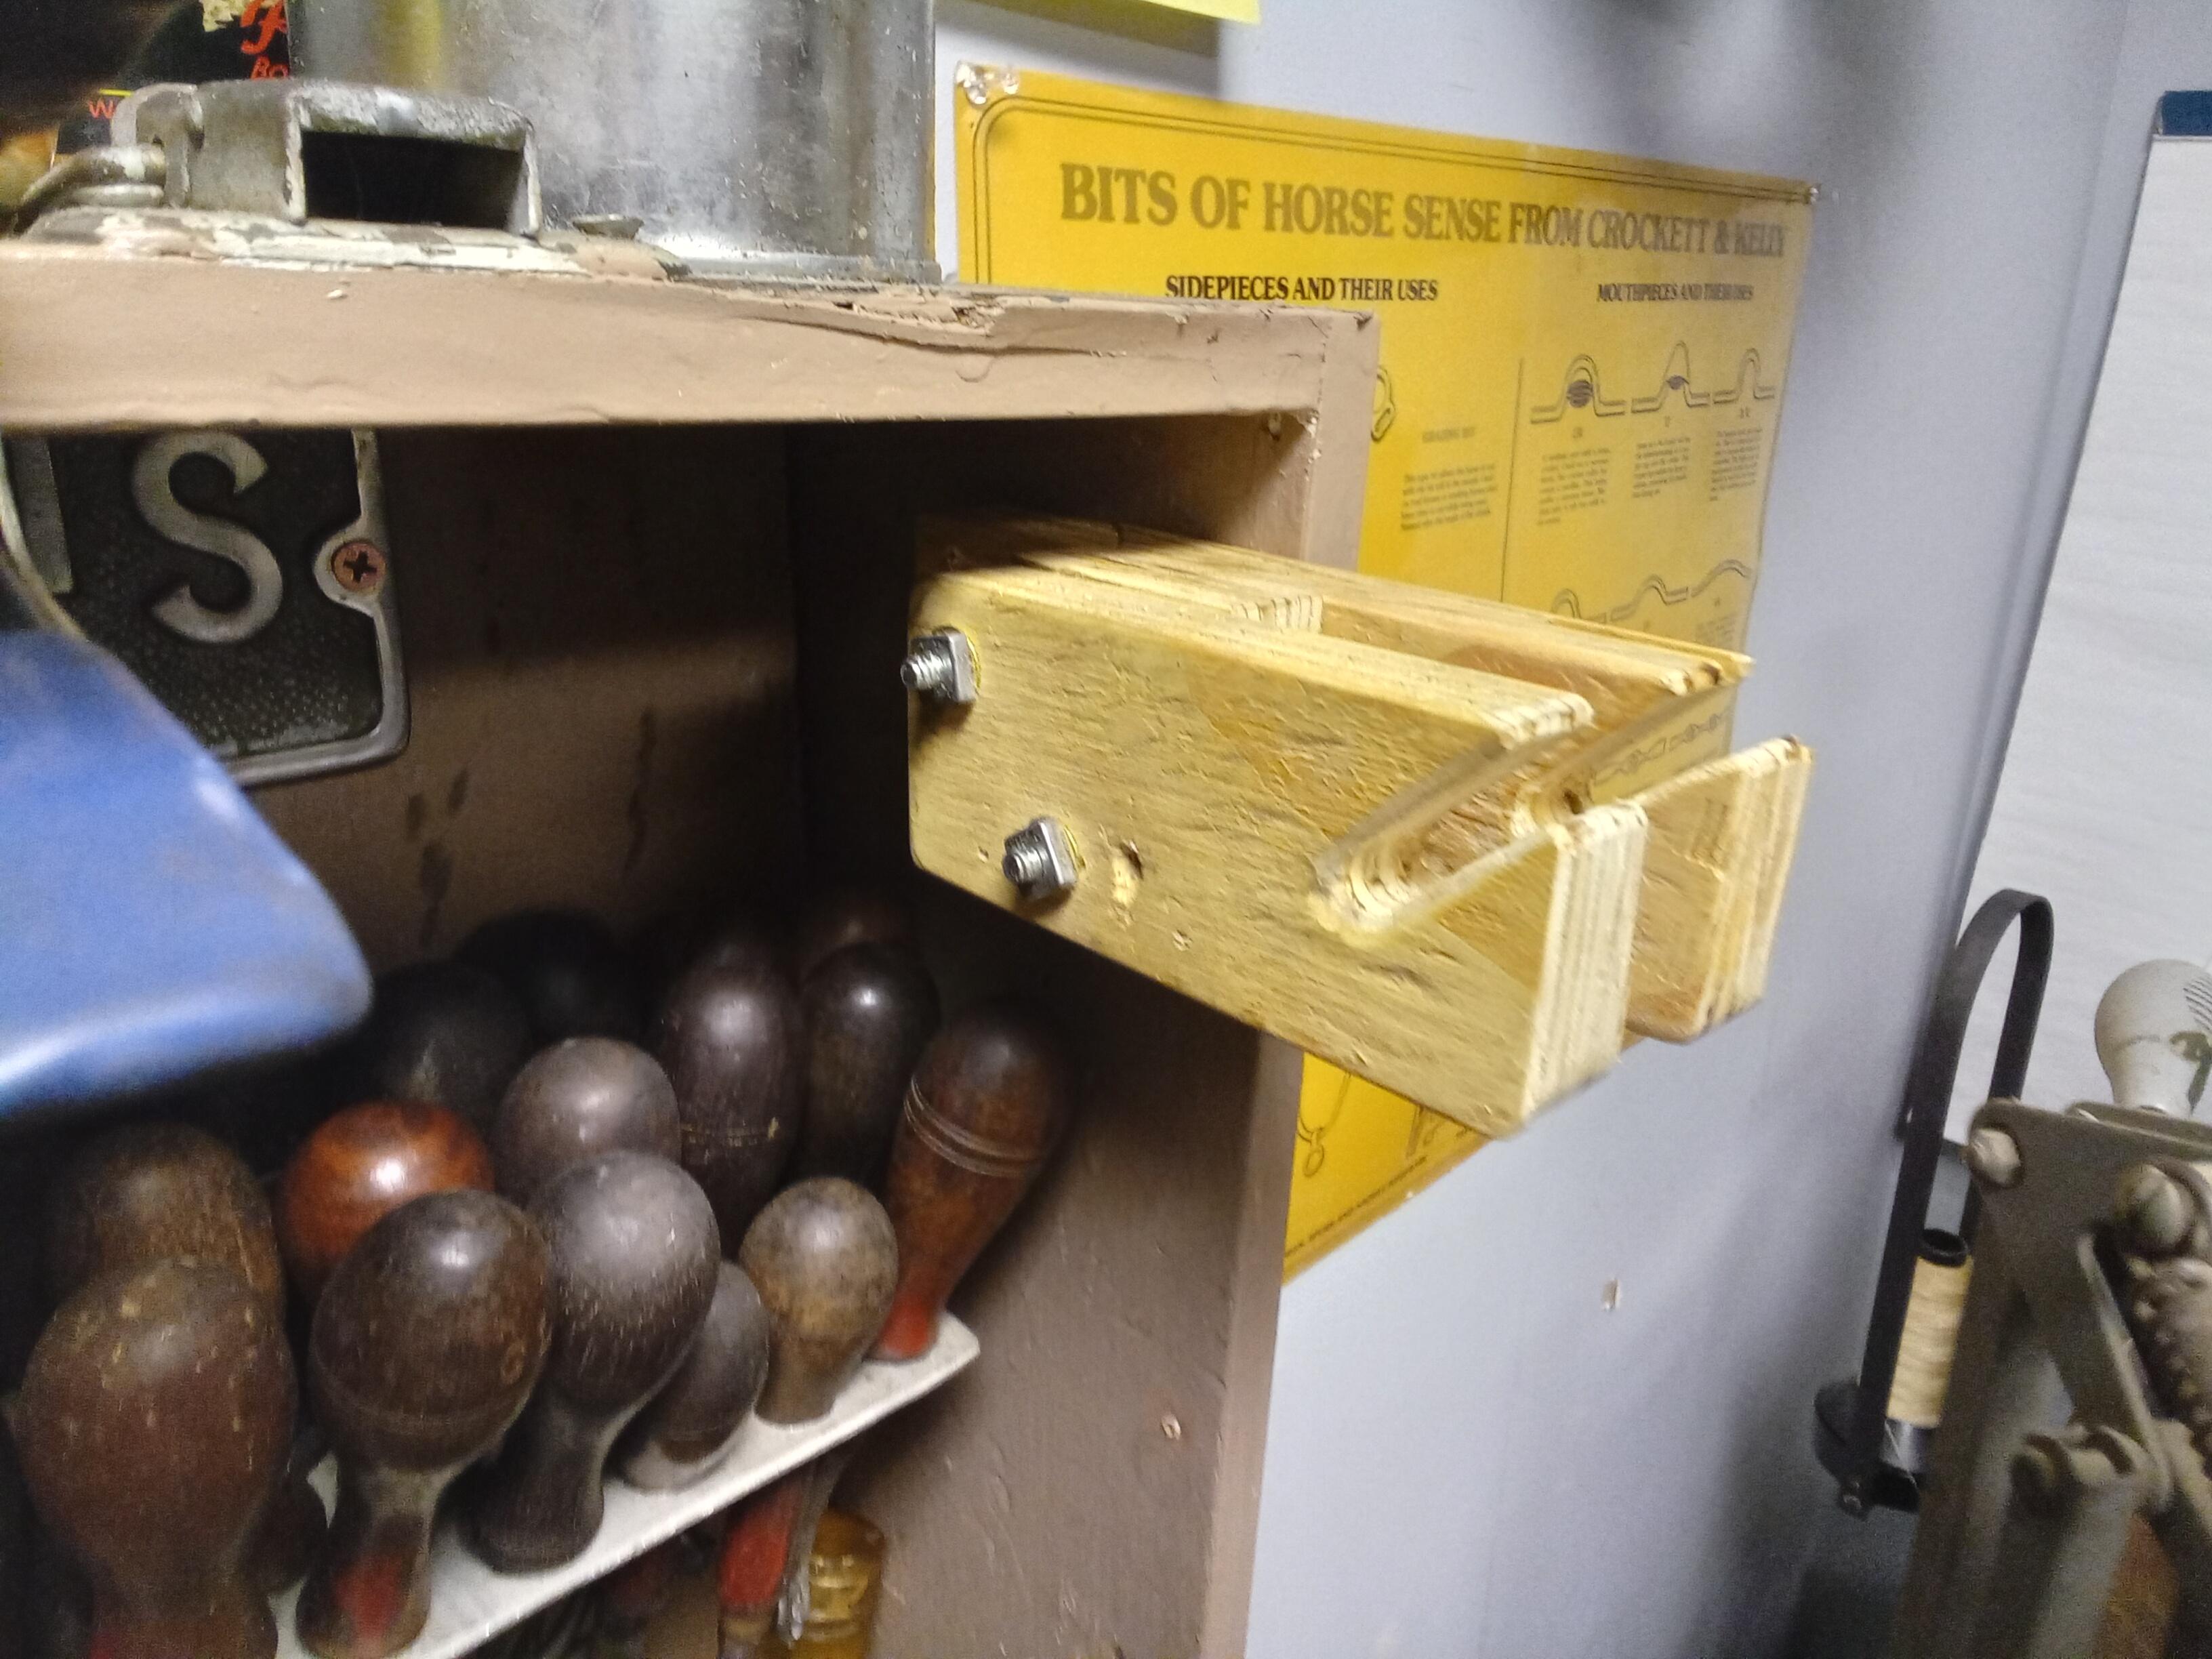
Made a prototype draw knife holder tonight and am really pleased with how it turned out. Easy to drop a knife in and pull it out, keeps the blade angled back so its less likely to nick you, and also takes up less space. Its a simple lamination of 3/4" plywood bolted together and the slots in the front were cut with a drill and a band saw. Now to make a few more.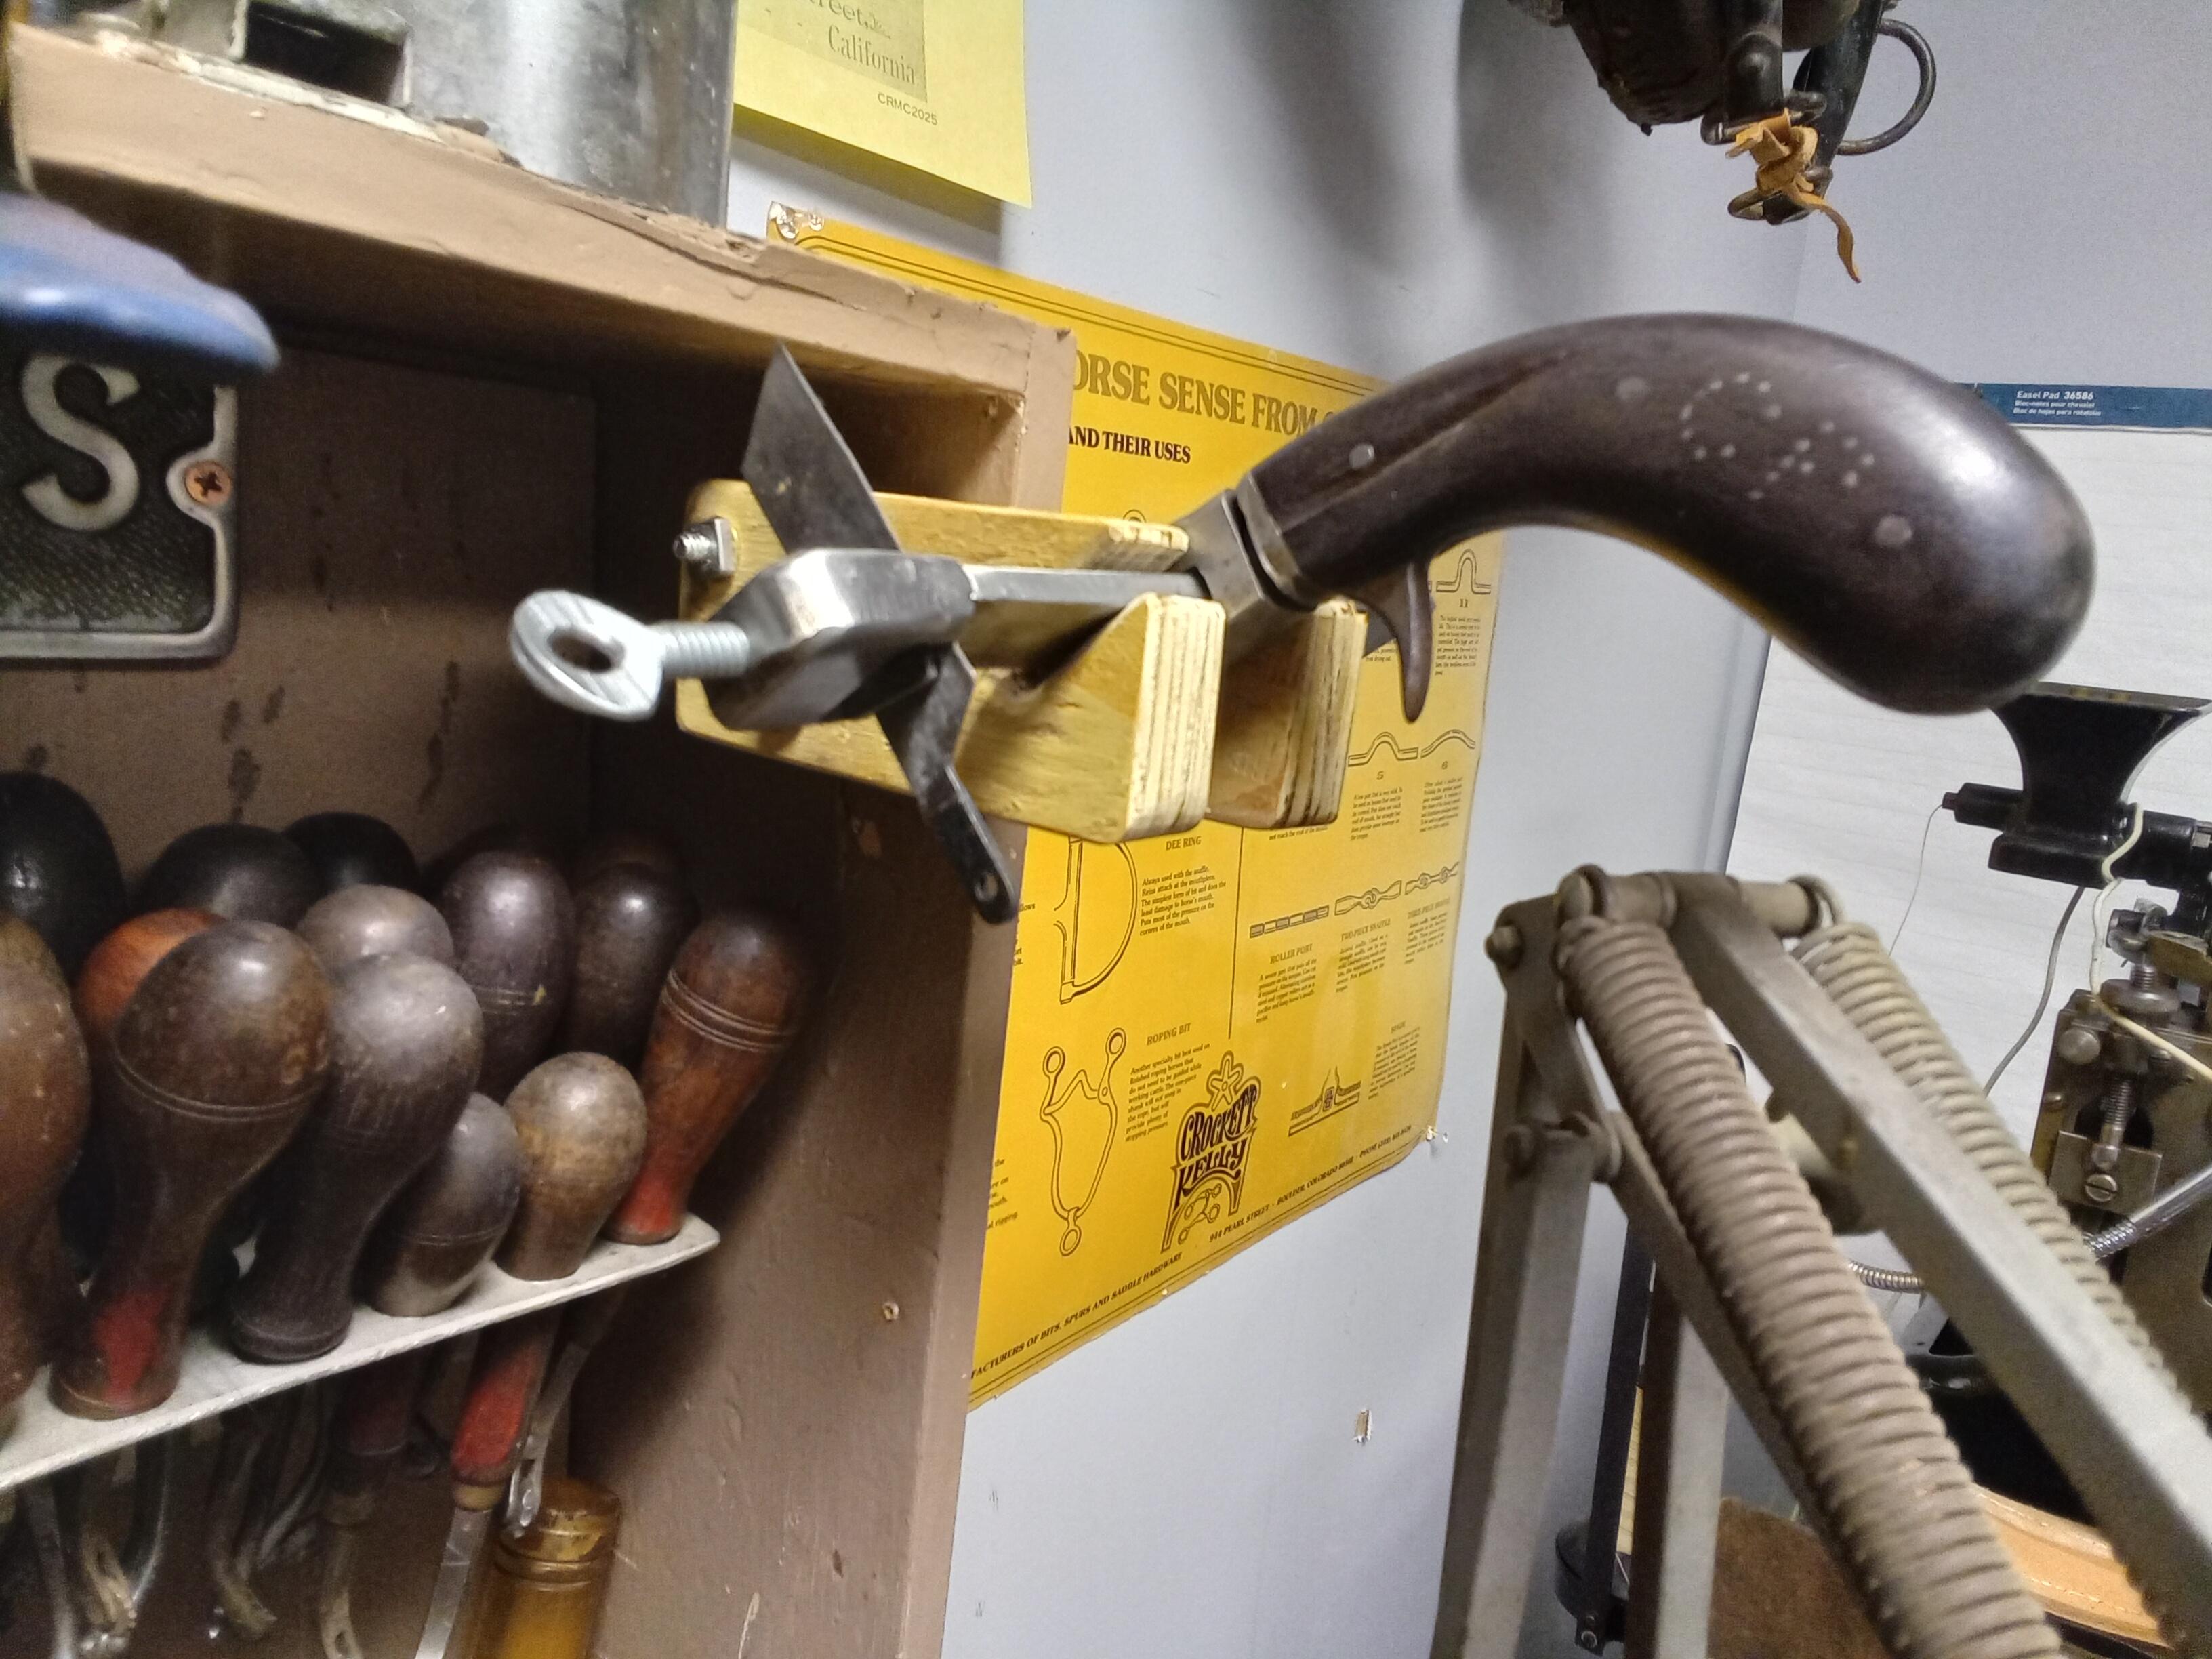

-
There should be a couple of tabs that stick up about 3/16" on top of the bottom roller bearings and these serve as reference marks for your blade position, separate from how high or low the roller itself sits. If you are splitting softer leathers, you would want the blade just touching the tabs, but if you are splitting harder denser leathers (shoe soles for example), you'd want maybe 1/16" or up to 1/8" gap between the tabs and the blade edge. This is because those denser leathers don't bend up over the blade as easily as they cut. If the blade is set too far forward, the material binds up as it cuts and puts extra pressure on the blade, while if it's too far back it might split easily but not accurately as the material can float and bend too much as it's cutting. You might have to do some trial and error, but it's not something you'll mess with often unless you are doing really precise work, and typically you just have to find a general area for the type of material you are seeing (softer or denser) and put the blade back at that same position whenever you take it off to sharpen. Most of the time I'll start with the blade shaving-sharp and adjusted all the way forward, and if the material dosn't want to go through or tires to bend the blade, I know to move it back a little and try again. Once you have the blade locked in place, then you can adjust the bottom roller using the studs and nuts under the bottom roller that go through the springs. Ideally, you want the roller as close to the blade as you can get it without the two touching. Some guys set it by looking at the visible gap between them and others will use paper or a feeler gauge to see that they are not hitting. This can be a little tricky since these rollers have the heavy saw-tooth like serrations, but it's better to error on having too much of a gap then to risk the two hitting. Too much of a gap just means it might "eat" really thin materials, which most don't use the 6" crank splitters for anyway. It's also worth noting that the bracket that the blade bolts too (the piece on yours that was broken and brazed) often has slots where it mounts to the frame. This is for balancing the blade to the top roller so that it splits evenly right to left, and can also help fine tune it to split 10 oz. when you set the dial to 10oz. I'll typically split one wide piece, or a small piece on either side at the same time, measure the result and adjust if as necessary, but afterwards you need to re-adjust the gap between the bottom roll and the blade. For many of these adjustments you'll have to go in circles checking and adjusting things over again, but each round it's closer to splitting easily and accurately. My experience with most splitters is that whatever dial or read-out the machine has to set thickness is a general reference, and you'll want to use a drop gauge or similar measuring tool to check your work and adjust the split thickness to compensate accordingly, because different materials compress differently than others as they feed through the machine. Adjusting the spring pressure on the bottom roller can also help with this. To be clear, I don't have any Landis literature to cite, but just experience working with different fixed blade and band knife splitters in general. I find the principals of blade position, feed roll position, and other adjustments all work the same. The parts, movements, and methods just vary between different models and manufacturers.
-
Not sure about a replacement blade holder, but In the past I've found on 6" crank splitters if the blade is flexing or seeing lots of downward force, it's usually a combination of being adjusted too far forward (towards the feed rollers) and/or not being sharp enough.
-
All good advise above. The lines in the cut are a give-away that the blade is not as sharp as it needs to be. Instead of the material passing through the blade easily, it meets resistance and will try to go above or bellow the blade as it cuts. Only thing I'd add is that if there's any wear in your feed roller, such that it's out of round or has play on the spindle it turns on, the machine is likely to "eat" the material, especially when doing thinner cuts.
-
Kind of a cool machine there. I've worked on some of the Seiko CH-8 machines and think they're a good machine in the same family as Adler 205 and Juki 441. I know that historically, Seiko came to be out of Singer's Japan division when the company started slitting up, but it's not often you see a machine like this that bears the old Singer name, while being the same as the newer Seiko's.
-
Thanks Randy. I'm looking through books to get an idea of patterns to follow and whatnot and It looks like the stirup strap rings and how that fits in with everything else would be the only thing unique about this saddle. Otherwise I'm planning to keep it fairly simple. If anything, I might lean a little towards an 1880's style with the squared off skirts, as the tall swells kind of remind me of one of those, but I don't plan on doing anything too extravagant.
-
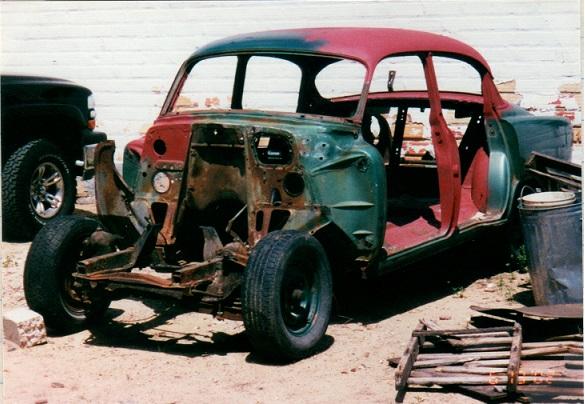
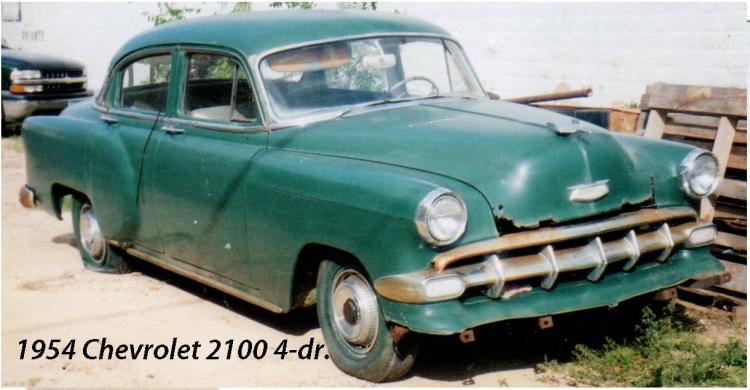
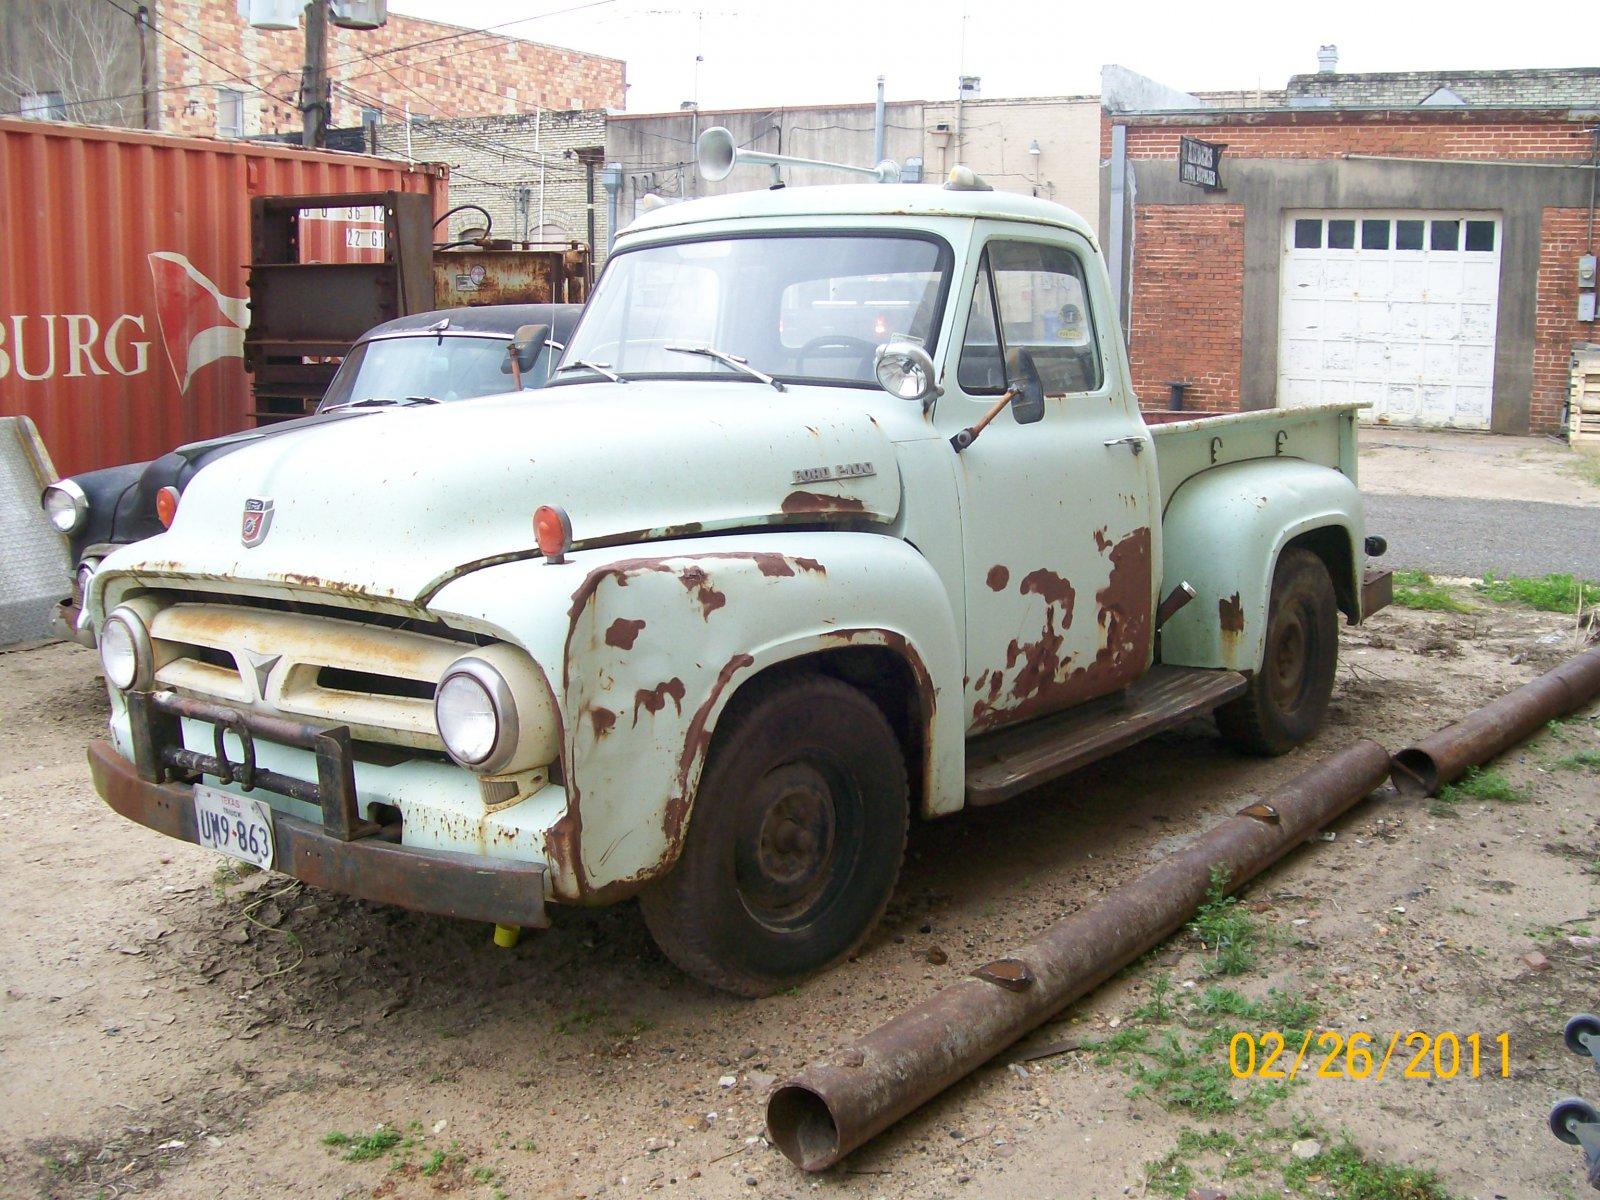
The late 1940's till the early 1950's are my favorites, though anything older than 1960 is cool to me. I grew up around them as my Dad used a 1953 Ford F-100 truck as his daily vehicle until about 2005 or so. He was friends with the guy that bought it new in Arizona, restored it in the late 1980's in California, wore it out again, then around 2012 started restoring it again here in Texas. It's about 3/4's done and since he passed a couple years ago I've been finishing it. My brother had a 1959 Chevy Apache long bed he's restoring. My very first car was a 1954 Chevy 4 door 2100 I got for $300 around 2001. It's in pieces everywhere but someday will be fully restored. It's sea green with not many factory options. Around 2004 I got a 1953 Chevy 4 door 2100 too. Very rusty, but I got it running by the time I was a Senior in high school and have tried to keep it running since then as a daily driver, other than being down a few times for bigger issues. When I can I'm getting sections of bodywork done, chrome re-plated, and in general it's getting an ongoing restoration without a full teardown. It's black with lots of stainless and chrome, and has a lot of factory options like a Powerglide automatic, skirts, visor, radio, heater, spotlight, automatic headlight dimmer system, and some other stuff. Both of my cars I'm keeping stock with their old 235 straight 6 engines, although the 54' I'm souping up with a bunch of old 50's engine upgrades. My dad's old 53' Ford is also staying stock with some work truck upgrades it's picked up over the years. I like keeping them original, but also intend to regularly use them and not just keep them in a garage. That's how I justify putting money into them, as they're still plenty capable and otherwise I'd have a car payment for something newer.


-
Old thread, but it's been on my mind recently. I've got a couple of the traditional draw down stand that my dad bought from some old saddle makers years ago. They could use some repairs but are otherwise going strong. He had another he built using the base of a 1930's-1940's Ritter Electric Dental Chair. It swiveled and locked and had really finely controlled hydraulic rise and fall that could tear leather straps if you were not careful (not that you want to, but having the power is nice). As he transitioned into other fields of work, he changed out the saddle stand top for a flat bench top and used it for a general work station. At some point it stopped working and probably 5 or 10 years ago we called the curtain on it and scrapped it. I'm kicking myself now as I wish I hadn't given up on it, but am thinking about building another. I know similar custom made electric/hydraulic drawdown stands are out there but would love to see pictures. Currently looking for a good candidate chair base to build up. Our old one was really neat with lots of chrome and such, but it's seeming hard to find electric pump powered hydraulic chairs or chair bases from that period. Most are newer, or older with manual pedal pump hydraulics, which is what I might end up going with.
-
Hand Tool Organization Tips, Tricks, Methods, etc.
mbnaegle replied to mbnaegle's topic in Leather Tools
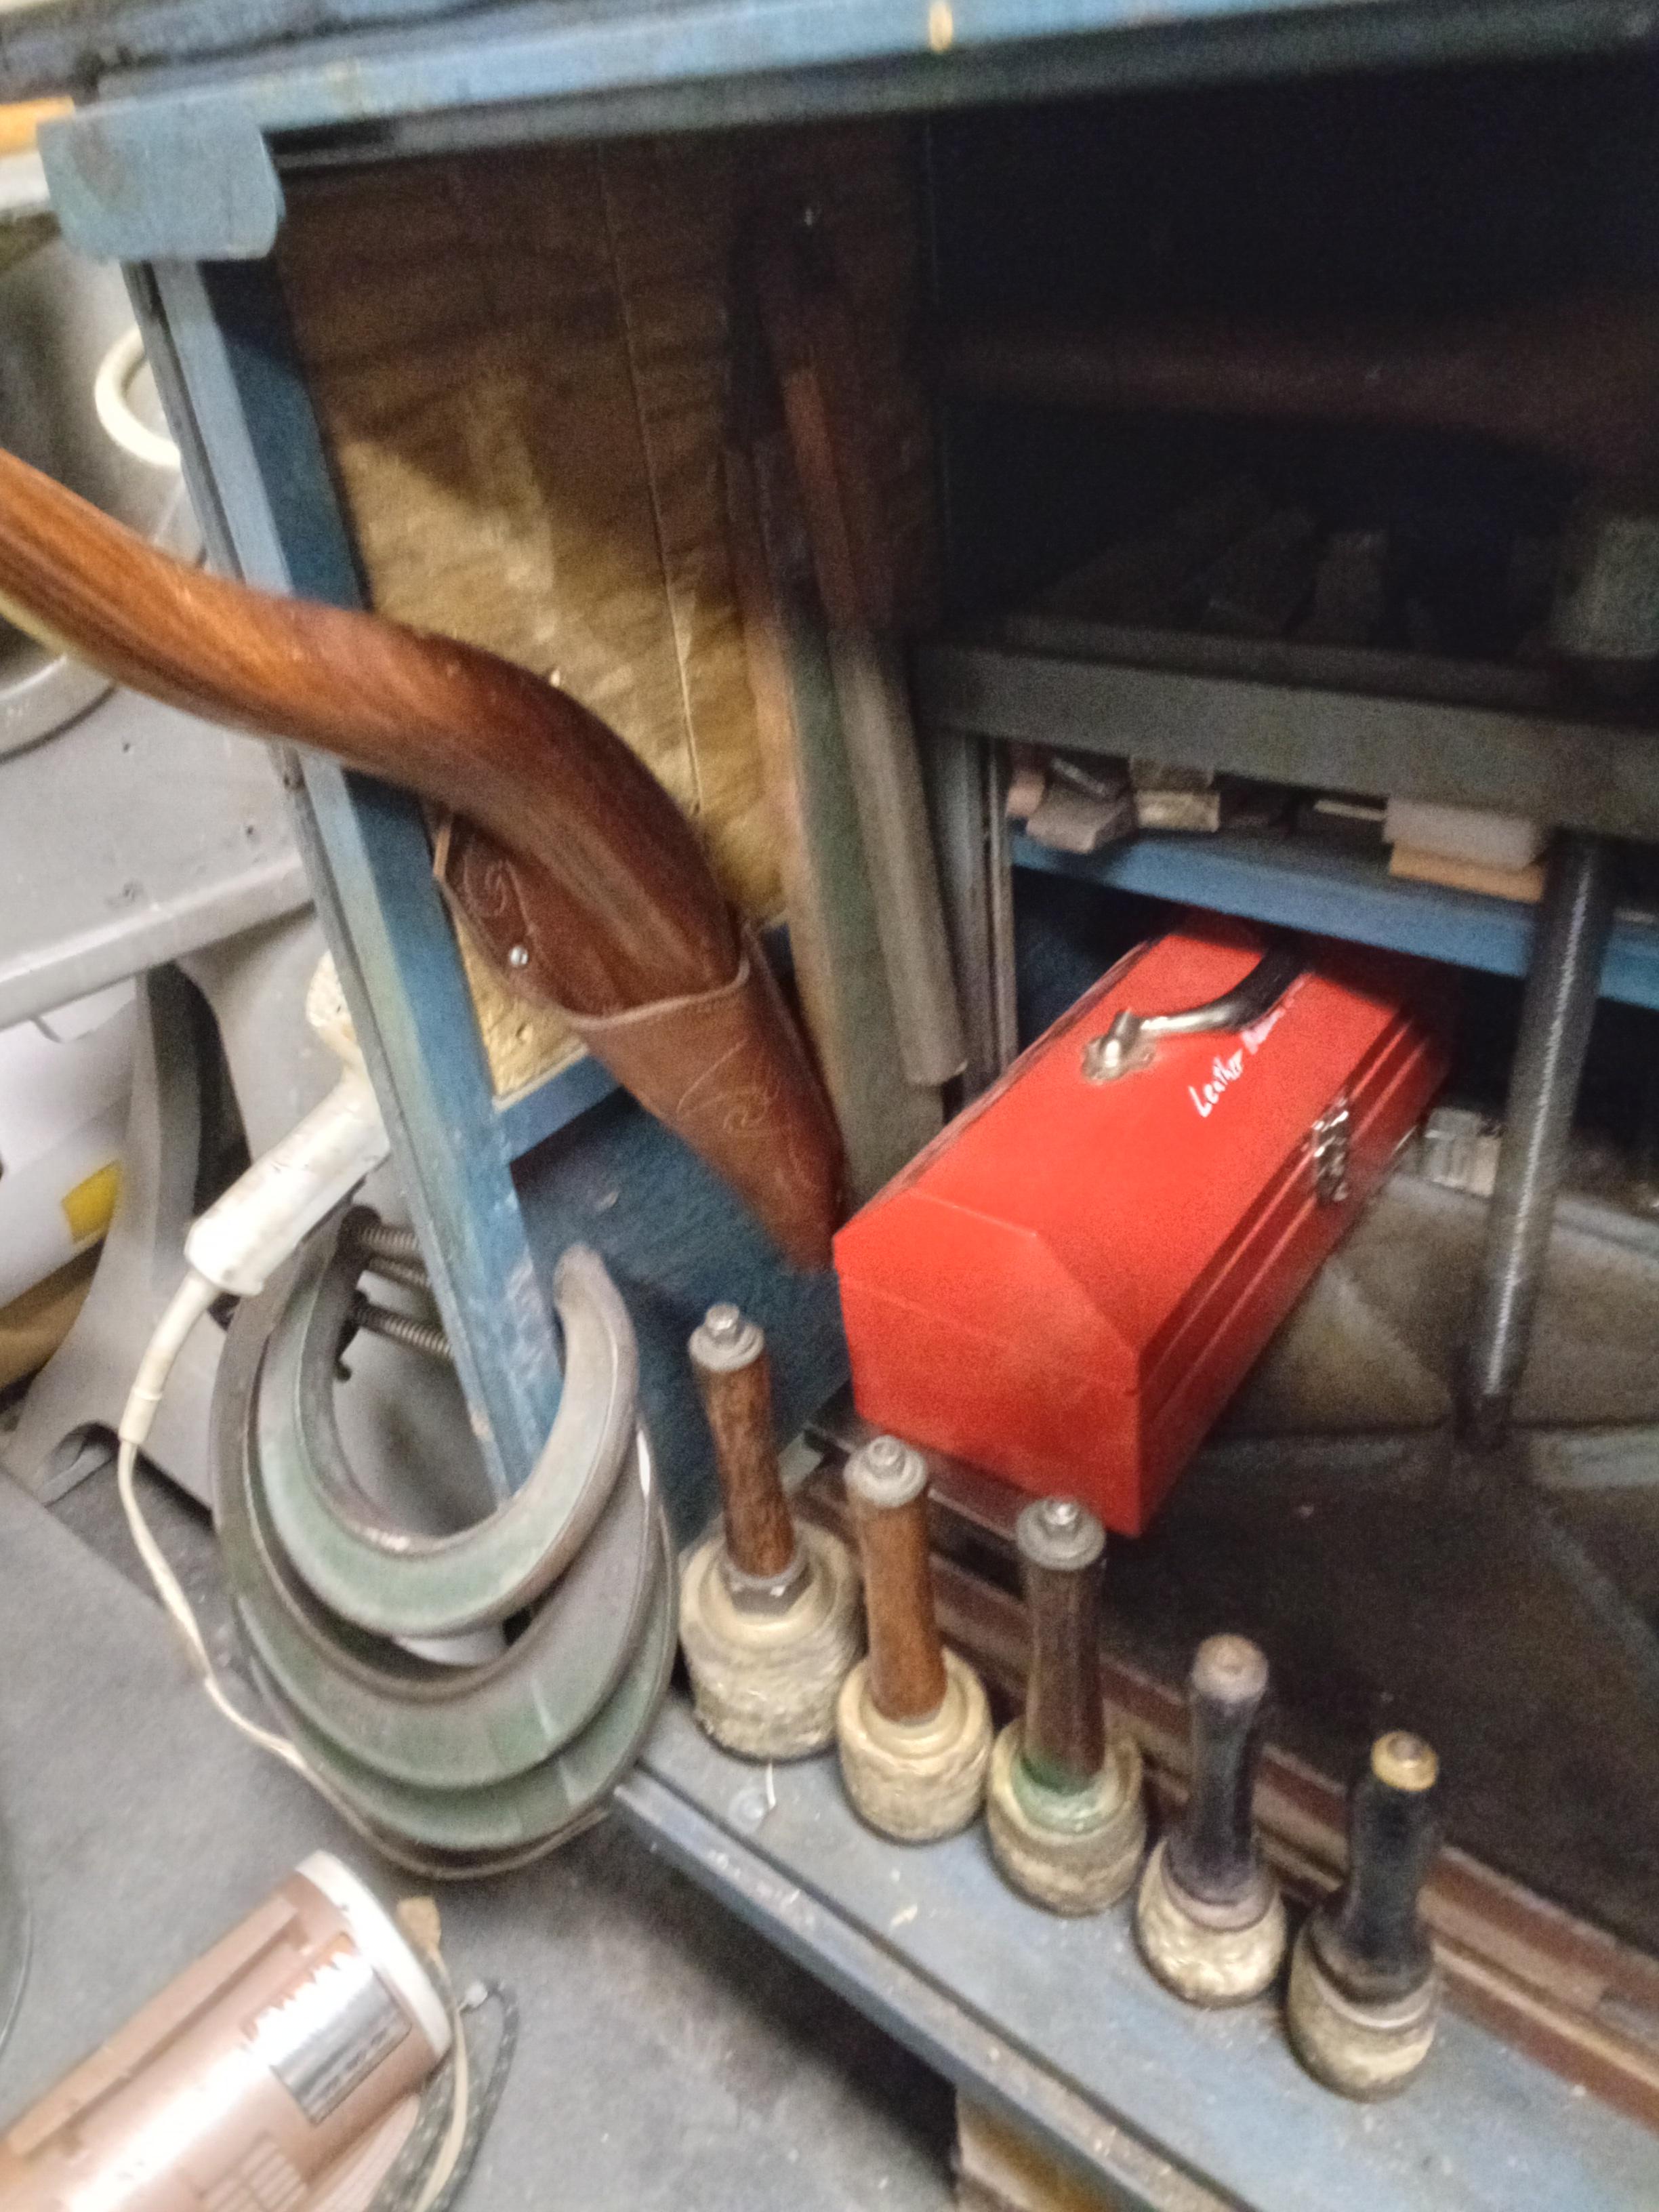
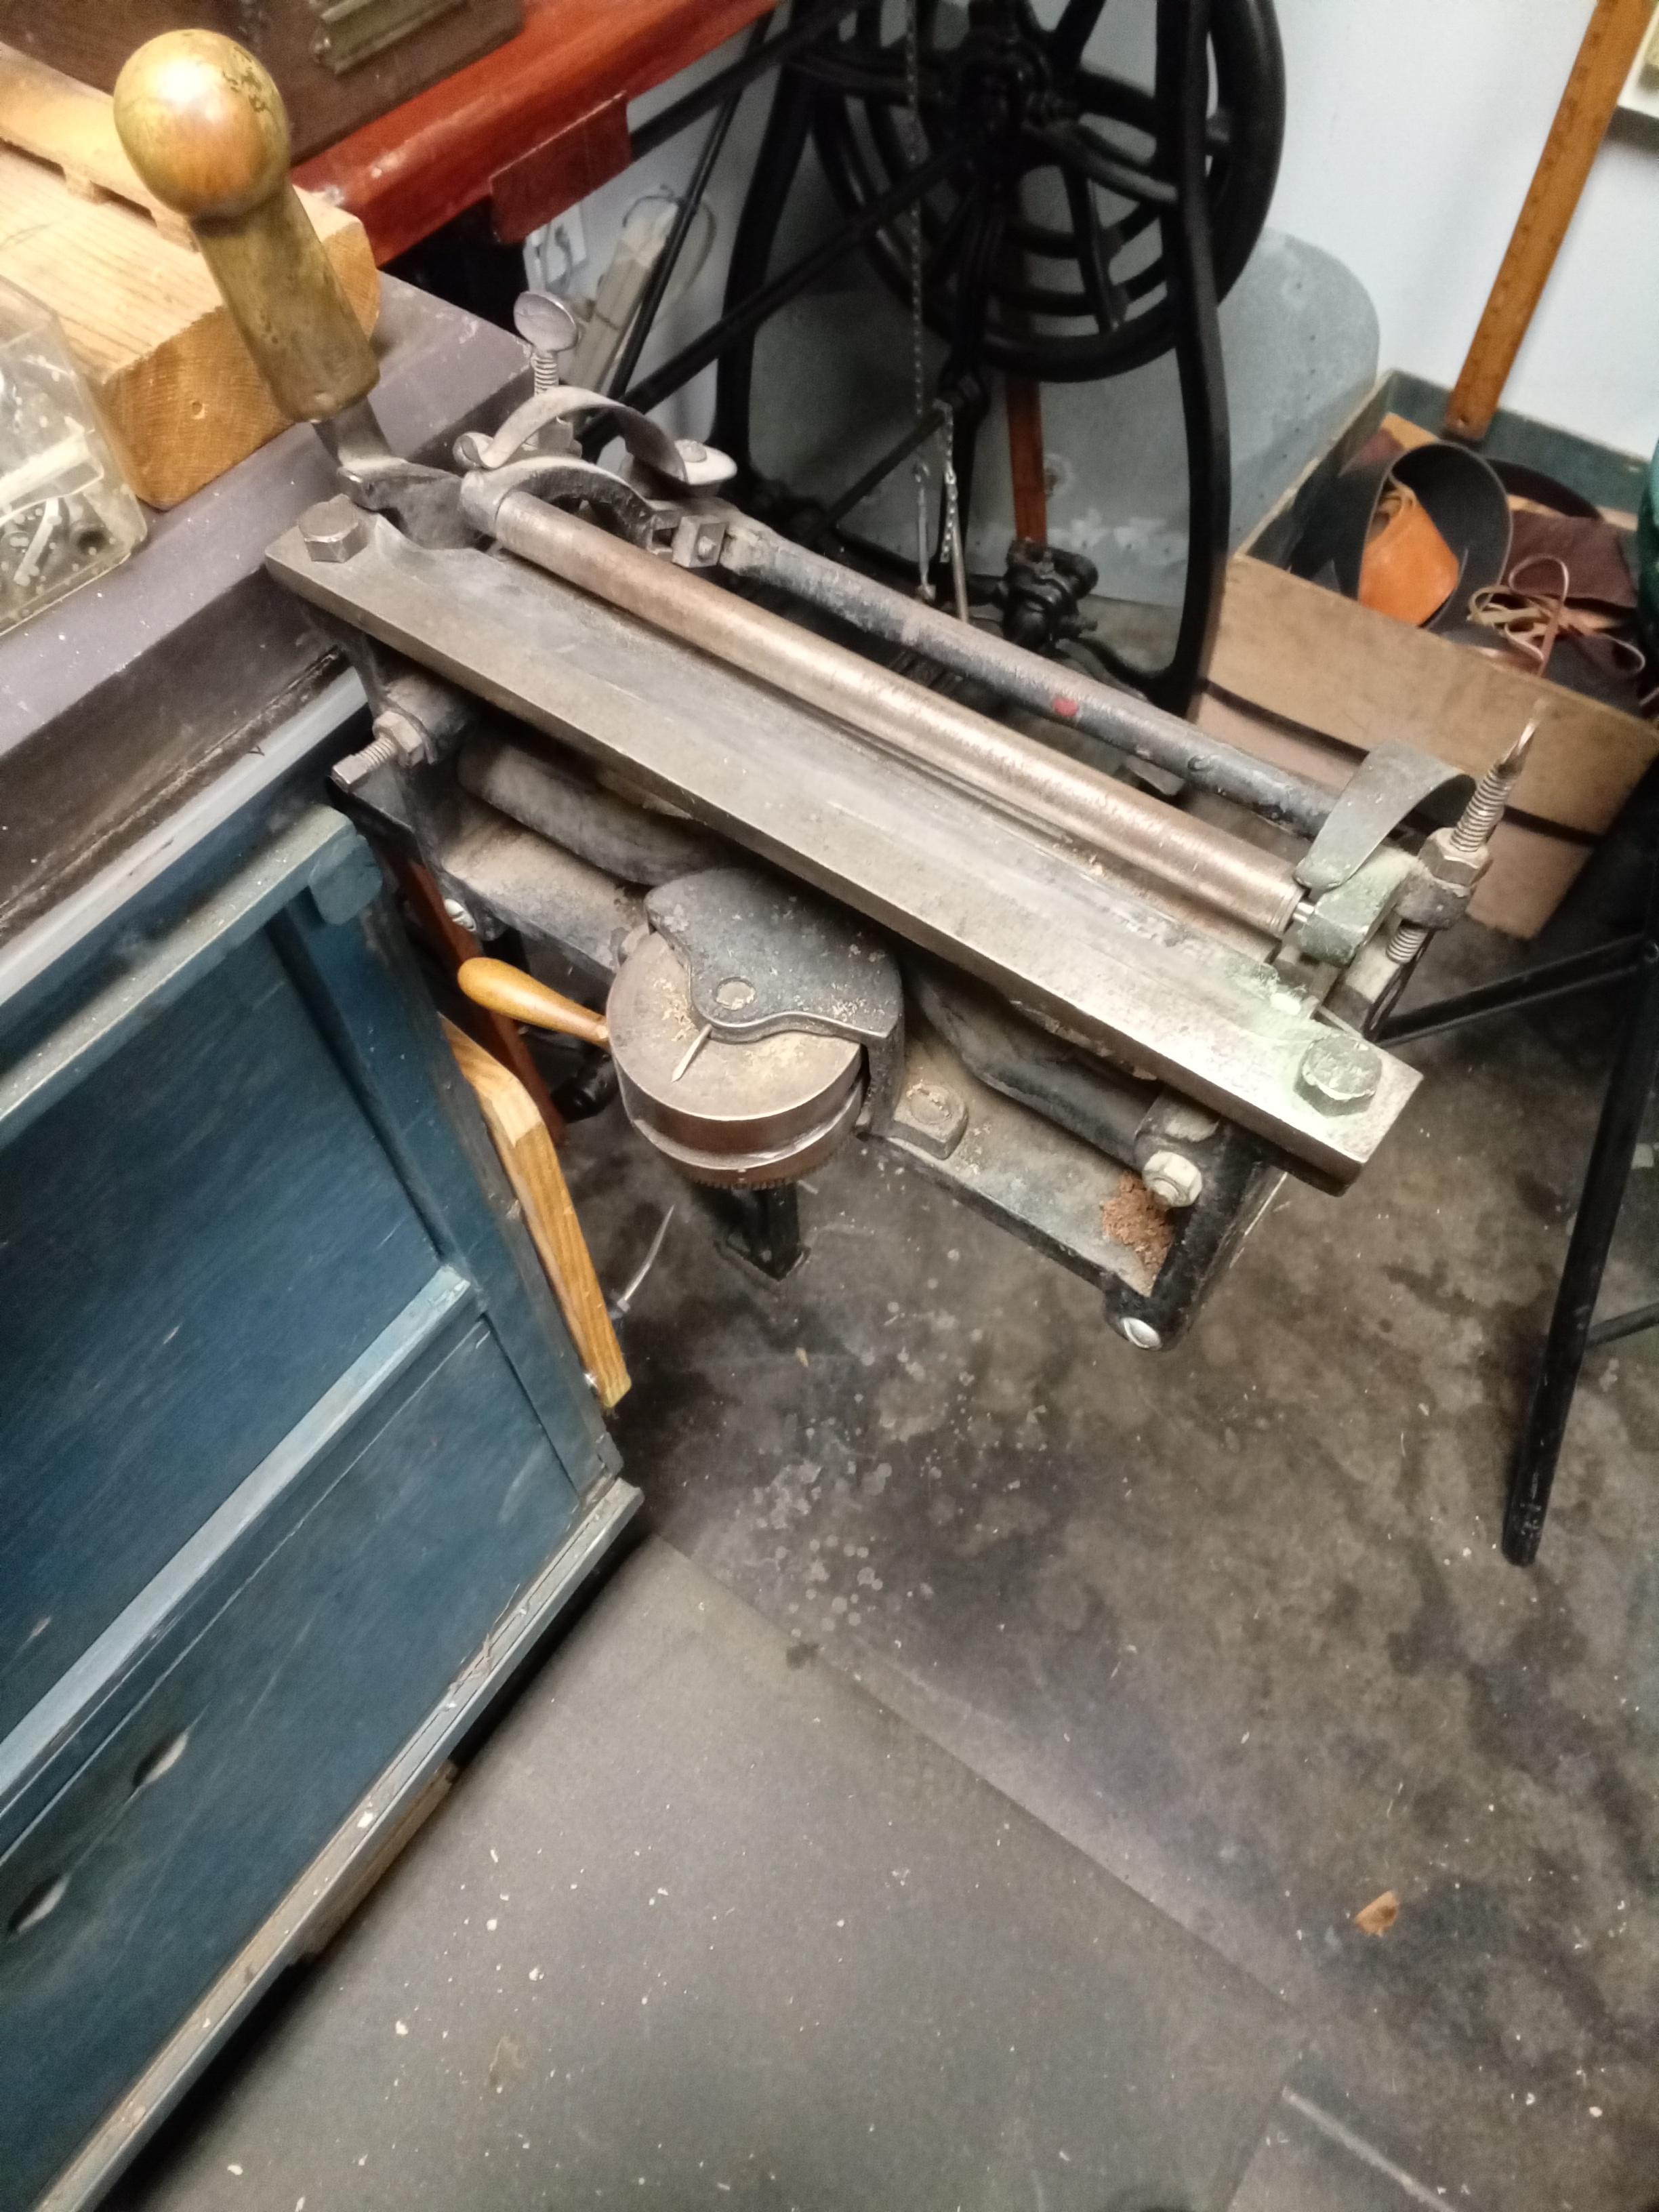
This is the drawers in the bench. Wide deep drawers with lots of cubbies and removable trays. Lots of space, but not quick to access. There's some big open shelves under the bench too. Mainly used for heavy stuff. Dad sewed up a lot of sheathes for some tools, like the one for his big slicker. He also kept a few Deep frame C-clamps at the bench as they could reach into a saddle seat to hold or set something in place. The bench is steel framed sheathed in plywood, and when he welded it up he made a long steel slot in the end and his bench splitter (an old "Krebs type" Randall) is mounted to a steel plank that fits into the slot. It's a fantastic configuration in use with all your scrap falling to the ground and ample room around the tool to work with it, and when you are done it slides out and hangs on the side of the bench. I've started mounting other small hand pull bench tools to planks to use the same routine, so they're all easy to use but don't take up any bench space.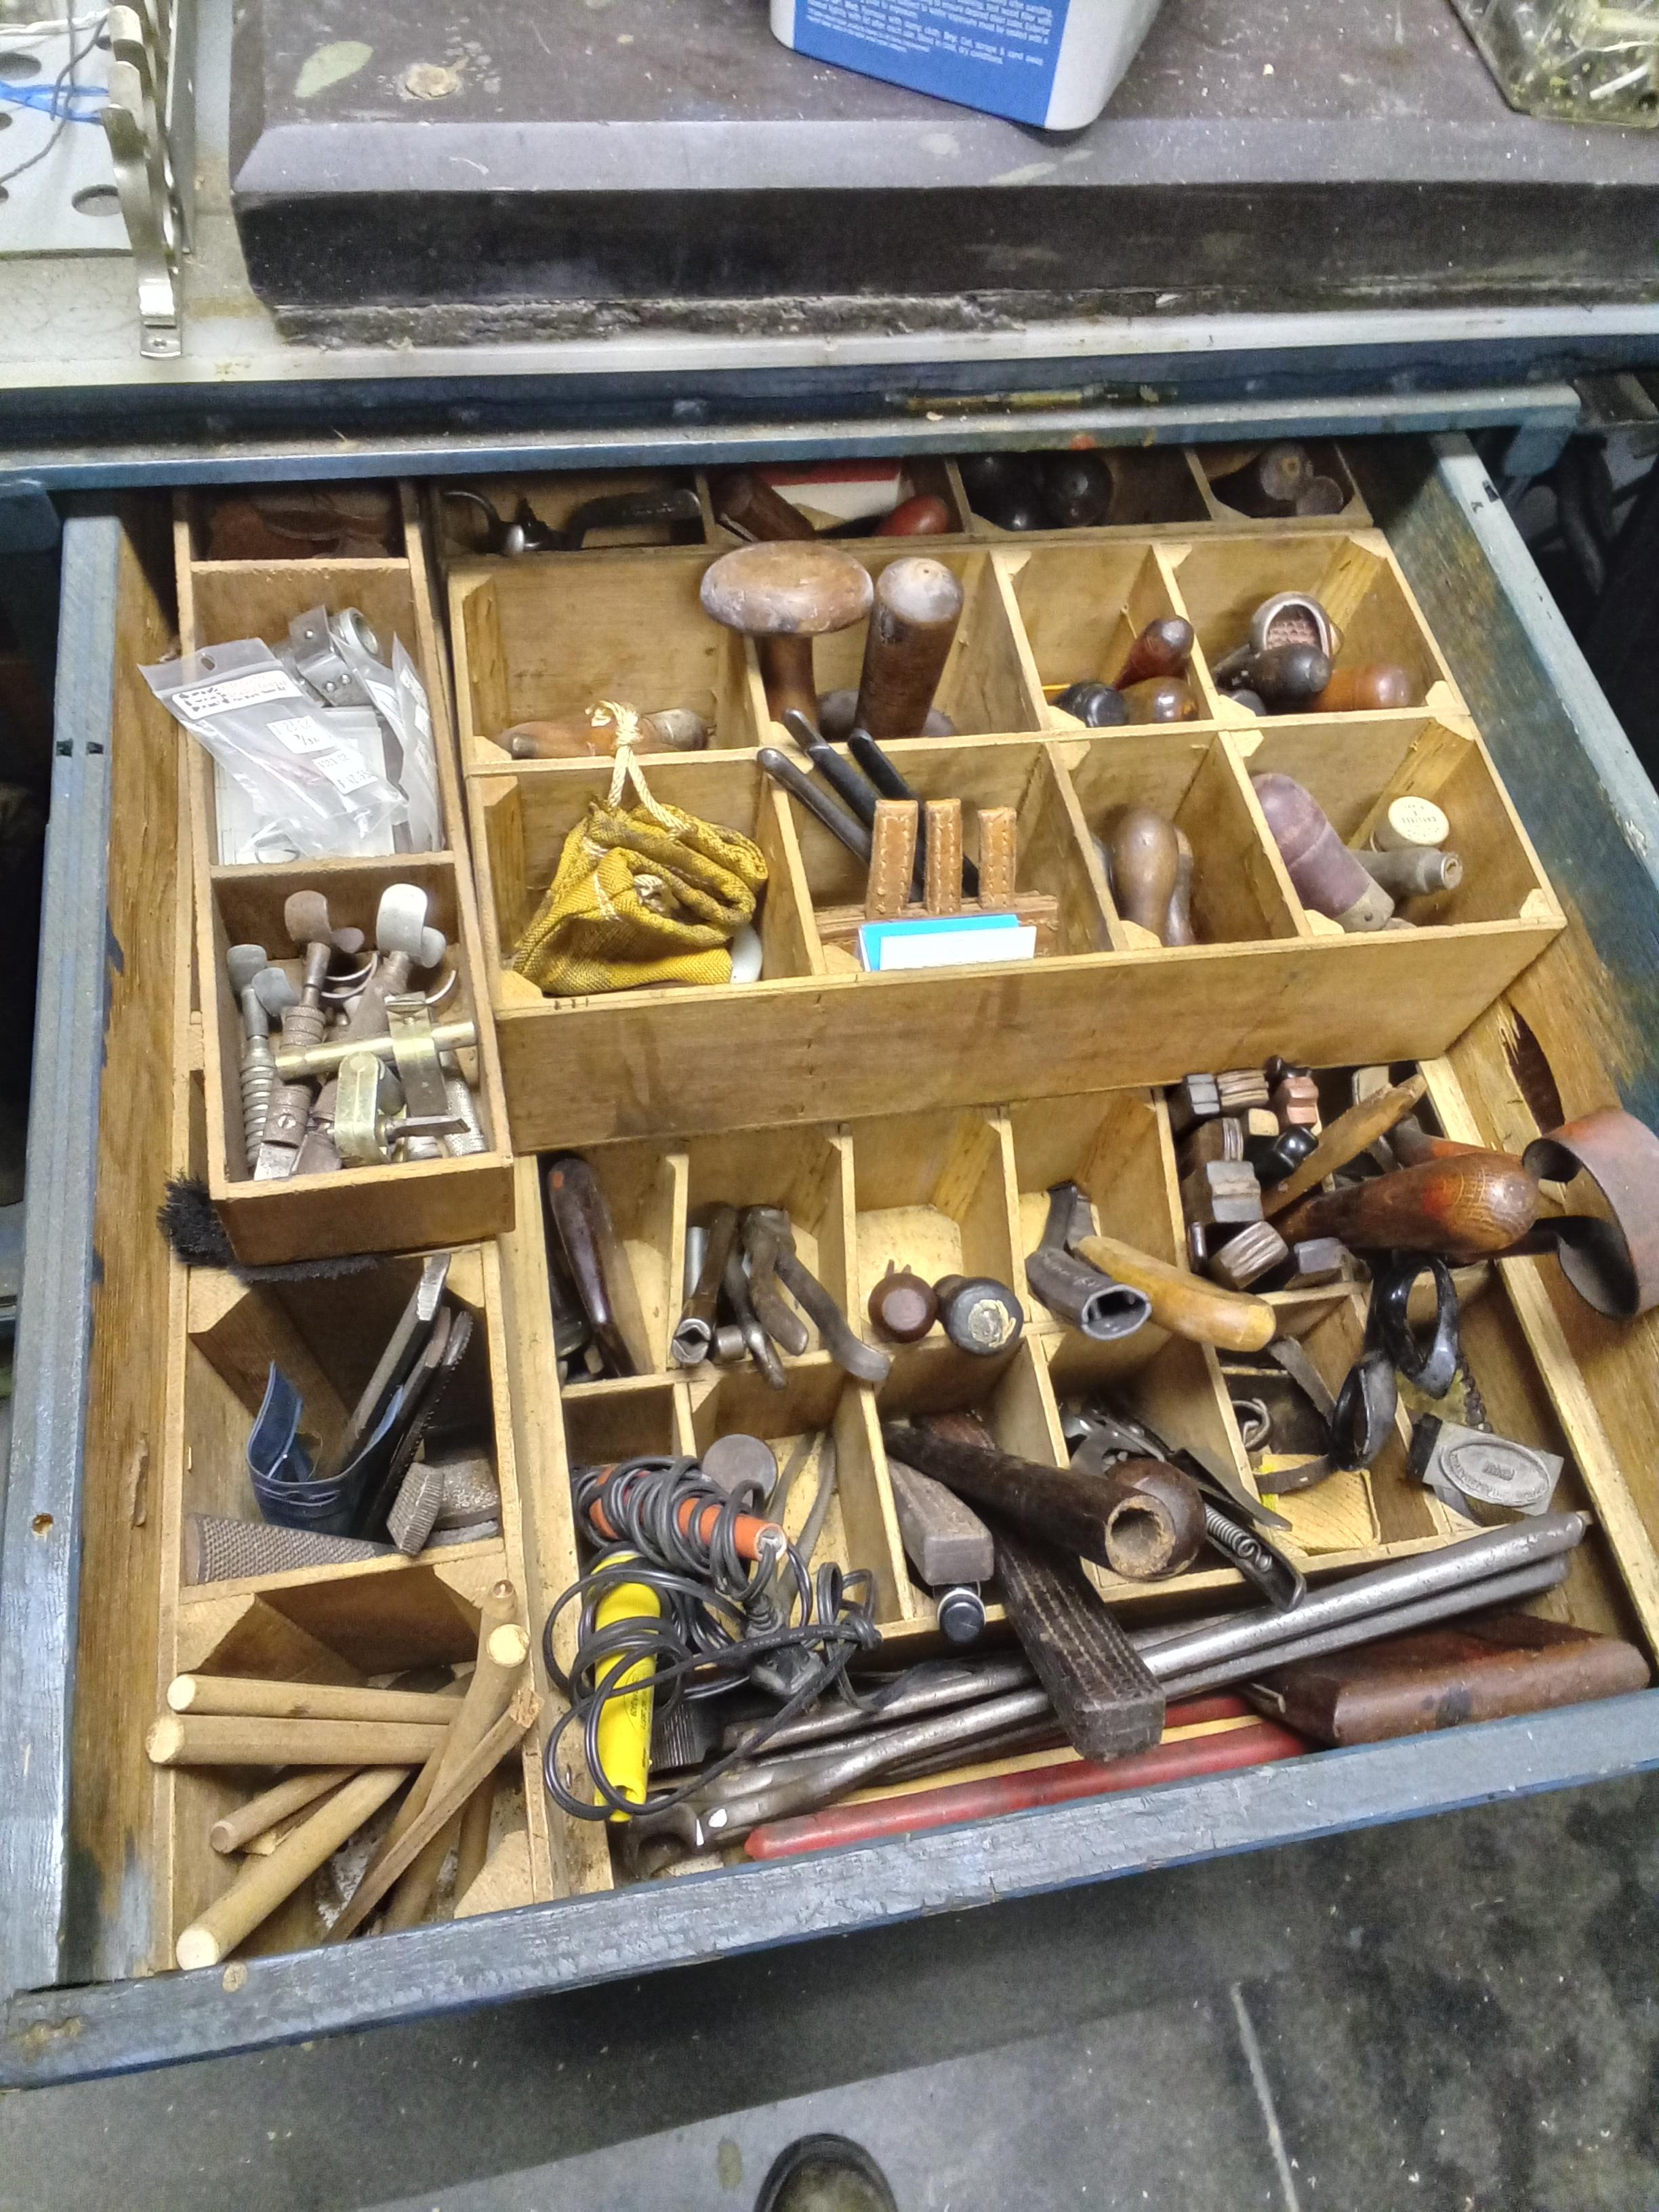

-
Hand Tool Organization Tips, Tricks, Methods, etc.
mbnaegle replied to mbnaegle's topic in Leather Tools
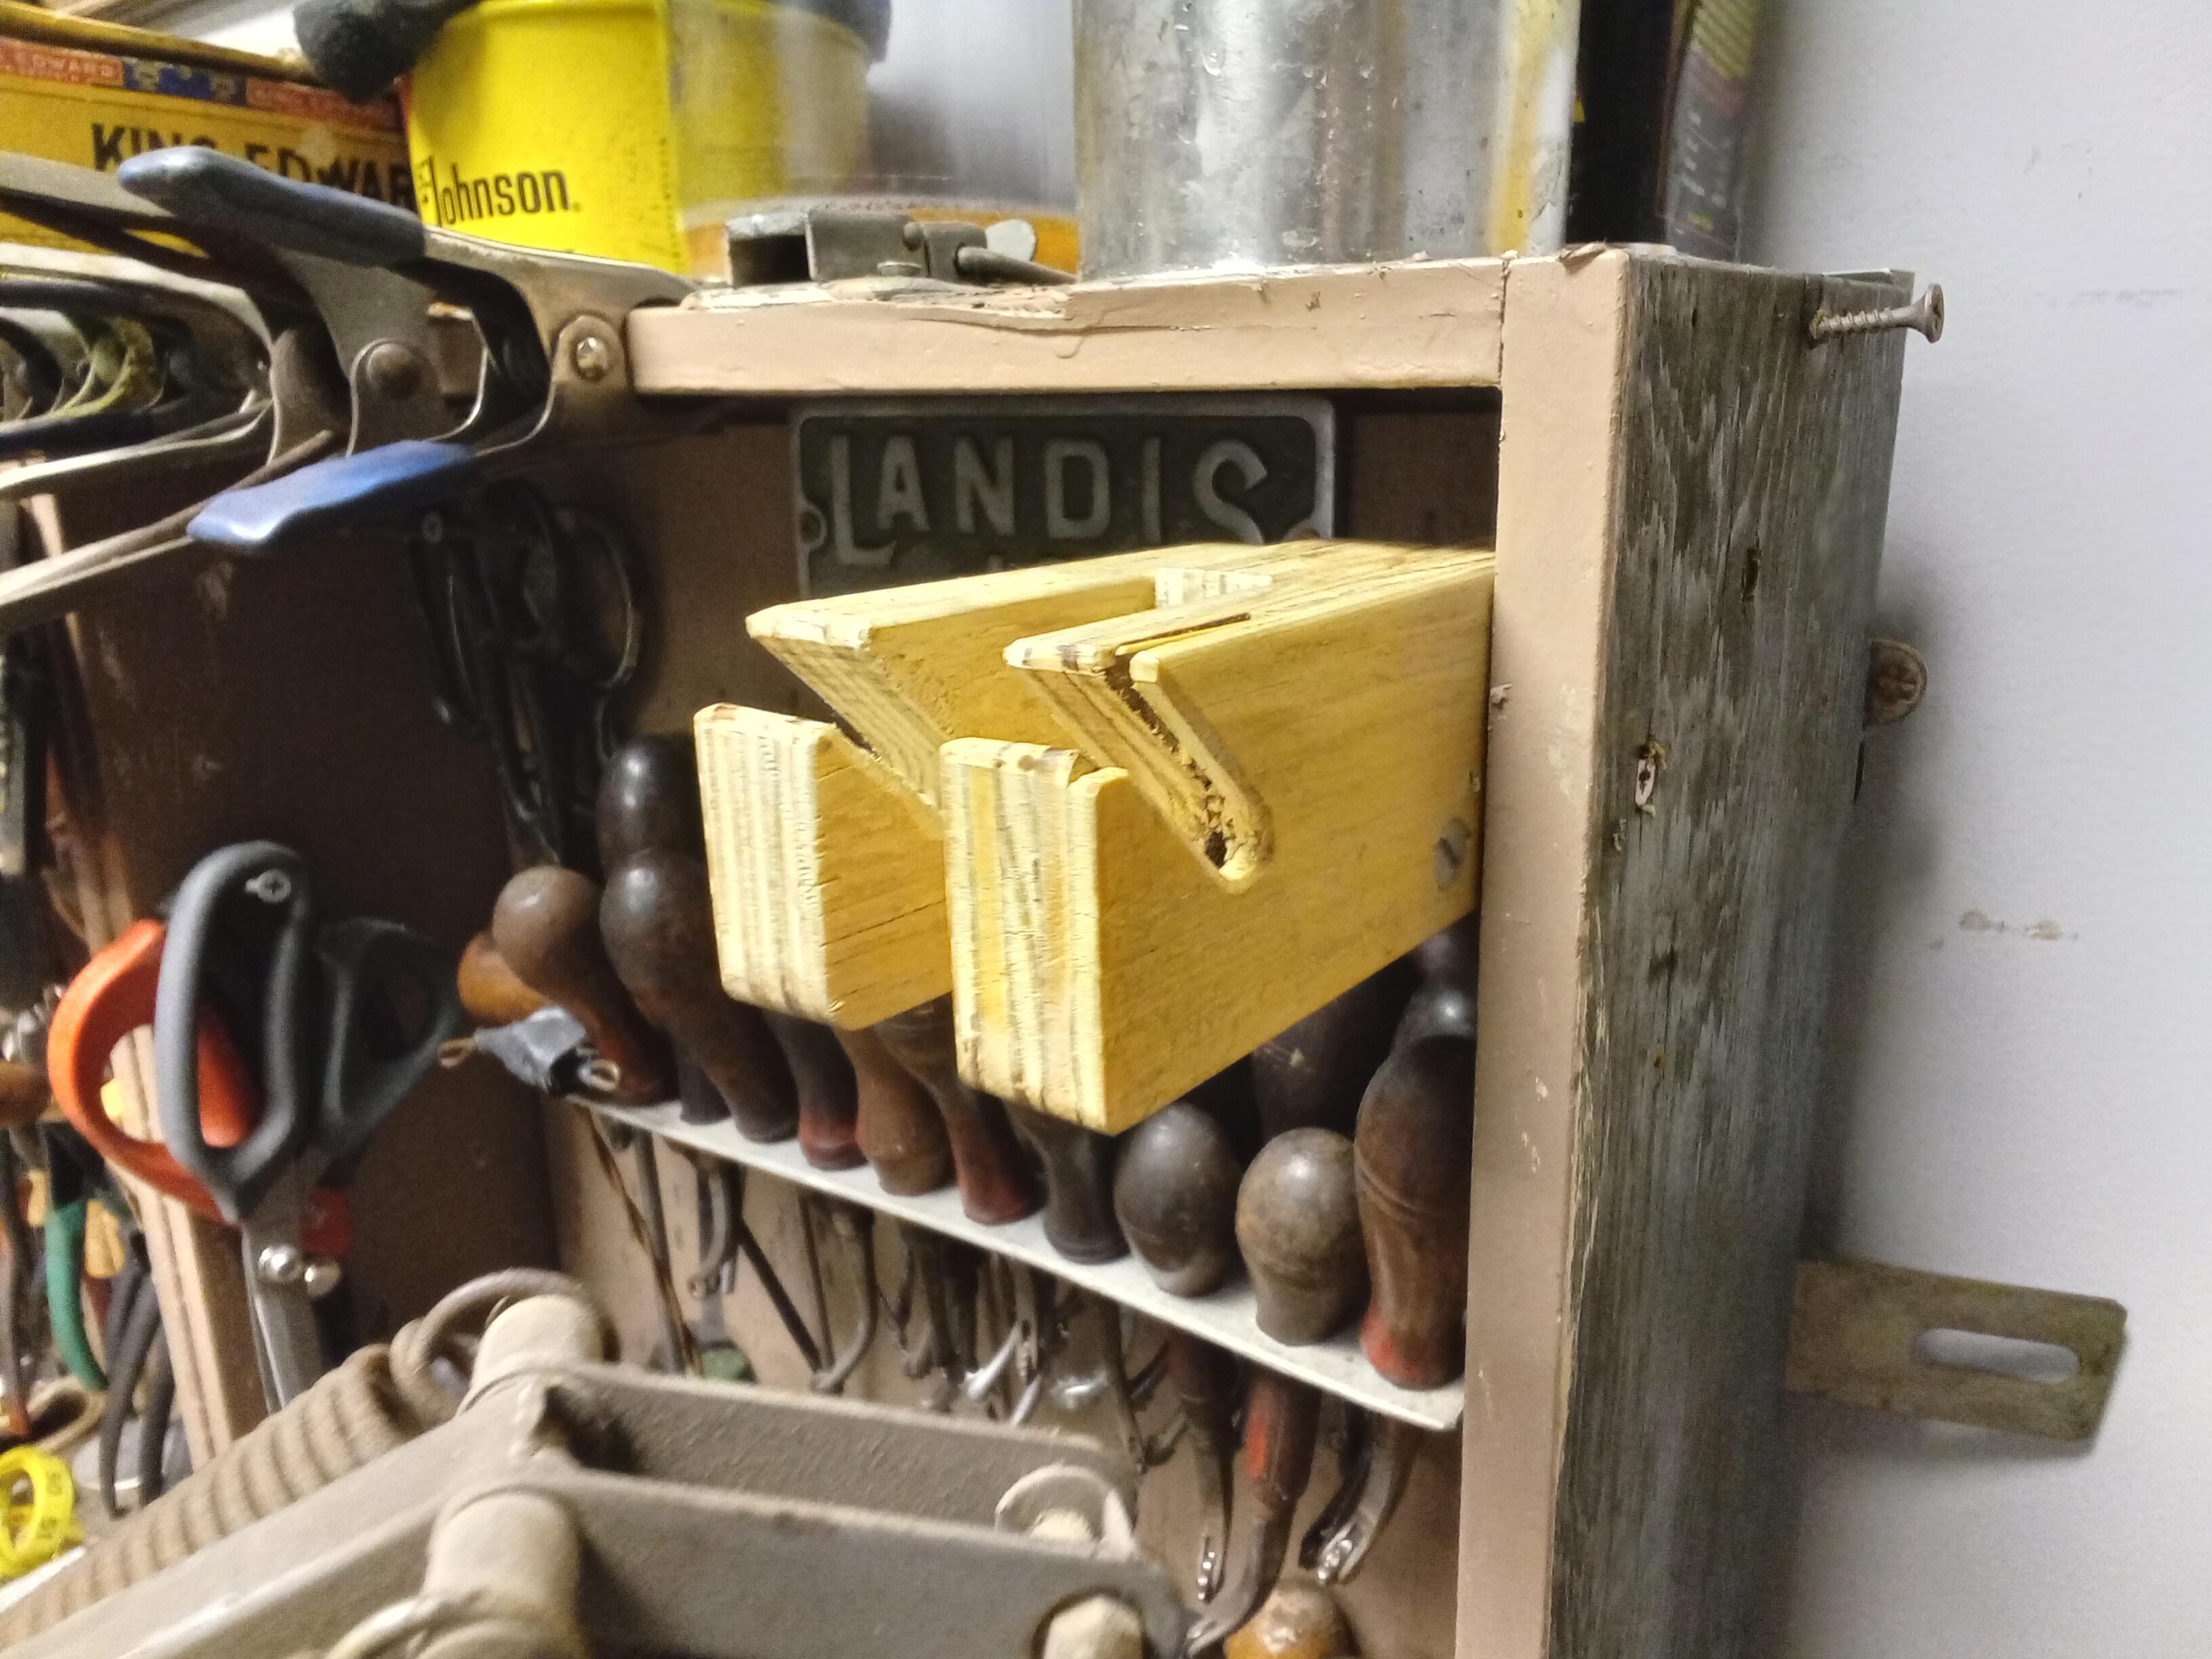
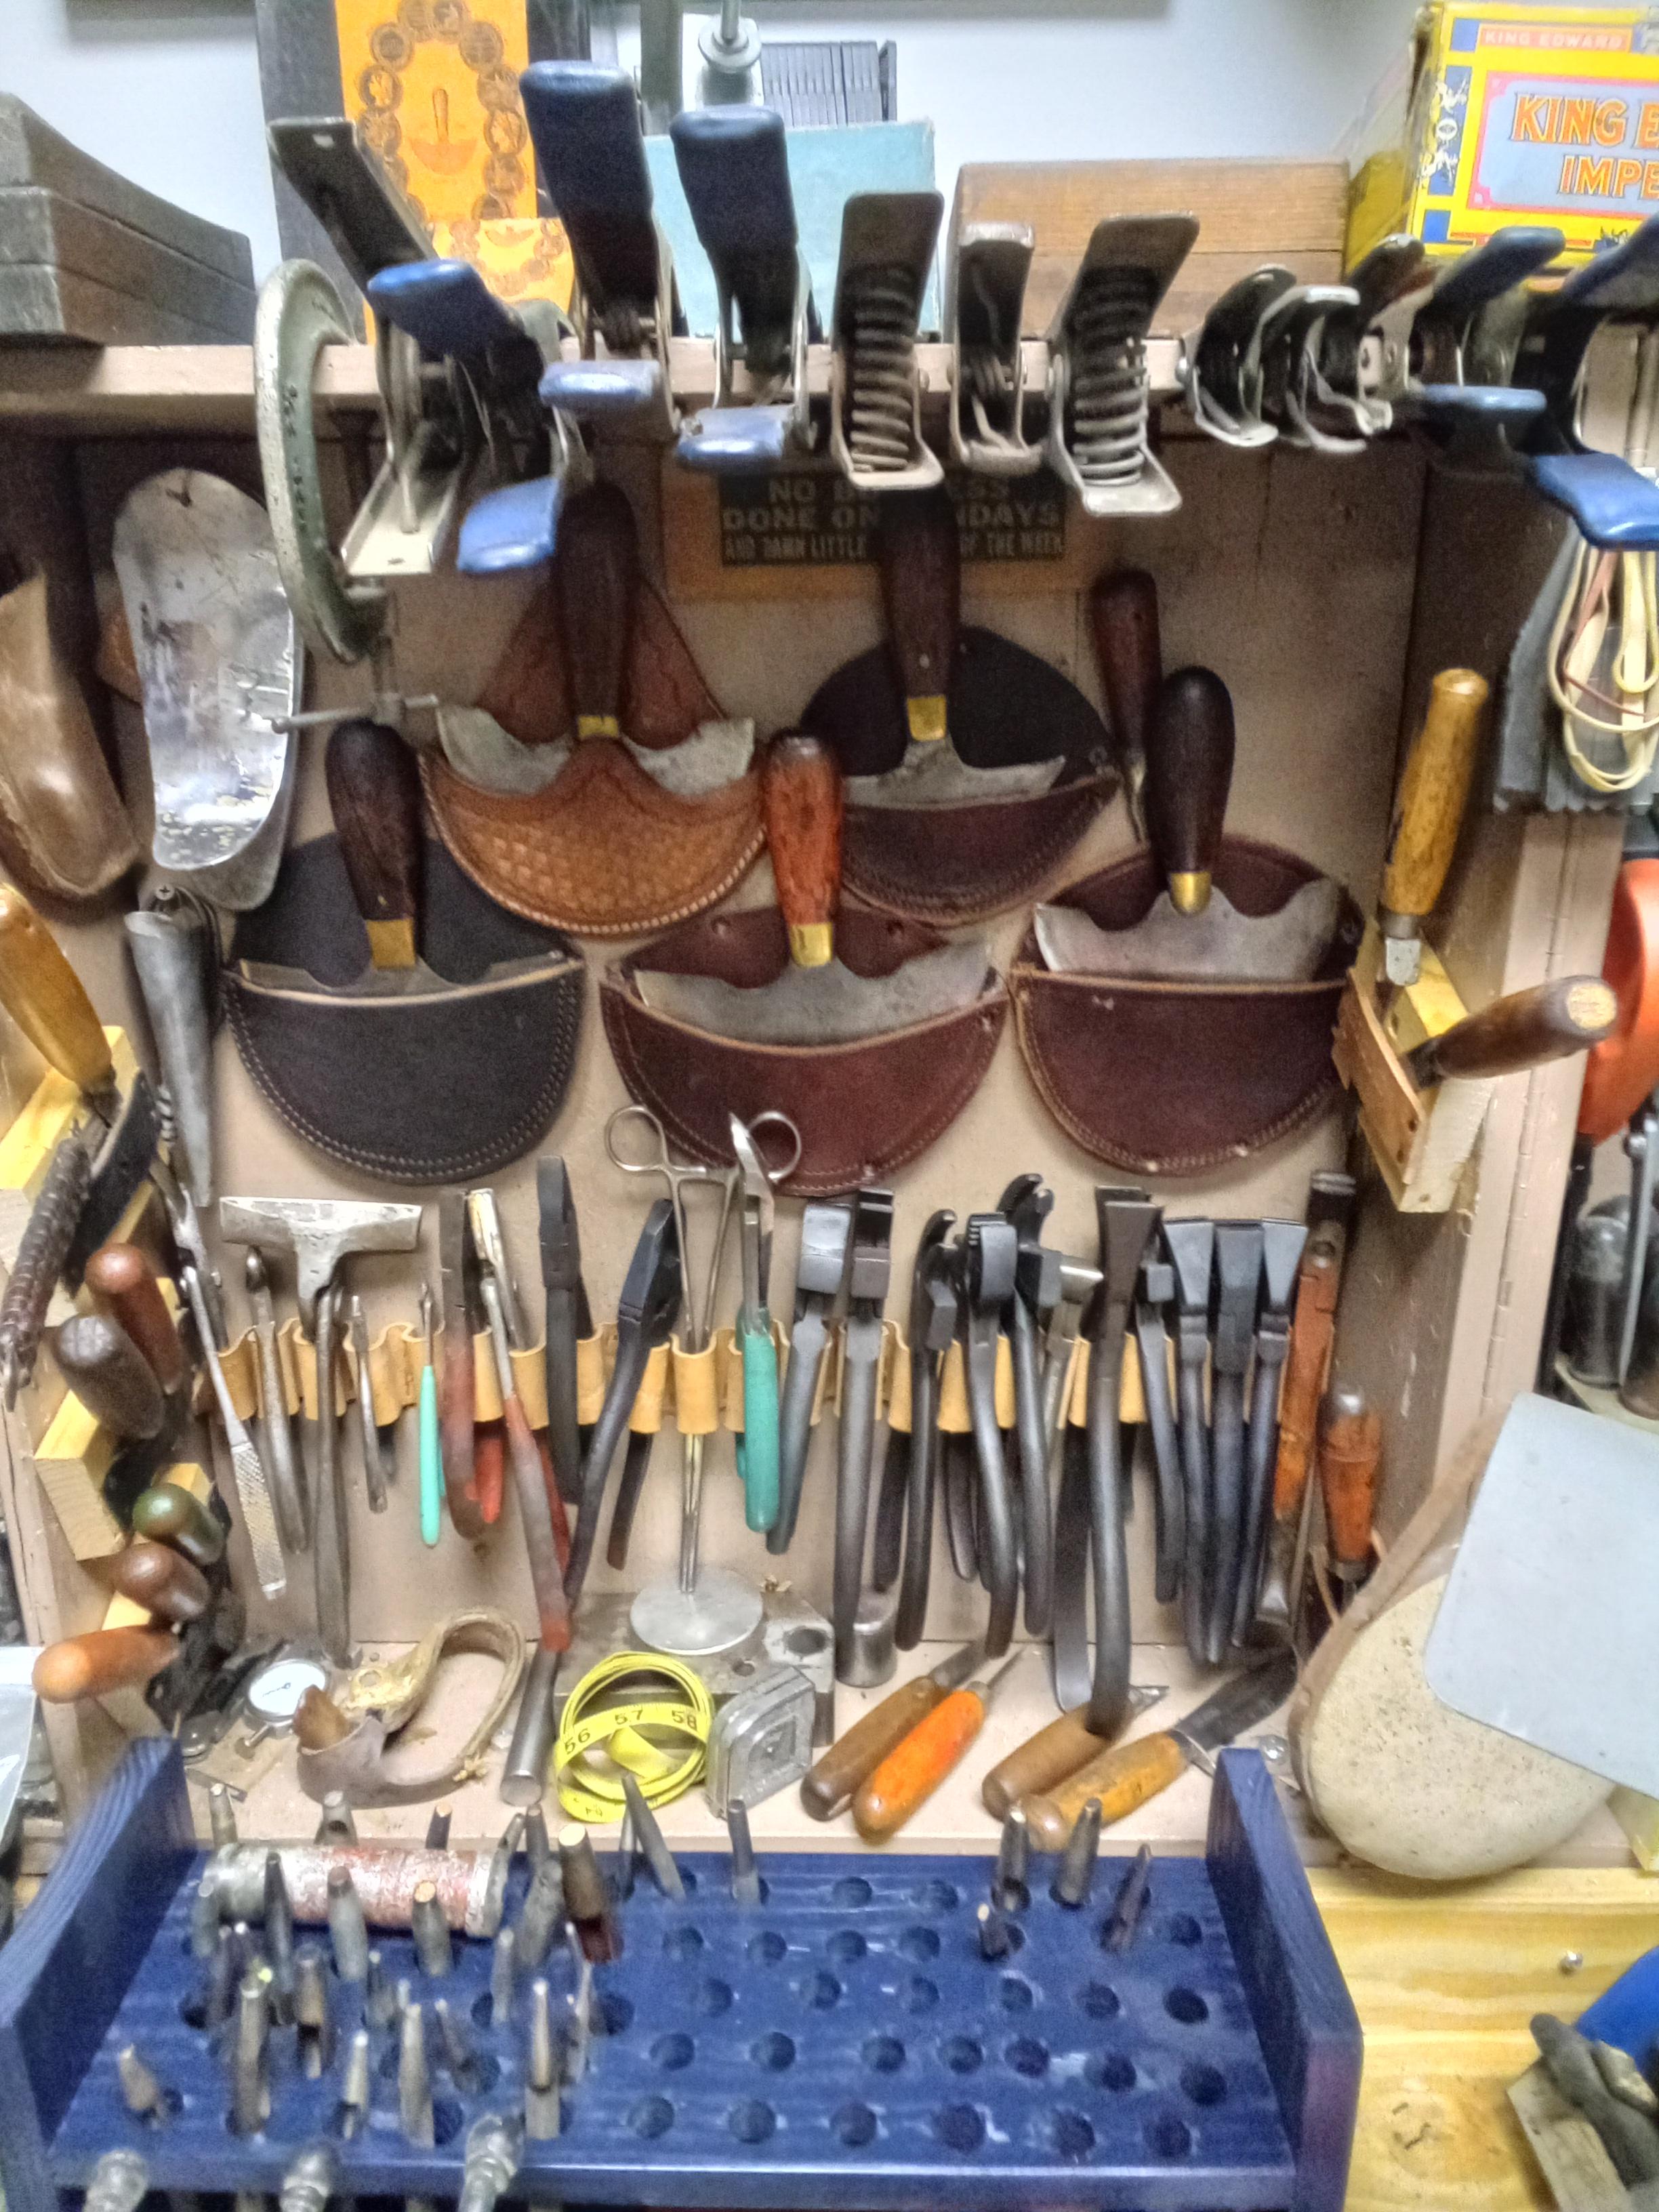
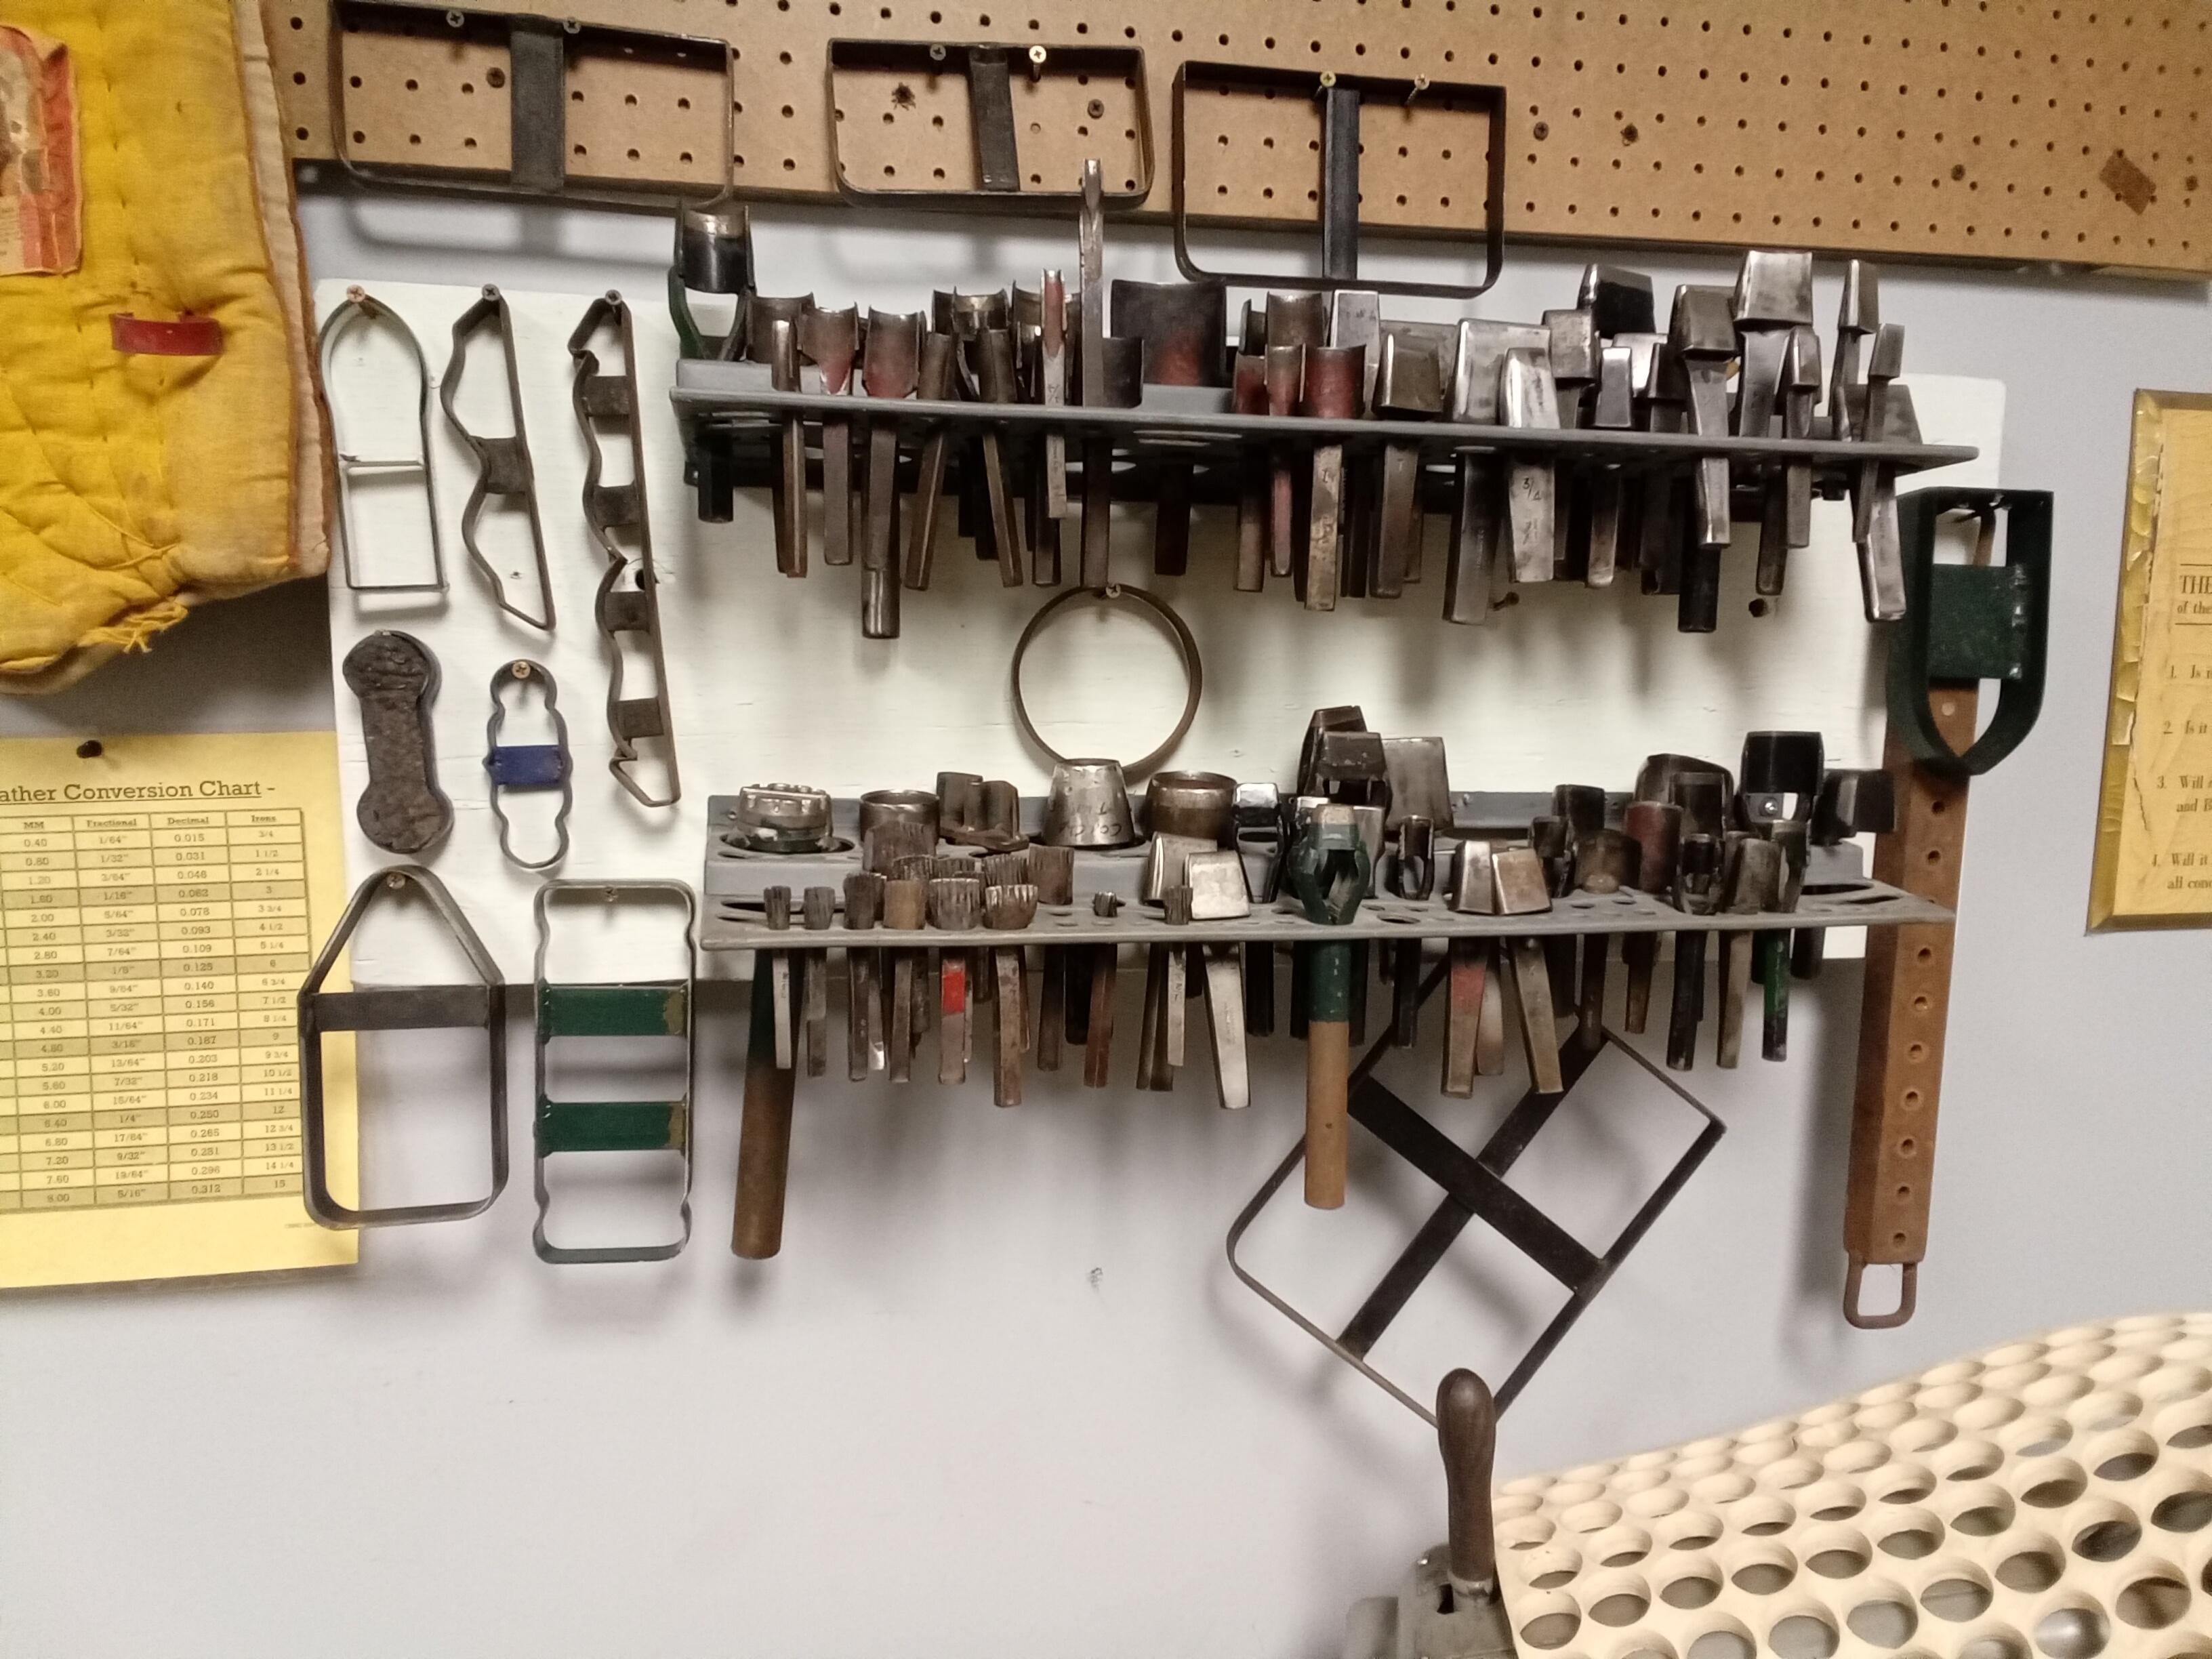
Here's the back of the bench currently. The draw knives I have on their sides in leather loops, but don't like this. A lot of knives have makeshift wood and leather slots presently that I'm going to replace with sewn leather sheaths that I'll screw or tack to the sides of the cubbies. The round knife sheaths work well, as do the racks for the edgers, but they're crowded and need more sorting (theres even more in the drawers!). The pin cushions work well for loose needle and awl and drapery pin storage. The Landis 16 plate is there as my Dad had one when he was doing full time saddle and harness work and loved it, but sold it at some point (kept his two Landis 3's thankfully). We a different one come through our shop a few years ago that was worn out and half gutted of parts, so I saved the plate for him before it went to the scrap pile. Here's the wall organizers. Mainly long and cumbersome stuff, and the punches and clicker dies are beside his old clicker (its pad gets used for hand punching stuff too).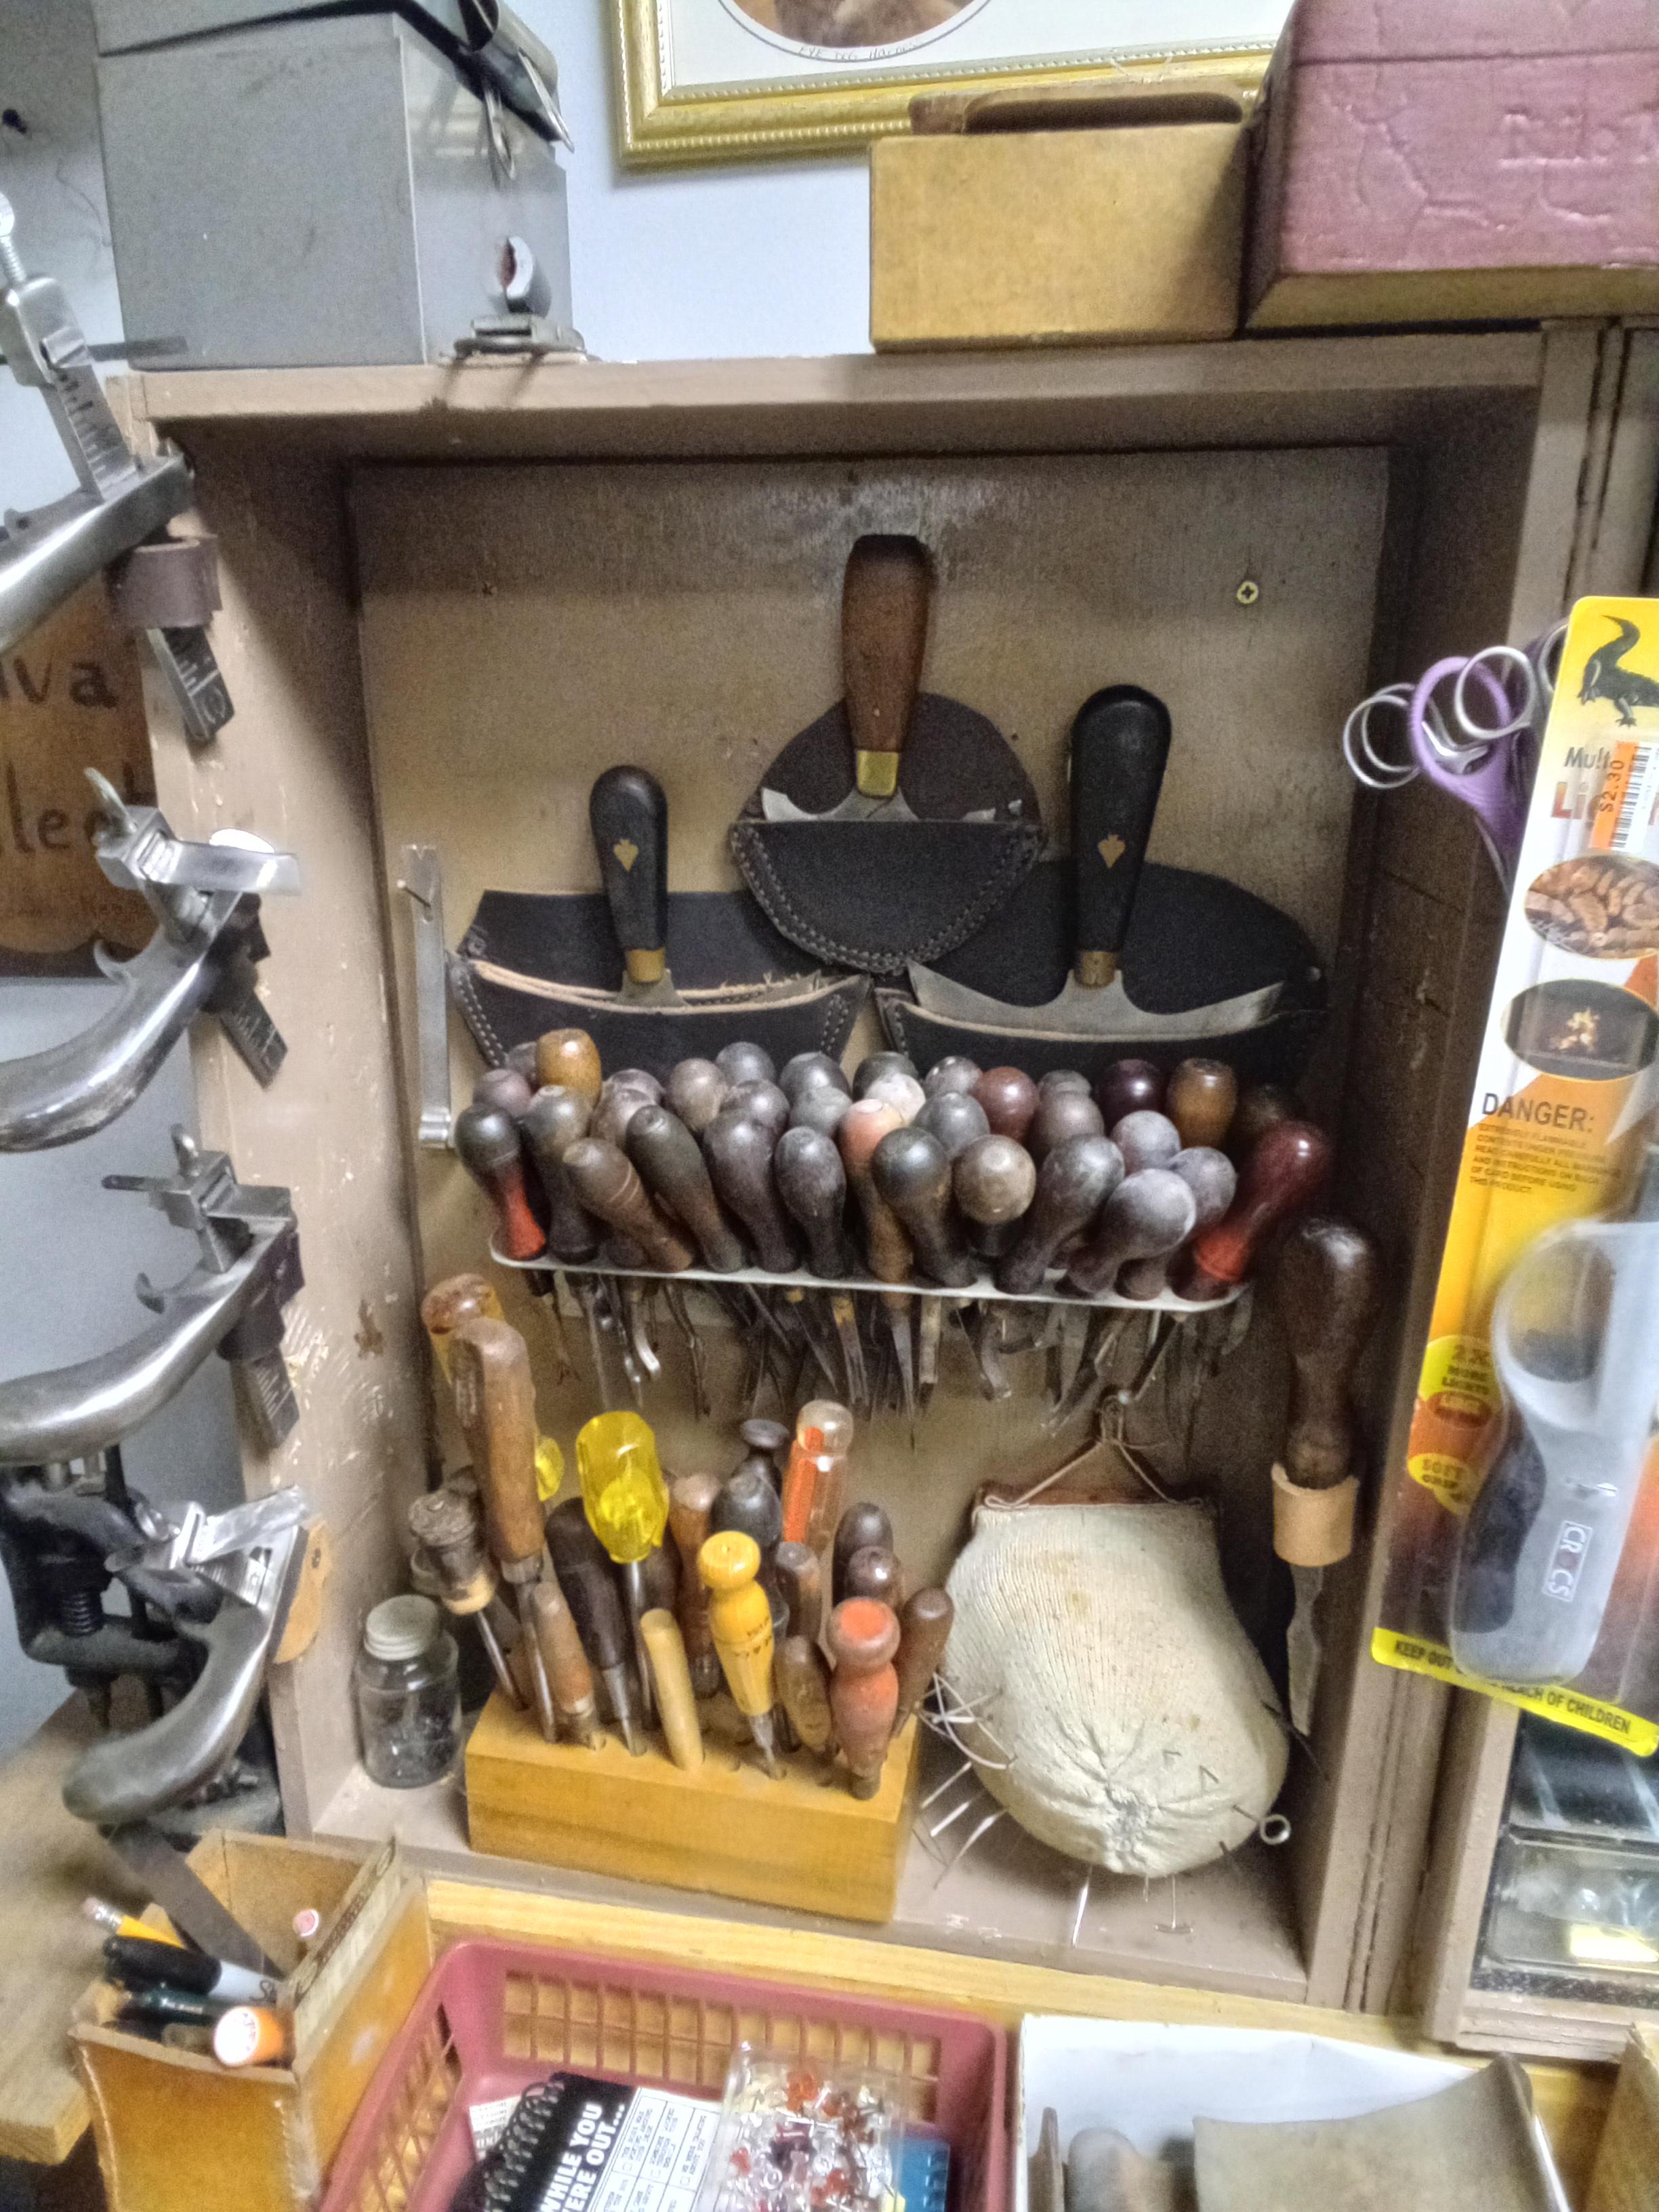


-
I'm a sucker for organization. For me it's more important than cleanliness, such that a little dust and scrap on the floor isn't a big deal, but tools and materials better be put away! My main tenants of fabrication, metal working with some occasional wood work, produce lots of flying chips, dust, and debris, and as such I don't like hanging tools up and leaving them exposed on the wall, opting instead to keep stuff in drawers, cabinets, trays, etc. Leatherwork typically doesn't make as much airborne mess, other than painting/dying and burnishing, which IMO is best neutralized with vacuum systems at the source or by doing it away from everything, so this opens up the possibilities of how I can store tools. I've been reorganizing my dad's leather bench, trying to put it back to being an active hand tool bench and not just a place to store his old tools. At one point it was meant to be a mobile work bench, which isn't as important now but is an aspect I like to consider with how stuff is hung on it. It has a built in back-board cubby as well as some large drawers with big and small tray organizers, and I've added some plywood panels on the walls to hang up other tools. In general my goal is to have stuff that is used often at easy access in the open, while stuff that is used less often is in the drawers. He had a LOT of tools and I'm not ready to part with any of it as it's more likely to split up between his grandkids if any of them develop an interest, so there's a lot of redundancy that I think will take time to establish which tools are my primary users, which are special, and which are the back-ups, which adds to the complexity. I'm interested in seeing how you store your tools. Hammers, edgers, knives, punches, etc. One thing I'd be interested in is how you store your draw knives? I have 5 or 6 and while I don't need them all, would like to keep a few on the bench to leave at different sizes. They're kind of an awkward shape as they don't fit in a hole or holster, but the pistol grip lends itself to something easy to grab. I'm thinking of making some kind of fork they can slide into. The blade is the other issue as it's easy to nick yourself on it when other tools are stored close to it. I could make micro-sheaths to cover them up, but that slows down the quick-draw. I'll post some pics of what I've done so far and other things my dad had done over the years.
-
Thanks, that makes sense. Closest I've found in the Al Stohlman book is some trees having slots cut in the bars for the sturip leathers to loop through. Here's tonight's progress. Most of the wood putty is done and did a little varnish to seal up some of the loose old cheese cloth. Once it's dry I'll do some sanding and touch up any holes that were missed, than more varnish and add more cheese cloth.

-
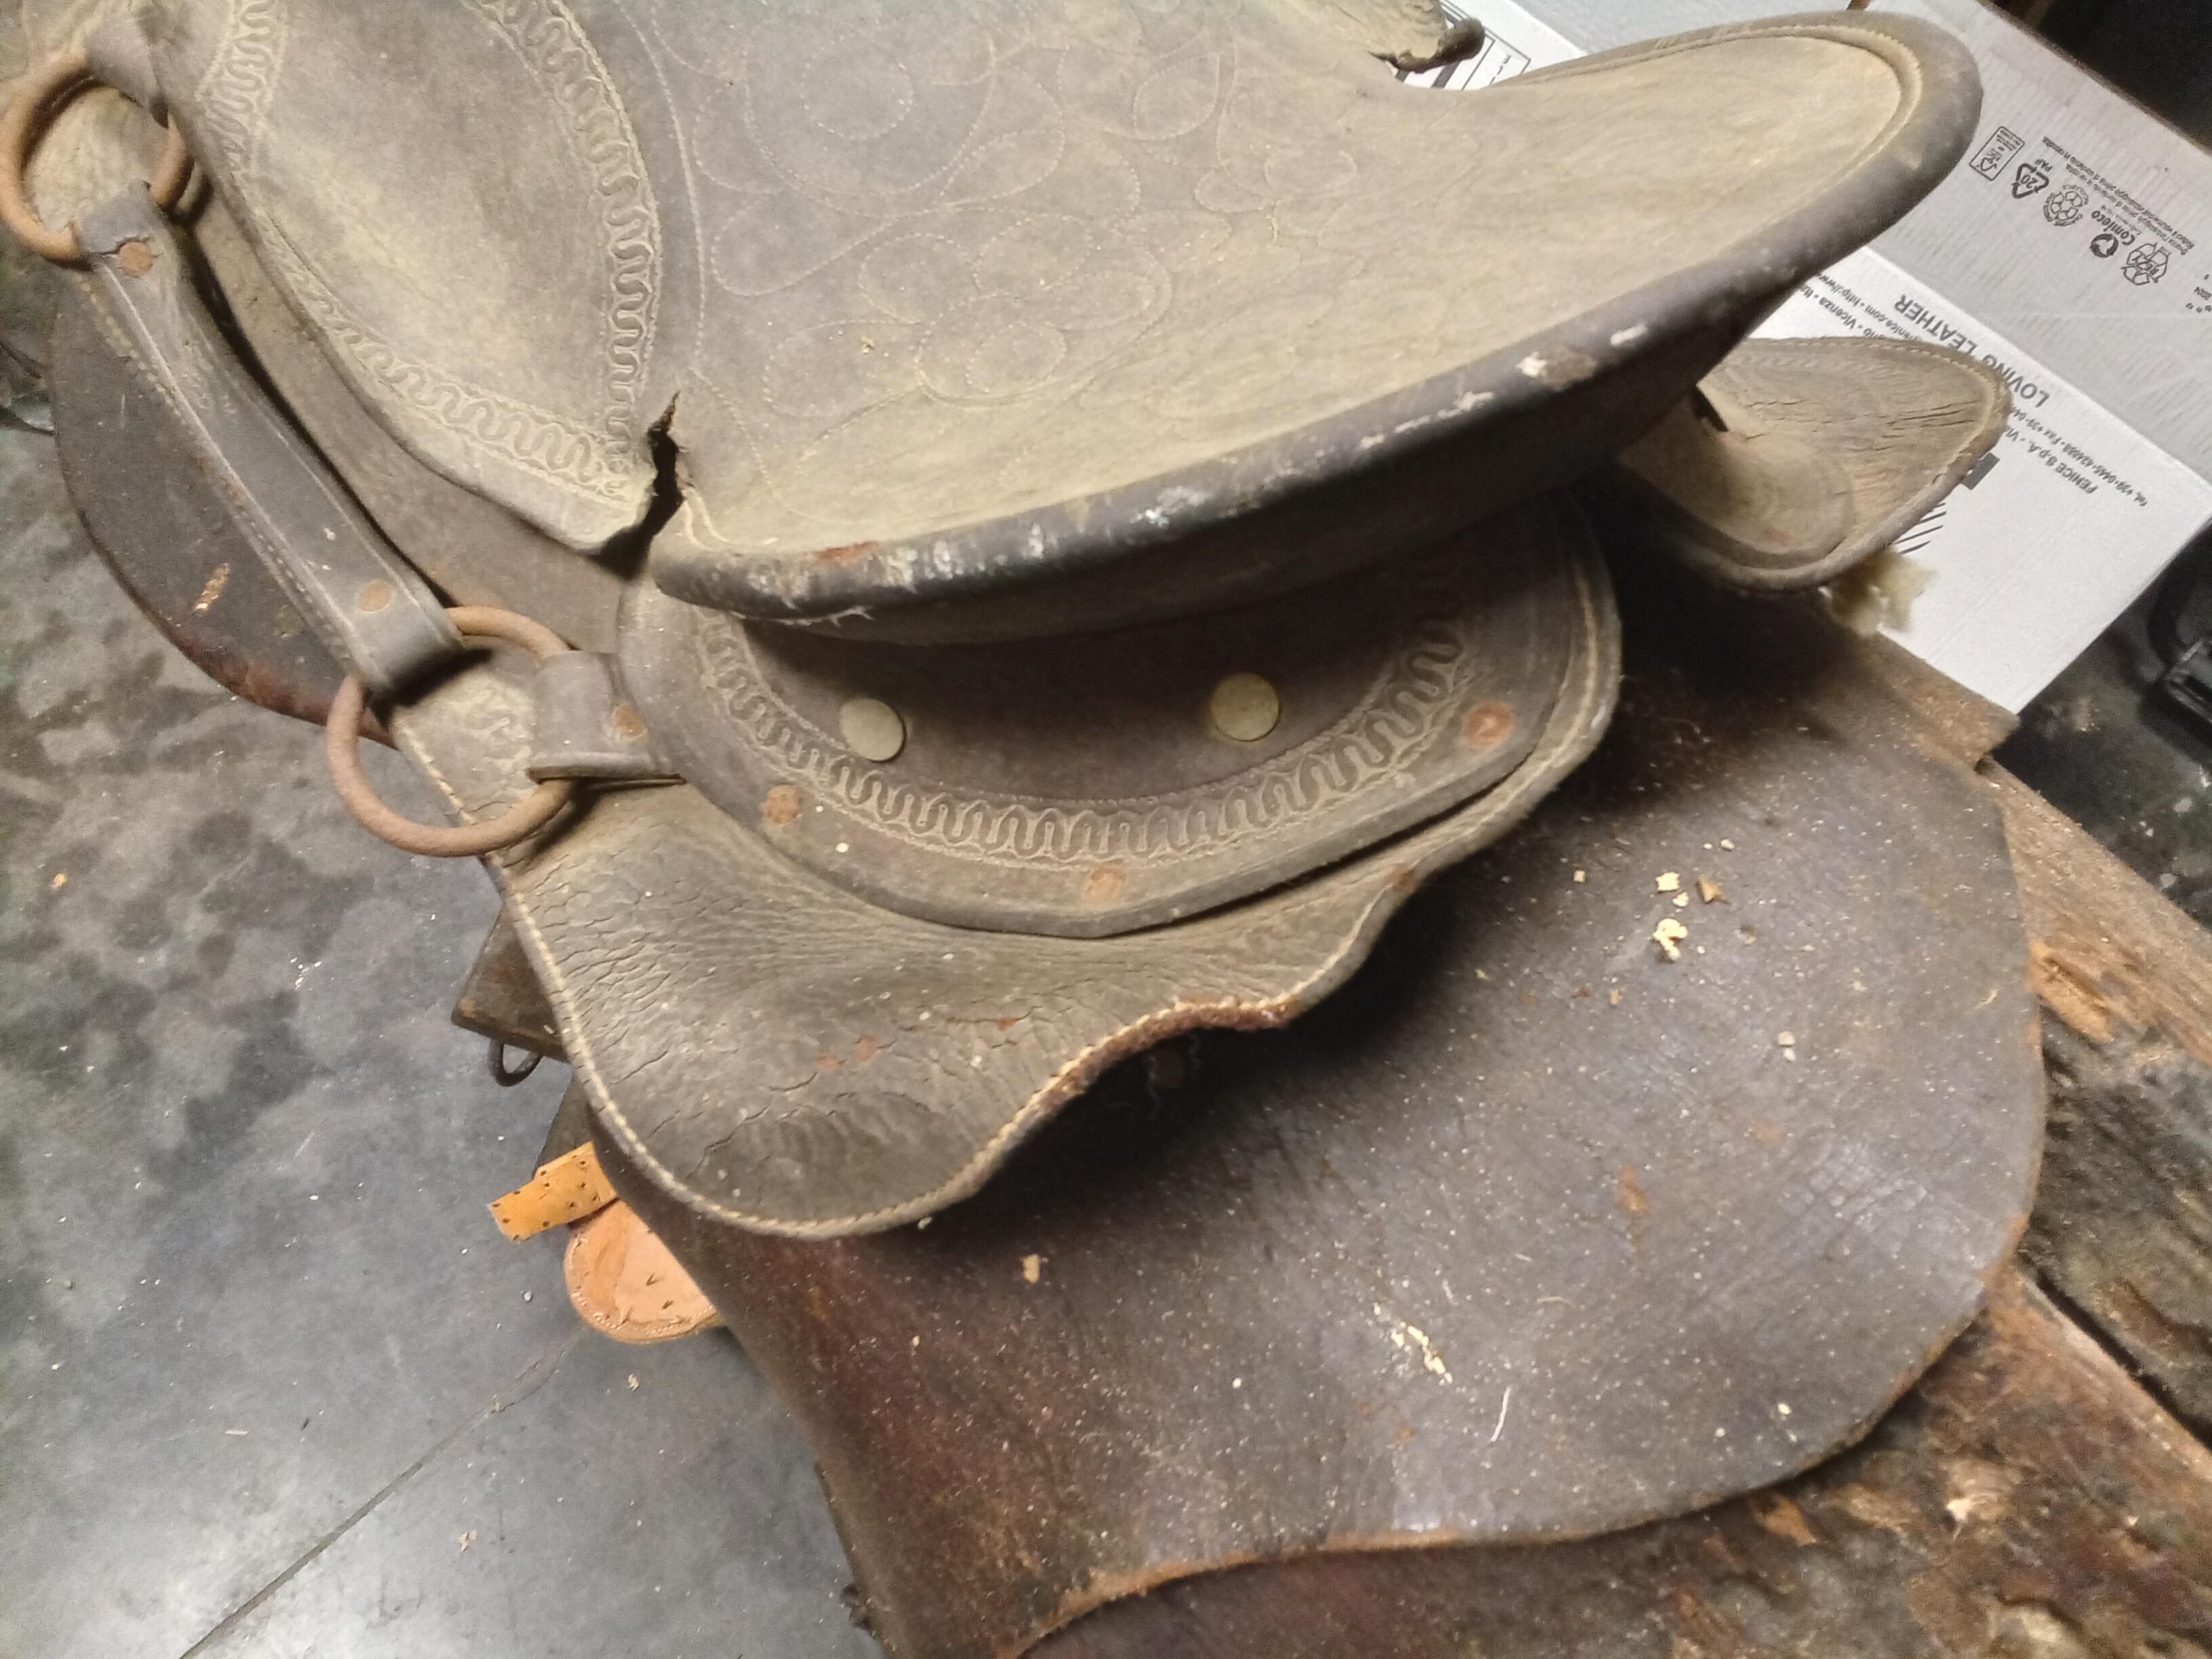
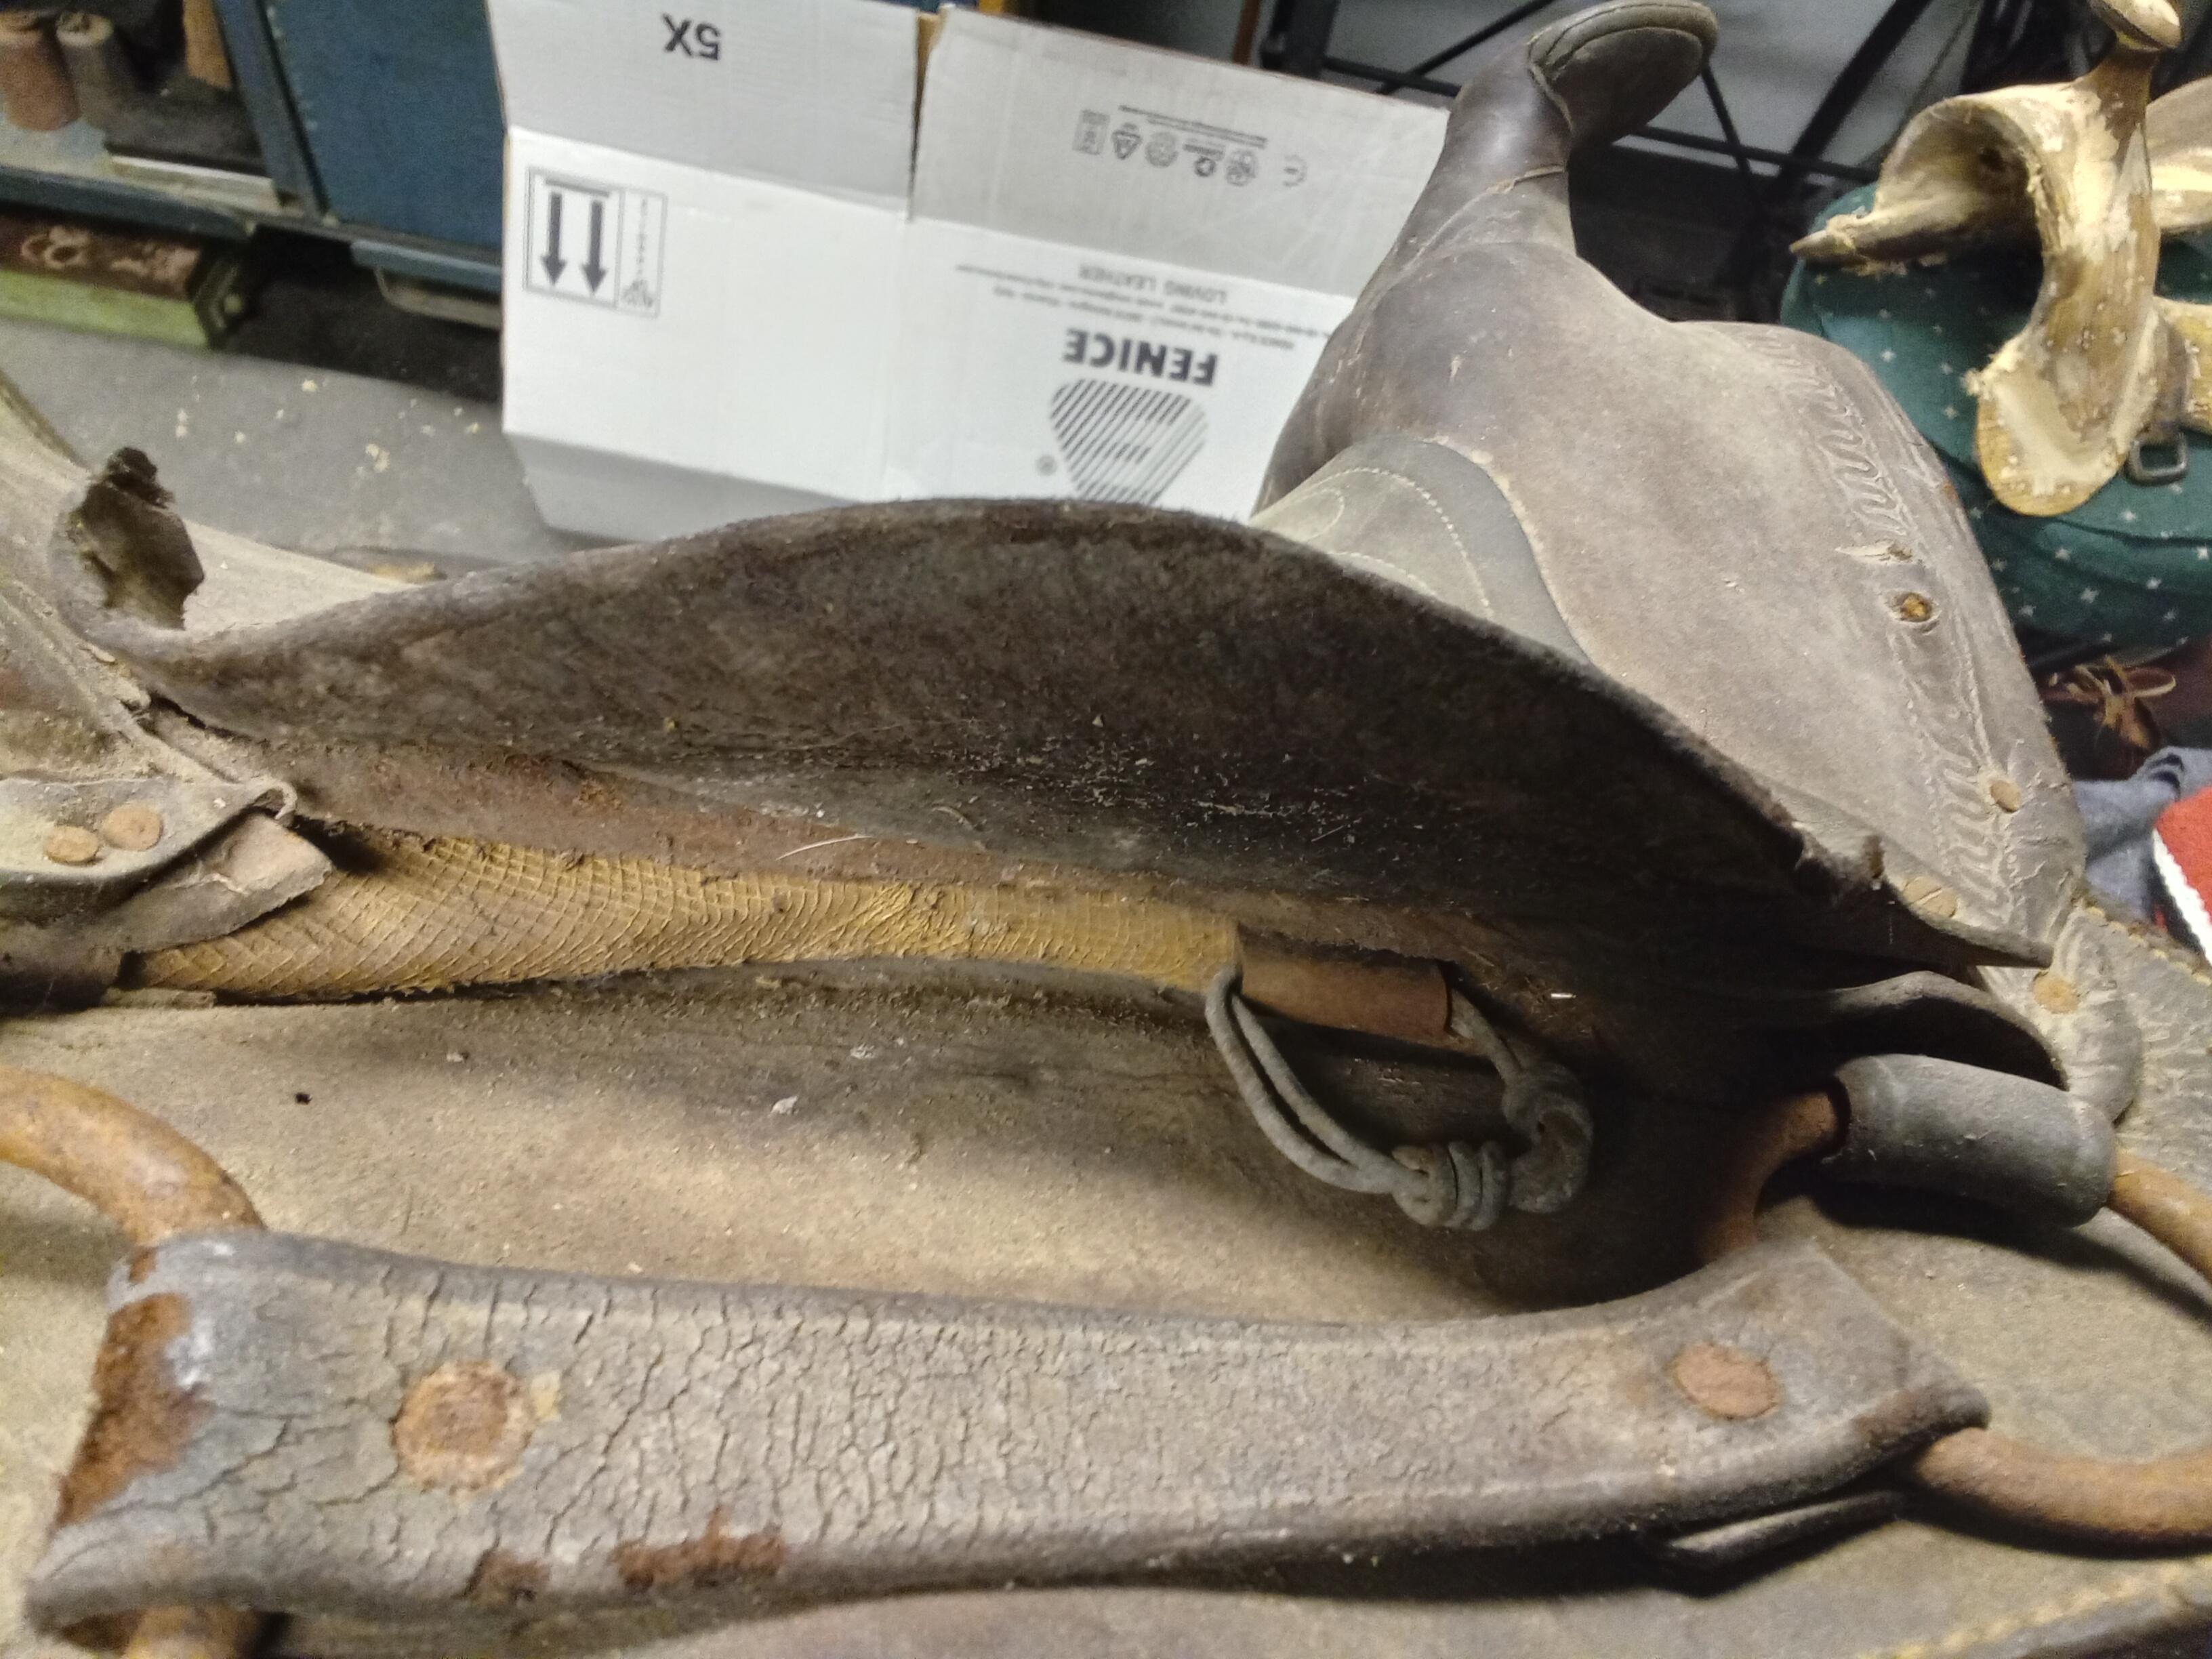
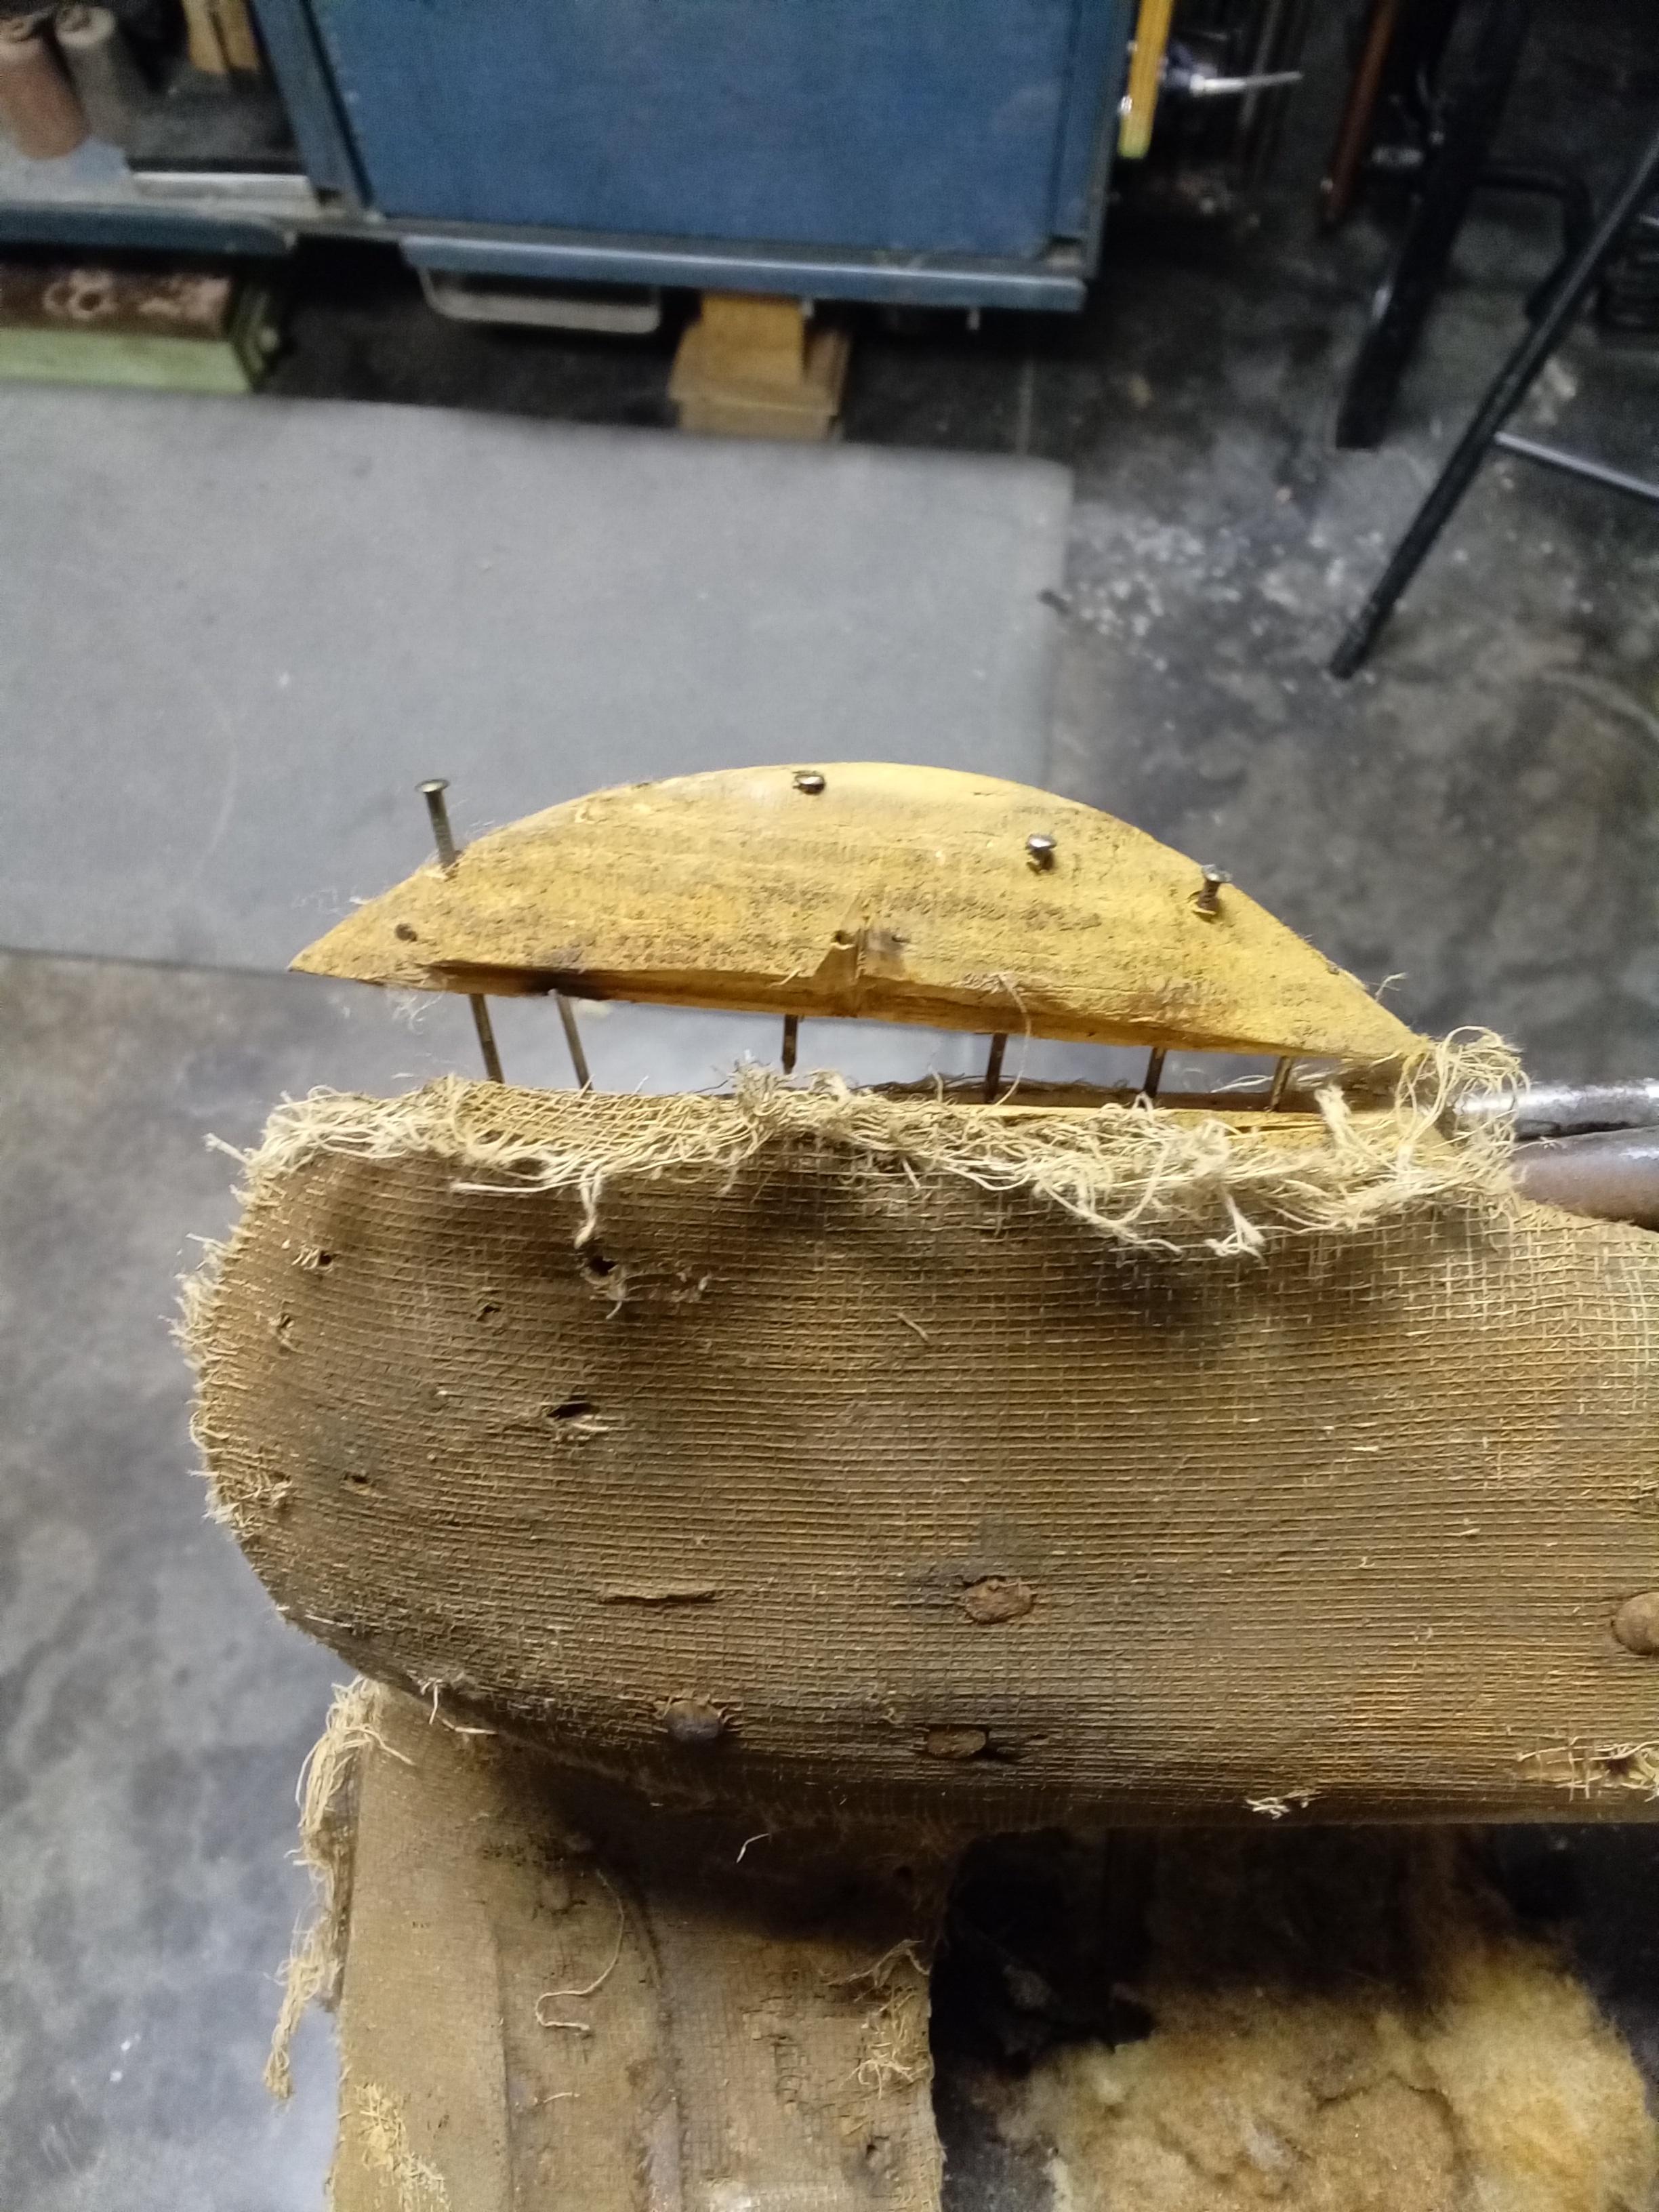
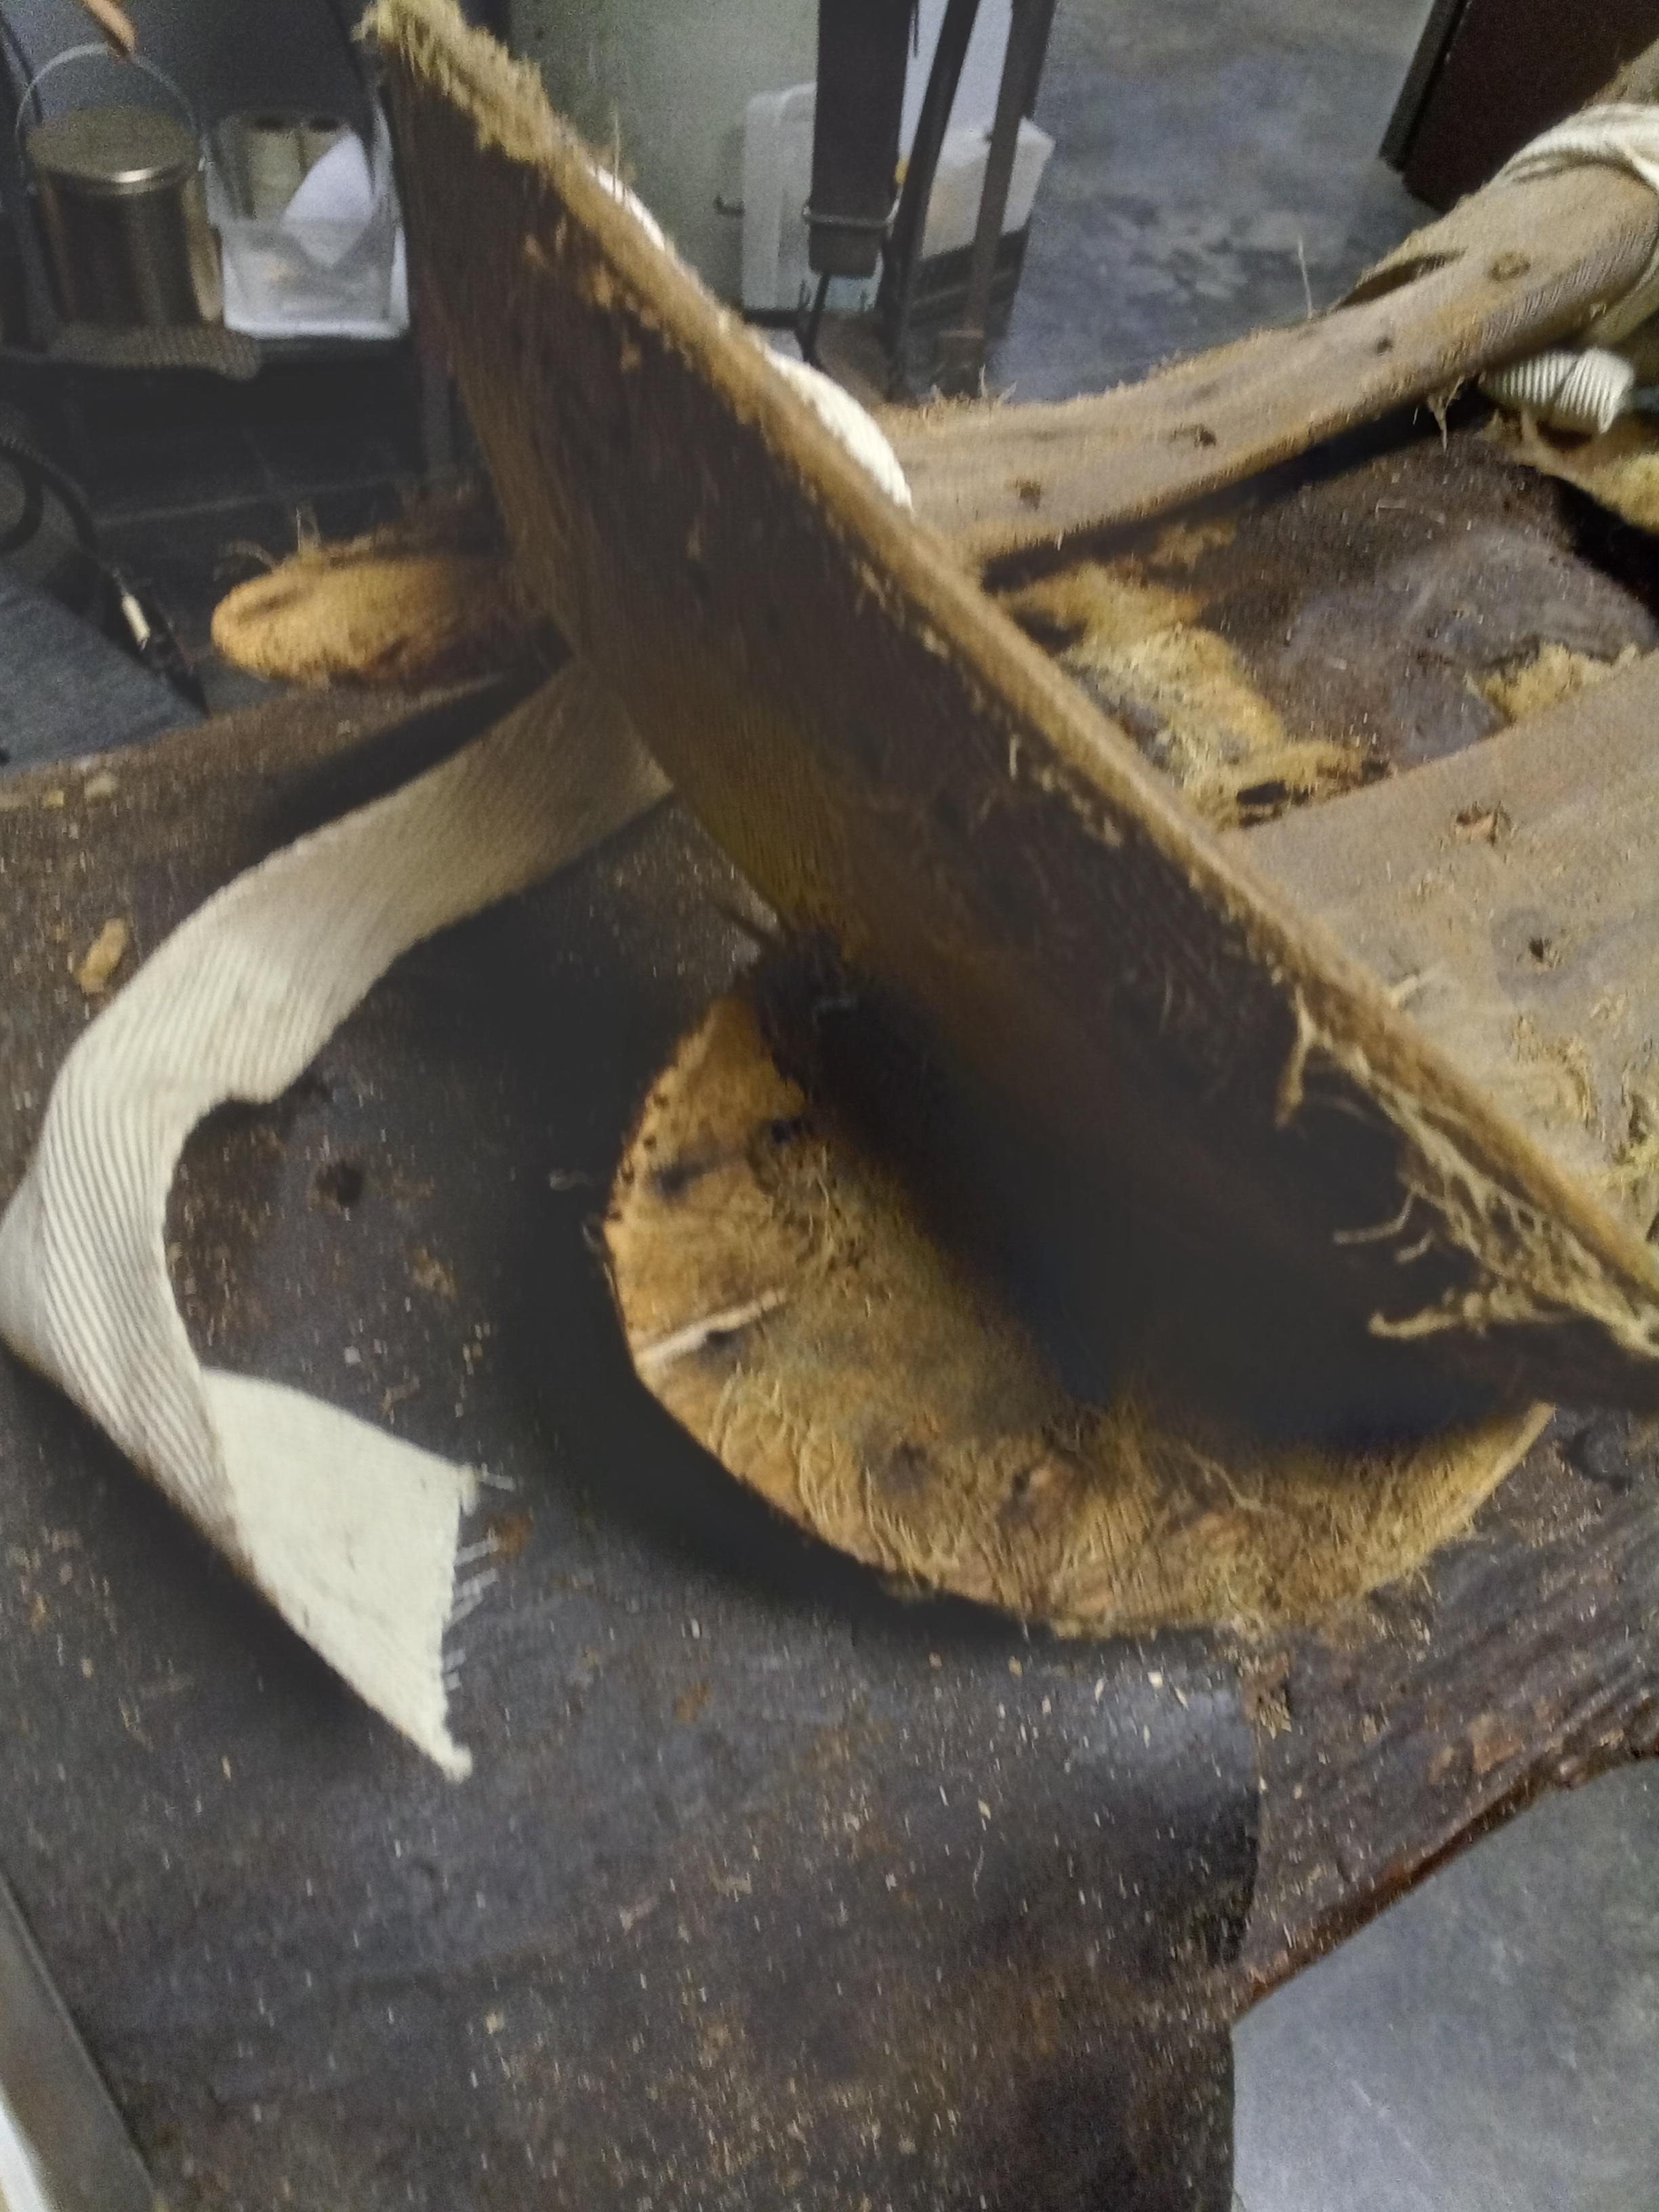
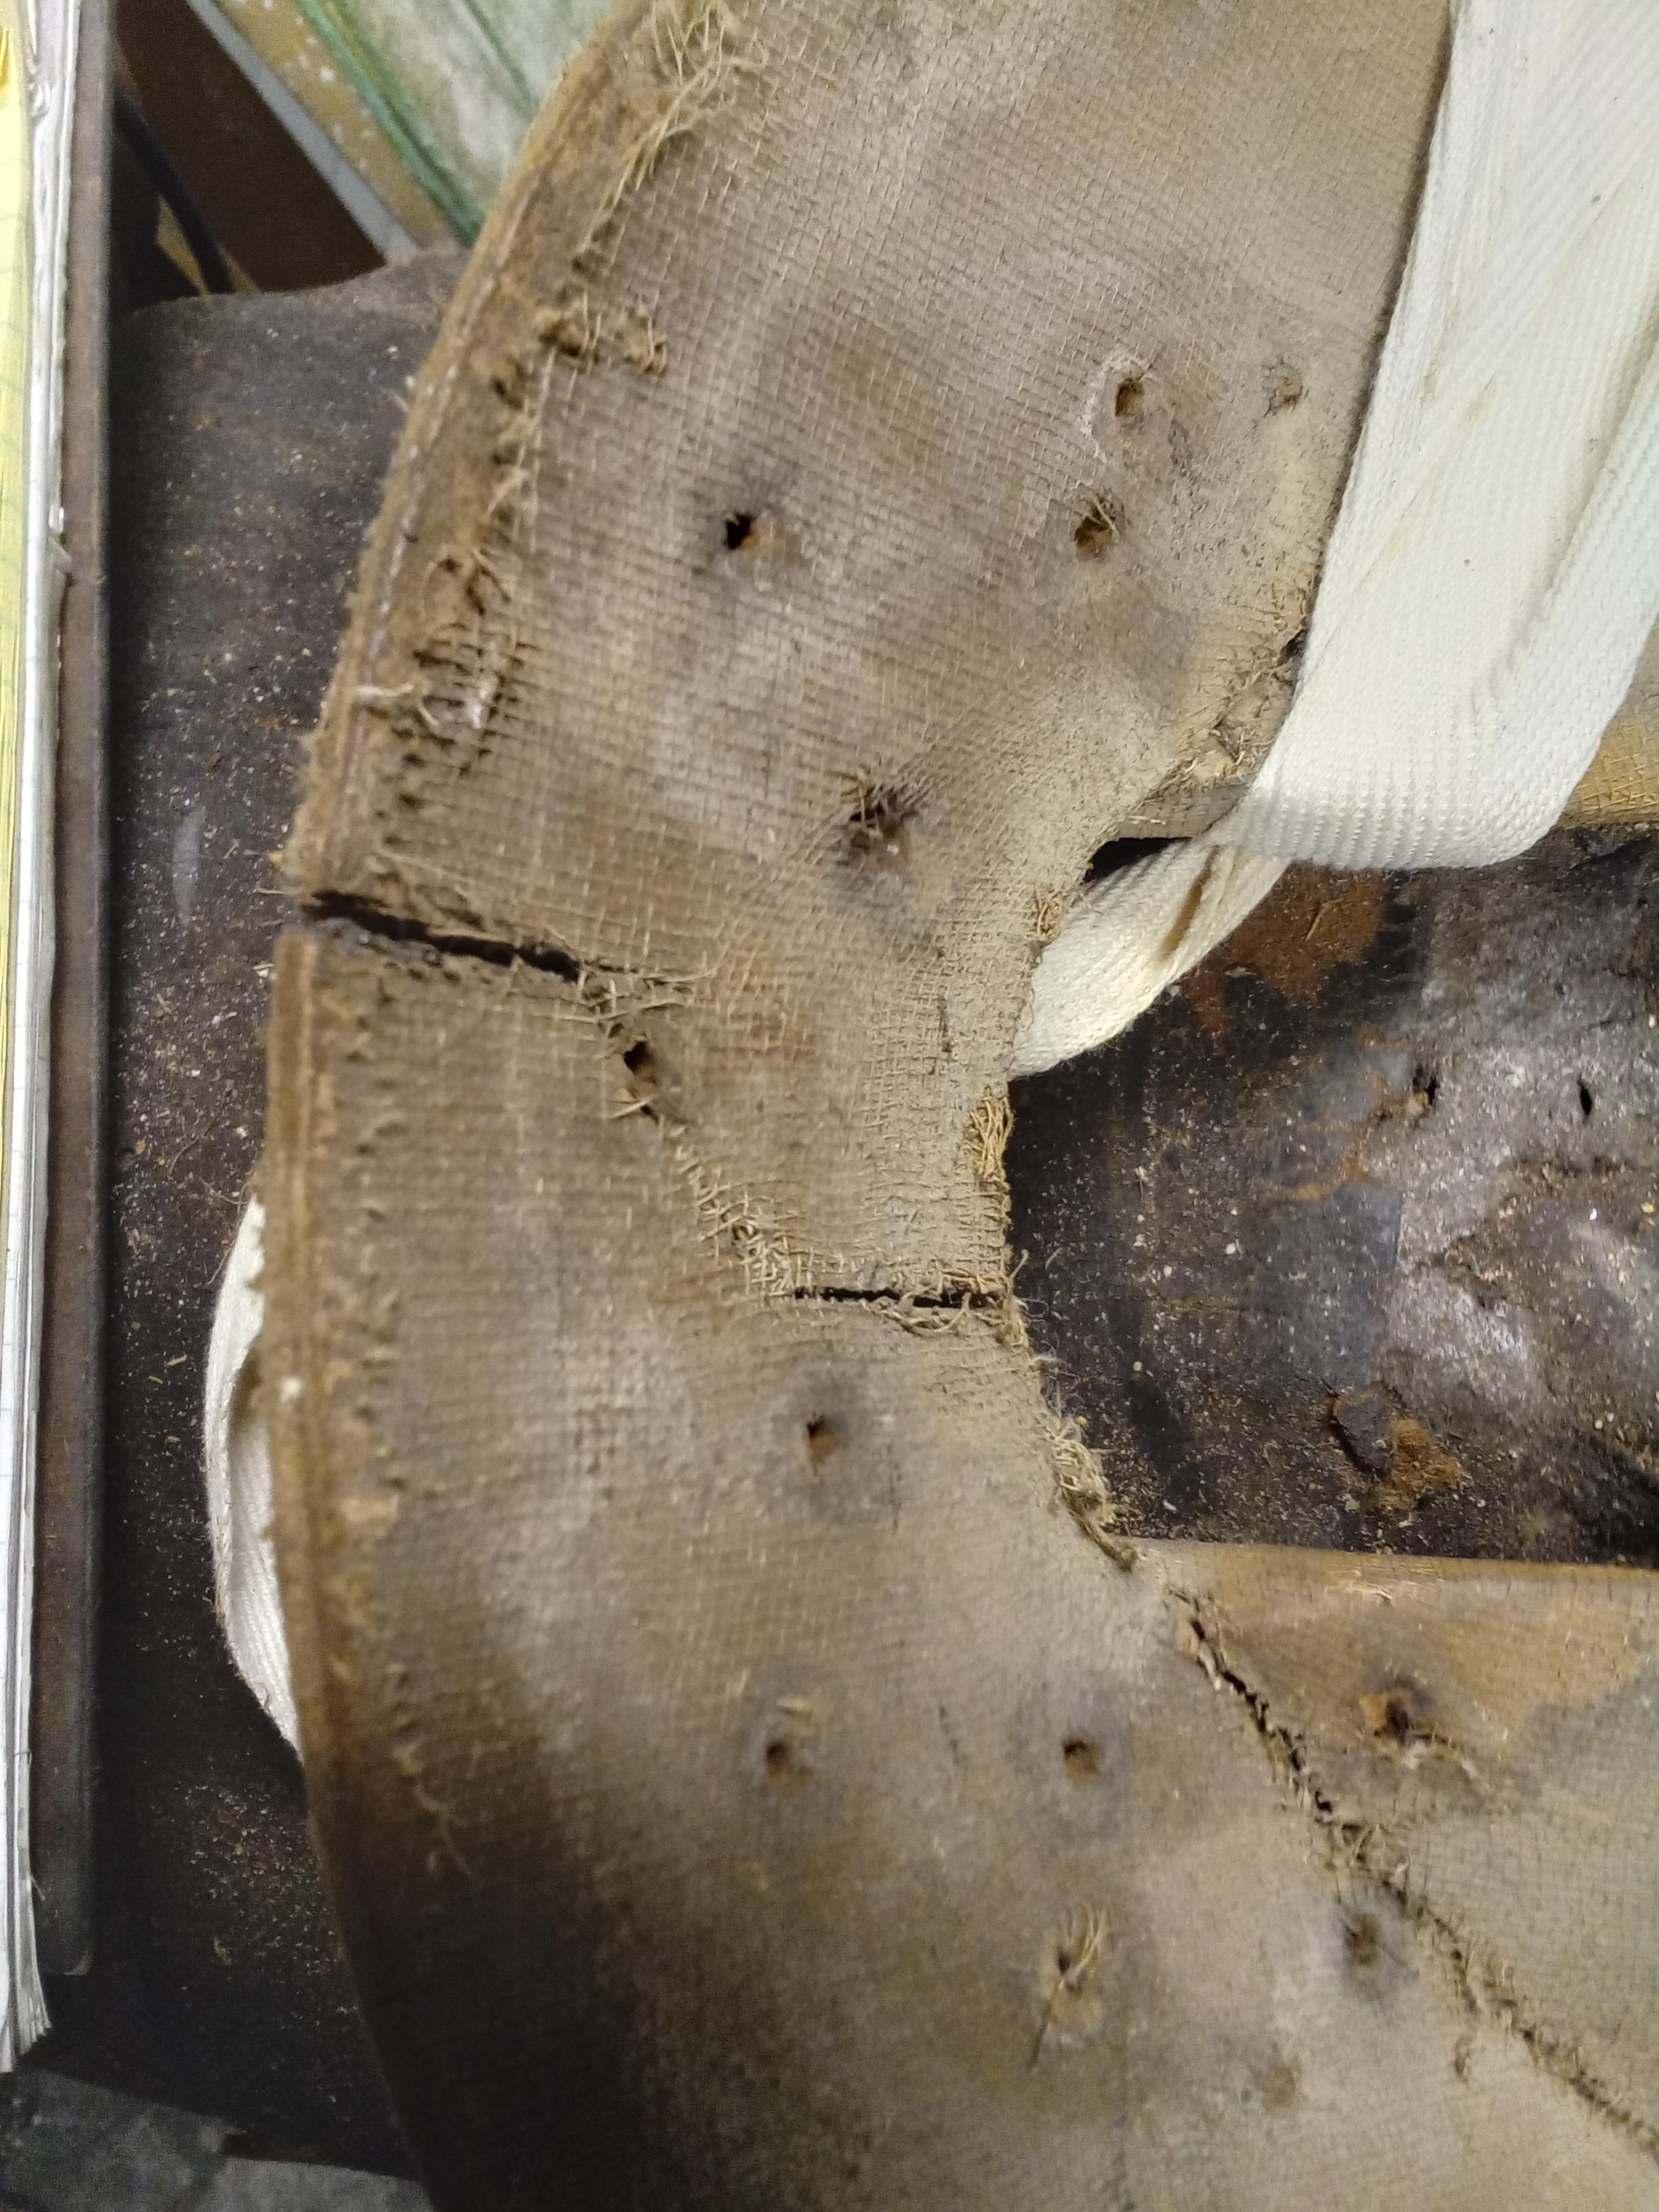
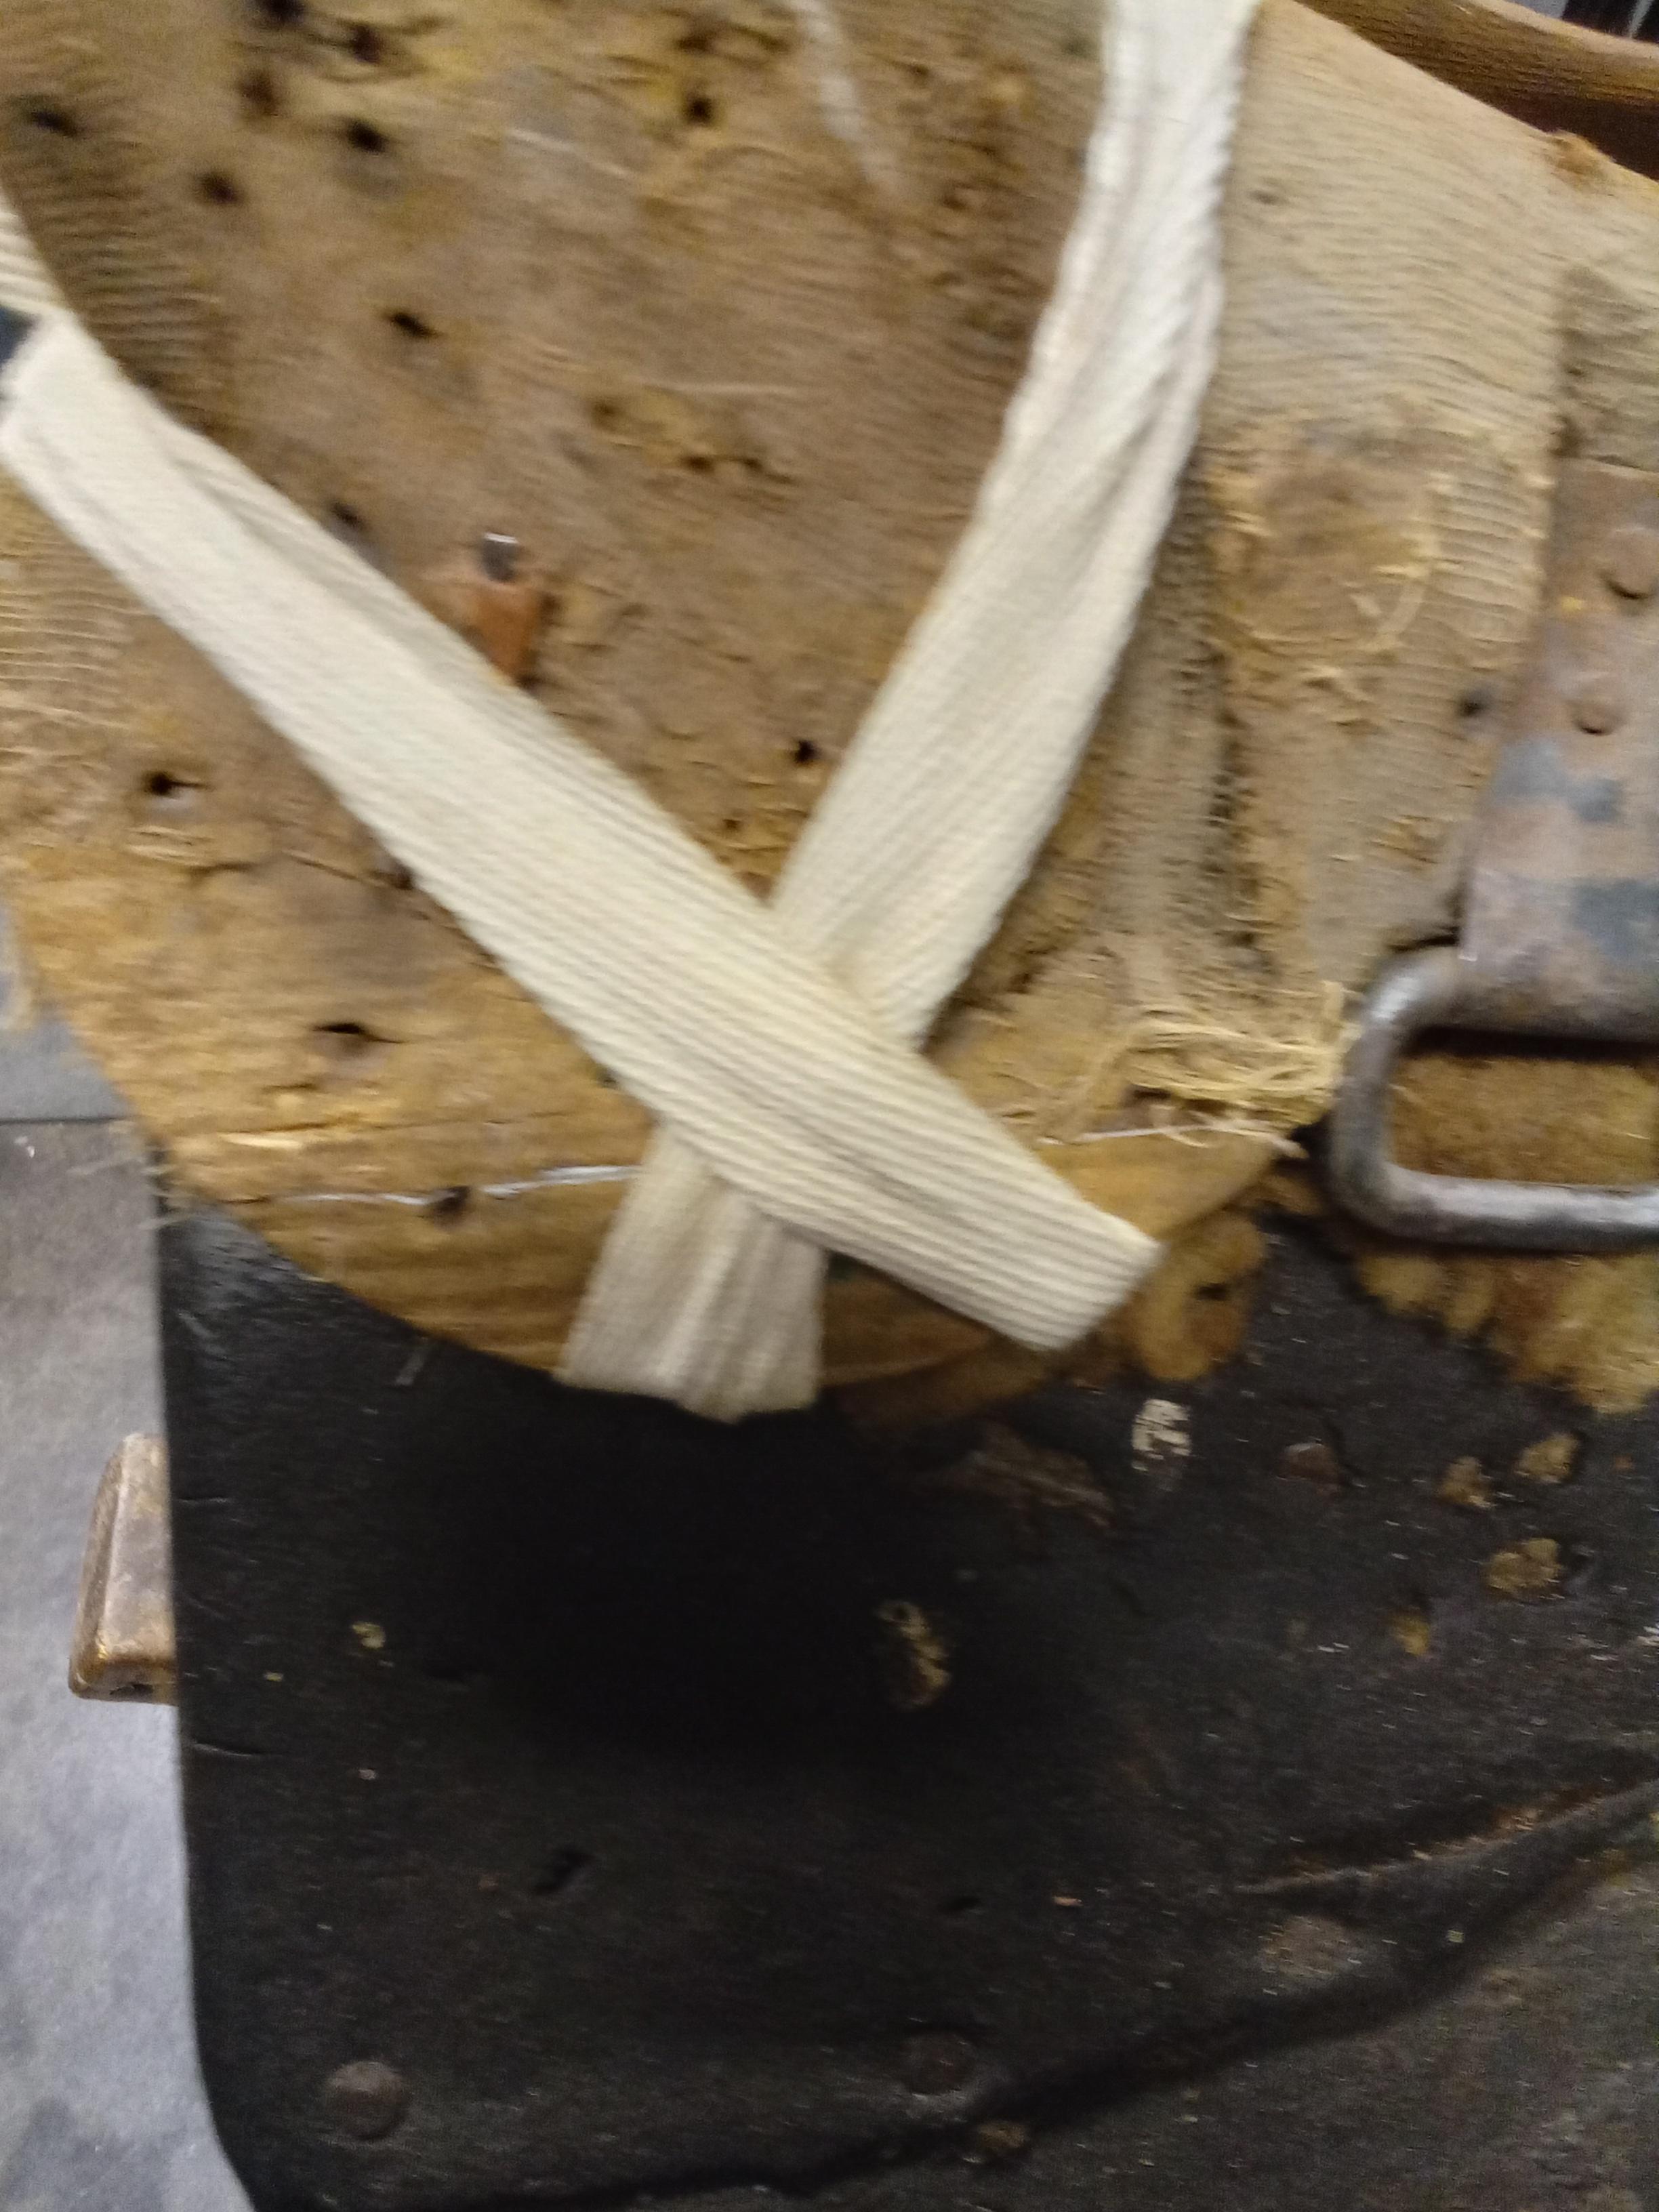
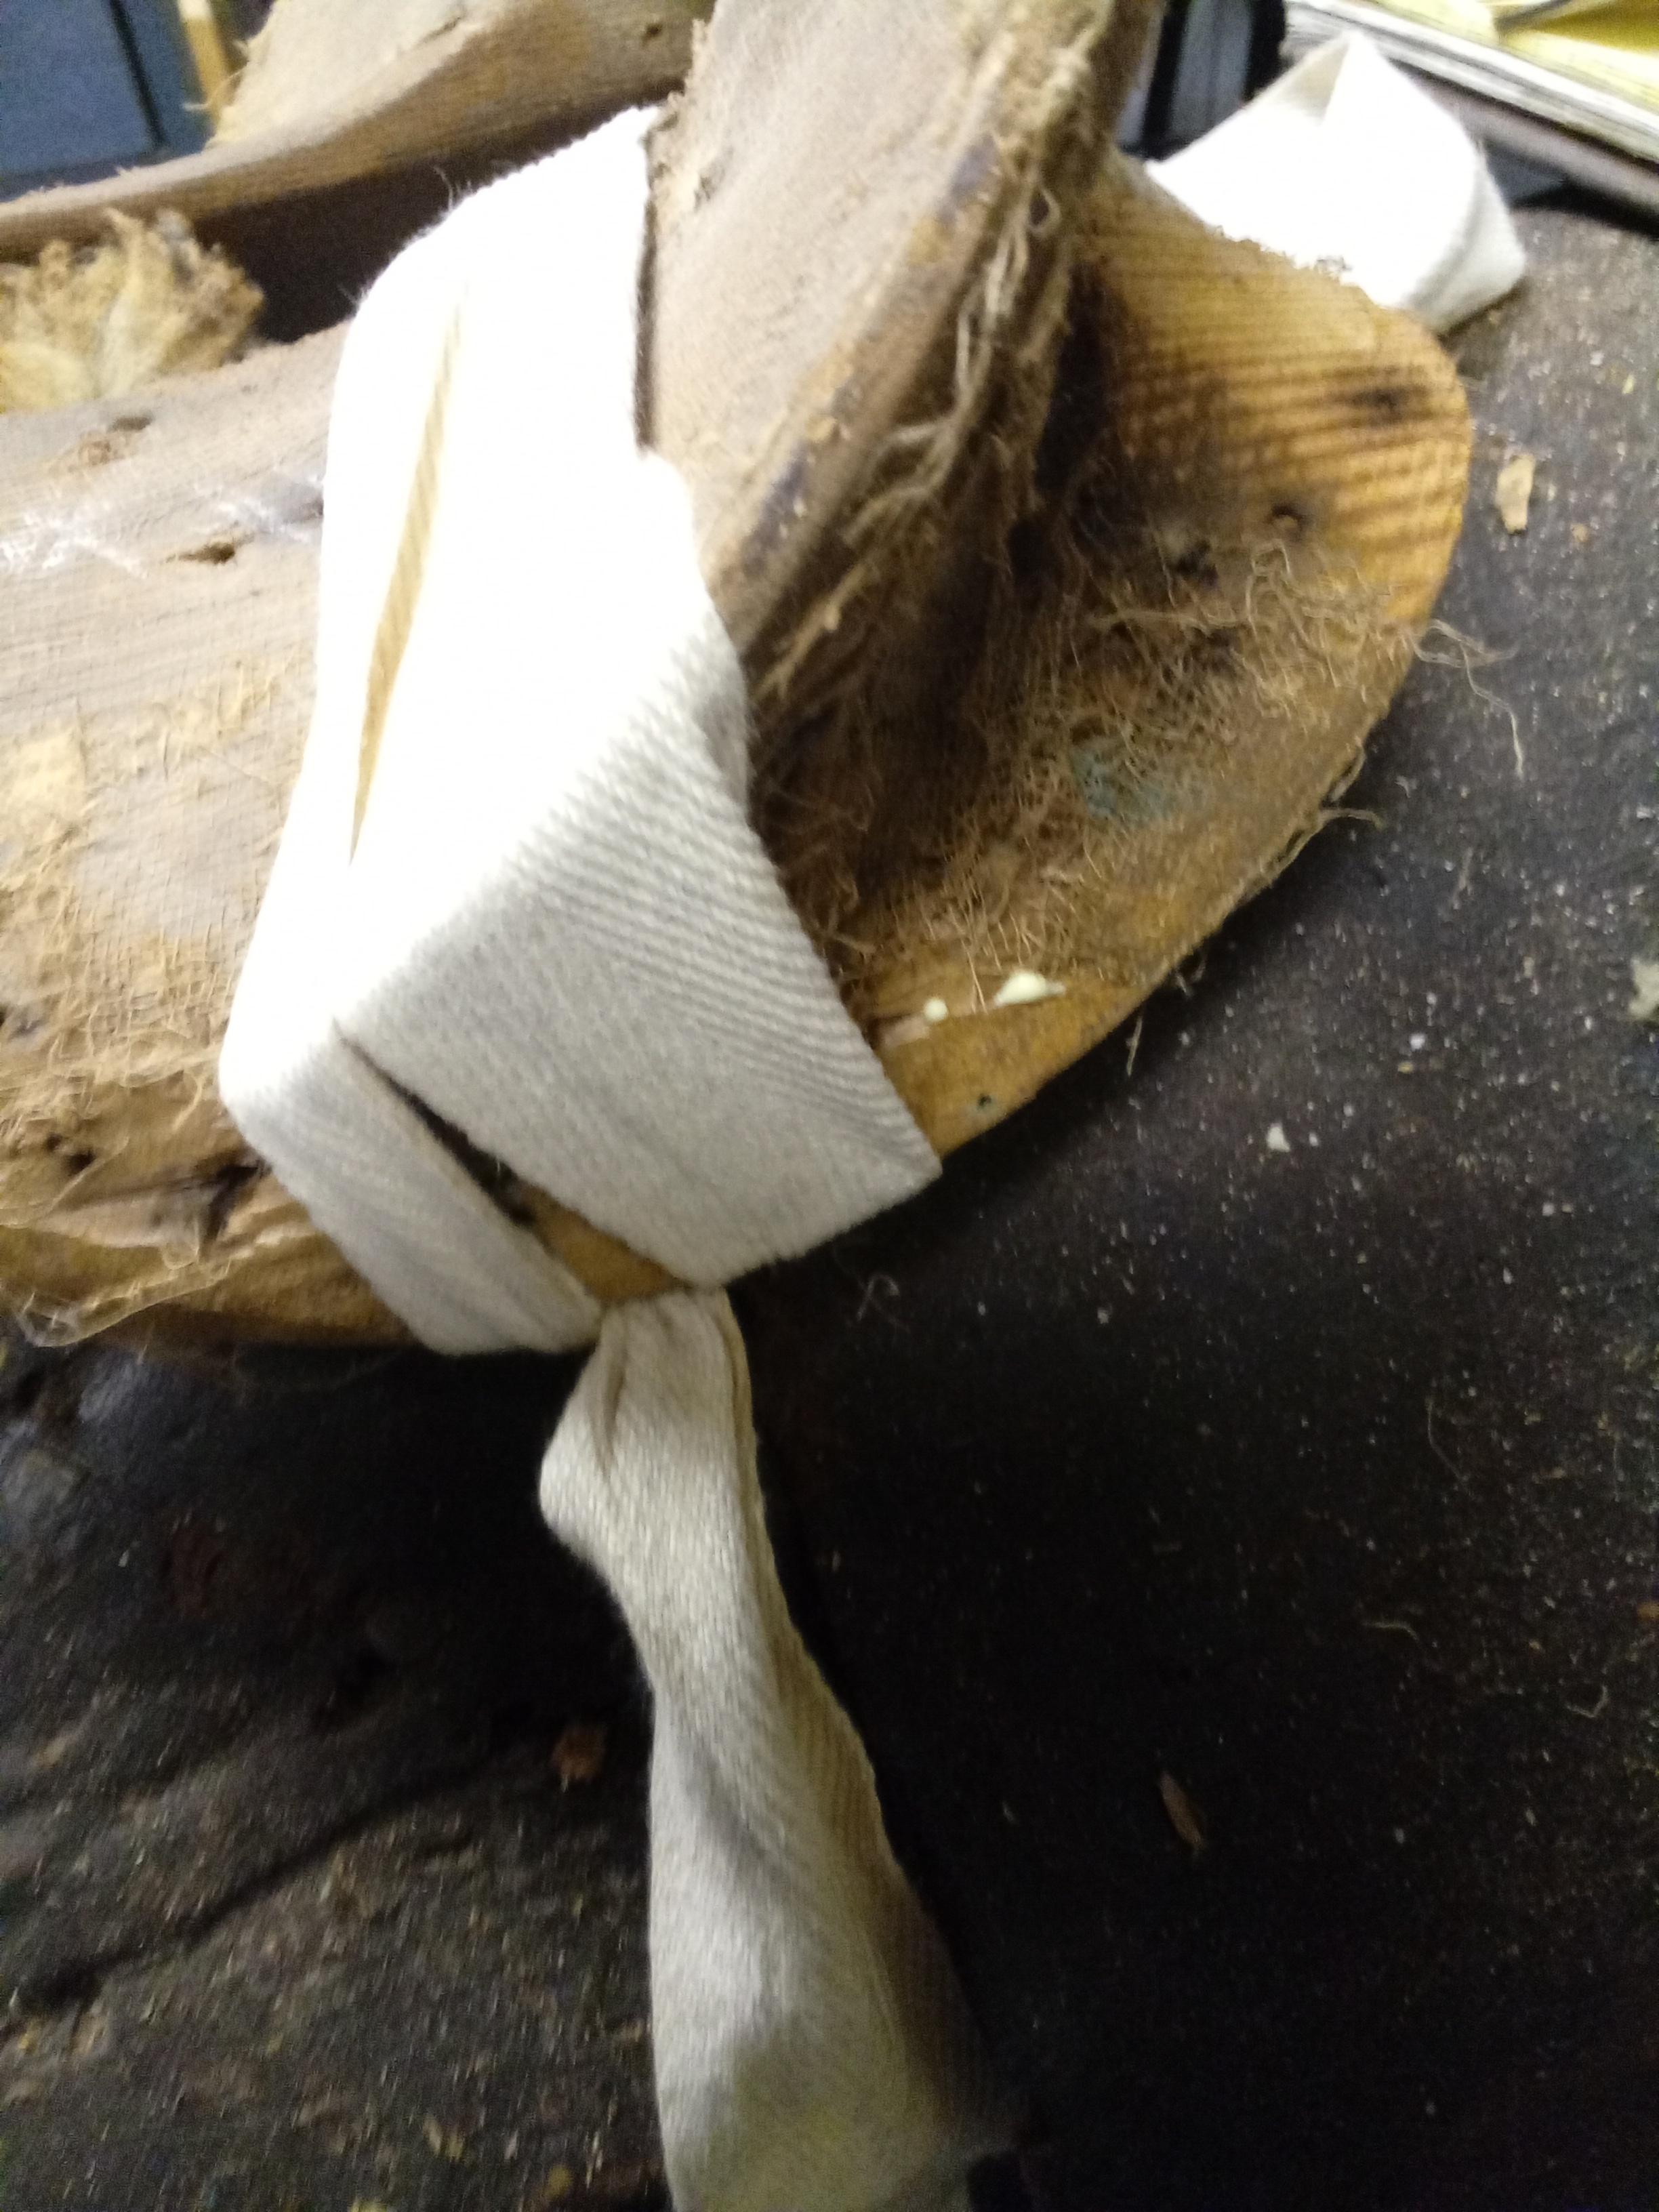
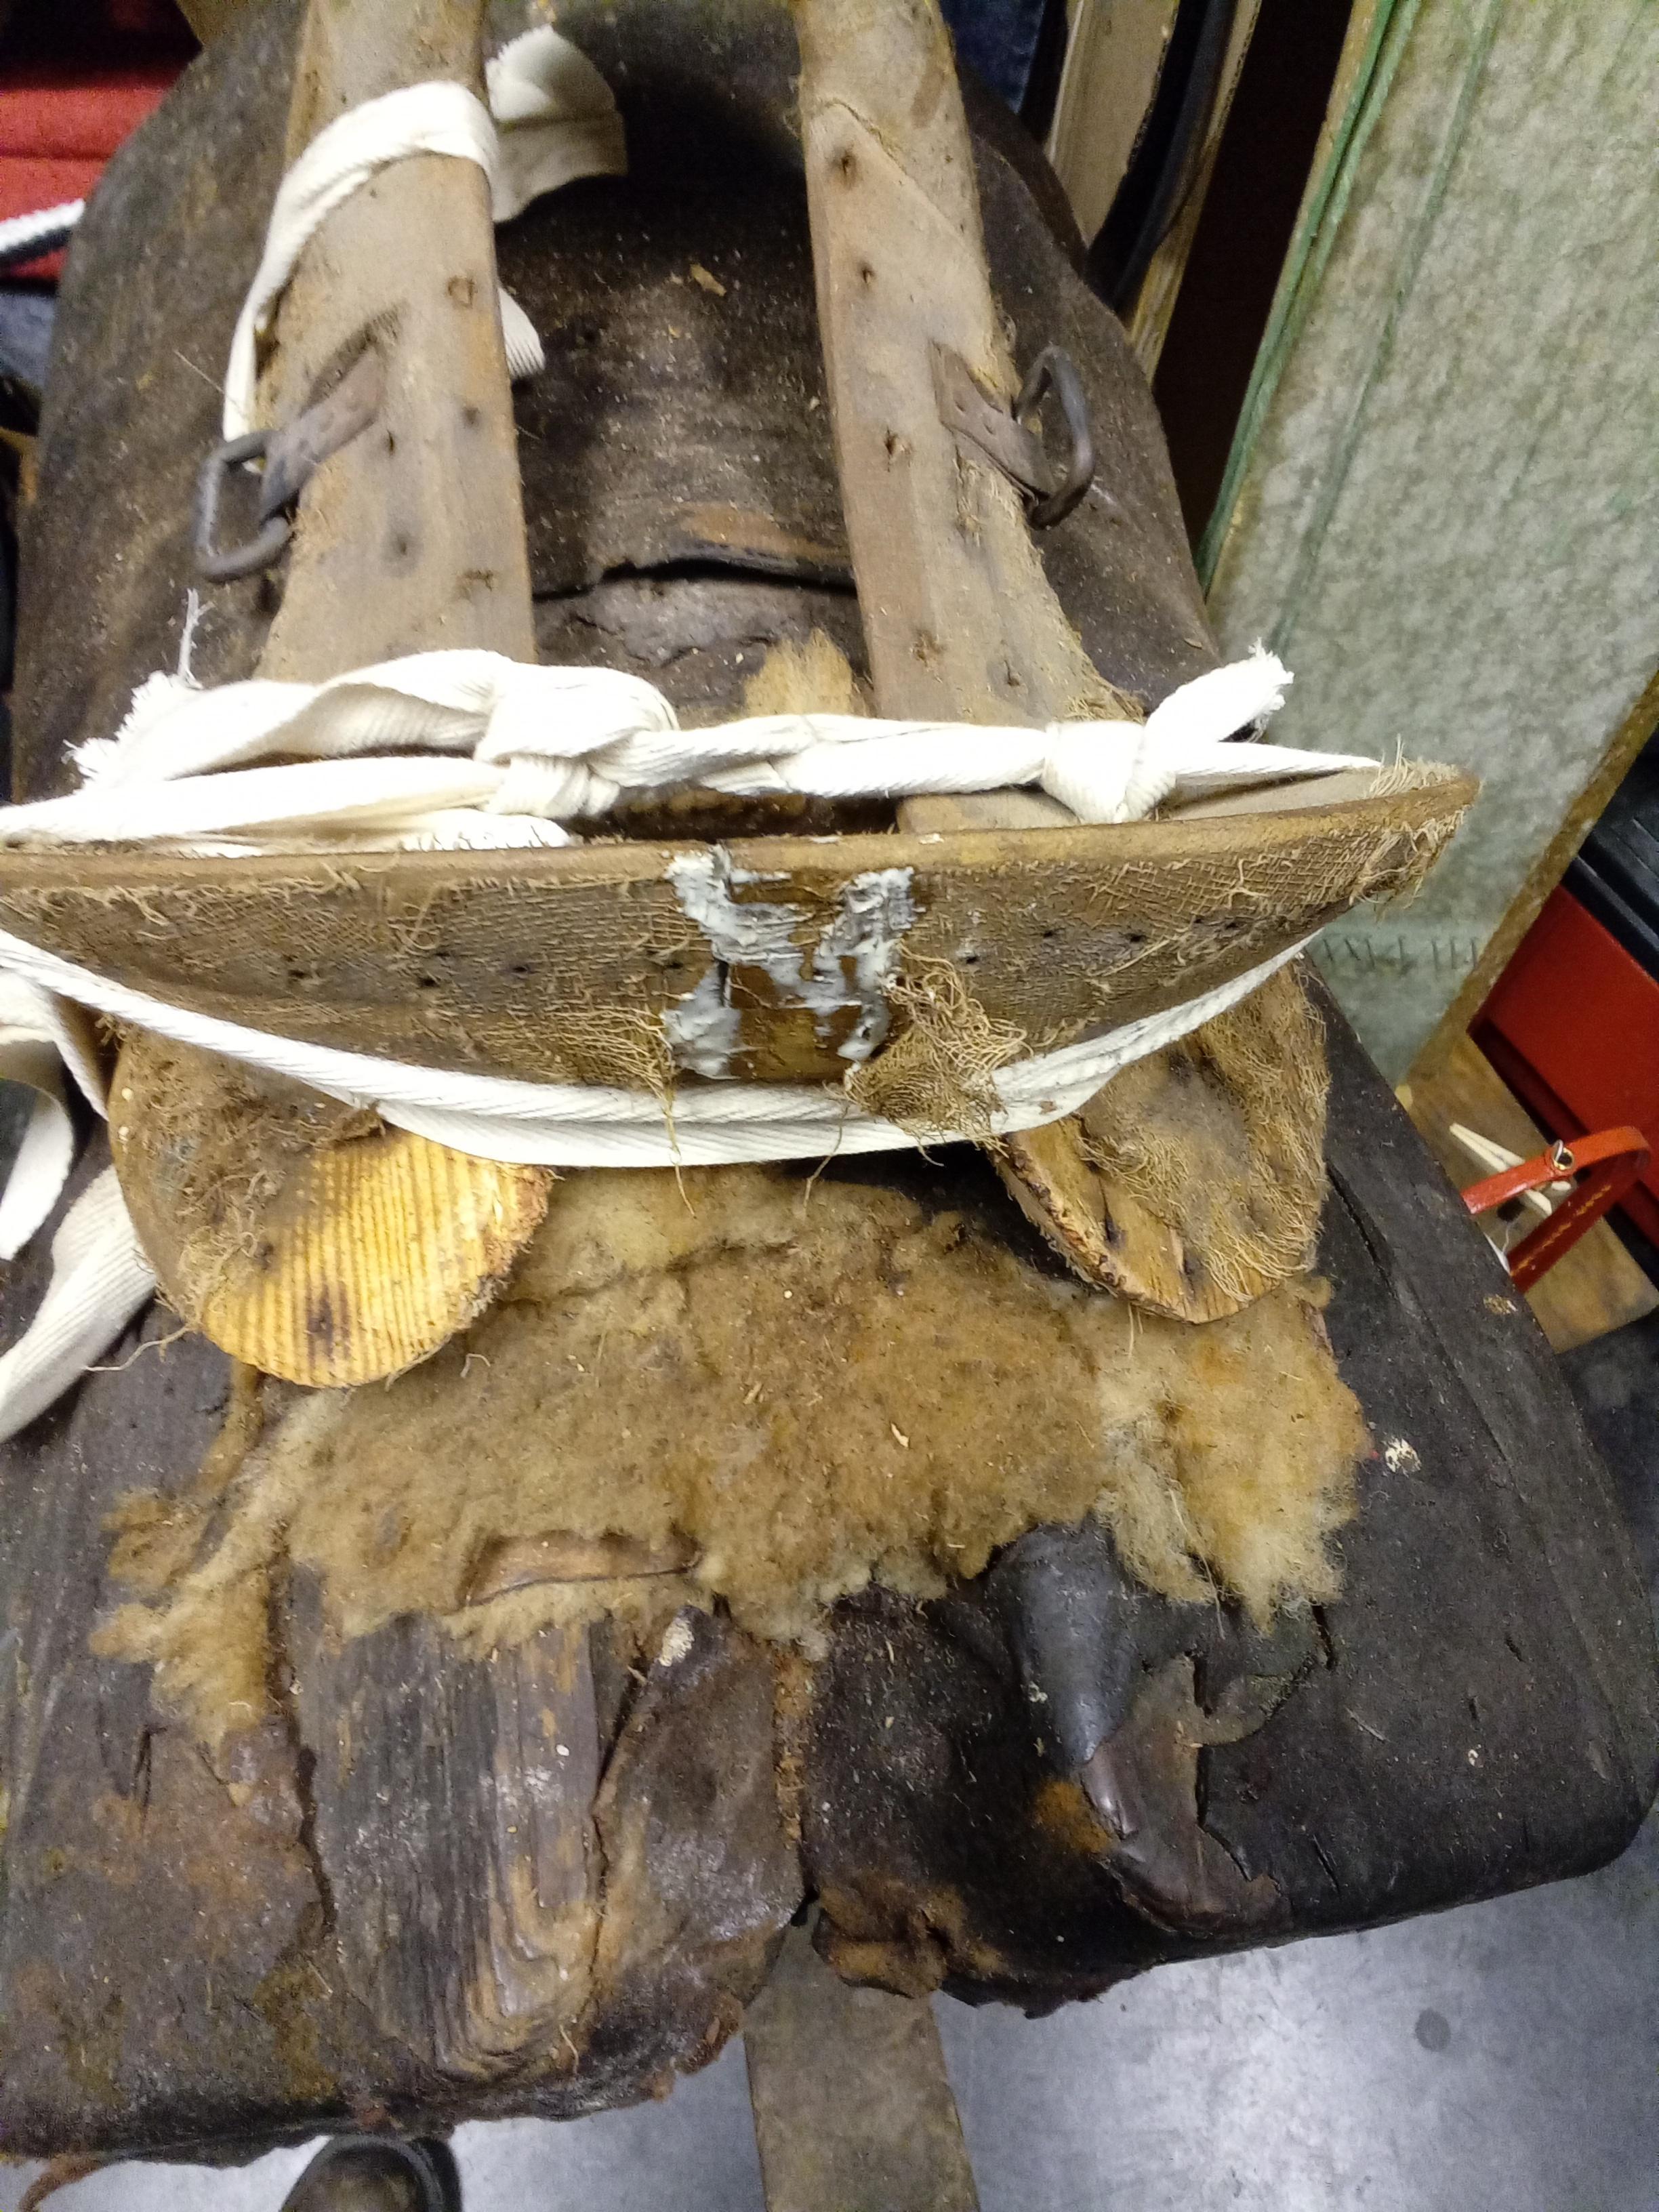
OK, it's stripped down to the bare tree. In addition to filling all the holes and fairing the joints before rewrapping and varnishing the cheese cloth covering, the bottom ears of one of the bars were broken off. It looks like it wasn't rot or stress, but they just had too many tacks over the years and had gotten weak. One was clearly an old break as it had several long tacks and an old sewing needle driven into it to hold it on (all pulled out). I'm gluing these back together, as well as a joint in the middle of the cantle that had a little movement. There isn't really an easy way to clamp them, so I tied them into place with cotton webbing. Here's the tree's measurements: Front bar width = 9" Rear bar width = 10" Front gullet width = 3" Rear gullet width = 2 1/2" Bar length from back of cantle = 1 1/2" Gullet height at swells = 5" Cantle width = 10 3/8" Cantle height = 2 1/2" Seat length = 11" Yep, it's an 11" seat. A little thing. I'm still looking through books to try and find more info on this tree, other than it has Slick Fork swells. The iron horn is nailed on and not screwed or bolted to the swell. That, it's small size, and the general light duty construction make me think this saddle was only meant to be used by small children on docile horses or pony's and was not built for any work or sport, or that it's only a display piece. The square rings nailed to the bars I'm not seeing in my books so far. What's their purpose? Are they for the sturip leathers, or part of the rigging? The metal tabs are recessed into the bars like it was designed for them.


-
It's been a little while since I've researched the CC rules here in Texas. I seem to remember rules changing a few years ago, but whatever the rules are I want to make a point to follow them. I've been around firearms my whole life, but for sure want to take a course before I start packing. In regards to an ankle holster, I should add I wear high top boots too (Red Wing Pecos or similar pull-on) with the jeans over the top. Just putting the pistol in my pocket might be a good simple option.
-
I don't have a CCL yet but have thought about getting one. As silly as it is, my biggest hold-up has been "how" I could even do it. My typical dress is blue-jeans and a button-up shirt with a T-shirt under that, but I always tuck my shirt and wear rigid leather suspenders and a leather belt to hold a Leatherman and flashlight sheath, so waste holsters are almost a non-starter unless I go way up on my waste size. I've thought about doing a breast/under-arm rig under my button up shirt, and then I would just need to pop a couple buttons to get to it. I'm not looking for a quick-draw solution, and think having a couple seconds to consider my situation as a benefit. I know training with whatever set-up I go with is imperative. I bought an elastic pocket harness to try out, but found that it would need some modification to fit whatever pistol I used (two candidates are a little 25APC blow-back pistol, or an old 32S&W top break revolver), and it was hot having a big wide strap of elastic around my chest. I'm interested in building something out of leather, thinking it could be made to fit better and have less contact area producing less sweat, but am curious if anyone else has run into a similar case, or if there were any existing designs I could take some inspiration from. I've got a friend who uses a belt case that looks like some kind of big cellphone wallet that's another possibility.
-
I have 3 of the old Atco Cement Keepers and want to get new brushes in a couple. I've heard that Atco is no longer making them, or at least not here in the states, and the new ones that are available (from various suppliers) have a different screw thread holding the brush onto the wand, and consequently the new replacement brushes are also a different thread. Has any one else had an issue finding brushes to fit their old cement pots, or is it a matter of who you buy them from, who has old stock, etc.? They're not expensive, but I wanted to ask before I have to make modifications to make stuff fit. I had one pot that was missing the top cone/wand, and I copied an existing one to make a replacement on the lathe (not a prudent thing. Just want to keep Dad's old tools kicking around), and when I did I found that the threads were 1/4-28. None of the sources I've seen list the thread size, but I've seen some pictures of replacement brushes that looked like they had a course thread, like a 1/4-20.
-
I agree with Cumberland above. Any working machine is better than nothing, but from a support and safety perspective, those old Model C's have major drawbacks. All clickers, regardless of if they work or have parts available to buy, are a bear to move. Their weight and tendency to tip over and cause damage when not properly moved, mean that they're not really a machine that's cheap/easy to swap out if it doesn't work for your needs, so it's something to consider when you make a purchase.
-
Albeko 83S splitting machine band knife size?
mbnaegle replied to snisson's topic in Leather Machinery
Yep, they're out of business. Scrapped a few Albeco machines in the last 20 years just cause there was no support. I think, If I'm reading my notes right, they take a 3350mm blade. I think it's actually the same as one of the Sagitta splitters (part 6.4264.37, but don't have the model written down). Not sure if it's available either. -
Anyone looking at these old "square neck" Fortuna skivers, my experience has been that they're a good basic skiver when running, but most parts are no longer available from Fortuna. They use the same blade, feet, and grind stone, some use the same feed rollers, and work plates as newer models (but many I've seen the feed roller is specific to these machines). They use leather belts that must be spliced together on the machine (can't use modern continuous belts), and most of the bearings are oddball open-face bearings that don't match modern cartridge bearings. If you need parts other than basic expendable stuff, you might find a company with old stock inventory, but I wouldn't invest much into one of these, at least not from a practical/fiscal approach. Fortuna didn't have hard set generational transitions on their machines, but IN GENERAL, I'd consider all of the old square neck Fortuna skivers obsolete, while most the newer round neck skivers are typically serviceable. The newest Fortuna skivers are white and are a whole-nother animal.
-
Some Fortuna and Italian skiver grind stones were/are hub-less, using a separate reusable nut and spacer, but some use a stone that has an epoxied aluminum hub that comes from the factory as one part. Both work fine and most of the time you can use either one on many machines (handy if you have an older skiver that someone lost the nut or spacer), and companies selling expendable skiver parts should have both, just tell them you need the stone with the aluminum center. I don't think the stone ID's are the same though and I wouldn't bother trying to glue a new stone onto an old hub. All of these wheels use the same left hand threads so they don't come apart when spinning, and most grinder spindles have a slot, hex socket, or a grip-able knurl on the bottom side of the pulley below the grinding wheel to hold it with, and you should only need to hand tighten the stone end when putting them together. If it's locked up, you might have to break the stone (you're halfway there!) and get some pliers on the hub.
-
For that style of main shaft, the brass piece is supposed to thread onto a steel sleeve inside of it. If the brass is turning but the steel isn't moving side to side, I expect the brass part is stripped. I see it has a Consew tag? I believe those skivers were made by Taking in Taiwan. I'm not sure who sells part for them. The design is very similar to old old Fortuna skivers, but I don't think the parts will interchange.