-
Posts
76 -
Joined
-
Last visited
Content Type
Profiles
Forums
Events
Blogs
Gallery
Store
Everything posted by MagiKelly
-

Refillable Leather Book / Journal Tutorial (Loads Of Pictures)
MagiKelly replied to MagiKelly's topic in How Do I Do That?
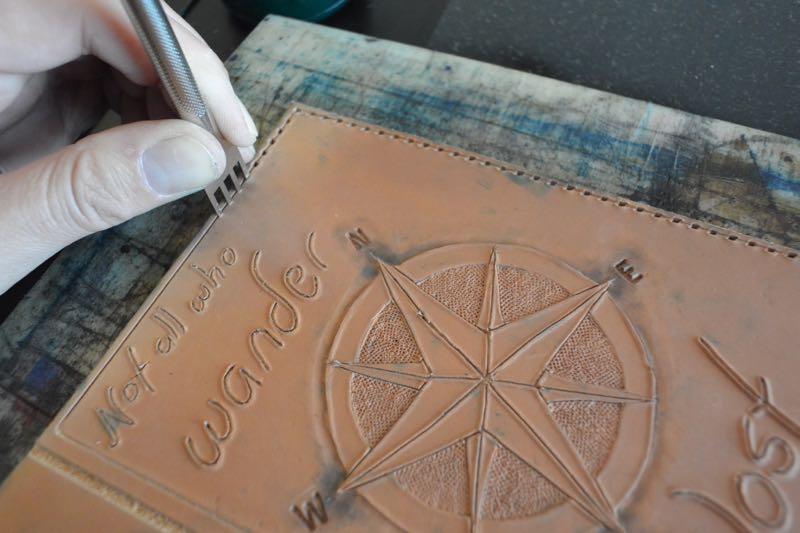
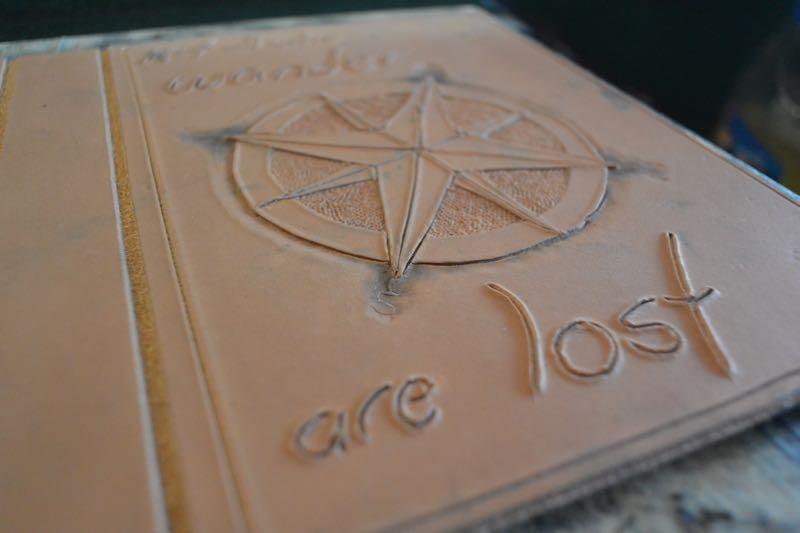
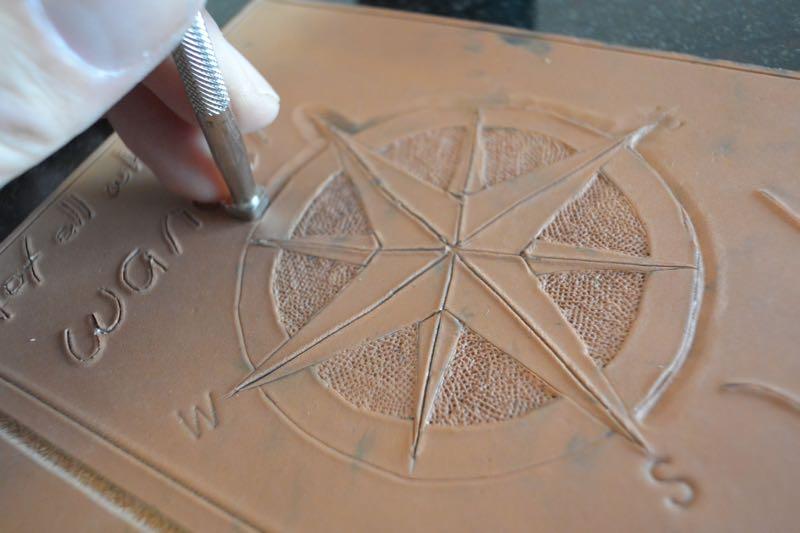
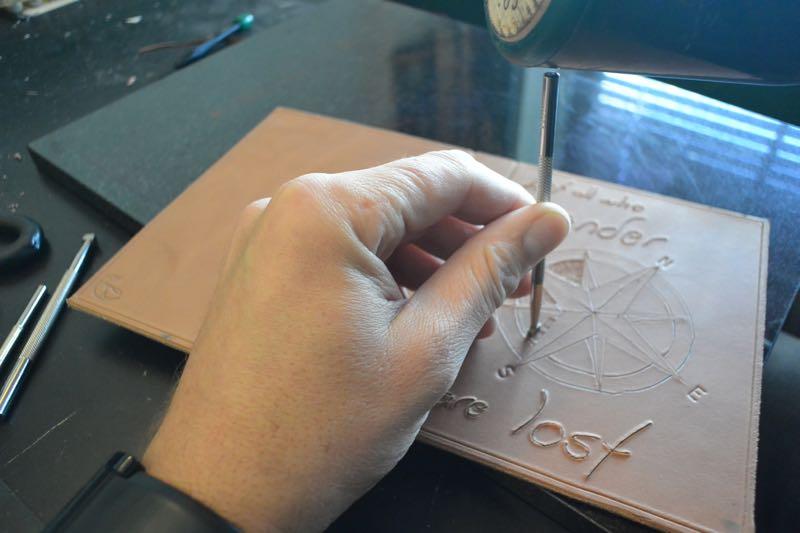
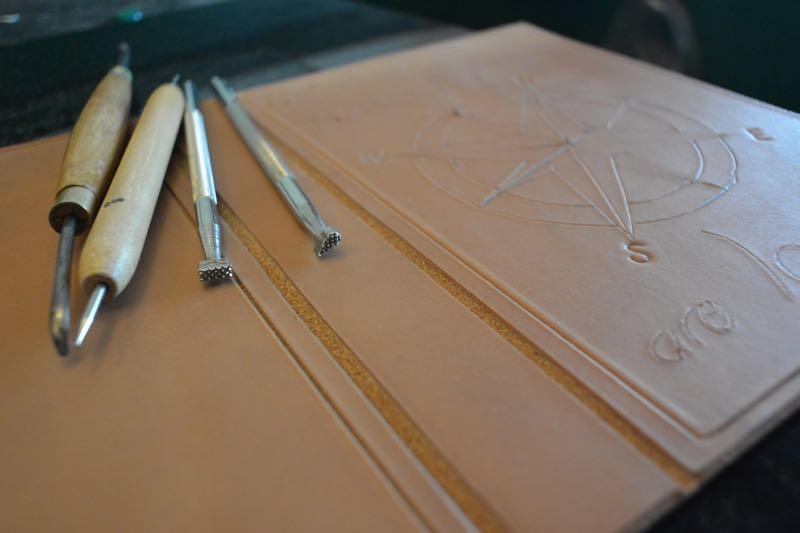
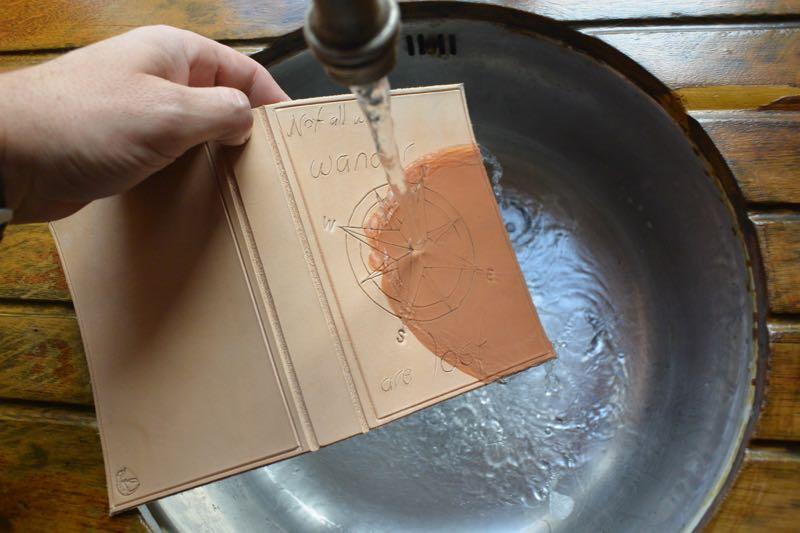
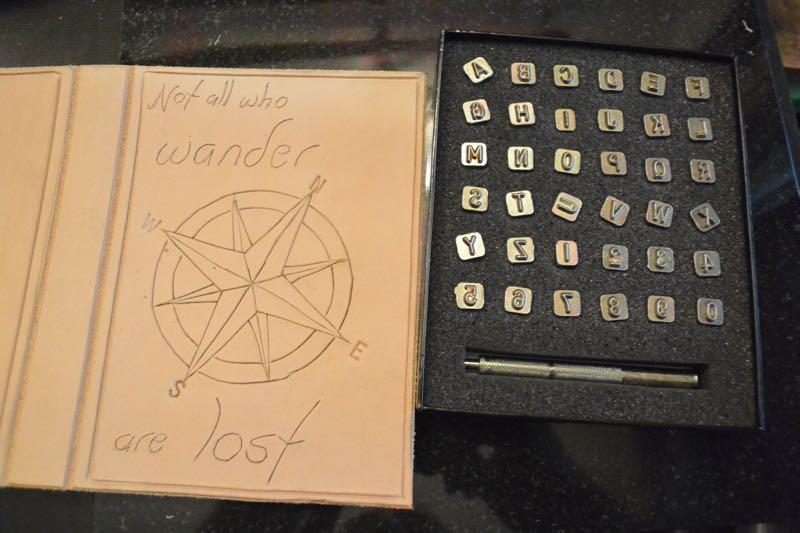
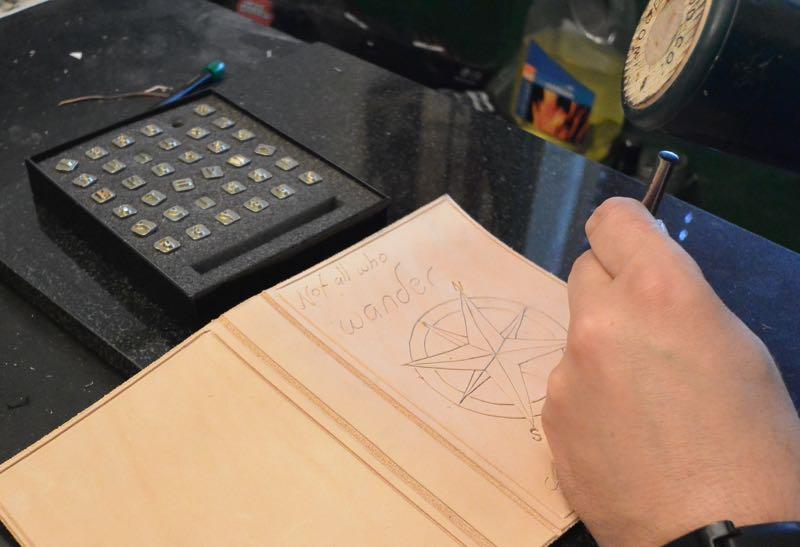
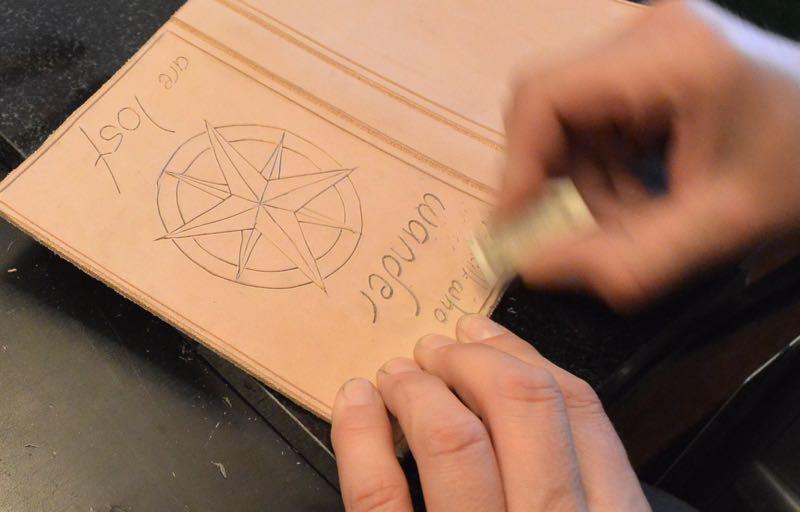
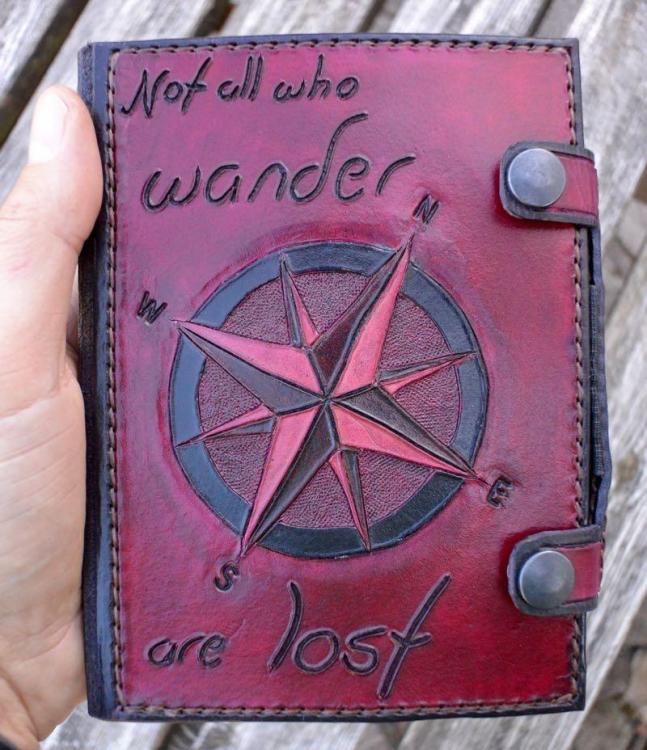
and here we have the front cover with the design all cut. Ready to get wet and carve . If that fills you with horror remember that you could just dye the whole thing one colour at the this stage and it would still look good. But I have complete confidence in you that you can shape the cover to really bring out the design. If I can do it you certainly can. Before I wet the cover I stamp the letters for the points of the compass. For this I use letter and number stamps I have. And again, I do it dry. Now it is time to wet the cover. I use warm water for this. How wet you get the leather and how long you leave it will be something you get a feel for. If it is too wet it will not take the impression as well and will tend to spring back. Again don't worry about this. As it dries out you just keep going and it will take. I do not do any fancy carving. I am pretty much limited to knocking back with textured background tools and sloping the leather in to lines in the pattern (again there is certainly a technical term for this that is escaping me). The good news is this means you do not need a lot of tools. You could pretty much get by with a stylus or blunt knife. I start near the centre of the pattern knocking back the areas in the back of the compass. Take your time. There is really no rush in this. Often taking a break and coming back to it you will find you make better progress. Usually because the leather is a bit drier. There is no real work to be done to the letters I have cut but I open these up with a stylus. A dry pen would work just as well. This helps when it comes to colouring them and makes them stand out more. Next I bevel the edge down to the compass to make the compass stand out. I am using the tool for this in the picture but often times I find a flat stylus good for this to shape the leather. In the process of bevelling the edge under the compass I have wiped out the letters for the points of the compass. I re-stamp the letters and mark out the stitching. I use the pricking fork for this but a real life eating fork would do. I used to use the stitch marking wheel for this but did not find it gave as strong a mark. Doing this while the leather is wet gives you really clear marks for every stitch. Take a big sigh of relief. You are done with shaping and stamping. -

Refillable Leather Book / Journal Tutorial (Loads Of Pictures)
MagiKelly replied to MagiKelly's topic in How Do I Do That?
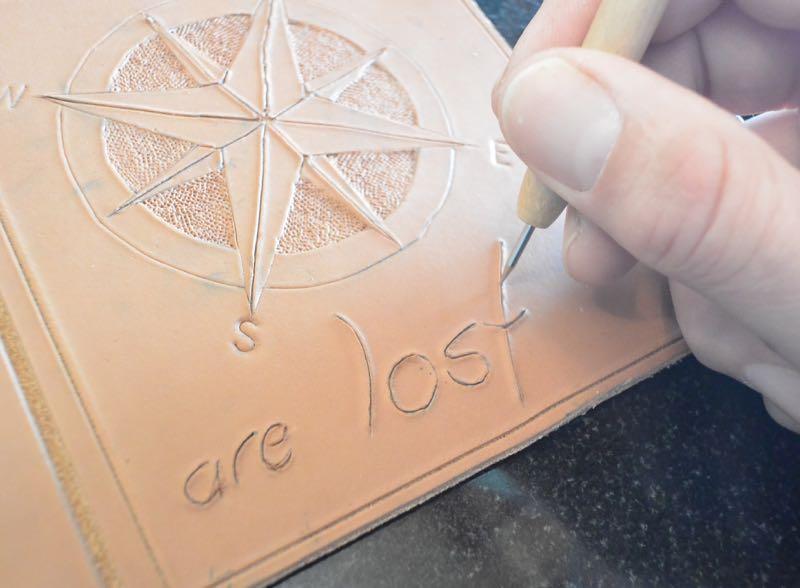
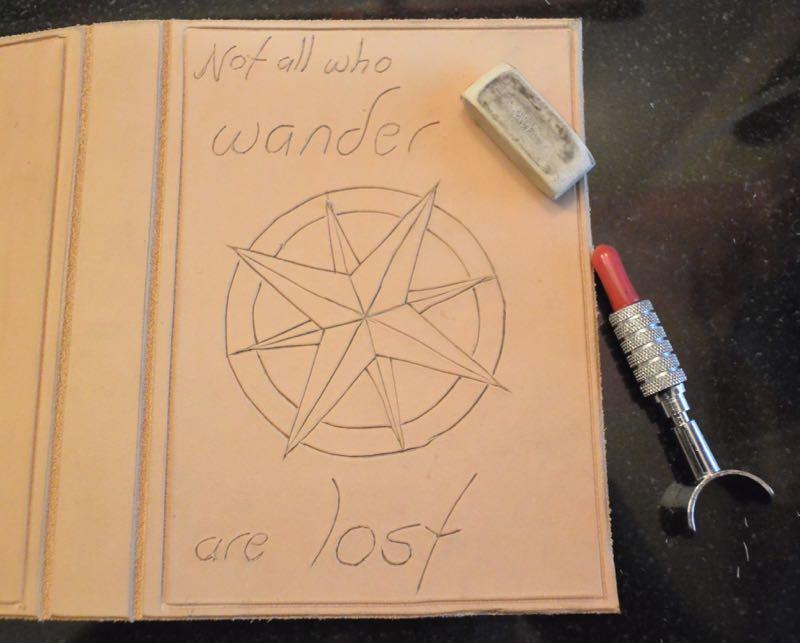
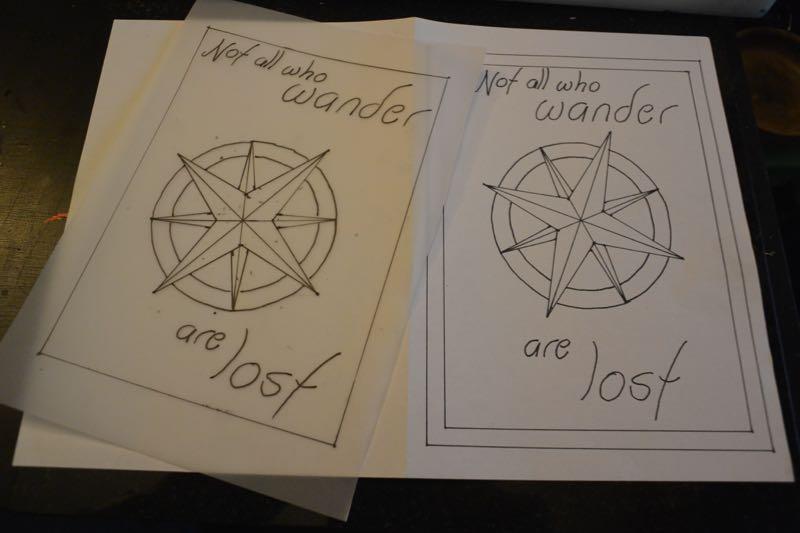
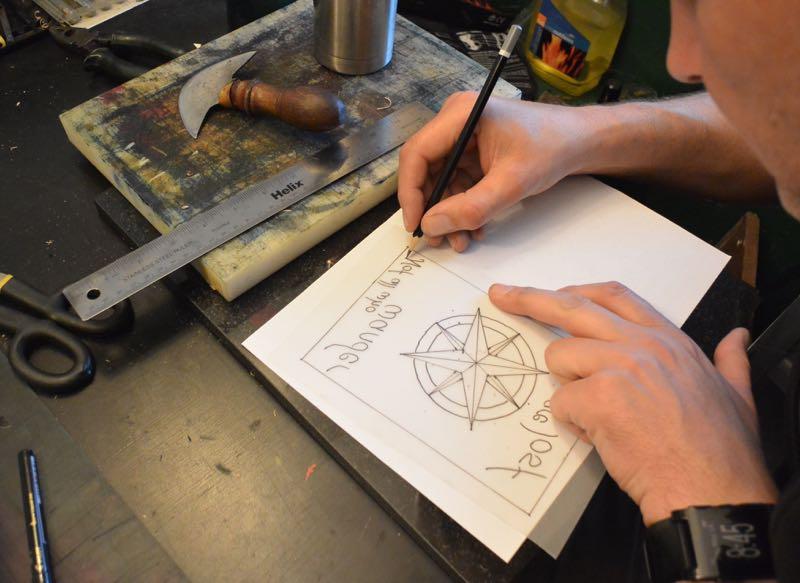
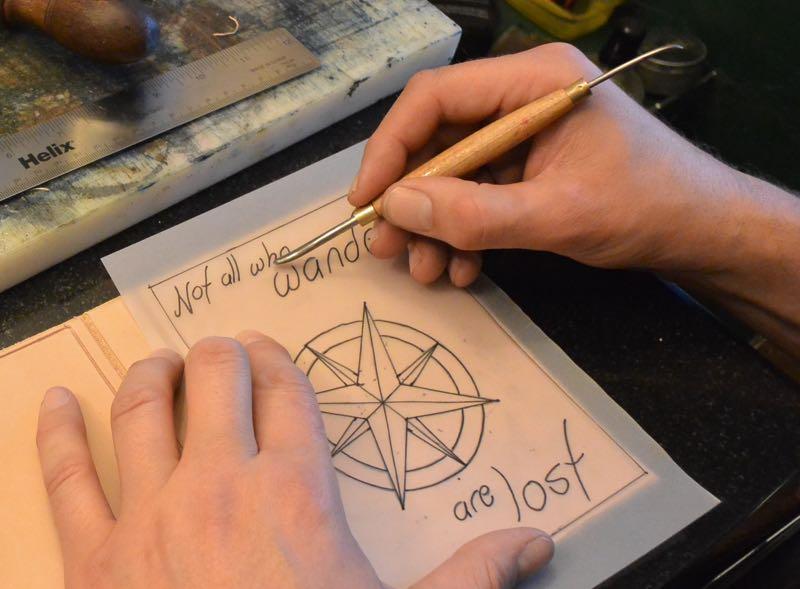
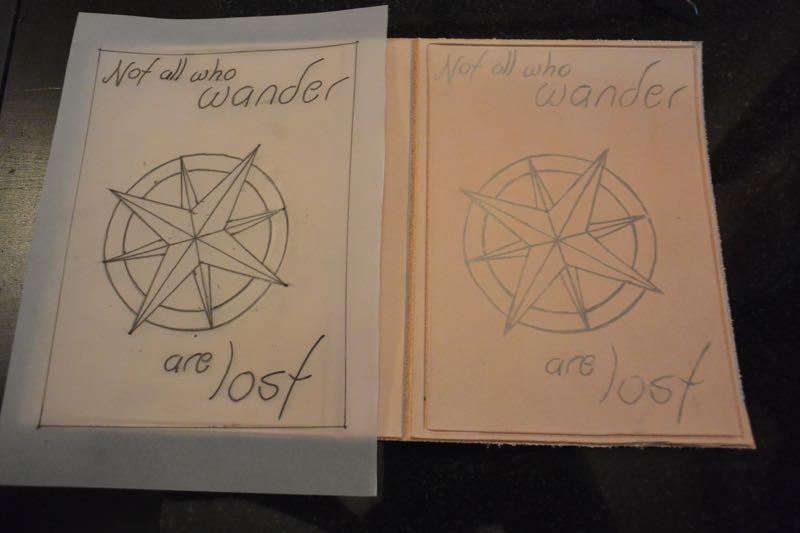
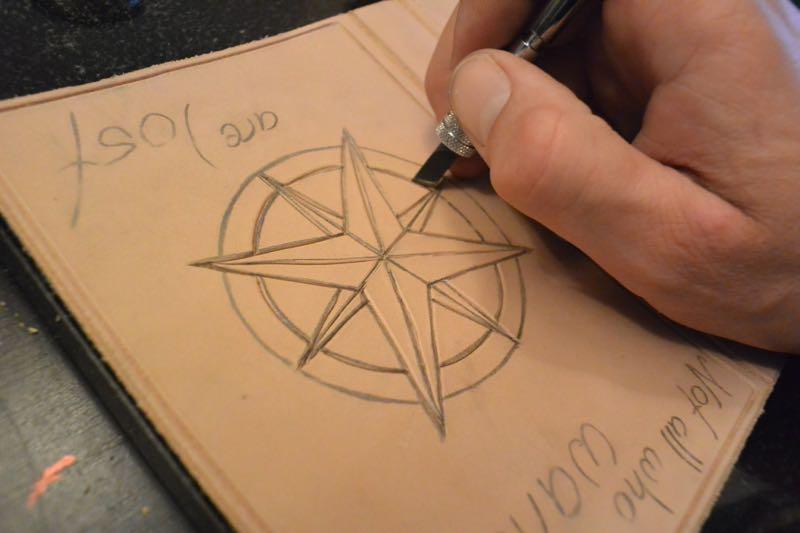
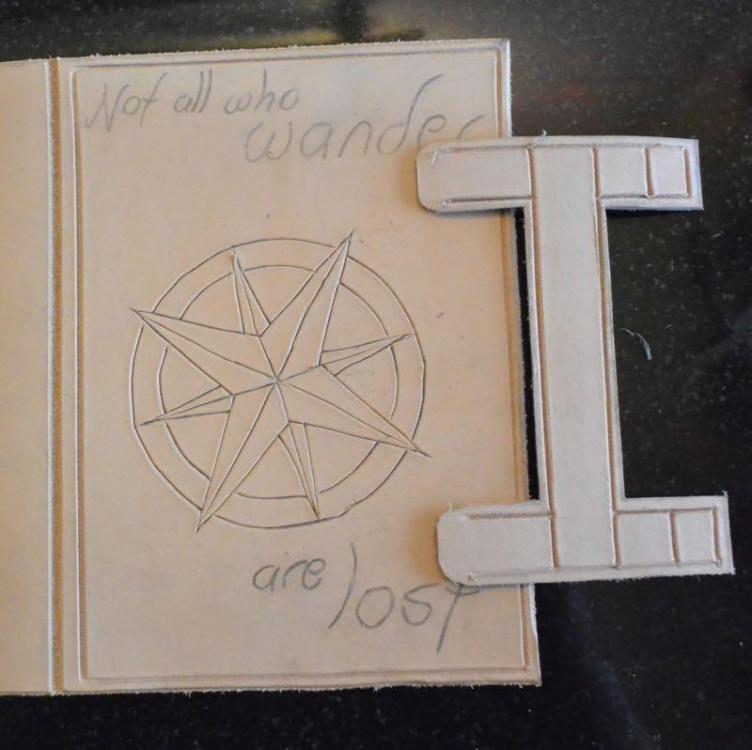
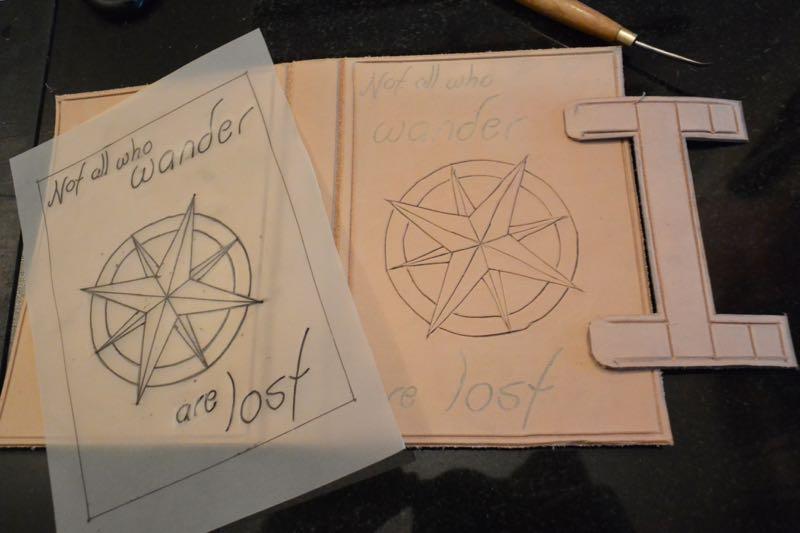
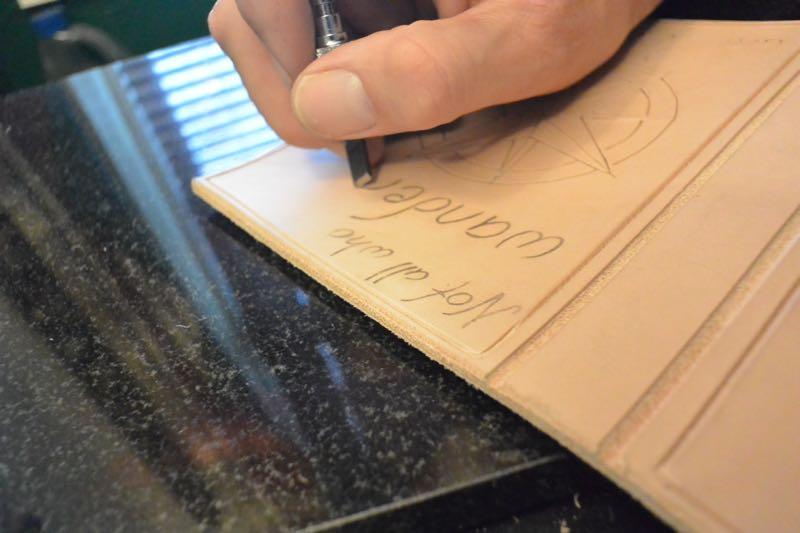
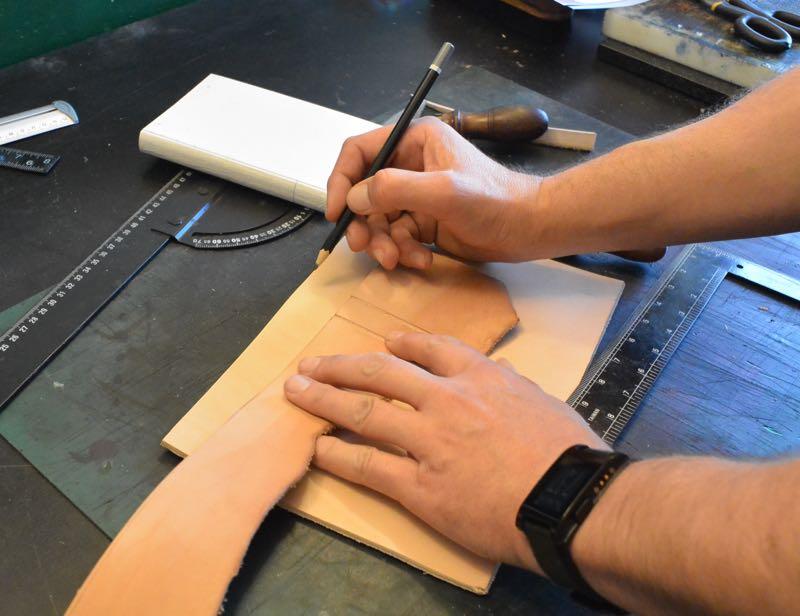
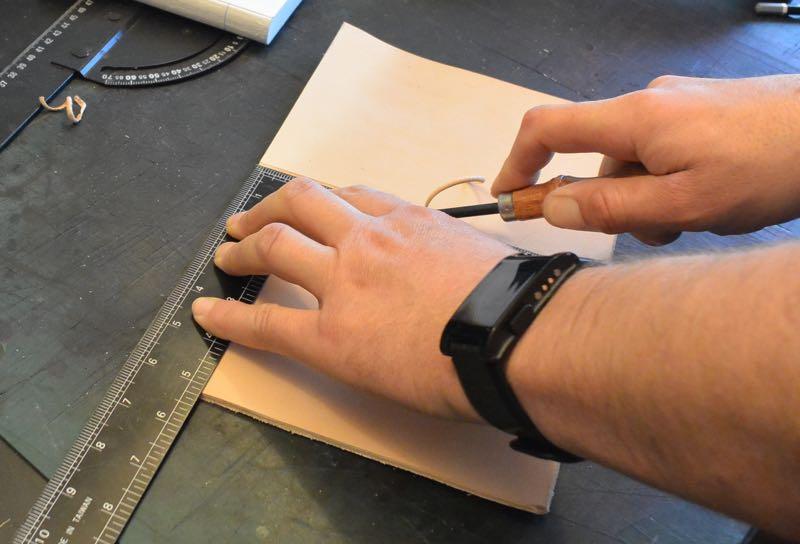
On this occasion I had created the design on the computer and printed it it out. The next stage was to trace this with a pen which is on the left, with the printed one on the right. Often times I will actually trace the pattern from a picture on the computer. Then on the reverse of the tracing, using a pencil (2B or softer if you have it) I mark out the lines of the pattern. Place the tracing on the cover where you want the design to be and rub over all the lines using a stylus or any blunt smooth object. And as if by magic you now have the pattern on your leather. I read in books that you need to wet the leather then use an old dry pen or the like to draw over the lines of the tracing. This was a pain to do and I look back in horror at all the hassle I want through when rubbing the pencilled pattern onto the leather works so well. The pencil will easily rub out if you need to change something, as we will see later. If the lines are a little faint you can go over them with the pencil to make sure they are clear enough. Again the books all tell you to wet the leather before cutting any pattern into it. I strongly recommend you ignore this and do your cutting dry. In my experience the leather stretches and does not cut as well when wet. I have yet to find any advantage so get your swivel kind and get to cutting the pattern into the leather. Having cut the compass part of the pattern I line up the pen holder to see how it fits in with the design. The wording is too far to the right and interferes with the closure. So I use an eraser to rub out the words on the leather. Line the tracing up with the words more to the left and rub over the words to mark them in their new place. Far enough left to not interfere with the press studs of the closure. That done we can now cut the wording in. With all the cutting done we can go over the whole of the front with the eraser to remove any remaining pencil marks. -

Refillable Leather Book / Journal Tutorial (Loads Of Pictures)
MagiKelly replied to MagiKelly's topic in How Do I Do That?
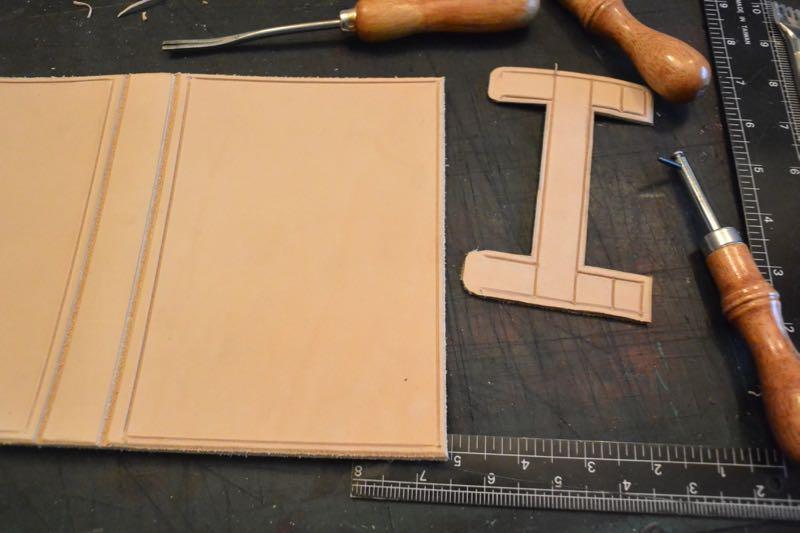
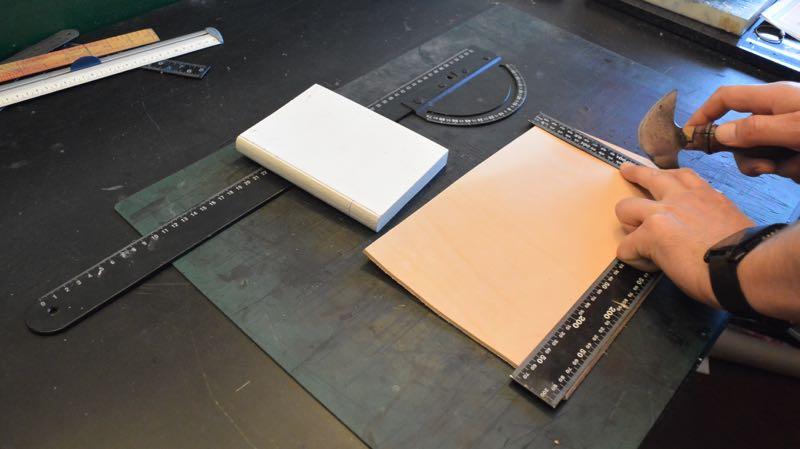
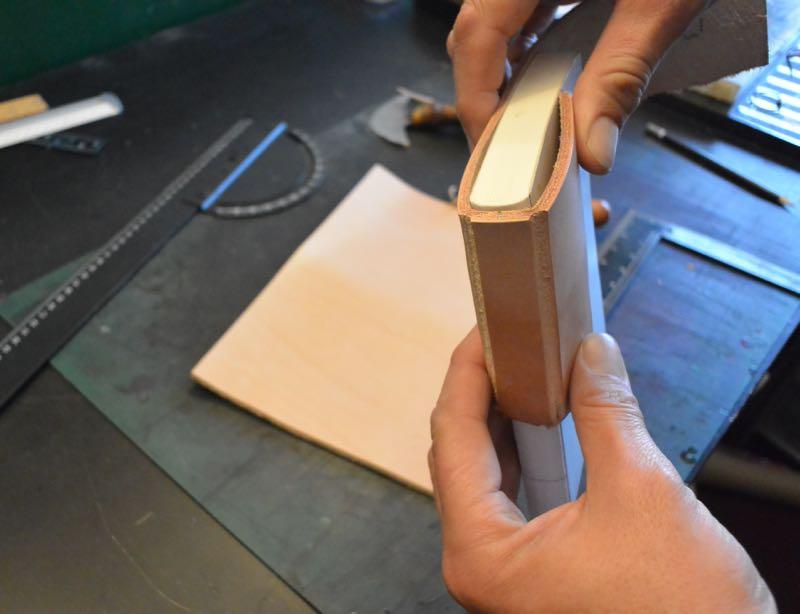
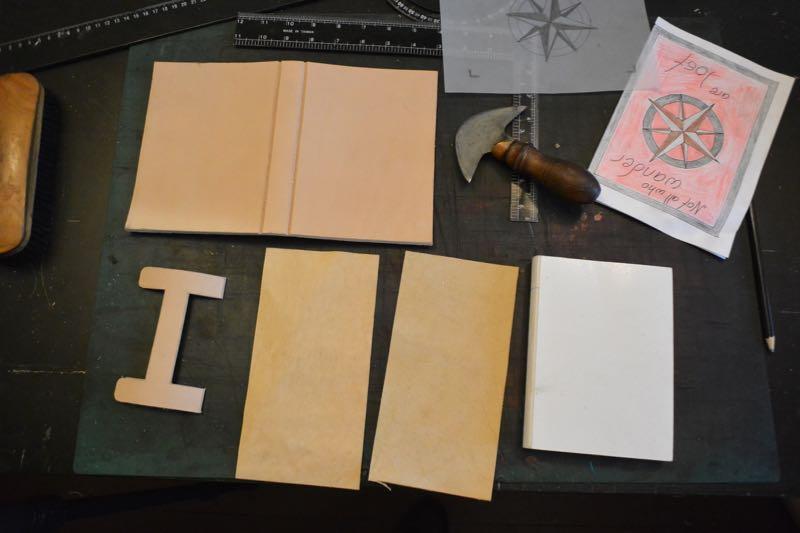
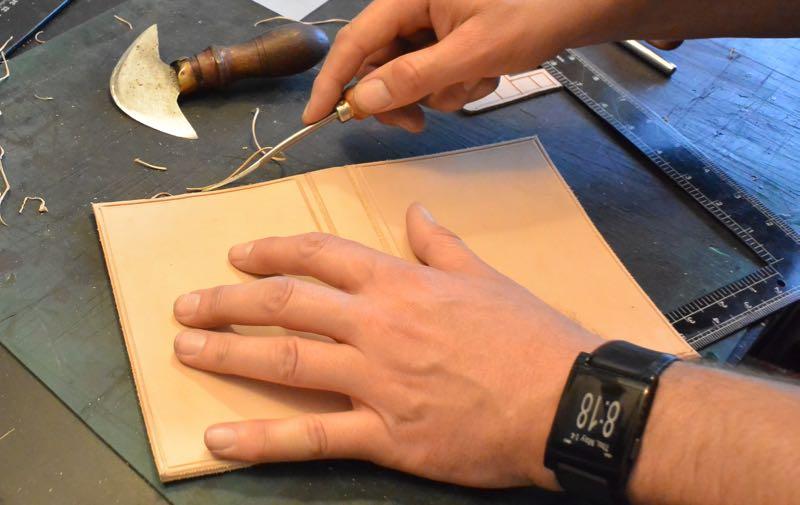
Before we start you might want to sort out the insert for the book. I use these ones which you can get in various sizes, http://www.amazon.co.uk/Papuro-Refillable-Handmade-Italian-Journal/dp/B00901DAA2/ref=sr_1_2?ie=UTF8&qid=1432149861&sr=8-2&keywords=journal+refill , however, I have also made my own. As luck would have it a few leather working tools and some paper are all you need. This tutorial will show you exactly what to do. https://www.youtube.com/watch?v=XGQ5P8QVHSg Once you have your insert it will govern the sizes of your cover. From a piece of thick leather cut a rectangle big enough to wrap round your insert. In this tutorial all sizes are governed by your insert so I will not be giving set sizes. I always cut a bit bigger than I need. Height wise you are going about half an inch more than your insert. This leaves enough of a border for you to stitch round the edge and still have enough room for the insert. Do not panic about getting this size just right. If it is too big it still looks fine and if it is too small you can trim the cover of your text block so it still fits in and it can actually look better that way. Being a bit OCD i used to obsess about getting it so the text block cover was not trimmed but eventually realized that it was not a big deal. In the early days I just wrapped the leather round the insert giving a rounded spine to the book but found that cutting channels either side of the spine gave the book a nice square spine and a much more professional look. I use a large groover to cut these channels but you could use one of those V shaped plough things (don’t you just love my technical terms?). I have one but really can’t get a good cut with it. You could probably get away with using a normal groover but would need to go over it a lot of times. To get the spacing right I get a scrap piece of leather the same thickness as i am using for the cover and cut to parallel channels to check i have the right spacing to fold neatly round the insert. Once I am happy with the spacing I use this scrap piece to mark where the actual cuts / grooves will go on my main cover. And then I groove the main cover This is when I tend to do my final sizing. i fold the cover round the insert and mark out an even border all round. As I have said top and bottom is not super critical as you can trim the cover of the insert to suit but if you are making the pen holder be sure to leave enough room for the pen to sit between the edge of the paper and the edge of the leather. I have only once made a pen holder where there was not enough room for the pen. I nearly cried, then I realized I could trim the whole insert back a little and all was good again. There is always a solution The other pieces you need to cut are two rectangles of thin leather to be stitched inside the cover to hold the insert in place and the pen holder section. This I cut from a medium thickness of leather but you can use the same thickness as the cover or even quite thin leather. It is up to you to choose based on what you have available and what you prefer the look of. The size of the “H” for the pen holder is to suit your book but the width of the arms is about 20mm but again feel free to experiment. You could actually make the pen holder, closure as a rectangle but I like the “H” shaped option. You will also need a small piece of elastic, although I have used thin leather for this in the past. If you will always use the same size pen then leather looks nicer but elastic gives you more leeway. Now we have the main cover at its finished size we can chamfer the edge. Then I use a normal stitching groover to groove round the edge of the front and back of the cover. You really only need to stitch on three sides of the front and back but I think it looks way better if it is stitched right round all four edges on the front and back. I also groove the pen holder as you can see in the picture. There will not actually be stitching in all these grooves. Some are just part of the design. -
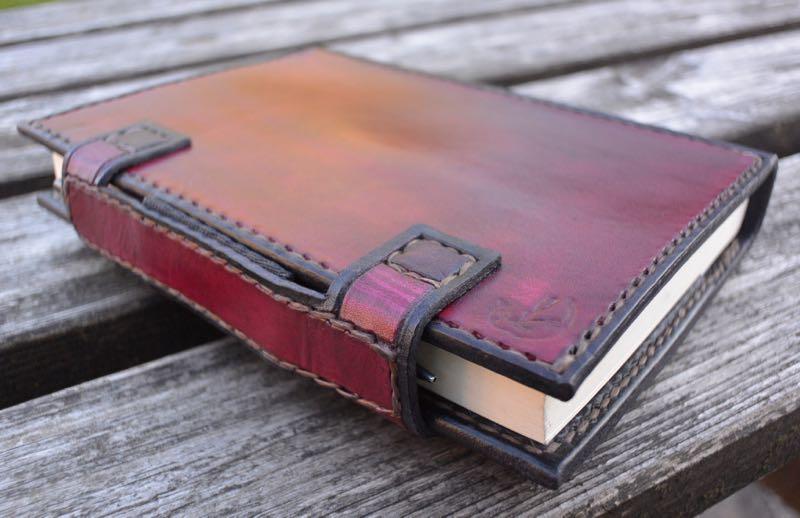
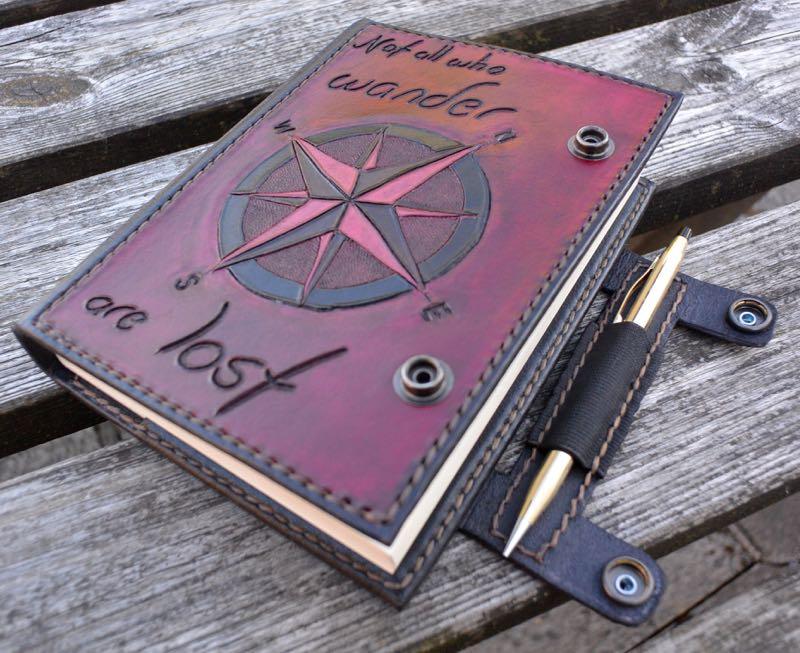
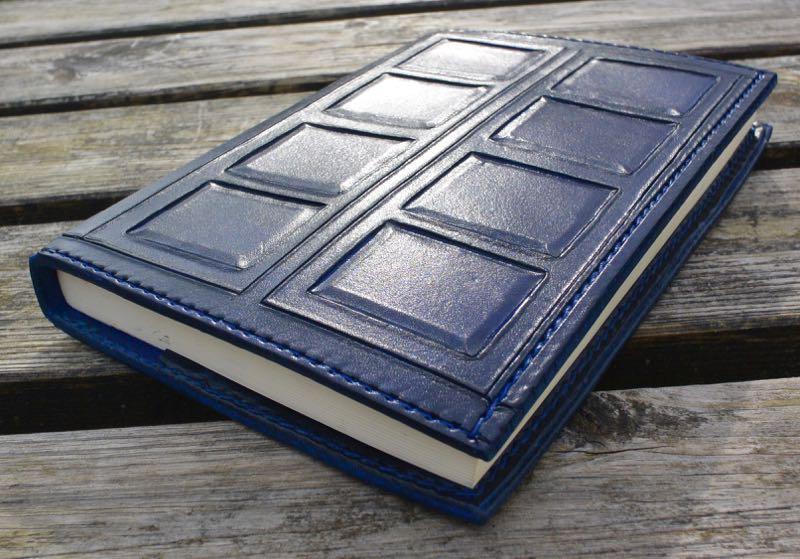
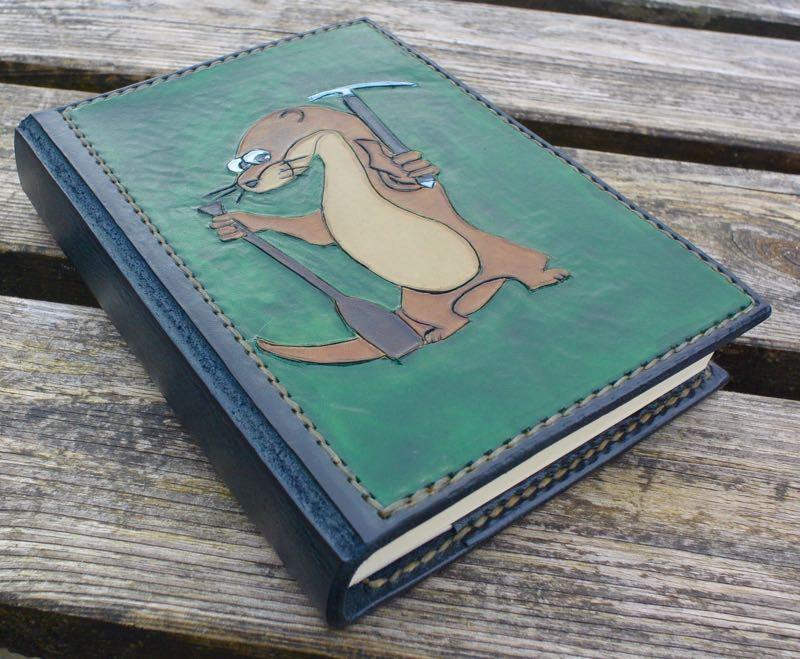
A long time ago I did a tutorial on making a wet formed bag, http://leatherworker.net/forum/index.php?showtopic=19782 It seems to have been quite popular and hopefully helpful. So spurred on by that success and only 6 years later I am here to inflict my second tutorial on you As last time I need to point out I do not do that much leatherwork and so am still very much a beginner. I'm probably doing lots of things wrong. That said, I seem to stumble through and I am happy with my results. So here is what we are going to make. A refillable leather book / journal / sketchbook with an integrated pen or pencil holder. When finished it will look like this, except with whatever design you have picked. And from the back And with the pen holder open so you can see it in use If you are experienced in leatherwork you have already probably seen enough to now go and make this book. probably better than me For the rest of you who are less sure we will go through it a step at a time. If the project seems too big a step for you then you can miss sections out and just do a one colour book without the pen holder, like this. Or a multi-colour but again without the pen holder, like this Or if the multi-colour part scares you but you are fine with constructing the pen holder then you can go for something like this The options are varied and you can take what you are comfortable with and start with something easy. You could even just go with plain leather and no carving, no dying and no pen holder as a starting place. Also of course you can use the techniques to do your own design rather than any of the ones shown. Again start with a design you are comfortable with or just outside your comfort zone then move on from there. This was the first book I did with more than one colour. Every other multi coloured book I have done is pictured above so you can see I have not being doing it that long but experimenting and pushing yourself will yield results. So without further ado lets get on with the tutorial. As only up to ten pictures show up per post I will split this into a few posts so all pictures show in each section.
-
I'm so pleased people are still finding this useful. I feel slightly guilty I never followed it up with any more tutorials but I have resolved that I will photograph by next book project in detail and write up a detailed tutorial. Hopefully that will be as well received as this one.
-
The inserts I use are these ones, although I occasionally stitch my own. http://www.amazon.co.uk/Papuro-Refillable-Handmade-Italian-Journal/dp/B00901DAA2/ref=sr_1_1?ie=UTF8&qid=1423735908&sr=8-1&keywords=Journal+refill Just finished another one. In progress And once finished
-
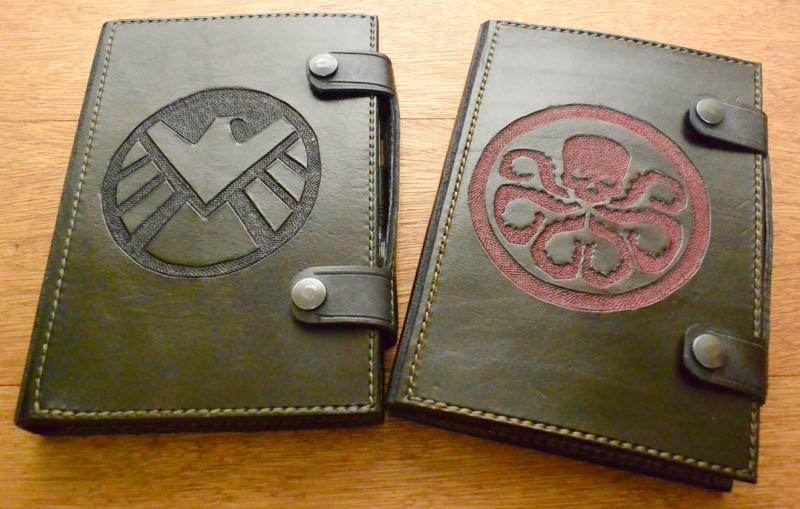
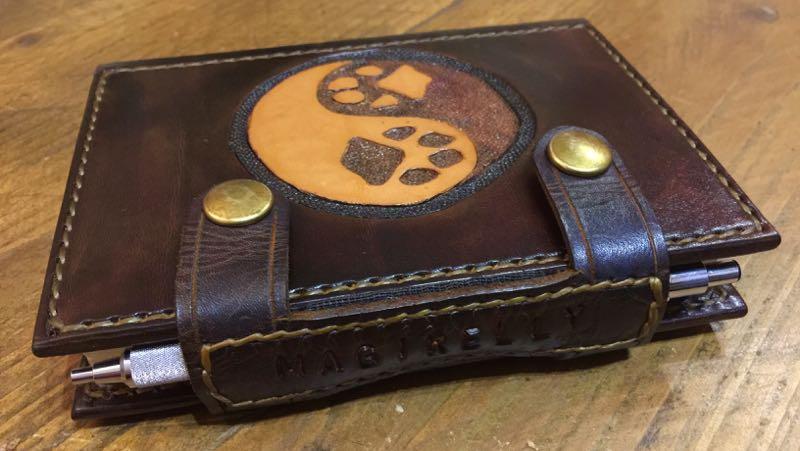
I've still been visiting often but have not been logged in for a while, so since I am I thought I would post up a few of my recent leather projects. I make a few things but seem to keep coming back to leather journals. I did a couple for Christmas presents with a Shield / Hydra theme. Like most makers I get better with each book as I find new techniques or just plain get better. As a result the journal I have for myself from a few years ago is pretty poor compared to my current work. So I made myself a new dog themed one. Of course I am not quite happy with the carving on this one but as it has my name on it I can't give it away and make another I also recently finished another dog themed one as a gift for a friend. it was a fairly straightforward one to do. Right now I am finishing off a couple of SongofthePaddle ones and then onto another to be a gift for a friend. I've got some ideas for new things to try on that, so more learning.
-
I'm so glad people are still finding this useful. I feel a bit guilty I've not done another tutorial since. I must break out the camera for the next journal I do.
-
If it inspired you to have a go then I'm happy. I've mostly seen the option of using an inverted form to hold it in shape while the leather dries but I lacked the skill to make one so went down the nailing it route. But whatever works for you is the way to go
-
Excellent. Well done.
-
I worried a bit about where the nail holes would be an issue but it has turned out not to be a problem. The nail hole is either on a stitching hole or between. So the stitch either goes through it or over it. Either way it is covered up. Of course it helps that I use small nails that make holes not much bigger than the stitching awl.
-
I've made bags out of almost every sort of veg tanned leather so don't think the type matters. Thicker is harder to shape but holds the shape better. It does need to be veg tanned though and dyed through stuff is unlikely to work. At least the stuff I tried was no good.
-
Thanks. I am so pleased that people continue to get benefit from this tutorial. I am still very much a beginner, only doing the odd project here and there. I really will need to do the photos for a tutorial on my next project. I feel kind of guilty I have not really done much since this one.
-
I've not tried forming a carved leather bag. The closest I have come is a sheath I carved then wet formed. I would think you would need to form the leather on the mould then carve it in situ. But as I say I have not tried it so you can show us how it is done
-
The different types confuse me too. Basically I get whatever is veg tanned and the thickness I want. The bag was made from about a 3mm leather but I couldn't tell you what "cut". All I know is it is veg tanned.
-
If you can get the pins to go in then I am sure they will hold it. The leather does take the shape fairly quickly so does not need a lot of force to hold it n position.
-
I've not found them to be a problem with the spacing. They either fall between stitches and you can go over them or they are on a stitch hole and you use them.
-
Scissors would be hard work. I use either tin snips or more usually a craft knife or scalpel
-
If you wait till the shaped piece is dry before dyeing it then it should end up the same shade as the back piece. The moulding is good for a first try. If you are doing another you may find that cutting darts (V shaped bits) where the leather is buckling up at the sides may help with the shaping.
-
I'm happy to help if I can. Well done. Shaping it over the mould really is one of the hardest bits. The general rule is 4 times the length you need to sew. I would wax it and once dry stuff it with newspaper for a while to make sure any residue was soaked up but finishes is not an area I am knowledgable in. I would dye the thread before you wax it. When I do this I just use the same dye as i used on th leather and it has worked well. Looking forward to seeing how you get on and delighted to have helped get you started.
-
I've not tried tooling a bag but with a mould from harder material I do not see any reason it would not work. As for the finish it is just stain then wax. There may well be better ways but that is how I started and I have just stuck with it.
-
I'm glad to see this is still proving informative. I just need to learn to do something else sufficently well to do another tutorial on
-
Screwing it on from the back fine. It is what I would have done if I had been really thinking ahead.
-
The wooden mould is about 2 inches or 50mm thick. The volume of the bag is about 6 x 7 x 2 inches all in. Hope this helps.
-
Hi Alan My understanding is that upholstery leather is chromium tanned and as such it will not wet mould. Of course you can always try moulding an offcut round something small to see if it takes the shape.


