-
Posts
76 -
Joined
-
Last visited
Content Type
Profiles
Forums
Events
Blogs
Gallery
Store
Everything posted by MagiKelly
-
-
I've thought about doing a basket weave pattern on one but I can't figure out how to get it to work. If you stamp the leather first the pattern will all get twisted etc during the moulding and trying to stamp it afterward will be difficult. Of the two options stamping it once on the mould seems the most likely to work to me but I am just guessing.
-
I have never done a double shaped item so have no experience to pass on. If I were to try it I guess I would mould both sides on the same form to make sure they matched up exactly. I'll be looking forward to your tutorial when you try it
-

Belt Pouch And Messenger Bag
MagiKelly replied to MagiKelly's topic in Purses, Wallets, Belts and Miscellaneous Pocket Items
The leather is veg tanned and about 1.5 to 2mm thick. A friend got it for me from a re-enactors market so I can't be more specific. -
I made a few bits and pieces for friends in Knutsford recently and was planning on having a little break from leatherwork for a week or two but a new air rifle inspired me to make a simple bag for pellets. For a change I used an oil finish on this to make it softer. This worked out well and made me think of a couple of projects I could do using thin leather and an oiled finish. So first off I had been planning on making a belt pouch for all the stuff I carry in my pockets. This is the stuff it is always handy to have about, leatherman juice, small torch, lighter, piece of string, secure flash drive, tweezers and diamond sharpening card. Much as all this fitted in my pockets it made them look like a gerbil's cheeks. I had planned a wet formed pouch for this but as it turned out a soft leather one worked better. It is just a simple pancake style with a clip attached to the back and closed with a couple of press studs. As usual one things leads to another. I had already made a canvas messenger style bag for my Ipad but was not entirely happy with it. So I remade it in leather but with buckle closures and a better attachment of the "D" rings on the back. I am very pleased with this but forgot that I should have made it just a little bigger. It fits the Ipad in its cover perfectly well but if it had just been a centimetre or so wider it would also have taken an A4 pad when required. Still as I am as pleased with the result chances are I will make a few more like this. As usual it is all hand stitched in artificial sinew with all brass fittings.
-
I have made a flexible plastic template that has the rounding and the start of the straight edge along the front. I use this to mark the first side, then extend the line across the front so I can use it to position the template on the other side to line it up properly. As to the radius of the rounding this is not critical. The top flap will conform to pretty much whatever radius you cut. I know many bag makers just cut a straight edge but the compulsive in me just keeps thinking that the gap you will get lets stuff fall out. Hope this helps.
-

My First Sheath
MagiKelly replied to MagiKelly's topic in Gun Holsters, Rifle Slings and Knife Sheathes
Well you know how it is. I still had one ring left. I thought if I made another sheath I could make it a little better fit and there was this leather winking at me from the corner. Still using the grade 2 leather but here we are with the mark 2 sheath. And here it is compared to number 1. The second one is at the top, in both pictures. -

My First Sheath
MagiKelly replied to MagiKelly's topic in Gun Holsters, Rifle Slings and Knife Sheathes
It is just the natural colour artificial sinew. I use it a lot as I like the thickness of it and usually I have brass fittings which it compliments well. -
I got a Spiderco Bushcrafter knife and was not particularly taken with the sheath. I asked a friend about making a sheath for me but I would have to wait for a while and send the knife to him. I decided I should really try making a sheath myself. So here we have it. It is 4mm leather stitched with artificial sinew. I decided to try doing it with a basketweeve pattern. I was expecting this to turn out pretty badly so used a grade 2 leather I had. It actually turned out pretty well so I should have probably used the good leather but I guess after a few weeks use it would probably have ended up looking the same anyway. Having no patience and with only pretty heavy duty rings to hand I have used a heavier gauge ring than I would normally have but again this looks okay, in my opinion. The sheath is a very deep one which is my preference. The only thing I would say was a mistake is I did not take enough time to make sure the tongue that goes over the back and holds the ring is not centred but I can live with this. So here are the pictures.
-
Certainly my first batches of buckles came from Leprevo and I suspect these are the ones in the photos. I may have bought some from AbbeySaddlery but can't be sure and don't have my receipts to hand. So the short answer in Leprevo
-
Thanks for the comments. Having picked up lots of tips from here it is good to be able to try and give a little back.
-
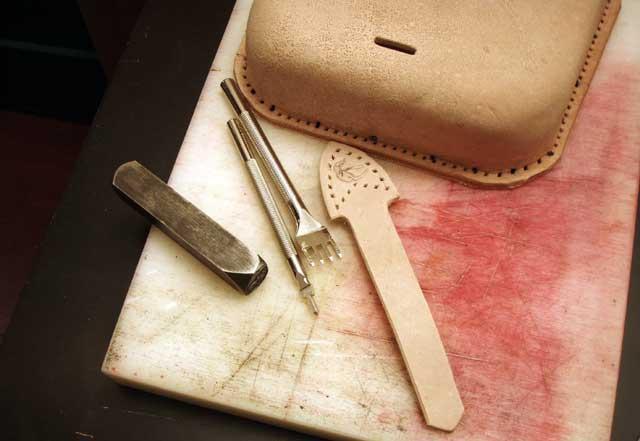
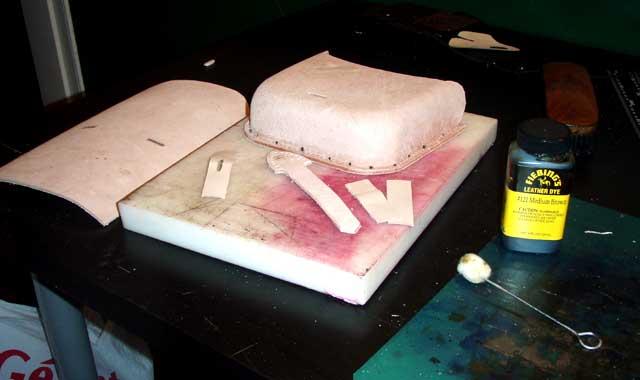
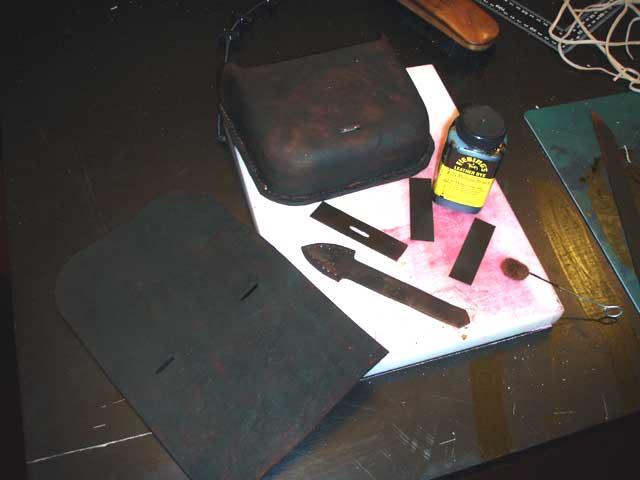
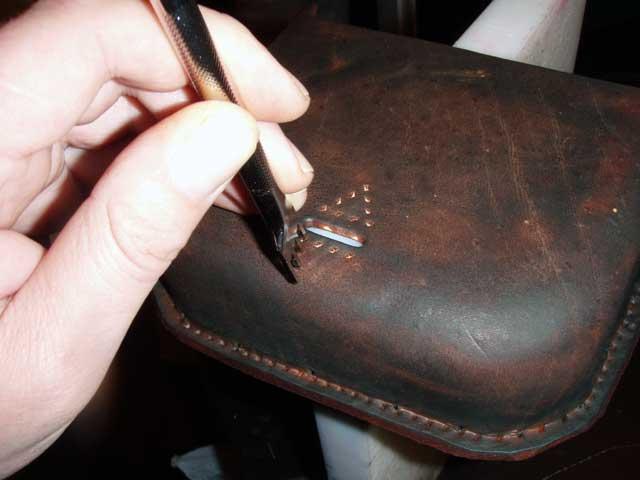
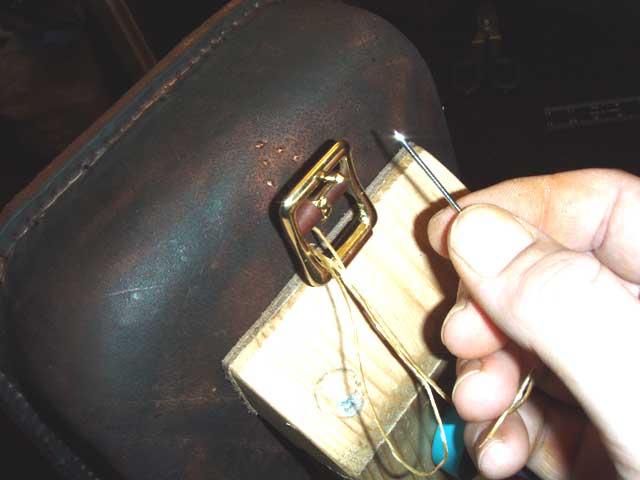
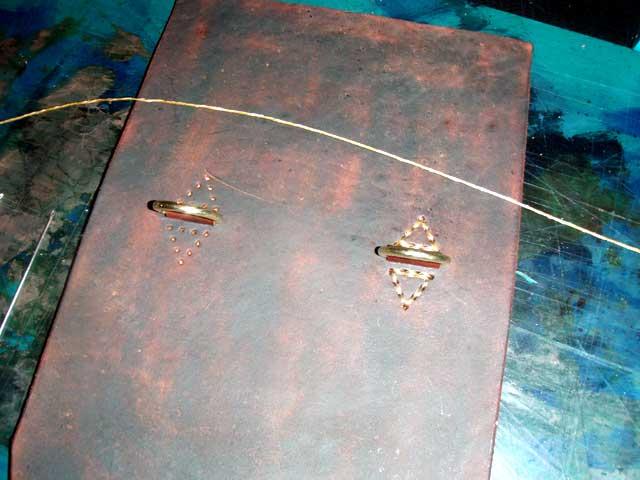
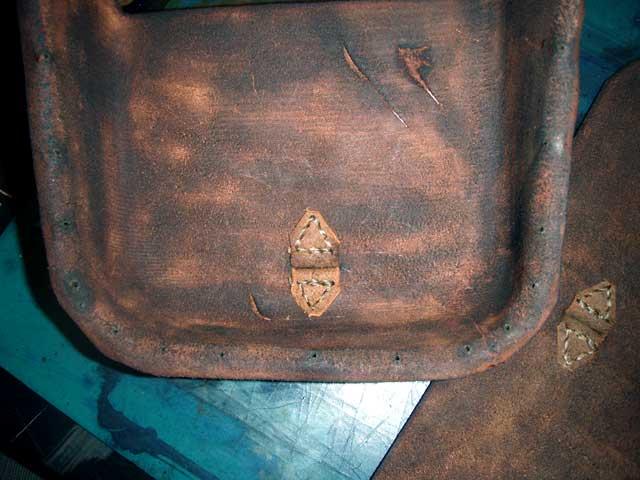
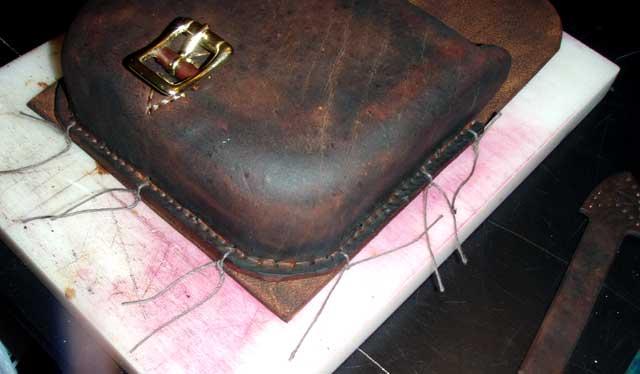
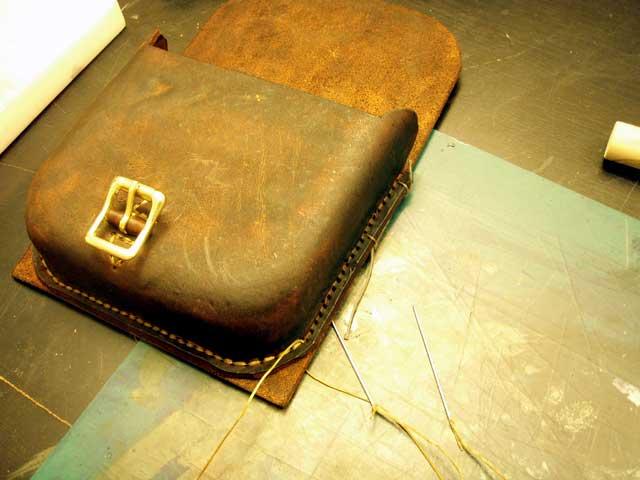
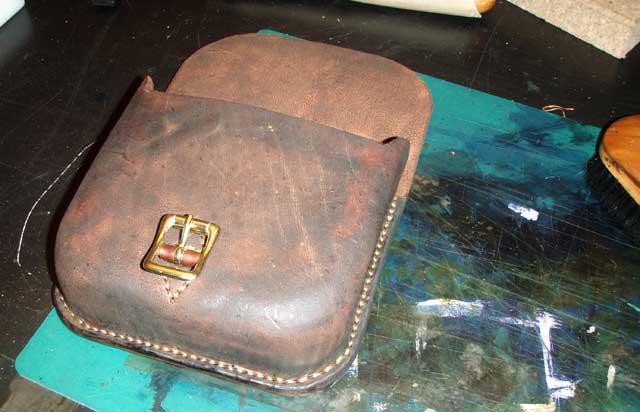
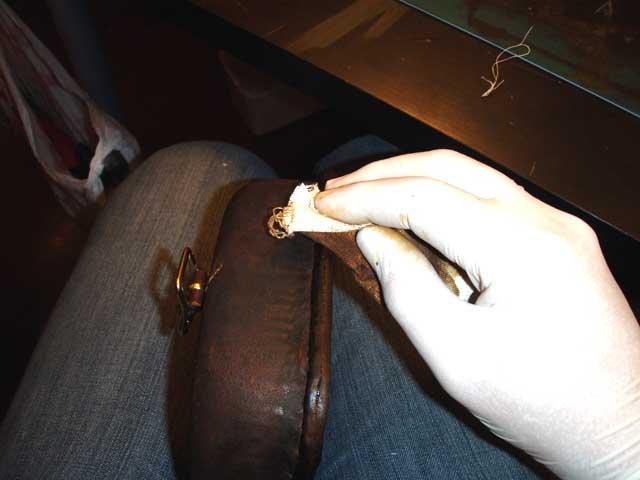
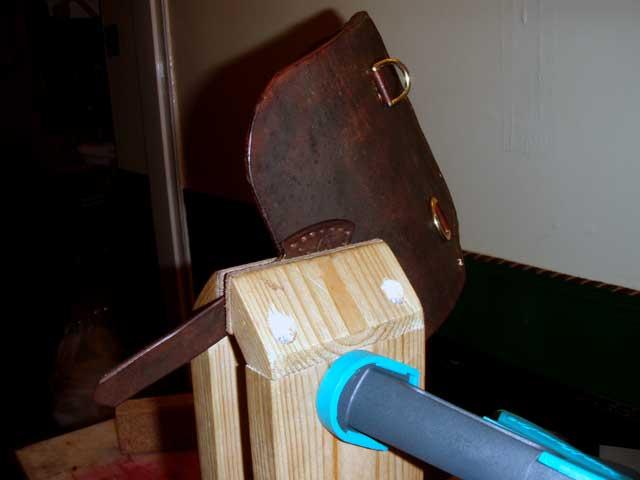
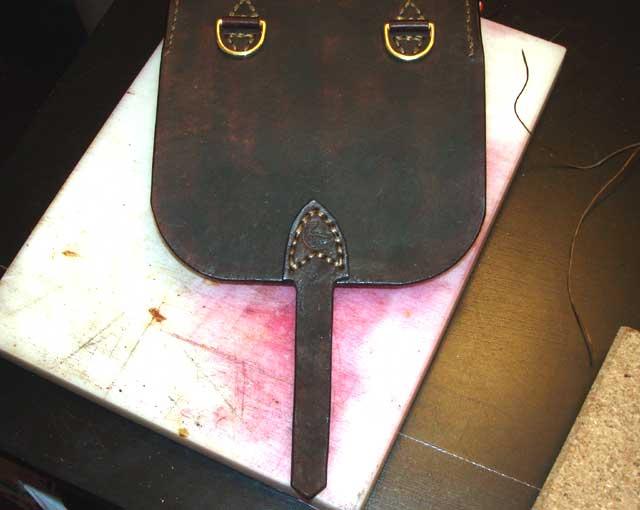
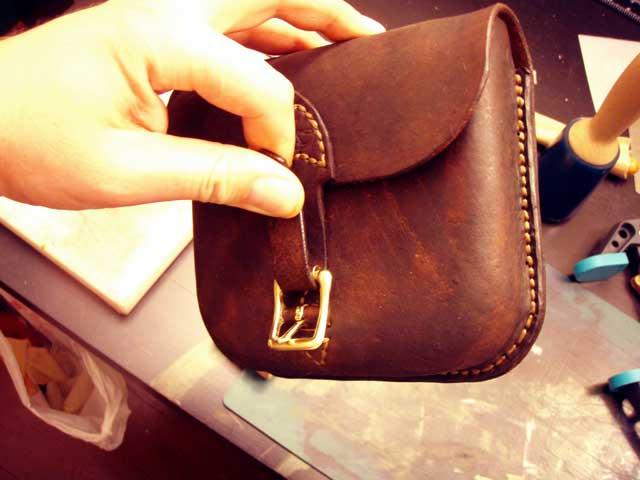
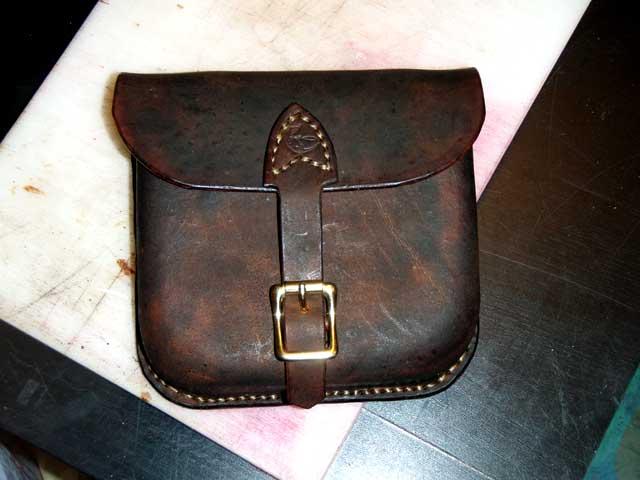
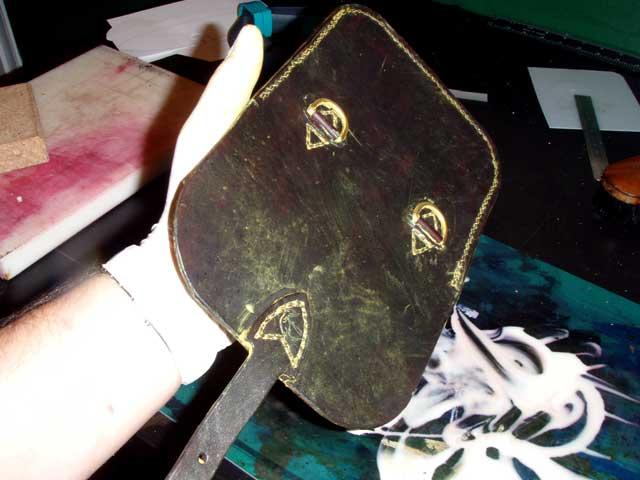
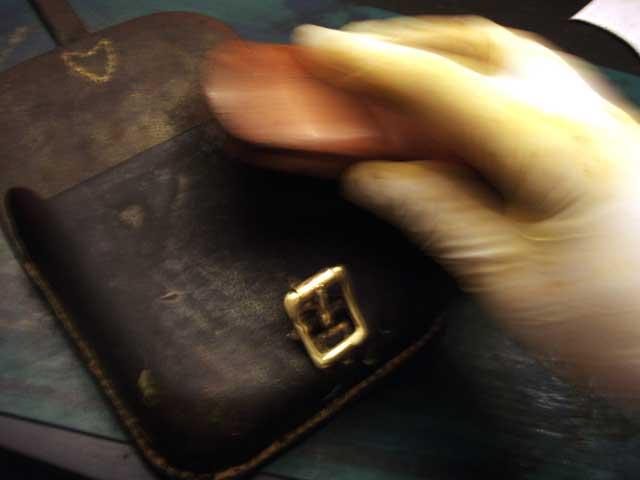
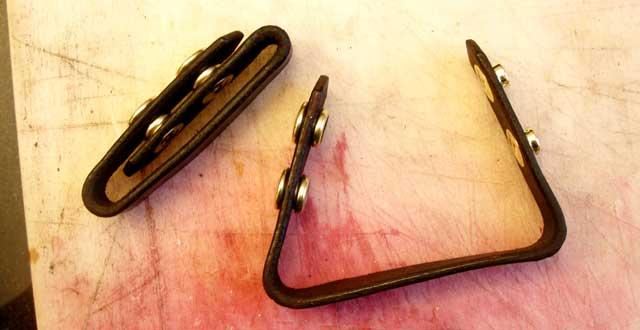
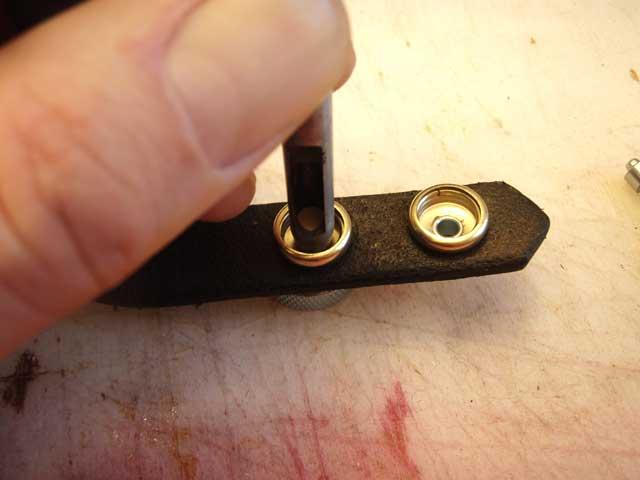
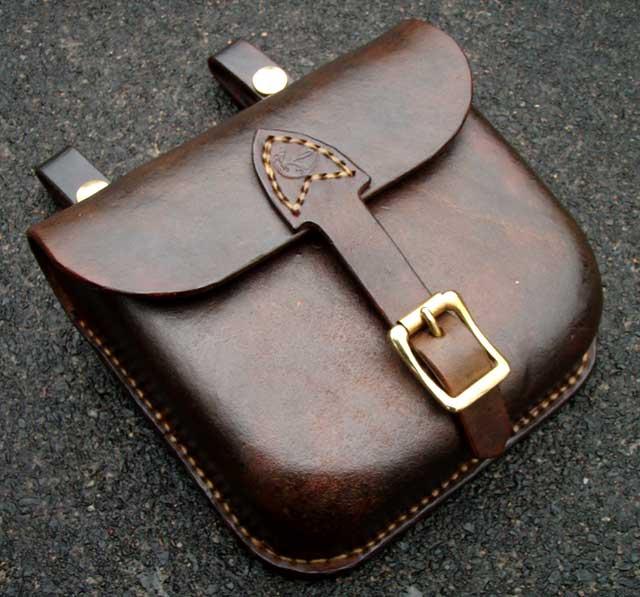
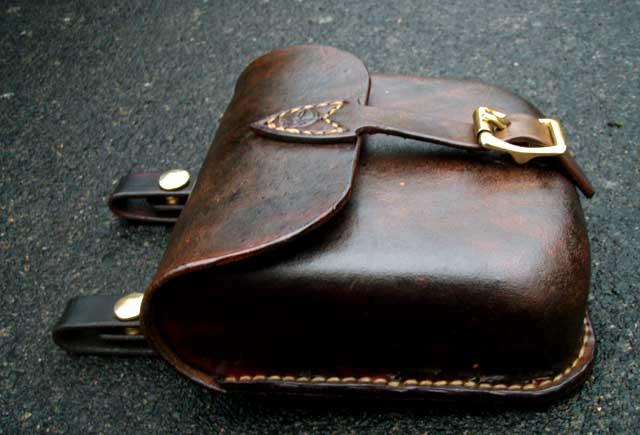
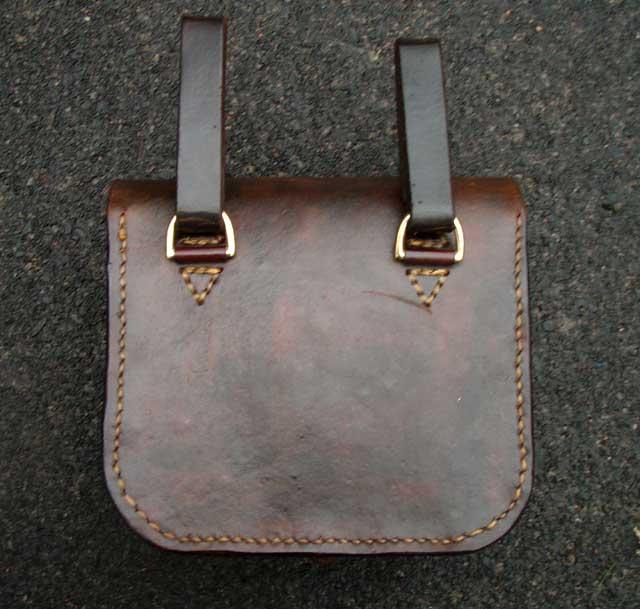
I now mark out the stitching on the tab for the buckle and round the edge of the bag. I have used a pricking iron. If you don't have one a fork will do. You can use a marking wheel but they do not always leave very clear marks unless you are doing this while the leather is wet. I have also stamped a small makers mark in the centre of the tab stitching. Time to dye all the pieces. Gather them all together along with your dye and a wool dabber. I use a spirit based dye and buy it in the 1 litre bottles as it is much cheaper that way. I still tend to decant it into the smaller bottles for use though as it is easier to handle and has a larger neck. I dye the inside of the leather as well. A light inside looks strange and I can never finish with a clean edge anyway. Give the leather a good coating with the dye then set aside to dry Once the dye is dry it is time to stitch on the buckle and D rings. First mark out your stitching with your pricking iron (or fork). I like the triangular pattern and my pricking iron is just the right size for marking this out. Put the buckle onto its tab. Thread the tab through the slot. Open the tab out and sew in place. Same thing with the D rings. Here we see one sewn and one about to be sewn. And once done you can trim the tabs in the inside as seen here. Some people glue the bag to the back to keep it in place but I have never got on with this method. I tend to tack the front to the back with stitched spaced an inch and a half apart. I only make the holes for these stitches with the awl at this time. I punch through the rest of the holes with the awl as I go along. I punch the holes between the first two tacks, stitch this section, remove the tacks at this bit, form the holes in the next section, sew that bit and so on Once finished sewing I trim the back piece round the bottom corners and also trim the edges along the sewn section to ensure they are even or as even as I can get them. Then I dye the freshly cut and trimmed bits. Before I stitch the tongue on I finish the edges of the bag and the tongue with gum tragacanth and rub down with a piece of canvas. Then clamp the tongue in position ready for stitching Tongue stitched on. Pull the end of the strap through the buckle and mark the position for the one hole needed. Punch the hole. Dye the edges of the hole (cotton buds are great for this) and we are nearly there. Now I cover the bag with carnauba wax. Inside and out and work it well in. (I managed to spill the wax which is why there is a puddle of it in the background) Let the wax dry for a little while then polish with a soft brush. Now the droppers are just two strips of leather, about ¾ of an inch wide with two press studs to close them over. You can easily work out how to make them from this picture. Cut, dye, finish edges, punch for studs, wax polish and attach studs. A handy hint for attaching the press studs. Use a punch a bit bigger than the part of the press stud that goes through the leather to push the leather down. A light tap with the mallet makes sure you have enough of this bit exposed to ensure the two parts of the stud lock together well. So that's us all finished. You should now have a bag that looks like this I hope you found this interesting and or useful. Any questions just ask.
-
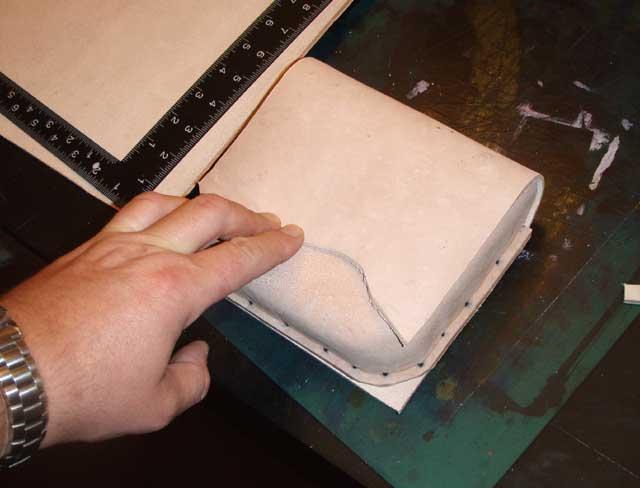
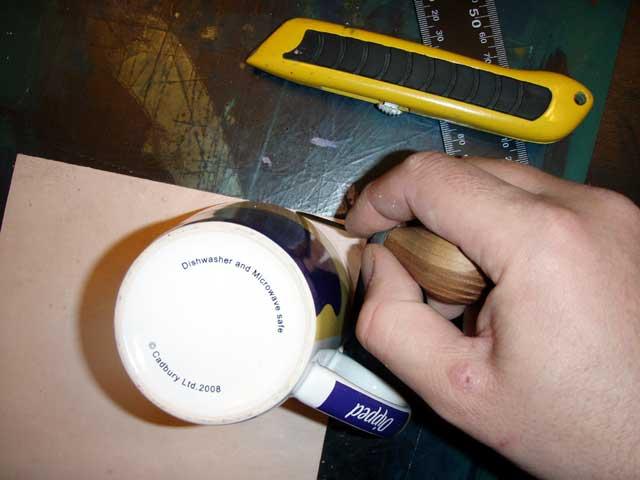
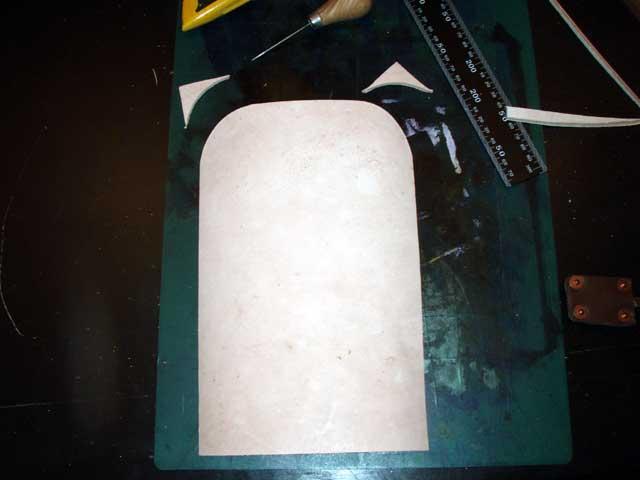
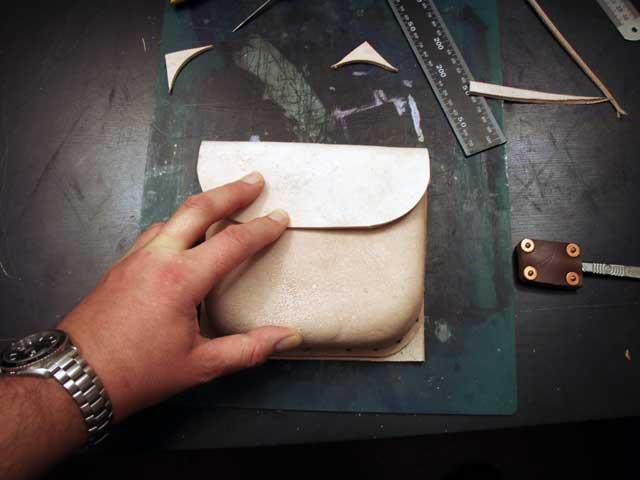
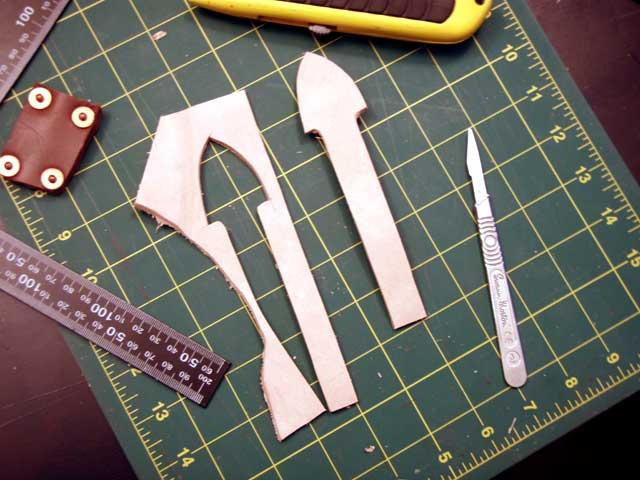
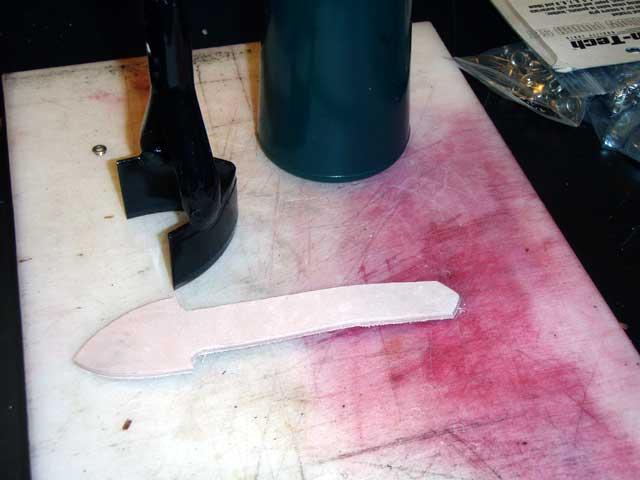
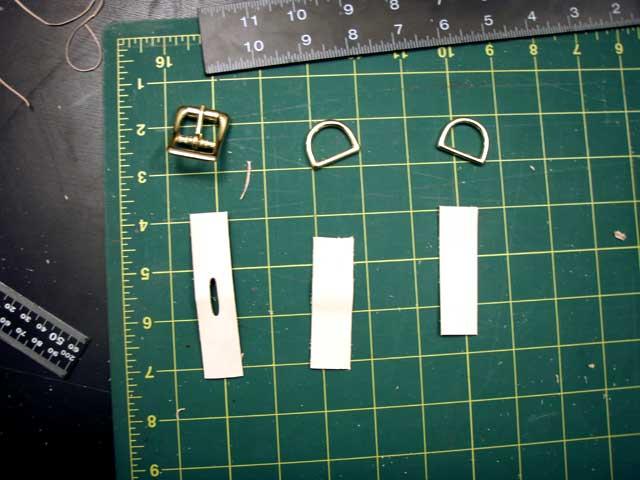
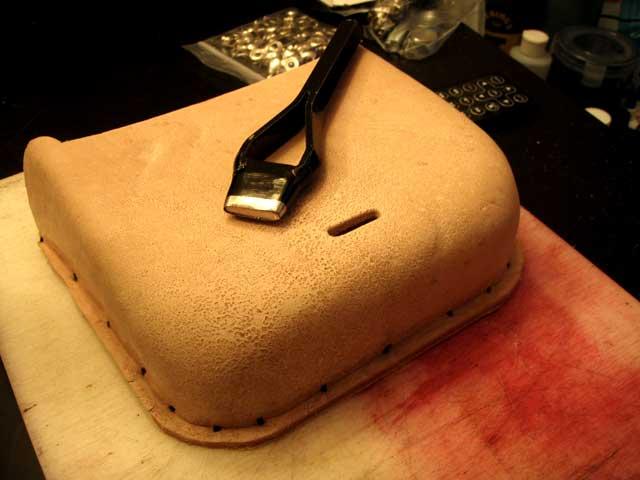
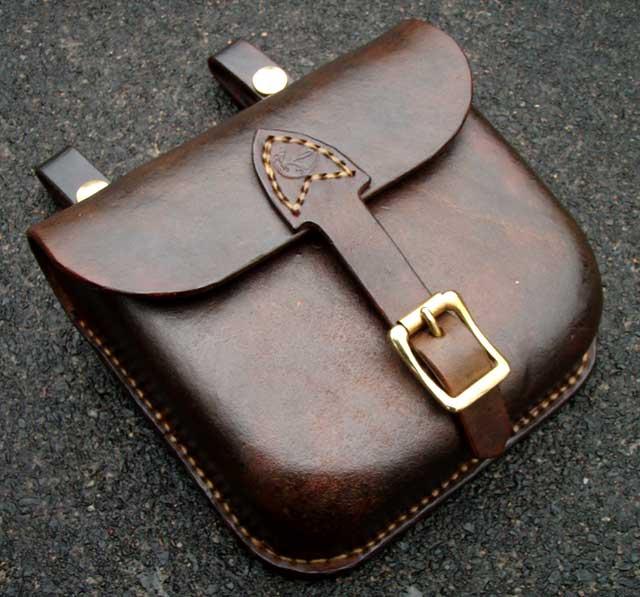
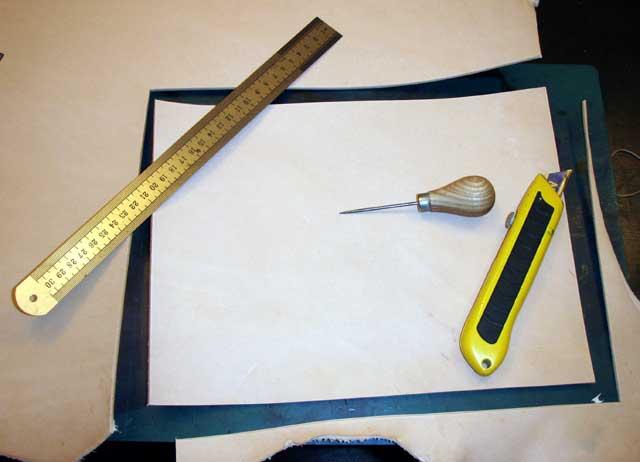
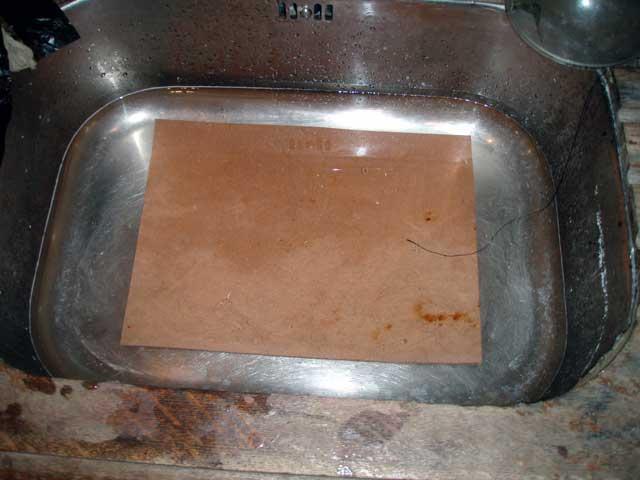
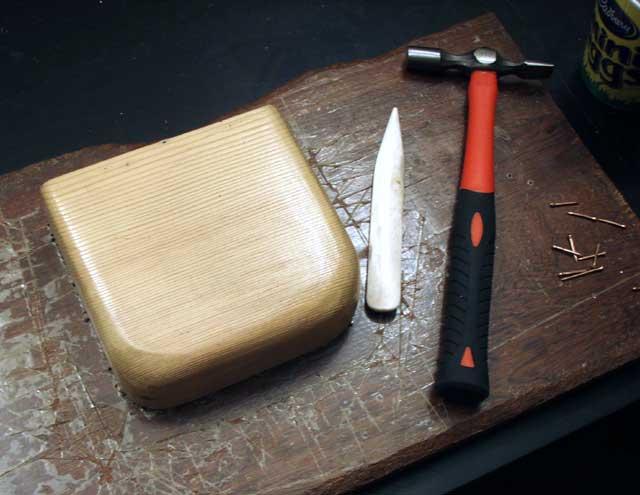
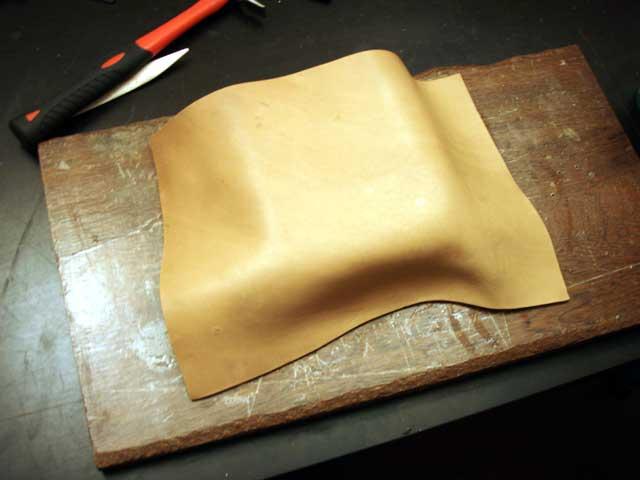
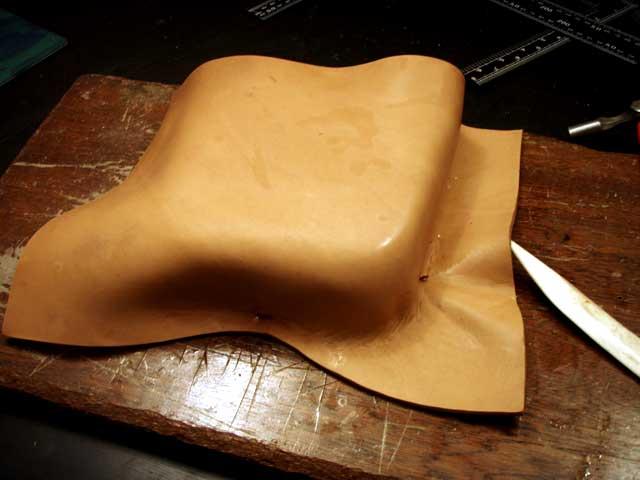
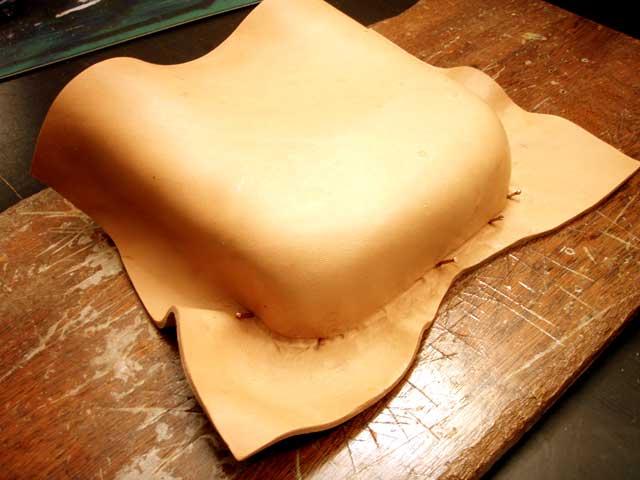
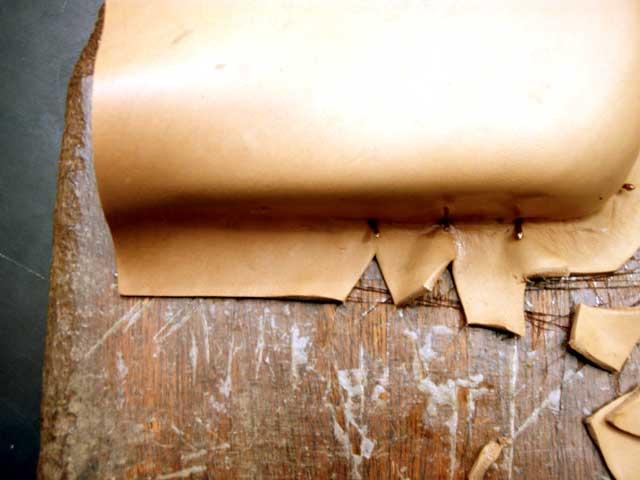
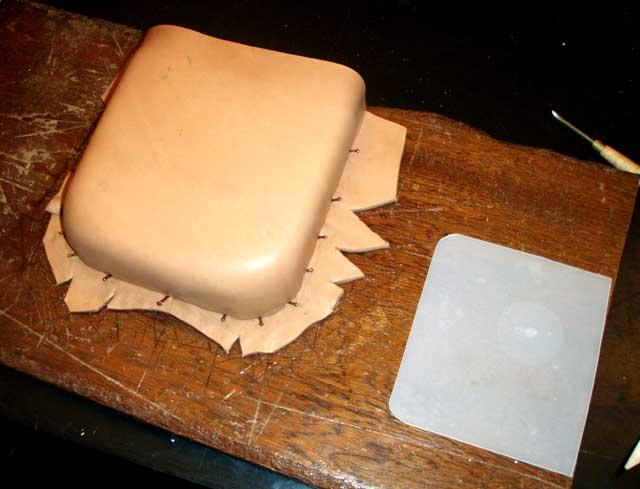
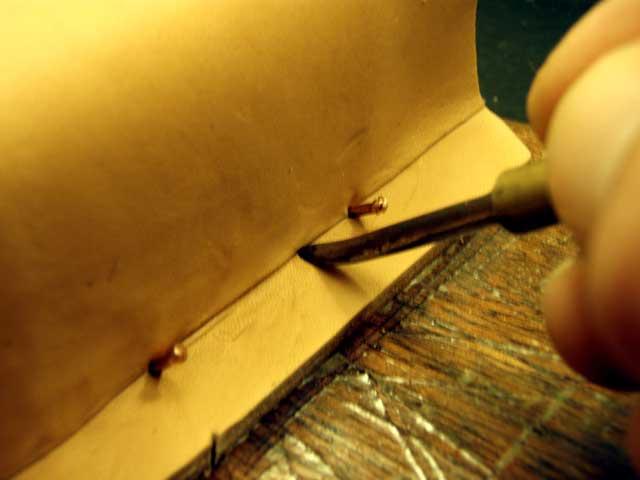
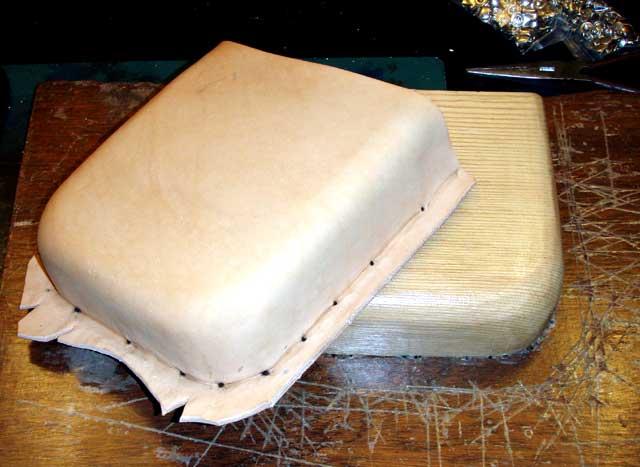
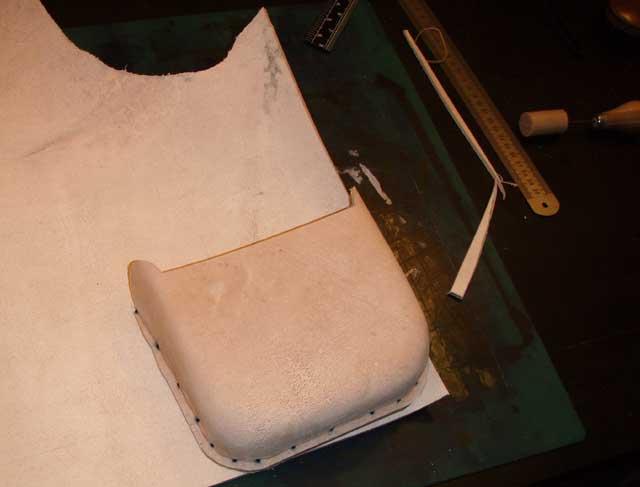
First the disclaimer. I am self taught at leatherwork and may well be doing everything the wrong way. I have read a few books but do not always follow what they say. That said I am pretty pleased with my results and have been asked to document the way I have made the wet formed bags I do and so here is how I do it (not necessarily how it should be done) We are going to make a wet formed bag. From the same mould I make both shoulder bags and possibles pouches. This tutorial is for the possible pouches but there is little to change for a shoulder bag. Once finished we should end up with a bag looking like this First thing to do is cut the piece of leather to wet form the front of the bag. In the following pictures I am working with 2.5mm leather but later we will switch to a front I formed from heavier leather (3.5mm). So what I am saying is you can do this with almost any weight of leather. So lets cut out a bit of leather for the front. Remember to allow plenty of spare. The size you need will of course depend on the size of your form. Once cut out I let it soak in warm water for 15 minutes to half an hour. You get a feel for when it is ready. Sometimes I will let it sit for another half hour or so before I start forming and sometimes not. So far I have never really noticed a difference in waiting. The form is a piece of pine, shaped and varnished. I have also glued it to a backing board but you do not need to and it is probably not a help as I can’t move it about once there are too many nail holes round the edge. I also use a bone folder to help shape the leather but you can use a bit of plastic or a butter knife if you do not have one. I will be nailing the leather in place with copper coated nails, which still stain the leather the same as steel ones. (note; this staining can be remove with Oxalic acid but as this was being stained a dark colour I did not bother) Place the wet (cased) leather over the form and put the first nail in the centre of the bottom. Next nail one round the corner but remember to not pull round the corner tight or you will have too much spare leather as you go up the edges. You want to use as much leather as possible between the central nail and being round the corner. Put a few nails in the curve of the corner to hold everything in place. This sounds easy and it can be but it is quite difficult to not end up with too much leather at the sides from going to tight round the corners. Once one corner is done start on the next. You can already see that I have too much leather for the sides and it is starting to stick up away from the face of the form. To solve this problem we cut away the spare leather at the corners. Then cut a dart at the last nail on the side. Pivot the leather round at this nail to take up some of the slack. Nail a bit further up, cut another dart and pivot some more to use up more leather. Remember to not cut in too close with the darts or you will end up with part of the dart still showing when the edges are trimmed. Repeat this on both sides and you should end us as shown below with the leather tight across the whole form. As you can see I have ended up with leather extending over the top of the form. Rather than cut this away I slide the piece of plastic (shown on the right of the picture) under the leather, above the form, to hold this top edge out and allow me to make the bag deeper. I use a modelling tool to ensure there is a good crease along the angle where the form meets the backboard. I tend to go over this every few hours or any time I am passing to ensure this crease stays well defined as the leather dries to shape. I also use the modelling tool to rub out any tool marks from the forming. I leave the leather nailed to the form for a few days to make sure it is completely dry. You can remove it sooner but I have found it will tend to shrink a little if you do, so now I ensure it is completely dry. Once dry I pull out the nails and pop the leather off of the form. Now at this point in the tutorial we are going to switch to a piece of leather that I formed earlier. This is purely to help with timing as these steps were actually carried out while the above bag was drying. It is formed from a piece of 3.5mm grade “b” hide so it has lots of blemishes etc. I only point this out as the more observant of you will notice a big difference in the quality of the leather and I don’t want you thinking it is because the forming makes the leather blemish etc. So off the form we trim the edges of the bag and round the corners. At this point I also shape the top end of the bag. I form a semi-circle on the sides and cut straight across from the bottom of these along the front edge. This means the sides will seal against the flap as it curls round and stop stuff falling out. I have rarely seen this done and can’t understand why. It seams obvious to me that a flat top to the sides allows things to fall out the bag. Now place it onto the leather we will use for the back and flat so that we can mark the width of leather we need. Cut a strip wide enough for the back and flap and hold this in place to mark where to cut for length to suit the bag. Now mark the rounding of the flap corners with my patented circle drawing tool. Cut the corners to shape Then check it looks right in place We now cut the tongue that will attach to the flap and go through the buckle. I prefer a shield shape at the top but any shape that takes your fancy should work. You could also just form the tongue into the piece of leather for the flap but I prefer the look of the sewn on one. I cut the end of the tongue with a strap end cutter but you can just cut it to shape with a knife if you don’t have one. (a handy hint is to buy the biggest strap end cutter you can get. It will cut the end of every strap as small as you want to go so there is no need for a selection of different sized ones) The bag will have 2 “D” rings at the back to take danglers to attach to a belt as well as a buckle on the front to hold the flap shut. These are attached to the bag with ¾ inch strips of 1 – 1.5mm leather as shown below. I use a slot cutter to cut the slot for the buckle but you can just cut this shape with a knife. (a handy tip if you are buying a slot cutter is to just buy the ¾ inch one. You will rarely need a smaller size and for larger slots you just cut then move the cutter along and cut again to extend the slot) I also use the slot cutter to cut the slot for the tabs of leather to go through where the buckle is to be located (I also cut the slots for the “D” ring tabs but have not photographed this). You can either put the leather back on the form to give you a bearing while stamping the slot or use another piece of wood or cutting block to give a rest under the piece to be cut. Continued...........
-

UK leatherworker's Show Competitions - Advice required
MagiKelly replied to UKRay's topic in Leatherwork Conversation
I am guessing you will have stands with suppliers selling kit and hides. Certainly sounds interesting and if i can make it i would like to come. -

Possible pouch, at last
MagiKelly replied to MagiKelly's topic in Purses, Wallets, Belts and Miscellaneous Pocket Items
A couple of pictures in its first outing. Russell seems quite happy with it. just needs to sort out the contents now. -
Well after being sidetracked by bags for my daughters http://leatherworker.net/forum/index.php?showtopic=18908 I eventually got back to doing a possibles pouch. This one is for Warthog1981 a regular test subject for my attempts. It is made on the same mould as the previous bags but has two "D" rings on the back for attaching two danglers. The danglers fasten with two press studs each to allow removal of the bag without taking off your belt. I have just finished the bag so the pictures were taken in a hurry with a flash and no set up so forgive the quality. These last two are really bad as I had to put the bag on and bounce the flash off a mirror.
-

First wet formed bag
MagiKelly replied to MagiKelly's topic in Purses, Wallets, Belts and Miscellaneous Pocket Items
I was asked for pictures of the backs so here they are Fronts at same time for reference and because these show the colours better than the previous pictures. I have the next piece of leather on the form so here are a few pictures of the process. The form Half done. The first half always being the easiest but you need to make sure you are not leaving too much loose leather for the other side to form. This is just before the stage where you are sure you will not get it on the form and you want to sweep it all off the table and smash everything in sight. This is just after the stage of abject hopelessness when you finish and once again are amazed that it actually went on. There is a mistake on this side. About a third up from the bottom I cut a slit too far in and it is right into the stitching crease. This should not really show up much on the finished bag and it did allow me to take out a good sized dart to tighten up the top part of the leather on this side. You can see there are far more darts on this side. As I said it is the second side where you get all the hard work. -

First wet formed bag
MagiKelly replied to MagiKelly's topic in Purses, Wallets, Belts and Miscellaneous Pocket Items
I shaped it myself. Here is a picture. I have now finished bag number two. This one is a bit taller as I had the leather a bit big so just formed it taller. It is pretty much the same construction but in purple this time. and a comparison with the first one -

First wet formed bag
MagiKelly replied to MagiKelly's topic in Purses, Wallets, Belts and Miscellaneous Pocket Items
Managed to get a few more pictures today. Still not great light but a bit better focus at least. -

First wet formed bag
MagiKelly replied to MagiKelly's topic in Purses, Wallets, Belts and Miscellaneous Pocket Items
I was going to use a 18/6 linen thread but decided to use the sinew as the colour matched the brass fittings well. I also like chunky thread even on small projects. I thought 3/4 inch was too narrow for the full strap and so either had to taper the strap at some point or have it thinner all the way. The thicker section could have been a lot shorter but I was not convinced this would be the final strap anyway. I still think it is too long but Eleanor seems set on it being this length. I also liked the way the rivets added some brass highlights to the strap to match the fittings on the bag. -
I thought it was about time I tried a wet formed bag. The plan was to make a possibles pouch with a couple of belt loops on droppers but as I was taking the top part off of the former my number one daughter Eleanor caught me and asked if she could have the bag when it was finished So a few design changes needed to be made. Colour was debated and she settled on red. As well as being my first wet formed bag it was the first time I had tried the more complicated ways of attaching the "D"s and buckle. As it was really a test piece I only used some lower grade leather. I wish i had used the better stuff now as it turned out much better than I expected. Size wise the bag is 17cm wide, 17cm high and 5cm deep. The leather is 3.5mm thick and the stitching is all in artificial sinew. The strap is attached with snaps so it can be removed. Eleanor wanted the strap long but I suspect a shorter one will be wanted later. So here are some poor pics. Bad light and no flash And here he it is being modelled by Eleanor
-
Looking at the links it seems these are even better value in the US but then I suppose the Al Stohlman ones will be cheaper there as well.
-
I have been drooling over the Al Stolman mallets but just could not justify the price. however while browsing ebay I spotted these and bought the 18 oz one. http://cgi.ebay.co.uk/ws/eBayISAPI.dll?Vie...em=110403209899 Arrived today and it is great. Feels fantastic and performs brilliantly. Best of all it was a fraction of the price of the Al Stohlman one and I will no longer have flakes of wood coming of the wooden one I use. Guaranteed for life so may well be the last mallet I buy. Had a quick google and these are available in the US as well. http://www.thebestthings.com/newtools/mallets.htm PS no connection to the seller or the maker etc just a happy customer.
-
I would be flattered. I did post it to share and am happy for anyone to use the design. Thank you. It was almost an accident. I was trying to think of a way of making a closure that would stop the corners from bending out. I have found books with a middle closure can suffer a bit from this. The logical solution was two closures one near each corner. Once I got this far the idea of joining them came and from their it seemed obvious to put a pen holder there. I have thought about forming the closure from the same piece of leather as the cover to save having to stitch it to the back but I have doubts about how well this would work. Still probably worth trying at some point.
-
First off Hi. I just registered today and will be looking round to start all your good ideas so thought I should at least start by showing something of mine. First off I am very new to this and really just learning. The main things I have made to date are journal covers. I posted a tutorial on how I make these on my own forum (for canoeists) and it is here http://www.songofthepaddle.co.uk/forum/showthread.php?t=5847 Since then I have improved a little and I now dye the inside leather as well as the pen holder. I do the stitching in full unsplit artificial sinew and have started doing some embossing / carving. Here is my first Celtic knotwork one. I found just the thing for designing Celtic knots here http://www.clanbadge.com/ details of how it works is here http://www.clanbadge.com/how.htm I got the truetype font for making up these patterns and did a few tests on coasters. Happy with the results it was time to do a full journal cover. Here is the result. it is hand stitched with artificial sinew and made pretty much as the tutorial. the embossing is designed using the font I mentioned above So here are the pictures A friend really liked this so I made one for his birthday. Problem was he could not decide if he wanted the Celtic knotwork or a Ying and Yang, so we compromised


