


MagiKelly
-
Posts
76 -
Joined
-
Last visited


MagiKelly's Achievements
Member (2/4)
-
I agree. At the time I was still really concentrating on the wet forming process so not as concerned with decoration. I think I got distracted thinking about how it would be hard to carve the leather after wet forming or how carving would be ruined during the forming that I forgot the flap was flat and could be decorated without worry about damage
-
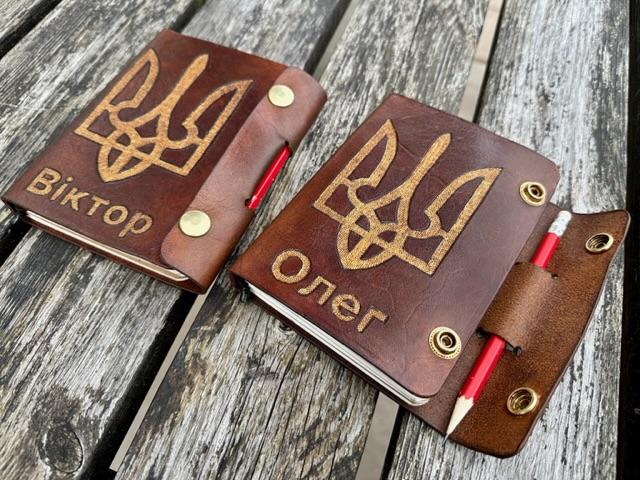
Looks great. I just got a laser this week so have a lot of learning in the software before I start using it in projects. I’m looking forward to it meaning I can use more intricate designs than I can pyrography by hand. I also might try using it to lightly burn on the outline of patterns I am going to pyro by hand. Will save some tracing time.
-
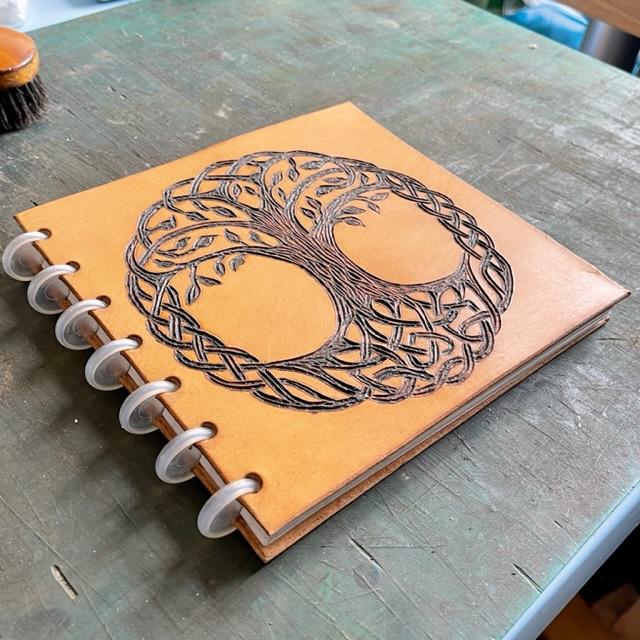
I like the look of the exposed discs. This may be because I use the metal discs mostly or just my preference. I have thought about having the discs internal to the book but then you lose the option of folding the front cover round to the back like a spiral bound notebook. If they are going to be inside it feels like the easier option is just to install a standard ring binder mechanism, which I have done on a number of books.
-
@Wepster I have a couple of punches. I used to have the happy planner one too but gave it to someone with a book so they could add their own paper. The two I still have and use are the staples one and the Atoma one. The Atoma one is really expensive and perhaps not worth the extra money. I eventually got it because I really like the Atoma aluminium discs. These discs have a flatter edge profile that the Atoma punch mimics, however they do work fine with the Stpales Arc punch. I just prefer the look of the Atoma holes with Atoma discs. From my experience any of the punches work with any of the discs and they all have the same spacing so are interchangeable. None of the punches will punch a lot of pages at once. I guess this is because of the amount of tabs you are punching that with a thick stack the forces needed would be too great. I should point out that none of the punches will cope with punching the leather covers. I tape a piece of punched paper to the leather. I use an oval hole punch to punch the rounded part of the mushroom tabs and then cut the straight stem parts with a craft knife. I have used standard thin copier paper in must of my books and had no problems so don’t think you will have any problems with that.
-
It is not a dumb question. I have given these to people who have not understood the way the rings work even when holding a book. It is straight forward when you see a page taken out and put in This page explains it well, I think, https://getorganizedhq.com/the-ultimate-guide-to-discbound-planners/ If you want more information I can take some pictures of covers without the discs to show how they are cut etc.
-
I just cut the leather and insert the discs. At first I thought it would only work with thick leather but I’ve used pretty thin leather and it works fine. Thinking about it, paper is really thin and it works fine. To make sure my cutting us accurate I tape a piece of paper, punched for the discs, to the leather as a guide.
-
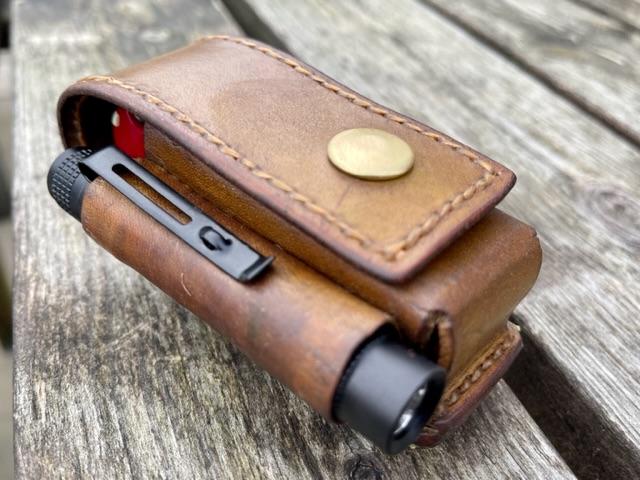
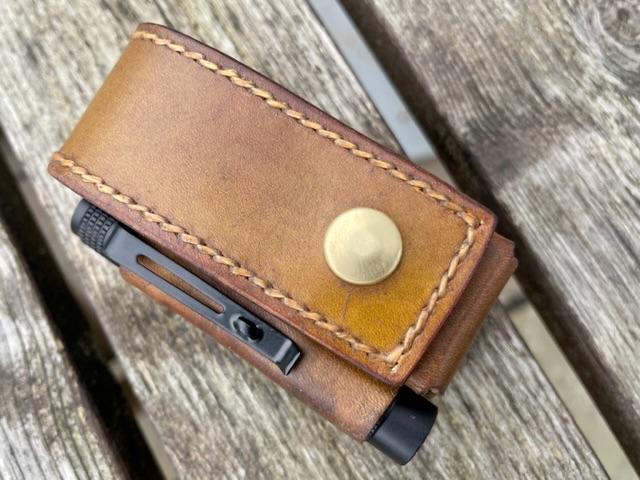
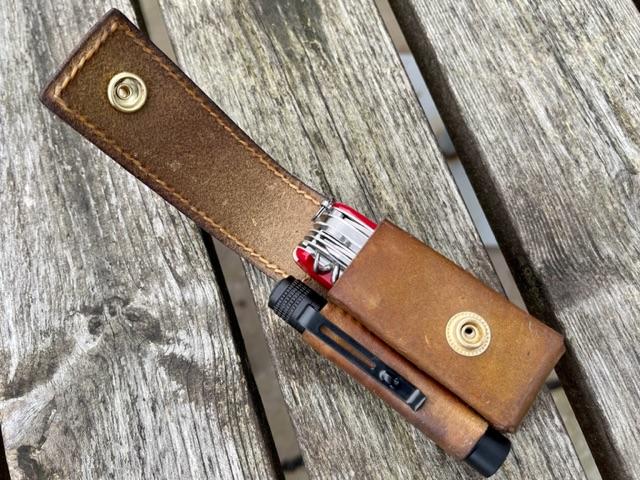
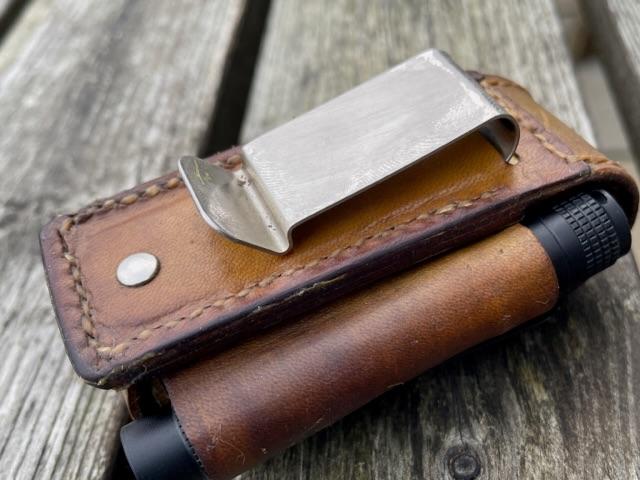
I feel like I only do books but when I look back at my projects I do actually make other things. They are just not as prominent in my memory. This is a Swiss Army knife and torch belt pouch I made for a friends birthday. I was pretty pleased with how it turned out for being not my normal project.

-
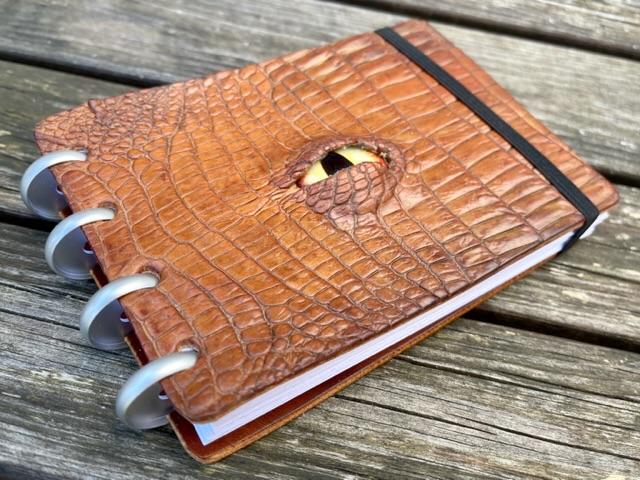
It’s been a long time since I posted any of my work. I still seem to end up mostly doing books. I keep changing how the pages are added as I can’t decide what offers the best use. Currently I’m favouring Midori style or disk bound. I’ve also been gravitating to pyrography as my carving skills are wanting. Also I had an old alligator skin I was given by a neighbour who had it in their loft for years. I had it for a long time too without using it till I finally had an idea of how to use the section round the cloaca
-
Thanks. I love that this tutorial is still useful after all these years. I still consider myself very much a beginner leatherworker so it is great that my detailing what I do helps. I think this thread used to be a sticky but not sure if it still is. I am not involved in the admin here in any way and imagine it must be really difficult to pick which tutorials to “stick” from the many great ones posted.
-
It’s great to hear people still find this helpful. I still feel like a bit of a fraud as one of the least experienced leather workers but having a tutorial on here
-

Round Leather Lace Making Without any Special Tool
MagiKelly replied to nottotell's topic in How Do I Do That?
That looks so much easier than the way I was doing it with the tool where you cut a hole in the leather and work from the centre out. Also looks like I could use this with smaller offcuts for short lengths of lace. -
Refillable Leather Book / Journal Tutorial (Loads Of Pictures)
MagiKelly replied to MagiKelly's topic in How Do I Do That?
Thanks for saving another of my tutorials -
Thanks for doing this. It’s much appriaciated.
-
If I could edit the original [post I could attach the images, however, I am trying to get them reloaded to their original location so they just show again.
-
I don’t think adding the pictures directly was an option way back when I posted this. I’ll go have a look and see if I have a link to it on my canoe forum with pictures.